Page Summary
-
Augmented Faces implementation requires custom textures and 3D models exported as FBX files.
-
The ARCore SDK provides
canonical_face_mesh.fbxandcanonical_face_mesh.psdfiles to help artists create compatible assets. -
The FBX file contains face mesh topology, UV coordinates, and rig information for creating 3D models.
-
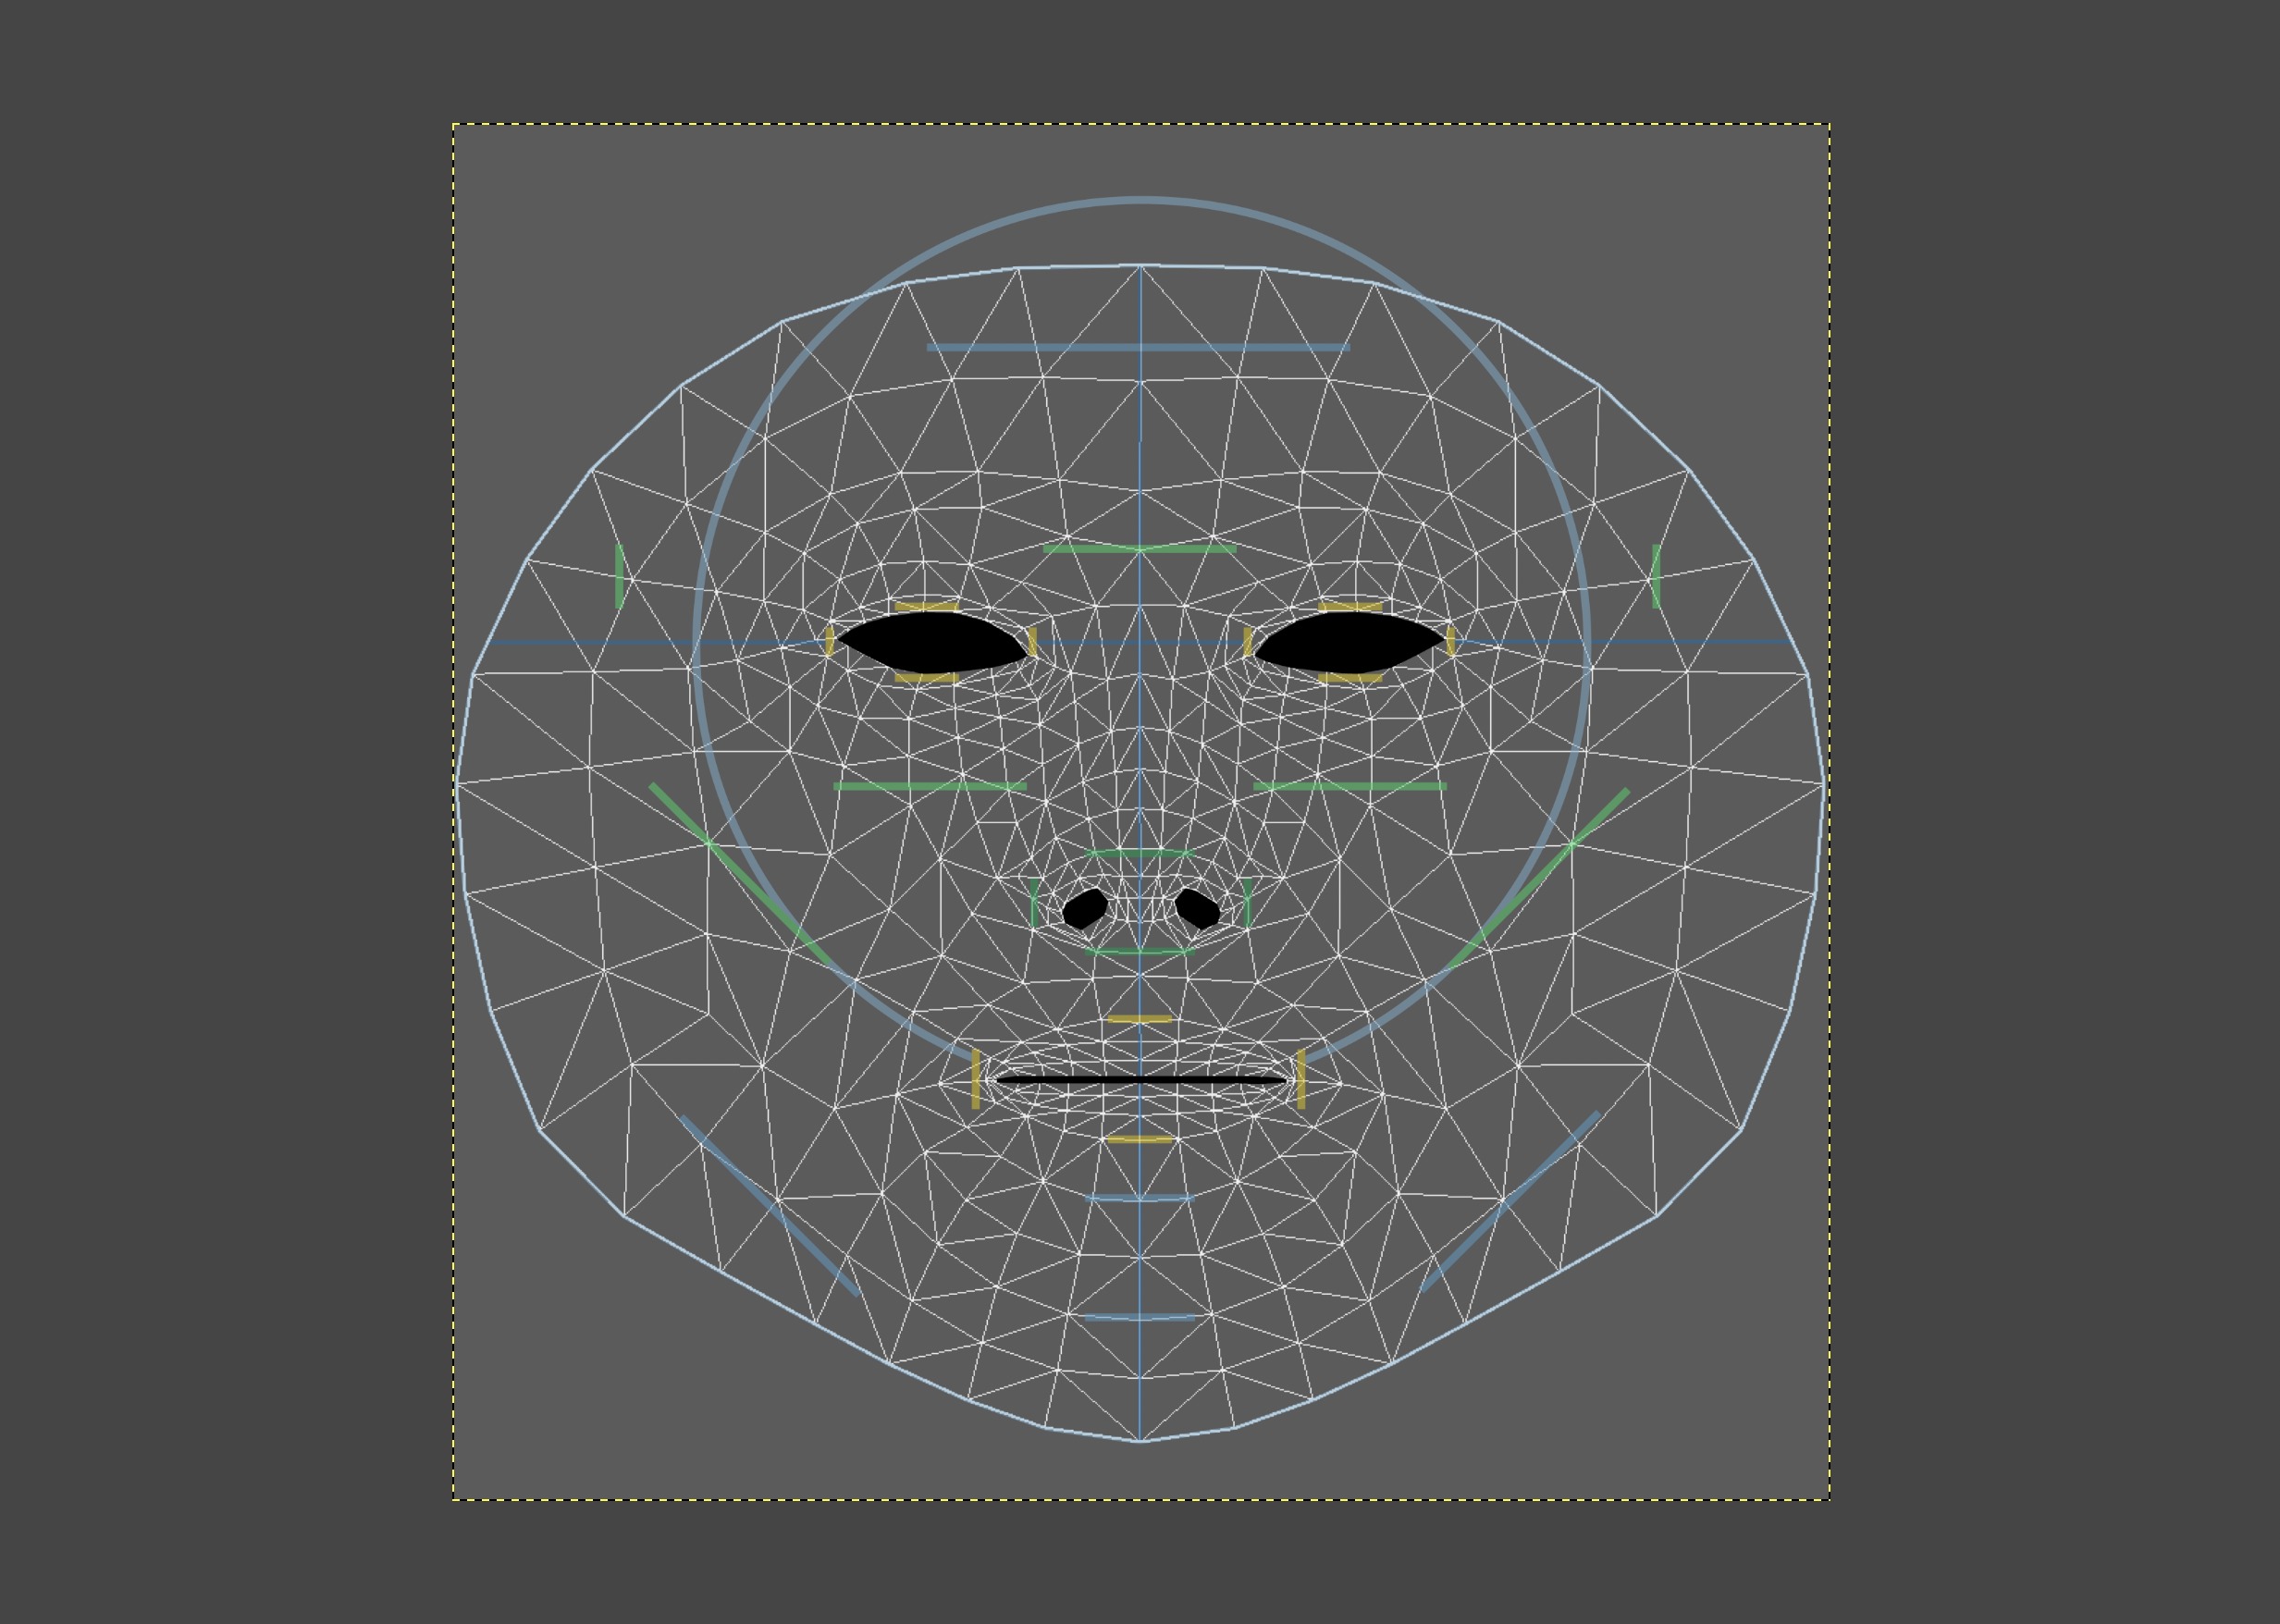
The PSD file provides a reference texture with layers for mask, lines, UVs, and background to align 2D textures with facial features.
-
When customizing the canonical face mesh and exporting FBX files, specific settings and a defined hierarchy must be followed, and the included
facemeshreference should not be exported.
To implement Augmented Faces, you need customized textures and models for overlaying on identified face meshes. These assets are created by artists ahead of time in 3D modeling and animation software, and exported as FBX files.
Canonical files
The SDKs ship with a canonical_face_mesh.fbx file and a
canonical_face_mesh.psd file to help artists create assets that will overlay
properly onto faces detected by ARCore. These files can be found in the
assets/canonical_face_mesh.fbx folder.
Create 3D models with the FBX file
The FBX file contains the face mesh topology, UV texture coordinates, and rig that defines the supported facial regions provided for creating and attaching assets. To ensure they're compatible with ARCore, FBX files should be saved using supported settings.
This file contains a reference facemesh that should not be exported as part of
the final FBX. ARCore will generate and update a separate face mesh at
runtime.
Create 2D textures with the PSD file
The .psd face mesh reference texture is used to see how a texture that an
artist creates lines up with a user's facial features at runtime. It includes
four layers:
- Mask: Shows where the eyes, nostrils, and mouth are located in the texture.
- Lines: Guidelines that show how a user's facial features line up with a texture during runtime.
- UVs: Represents triangulation of the 468 point face texture mesh.
- Background: A neutral gray background layer to make the other three components visually clear.
If you modify the PSD file, you should see your changes as soon as you export.
Customize the canonical face mesh
If models and textures are being created using the
assets/canonical_face_mesh.fbx included in the SDK, these settings are also
required when exporting FBX files:
Make sure the any custom meshes are skinned to the associated bones or regions.
Use the following hierarchy:
asset
|__root
|   |__NOSE_TIP
|   |__FOREHEAD_RIGHT
|   |__FOREHEAD_LEFT
|__facemesh           <-- for reference
|__                   <-- place additional custom 3D meshes here
Do not export the included
facemeshmodel. This mesh is for reference only. ARCore will create a separate face mesh at runtime. Use the UVs infacemeshas a reference when creating custom face mesh textures.Place custom meshes as children of the
assetnode.Use of namespaces is supported.
The asset contains four bones consisting of
rootandNOSE_TIP,FOREHEAD_RIGHT, andFOREHEAD_LEFTregions. Do not change the names of these bones.