Page Summary
-
Entry points are surfaces where users can start conversations with Business Messages agents, each with a unique appearance and placement.
-
Agents can be launched with Non-local, Location, and Brand-managed entry point groups, and supporting more entry points increases agent visibility and drives more conversations.
-
The
entryPointvalue in received messages indicates which entry point started a conversation, and some entry points provide additional contextual information like aplaceId. -
The Non-local group includes entry points not reliant on locations like Featured snippets and Sitelinks.
-
The Location group encompasses entry points based on locations, including Maps, Placesheet, and Local Pack.
-
Brand-managed entry points appear on properties owned or managed by the brand, such as URL and Web Widget.
Entry points are surfaces where users can start conversations with Business Messages agents. Each entry point has a unique appearance and appears in a different place.
You can launch agents with the Non-local, Location, and Brand-managed entry point groups, each of which enables multiple entry points. Each entry point your agent supports increases your agent's visibility and drives more conversations for your agent.
You can tell which entry points started a conversation by checking the
entryPoint value in messages your agent
receives from
users. (Entry point values you receive in messages are defined in the Business
Messages API's
EntryPoint.)
Some entry points pass additional contextual
information,
such as a placeId identifier for a location.
Launching to an entry point group doesn't guarantee that your agent will be available at all potential entry points within that group.
Non-local entry points
The Non-local entry point group includes all entry points that don't rely on locations:
To enable non-local entry points, do the following:
Specify your agent's non-local information.
Be sure to complete the information before you verify your agent. Some fields can't be edited after verification. See Update agent information for details.
Verify your agent.
Business Messages approves your agent for various entry points based on the non-local information you specify.
Launch your agent.
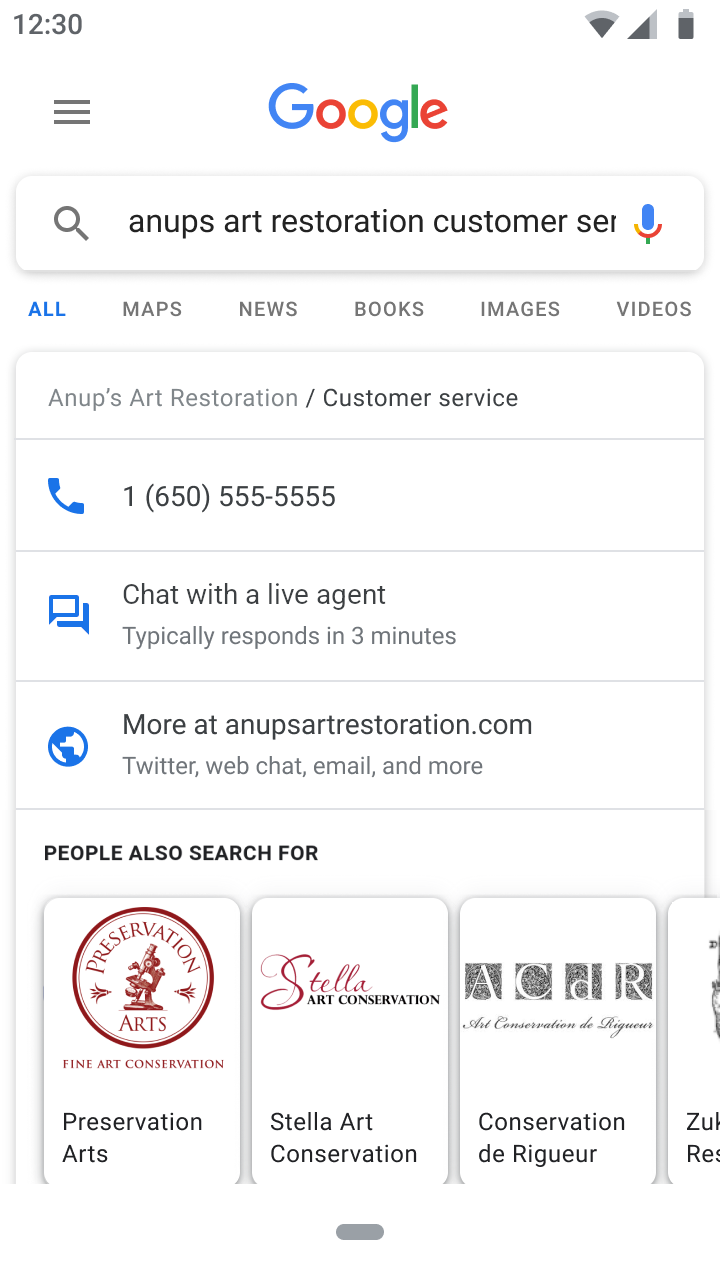
Featured snippets
The FEATURED_SNIPPETS entry point enables conversations with your agent when a
user finds contact details through Search.
FEATURED_SNIPPETS supports Android and Desktop.
Once enabled, FEATURED_SNIPPETS launches chat on both Android and Desktop.
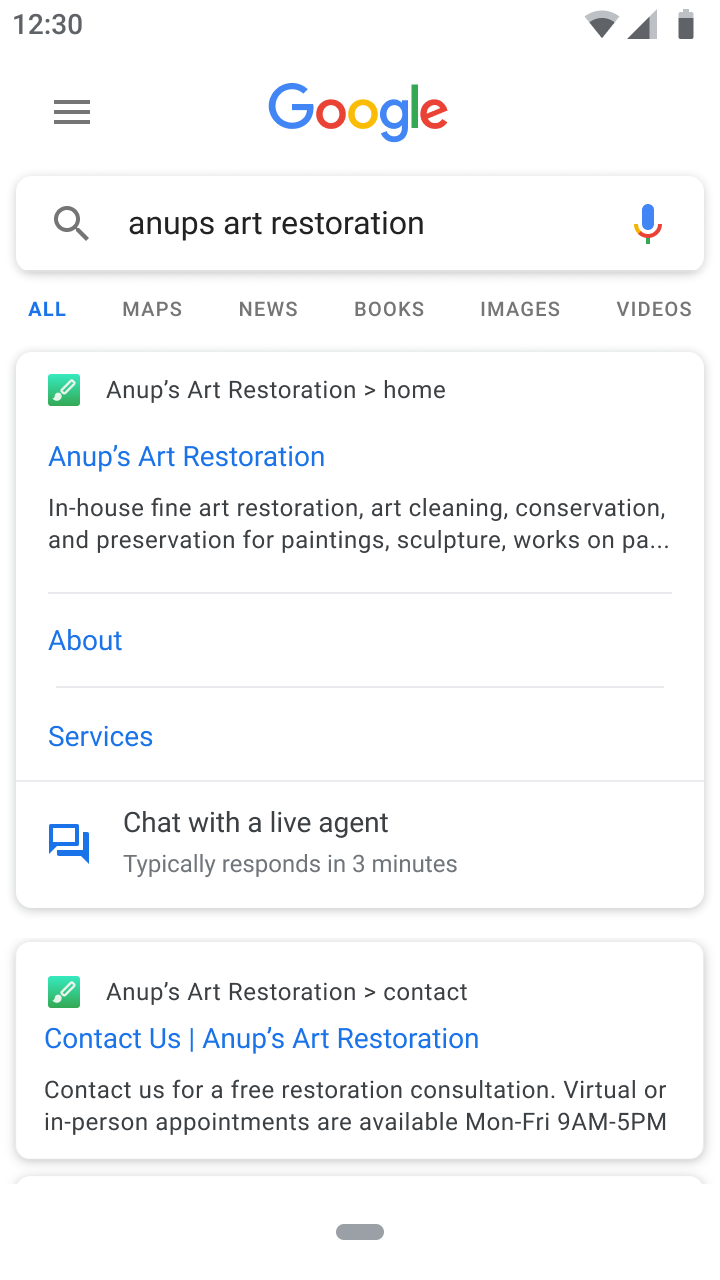
Sitelinks
The SITELINKS entry point enables conversations with your agent when
sitelinks
appear in Search.
SITELINKS supports Android.
Location-based entry points
The Location entry point group encompasses entry points that rely on locations.
To enable location-based entry points,
- Update your agent information.
- Verify your agent.
- Create one or more locations for your agent.
- Verify your location.
- Wait for Business Messages to automatically import, associate, and verify other locations associated with the verified location.
- Launch your locations.
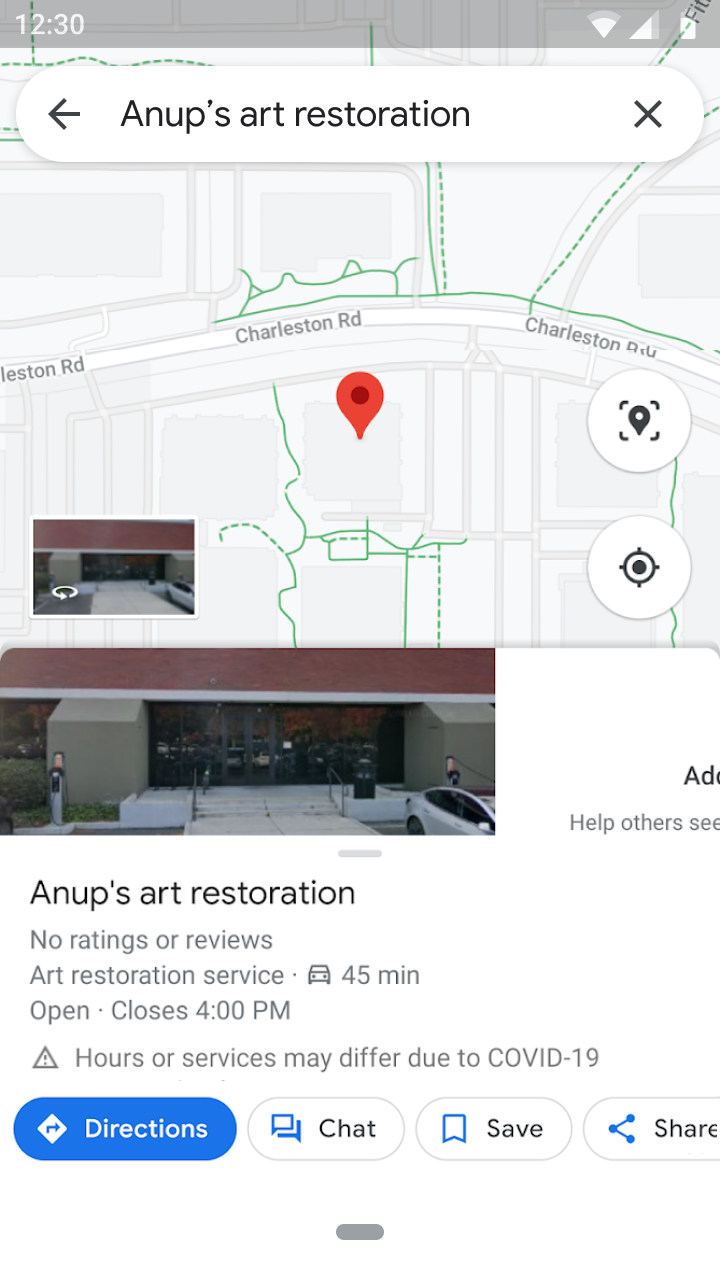
Maps
The MAPS entry point enables conversations with locations associated with your
agent from the Maps app
(Android,
iOS).
Conversations from the MAPS entry point pass location data in the context
object of user messages.
MAPS supports iOS and Android.
Placesheet
The PLACESHEET entry point enables conversations with locations associated
with your agent when a user finds the location in Search.
PLACESHEET supports iOS (with the
Maps
app installed), Android and Desktop.

Local Pack
When a user's search results include multiple nearby locations, the LOCAL_PACK
entry point displays a messaging button below the list of locations.
Additionally, LOCAL_PACK enables messaging for a location when the location is
closed and can't answer calls.
LOCAL_PACK supports iOS (with the
Maps
app installed) and Android.

Brand-managed entry points
Brand-managed entry points include entry points that appear on properties that the brand manages or owns. You can use brand-managed entry points without launching your agent to non-local or location-based entry points.
To enable brand-managed entry points,
Update your agent's non-local information.
Be sure to complete the information before you verify your agent. Some fields can't be edited after verification. See Update agent information for details.
Verify your agent.
Business Messages approves your agent for various entry points based on the non-local information you specify.
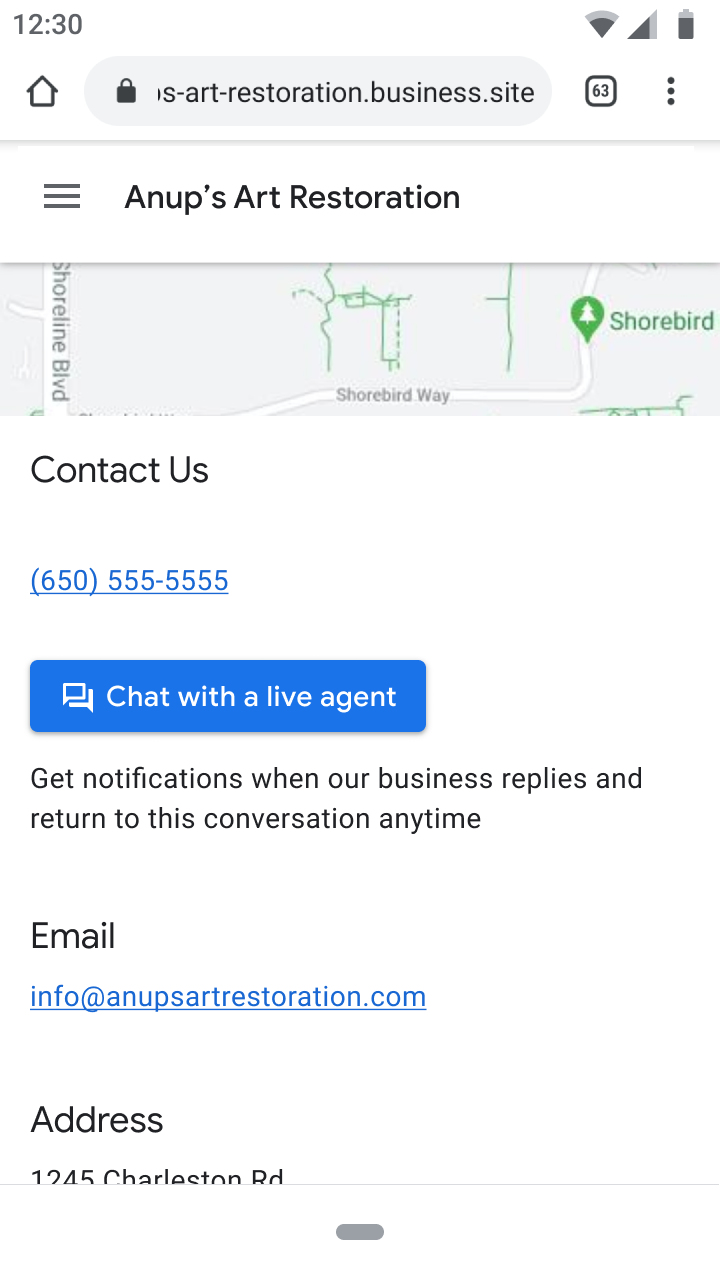
URL
The URL entry point enables conversations from URLs in messages, links, or
websites. See Start conversations from
URLs.
URL supports Android.
Widget
The WEB_WIDGET entry point enables conversations from widgets you integrate
with a
website.
WEB_WIDGET supports Android.