คุณสามารถใช้ Google Messages กับ RCS และ Google Wallet เพื่อออกแบบขั้นตอนการเช็คอินที่ราบรื่นได้ โดยผู้ใช้จะเช็คอินให้เสร็จสมบูรณ์ รับบอร์ดดิ้งพาส และเพิ่มบอร์ดดิ้งพาสลงใน Google Wallet ได้โดยตรงจากแอป Messages เมื่อบอร์ดดิ้งพาสอยู่ใน Wallet แล้ว ระบบจะอัปเดตบอร์ดดิ้งพาสโดยอัตโนมัติหากรายละเอียดเที่ยวบินมีการเปลี่ยนแปลง ผู้ใช้จะเข้าถึงบอร์ดดิ้งพาสล่าสุดได้รวดเร็วบนโทรศัพท์
เอกสารนี้อธิบายขั้นตอนทางเทคนิคในการติดตั้งใช้งานบอร์ดดิ้งพาสในขั้นตอนการเพิ่มลงใน Google Wallet นอกจากนี้ ยังมีตัวอย่างการสนทนาพร้อมเคล็ดลับการออกแบบเพื่อ ประสบการณ์การเช็คอินที่ราบรื่นและมีประสิทธิภาพด้วย RBM
การติดตั้งใช้งานทางเทคนิค
หากต้องการติดตั้งใช้งานโฟลว์บอร์ดดิ้งพาสไปยัง Google Wallet คุณจะต้องทำงานร่วมกับ Google Wallet API และ RBM API
ข้อกำหนดเบื้องต้น
หากต้องการเริ่มต้นใช้งาน Google Wallet API ให้ทำตามขั้นตอนที่จำเป็นต่อไปนี้
- ลงชื่อสมัครใช้บัญชีผู้ออกบัตรใน Wallet เพื่อสร้างและเผยแพร่บัตรสำหรับ Google Wallet
- สร้างโปรเจ็กต์ Google Cloud (GCP) หากยังไม่มี
- เปิดใช้ Google Wallet API
- สร้างบัญชีบริการและคีย์เพื่อให้เรียกใช้ Google Wallet API ได้
- ให้สิทธิ์บัญชีบริการในคอนโซล Google Pay และ Wallet
- ใช้เทมเพลตบอร์ดดิ้งพาสเพื่อสร้างคลาส Boarding ใหม่
Google Wallet API
หากต้องการสร้างบอร์ดดิ้งพาสและสร้าง URL "เพิ่มไปยัง Google Wallet" สำหรับ RBM ให้ทำตามขั้นตอนเหล่านี้
- ทำการตรวจสอบสิทธิ์และการให้สิทธิ์ที่จำเป็น
- สร้างออบเจ็กต์บัตร
- รับโทเค็นเว็บ JSON (JWT) ที่ลงชื่อแล้ว ความยาวสูงสุดของ JWT ที่เข้ารหัส คือ 2048 อักขระ
- ใช้ JWT เพื่อสร้าง URL เพิ่มลงใน Google Wallet
RBM API
หากต้องการส่งคำแนะนำให้เพิ่มลงใน Google Wallet จาก RBM ให้ส่งการดำเนินการเปิด URL ในเพย์โหลดของข้อความ ให้ทำดังนี้
- สำหรับ
textให้ป้อน "เพิ่มลงใน Google Wallet" - สำหรับ
urlให้ป้อน URL เพิ่มลงใน Google Wallet
ไอคอน Google Wallet จะแสดงบนป้ายกำกับคำแนะนำโดยอัตโนมัติ

การออกแบบการสนทนา
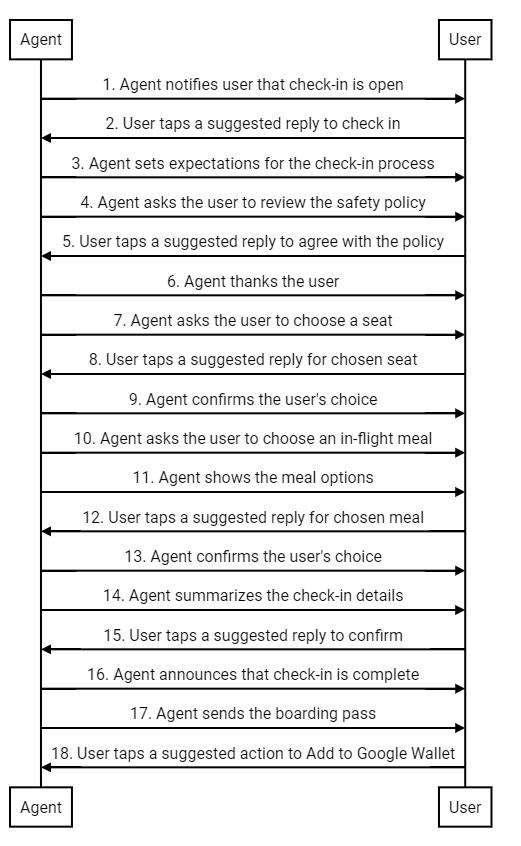
ตัวอย่างนี้ใช้พลังแห่งการสนทนาที่ไม่เหมือนใครเพื่อแนะนำผู้ใช้ตลอดขั้นตอนการเช็คอินที่สมบูรณ์ โดยจะแสดงวิธีใช้กล่องโต้ตอบที่เป็นธรรมชาติและฟีเจอร์ที่หลากหลาย เช่น คำแนะนำแบบแตะครั้งเดียวและการ์ดที่หลากหลาย เพื่อช่วยให้ผู้ใช้บรรลุเป้าหมาย ในกรณีนี้ เป้าหมายของผู้ใช้คือ (1) ปรับแต่งประสบการณ์การใช้งานเที่ยวบิน (2) รับบอร์ดดิ้งพาส และ (3) เพิ่มบอร์ดดิ้งพาสลงใน Google Wallet เพื่อให้เข้าถึงได้อย่างรวดเร็วที่สนามบิน
ถัดไปคือภาพรวมของการสนทนา ตามด้วยเคล็ดลับการออกแบบและ การวิเคราะห์ขั้นตอนต่างๆ ของโฟลว์ หากต้องการใช้การออกแบบที่คล้ายกันสำหรับเอเจนต์ โปรดดูตัวอย่างโค้ดตามขั้นตอน
คำแนะนำด้านการออกแบบ
โปรดคำนึงถึงหลักการเหล่านี้เมื่อออกแบบขั้นตอนการเช็คอิน
- ข้อความแรกของคุณสำคัญที่สุด ระบุวัตถุประสงค์ของการสนทนาโดยย่อเพื่อให้ผู้ใช้มีเหตุผลในการมีส่วนร่วม
- แต่ละข้อความควรให้ข้อมูลเล็กๆ น้อยๆ และแจ้งให้ผู้ใช้ตอบกลับ การตอบกลับที่แนะนำ และการดำเนินการที่แนะนำ ช่วยให้ผู้ใช้ดำเนินการในขั้นตอนถัดไปได้
- ตัวแทนของคุณควรตอบสนองได้ ไม่ใช่ตอบแบบหุ่นยนต์ ใช้ภาษาที่แสดงถึง น้ำเสียงของแบรนด์ ตัวแทนแบรนด์ในอุดมคติของคุณจะแชทกับลูกค้าอย่างไร
- ผู้คนชอบรู้สึกว่าตัวเองเป็นคนพิเศษ คุณปรับเปลี่ยนประสบการณ์การเช็คอินในแบบของคุณได้โดย แนะนำที่นั่งหรืออาหารตามประวัติการบินของผู้ใช้
- Rich Card และCarousel ทำให้การสนทนามีชีวิตชีวามากขึ้น ใช้เพื่อแชร์รูปภาพและรายละเอียดที่จะช่วยให้ผู้ใช้เลือกจากตัวเลือกต่างๆ ได้
- การสนทนาที่ดีจะจบลงด้วยดี ยืนยันรายละเอียดการเช็คอินของผู้ใช้ก่อนส่งบอร์ดดิ้งพาส เพิ่มความเป็นกันเองด้วยการส่งท้ายที่เป็นมิตร
ขั้นตอนการเช็คอิน
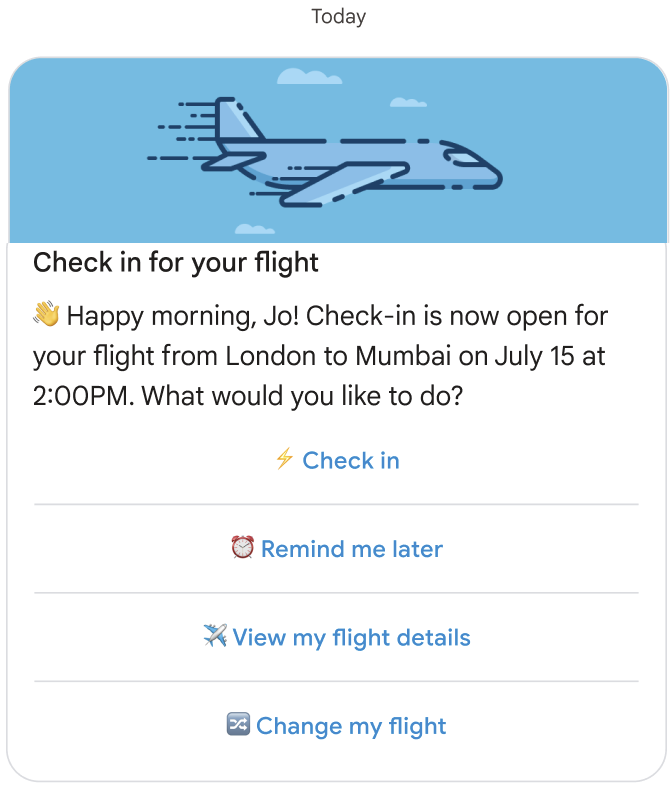
เอเจนต์จะแจ้งให้ผู้ใช้ทราบว่าสามารถเช็คอินเที่ยวบินได้แล้ว
ตัวอย่างโค้ด
const suggestions = [
  {
    reply: {
      text: '⚡ Check in',
      postbackData: 'checkIn',
    },
  },
  {
    reply: {
      text: '⏰ Remind me later',
      postbackData: 'remindMe',
    },
  },
  {
    reply: {
      text: '✈️ View my flight details',
      postbackData: 'flightDetails',
    },
  },
  {
    reply: {
      text: '🔀 Change my flight',
      postbackData: 'flightChange',
    },
  },
];

const params = {
  messageText: 'Check-in for your flight',
  messageDescription: '👏 Happy morning, Jo! Check-in is now open for your flight from London to Mumbai on ' + getFlightTime() + ' at 2:00PM. What would you like to do? ',
  msisdn: phoneNumber,
  suggestions: suggestions,
  imageUrl: getImageUrl('fly.png'),
  height: 'MEDIUM',
};

rbmApiHelper.sendRichCard(params);
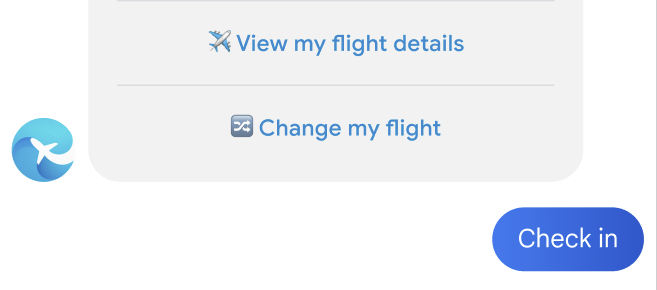
ผู้ใช้แตะการตอบกลับที่แนะนำเพื่อเช็คอิน
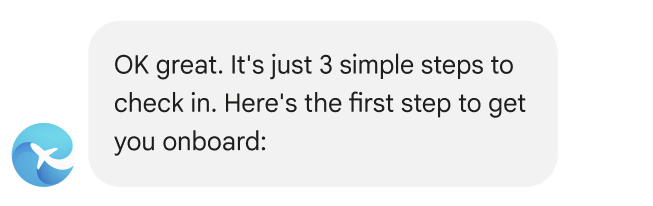
ตัวแทนจะกำหนดความคาดหวังสำหรับกระบวนการเช็คอิน
ตัวอย่างโค้ด
const params = {
  messageText: "OK, great. It's just 3 simple steps to check in. Here's the first step to get you onboard:",
  msisdn: msisdn,
};

let self = this;

rbmApiHelper.sendMessage(params, function (response, err) {
  self.sendPolicyImage(msisdn);
});
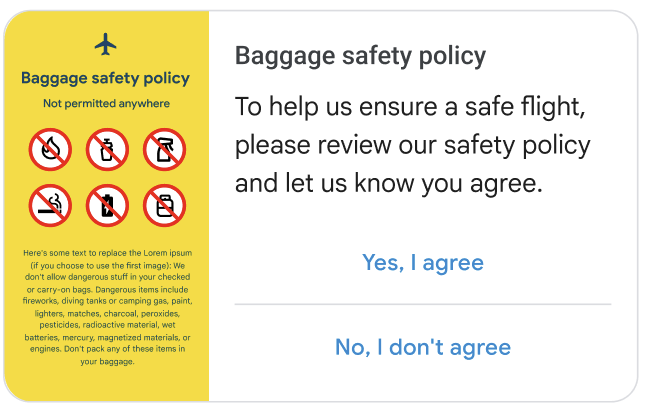
ตัวแทนขอให้ผู้ใช้ยอมรับนโยบายความปลอดภัย
ตัวอย่างโค้ด
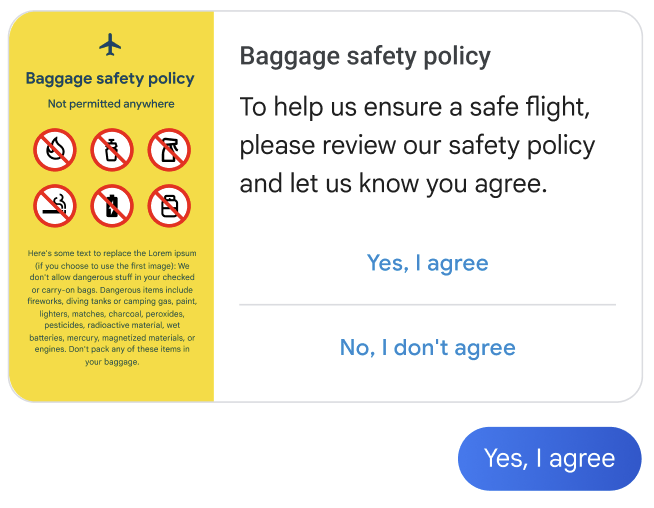
const suggestions = [
  {
    reply: {
      text: 'Yes, I agree',
      postbackData: 'policy_agree',
    },
  },
  {
    reply: {
      text: "No, I don't agree",
      postbackData: 'policy_nack',
    },
  },
];

const params = {
  messageText: 'Baggage safety policy',
  messageDescription: 'To help us ensure a safe flight, please review our safety policy and let us know you agree',
  msisdn: msisdn,
  suggestions: suggestions,
  imageUrl: getImageUrl('policyImage.png'),
  height: 'MEDIUM',
  orientation: 'HORIZONTAL',
  thumbnailImageAlignment: 'LEFT',
};

rbmApiHelper.sendRichCard(params);
ผู้ใช้แตะคำตอบที่แนะนำเพื่อตอบตกลง
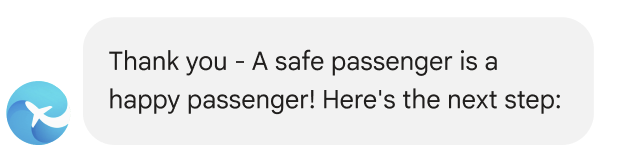
ตัวแทนกล่าวขอบคุณผู้ใช้และแนะนำขั้นตอนถัดไป
ตัวอย่างโค้ด
const params = {
  messageText: "Thank you - A safe passenger is a happy passenger! Here's the next step:",
  msisdn: msisdn,
};

let self = this;

rbmApiHelper.sendMessage(params, function (response, err) {
  self.sendPlan(msisdn);
});
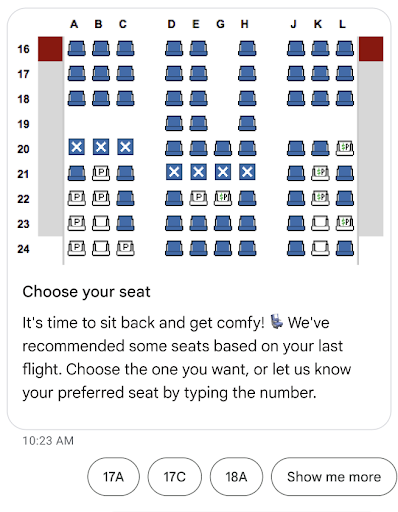
ตัวแทนจะแจ้งให้ผู้ใช้เลือกที่นั่ง
ตัวอย่างโค้ด
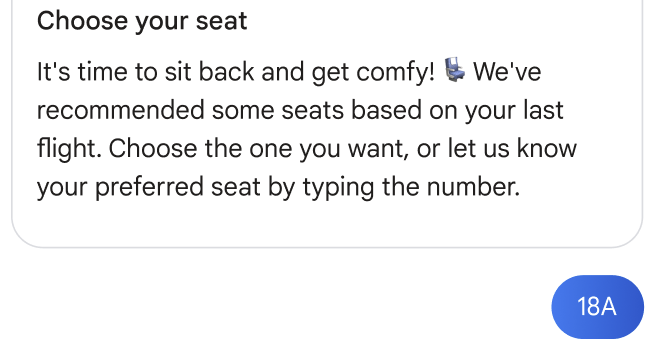
const suggestions = [
  {
    reply: {
      text: 'View the seat map',
      postbackData: 'view_seat_map',
    },
  },
];

const outerSuggestions = [
  {
    reply: {
      text: '17A',
      postbackData: 'seat_17A',
    },
  },
  {
    reply: {
      text: '17C',
      postbackData: 'seat_17C',
    },
  },
  {
    reply: {
      text: '18A',
      postbackData: 'seat_18A',
    },
  },
  {
    reply: {
      text: 'Show me more',
      postbackData: 'more',
    },
  },
];

const params = {
  messageText: 'Choose your seat',
  messageDescription: "It's time to sit back and get comfy! 💺 We've recommended some seats based on your last flight. Choose the one you want, or let us know your preferred seat by typing the number.",
  msisdn: msisdn,
  imageUrl: getImageUrl('seatMap.png'),
  height: 'TALL',
  orientation: 'VERTICAL',
  outerSuggestions: outerSuggestions
};

rbmApiHelper.sendRichCard(params);
ผู้ใช้แตะคำตอบที่แนะนำสำหรับที่นั่งที่เลือก
ตัวแทนจะยืนยันตัวเลือกของผู้ใช้

ตัวอย่างโค้ด
this.seatmap[msisdn] = seat;

const params = {
  messageText: `Seat ${seat}, you got it`,
  msisdn: msisdn,
};

let self = this;
  rbmApiHelper.sendMessage(params, function(res) {
    self.sendFoodOptions(msisdn);
});
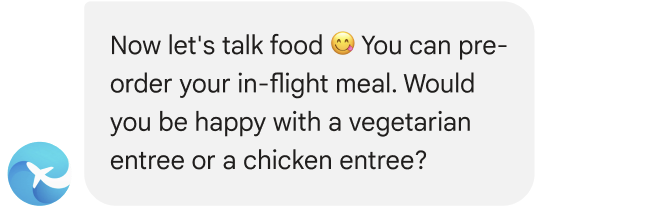
ตัวแทนขอให้ผู้ใช้เลือกอาหารบนเครื่องบิน
ตัวอย่างโค้ด
const params = {
  messageText: `Now let's talk food 😋 You can pre-order your in-flight meal. Would you be happy with a vegetarian entree or a chicken entree?`,
  msisdn: msisdn,
};

let self = this;

rbmApiHelper.sendMessage(params, function(res) {
  self.sendFoodDetails(msisdn);
});
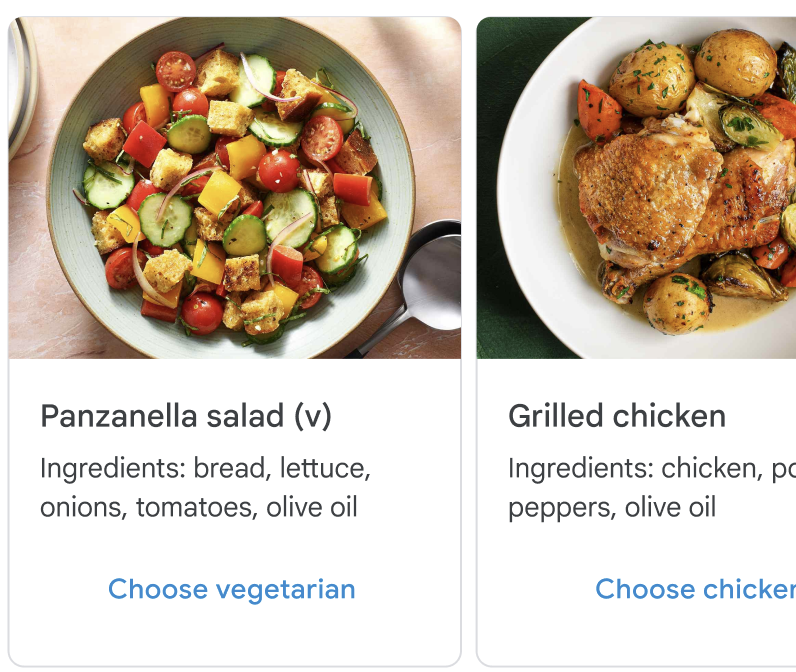
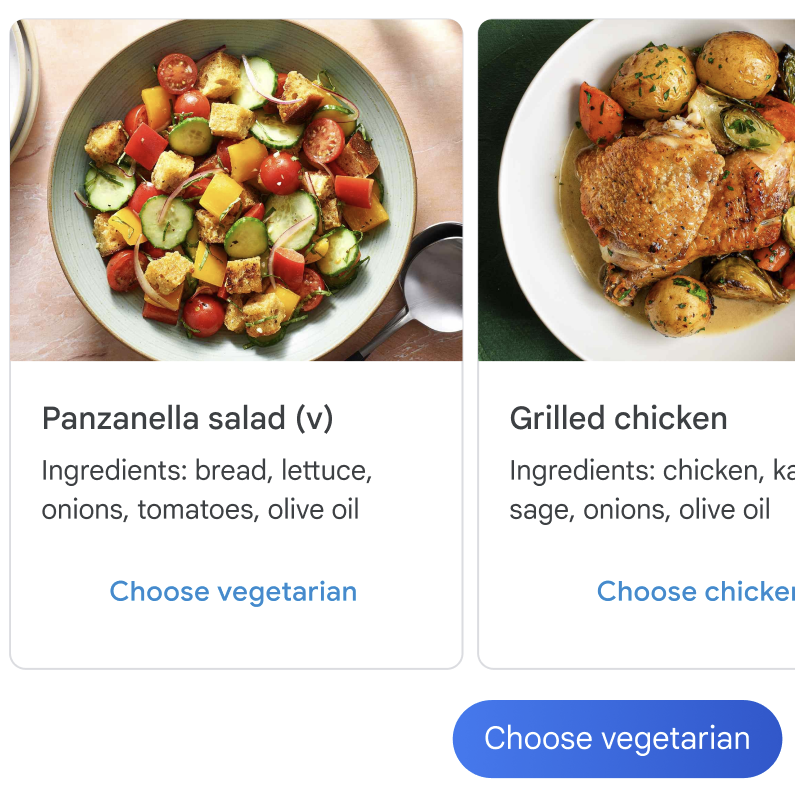
เอเจนต์จะแสดงตัวเลือกอาหาร
ตัวอย่างโค้ด
const cardContents = [
  {
    title: 'Panzanella salad (v)',
    description: 'Ingredients: bread, lettuce, onions, tomatoes, olive oil',
    suggestions: [
      {
        reply: {
          text: 'Choose vegetarian',
          postbackData: 'veggie',
        },
      },
    ],
    media: {
      height: 'MEDIUM',
      contentInfo: {
        fileUrl: getImageUrl('salad.jpg'),
      },
    },
  },
  {
    title: 'Grilled chicken with greens',
    description: 'Ingredients: chicken, potatoes, peppers, olive oil',
    suggestions: [
      {
        reply: {
          text: 'Choose chicken',
          postbackData: 'chicken',
        },
      },
    ],
    media: {
      height: 'MEDIUM',
      contentInfo: {
        fileUrl: getImageUrl('chicken.png'),
      },
    },
  },
];

const params = {
  msisdn: msisdn,
  cardContents: cardContents,
};

rbmApiHelper.sendCarouselCard(params);
ผู้ใช้แตะคำตอบที่แนะนำสำหรับมื้ออาหารที่เลือก
ตัวแทนจะยืนยันตัวเลือกของผู้ใช้

ตัวอย่างโค้ด
const params = {
  messageText: `Vegetarian it is 💚`,
  msisdn: msisdn,
};

let self = this;

rbmApiHelper.sendMessage(params, function (response, err) {
  self.sendAskConfirmation(msisdn);
});
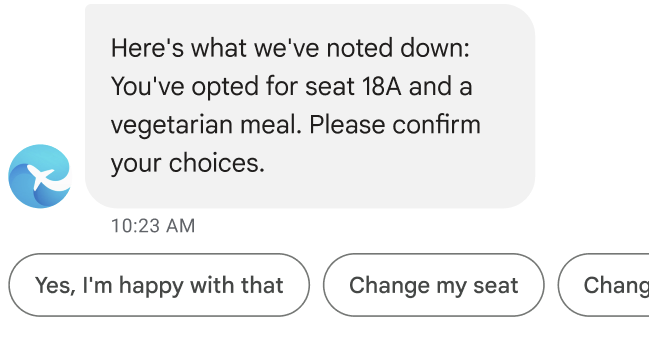
ตัวแทนจะสรุปรายละเอียดการเช็คอิน
ตัวอย่างโค้ด
let seat = this.seatmap[msisdn];

const suggestions = [
  {
    reply: {
      text: "Yes, I'm happy with that",
      postbackData: 'happy',
    },
  },
  {
    reply: {
      text: 'Change my seat',
      postbackData: 'change_seat',
    },
  },
  {
    reply: {
      text: 'Change my meal',
      postbackData: 'change_meal',
    },
  },
];

const params = {
  messageText: "Here's what we've noted down: You've opted for seat " + seat + " and a vegetarian meal. Please confirm your choices.",
  msisdn: msisdn,
  suggestions: suggestions
};

rbmApiHelper.sendMessage(params);
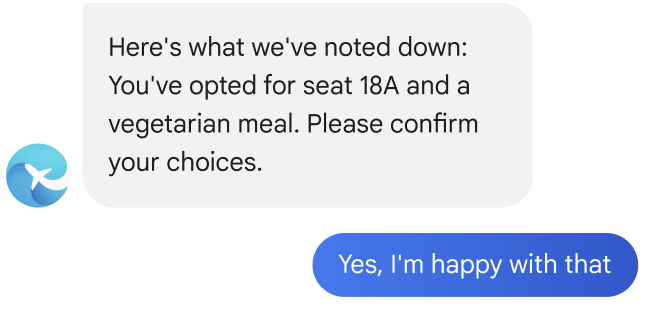
ผู้ใช้แตะคำตอบที่แนะนำเพื่อยืนยันรายละเอียดการเช็คอิน
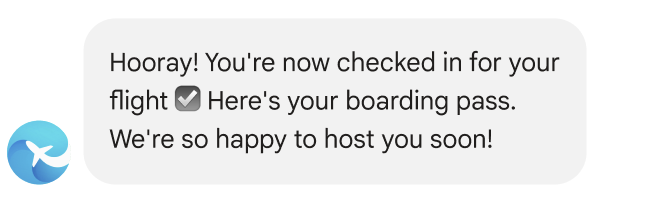
ตัวแทนประกาศว่าการเช็คอินเสร็จสมบูรณ์แล้ว
ตัวอย่างโค้ด
const params = {
  messageText: "Hooray! You're now checked in for your flight ☑️ Here's your boarding pass. We're so happy to host you soon!",
  msisdn: msisdn,
};

let self = this;

rbmApiHelper.sendMessage(params, function (response, err) {
  self.sendWalletPass(msisdn);
});
ตัวแทนจะส่งบอร์ดดิ้งพาสของผู้ใช้
ตัวอย่างโค้ด
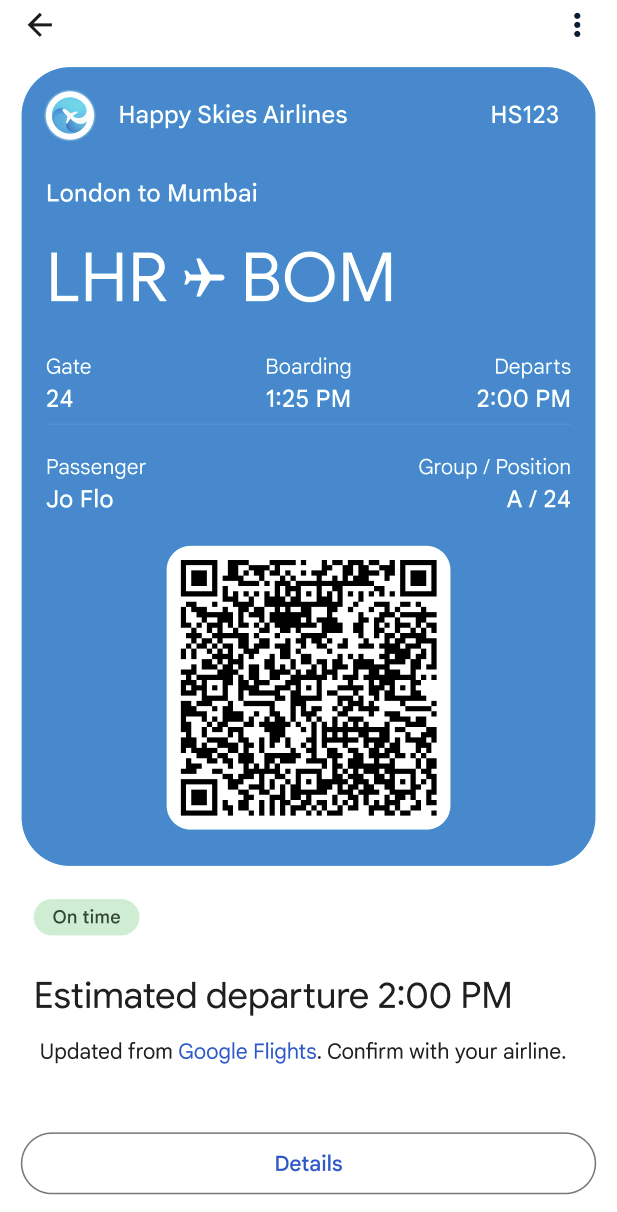
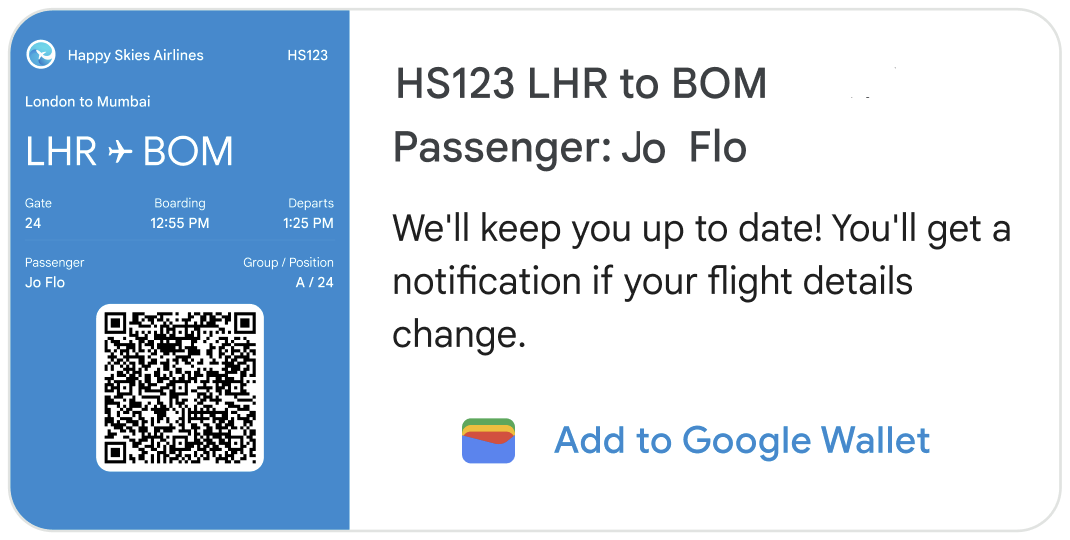
this.walletHelper.createFlightPassUrl(this.seatmap[msisdn]).then((url) => {
  let suggestions = [
    {
      action: {
        text: 'Add to Google Wallet',
        postbackData: 'addToWallet',
        openUrlAction: {
          url: url
        },
      },
    },
  ];

  const params = {
    messageText: 'HS123 LHR to BOM\nPassenger: Jo Flow',
    messageDescription: "We'll keep you up to date! You'll get a notification if your flight details change.",
    msisdn: msisdn,
    suggestions: suggestions,
    imageUrl: getImageUrl('boardingPass.png'),
    height: 'TALL',
    orientation: 'HORIZONTAL',
    thumbnailImageAlignment: 'LEFT',
  };

  rbmApiHelper.sendRichCard(params);
});
ใน Rich Card แนวนอนนี้ รูปภาพคือบอร์ดดิ้งพาสที่ใช้งานได้อย่างสมบูรณ์ซึ่งสายการบินเป็นผู้ระบุ รูปภาพควรแสดงข้อมูลการขึ้นเครื่องที่จำเป็นทั้งหมด รวมถึง บาร์โค้ดที่สแกนได้ ผู้ใช้สามารถแตะรูปภาพเพื่อดูและสแกนบัตรขึ้นเครื่อง จากแอปข้อความของ Google
คำแนะนำเพิ่มลงใน Google Wallet จะปรากฏในการ์ด Rich คำแนะนำนี้จะทริกเกอร์การดำเนินการเปิด URL ซึ่งจะเปิดแอป Google Wallet ที่ผู้ใช้สามารถเพิ่มบอร์ดดิ้งพาสลงใน Wallet ได้ (หากผู้ใช้ไม่มีแอปในอุปกรณ์ ระบบจะแจ้งให้ผู้ใช้ติดตั้งแอป) เมื่อเพิ่มบัตรลงใน Google Wallet แล้ว ผู้ใช้จะได้รับการช่วยเตือนเกี่ยวกับเที่ยวบิน และข้อมูลอัปเดตสถานะ โดยอัตโนมัติหากรายละเอียดเที่ยวบินมีการเปลี่ยนแปลง
นอกจากนี้ คุณควรแจ้งให้ผู้ใช้ที่ไม่ได้เพิ่มบัตรลงใน Google Wallet ทราบข้อมูลล่าสุดด้วย ส่งข้อความถึงผู้ใช้เกี่ยวกับการเปลี่ยนแปลงข้อมูลการขึ้นเครื่อง ที่แสดงในการ์ดริช
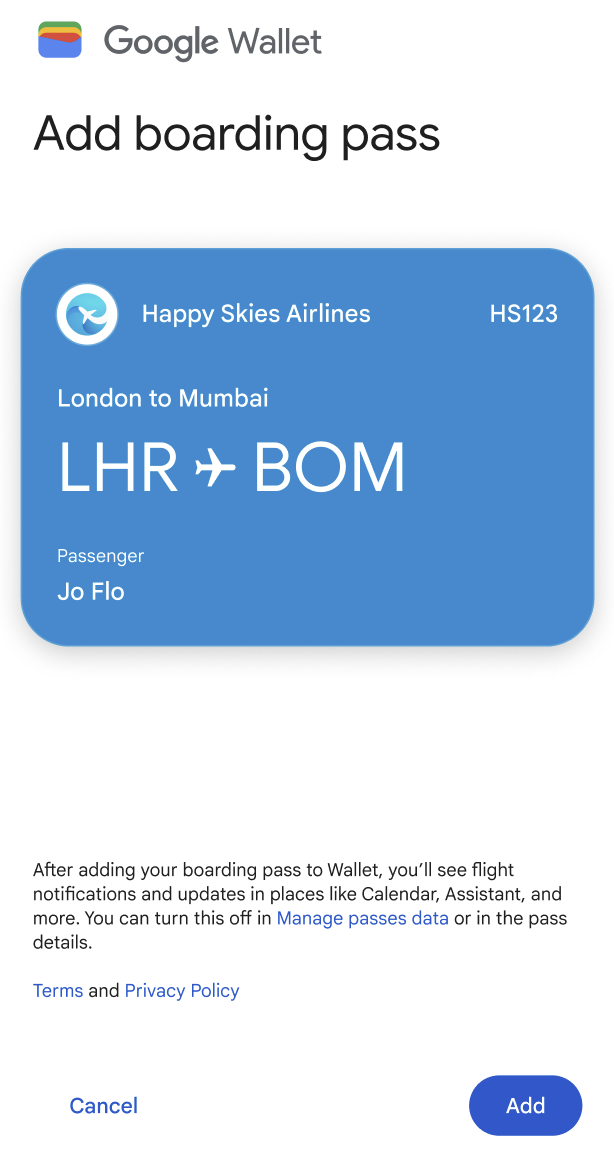
ผู้ใช้แตะการดำเนินการที่แนะนำเพื่อเพิ่มบัตรลงใน Google Wallet

แอป Google Wallet จะเปิดขึ้น ผู้ใช้แตะปุ่มเพื่อเพิ่มบัตรไปยัง กระเป๋าเงิน
ผู้ใช้แตะปุ่มเพื่อดูบัตร
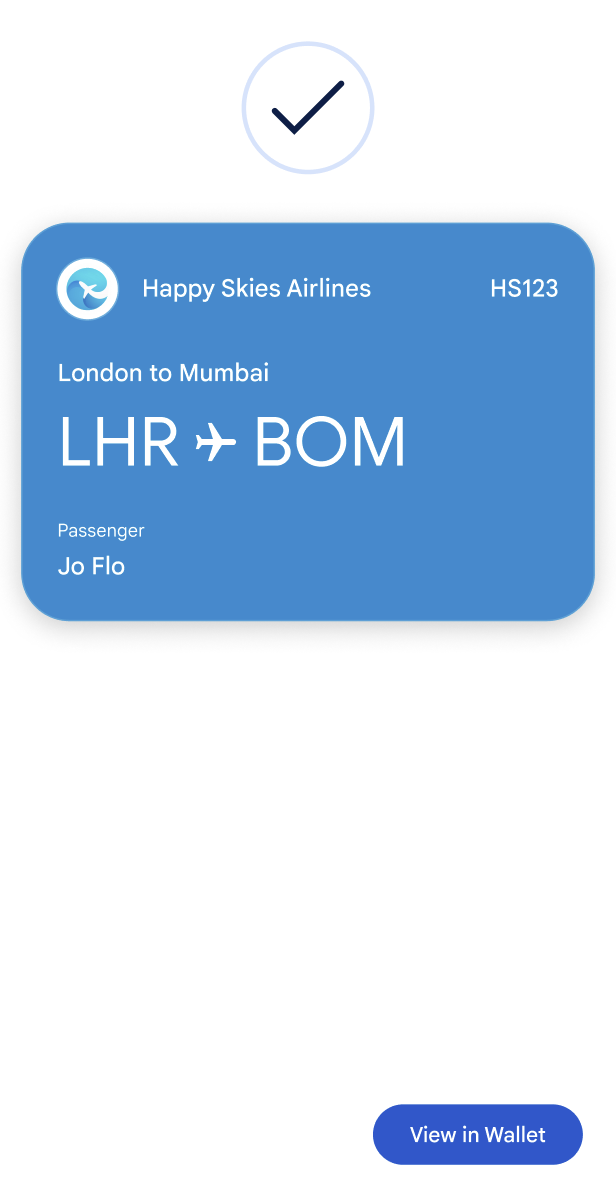
ระบบจะแสดงบอร์ดดิ้งพาสพร้อมคิวอาร์โค้ด