
Page Summary
-
Tile overlays are image collections displayed on top of base map tiles, ideal for adding extensive imagery to large geographical areas.
-
Tile overlays are composed of images organized by zoom levels and coordinates, fetched using a URL pattern you define.
-
You can customize tile overlays with transparency and control their visibility and order using z-index.
-
To update or remove an existing tile overlay, methods like
clearTileCache()andremove()are available.
A tile overlay, sometimes called a tile layer, is a collection of images that are displayed on top of the base map tiles.
Code Samples
The ApiDemos repository on GitHub includes a sample that demonstrates the tile overlay feature:
- TileOverlayDemoActivity - Java: Tile overlay features in Java
- TileCoordinateDemoActivity - Java: The coordinate system used for tile overlays in Java
- TileOverlayDemoActivity - Kotlin: Tile overlay features in Kotlin
- TileCoordinateDemoActivity - Kotlin: The coordinate system used for tile overlays in Kotlin
Introduction
A
TileOverlay defines a set of images that are added on top of
the base map tiles.
You need to provide the tiles for each zoom level that you want to support. If you have enough tiles at multiple zoom levels, you can supplement Google's map data for the entire map.
Tile overlays are useful when you want to add extensive imagery to the map, typically covering large geographical areas. In contrast, ground overlays are useful when you wish to fix a single image at one area on the map.
You can also use transparent tile overlays to add extra features to the map, by setting a transparency factor on the tile overlay programmatically or by providing transparent tile images.
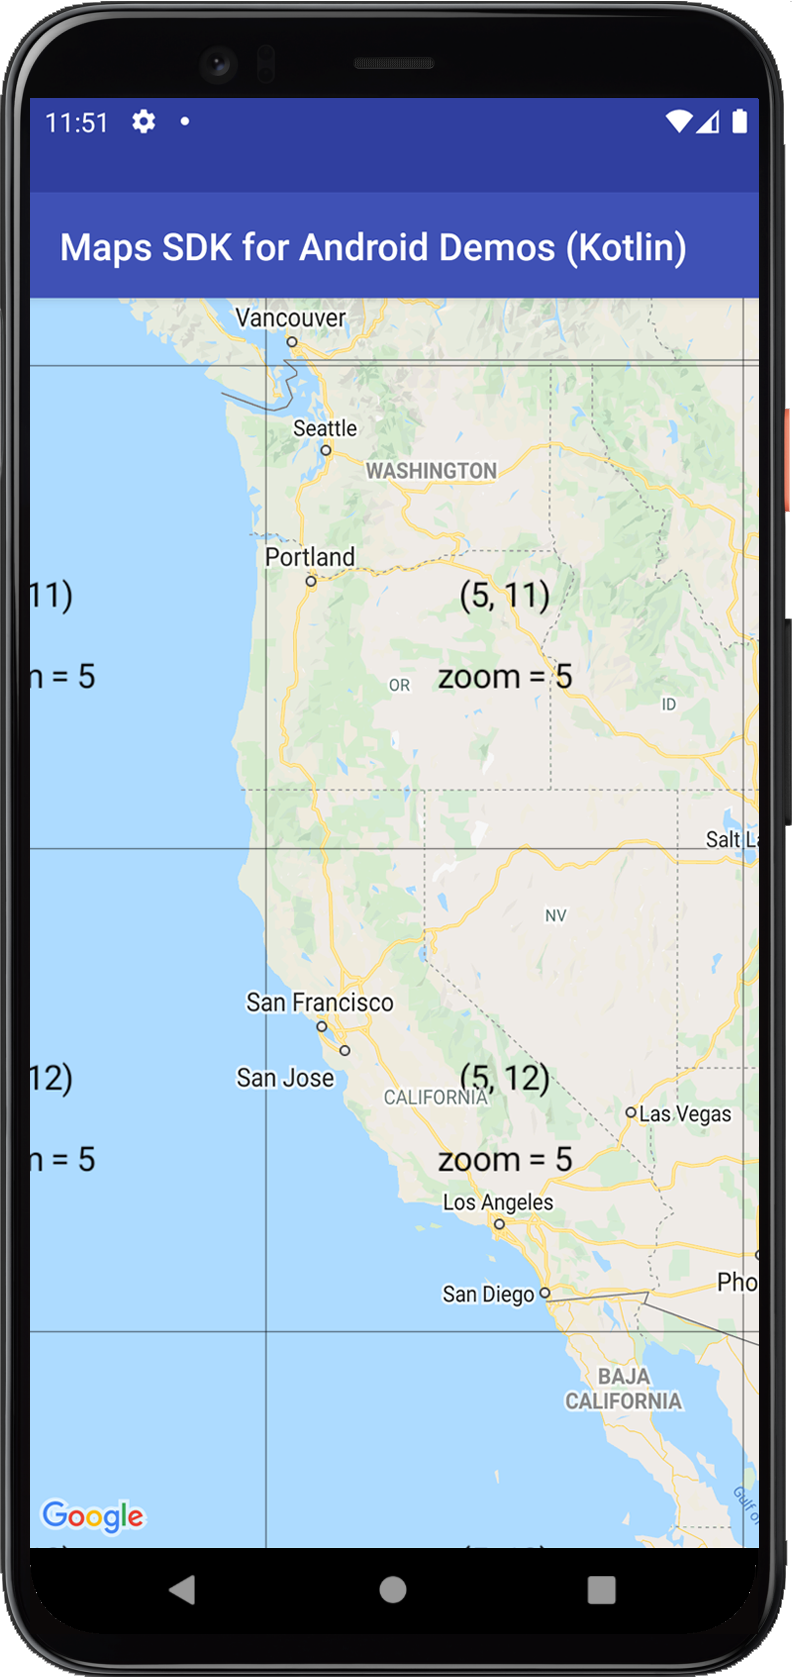
Tile coordinates and zoom levels
The Google Maps API breaks up the imagery at each zoom level into a set of square map tiles arranged in a grid. When a map moves to a new location, or to a new zoom level, the Maps API determines which tiles are needed and translates that information into a set of tiles to retrieve.
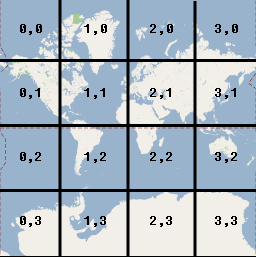
The tile with coordinates (0,0) is always at the northwest corner of the map, with x values increasing from west to east and y values increasing from north to south. Tiles are indexed using x,y coordinates from that origin.
At zoom level 0, the entire world is rendered in a single tile. Each zoom level increases the magnification by a factor of two. So, at zoom level 1 the map will be rendered as a 2x2 grid of tiles. At zoom level 2, it's a 4x4 grid. At zoom level 3, it's an 8x8 grid, and so on.
For example, at zoom level 2 the earth is divided into 16 tiles. Each tile can be referenced by a unique combination of x, y and zoom:
When creating images for a tile layer, you will need to create an image for each tile at each zoom level that you wish to support. Google Maps targets 256 dp (device-independent pixels) when displaying tiles. For high resolution devices, it is recommended that you return high dpi tiles (512x512 px). Refer to the Android Developers documentation for information on supporting different screen sizes and densities.
Note: The zoom levels supported by the camera depend on various factors, and are not related to the zoom levels that your tiles will support.
-
GoogleMap.getMaxZoomLevel()returns the maximum zoom level available at the current camera position. This takes into account the map type currently being used. For example, a satellite or terrain map may have a lower maximum zoom level than the base map tiles. -
GoogleMap.getMinZoomLevel()returns the minimum zoom level, which is the same for every location (unlike the maximum zoom level) but may vary between devices and map sizes.
Add a tile overlay
The simplest and most common way of creating a tile overlay is to provide a
URL pointing to the relevant tile image.
UrlTileProvider is a partial implementation of
TileProvider that provides image tiles based on a URL. This
class requires that all the images have the same dimensions.
You will need to implement UrlTileProvider.getTileUrl(), which
accepts the tile coordinates (x, y, zoom), and returns a URL pointing to the
image to be used for the tile. The method should return null if there is no
tile for the given x, y and zoom. A URL can point to a web resource, an
Android asset, or a file on the local disk.
Set up your stock of tile images on a server, defined for all the x,y coordinates and zoom levels that you intend to support. Then add the tile overlay:
- Define a
UrlTileProviderto supply the tile images. - Override
getTileUrl()to construct the URL for each tile image. - Provide a
TileOverlayOptionsobject with the relevant options: fadeIn: Boolean. Specifies whether the tiles should fade in. The default value istrue. You may find it useful to turn off the fade-in when switching between tile overlays quickly. For information on the relationship between transparency and fade-in, see the section on transparency below.tileProvider: TheTileProviderto use for this overlay.transparency: Float. Sets a transparency factor for tile images. The value must be in the range[0.0f, 1.0f]where0.0fmeans fully opaque (default) and1.0fmeans fully transparent. See the section on transparency below for a code sample and the relationship between transparency and fade-in.visible: Boolean. Specifies the visibility of the tile overlay. An invisible tile overlay (valuefalse) is not drawn on the map, but retains all of its other properties. The default istrue.zIndex: Determines the order in which the tile overlay will be drawn in relation to other overlays, including ground overlays , circles, polylines and polygons. Overlays with a higher z-index are drawn on top of those with lower z-indexes. The order of overlays with the same z-index is arbitrary. The default z-index is 0. Note that markers are always drawn above other overlays, regardless of the z-index of the other overlays.- Call
GoogleMap.addTileOverlay()to add the overlay to the map.
Kotlin
private lateinit var map: GoogleMap

var tileProvider: TileProvider = object : UrlTileProvider(256, 256) {
    override fun getTileUrl(x: Int, y: Int, zoom: Int): URL? {

        /* Define the URL pattern for the tile images */
        val url = "http://my.image.server/images/$zoom/$x/$y.png"
        return if (!checkTileExists(x, y, zoom)) {
            null
        } else try {
            URL(url)
        } catch (e: MalformedURLException) {
            throw AssertionError(e)
        }
    }

    /*
     * Check that the tile server supports the requested x, y and zoom.
     * Complete this stub according to the tile range you support.
     * If you support a limited range of tiles at different zoom levels, then you
     * need to define the supported x, y range at each zoom level.
     */
    private fun checkTileExists(x: Int, y: Int, zoom: Int): Boolean {
        val minZoom = 12
        val maxZoom = 16
        return zoom in minZoom..maxZoom
    }
}

val tileOverlay = map.addTileOverlay(
    TileOverlayOptions()
        .tileProvider(tileProvider)
)
Java
private GoogleMap map;

TileProvider tileProvider = new UrlTileProvider(256, 256) {

    @Override
    public URL getTileUrl(int x, int y, int zoom) {

        /* Define the URL pattern for the tile images */
        String s = String.format("http://my.image.server/images/%d/%d/%d.png", zoom, x, y);

        if (!checkTileExists(x, y, zoom)) {
            return null;
        }

        try {
            return new URL(s);
        } catch (MalformedURLException e) {
            throw new AssertionError(e);
        }
    }

    /*
     * Check that the tile server supports the requested x, y and zoom.
     * Complete this stub according to the tile range you support.
     * If you support a limited range of tiles at different zoom levels, then you
     * need to define the supported x, y range at each zoom level.
     */
    private boolean checkTileExists(int x, int y, int zoom) {
        int minZoom = 12;
        int maxZoom = 16;

        return (zoom >= minZoom && zoom <= maxZoom);
    }
};

TileOverlay tileOverlay = map.addTileOverlay(new TileOverlayOptions()
    .tileProvider(tileProvider));
To see an example of a UrlTileProvider in action, refer to the
TileOverlayDemoActivity in the
sample code
that is bundled with the Google Play services SDK.
Set transparency for tile overlays
It can be useful to overlay transparent tiles on the map, so that users can see the base map below the overlaid tiles. You can do this by providing your own transparent tiles, or by setting a transparency factor on the tile overlay programmatically.
The following code sample toggles the tile overlay's transparency
between 0.5f and 0.0f:
Kotlin
private var tileOverlayTransparent: TileOverlay? = null

override fun onMapReady(map: GoogleMap) {
    tileOverlayTransparent = map.addTileOverlay(
        TileOverlayOptions()
            .tileProvider(object : UrlTileProvider(256, 256) {
                // ...
            })
            .transparency(0.5f)
    )
}

// Switch between 0.0f and 0.5f transparency.
fun toggleTileOverlayTransparency() {
    tileOverlayTransparent?.let {
        it.transparency = 0.5f - it.transparency
    }
}
Java
private TileOverlay tileOverlayTransparent;

@Override
public void onMapReady(GoogleMap map) {
    tileOverlayTransparent = map.addTileOverlay(new TileOverlayOptions()
        .tileProvider(new UrlTileProvider(256, 256) {
            // ...
        })
        .transparency(0.5f));
}

// Switch between 0.0f and 0.5f transparency.
public void toggleTileOverlayTransparency() {
    if (tileOverlayTransparent != null) {
        tileOverlayTransparent.setTransparency(0.5f - tileOverlayTransparent.getTransparency());
    }
}
The transparency is implemented as an alpha channel multiplier for tile
images. To set the transparency of a tile overlay, provide a
TileOverlayOptions object with a transparency
in the range [0.0f, 1.0f] as shown in the above sample. A value
of 0.0f means the tile overlay is fully opaque and
1.0f means it's fully transparent. The default value is
0.0f (opaque).
You can access the tile overlay's transparency by calling
TileOverlay.getTransparency(), and you can change it by calling
TileOverlay.setTransparency().
Transparency, animation, and fade-in
There is no animation when the transparency is changed. The transparency option operates alongside the fadeIn option.
Fade-in provides animation of transparency upon tile loading. If you set a transparency value, the tiles fade in from fully transparent to the defined transparency value. If you change the transparency during fade-in, the animation continues toward the new target transparency.
Remove a tile overlay
You can remove a tile overlay with the
TileOverlay.remove() method.
Kotlin
tileOverlay?.remove()
Java
tileOverlay.remove();
Clear stale tiles
If the tiles provided by the tile overlay become 'stale', you can call
clearTileCache() to force a refresh. This will cause all the
tiles on this overlay to be reloaded. For example, if the tiles provided by
the TileProvider change, you must call
clearTileCache() afterwards to ensure that the previous tiles are
no longer rendered.
Kotlin
tileOverlay?.clearTileCache()
Java
tileOverlay.clearTileCache();