
Page Summary
-
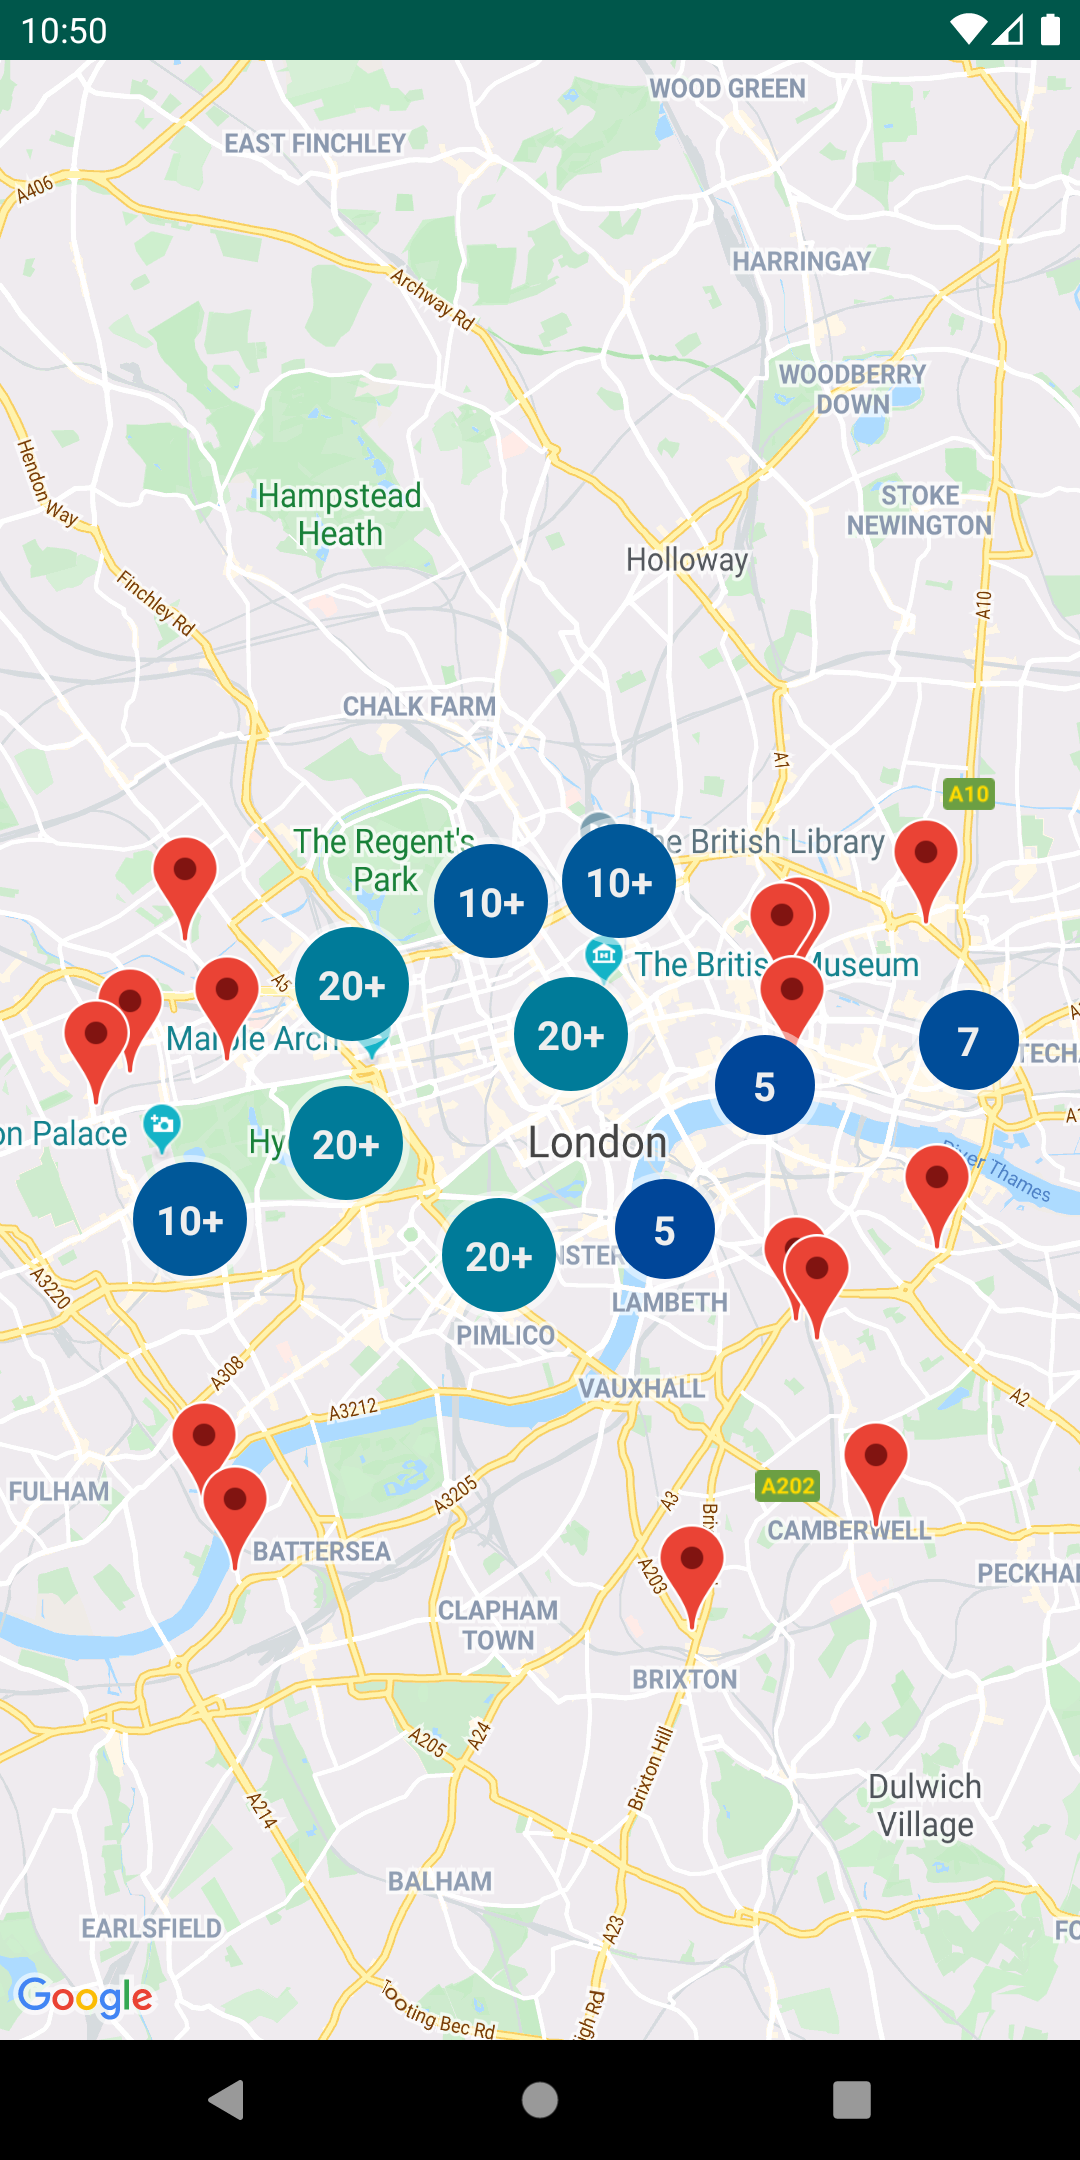
Marker clustering helps manage many map markers, grouping them into clusters when zoomed out for better readability.
-
Markers are added as
ClusterItemobjects to aClusterManager, which handles clustering based on zoom level. -
Customization is possible by implementing a custom
ClusterRendererand setting it on theClusterManager. -
Info windows can be added to individual clustered markers by providing title and snippet information in the
ClusterItemimplementation. -
The Maps SDK for Android Utility Library provides a demo app with examples of basic and custom marker clustering.
By clustering your markers, you can put a large number of markers on a map without making the map hard to read.
Introduction
This video discusses the use of marker clustering when your data requires a large number of data points on the map.
The marker clustering utility helps you manage multiple markers at different zoom levels. To be precise, the 'markers' are actually 'items' at this point, and only become 'Markers' when they're rendered. But for the sake of clarity, this document will name them 'markers' throughout.
When a user views the map at a high zoom level, the individual markers show on the map. When the user zooms out, the markers gather together into clusters, to make viewing the map easier. The marker clustering utility is part of the Maps SDK for Android Utility Library. If you haven't yet set up the library, follow the setup guide before reading the rest of this page.
To use the marker clustering utility, you will need to add markers as
ClusterItem objects to the ClusterManager. The
ClusterManager passes the markers to the Algorithm,
which transforms them into a set of clusters. The ClusterRenderer
takes care of the rendering, by adding and removing clusters and individual
markers. The ClusterRenderer and Algorithm are
pluggable and can be customized.
The utility library ships with a demo app providing sample implementations of the marker clustering utility. For help with running the demo app, see the setup guide. The demo app includes the following marker clustering samples:
ClusteringDemoActivity: A simple activity demonstrating marker clustering.BigClusteringDemoActivity: Clustering with 2 000 markers.CustomMarkerClusteringDemoActivity: Creating a custom design for clustered markers.
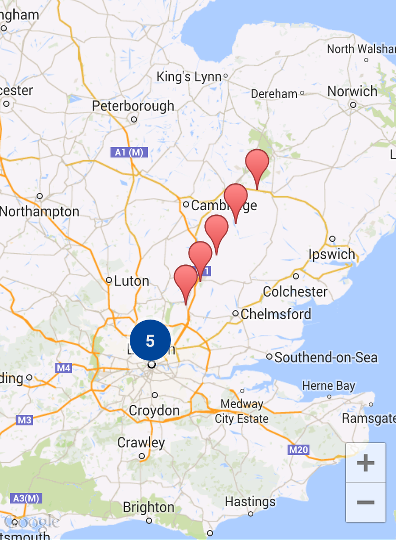
Add a simple marker clusterer
Follow the steps below to create a simple cluster of ten markers. The result will look like this, although the number of markers shown/clustered will change depending on the zoom level:
Here is a summary of the steps required:
- Implement
ClusterItemto represent a marker on the map. The cluster item returns the position of the marker as a LatLng object, and an optional title or snippet. - Add a new
ClusterManagerto group the cluster items (markers) based on zoom level. - Set the map's
OnCameraIdleListener()to theClusterManager, sinceClusterManagerimplements the listener. - If you want to add specific functionality in response to a marker click
event, set the map's
OnMarkerClickListener()to theClusterManager, sinceClusterManagerimplements the listener. - Feed the markers into the
ClusterManager.
Looking at the steps in more detail: To create our simple cluster of ten
markers, first create a MyItem class that implements
ClusterItem.
Kotlin
inner class MyItem(
    lat: Double,
    lng: Double,
    title: String,
    snippet: String
) : ClusterItem {

    private val position: LatLng
    private val title: String
    private val snippet: String

    override fun getPosition(): LatLng {
        return position
    }

    override fun getTitle(): String {
        return title
    }

    override fun getSnippet(): String {
        return snippet
    }

    override fun getZIndex(): Float {
        return 0f
    }

    init {
        position = LatLng(lat, lng)
        this.title = title
        this.snippet = snippet
    }
}
Java
public class MyItem implements ClusterItem {
    private final LatLng position;
    private final String title;
    private final String snippet;

    public MyItem(double lat, double lng, String title, String snippet) {
        position = new LatLng(lat, lng);
        this.title = title;
        this.snippet = snippet;
    }

    @Override
    public LatLng getPosition() {
        return position;
    }

    @Override
    public String getTitle() {
        return title;
    }

    @Override
    public String getSnippet() {
        return snippet;
    }

    @Nullable
    @Override
    public Float getZIndex() {
        return 0f;
    }
}
In your map activity, add the ClusterManager and feed it the
cluster items. Note the
type
argument <MyItem>, which declares the
ClusterManager to be of type MyItem.
Kotlin
// Declare a variable for the cluster manager.
private lateinit var clusterManager: ClusterManager<MyItem>

private fun setUpClusterer() {
    // Position the map.
    map.moveCamera(CameraUpdateFactory.newLatLngZoom(LatLng(51.503186, -0.126446), 10f))

    // Initialize the manager with the context and the map.
    // (Activity extends context, so we can pass 'this' in the constructor.)
    clusterManager = ClusterManager(context, map)

    // Point the map's listeners at the listeners implemented by the cluster
    // manager.
    map.setOnCameraIdleListener(clusterManager)
    map.setOnMarkerClickListener(clusterManager)

    // Add cluster items (markers) to the cluster manager.
    addItems()
}

private fun addItems() {

    // Set some lat/lng coordinates to start with.
    var lat = 51.5145160
    var lng = -0.1270060

    // Add ten cluster items in close proximity, for purposes of this example.
    for (i in 0..9) {
        val offset = i / 60.0
        lat += offset
        lng += offset
        val offsetItem =
            MyItem(lat, lng, "Title $i", "Snippet $i")
        clusterManager.addItem(offsetItem)
    }
}
Java
// Declare a variable for the cluster manager.
private ClusterManager<MyItem> clusterManager;

private void setUpClusterer() {
    // Position the map.
    map.moveCamera(CameraUpdateFactory.newLatLngZoom(new LatLng(51.503186, -0.126446), 10));

    // Initialize the manager with the context and the map.
    // (Activity extends context, so we can pass 'this' in the constructor.)
    clusterManager = new ClusterManager<MyItem>(context, map);

    // Point the map's listeners at the listeners implemented by the cluster
    // manager.
    map.setOnCameraIdleListener(clusterManager);
    map.setOnMarkerClickListener(clusterManager);

    // Add cluster items (markers) to the cluster manager.
    addItems();
}

private void addItems() {

    // Set some lat/lng coordinates to start with.
    double lat = 51.5145160;
    double lng = -0.1270060;

    // Add ten cluster items in close proximity, for purposes of this example.
    for (int i = 0; i < 10; i++) {
        double offset = i / 60d;
        lat = lat + offset;
        lng = lng + offset;
        MyItem offsetItem = new MyItem(lat, lng, "Title " + i, "Snippet " + i);
        clusterManager.addItem(offsetItem);
    }
}
You can also choose to disable the clustering animations when zooming in and out.
If animation is turned off, the markers snap into position instead of
migrating in and out of the clusters.
To disable animations, use setAnimation() in ClusterManager
as shown below:
Kotlin
clusterManager.setAnimation(false)
Java
clusterManager.setAnimation(false);
Add an info window for an individual clustered marker
To add an info window for specific clustered markers, add title and snippet strings into
the constructor of your implementation of ClusterItem.
The following example adds a marker with an info window
in the addItems() method, by setting a title and snippet:
Kotlin
// Set the lat/long coordinates for the marker.
val lat = 51.5009
val lng = -0.122

// Set the title and snippet strings.
val title = "This is the title"
val snippet = "and this is the snippet."

// Create a cluster item for the marker and set the title and snippet using the constructor.
val infoWindowItem = MyItem(lat, lng, title, snippet)

// Add the cluster item (marker) to the cluster manager.
clusterManager.addItem(infoWindowItem)
Java
// Set the lat/long coordinates for the marker.
double lat = 51.5009;
double lng = -0.122;

// Set the title and snippet strings.
String title = "This is the title";
String snippet = "and this is the snippet.";

// Create a cluster item for the marker and set the title and snippet using the constructor.
MyItem infoWindowItem = new MyItem(lat, lng, title, snippet);

// Add the cluster item (marker) to the cluster manager.
clusterManager.addItem(infoWindowItem);
Customize the marker clusters
The ClusterManager constructor creates a
DefaultClusterRenderer and a
NonHierarchicalDistanceBasedAlgorithm. You can change the
ClusterRenderer and the Algorithm
using the setAlgorithm(Algorithm<T> algorithm) and
setRenderer(ClusterRenderer<T> view) methods of
ClusterManager.
You can implement ClusterRenderer to customize the rendering of
the clusters. DefaultClusterRenderer provides a good base to
start from. By subclassing DefaultClusterRenderer, you can
override the defaults.
For an in-depth example of customization, take a look at
CustomMarkerClusteringDemoActivity in the demo app that ships
with the utility library.
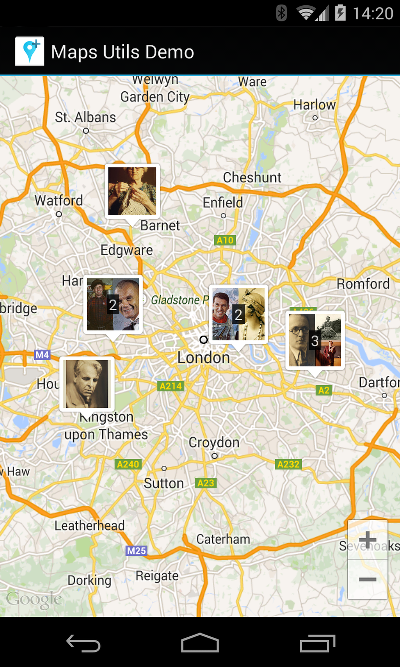
The CustomMarkerClusteringDemoActivity defines its own cluster
item, a Person, and renders it by extending the
DefaultClusterRenderer as PersonRenderer.
The demo also shows how to implement the
ClusterManager.OnClusterClickListener<Person> interface to
display more information about the person when the cluster is clicked. You can
also implement
ClusterManager.OnClusterItemClickListener<Person> in a
similar way.
For help with running the demo app, see the setup guide.