RCS と Google ウォレットで Google メッセージを使用すると、シームレスなチェックイン フローを設計できます。ユーザーはチェックインを完了し、搭乗券を受け取って、メッセージ アプリから Google ウォレットに直接追加できます。ウォレットに追加されたパスは、フライトの詳細が変更されると自動的に更新されます。ユーザーは、スマートフォンで最新の搭乗券にすばやくアクセスできます。
このドキュメントでは、搭乗券を Google ウォレット フローに実装するための技術的な手順について説明します。また、RBM を使用してスムーズかつ効率的なチェックイン エクスペリエンスを実現するための設計のヒントと、会話のサンプルも紹介します。
技術実装
搭乗券を Google ウォレット フローに実装するには、Google Wallet API と RBM API を使用します。
前提条件
Google Wallet API の使用を開始するには、次の必須の手順を行います。
- 登録して、Google ウォレットのパスを作成して配布できるようにウォレット発行者アカウントを取得します。
- Google Cloud(GCP)プロジェクトを作成します(まだ作成していない場合)。
- Google Wallet API を有効にします。
- Google Wallet API を呼び出すためのサービス アカウントとキーを作成します。
- Google Pay と Google ウォレットのコンソールでサービス アカウントを承認します。
- 搭乗券テンプレートを使用して、新しい Boarding クラスを作成します。
Google ウォレット API
搭乗券を作成し、RBM 用の [Google ウォレットに追加] URL を生成する手順は次のとおりです。
- 必要な認証と認可を行います。
- パス オブジェクトを作成します。
- 署名付き JSON Web Token(JWT)を取得します。エンコードされた JWT の最大長は 2,048 文字です。
- JWT を使用して [Google ウォレットに追加] URL を生成します。
RBM API
RBM から [Google ウォレットに追加] の候補を送信するには、[URL を開く] アクションを送信します。 メッセージ ペイロードで次の操作を行います。
textに「Google ウォレットに追加」と入力します。urlに [Google ウォレットに追加] URL を入力します。
候補のラベルに Google ウォレットのアイコンが自動的に表示されます。
![[Google ウォレットに追加] の候補に表示される Google ウォレットのアイコン](https://developers.google.com/static/business-communications/rcs-business-messaging/images/boarding-wallet-flow/wallet-suggestion.png?hl=ja)
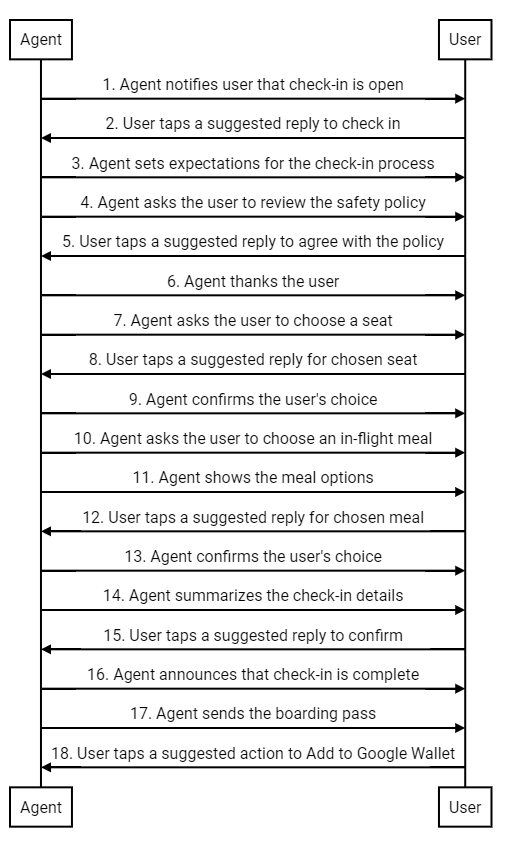
会話設計
このサンプルでは、会話の独自の機能を使用して、ユーザーをチェックイン フロー全体にわたって案内します。自然なダイアログと、ワンタップの候補やリッチカードなどの豊富な機能を使用して、ユーザーが目標を達成できるようにする方法を示します。この例では、ユーザーの目標は次のとおりです。(1)フライト エクスペリエンスをカスタマイズする、(2)搭乗券を受け取る、(3)空港で簡単にアクセスできるように Google ウォレットに追加する。
次は、会話の概要です。その後に、設計のヒントとフローの詳細な手順を示します。エージェントに同様のデザインを実装するには、手順の後のコードサンプルをご覧ください。
設計に関するアドバイス
チェックイン フローを設計する際は、次の原則に留意してください。
- 最初のメッセージが最も重要です。会話の目的を簡潔に説明して、ユーザーが参加する理由を示します。
- 各メッセージで、少量の情報を提供し、ユーザーにレスポンスを促します。候補の返信 と候補のアクション は、ユーザーが次のステップに進むのに役立ちます。
- エージェントは、ロボットではなく、レスポンスが迅速である必要があります。ブランドのトーンを反映した言語を使用します。理想的なブランド担当者は、お客様とどのようにチャットしますか?
- 人は特別扱いされることを好みます。ユーザーのフライト履歴に基づいて座席や食事を提案することで、チェックイン エクスペリエンスをパーソナライズできます。
- リッチカードとカルーセル を使用すると、会話がより動的になります。画像や詳細情報を共有して、ユーザーが選択肢の中から選択できるようにします。
- 良い会話は、良い結末を迎えます。搭乗券を送信する前に、ユーザーのチェックインの詳細を確認します。フレンドリーな見送りで、人間味を添えます。
チェックイン フロー
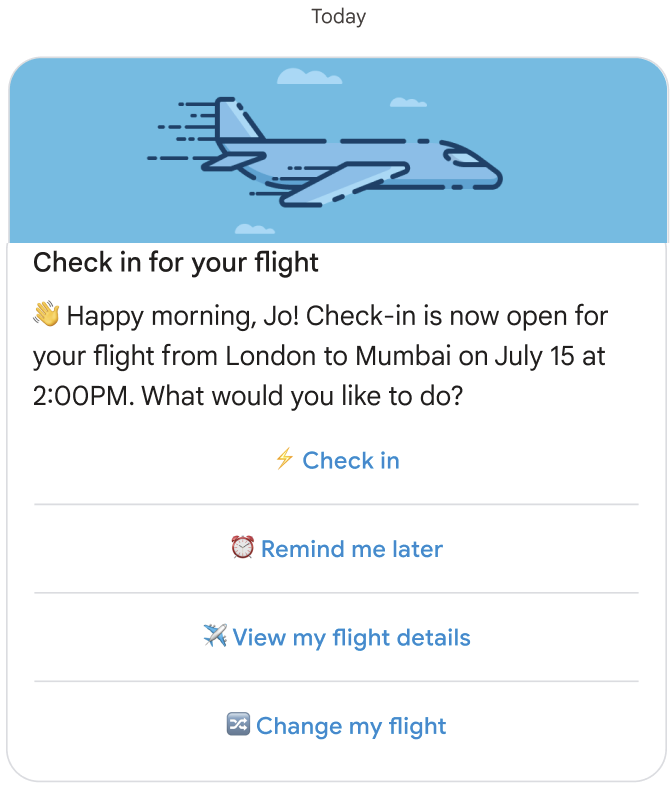
エージェントは、フライトのチェックインが開始されたことをユーザーに通知します。
コードサンプル
const suggestions = [
  {
    reply: {
      text: '⚡ Check in',
      postbackData: 'checkIn',
    },
  },
  {
    reply: {
      text: '⏰ Remind me later',
      postbackData: 'remindMe',
    },
  },
  {
    reply: {
      text: '✈️ View my flight details',
      postbackData: 'flightDetails',
    },
  },
  {
    reply: {
      text: '🔀 Change my flight',
      postbackData: 'flightChange',
    },
  },
];

const params = {
  messageText: 'Check-in for your flight',
  messageDescription: '👏 Happy morning, Jo! Check-in is now open for your flight from London to Mumbai on ' + getFlightTime() + ' at 2:00PM. What would you like to do? ',
  msisdn: phoneNumber,
  suggestions: suggestions,
  imageUrl: getImageUrl('fly.png'),
  height: 'MEDIUM',
};

rbmApiHelper.sendRichCard(params);
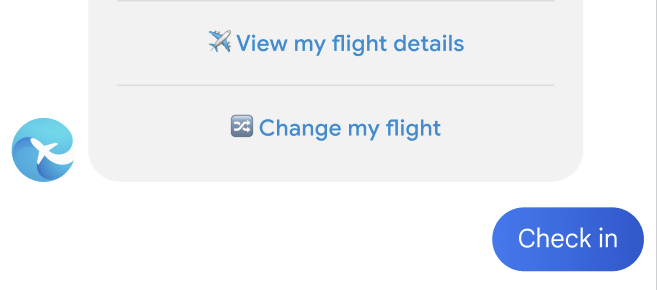
ユーザーは、候補の返信をタップしてチェックインします。
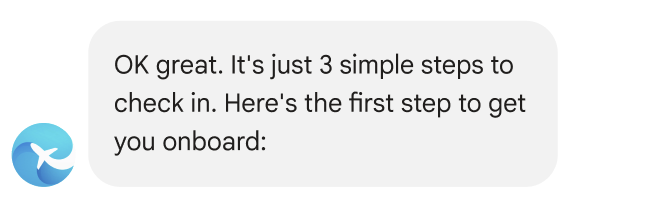
エージェントは、チェックイン プロセスの期待値を設定します。
コードサンプル
const params = {
  messageText: "OK, great. It's just 3 simple steps to check in. Here's the first step to get you onboard:",
  msisdn: msisdn,
};

let self = this;

rbmApiHelper.sendMessage(params, function (response, err) {
  self.sendPolicyImage(msisdn);
});
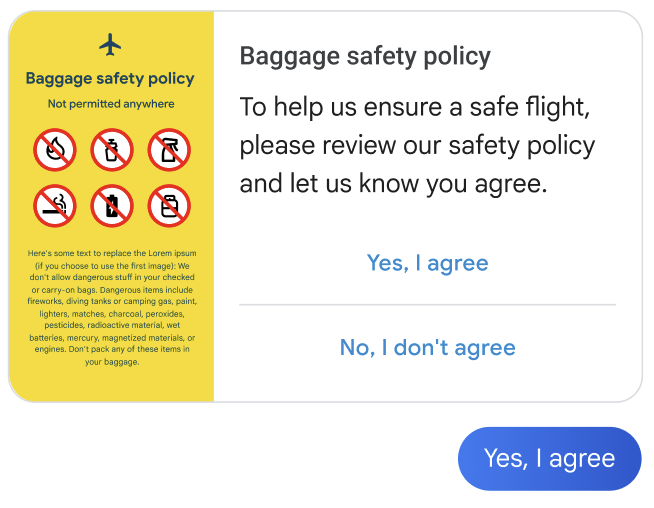
エージェントは、安全に関するポリシーに同意するようユーザーに求めます。

コードサンプル
const suggestions = [
  {
    reply: {
      text: 'Yes, I agree',
      postbackData: 'policy_agree',
    },
  },
  {
    reply: {
      text: "No, I don't agree",
      postbackData: 'policy_nack',
    },
  },
];

const params = {
  messageText: 'Baggage safety policy',
  messageDescription: 'To help us ensure a safe flight, please review our safety policy and let us know you agree',
  msisdn: msisdn,
  suggestions: suggestions,
  imageUrl: getImageUrl('policyImage.png'),
  height: 'MEDIUM',
  orientation: 'HORIZONTAL',
  thumbnailImageAlignment: 'LEFT',
};

rbmApiHelper.sendRichCard(params);
ユーザーは、候補の返信をタップして同意します。
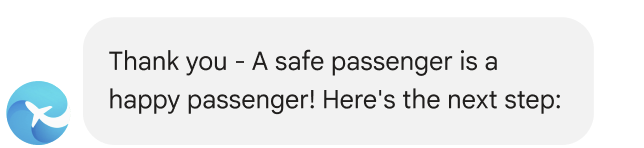
エージェントはユーザーに感謝し、次のステップを紹介します。
コードサンプル
const params = {
  messageText: "Thank you - A safe passenger is a happy passenger! Here's the next step:",
  msisdn: msisdn,
};

let self = this;

rbmApiHelper.sendMessage(params, function (response, err) {
  self.sendPlan(msisdn);
});
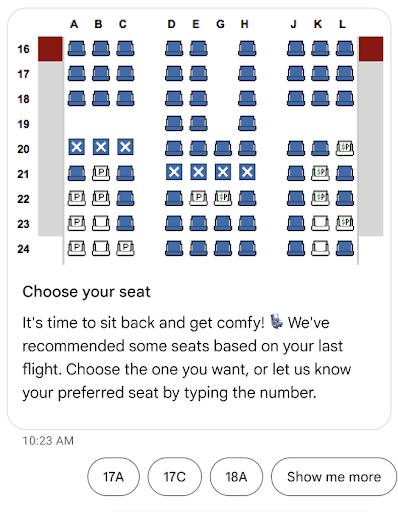
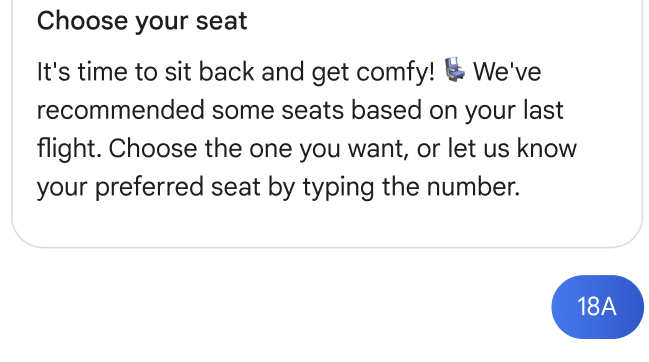
エージェントは、座席を選択するようユーザーに促します。
コードサンプル
const suggestions = [
  {
    reply: {
      text: 'View the seat map',
      postbackData: 'view_seat_map',
    },
  },
];

const outerSuggestions = [
  {
    reply: {
      text: '17A',
      postbackData: 'seat_17A',
    },
  },
  {
    reply: {
      text: '17C',
      postbackData: 'seat_17C',
    },
  },
  {
    reply: {
      text: '18A',
      postbackData: 'seat_18A',
    },
  },
  {
    reply: {
      text: 'Show me more',
      postbackData: 'more',
    },
  },
];

const params = {
  messageText: 'Choose your seat',
  messageDescription: "It's time to sit back and get comfy! 💺 We've recommended some seats based on your last flight. Choose the one you want, or let us know your preferred seat by typing the number.",
  msisdn: msisdn,
  imageUrl: getImageUrl('seatMap.png'),
  height: 'TALL',
  orientation: 'VERTICAL',
  outerSuggestions: outerSuggestions
};

rbmApiHelper.sendRichCard(params);
ユーザーは、選択した座席の返信の候補をタップします。
エージェントはユーザーの選択を確認します。

コードサンプル
this.seatmap[msisdn] = seat;

const params = {
  messageText: `Seat ${seat}, you got it`,
  msisdn: msisdn,
};

let self = this;
  rbmApiHelper.sendMessage(params, function(res) {
    self.sendFoodOptions(msisdn);
});
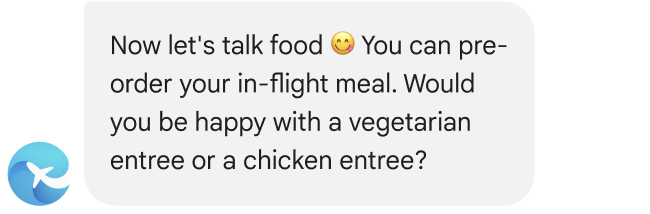
エージェントは、機内食を選択するようユーザーに求めます。
コードサンプル
const params = {
  messageText: `Now let's talk food 😋 You can pre-order your in-flight meal. Would you be happy with a vegetarian entree or a chicken entree?`,
  msisdn: msisdn,
};

let self = this;

rbmApiHelper.sendMessage(params, function(res) {
  self.sendFoodDetails(msisdn);
});
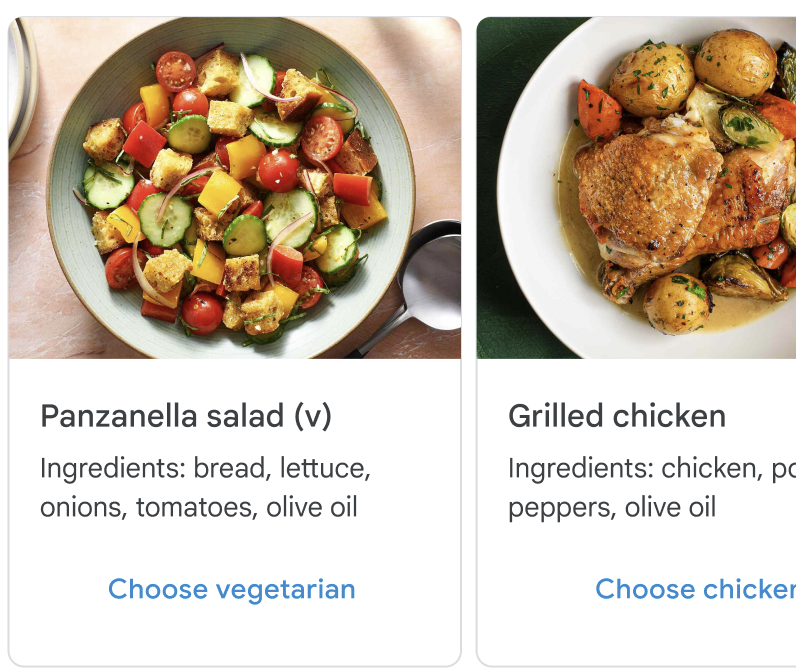
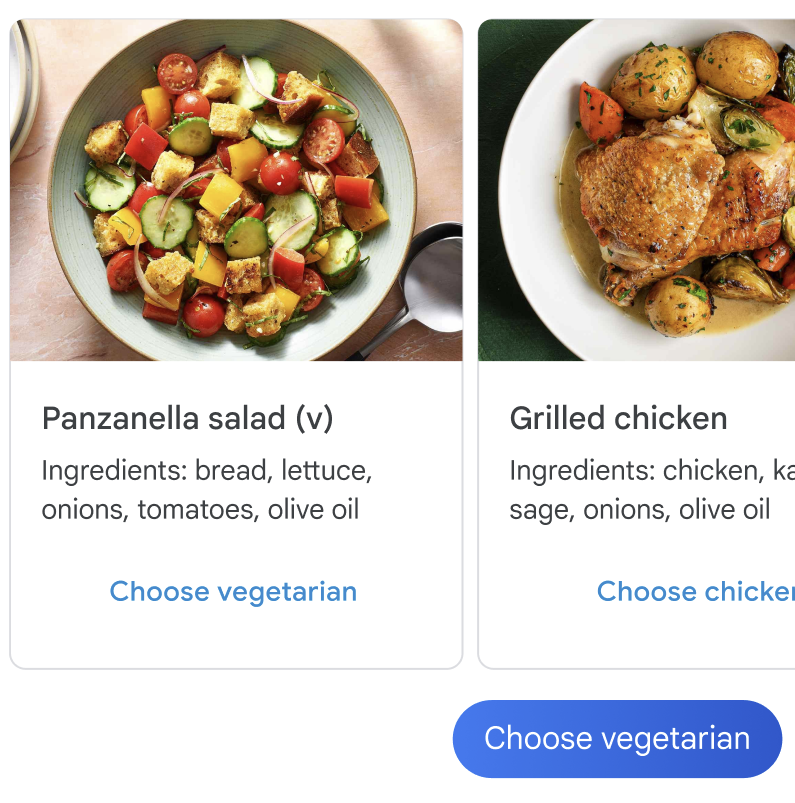
エージェントは食事の選択肢を表示します。
コードサンプル
const cardContents = [
  {
    title: 'Panzanella salad (v)',
    description: 'Ingredients: bread, lettuce, onions, tomatoes, olive oil',
    suggestions: [
      {
        reply: {
          text: 'Choose vegetarian',
          postbackData: 'veggie',
        },
      },
    ],
    media: {
      height: 'MEDIUM',
      contentInfo: {
        fileUrl: getImageUrl('salad.jpg'),
      },
    },
  },
  {
    title: 'Grilled chicken with greens',
    description: 'Ingredients: chicken, potatoes, peppers, olive oil',
    suggestions: [
      {
        reply: {
          text: 'Choose chicken',
          postbackData: 'chicken',
        },
      },
    ],
    media: {
      height: 'MEDIUM',
      contentInfo: {
        fileUrl: getImageUrl('chicken.png'),
      },
    },
  },
];

const params = {
  msisdn: msisdn,
  cardContents: cardContents,
};

rbmApiHelper.sendCarouselCard(params);
ユーザーは、選択した食事の候補の返信をタップします。
エージェントはユーザーの選択を確認します。

コードサンプル
const params = {
  messageText: `Vegetarian it is 💚`,
  msisdn: msisdn,
};

let self = this;

rbmApiHelper.sendMessage(params, function (response, err) {
  self.sendAskConfirmation(msisdn);
});
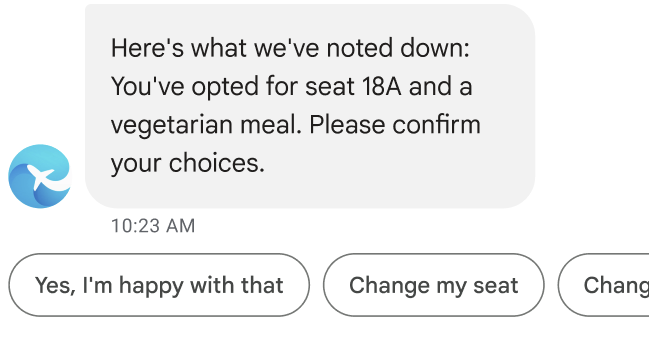
エージェントはチェックインの詳細を要約します。
コードサンプル
let seat = this.seatmap[msisdn];

const suggestions = [
  {
    reply: {
      text: "Yes, I'm happy with that",
      postbackData: 'happy',
    },
  },
  {
    reply: {
      text: 'Change my seat',
      postbackData: 'change_seat',
    },
  },
  {
    reply: {
      text: 'Change my meal',
      postbackData: 'change_meal',
    },
  },
];

const params = {
  messageText: "Here's what we've noted down: You've opted for seat " + seat + " and a vegetarian meal. Please confirm your choices.",
  msisdn: msisdn,
  suggestions: suggestions
};

rbmApiHelper.sendMessage(params);
ユーザーは、候補の返信をタップしてチェックインの詳細を確認します。
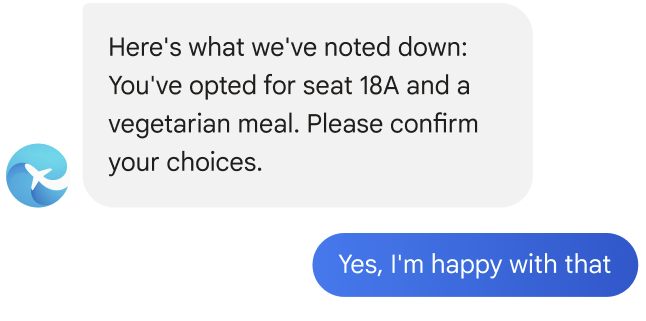
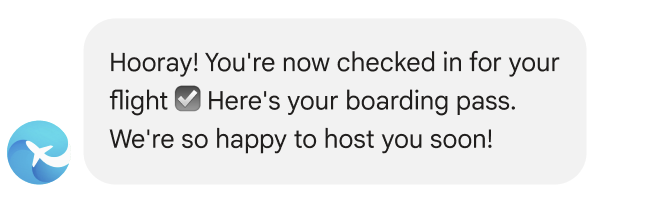
エージェントはチェックインが完了したことを通知します。
コードサンプル
const params = {
  messageText: "Hooray! You're now checked in for your flight ☑️ Here's your boarding pass. We're so happy to host you soon!",
  msisdn: msisdn,
};

let self = this;

rbmApiHelper.sendMessage(params, function (response, err) {
  self.sendWalletPass(msisdn);
});
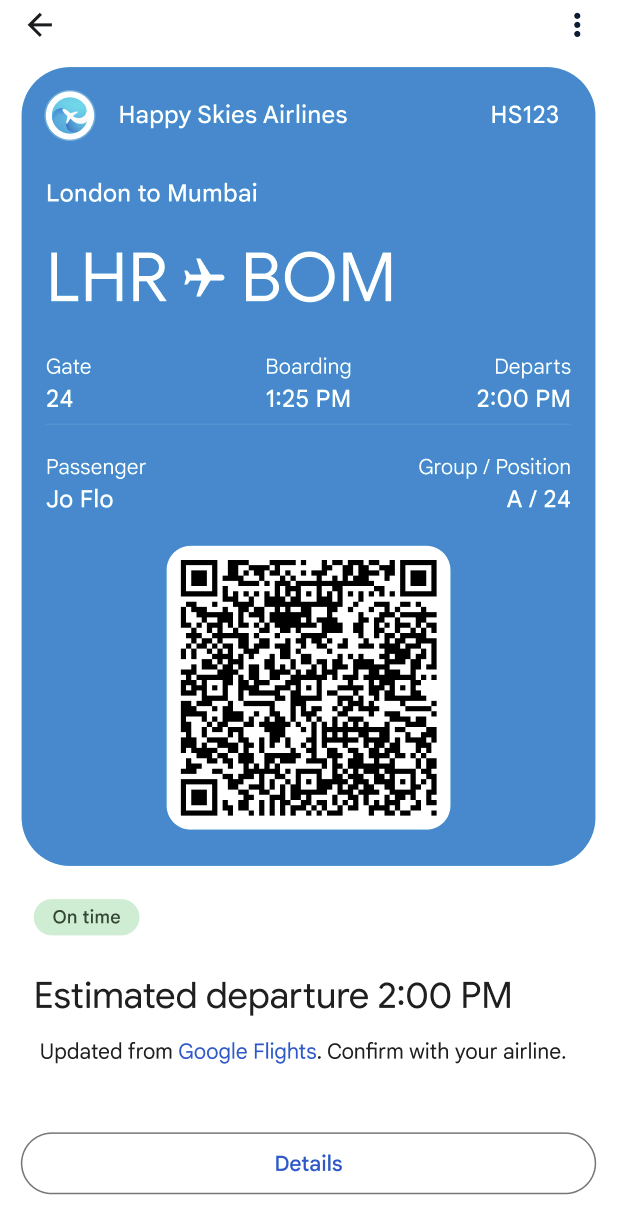
エージェントはユーザーの搭乗券を送信します。
![リッチカードには、QR コードとフライトの詳細情報が記載された搭乗券の画像が表示されます。カードのテキスト: 最新情報をお届けします。フライトの詳細が変更された場合は、通知が届きます。カードに [Google ウォレットに追加] という提案が表示されている。](https://developers.google.com/static/business-communications/rcs-business-messaging/images/boarding-wallet-flow/step17.png?hl=ja)
コードサンプル
this.walletHelper.createFlightPassUrl(this.seatmap[msisdn]).then((url) => {
  let suggestions = [
    {
      action: {
        text: 'Add to Google Wallet',
        postbackData: 'addToWallet',
        openUrlAction: {
          url: url
        },
      },
    },
  ];

  const params = {
    messageText: 'HS123 LHR to BOM\nPassenger: Jo Flow',
    messageDescription: "We'll keep you up to date! You'll get a notification if your flight details change.",
    msisdn: msisdn,
    suggestions: suggestions,
    imageUrl: getImageUrl('boardingPass.png'),
    height: 'TALL',
    orientation: 'HORIZONTAL',
    thumbnailImageAlignment: 'LEFT',
  };

  rbmApiHelper.sendRichCard(params);
});
この横型リッチカードの画像は、航空会社が提供する完全に機能する搭乗券です。画像には、スキャン可能なバーコードなど、必要な搭乗情報がすべて表示されます。ユーザーは画像をタップして、Google のメッセージ アプリから搭乗券を表示してスキャンできます。
リッチカードに [Google ウォレットに追加] の候補が表示されます。この候補は、Google ウォレット アプリを開く [URL を開く] アクション をトリガーします。ユーザーは、このアプリで搭乗券を ウォレットに追加できます(アプリがユーザーのデバイスにインストールされていない場合は、インストールするよう求められます)。 パスが Google ウォレットに追加されると、ユーザーは フライトのリマインダー とステータスの更新情報 を、フライトの詳細が変更された場合に自動的に受け取ります。
パスを Google ウォレットに追加しないユーザーにも、最新情報を提供する必要があります。リッチカードに表示される搭乗情報の変更についてユーザーにメッセージを送信します。
ユーザーは、候補のアクションをタップしてパスを Google ウォレットに追加します。
![Google ウォレットのアイコンと [Google ウォレットに追加] の候補](https://developers.google.com/static/business-communications/rcs-business-messaging/images/boarding-wallet-flow/step18.png?hl=ja)
Google ウォレット アプリが開きます。ユーザーはボタンをタップしてパスをウォレットに追加します。
![ウォレット アプリに簡略化された搭乗券と [追加] ボタンが表示されています。](https://developers.google.com/static/business-communications/rcs-business-messaging/images/boarding-wallet-flow/step19.png?hl=ja)
ユーザーはボタンをタップしてパスを表示します。
![パスの上にチェックマークが表示されます。[Google ウォレットで表示] ボタンが表示されます。](https://developers.google.com/static/business-communications/rcs-business-messaging/images/boarding-wallet-flow/step20.png?hl=ja)
QR コード付きの搭乗券が表示されます。