Page Summary
-
This guide explains how to integrate Unity Ads into your Android app using Google Mobile Ads SDK mediation, focusing on waterfall configurations.
-
The Unity Ads mediation adapter supports both bidding and waterfall integrations for Banner, Interstitial, Rewarded, and Native ad formats.
-
Key requirements include Android API level 23 or higher, the latest Google Mobile Ads SDK, and completing the mediation Get started guide.
-
The setup involves configuring settings in the Unity Ads UI, including creating a project, ad units, and placements, and obtaining necessary IDs and API keys.
-
You need to set up Unity Ads demand in the Ad Manager UI by adding Unity Ads as a company and configuring ad unit mapping for waterfall integrations.
-
Implementing privacy settings by passing EU consent and US states privacy information to the Unity Ads SDK is crucial for compliance.
This guide shows you how to use Google Mobile Ads SDK (Legacy) to load and display ads from Unity Ads using mediation, covering bidding and waterfall integrations. It covers how to add Unity Ads to an ad unit's mediation configuration, and how to integrate the Unity Ads SDK and adapter into an Android app.
Supported integrations and ad formats
The mediation adapter for Unity Ads has the following capabilities:
| Integration | |
|---|---|
| Bidding | |
| Waterfall | 1 |
| Formats | |
| Banner | |
| Interstitial | |
| Rewarded | |
| Native | |
Requirements
- Android API level 23 or higher
- [For bidding]: To integrate all supported ad formats in bidding, use Unity adapter 4.16.0.1 or higher (latest version recommended)
Latest Google Mobile Ads SDK (Legacy)
Complete the mediation Get started guide
Step 1: Set up configurations in Unity Ads UI
Sign up or log in to Unity Ads.
Create a project
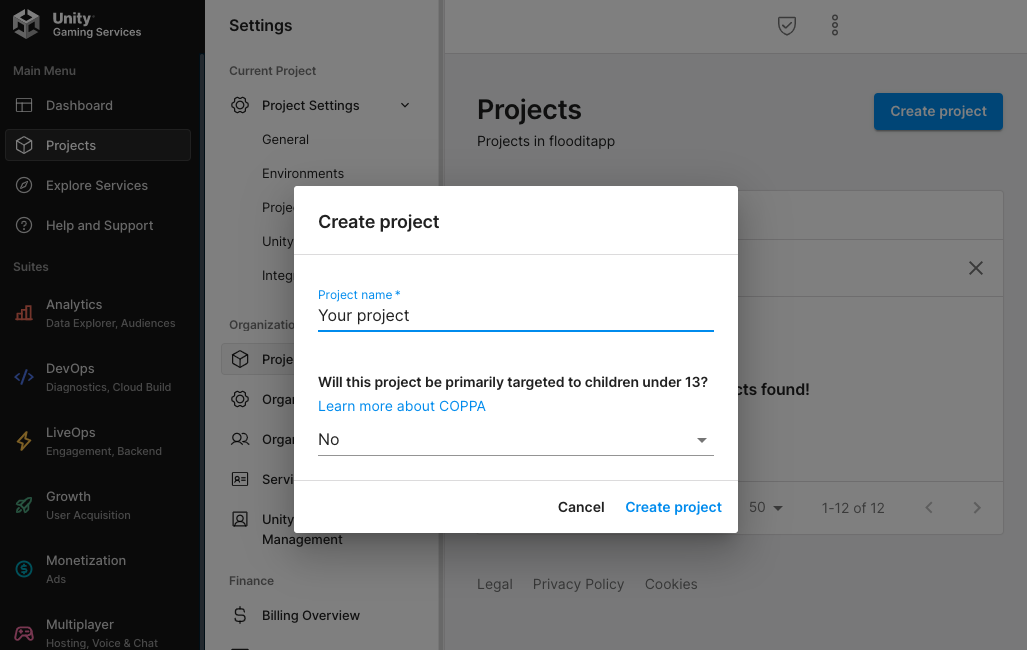
On the Unity Ads dashboard, navigate to Projects and click New.
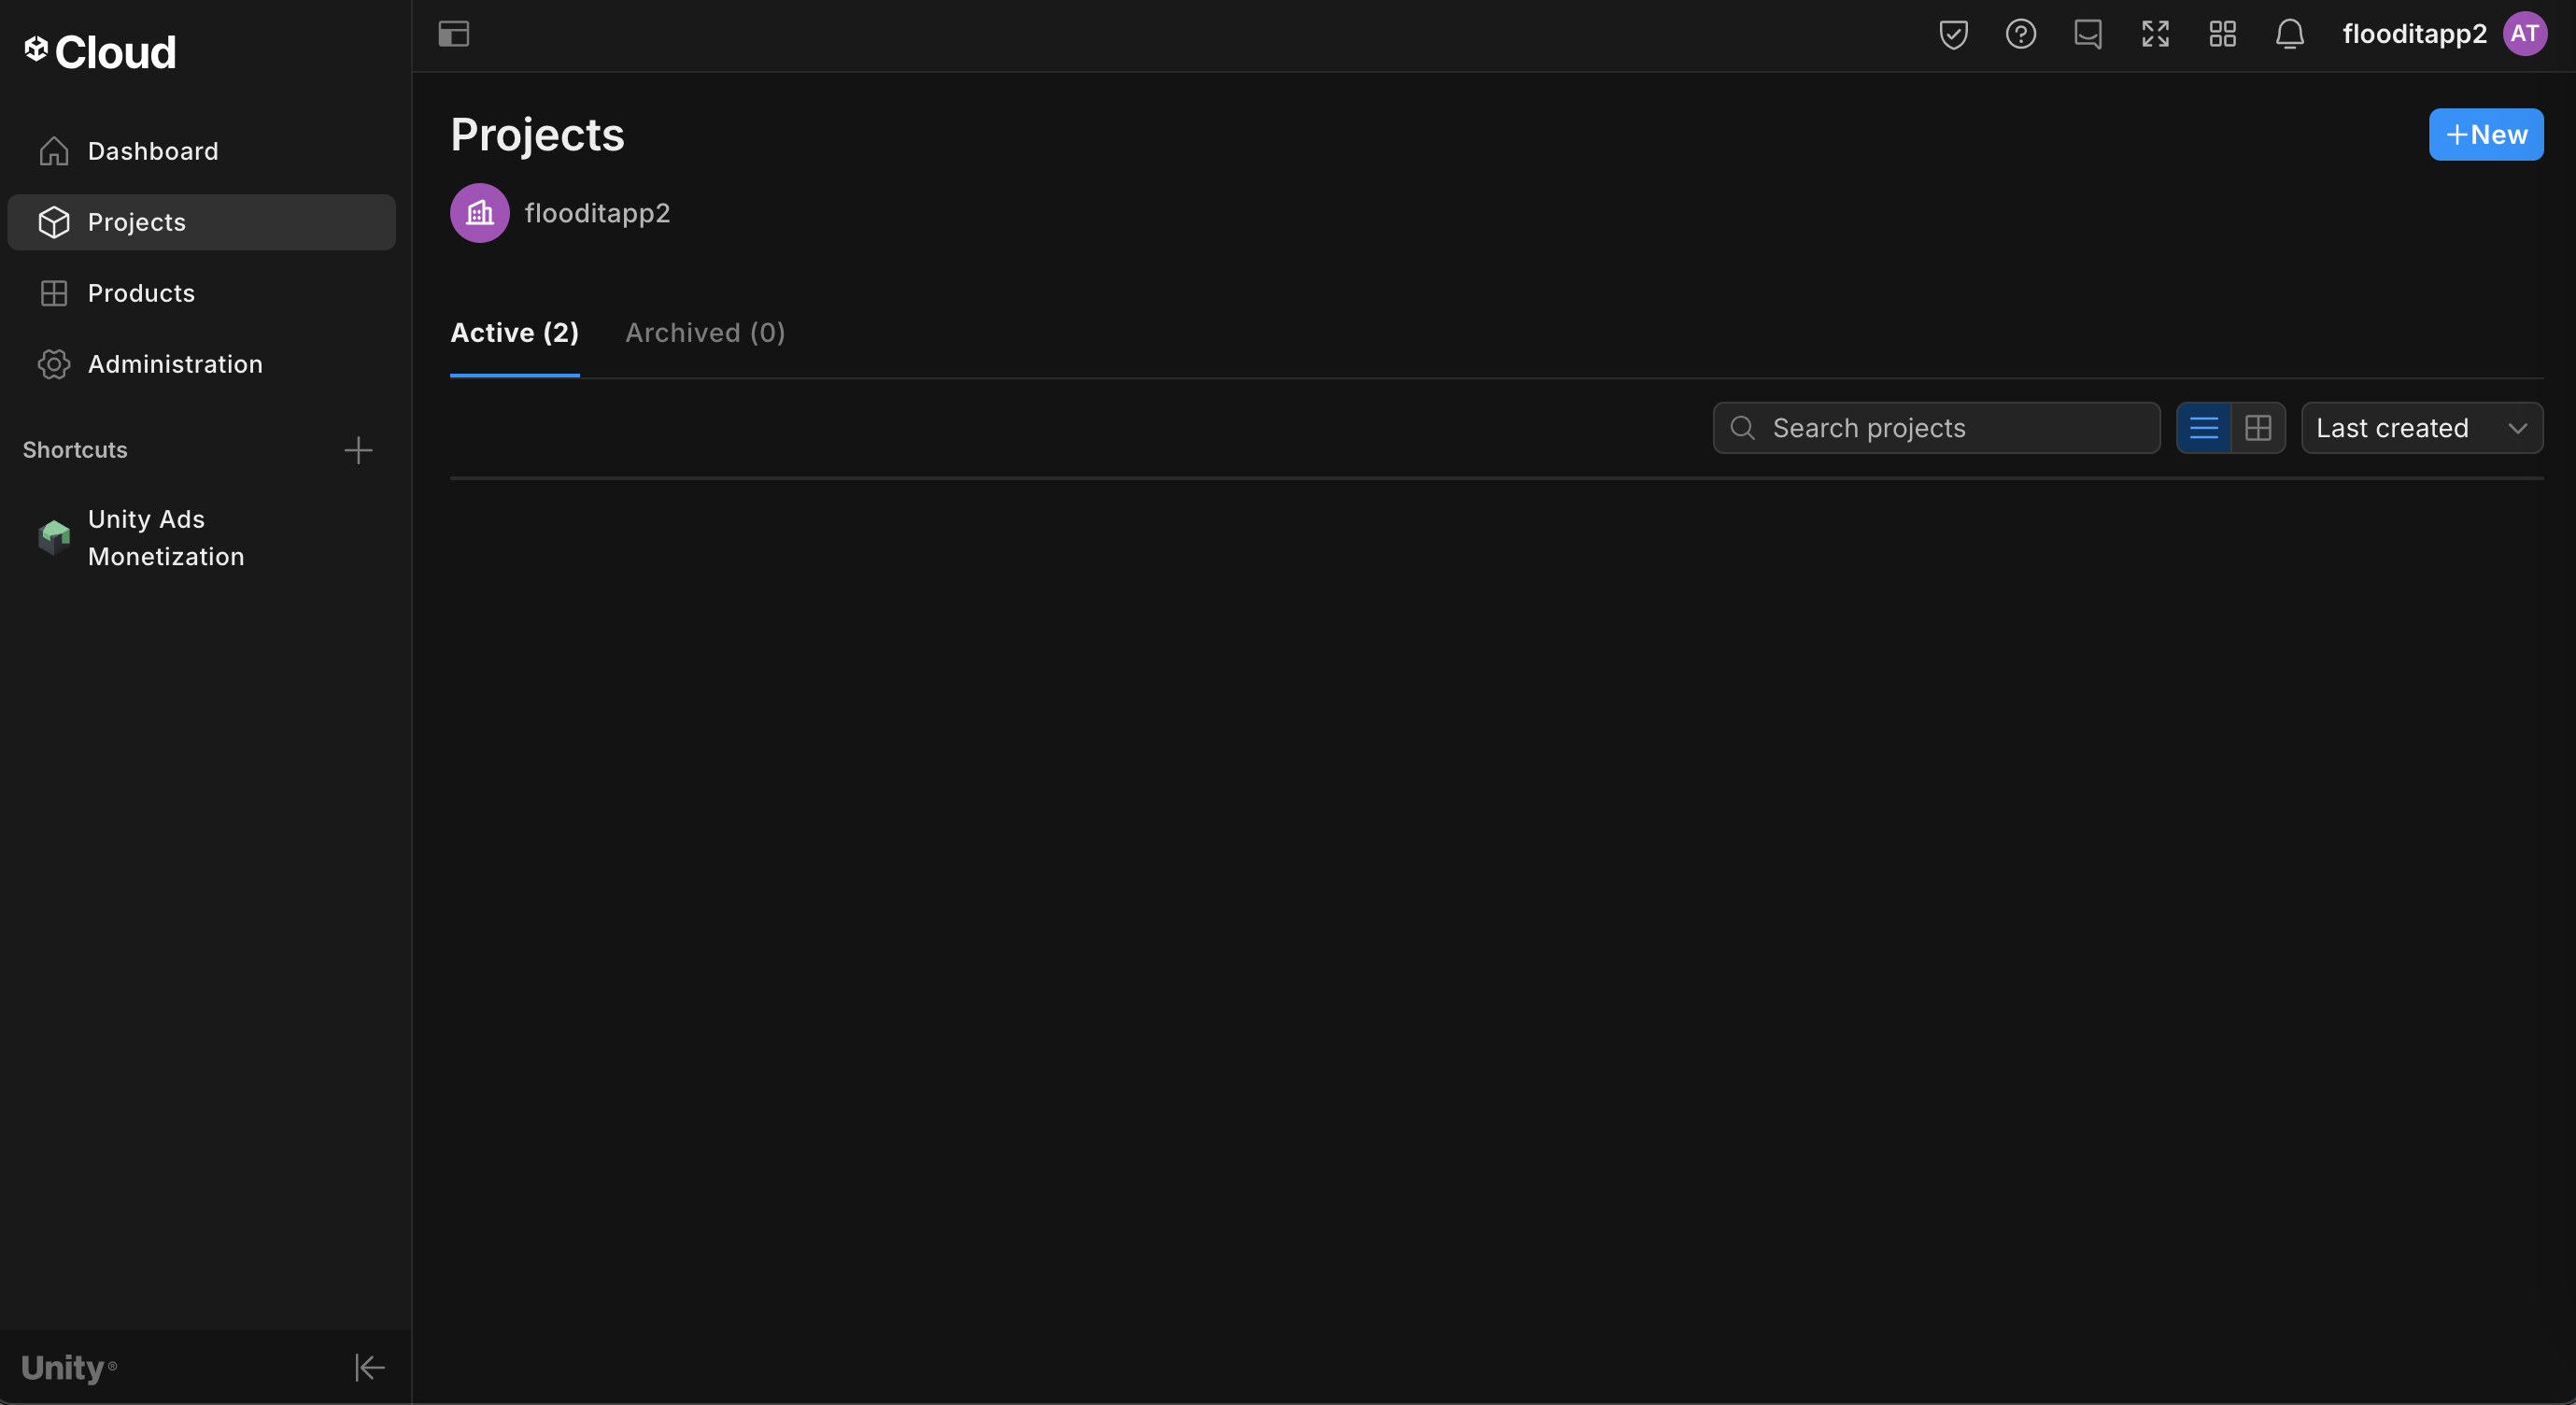
Fill out the form and click Create to add your project.
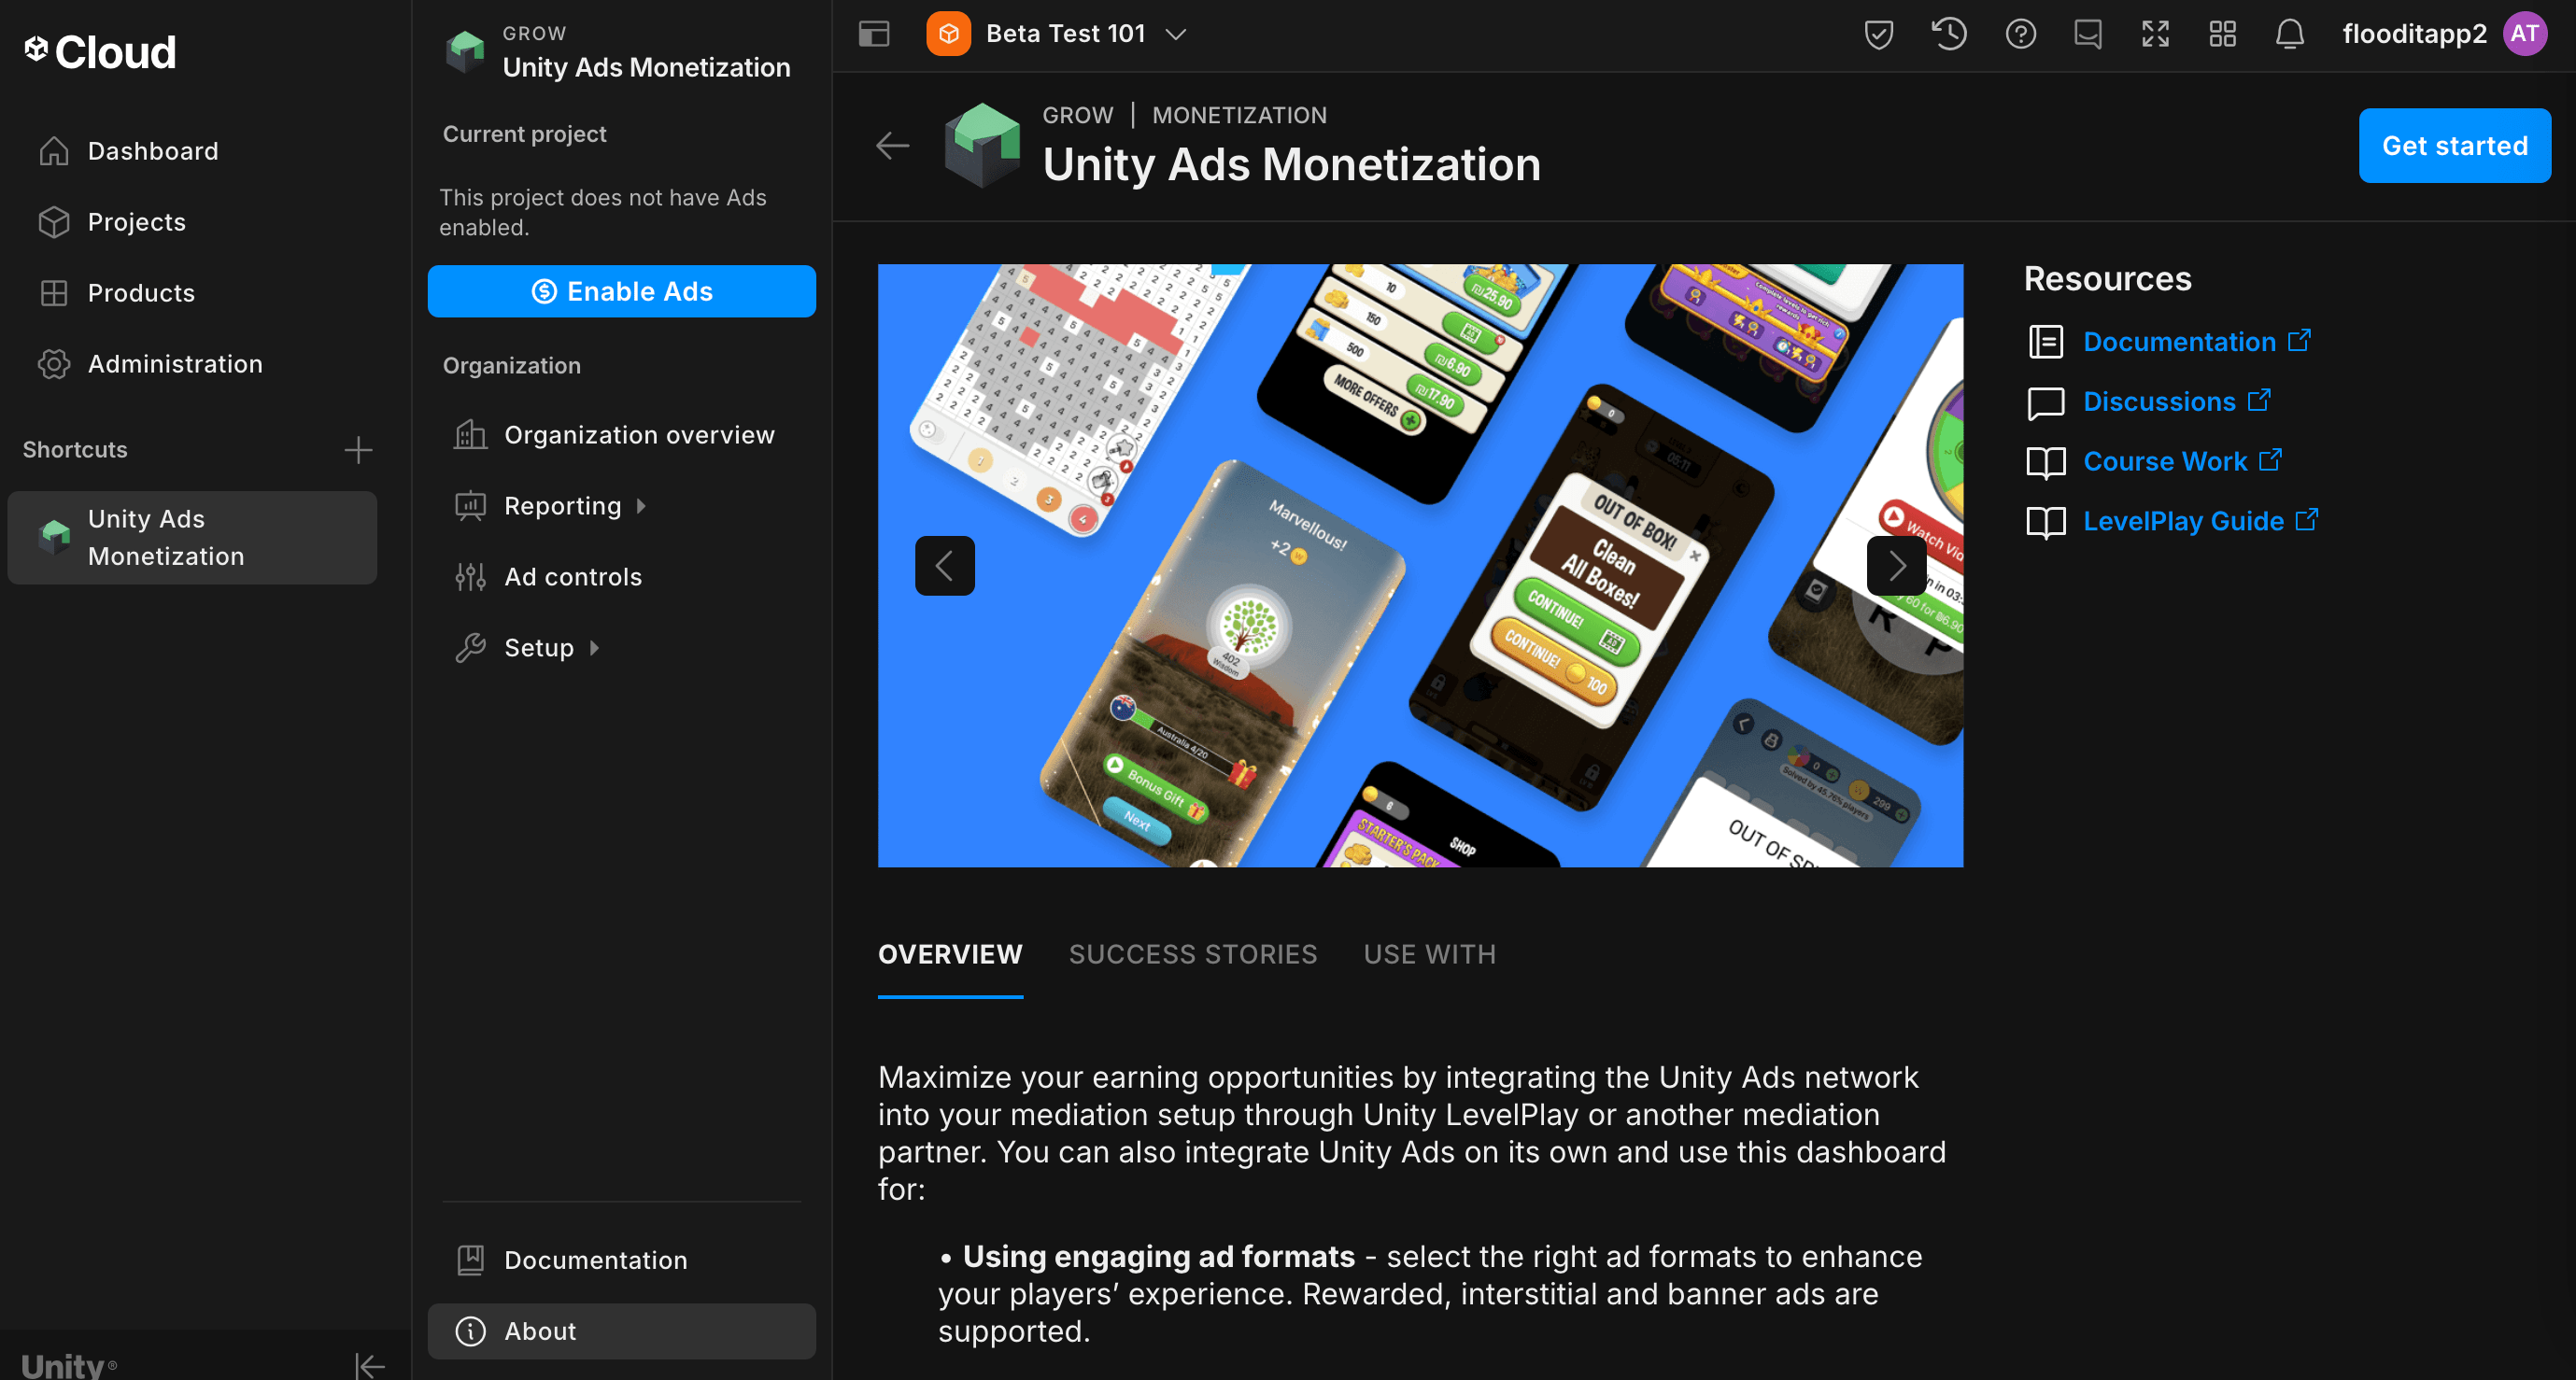
Navigate to Unity Ads Monetization, then click Get started.
In the New Project modal, select I will use Mediation and Google Admob for Mediation Partner, then click Next.

Select the option for ad settings, then click Next.

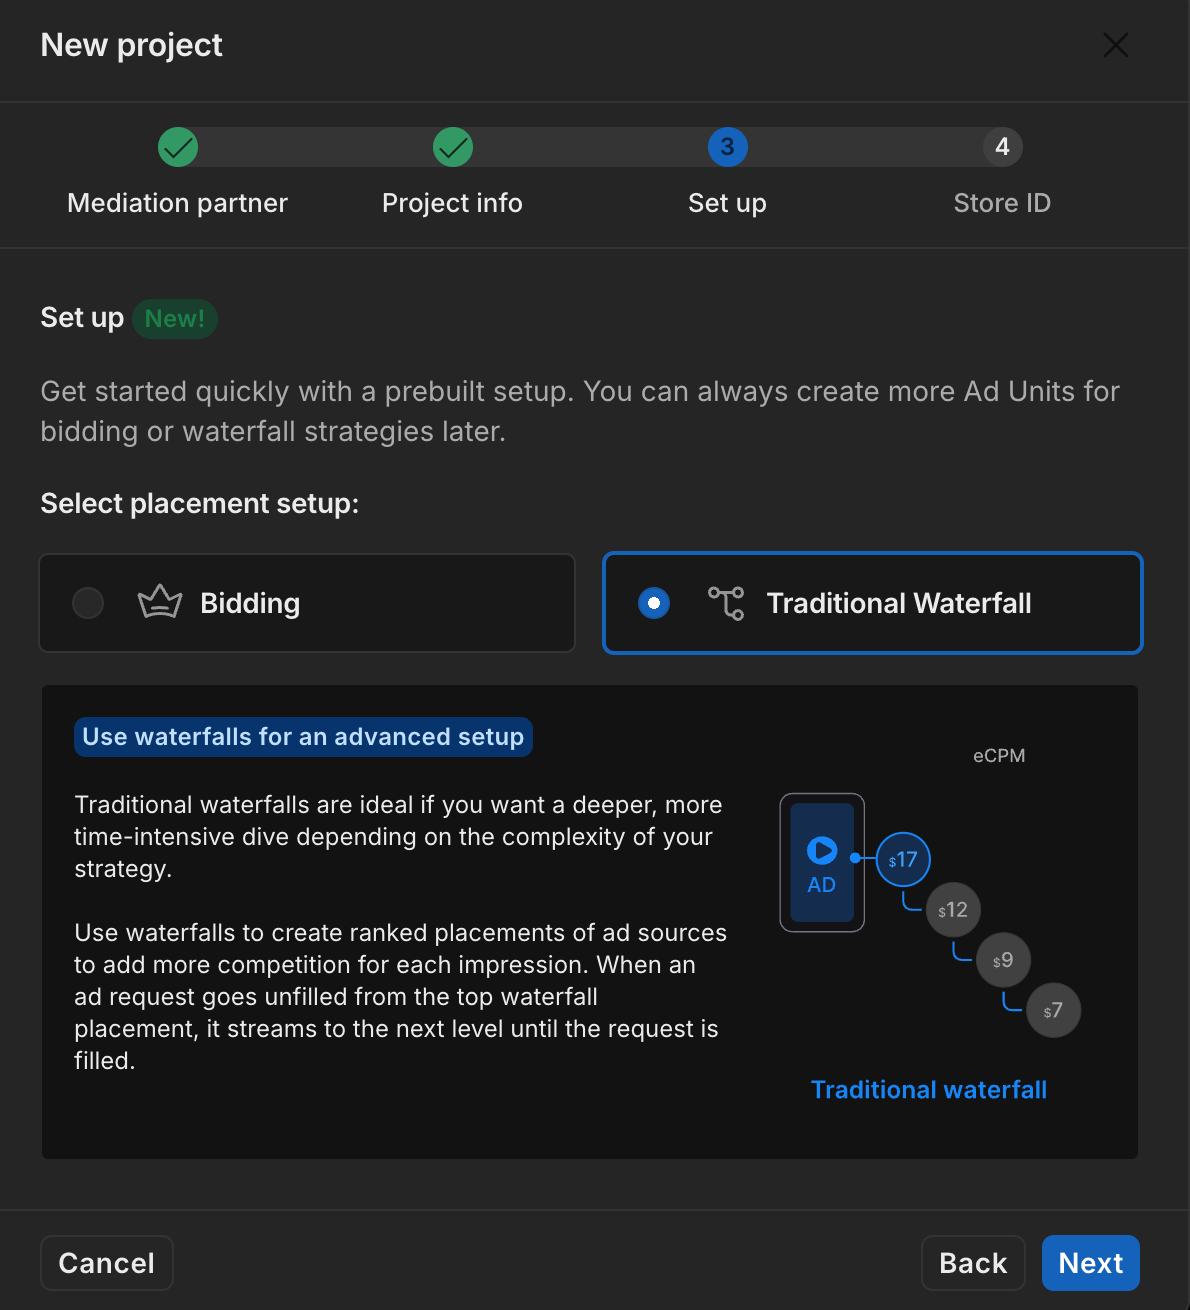
Select your placement setup, then click Next.
Bidding
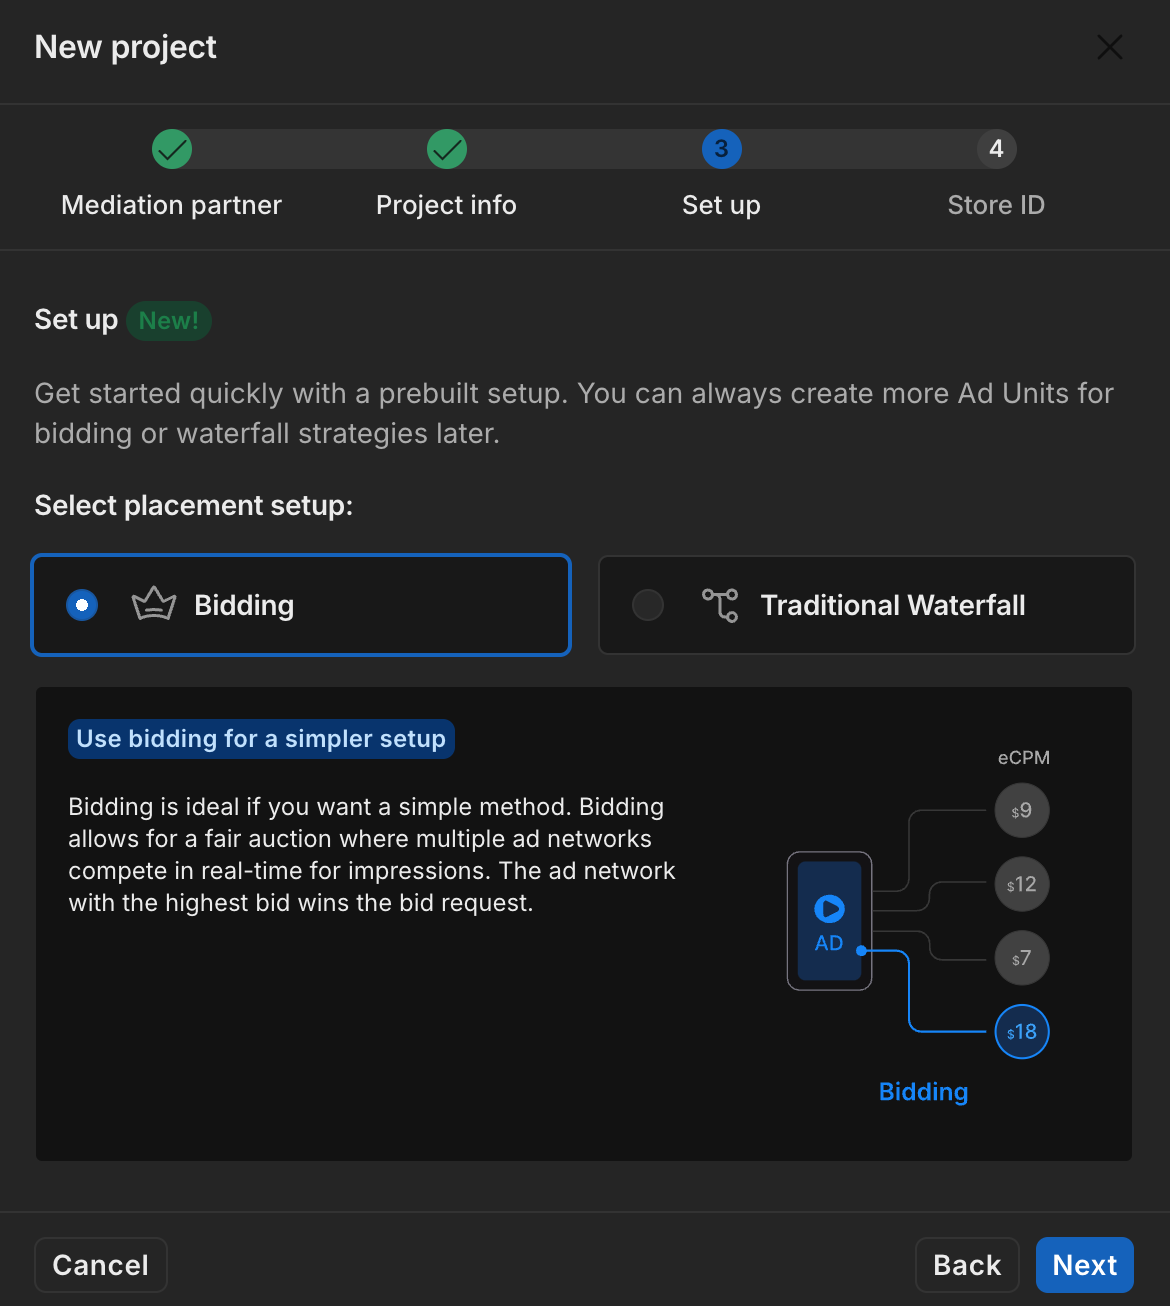
Waterfall
Fill out the form, then click Add project.
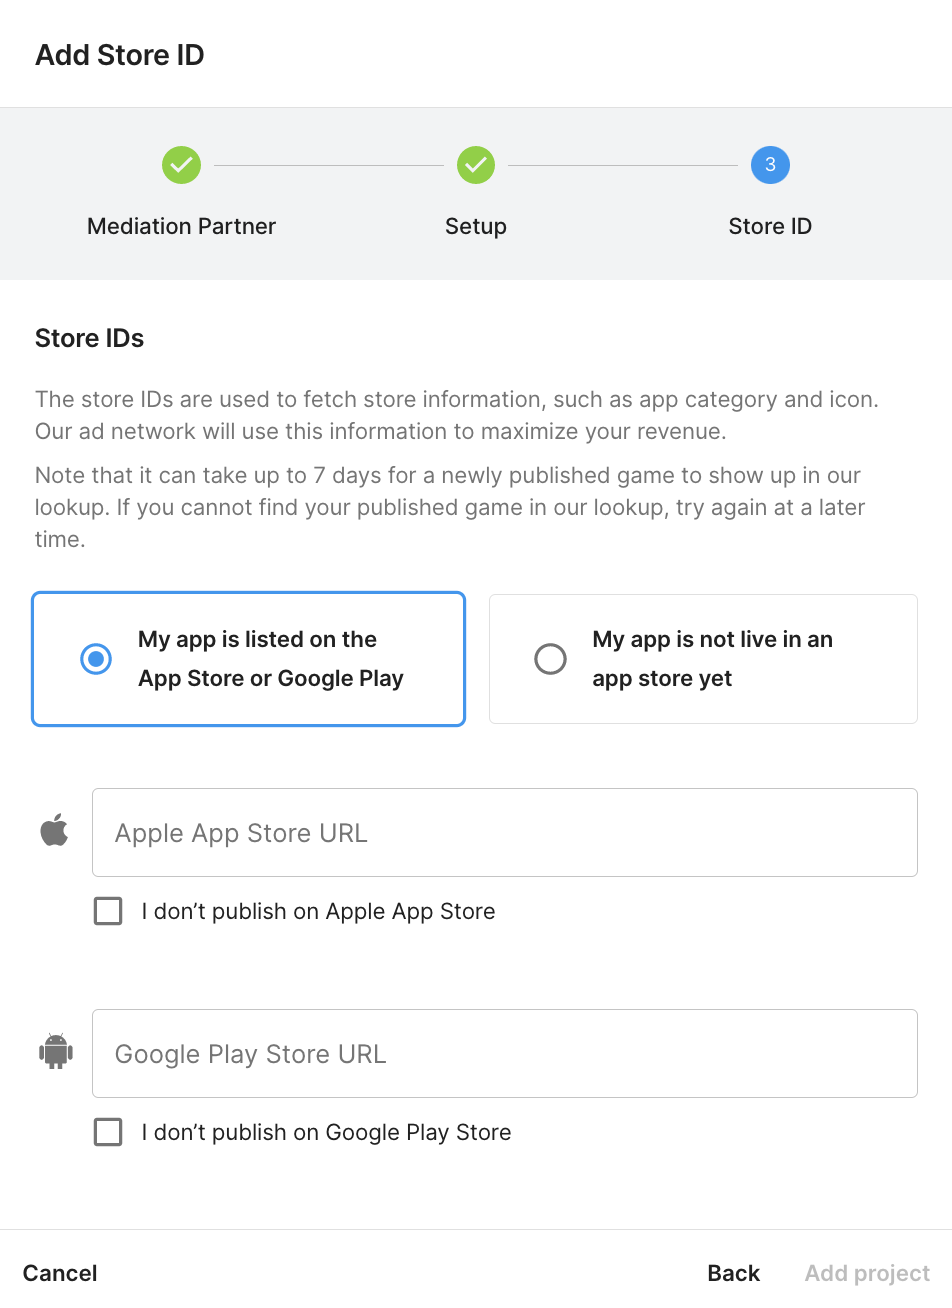
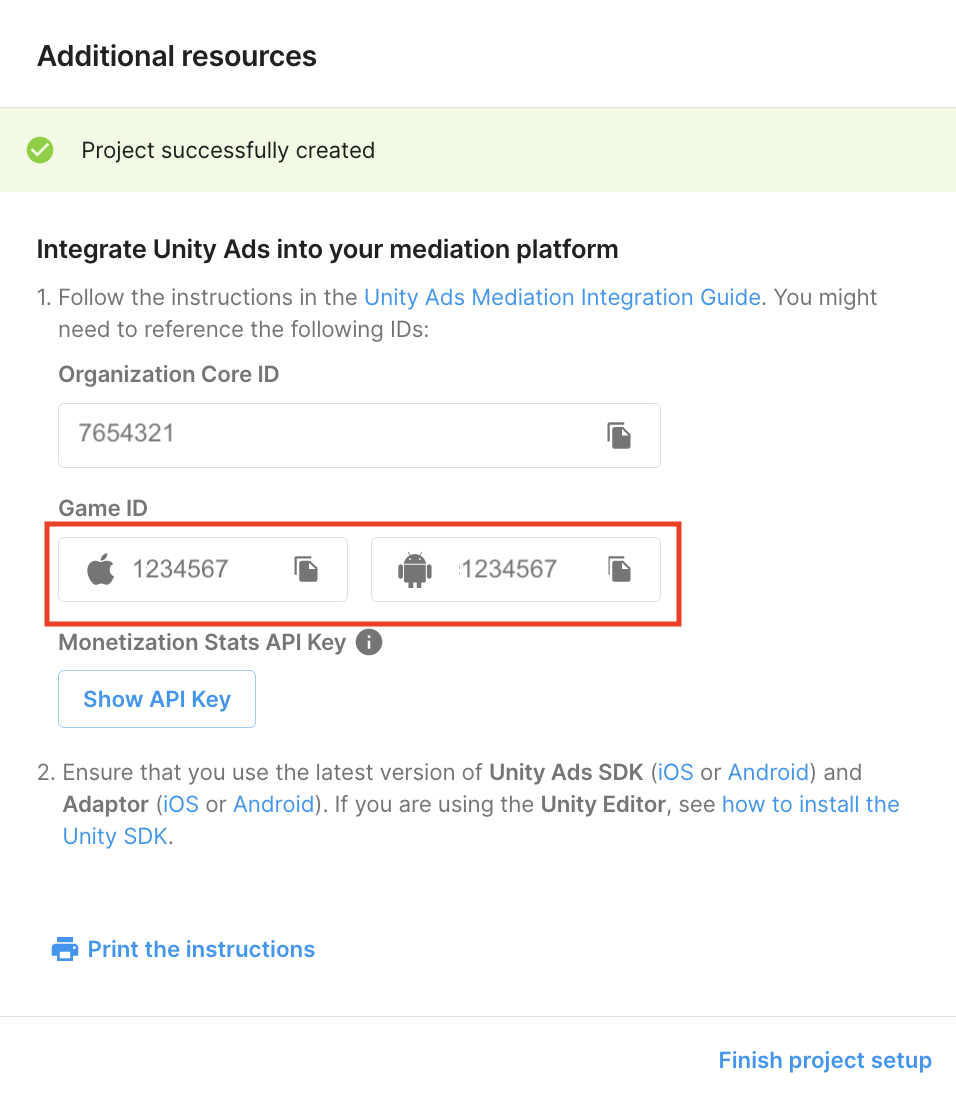
Take note of the Game ID.
Create ad units and placements
Navigate to Unity Ads Monetization > Placements, then select your project and click Add ad unit.
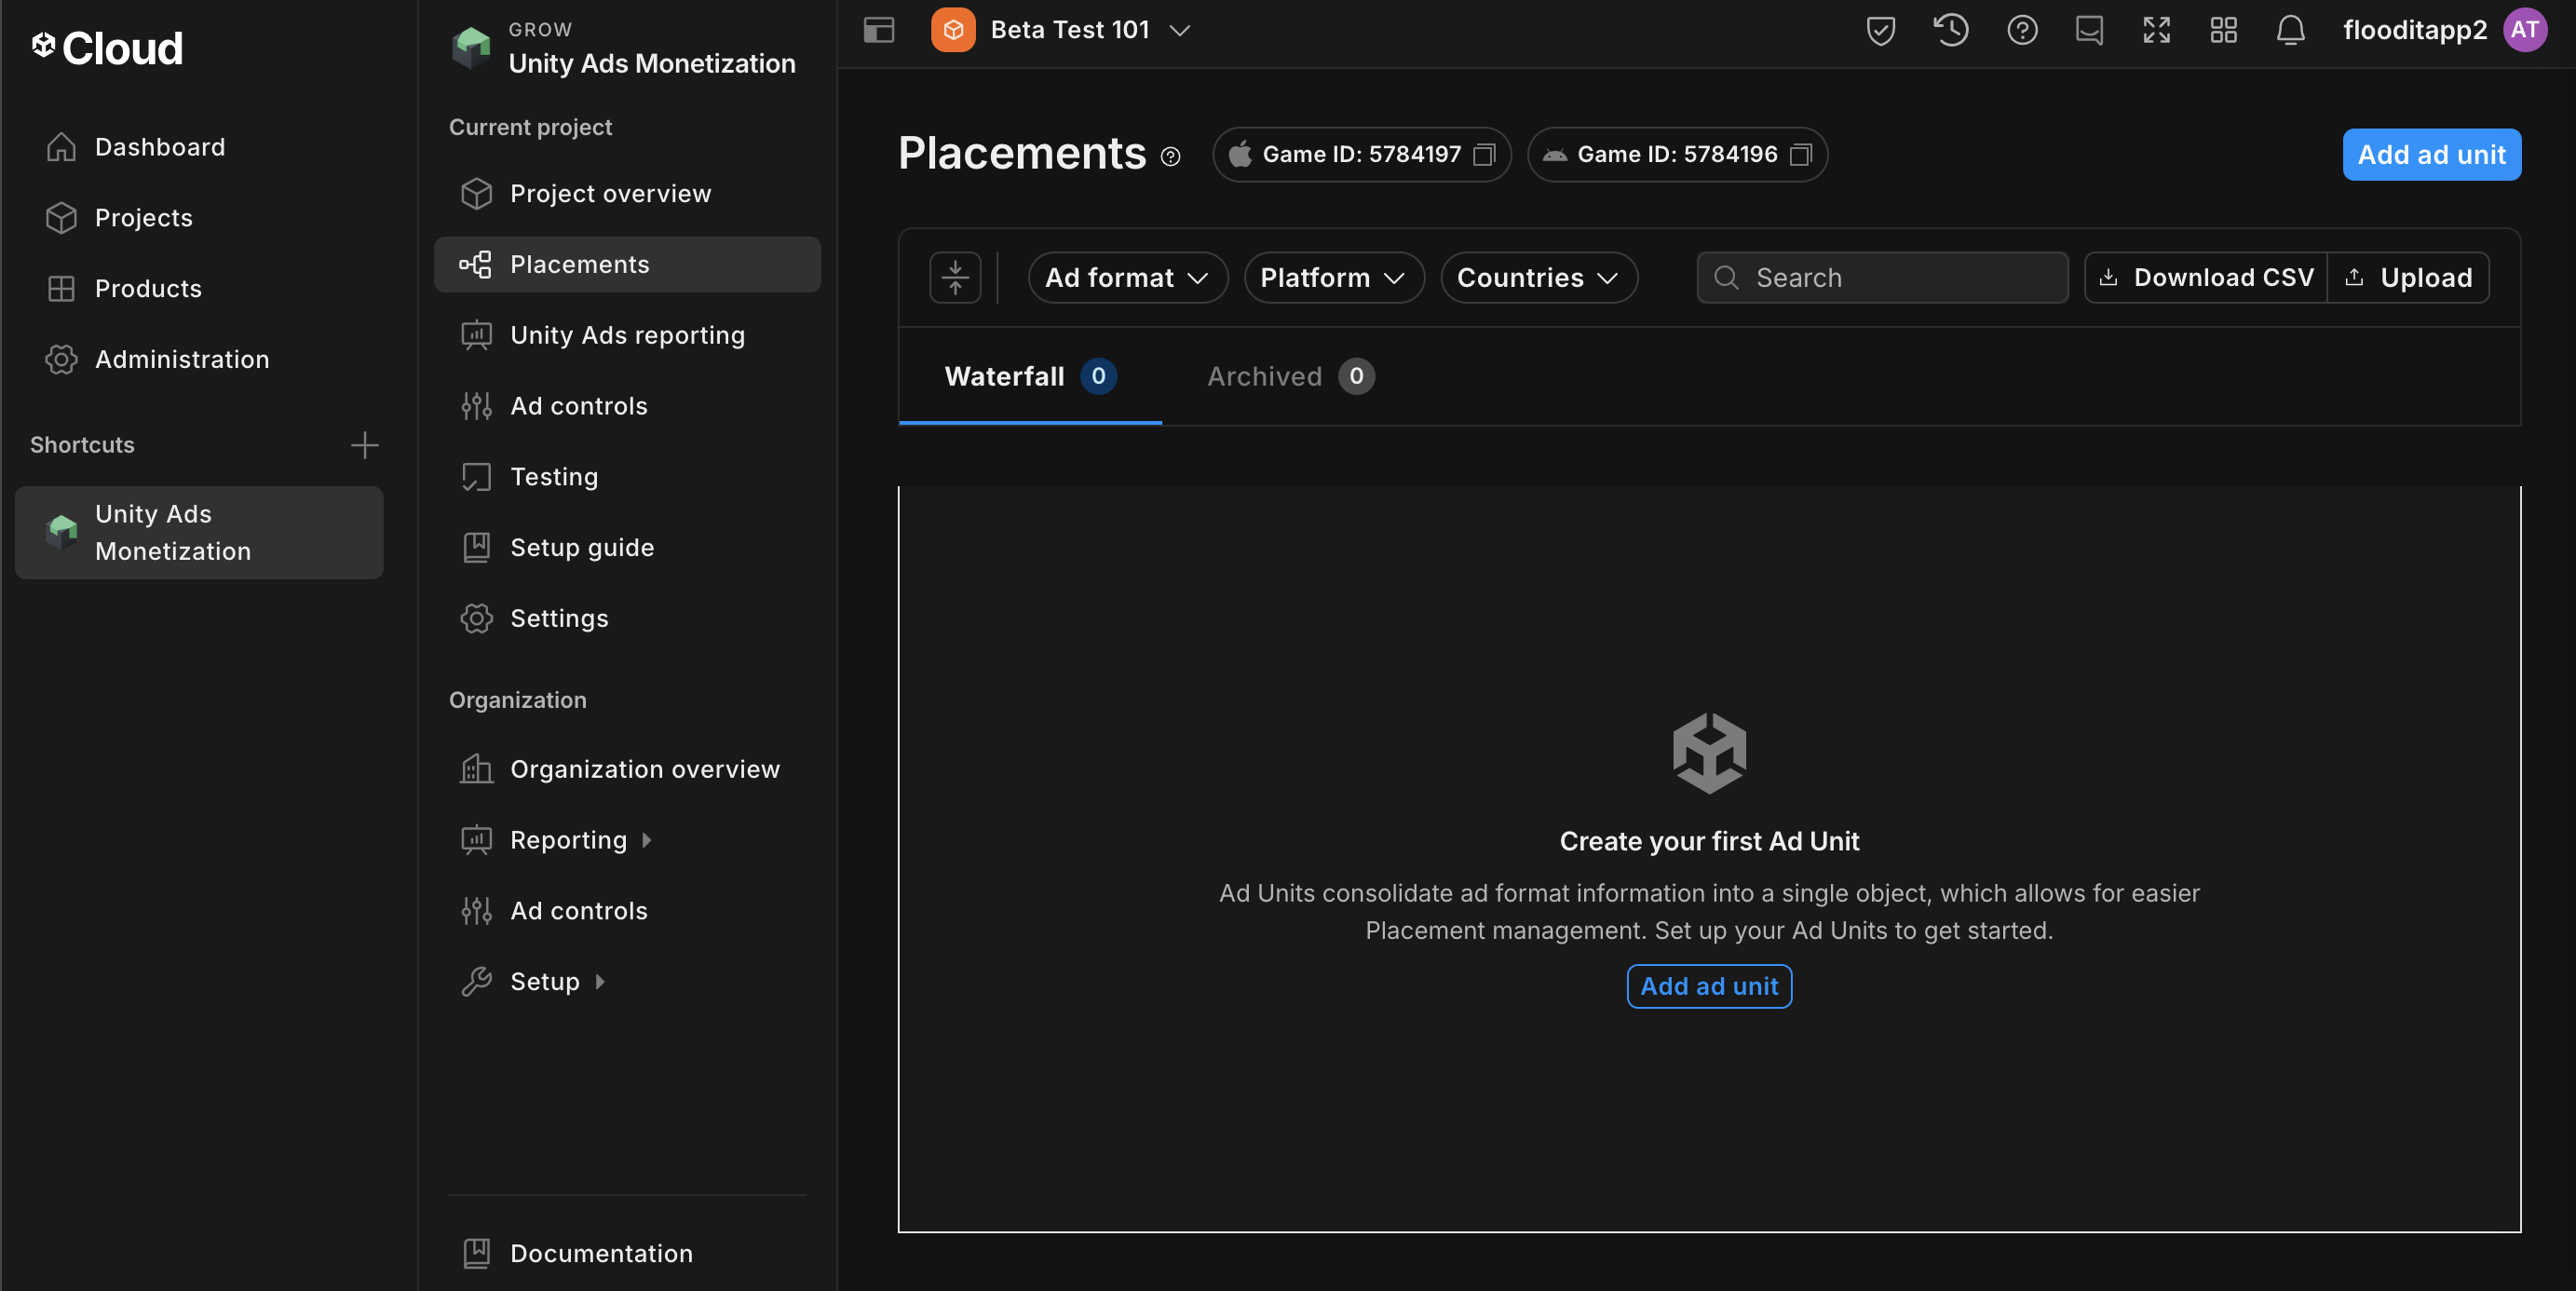
Enter an Ad unit name, then select your Platform and Ad format.
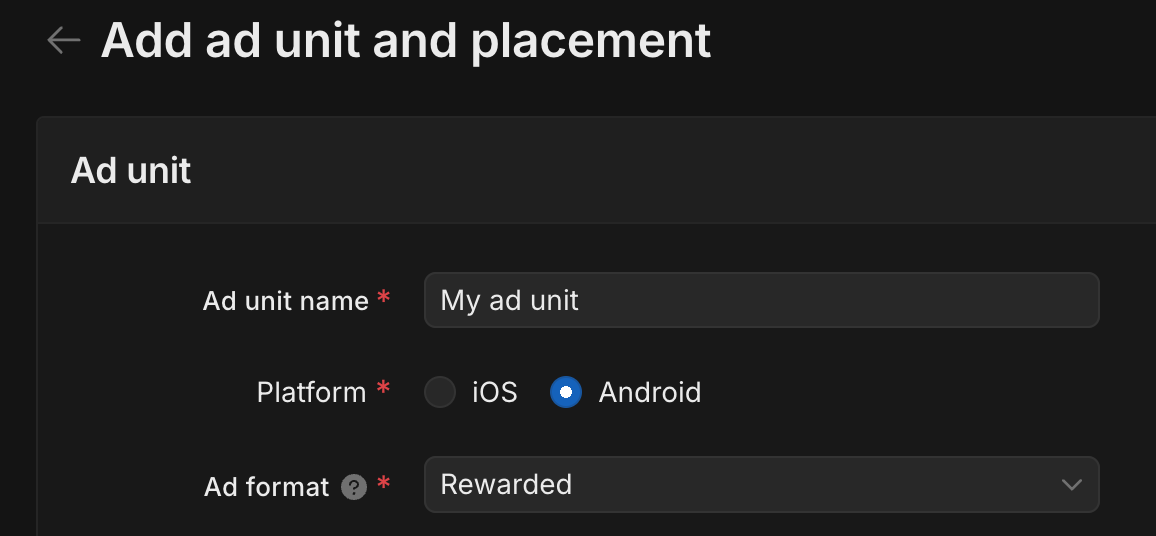
Navigate to Monetization > Placements, then click Add Ad Unit.
Enter an Ad Unit Name, then select your Platform and Ad Format.
Select Waterfall for the Setup. Under Placement, enter the Placement name, GEO Tagging and Target.
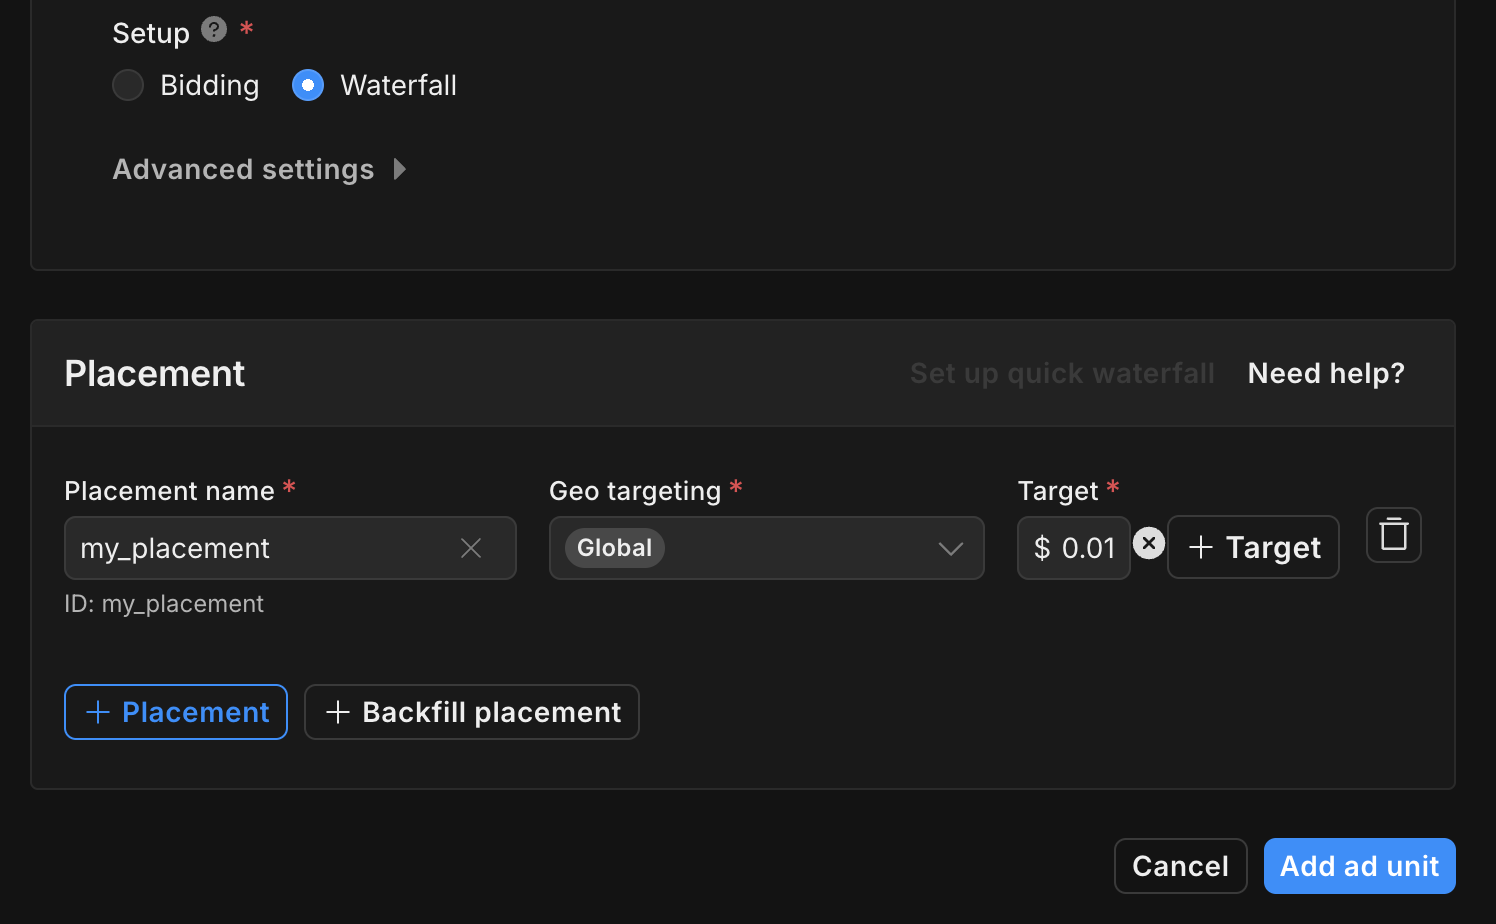
Take note of the Placement ID.
Finally, click Add ad unit to save your ad unit and placement.
Locate Unity Ads Reporting API key
Bidding
This step isn't required for bidding integrations.
Waterfall
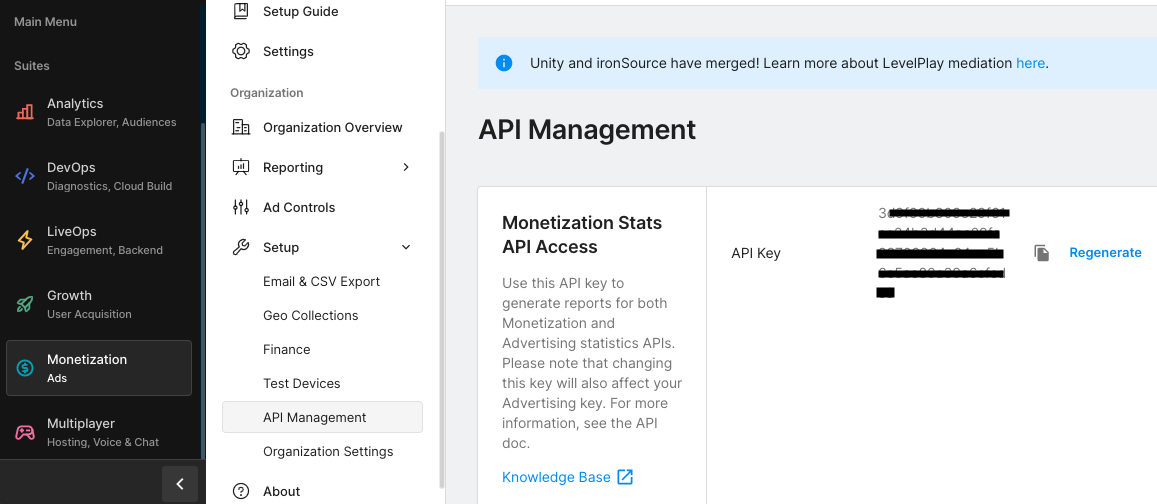
Navigate to the Unity Ads Monetization > API management and take note of the API Key in Monetization Stats API Access.
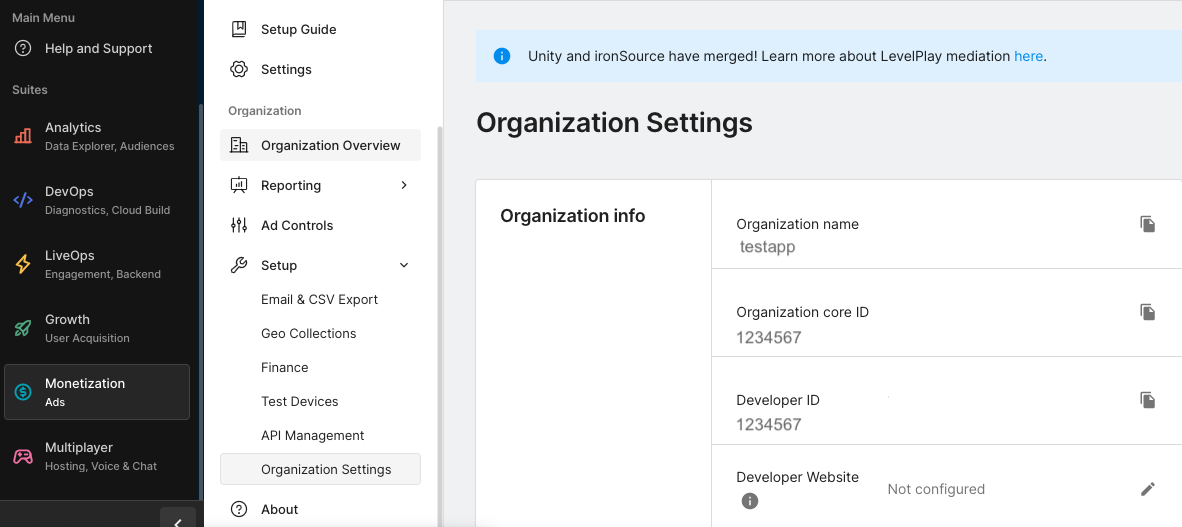
Then, navigate to the Unity Ads Monetization > Organization Settings and take note of the Organization core ID.
Update your app-ads.txt
Authorized Sellers for Apps app-ads.txt is an IAB Tech Lab initiative that helps ensure your
app ad inventory is only sold through channels you've identified as authorized. To prevent a
significant loss in ad revenue, you'll need to implement an app-ads.txt file.
If you haven't done so already,
create an app-ads.txt file for Ad Manager.
To implement app-ads.txt for Unity Ads, see
setting up app-ads.txt for the first time.
Turn on test mode
Test mode can be enabled from the Unity Ads dashboard. Navigate to Unity Ads Monetization > Testing.
You can force test mode for your app by clicking the edit button beside Google Play Store , enabling Override client test mode and selecting Force test mode ON (i.e. use test ads) for all devices.
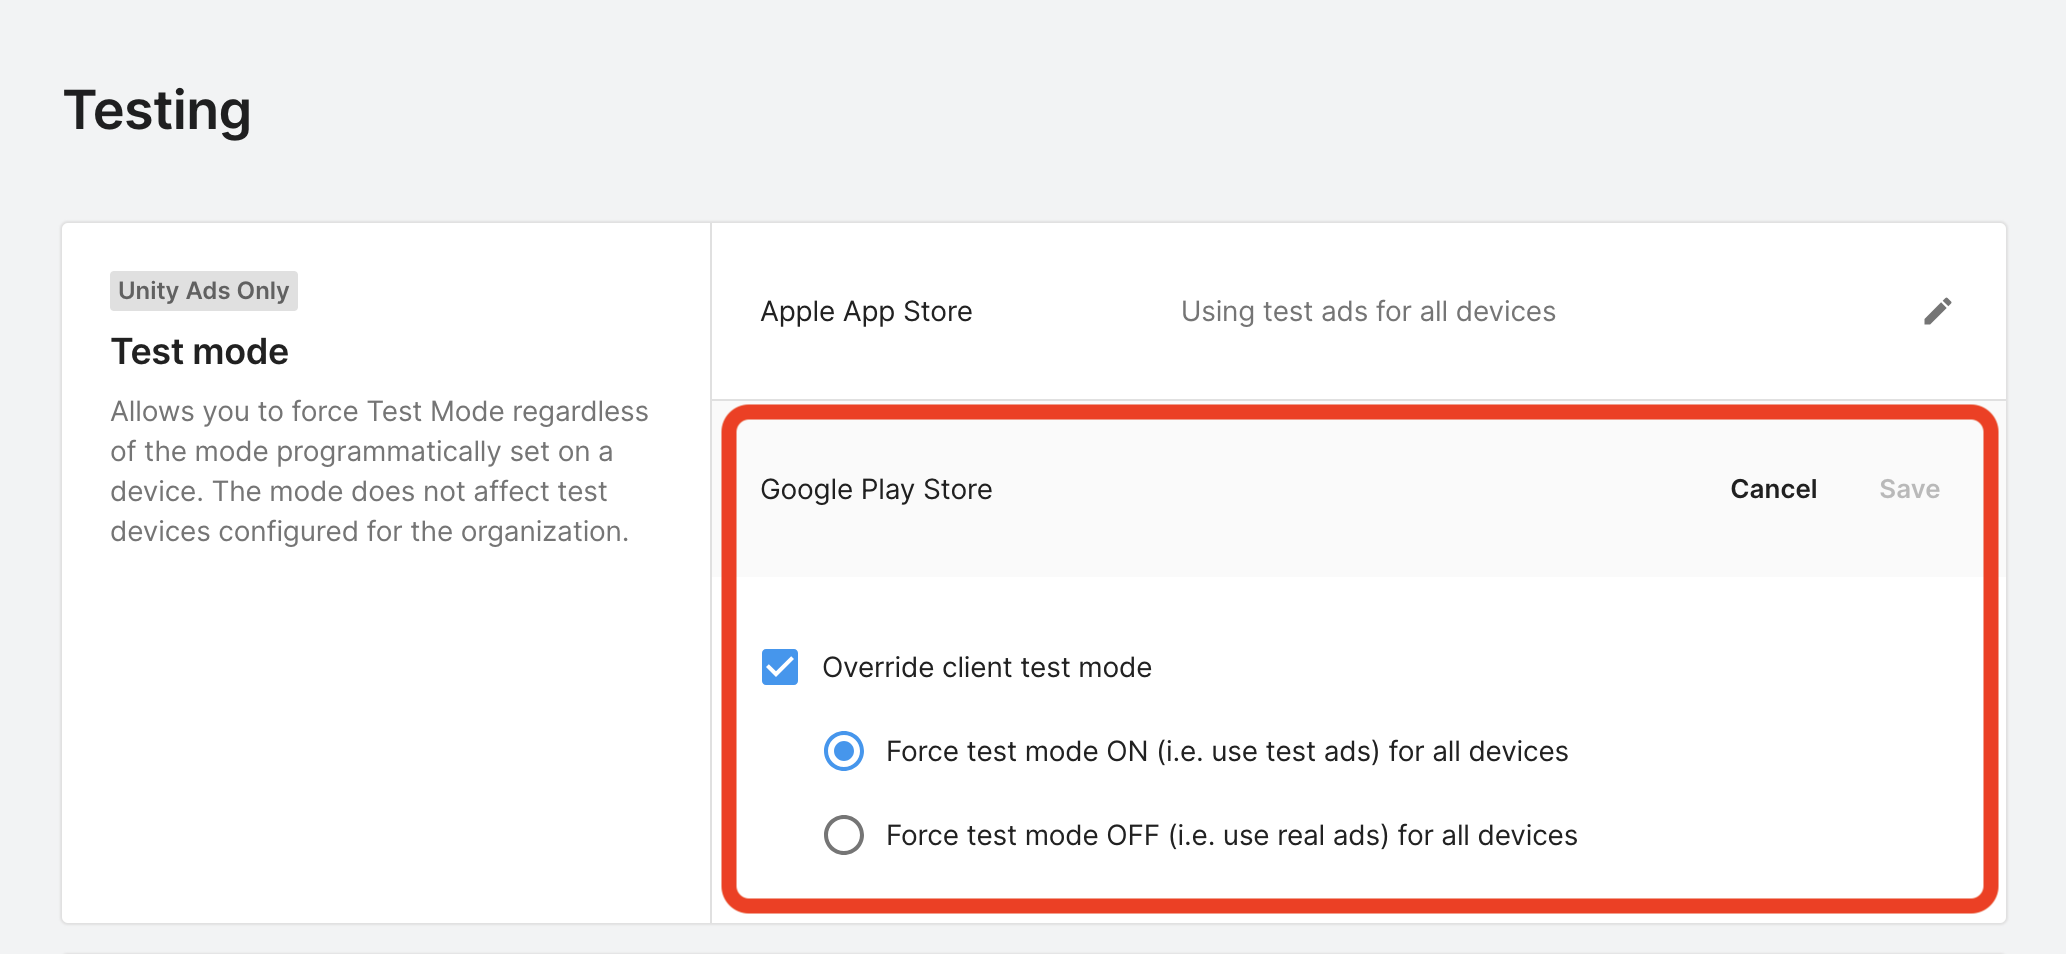
Alternatively, you can enable test mode for specific devices by clicking Add Test Device.
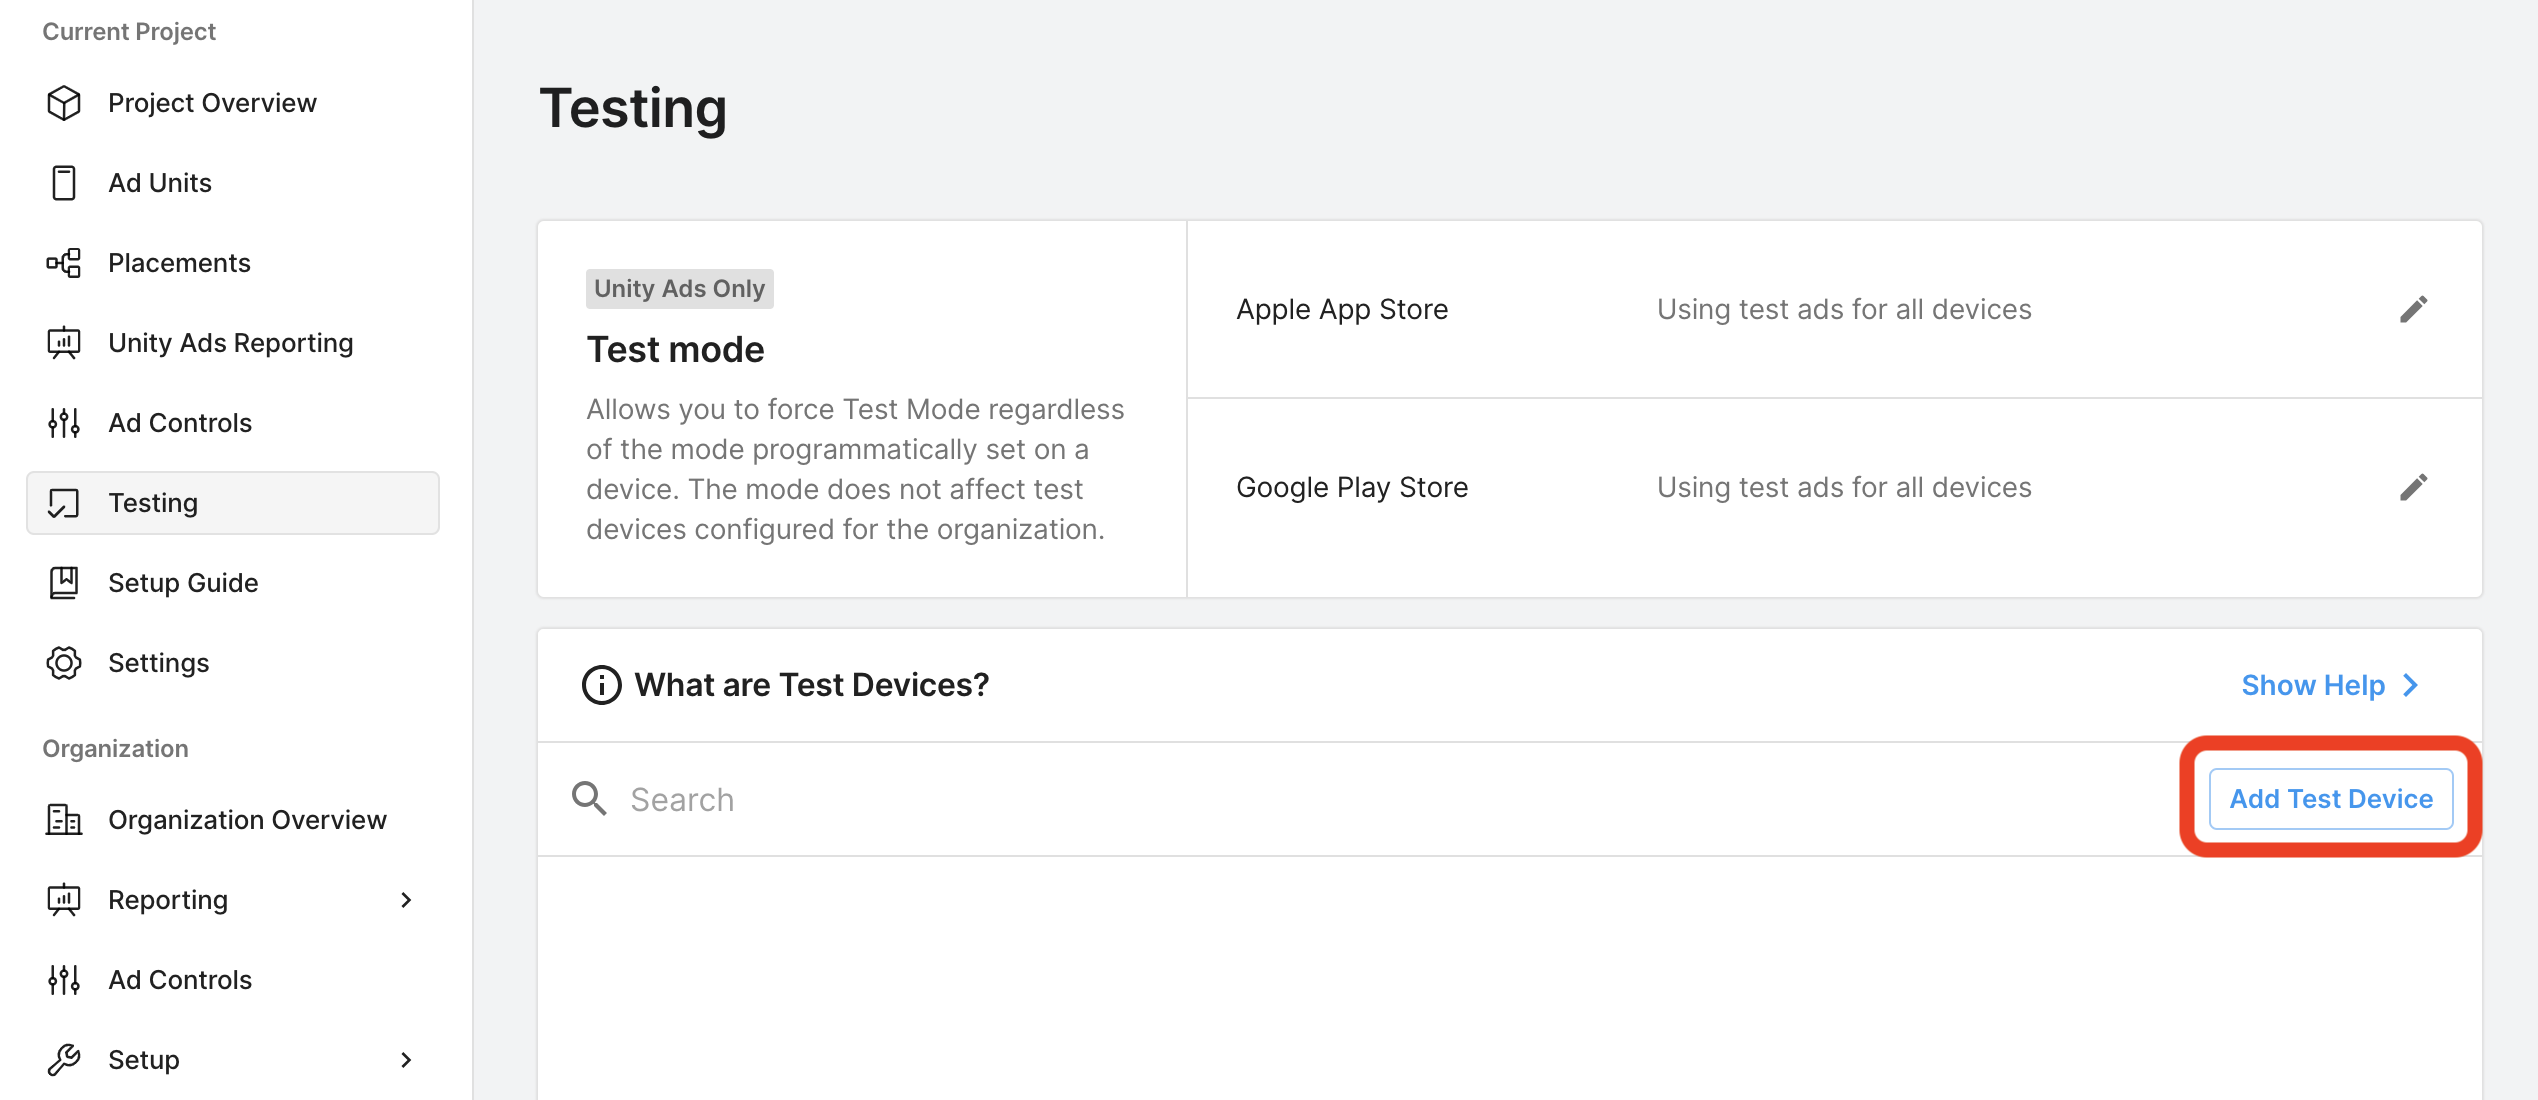
Enter your test device details, then click Save.

Step 2: Set up Unity Ads demand in Ad Manager UI
Sign in to your Ad Manager account.
Add Unity Ads in Companies
Bidding
This step isn't required for bidding integrations.
Waterfall
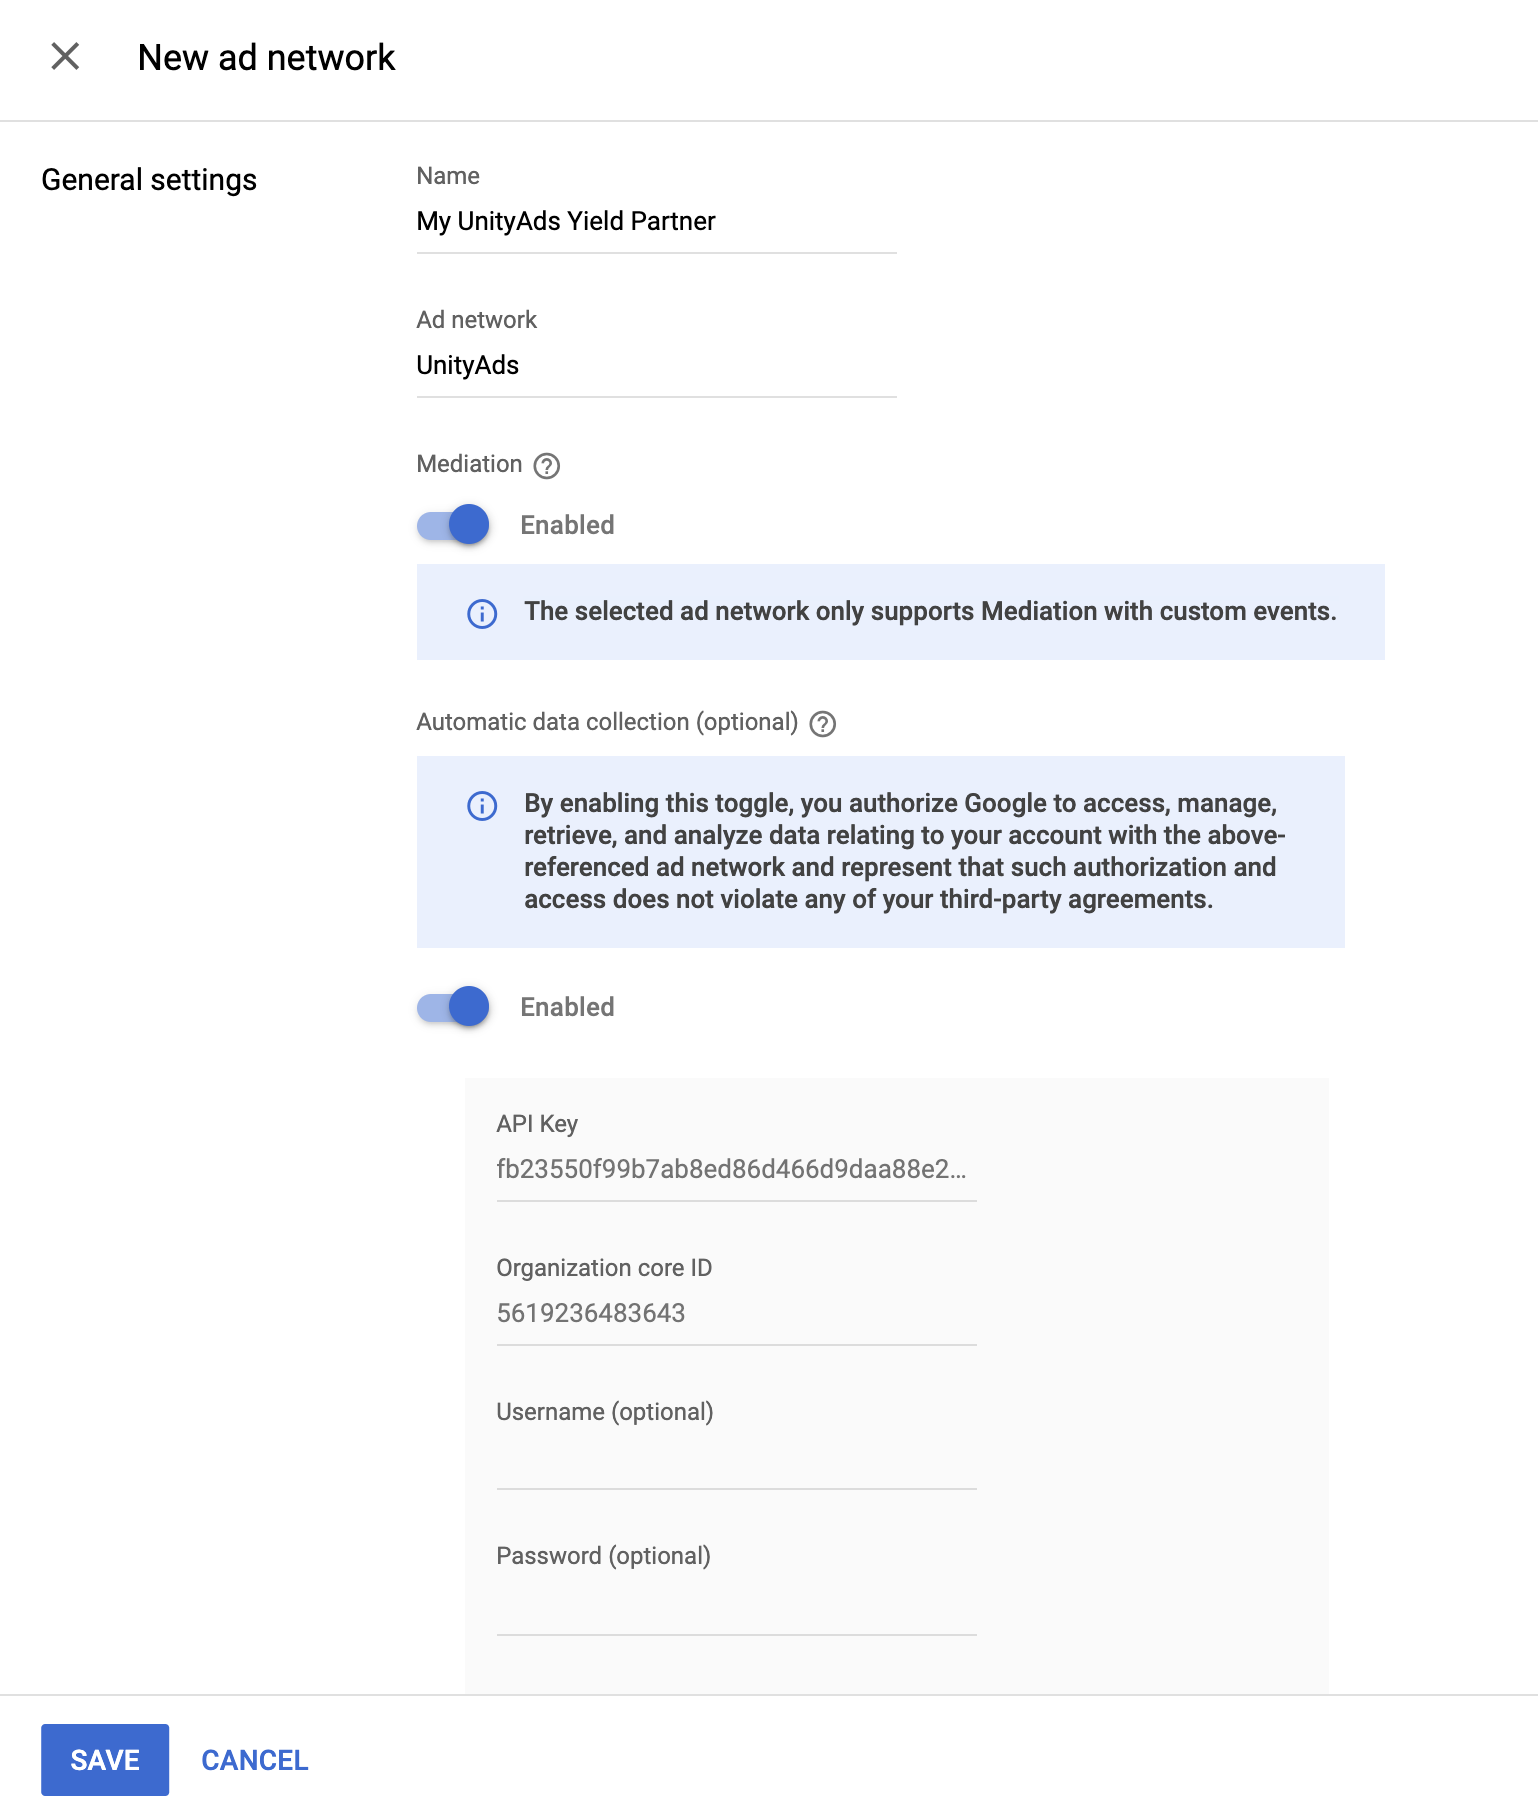
Navigate to Admin > Companies, then click the New company button in the All companies tab. Select Ad network.

Select Unity Ads as the Ad network, enter a unique Name and enable Mediation. Turn on Automatic data collection, and enter the API Key and Organization core ID obtained in the previous section.
You don't need to enter a Username or Password. Click Save when done.
Enable secure signal sharing
Bidding
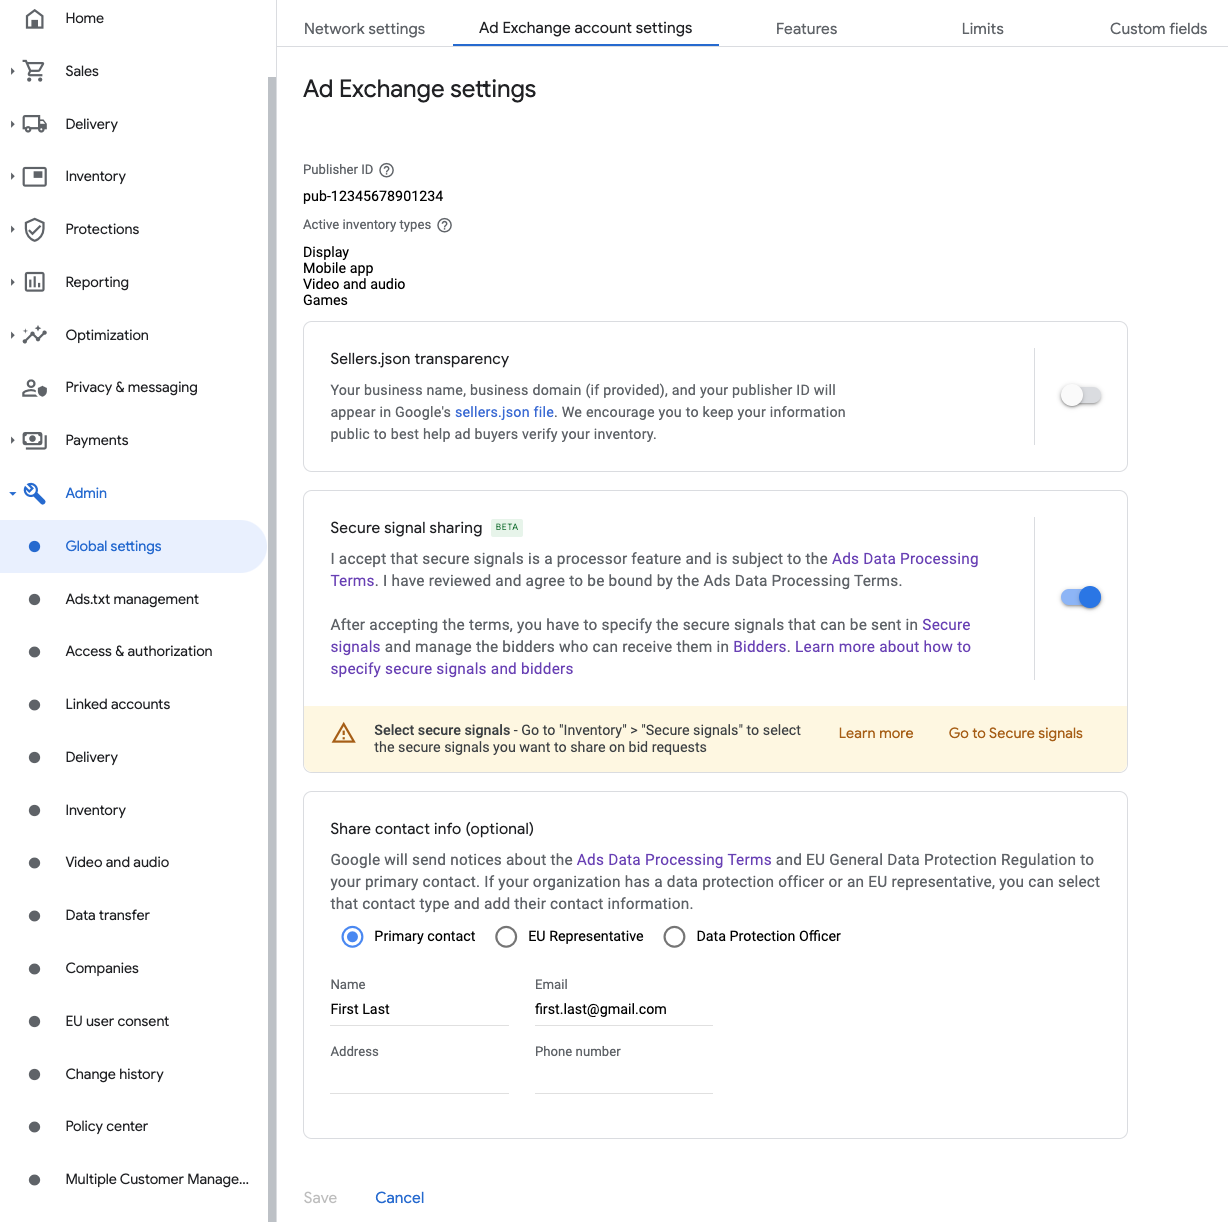
Navigate to Admin > Global settings. Go to the Ad Exchange account settings tab and review and toggle on Secure signal sharing. Click Save.
Waterfall
This step isn't required for waterfall integrations.
Share secure signal on bid requests
Bidding
Navigate to Inventory > Secure Signals. Under Secure signals, search for Unity Ads and toggle on Enable app integration.

Click Save.
Waterfall
This step isn't required for waterfall integrations.
Allow secure signal sharing for SDK Bidding
Bidding
Navigate to Delivery > Demand channel settings. In the Default settings tab, toggle on Allow secure signal sharing for SDK Bidding.
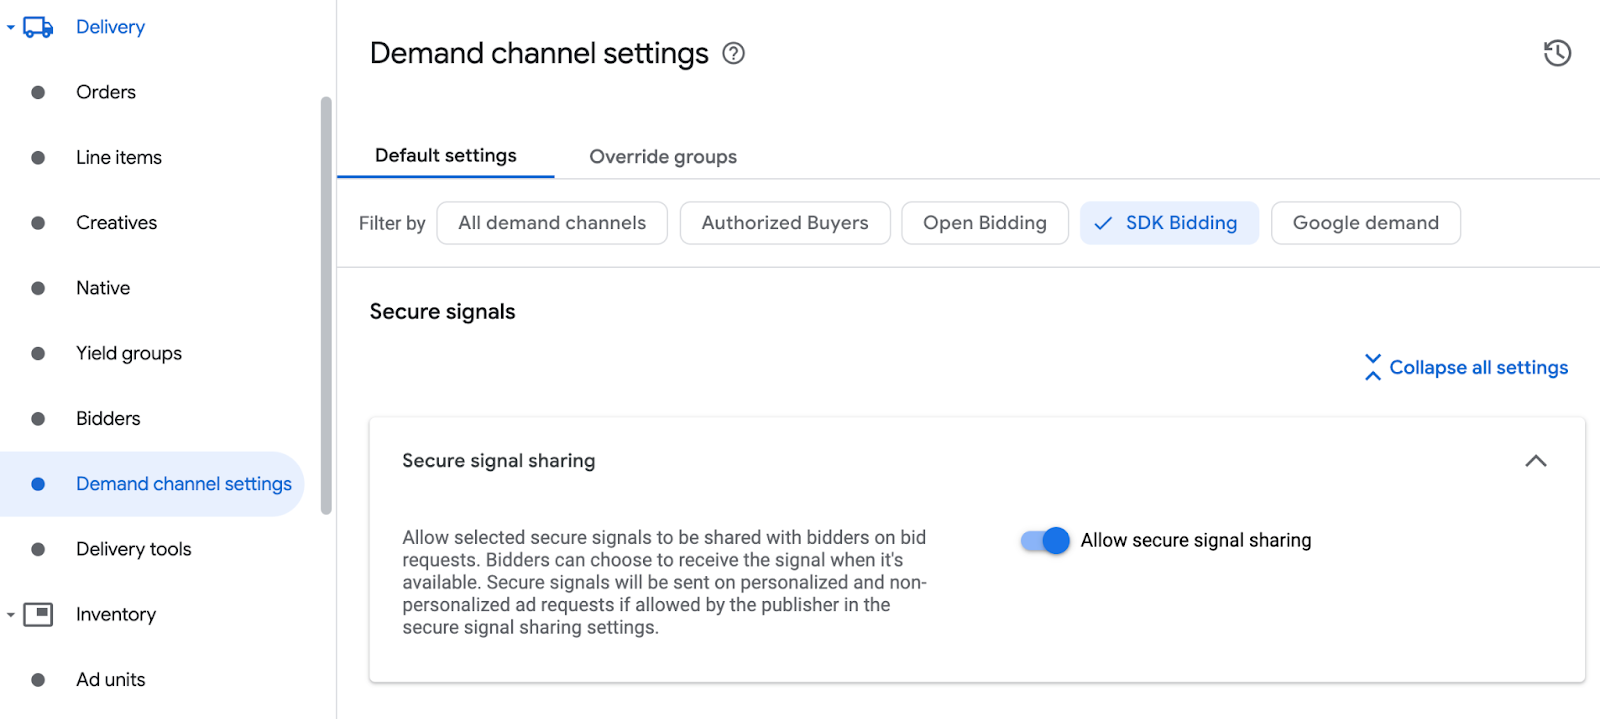
Click Save.
Waterfall
This step isn't required for waterfall integrations.
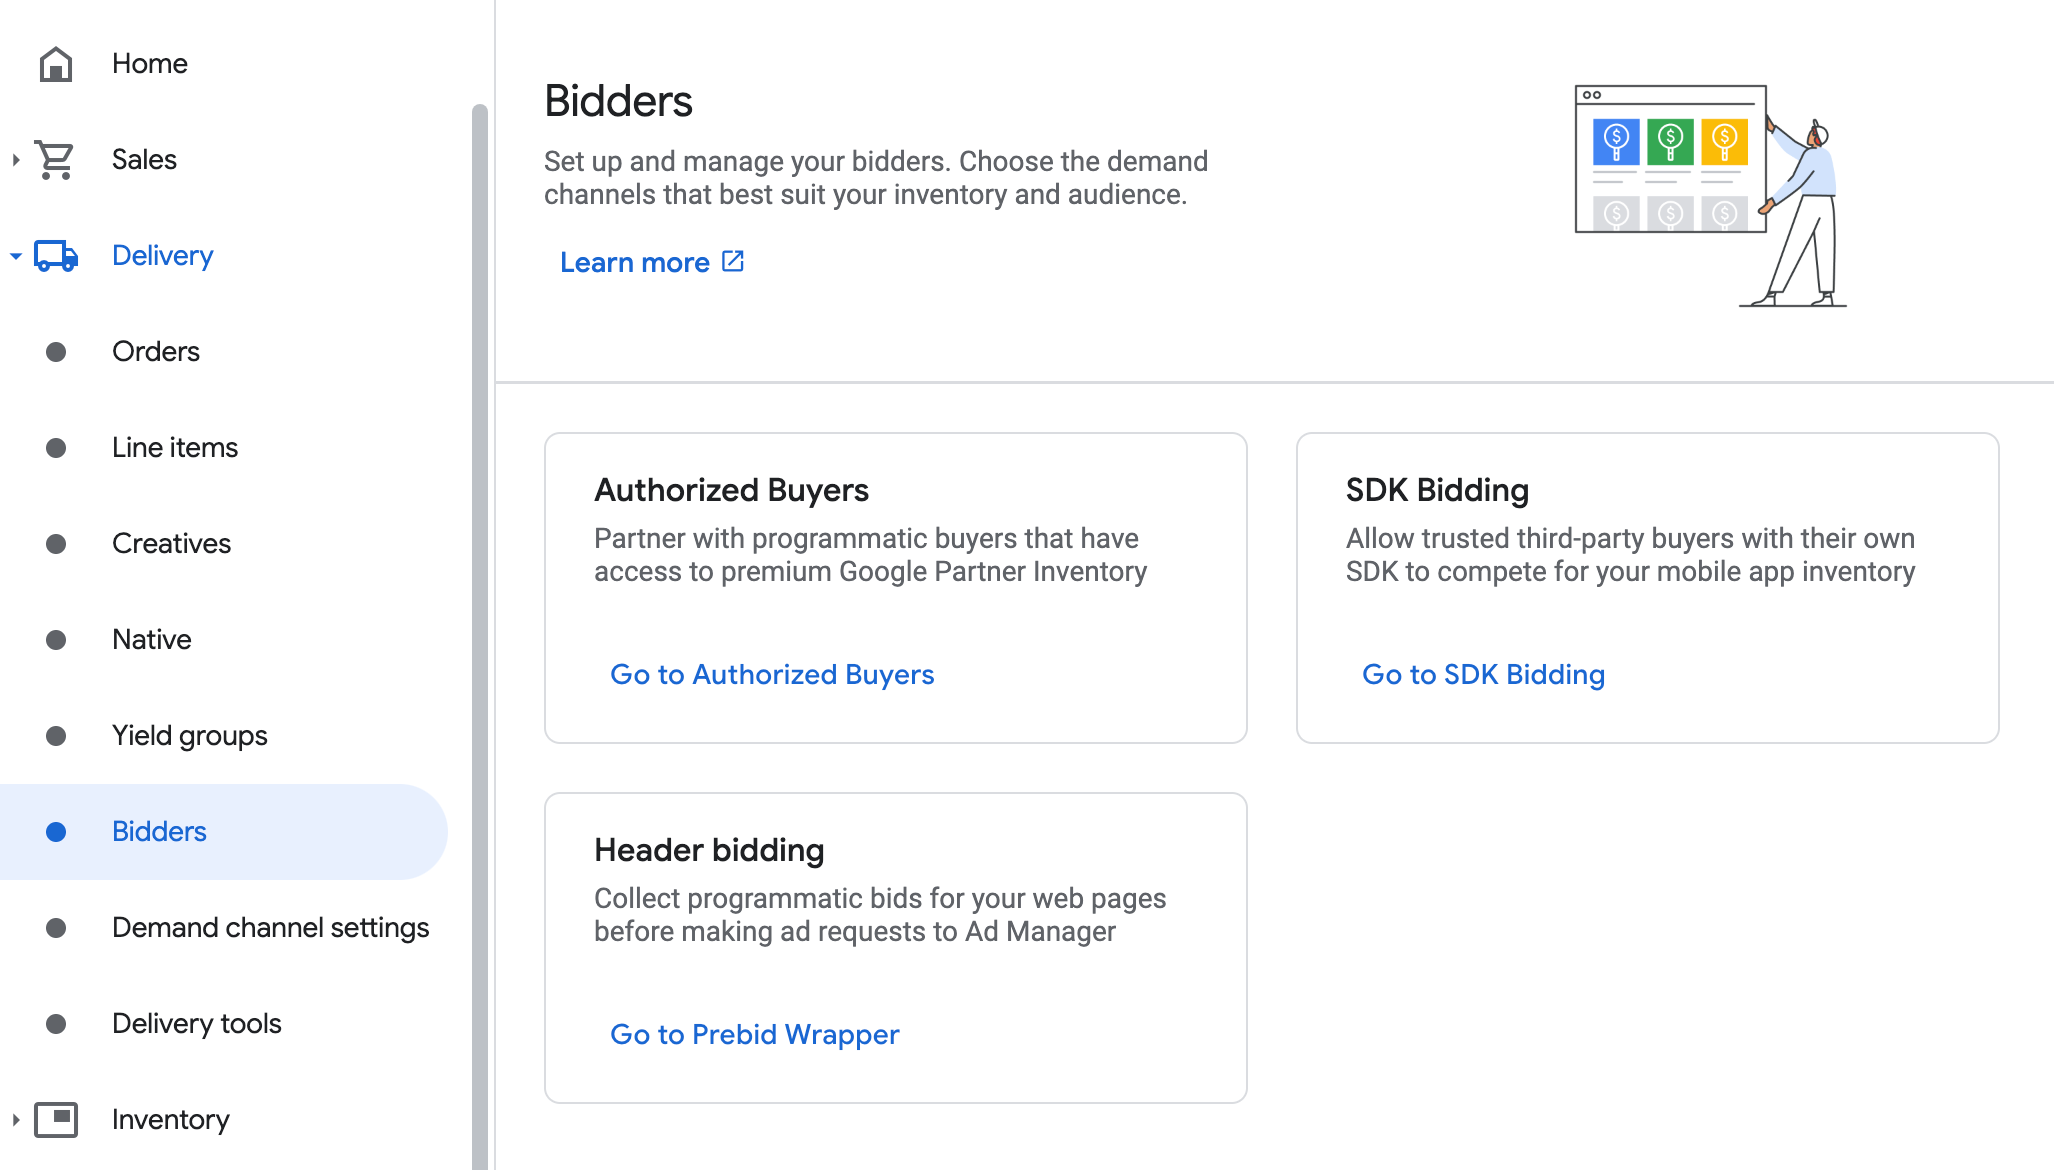
Configure Unity Ads bidding
Bidding
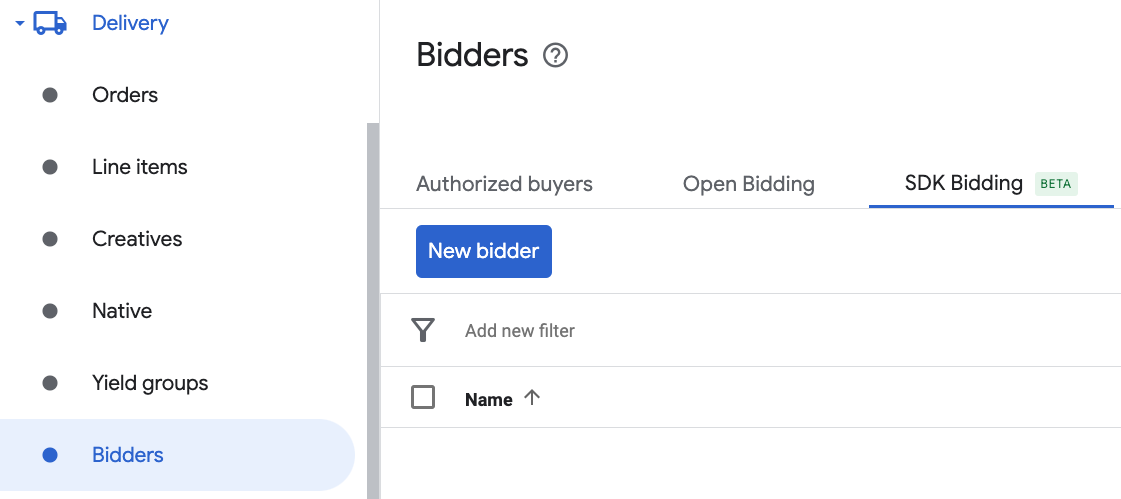
Navigate to Delivery > Bidders, and click Go to SDK Bidding.
Click New bidder.
Select Unity Ads as the bidder.
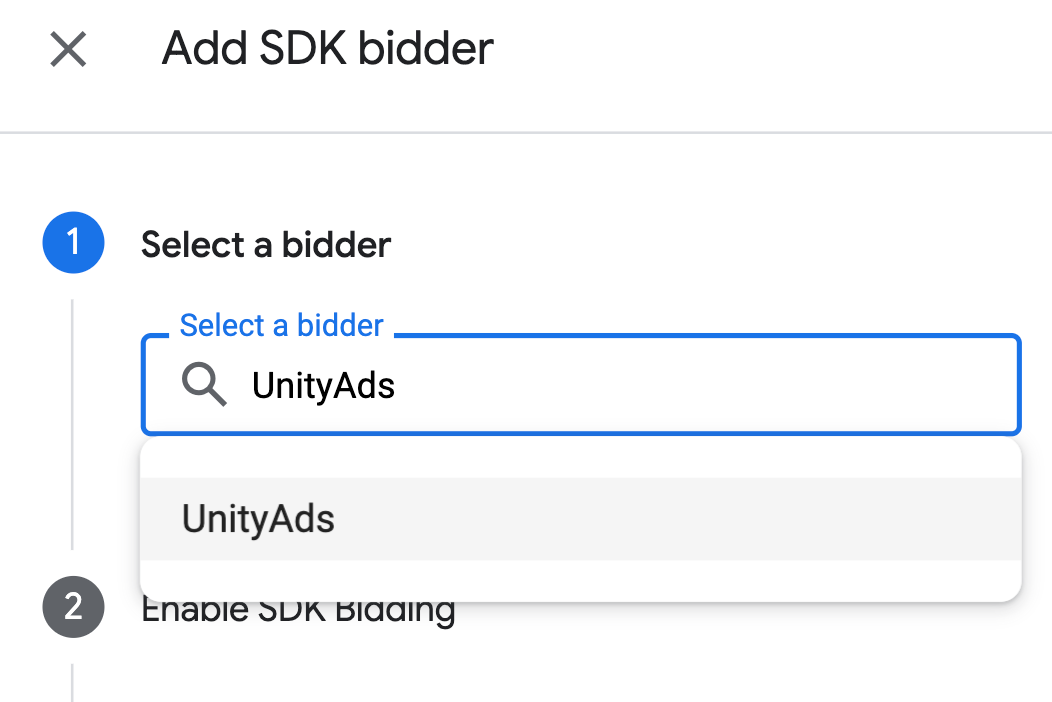
Click Continue to enable SDK Bidding for this bidder.
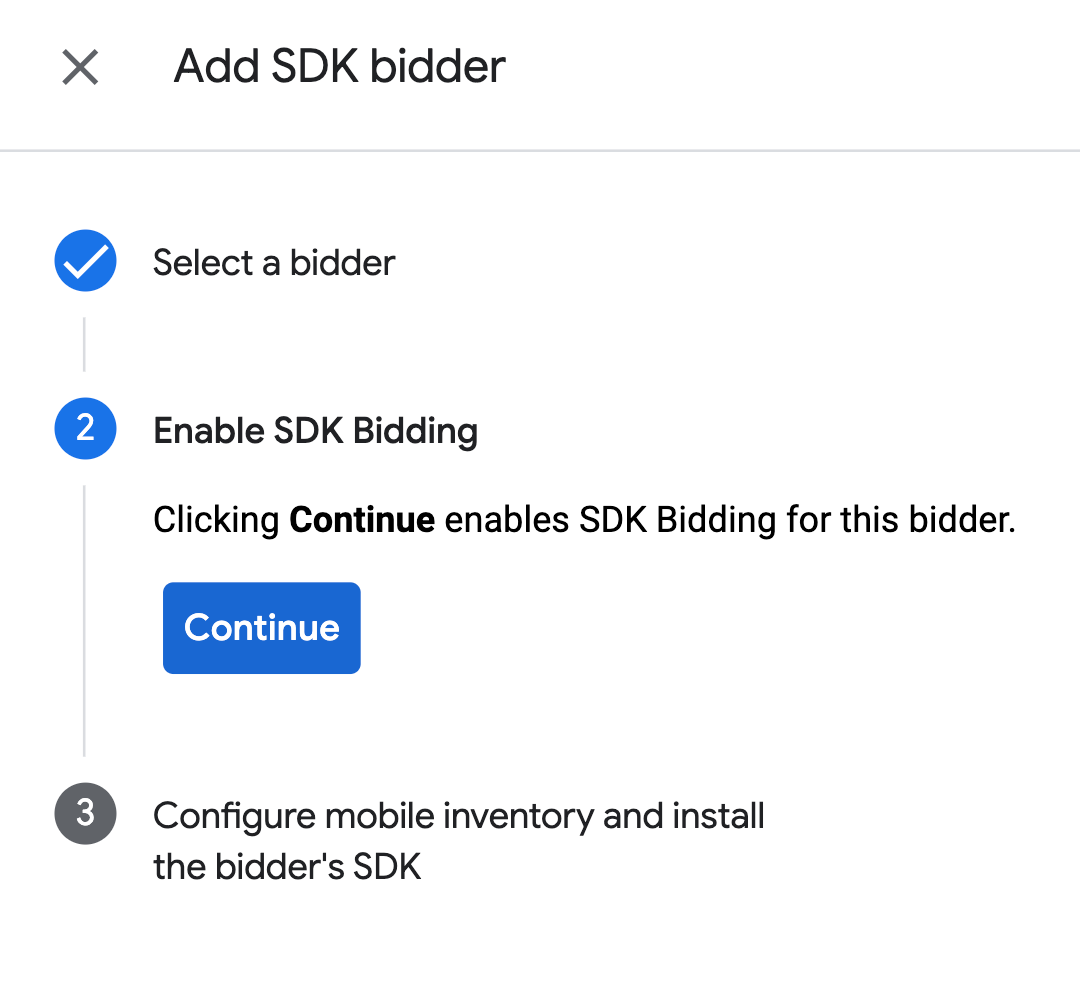
Click Done.
Waterfall
This step isn't required for waterfall integrations.
Configure ad unit mapping
Bidding
Navigate to Delivery > Bidders, and click Go to SDK Bidding.
Select the company for Unity Ads.
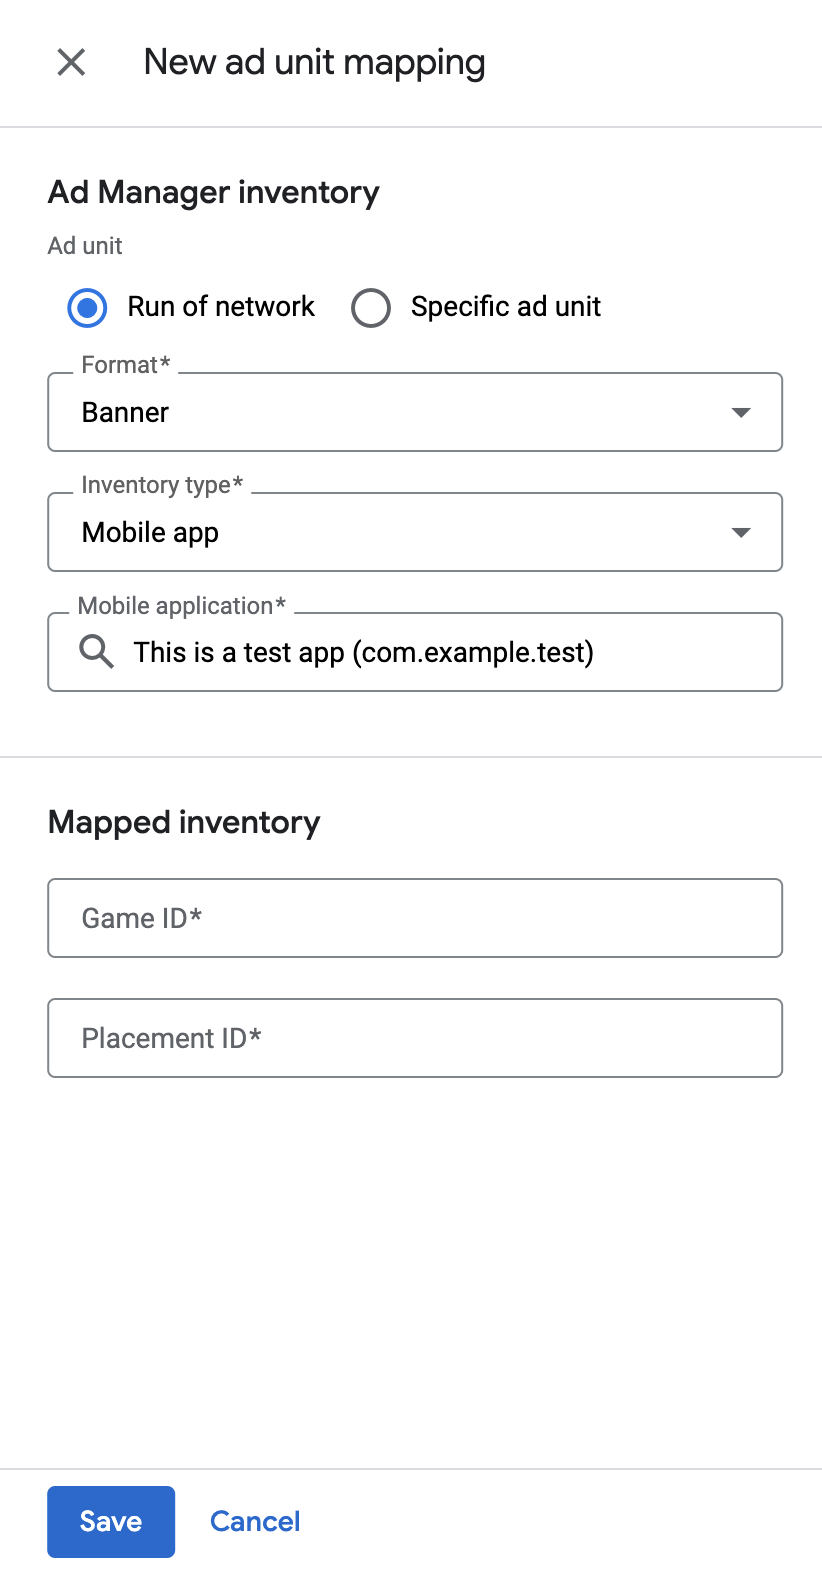
Go to the Ad unit mapping tab and click New ad unit mapping.

Choose Specific ad unit. Select an ad unit and format, Mobile app as the Inventory type, and your Mobile application. Then, enter Game ID and Placement ID obtained in the previous section.
Finally, click Save.
Waterfall
Navigate to Delivery > Yield groups and click the New yield group button. Select your Inventory and App.
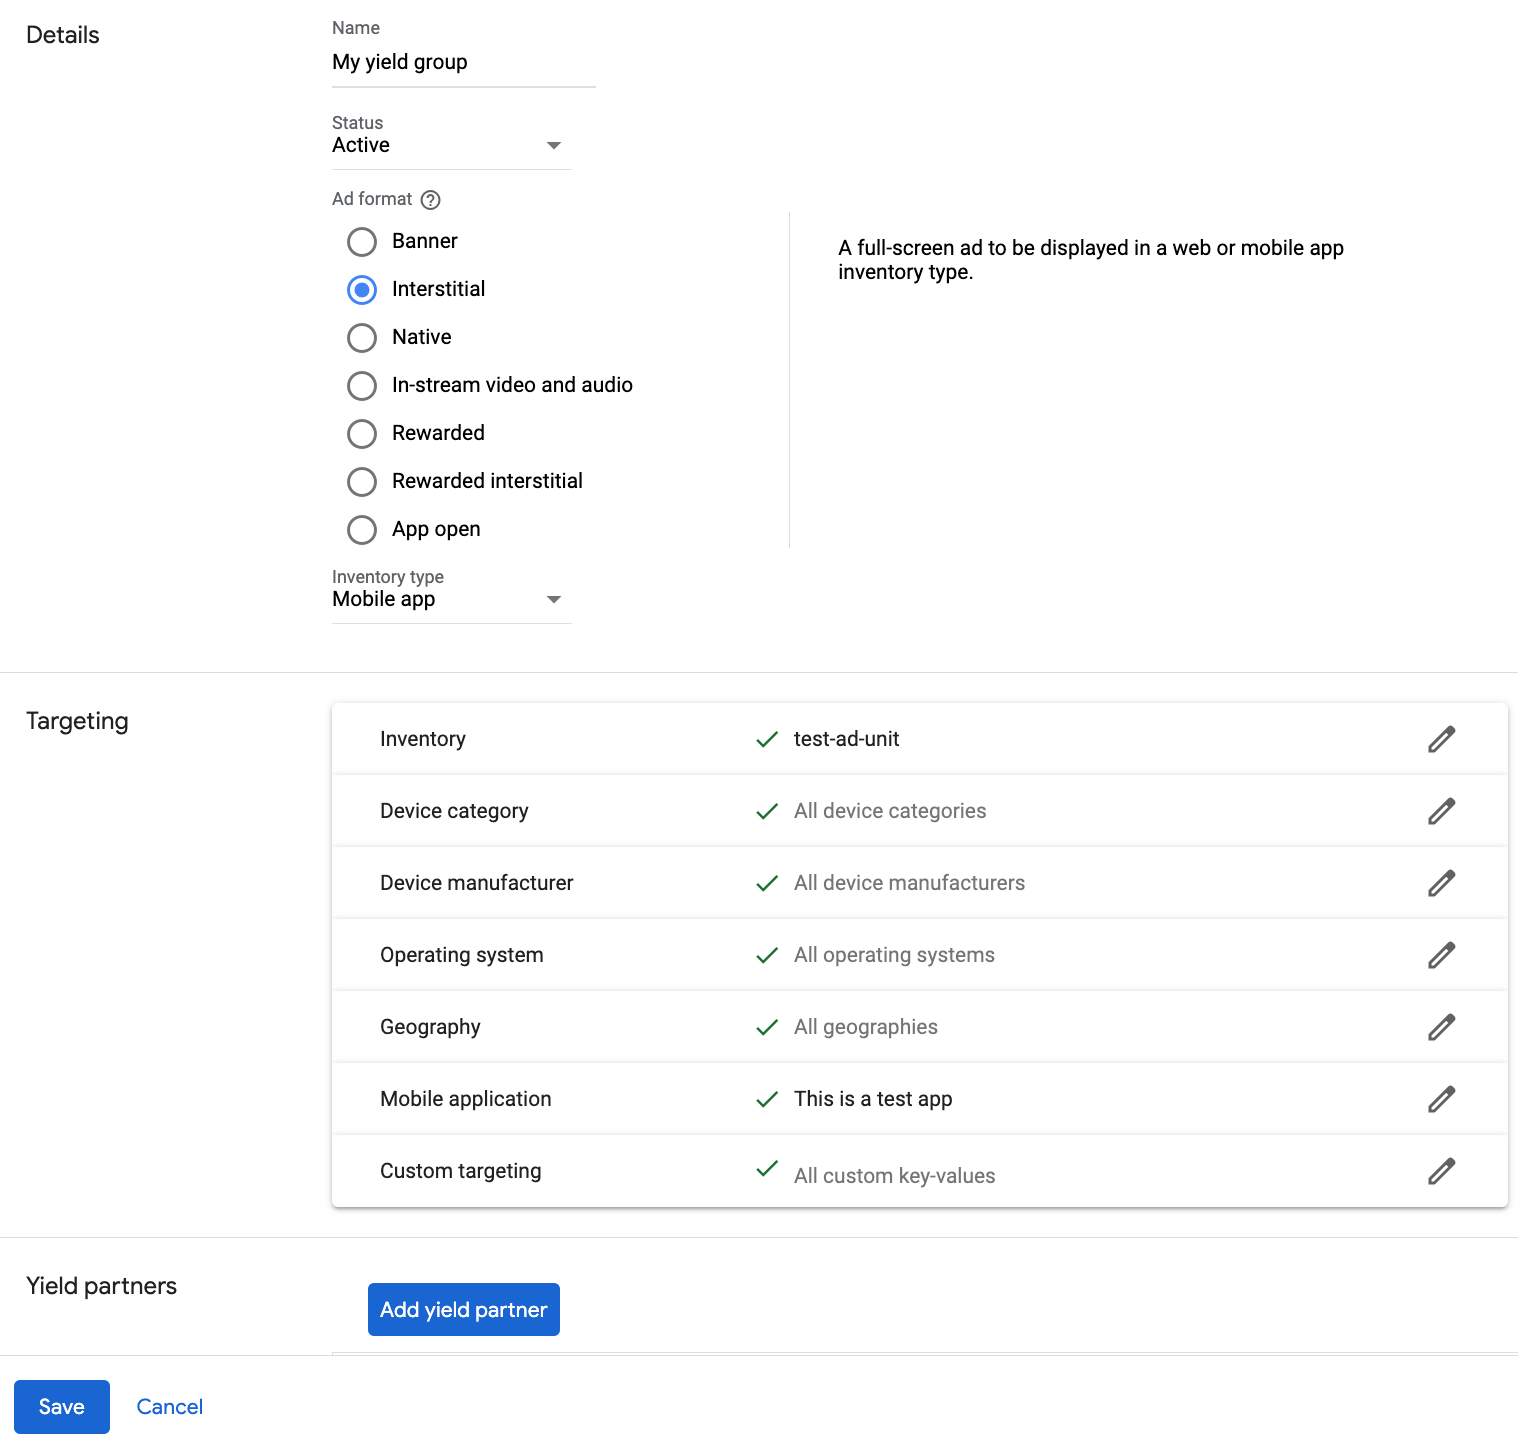
Scroll down and click Add mediation partner.

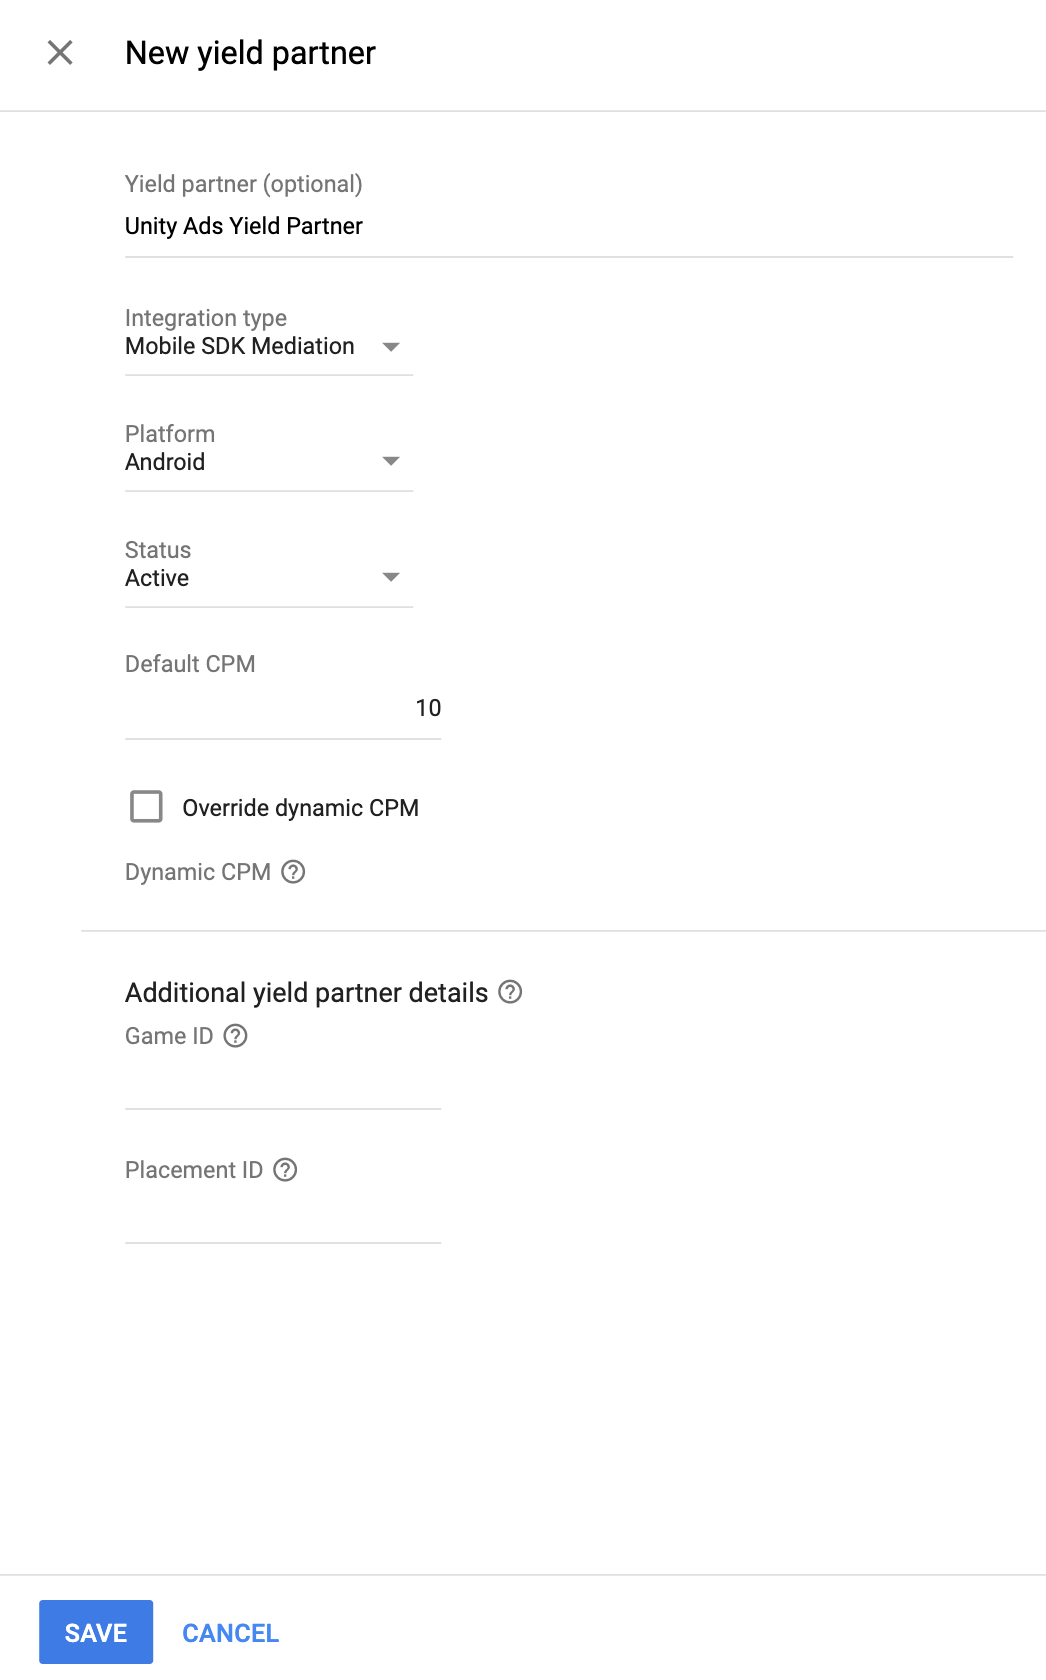
Select the company you created for Unity Ads in the previous section. Choose Mobile SDK mediation as the Integration type, Android as the Platform, and Active as the Status.
Enter the Game ID and Placement ID obtained in the previous section, and the Default CPM value. Click Save.
Add Unity Ads to GDPR and US state regulations ad partners list
Follow the steps in European regulations settings and US state regulations settings to add Unity Ads to the European and US state regulations ad partners list in the Ad Manager UI.
Step 3: Import the Unity Ads SDK and adapter
Android Studio integration (recommended)
In your app-level gradle file, add the following implementation dependencies:
Kotlin
dependencies {
    implementation("com.google.android.gms:play-services-ads:25.4.0")
    implementation("com.unity3d.ads:unity-ads:4.19.0")
    implementation("com.google.ads.mediation:unity:4.19.0.0")
}
Groovy
dependencies {
    implementation 'com.google.android.gms:play-services-ads:25.4.0'
    implementation 'com.unity3d.ads:unity-ads:4.19.0'
    implementation 'com.google.ads.mediation:unity:4.19.0.0'
}
Manual integration
Download the latest Unity Ads SDK (
unity-ads.aar) from their GitHub repository and add it to your project.Navigate to the Unity Ads adapter artifacts on Google's Maven Repository. Select the latest version, download the Unity Ads adapter's
.aarfile, and add it to your project.
Step 4: Implement privacy settings on Unity Ads SDK
EU consent and GDPR
To comply with Google EU User Consent Policy, you must make certain disclosures to your users in the European Economic Area (EEA), the UK, and Switzerland, and obtain their consent for the use of cookies or other local storage where legally required, and for the collection, sharing, and use of personal data for ads personalization. This policy reflects the requirements of the EU ePrivacy Directive and the General Data Protection Regulation (GDPR). You are responsible for verifying consent is propagated to each ad source in your mediation chain. Google is unable to pass the user's consent choice to such networks automatically.
In SDK version 2.0.0, Unity Ads added an API to support privacy settings. The following sample code shows how to pass this consent information to the Unity Ads SDK. Should you choose to pass consent information to the Unity Ads SDK manually, it is recommended that this code is called prior to requesting ads through the Google Mobile Ads SDK (Legacy).
Java
MetaData gdprMetaData = new MetaData(this);
gdprMetaData.set("gdpr.consent", true);
gdprMetaData.commit();
Kotlin
val gdprMetaData = MetaData(this)
gdprMetaData["gdpr.consent"] = true
gdprMetaData.commit()
See Unity Ads' GDPR Compliance for more details and the values that can be provided in each method.
US states privacy laws
US states privacy laws require giving users the right to opt out of the "sale" of their "personal information" (as the law defines those terms), with the opt-out offered through a prominent "Do Not Sell My Personal Information" link on the "selling" party's homepage. The US states privacy laws compliance guide offers the ability to enable restricted data processing for Google ad serving, but Google is unable to apply this setting to each ad network in your mediation chain. Therefore, you must identify each ad network in your mediation chain that may participate in the sale of personal information and follow guidance from each of those networks to ensure compliance.
In SDK version 2.0.0, Unity Ads added an API to support privacy settings. The following sample code shows how to pass this consent information to the Unity Ads SDK. Should you choose to pass consent information to the Unity Ads SDK manually, it is recommended that this code is called prior to requesting ads through Google Mobile Ads SDK (Legacy).
Java
MetaData ccpaMetaData = new MetaData(this);
ccpaMetaData.set("privacy.consent", true);
ccpaMetaData.commit();
Kotlin
val ccpaMetaData = MetaData(this)
ccpaMetaData["privacy.consent"] = true
ccpaMetaData.commit()
See Unity Ads' Consumer privacy act compliance for more details and the values that can be provided in each method.
Set age treatment
Unity Ads mediation adapter version 4.16.6.0 and later forwards the child-directed setting and users under the age of consent setting to Unity Ads.
To process these signals on a per-user basis, Unity Ads requires you to enable the Mixed Audience designation in the Unity Monetization dashboard. For more information about enabling a mixed audience designation on your project, see Setting game-level age designations.
Step 5: Add required code
Load ad with Activity context
Pass Activity context when loading Banner, Interstitial and Native ad formats.
Without activity context, ad load will fail.
Step 6: Test your implementation
Enable test ads
Make sure you register your test device for Ad Manager and enable test mode in Unity Ads UI.
Verify test ads
To verify that you are receiving test ads from Unity Ads, enable single ad source testing in ad inspector using the Unity Ads (Bidding) and Unity Ads (Waterfall) ad source(s).
Error codes
If the adapter fails to receive an ad from Unity Ads,
publishers can check the underlying error from the ad response using
ResponseInfo.getAdapterResponses()
under the following classes:
com.google.ads.mediation.unity.UnityAdapter
com.google.ads.mediation.unity.UnityMediationAdapter
Here are the codes and accompanying messages thrown by the UnityAds adapter when an ad fails to load:
| Error code | Reason |
|---|---|
| 0-10 | UnityAds SDK returned an error. See code for more details. |
| 101 | UnityAds server parameters configured in the Ad Manager UI are missing/invalid. |
| 102 | UnityAds returned a placement with a NO_FILL state. |
| 103 | UnityAds returned a placement with a DISABLED state. |
| 104 | UnityAds tried to show an ad with a null context. |
| 105 | Context used to initialize, load and/or show ads from Unity Ads is not an Activity instance. |
| 106 | UnityAds tried to show an ad that's not ready to be shown. |
| 107 | UnityAds is not supported on the device. |
| 108 | UnityAds can only load 1 ad per placement at a time. |
| 109 | UnityAds finished with an ERROR state. |
| 200-204 | UnityAds Banner specific error. See code for more details. |
Unity Ads Android Mediation Adapter Changelog
Next Version
- Adapter now automatically forwards GDPR consent found inside
IABTCF_AddtlConsentto the Unity Ads SDK if GDPR applies.
Version 4.19.0.0
- Verified compatibility with Unity Ads SDK 4.19.0.
Built and tested with:
- Google Mobile Ads SDK version 25.4.0.
- Google Mobile Ads Next-Gen SDK version 1.2.1.
- Unity Ads SDK version 4.19.0.
Version 4.18.1.0
- Removed old API implementation for interstitial ads. Adapter will start using the new API implementation.
- Verified compatibility with Unity Ads SDK 4.18.1.
Built and tested with:
- Google Mobile Ads SDK version 25.3.0.
- Google Mobile Ads Next-Gen SDK version 1.2.1.
- Unity Ads SDK version 4.18.1.
Version 4.18.0.0
- Added property to build the adapter with GMA Next-Gen SDK dependency.
- Verified compatibility with Unity Ads SDK 4.18.0.
Built and tested with:
- Google Mobile Ads SDK version 25.2.0.
- Google Mobile Ads Next-Gen SDK version 1.0.1.
- Unity Ads SDK version 4.18.0.
Version 4.17.0.0
- Verified compatibility with Unity Ads SDK 4.17.0.
Built and tested with:
- Google Mobile Ads SDK version 25.0.0.
- Unity Ads SDK version 4.17.0.
Version 4.16.6.0
- Added support for forwarding the
tagForUnderAgeOfConsentGoogle Mobile Ads SDK parameter to the Unity Ads SDK. - Verified compatibility with Unity Ads SDK 4.16.6.
Built and tested with:
- Google Mobile Ads SDK version 24.9.0.
- Unity Ads SDK version 4.16.6.
Version 4.16.5.0
- Verified compatibility with Unity Ads SDK 4.16.5.
Built and tested with:
- Google Mobile Ads SDK version 24.8.0.
- Unity Ads SDK version 4.16.5.
Version 4.16.4.0
- Verified compatibility with Unity Ads SDK 4.16.4.
Built and tested with:
- Google Mobile Ads SDK version 24.7.0.
- Unity Ads SDK version 4.16.4.
Version 4.16.3.0
- Verified compatibility with Unity Ads SDK 4.16.3.
Built and tested with:
- Google Mobile Ads SDK version 24.7.0.
- Unity Ads SDK version 4.16.3.
Version 4.16.2.0
- Added format parameter when getting signal token from Unity Ads SDK.
- Removed old banner API implementation. Note: New banner API implementation already exists in the adapter and GMA SDK will use that.
- Added an error code to identify show failure due to timeout.
- Removed class-level references to
Contextobjects to help with memory leak issues. - Verified compatibility with Unity Ads SDK 4.16.2.
Built and tested with:
- Google Mobile Ads SDK version 24.6.0.
- Unity Ads SDK version 4.16.2.
Version 4.16.1.0
- Verified compatibility with Unity Ads SDK 4.16.1.
Built and tested with:
- Google Mobile Ads SDK version 24.5.0.
- Unity Ads SDK version 4.16.1.
Version 4.16.0.1
- Removed size check from the adapter for banner RTB ads.
Built and tested with:
- Google Mobile Ads SDK version 24.5.0.
- Unity Ads SDK version 4.16.0.
Version 4.16.0.0
- Verified compatibility with Unity Ads SDK 4.16.0.
Built and tested with:
- Google Mobile Ads SDK version 24.5.0.
- Unity Ads SDK version 4.16.0.
Version 4.15.1.0
- Verified compatibility with Unity Ads SDK 4.15.1.
Built and tested with:
- Google Mobile Ads SDK version 24.4.0.
- Unity Ads SDK version 4.15.1.
Version 4.15.0.0
- Updated to fail signal collection for RTB banner ads if the context is not an activity (since Unity Ads SDK requires activity context to load RTB banner ads). This fix will increase ad load success rate for publishers.
- Verified compatibility with Unity Ads SDK 4.15.0.
Built and tested with:
- Google Mobile Ads SDK version 24.3.0.
- Unity Ads SDK version 4.15.0.
Version 4.14.2.0
- Verified compatibility with Unity Ads SDK 4.14.2.
Built and tested with:
- Google Mobile Ads SDK version 24.2.0.
- Unity Ads SDK version 4.14.2.
Version 4.14.1.0
- Verified compatibility with Unity Ads SDK 4.14.1.
Built and tested with:
- Google Mobile Ads SDK version 24.1.0.
- Unity Ads SDK version 4.14.1.
Version 4.14.0.0
- Verified compatibility with Unity Ads SDK 4.14.0.
Built and tested with:
- Google Mobile Ads SDK version 24.0.0.
- Unity Ads SDK version 4.14.0.
Version 4.13.2.0
- Updated the minimum required Android API level to 23.
- Updated the minimum required Google Mobile Ads SDK version to 24.0.0.
Built and tested with:
- Google Mobile Ads SDK version 24.0.0.
- Unity Ads SDK version 4.13.2.
Version 4.13.1.0
- Verified compatibility with Unity Ads SDK 4.13.1.
Built and tested with:
- Google Mobile Ads SDK version 23.6.0.
- Unity Ads SDK version 4.13.1.
Version 4.13.0.0
- Removed unnecessary
Activitycontext checks from the adapter. - Verified compatibility with Unity Ads SDK 4.13.0.
Built and tested with:
- Google Mobile Ads SDK version 23.6.0.
- Unity Ads SDK version 4.13.0.
Version 4.12.5.1
- Fixed bidding banner ad load failures by setting the object ID when loading ads.
Built and tested with:
- Google Mobile Ads SDK version 23.6.0.
- Unity Ads SDK version 4.12.5.
Version 4.12.5.0
- Verified compatibility with Unity Ads SDK 4.12.5.
Built and tested with:
- Google Mobile Ads SDK version 23.5.0.
- Unity Ads SDK version 4.12.5.
Version 4.12.4.0
- Verified compatibility with Unity Ads SDK 4.12.4.
Built and tested with:
- Google Mobile Ads SDK version 23.3.0.
- Unity Ads SDK version 4.12.4.
Version 4.12.3.0
- Verified compatibility with Unity Ads SDK 4.12.3.
Built and tested with:
- Google Mobile Ads SDK version 23.3.0.
- Unity Ads SDK version 4.12.3.
Version 4.12.2.0
- Verified compatibility with Unity Ads SDK 4.12.2.
Built and tested with:
- Google Mobile Ads SDK version 23.2.0.
- Unity Ads SDK version 4.12.2.
Version 4.12.1.0
- Verified compatibility with Unity Ads SDK 4.12.1.
Built and tested with:
- Google Mobile Ads SDK version 23.2.0.
- Unity Ads SDK version 4.12.1.
Version 4.12.0.0
- Verified compatibility with Unity Ads SDK 4.12.0.
Built and tested with:
- Google Mobile Ads SDK version 23.1.0.
- Unity Ads SDK version 4.12.0.
Version 4.11.3.0
- Added bidding support for banner, interstitial and rewarded ad formats.
- Verified compatibility with Unity Ads SDK 4.11.3.
Built and tested with:
- Google Mobile Ads SDK version 23.1.0.
- Unity Ads SDK version 4.11.3.
Version 4.11.2.0
- Verified compatibility with Unity Ads SDK 4.11.2.
Built and tested with:
- Google Mobile Ads SDK version 23.0.0.
- Unity Ads SDK version 4.11.2.
Version 4.10.0.0
- Updated the minimum required Google Mobile Ads SDK version to 23.0.0.
- Verified compatibility with Unity Ads SDK 4.10.0.
Built and tested with:
- Google Mobile Ads SDK version 23.0.0.
- Unity Ads SDK version 4.10.0.
Version 4.9.3.0
- Verified compatibility with Unity Ads SDK 4.9.3.
Built and tested with:
- Google Mobile Ads SDK version 22.6.0.
- Unity Ads SDK version 4.9.3.
Version 4.9.2.0
- Verified compatibility with Unity Ads SDK 4.9.2.
Built and tested with:
- Google Mobile Ads SDK version 22.3.0.
- Unity Ads SDK version 4.9.2.
Version 4.9.1.0
- Updated the minimum required Google Mobile Ads SDK version to 22.3.0.
- Verified compatibility with Unity Ads SDK 4.9.1.
Built and tested with:
- Google Mobile Ads SDK version 22.3.0.
- Unity Ads SDK version 4.9.1.
Version 4.8.0.0
- Reports ad impression when Unity Ads SDK invokes its new onBannerShown() callback method.
- Verified compatibility with Unity Ads SDK 4.8.0.
Built and tested with:
- Google Mobile Ads SDK version 22.2.0.
- Unity Ads SDK version 4.8.0.
Version 4.7.1.0
- Verified compatibility with Unity Ads SDK 4.7.1.
Built and tested with:
- Google Mobile Ads SDK version 22.1.0.
- Unity Ads SDK version 4.7.1.
Version 4.7.0.0
- Verified compatibility with Unity Ads SDK 4.7.0.
Built and tested with:
- Google Mobile Ads SDK version 22.0.0.
- Unity Ads SDK version 4.7.0.
Version 4.6.1.1
- Updated adapter to use new
VersionInfoclass. - Updated the minimum required Google Mobile Ads SDK version to 22.0.0.
Built and tested with:
- Google Mobile Ads SDK version 22.0.0.
- Unity Ads SDK version 4.6.1.
Version 4.6.1.0
- Verified compatibility with Unity Ads SDK 4.6.1.
Built and tested with:
- Google Mobile Ads SDK version 21.5.0
- Unity Ads SDK version 4.6.1.
Version 4.6.0.0
- Added support for forwarding COPPA information to the Unity Ads SDK.
- Verified compatibility with Unity Ads SDK 4.6.0.
- Updated the minimum required Google Mobile Ads SDK version to 21.5.0.
Built and tested with:
- Google Mobile Ads SDK version 21.5.0
- Unity Ads SDK version 4.6.0.
Version 4.5.0.0
- Verified compatibility with Unity Ads SDK 4.5.0.
- Updated the minimum required Google Mobile Ads SDK version to 21.4.0.
Built and tested with:
- Google Mobile Ads SDK version 21.4.0
- Unity Ads SDK version 4.5.0.
Version 4.4.1.0
- Verified compatibility with Unity Ads SDK 4.4.1.
Built and tested with:
- Google Mobile Ads SDK version 21.2.0
- Unity Ads SDK version 4.4.1.
Version 4.4.0.0
- Verified compatibility with Unity Ads SDK 4.4.0.
- Updated the minimum required Google Mobile Ads SDK version to 21.2.0.
Built and tested with:
- Google Mobile Ads SDK version 21.2.0
- Unity Ads SDK version 4.4.0.
Version 4.3.0.0
- Verified compatibility with Unity Ads SDK 4.3.0.
- The
onAdOpened()callback is now forwarded when interstitial and rewarded ads start playing.
Built and tested with:
- Google Mobile Ads SDK version 21.1.0
- Unity Ads SDK version 4.3.0.
Version 4.2.1.1
- Updated
compileSdkVersionandtargetSdkVersionto API 31. - Updated the minimum required Google Mobile Ads SDK version to 21.0.0.
Built and tested with:
- Google Mobile Ads SDK version 21.0.0.
- Unity Ads SDK version 4.2.1.
Version 4.2.1.0
- Verified compatibility with Unity Ads SDK 4.2.1.
Built and tested with:
- Google Mobile Ads SDK version 20.6.0.
- Unity Ads SDK version 4.2.1.
Version 4.1.0.0
- Verified compatibility with Unity Ads SDK 4.1.0.
Built and tested with:
- Google Mobile Ads SDK version 20.6.0.
- Unity Ads SDK version 4.1.0.
Version 4.0.1.0
- Verified compatibility with Unity Ads SDK 4.0.1.
- Updated the minimum required Google Mobile Ads SDK version to 20.6.0.
Built and tested with:
- Google Mobile Ads SDK version 20.6.0.
- Unity Ads SDK version 4.0.1.
Version 4.0.0.0
- Verified compatibility with Unity Ads SDK 4.0.0.
- Updated the minimum required Google Mobile Ads SDK version to 20.5.0.
Built and tested with:
- Google Mobile Ads SDK version 20.5.0.
- Unity Ads SDK version 4.0.0.
Version 3.7.5.0
- Verified compatibility with Unity Ads SDK 3.7.5.
Built and tested with:
- Google Mobile Ads SDK version 20.2.0.
- Unity Ads SDK version 3.7.5.
Version 3.7.4.0
- Verified compatibility with Unity Ads SDK 3.7.4.
Built and tested with:
- Google Mobile Ads SDK version 20.2.0.
- Unity Ads SDK version 3.7.4.
Version 3.7.2.0
- Verified compatibility with Unity Ads SDK 3.7.2.
- Updated the minimum required Google Mobile Ads SDK version to 20.2.0.
Built and tested with:
- Google Mobile Ads SDK version 20.2.0.
- Unity Ads SDK version 3.7.2.
Version 3.7.1.0
- Verified compatibility with Unity Ads SDK 3.7.1.
- Updated the minimum required Google Mobile Ads SDK version to 20.1.0.
Built and tested with:
- Google Mobile Ads SDK version 20.1.0.
- Unity Ads SDK version 3.7.1.
Version 3.6.2.0
- Verified compatibility with Unity Ads SDK 3.6.2.
- Fixed an issue where rewarded ads were not forwarding click callbacks.
- The UnityAds SDK has been removed from the bundled adapter build. Publishers are now required to manually include the UnityAds SDK as an additional dependency.
- Updated the minimum required Google Mobile Ads SDK version to 19.8.0.
Built and tested with:
- Google Mobile Ads SDK version 19.8.0.
- Unity Ads SDK version 3.6.2.
Version 3.6.0.0
- Verified compatibility with Unity Ads SDK 3.6.0.
- Updated the minimum required Google Mobile Ads SDK version to 19.6.0.
Built and tested with:
- Google Mobile Ads SDK version 19.6.0.
- Unity Ads SDK version 3.6.0.
Version 3.5.1.1
- Fixed an issue where when trying to request for multiple interstitial and rewarded ads.
Built and tested with:
- Google Mobile Ads SDK version 19.5.0.
- Unity Ads SDK version 3.5.1.
Version 3.5.1.0
- Verified compatibility with Unity Ads SDK 3.5.1.
- Fixed an issue that causes smart banner ad requests to fail.
Built and tested with:
- Google Mobile Ads SDK version 19.5.0.
- Unity Ads SDK version 3.5.1.
Version 3.5.0.0
- Verified compatibility with Unity Ads SDK 3.5.0.
- Added adaptive banner support.
- Updated the minimum required Google Mobile Ads SDK version to 19.5.0.
Built and tested with:
- Google Mobile Ads SDK version 19.5.0.
- Unity Ads SDK version 3.5.0.
Version 3.4.8.0
- Fixed a
NullPointerExceptionerror that occurs when a banner ad is destroyed. - Updated the minimum required Google Mobile Ads SDK version to 19.3.0.
Built and tested with:
- Google Mobile Ads SDK version 19.3.0.
- Unity Ads SDK version 3.4.8.
Version 3.4.6.1
- Created an adapter build that does not include the Unity Ads SDK bundled in.
This gives publishers an option to use the Unity Ads Services when mediating on
Unity to avoid conflicting dependency issues.
- Publishers may opt to use this by including the
com.google.ads.mediation:unity-adapter-only:x.y.z.pdependency on their app-levelbuild.gradlefile.
- Publishers may opt to use this by including the
Built and tested with:
- Google Mobile Ads SDK version 19.1.0.
- Unity Ads SDK version 3.4.6.
Version 3.4.6.0
- Verified compatibility with Unity Ads SDK 3.4.6.
- Adapter now forwards the
onAdOpened()callback when a banner ad is clicked.
Built and tested with:
- Google Mobile Ads SDK version 19.1.0.
- Unity Ads SDK version 3.4.6.
Version 3.4.2.3
- Added descriptive error codes and reasons for adapter load/show failures.
- Updated the minimum required Google Mobile Ads SDK version to 19.1.0.
Built and tested with:
- Google Mobile Ads SDK version 19.1.0.
- Unity Ads SDK version 3.4.2.
Version 3.4.2.2
- Fixed a
ConcurrentModificationExceptioncrash that occurred when Unity Ads returns an error.
Built and tested with:
- Google Mobile Ads SDK version 19.0.1.
- Unity Ads SDK version 3.4.2.
Version 3.4.2.1
- Improved forwarding of Unity's errors to recognize initialization and ad load failures earlier and reduce timeouts.
- Updated the minimum required Google Mobile Ads SDK version to 19.0.1.
Built and tested with:
- Google Mobile Ads SDK version 19.0.1.
- Unity Ads SDK version 3.4.2.
Version 3.4.2.0
- Verified compatibility with Unity Ads SDK 3.4.2.
- Updated the minimum required Google Mobile Ads SDK version to 18.3.0.
Built and tested with:
- Google Mobile Ads SDK version 18.3.0.
- Unity Ads SDK version 3.4.2.
Version 3.4.0.0
- Verified compatibility with Unity Ads SDK 3.4.0.
- Updated the minimum required Google Mobile Ads SDK version to 18.3.0.
Built and tested with:
- Google Mobile Ads SDK version 18.3.0.
- Unity Ads SDK version 3.4.0.
Version 3.3.0.0
- Verified compatibility with Unity Ads SDK 3.3.0.
Built and tested with:
- Google Mobile Ads SDK version 18.2.0.
- Unity Ads SDK version 3.3.0.
Version 3.2.0.1
- Fixed a null pointer exception crash that occurred when calling
loadAd()before callingUnityAds.initialize(). - Updated the minimum required Google Mobile Ads SDK version to 18.2.0.
Version 3.2.0.0
- Fixed an issue that caused Banner Ad requests to fail.
- Verified compatibility with Unity Ads SDK 3.2.0.
- Migrated the adapter to AndroidX.
- Updated the minimum required Google Mobile Ads SDK version to 18.1.1.
Version 3.1.0.0
- Added support for flexible banner ad sizes.
- Adapter fails the ad request if the requested size isn't compatible with any Unity Ads banner sizes
- Verified compatibility with Unity Ads SDK 3.1.0.
Version 3.0.1.0
- Verified compatibility with Unity Ads SDK 3.0.1.
- Fixed a bug that caused 'NPE' while showing an interstitial ad.
Version 3.0.0.2
- Updated adapter to support new open-beta Rewarded API.
- Updated the minimum required Google Mobile Ads SDK version to 17.2.0.
Version 3.0.0.1
- Added support for Unity Ads Banner.
Version 3.0.0.0
- Verified compatibility with Unity Ads SDK 3.0.0.
Version 2.3.0.0
- Verified compatibility with Unity Ads SDK 2.3.0.
Version 2.2.1.1
- Updated the adapter to invoke the
onRewardedVideoComplete()ad event.
Version 2.2.1.0
- Verified compatibility with Unity Ads SDK 2.2.1.
Version 2.2.0.0
- Verified compatibility with Unity Ads SDK 2.2.0.
Version 2.1.2.0
- Verified compatibility with Unity Ads SDK 2.1.2.
Version 2.1.1.0
- Verified compatibility with Unity Ads SDK 2.1.1.
Version 2.1.0.0
- Updated the adapter to make it compatible with Unity Ads SDK 2.1.0.
Version 2.0.8.0
- Verified compatibility with Unity Ads SDK 2.0.8.
Version 2.0.7.0
- Using Unity Ads's click reporting (AdMob and Unity Ads click statistics will match up).
- Added onAdLeftApplication callback support.
Version 2.0.6.0
- Verified compatibility with Unity Ads SDK 2.0.6.
Version 2.0.5.0
- The adapters can now be added as a compile dependency by adding the following
to the build.gradle file's dependencies tag:
compile 'com.google.ads.mediation:unity:2.0.5.0' - Moved to distributing the adapter as an aar instead of a jar file (see README for additional instructions).
Version 2.0.4.0
- Fixed a bug that caused rewarded video ads to fail to load when an interstitial ad was loaded first.
Version 2.0.2.0
- Changed the version naming system to [Unity Ads SDK version].[adapter patch version].
- Updated the minimum required Unity Ads SDK to v2.0.2.
- Updated the minimum required Google Mobile Ads SDK to v9.0.0.
- Apps are no longer required to call UnityAds.changeActivity(this).
Version 1.0.0
- Initial release. Supports reward-based video ads and interstitial ads.