เกริ่นนำ
เครื่องหมายระบุตำแหน่งบนแผนที่ เครื่องหมายจะใช้รูปภาพมาตรฐานโดยค่าเริ่มต้น ตัวทำเครื่องหมายจะแสดงรูปภาพที่กำหนดเองได้ ซึ่งในกรณีนี้เรามักเรียกว่า "ไอคอน" เครื่องหมายและไอคอนเป็นวัตถุประเภท Marker คุณสามารถกำหนดไอคอนที่กำหนดเองภายในตัวสร้างของเครื่องหมายหรือโดยการเรียก setIcon() บนเครื่องหมายก็ได้ ดูเพิ่มเติมเกี่ยวกับการปรับแต่งรูปภาพเครื่องหมาย
หรือพูดกว้างๆ ก็คือเครื่องหมายก็คือการวางซ้อนประเภทหนึ่ง ดูข้อมูลเกี่ยวกับการวางซ้อนประเภทอื่นๆ ได้ที่การวาดบนแผนที่
เครื่องหมายออกแบบมาให้โต้ตอบได้ ตัวอย่างเช่น โดยค่าเริ่มต้น เหตุการณ์จะได้รับ 'click' คุณจึงเพิ่ม Listener เหตุการณ์เพื่อแสดงหน้าต่างข้อมูลที่แสดงข้อมูลที่กำหนดเองได้ คุณอนุญาตให้ผู้ใช้ย้ายเครื่องหมายบนแผนที่ได้โดยการตั้งค่าคุณสมบัติ draggable ของเครื่องหมายเป็น true ดูข้อมูลเพิ่มเติมเกี่ยวกับเครื่องหมายที่ลากได้
ด้านล่าง
เพิ่มเครื่องหมาย
เครื่องมือสร้าง google.maps.Marker จะใช้ลิเทอรัลของออบเจ็กต์ Marker options รายการเดียวที่ระบุพร็อพเพอร์ตี้เริ่มต้นของเครื่องหมาย
ฟิลด์ต่อไปนี้มีความสำคัญเป็นพิเศษและมักจะได้รับการกำหนดโดยทั่วไปเมื่อสร้างเครื่องหมาย
-
position(ต้องระบุ) ระบุLatLngที่ระบุตำแหน่งเริ่มต้นของเครื่องหมาย วิธีหนึ่งในการดึงข้อมูลLatLngคือการใช้บริการระบุพิกัดทางภูมิศาสตร์ -
map(ไม่บังคับ) ระบุMapที่จะวางเครื่องหมาย หากคุณไม่ระบุแผนที่เมื่อสร้างเครื่องหมาย เครื่องหมายจะสร้างขึ้นแต่ไม่ได้แนบกับ (หรือแสดงบน) แผนที่ คุณเพิ่มเครื่องหมายในภายหลังได้โดยเรียกใช้เมธอดsetMap()ของเครื่องหมาย
ตัวอย่างต่อไปนี้เพิ่มเครื่องหมายแบบง่ายลงในแผนที่ที่ Uluru บริเวณใจกลางออสเตรเลีย
TypeScript
function initMap(): void {
const myLatLng = { lat: -25.363, lng: 131.044 };
const map = new google.maps.Map(
document.getElementById("map") as HTMLElement,
{
zoom: 4,
center: myLatLng,
}
);
new google.maps.Marker({
position: myLatLng,
map,
title: "Hello World!",
});
}
declare global {
interface Window {
initMap: () => void;
}
}
window.initMap = initMap;
JavaScript
function initMap() {
const myLatLng = { lat: -25.363, lng: 131.044 };
const map = new google.maps.Map(document.getElementById("map"), {
zoom: 4,
center: myLatLng,
});
new google.maps.Marker({
position: myLatLng,
map,
title: "Hello World!",
});
}
window.initMap = initMap;
ลองใช้ตัวอย่าง
ในตัวอย่างข้างต้น เครื่องหมายวางอยู่บนแผนที่เมื่อสร้างเครื่องหมายโดยใช้คุณสมบัติ map ในตัวเลือกเครื่องหมาย
หรือคุณสามารถเพิ่มตัวทำเครื่องหมายลงในแผนที่โดยตรงได้โดยใช้เมธอด setMap() ของเครื่องหมายดังที่แสดงในตัวอย่างด้านล่าง
var myLatlng = new google.maps.LatLng(-25.363882,131.044922);
var mapOptions = {
  zoom: 4,
  center: myLatlng
}
var map = new google.maps.Map(document.getElementById("map"), mapOptions);

var marker = new google.maps.Marker({
    position: myLatlng,
    title:"Hello World!"
});

// To add the marker to the map, call setMap();
marker.setMap(map);
The marker's title will appear as a tooltip.
If you do not wish to pass any Marker options in the
marker's constructor, instead pass an empty object {} in the
last argument of the constructor.
Remove a marker
To remove a marker from the map, call the setMap() method
passing null as the argument.
marker.setMap(null);
Note that the above method does not delete the marker. It removes the
marker from the map. If instead you wish to delete the marker, you should
remove it from the map, and then set the marker itself to
null.
If you wish to manage a set of markers, you should create an array to hold
the markers. Using this array, you can then call setMap() on
each marker in the array in turn when you need to remove the markers. You
can delete the markers by removing them from the map and then setting the
array's length to 0, which removes all
references to the markers.
Customize a marker image
You can customize the visual appearance of markers by specifying an image file or vector-based icon to display instead of the default Google Maps pushpin icon. You can add text with a marker label, and use complex icons to define clickable regions, and set the stack order of markers.
Markers with image icons
In the most basic case, an icon can specify an image to use instead of the
default Google Maps pushpin icon. To specify such an icon, set the
marker's icon property to the URL of an image. The Maps JavaScript API will size the icon automatically.
TypeScript
// This example adds a marker to indicate the position of Bondi Beach in Sydney,
// Australia.
function initMap(): void {
const map = new google.maps.Map(
document.getElementById("map") as HTMLElement,
{
zoom: 4,
center: { lat: -33, lng: 151 },
}
);
const image =
"https://developers.google.com/maps/documentation/javascript/examples/full/images/beachflag.png";
const beachMarker = new google.maps.Marker({
position: { lat: -33.89, lng: 151.274 },
map,
icon: image,
});
}
declare global {
interface Window {
initMap: () => void;
}
}
window.initMap = initMap;
JavaScript
// This example adds a marker to indicate the position of Bondi Beach in Sydney,
// Australia.
function initMap() {
const map = new google.maps.Map(document.getElementById("map"), {
zoom: 4,
center: { lat: -33, lng: 151 },
});
const image =
"https://developers.google.com/maps/documentation/javascript/examples/full/images/beachflag.png";
const beachMarker = new google.maps.Marker({
position: { lat: -33.89, lng: 151.274 },
map,
icon: image,
});
}
window.initMap = initMap;
ลองใช้ตัวอย่าง
เครื่องหมายที่มีไอคอนตามเวกเตอร์
คุณใช้เส้นทางเวกเตอร์ SVG ที่กำหนดเองเพื่อกำหนดลักษณะที่ปรากฏของตัวทำเครื่องหมายได้ วิธีการคือให้ส่ง Object Literal ของ Symbol ที่มีเส้นทางที่ต้องการไปยังพร็อพเพอร์ตี้ icon ของเครื่องหมาย คุณกำหนดเส้นทางที่กำหนดเองได้โดยใช้รูปแบบเส้นทาง SVG หรือใช้หนึ่งในเส้นทางที่กำหนดไว้ล่วงหน้าใน google.maps.SymbolPath ต้องใช้พร็อพเพอร์ตี้ anchor เพื่อให้ตัวทำเครื่องหมายแสดงผลอย่างถูกต้องเมื่อระดับการซูมเปลี่ยนแปลง ดูข้อมูลเพิ่มเติมเกี่ยวกับการใช้สัญลักษณ์เพื่อสร้างไอคอนตามเวกเตอร์สำหรับเครื่องหมาย (และเส้นประกอบ)
TypeScript
// This example uses SVG path notation to add a vector-based symbol
// as the icon for a marker. The resulting icon is a marker-shaped
// symbol with a blue fill and no border.
function initMap(): void {
const center = new google.maps.LatLng(-33.712451, 150.311823);
const map = new google.maps.Map(
document.getElementById("map") as HTMLElement,
{
zoom: 9,
center: center,
}
);
const svgMarker = {
path: "M-1.547 12l6.563-6.609-1.406-1.406-5.156 5.203-2.063-2.109-1.406 1.406zM0 0q2.906 0 4.945 2.039t2.039 4.945q0 1.453-0.727 3.328t-1.758 3.516-2.039 3.070-1.711 2.273l-0.75 0.797q-0.281-0.328-0.75-0.867t-1.688-2.156-2.133-3.141-1.664-3.445-0.75-3.375q0-2.906 2.039-4.945t4.945-2.039z",
fillColor: "blue",
fillOpacity: 0.6,
strokeWeight: 0,
rotation: 0,
scale: 2,
anchor: new google.maps.Point(0, 20),
};
new google.maps.Marker({
position: map.getCenter(),
icon: svgMarker,
map: map,
});
}
declare global {
interface Window {
initMap: () => void;
}
}
window.initMap = initMap;
JavaScript
// This example uses SVG path notation to add a vector-based symbol
// as the icon for a marker. The resulting icon is a marker-shaped
// symbol with a blue fill and no border.
function initMap() {
const center = new google.maps.LatLng(-33.712451, 150.311823);
const map = new google.maps.Map(document.getElementById("map"), {
zoom: 9,
center: center,
});
const svgMarker = {
path: "M-1.547 12l6.563-6.609-1.406-1.406-5.156 5.203-2.063-2.109-1.406 1.406zM0 0q2.906 0 4.945 2.039t2.039 4.945q0 1.453-0.727 3.328t-1.758 3.516-2.039 3.070-1.711 2.273l-0.75 0.797q-0.281-0.328-0.75-0.867t-1.688-2.156-2.133-3.141-1.664-3.445-0.75-3.375q0-2.906 2.039-4.945t4.945-2.039z",
fillColor: "blue",
fillOpacity: 0.6,
strokeWeight: 0,
rotation: 0,
scale: 2,
anchor: new google.maps.Point(0, 20),
};
new google.maps.Marker({
position: map.getCenter(),
icon: svgMarker,
map: map,
});
}
window.initMap = initMap;
ลองใช้ตัวอย่าง
ป้ายเครื่องหมาย
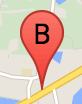
ป้ายกำกับเครื่องหมายคือตัวอักษรหรือตัวเลขที่ปรากฏภายในเครื่องหมาย ภาพตัวทำเครื่องหมายในส่วนนี้แสดงป้ายเครื่องหมายที่มีตัวอักษร "B" คุณระบุป้ายกำกับเครื่องหมายเป็นสตริงหรือออบเจ็กต์ MarkerLabel ที่มีสตริงและพร็อพเพอร์ตี้ป้ายกำกับอื่นๆ ได้
เมื่อสร้างเครื่องหมาย คุณจะระบุพร็อพเพอร์ตี้ label ในออบเจ็กต์ MarkerOptions ได้ หรือคุณอาจเรียกใช้ setLabel() ในออบเจ็กต์ มาร์กเกอร์ เพื่อกำหนดป้ายกำกับบนตัวทำเครื่องหมายที่มีอยู่ก็ได้
ตัวอย่างต่อไปนี้แสดงเครื่องหมายที่ติดป้ายกำกับเมื่อผู้ใช้คลิกบนแผนที่
TypeScript
// In the following example, markers appear when the user clicks on the map.
// Each marker is labeled with a single alphabetical character.
const labels = "ABCDEFGHIJKLMNOPQRSTUVWXYZ";
let labelIndex = 0;
function initMap(): void {
const bangalore = { lat: 12.97, lng: 77.59 };
const map = new google.maps.Map(
document.getElementById("map") as HTMLElement,
{
zoom: 12,
center: bangalore,
}
);
// This event listener calls addMarker() when the map is clicked.
google.maps.event.addListener(map, "click", (event) => {
addMarker(event.latLng, map);
});
// Add a marker at the center of the map.
addMarker(bangalore, map);
}
// Adds a marker to the map.
function addMarker(location: google.maps.LatLngLiteral, map: google.maps.Map) {
// Add the marker at the clicked location, and add the next-available label
// from the array of alphabetical characters.
new google.maps.Marker({
position: location,
label: labels[labelIndex++ % labels.length],
map: map,
});
}
declare global {
interface Window {
initMap: () => void;
}
}
window.initMap = initMap;
JavaScript
// In the following example, markers appear when the user clicks on the map.
// Each marker is labeled with a single alphabetical character.
const labels = "ABCDEFGHIJKLMNOPQRSTUVWXYZ";
let labelIndex = 0;
function initMap() {
const bangalore = { lat: 12.97, lng: 77.59 };
const map = new google.maps.Map(document.getElementById("map"), {
zoom: 12,
center: bangalore,
});
// This event listener calls addMarker() when the map is clicked.
google.maps.event.addListener(map, "click", (event) => {
addMarker(event.latLng, map);
});
// Add a marker at the center of the map.
addMarker(bangalore, map);
}
// Adds a marker to the map.
function addMarker(location, map) {
// Add the marker at the clicked location, and add the next-available label
// from the array of alphabetical characters.
new google.maps.Marker({
position: location,
label: labels[labelIndex++ % labels.length],
map: map,
});
}
window.initMap = initMap;
ลองใช้ตัวอย่าง
ไอคอนที่ซับซ้อน
คุณสามารถระบุรูปร่างที่ซับซ้อนเพื่อระบุพื้นที่ที่คลิกได้ และระบุลักษณะที่ไอคอนควรปรากฏเทียบกับการวางซ้อนอื่นๆ ("ลำดับสแต็ก") ไอคอนที่ระบุในลักษณะนี้ควรตั้งค่าพร็อพเพอร์ตี้ icon ของตนเป็นออบเจ็กต์ประเภท Icon
ออบเจ็กต์ Icon
กำหนดรูปภาพ นอกจากนี้ยังกำหนด size ของไอคอน origin ของไอคอน (เช่น หากรูปภาพที่คุณต้องการเป็นส่วนหนึ่งของรูปภาพขนาดใหญ่ในสไปรท์) และ anchor ตำแหน่งที่ฮอตสปอตของไอคอนควรอยู่ (ซึ่งอิงตามต้นทาง)
หากใช้ป้ายกำกับที่มีตัวทำเครื่องหมายที่กำหนดเอง คุณจะวางตำแหน่งป้ายกำกับที่มีพร็อพเพอร์ตี้ labelOrigin ในออบเจ็กต์ Icon ได้
TypeScript
// The following example creates complex markers to indicate beaches near
// Sydney, NSW, Australia. Note that the anchor is set to (0,32) to correspond
// to the base of the flagpole.
function initMap(): void {
const map = new google.maps.Map(
document.getElementById("map") as HTMLElement,
{
zoom: 10,
center: { lat: -33.9, lng: 151.2 },
}
);
setMarkers(map);
}
// Data for the markers consisting of a name, a LatLng and a zIndex for the
// order in which these markers should display on top of each other.
const beaches: [string, number, number, number][] = [
["Bondi Beach", -33.890542, 151.274856, 4],
["Coogee Beach", -33.923036, 151.259052, 5],
["Cronulla Beach", -34.028249, 151.157507, 3],
["Manly Beach", -33.80010128657071, 151.28747820854187, 2],
["Maroubra Beach", -33.950198, 151.259302, 1],
];
function setMarkers(map: google.maps.Map) {
// Adds markers to the map.
// Marker sizes are expressed as a Size of X,Y where the origin of the image
// (0,0) is located in the top left of the image.
// Origins, anchor positions and coordinates of the marker increase in the X
// direction to the right and in the Y direction down.
const image = {
url: "https://developers.google.com/maps/documentation/javascript/examples/full/images/beachflag.png",
// This marker is 20 pixels wide by 32 pixels high.
size: new google.maps.Size(20, 32),
// The origin for this image is (0, 0).
origin: new google.maps.Point(0, 0),
// The anchor for this image is the base of the flagpole at (0, 32).
anchor: new google.maps.Point(0, 32),
};
// Shapes define the clickable region of the icon. The type defines an HTML
// <area> element 'poly' which traces out a polygon as a series of X,Y points.
// The final coordinate closes the poly by connecting to the first coordinate.
const shape = {
coords: [1, 1, 1, 20, 18, 20, 18, 1],
type: "poly",
};
for (let i = 0; i < beaches.length; i++) {
const beach = beaches[i];
new google.maps.Marker({
position: { lat: beach[1], lng: beach[2] },
map,
icon: image,
shape: shape,
title: beach[0],
zIndex: beach[3],
});
}
}
declare global {
interface Window {
initMap: () => void;
}
}
window.initMap = initMap;
JavaScript
// The following example creates complex markers to indicate beaches near
// Sydney, NSW, Australia. Note that the anchor is set to (0,32) to correspond
// to the base of the flagpole.
function initMap() {
const map = new google.maps.Map(document.getElementById("map"), {
zoom: 10,
center: { lat: -33.9, lng: 151.2 },
});
setMarkers(map);
}
// Data for the markers consisting of a name, a LatLng and a zIndex for the
// order in which these markers should display on top of each other.
const beaches = [
["Bondi Beach", -33.890542, 151.274856, 4],
["Coogee Beach", -33.923036, 151.259052, 5],
["Cronulla Beach", -34.028249, 151.157507, 3],
["Manly Beach", -33.80010128657071, 151.28747820854187, 2],
["Maroubra Beach", -33.950198, 151.259302, 1],
];
function setMarkers(map) {
// Adds markers to the map.
// Marker sizes are expressed as a Size of X,Y where the origin of the image
// (0,0) is located in the top left of the image.
// Origins, anchor positions and coordinates of the marker increase in the X
// direction to the right and in the Y direction down.
const image = {
url: "https://developers.google.com/maps/documentation/javascript/examples/full/images/beachflag.png",
// This marker is 20 pixels wide by 32 pixels high.
size: new google.maps.Size(20, 32),
// The origin for this image is (0, 0).
origin: new google.maps.Point(0, 0),
// The anchor for this image is the base of the flagpole at (0, 32).
anchor: new google.maps.Point(0, 32),
};
// Shapes define the clickable region of the icon. The type defines an HTML
// <area> element 'poly' which traces out a polygon as a series of X,Y points.
// The final coordinate closes the poly by connecting to the first coordinate.
const shape = {
coords: [1, 1, 1, 20, 18, 20, 18, 1],
type: "poly",
};
for (let i = 0; i < beaches.length; i++) {
const beach = beaches[i];
new google.maps.Marker({
position: { lat: beach[1], lng: beach[2] },
map,
icon: image,
shape: shape,
title: beach[0],
zIndex: beach[3],
});
}
}
window.initMap = initMap;
ลองใช้ตัวอย่าง
กำลังแปลงออบเจ็กต์ MarkerImage รายการเป็นประเภท Icon
Maps JavaScript API เวอร์ชัน 3.10 มีการกำหนดไอคอนที่ซับซ้อนเป็นวัตถุ MarkerImage รายการ มีการเพิ่ม Object Literal ของ Icon ในเวอร์ชัน 3.10 และแทนที่ MarkerImage ตั้งแต่เวอร์ชัน 3.11 เป็นต้นไป
ลิเทอรัลออบเจ็กต์ Icon รองรับพารามิเตอร์เดียวกันกับ MarkerImage ซึ่งช่วยให้คุณแปลง MarkerImage เป็น Icon ได้อย่างง่ายดายโดยการนำตัวสร้างออก รวมพารามิเตอร์ก่อนหน้าใน {} และเพิ่มชื่อพารามิเตอร์แต่ละรายการ เช่น
var image = new google.maps.MarkerImage(
    place.icon,
    new google.maps.Size(71, 71),
    new google.maps.Point(0, 0),
    new google.maps.Point(17, 34),
    new google.maps.Size(25, 25));
becomes
var image = {
  url: place.icon,
  size: new google.maps.Size(71, 71),
  origin: new google.maps.Point(0, 0),
  anchor: new google.maps.Point(17, 34),
  scaledSize: new google.maps.Size(25, 25)
};
Optimize markers
Optimization enhances performance by rendering many markers as a single static element. This is useful in cases where a large number of markers is required. By default, the Maps JavaScript API will decide whether a marker will be optimized. When there is a large number of markers, the Maps JavaScript API will attempt to render markers with optimization. Not all Markers can be optimized; in some situations, the Maps JavaScript API may need to render Markers without optimization. Disable optimized rendering for animated GIFs or PNGs, or when each marker must be rendered as a separate DOM element. The following example shows creating an optimized marker:
var marker = new google.maps.Marker({
    position: myLatlng,
    title:"Hello World!",
    optimized: true
});
ทำให้เครื่องหมายเข้าถึงได้
คุณทำให้เครื่องหมายเข้าถึงได้โดยเพิ่มเหตุการณ์ Click Listener และตั้งค่า optimized เป็น false Listener การคลิกจะทำให้เครื่องหมายมีความหมายของปุ่ม ซึ่งเข้าถึงได้โดยใช้การนำทางด้วยแป้นพิมพ์ โปรแกรมอ่านหน้าจอ และอื่นๆ ใช้ตัวเลือก title เพื่อแสดงข้อความที่เข้าถึงได้สำหรับเครื่องหมาย
ในตัวอย่างต่อไปนี้ เครื่องหมายแรกจะได้รับการโฟกัสเมื่อกดแท็บ จากนั้นคุณจะใช้ปุ่มลูกศรเพื่อย้ายไปมาระหว่างเครื่องหมายได้ กด Tab อีกครั้งเพื่อดำเนินการต่อผ่านตัวควบคุมแผนที่ส่วนที่เหลือ หากเครื่องหมายมีหน้าต่างข้อมูล คุณสามารถเปิดเครื่องหมายได้โดยคลิกที่เครื่องหมาย หรือโดยกดแป้น Enter หรือแป้นเว้นวรรคเมื่อเลือกเครื่องหมาย เมื่อหน้าต่างข้อมูลปิดลง โฟกัสจะกลับไปที่เครื่องหมายที่เกี่ยวข้อง
TypeScript
// The following example creates five accessible and
// focusable markers.
function initMap(): void {
const map = new google.maps.Map(
document.getElementById("map") as HTMLElement,
{
zoom: 12,
center: { lat: 34.84555, lng: -111.8035 },
}
);
// Set LatLng and title text for the markers. The first marker (Boynton Pass)
// receives the initial focus when tab is pressed. Use arrow keys to
// move between markers; press tab again to cycle through the map controls.
const tourStops: [google.maps.LatLngLiteral, string][] = [
[{ lat: 34.8791806, lng: -111.8265049 }, "Boynton Pass"],
[{ lat: 34.8559195, lng: -111.7988186 }, "Airport Mesa"],
[{ lat: 34.832149, lng: -111.7695277 }, "Chapel of the Holy Cross"],
[{ lat: 34.823736, lng: -111.8001857 }, "Red Rock Crossing"],
[{ lat: 34.800326, lng: -111.7665047 }, "Bell Rock"],
];
// Create an info window to share between markers.
const infoWindow = new google.maps.InfoWindow();
// Create the markers.
tourStops.forEach(([position, title], i) => {
const marker = new google.maps.Marker({
position,
map,
title: `${i + 1}. ${title}`,
label: `${i + 1}`,
optimized: false,
});
// Add a click listener for each marker, and set up the info window.
marker.addListener("click", () => {
infoWindow.close();
infoWindow.setContent(marker.getTitle());
infoWindow.open(marker.getMap(), marker);
});
});
}
declare global {
interface Window {
initMap: () => void;
}
}
window.initMap = initMap;
JavaScript
// The following example creates five accessible and
// focusable markers.
function initMap() {
const map = new google.maps.Map(document.getElementById("map"), {
zoom: 12,
center: { lat: 34.84555, lng: -111.8035 },
});
// Set LatLng and title text for the markers. The first marker (Boynton Pass)
// receives the initial focus when tab is pressed. Use arrow keys to
// move between markers; press tab again to cycle through the map controls.
const tourStops = [
[{ lat: 34.8791806, lng: -111.8265049 }, "Boynton Pass"],
[{ lat: 34.8559195, lng: -111.7988186 }, "Airport Mesa"],
[{ lat: 34.832149, lng: -111.7695277 }, "Chapel of the Holy Cross"],
[{ lat: 34.823736, lng: -111.8001857 }, "Red Rock Crossing"],
[{ lat: 34.800326, lng: -111.7665047 }, "Bell Rock"],
];
// Create an info window to share between markers.
const infoWindow = new google.maps.InfoWindow();
// Create the markers.
tourStops.forEach(([position, title], i) => {
const marker = new google.maps.Marker({
position,
map,
title: `${i + 1}. ${title}`,
label: `${i + 1}`,
optimized: false,
});
// Add a click listener for each marker, and set up the info window.
marker.addListener("click", () => {
infoWindow.close();
infoWindow.setContent(marker.getTitle());
infoWindow.open(marker.getMap(), marker);
});
});
}
window.initMap = initMap;
ลองใช้ตัวอย่าง
ทำให้เครื่องหมายเคลื่อนไหว
คุณสามารถทำให้เครื่องหมายเคลื่อนไหวเพื่อแสดงการเคลื่อนไหวแบบไดนามิกในหลากหลายสถานการณ์ได้ หากต้องการระบุวิธีที่เครื่องหมายเคลื่อนไหว ให้ใช้พร็อพเพอร์ตี้ animation ของเครื่องหมายประเภท google.maps.Animation ระบบรองรับค่า Animation ต่อไปนี้
-
DROPบ่งชี้ว่าเครื่องหมายควรวางจากด้านบนของแผนที่ไปยังตำแหน่งสุดท้ายเมื่อวางบนแผนที่ครั้งแรก ภาพเคลื่อนไหวจะหยุดเมื่อเครื่องหมายไม่มีการใช้งาน และanimationจะเปลี่ยนกลับไปเป็นnullโดยปกติแล้ว ภาพเคลื่อนไหวประเภทนี้มักจะระบุไว้ระหว่างการสร้างMarker -
BOUNCEระบุว่าเครื่องหมายควรตีกลับที่ตำแหน่ง เครื่องหมายตีกลับจะตีกลับต่อไปจนกว่าจะมีการตั้งค่าพร็อพเพอร์ตี้animationเป็นnullอย่างชัดเจน
คุณเริ่มภาพเคลื่อนไหวบนตัวทำเครื่องหมายที่มีอยู่ได้โดยเรียกใช้ setAnimation() ในออบเจ็กต์ Marker
TypeScript
// The following example creates a marker in Stockholm, Sweden using a DROP
// animation. Clicking on the marker will toggle the animation between a BOUNCE
// animation and no animation.
let marker: google.maps.Marker;
function initMap(): void {
const map = new google.maps.Map(
document.getElementById("map") as HTMLElement,
{
zoom: 13,
center: { lat: 59.325, lng: 18.07 },
}
);
marker = new google.maps.Marker({
map,
draggable: true,
animation: google.maps.Animation.DROP,
position: { lat: 59.327, lng: 18.067 },
});
marker.addListener("click", toggleBounce);
}
function toggleBounce() {
if (marker.getAnimation() !== null) {
marker.setAnimation(null);
} else {
marker.setAnimation(google.maps.Animation.BOUNCE);
}
}
declare global {
interface Window {
initMap: () => void;
}
}
window.initMap = initMap;
JavaScript
// The following example creates a marker in Stockholm, Sweden using a DROP
// animation. Clicking on the marker will toggle the animation between a BOUNCE
// animation and no animation.
let marker;
function initMap() {
const map = new google.maps.Map(document.getElementById("map"), {
zoom: 13,
center: { lat: 59.325, lng: 18.07 },
});
marker = new google.maps.Marker({
map,
draggable: true,
animation: google.maps.Animation.DROP,
position: { lat: 59.327, lng: 18.067 },
});
marker.addListener("click", toggleBounce);
}
function toggleBounce() {
if (marker.getAnimation() !== null) {
marker.setAnimation(null);
} else {
marker.setAnimation(google.maps.Animation.BOUNCE);
}
}
window.initMap = initMap;
ลองใช้ตัวอย่าง
หากมีเครื่องหมายจำนวนมาก คุณอาจไม่ต้องการวางเครื่องหมายเหล่านั้นลงในแผนที่พร้อมกันทั้งหมด คุณใช้ setTimeout() เพื่อเว้นระยะห่างระหว่างภาพเคลื่อนไหวของตัวทำเครื่องหมายได้โดยใช้รูปแบบตามที่แสดงด้านล่าง
function drop() {
  for (var i =0; i < markerArray.length; i++) {
    setTimeout(function() {
      addMarkerMethod();
    }, i * 200);
  }
}
ทำให้เครื่องหมายลากได้
หากต้องการอนุญาตให้ผู้ใช้ลากเครื่องหมายไปยังตำแหน่งอื่นบนแผนที่ ให้ตั้งค่า draggable เป็น true ในตัวเลือกเครื่องหมาย
var myLatlng = new google.maps.LatLng(-25.363882,131.044922);
var mapOptions = {
  zoom: 4,
  center: myLatlng
}
var map = new google.maps.Map(document.getElementById("map"), mapOptions);

// Place a draggable marker on the map
var marker = new google.maps.Marker({
    position: myLatlng,
    map: map,
    draggable:true,
    title:"Drag me!"
});
การปรับแต่งเครื่องหมายเพิ่มเติม
สําหรับเครื่องหมายที่ปรับแต่งได้ทั้งหมด โปรดดูตัวอย่างป๊อปอัปที่กําหนดเอง
หากต้องการส่วนขยายเพิ่มเติมเกี่ยวกับคลาสของมาร์กเกอร์ การจัดการและคลัสเตอร์เครื่องหมาย และการปรับแต่งการวางซ้อน โปรดดูไลบรารีโอเพนซอร์ส
เนื้อหาของหน้าเว็บนี้ได้รับอนุญาตภายใต้ใบอนุญาตที่ต้องระบุที่มาของครีเอทีฟคอมมอนส์ 4.0 และตัวอย่างโค้ดได้รับอนุญาตภายใต้ใบอนุญาต Apache 2.0 เว้นแต่จะระบุไว้เป็นอย่างอื่น โปรดดูรายละเอียดที่นโยบายเว็บไซต์ Google Developers Java เป็นเครื่องหมายการค้าจดทะเบียนของ Oracle และ/หรือบริษัทในเครือ
อัปเดตล่าสุด 2024-07-26 UTC