
Page Summary
-
This documentation guides you through adding a basic Google Map to your Android app using the Maps SDK.
-
You'll learn how to integrate a
SupportMapFragmentorMapViewas a container for the map within your layout. -
The guide covers implementing the
OnMapReadyCallbackto interact with theGoogleMapobject once it's ready. -
Finally, it provides a basic example of adding a marker to the map at a specific location (Null Island).
This topic describes how to add a basic map to an Android app after you have configured the project to use the Maps SDK for Android. After adding a map, you can change the map type and features.
Overview
The Maps SDK for Android provides several classes your app can use to manage the lifecycle, functionality, and data of a map. The classes support user interactions based on the Android UI model, such as setting the initial state of the map, and responding to gesture input from the user at runtime.
The main interface and classes for handling maps:
GoogleMap— The entry point for managing the underlying map features and data. Your app can only access aGoogleMapobject after it has been retrieved from aSupportMapFragmentorMapViewobject.SupportMapFragment— A fragment for managing the lifecycle of aGoogleMapobject.MapView— A view for managing the lifecycle of aGoogleMapobject.OnMapReadyCallback— A callback interface that handles events and user interaction for theGoogleMapobject.
A GoogleMap object automatically performs these operations:
- Connecting to the Google Maps service.
- Downloading map tiles.
- Displaying tiles on the device screen.
- Displaying various controls such as pan and zoom.
- Responding to pan and zoom gestures by moving the map and zooming in or out.
To use a GoogleMap object in your app, you must use either a
SupportMapFragment or MapView object as a container object for the map and
then retrieve the GoogleMap object from the container. Because the container
classes derive from either an Android fragment or view, they provide the map
with the lifecycle management and UI capabilities of their Android base classes.
The SupportMapFragment class is the more modern and common container for a
GoogleMap object.
View the code
The following code is from the full Java activity used in this topic when adding a fragment statically. The Android project was created from the Empty project template, and then updated based on the project configuration guide. After performing the steps in this topic, your code may differ based on the project template.
  package com.example.mapsetup;

  import androidx.appcompat.app.AppCompatActivity;

  import android.os.Bundle;

  import com.google.android.gms.maps.GoogleMap;
  import com.google.android.gms.maps.OnMapReadyCallback;
  import com.google.android.gms.maps.SupportMapFragment;
  import com.google.android.gms.maps.model.LatLng;
  import com.google.android.gms.maps.model.MarkerOptions;

  // Implement OnMapReadyCallback.
  public class MainActivity extends AppCompatActivity implements OnMapReadyCallback {

      @Override
      protected void onCreate(Bundle savedInstanceState) {
          super.onCreate(savedInstanceState);
          // Set the layout file as the content view.
          setContentView(R.layout.activity_main);

          // Get a handle to the fragment and register the callback.
          SupportMapFragment mapFragment = (SupportMapFragment) getSupportFragmentManager()
                  .findFragmentById(R.id.map);
          mapFragment.getMapAsync(this);

      }

      // Get a handle to the GoogleMap object and display marker.
      @Override
      public void onMapReady(GoogleMap googleMap) {
          googleMap.addMarker(new MarkerOptions()
                  .position(new LatLng(0, 0))
                  .title("Marker"));
      }
  }
To add a map
This section describes how to add a basic map by using a fragment as a map container; however, you can use a view instead. For an example, see RawMapViewDemoActivity on Github.
The basic steps:
To get the SDK, obtain an API key, and add the required frameworks, follow the steps in:
Add a
SupportMapFragmentobject to the activity that will handle the map. You can add the fragment statically or dynamically.Implement the
OnMapReadyCallbackinterface.Set the layout file as the content view.
If you added the fragment statically, get a handle to the fragment.
Register the callback.
Get a handle to the
GoogleMapobject.
Add a SupportMapFragment object
You can add a SupportMapFragment object to your app statically or dynamically.
The simplest way is to add it statically. If you add the fragment dynamically,
you can perform additional actions on the fragment, such as removing and
replacing it at runtime.
To add a fragment Statically
In the layout file of the activity that will handle the map:
- Add a
fragmentelement. - Add the name declaration
xmlns:map="http://schemas.android.com/apk/res-auto". This enables the use ofmapscustom XML attributes. - In the
fragmentelement, set theandroid:nameattribute tocom.google.android.gms.maps.SupportMapFragment. - In the
fragmentelement, add theandroid:idattribute and set it to the the R.id.map resource ID (@+id/map).
For example, here's a complete layout file that includes a fragment element:
<?xml version="1.0" encoding="utf-8"?>
<fragment xmlns:android="http://schemas.android.com/apk/res/android"
    xmlns:map="http://schemas.android.com/apk/res-auto"
    android:name="com.google.android.gms.maps.SupportMapFragment"
    android:id="@+id/map"
    android:layout_width="match_parent"
    android:layout_height="match_parent"/>
To add a fragment dynamically
In the activity:
- Create a
SupportMapFragmentinstance. - Commit a transaction that adds the fragment to the activity. For more info, see Fragment Transactions.
For example:
Kotlin
val mapFragment = SupportMapFragment.newInstance()
supportFragmentManager
    .beginTransaction()
    .add(R.id.my_container, mapFragment)
    .commit()
Java
SupportMapFragment mapFragment = SupportMapFragment.newInstance();
getSupportFragmentManager()
    .beginTransaction()
    .add(R.id.my_container, mapFragment)
    .commit();
Implement the OnMapReadyCallback interface
Update the activity declaration as follows:
Kotlin
class MainActivity : AppCompatActivity(), OnMapReadyCallback {

    // ...
}
Java
class MainActivity extends AppCompatActivity implements OnMapReadyCallback {
    // ...
}
Set the content view
In the onCreate method of your activity, call the
setContentView method and set the layout file as the content view.
For example, if the layout file is named main.xml:
Kotlin
override fun onCreate(savedInstanceState: Bundle?) {
    super.onCreate(savedInstanceState)
    setContentView(R.layout.main)
}
Java
@Override
protected void onCreate(@Nullable Bundle savedInstanceState) {
    super.onCreate(savedInstanceState);
    setContentView(R.layout.main);
}
Get a handle to the fragment and register the callback
To get a handle to the fragment, call the
FragmentManager.findFragmentByIdmethod and pass it the resource ID of the fragment in your layout file. If you added the fragment dynamically, skip this step because you already retrieved the handle.Call the
getMapAsyncmethod to set the callback on the fragment.
For example, if you added the fragment statically:
Kotlin
val mapFragment = supportFragmentManager
    .findFragmentById(R.id.map) as SupportMapFragment
mapFragment.getMapAsync(this)
Java
SupportMapFragment mapFragment = (SupportMapFragment) getSupportFragmentManager()
    .findFragmentById(R.id.map);
mapFragment.getMapAsync(this);
Get a handle to the GoogleMap object
Use the onMapReady callback method to get a handle to the
GoogleMapobject. The callback is triggered when the map is ready to receive
user input. It provides a non-null instance of the GoogleMap class that you
can use to update the map.
In this example the onMapReady callback retrieves a handle to the GoogleMap
object and then a marker is added to the map:
Kotlin
override fun onMapReady(googleMap: GoogleMap) {
    googleMap.addMarker(
        MarkerOptions()
            .position(LatLng(0.0, 0.0))
            .title("Marker")
    )
}
Java
@Override
public void onMapReady(GoogleMap googleMap) {
    googleMap.addMarker(new MarkerOptions()
        .position(new LatLng(0, 0))
        .title("Marker"));
}
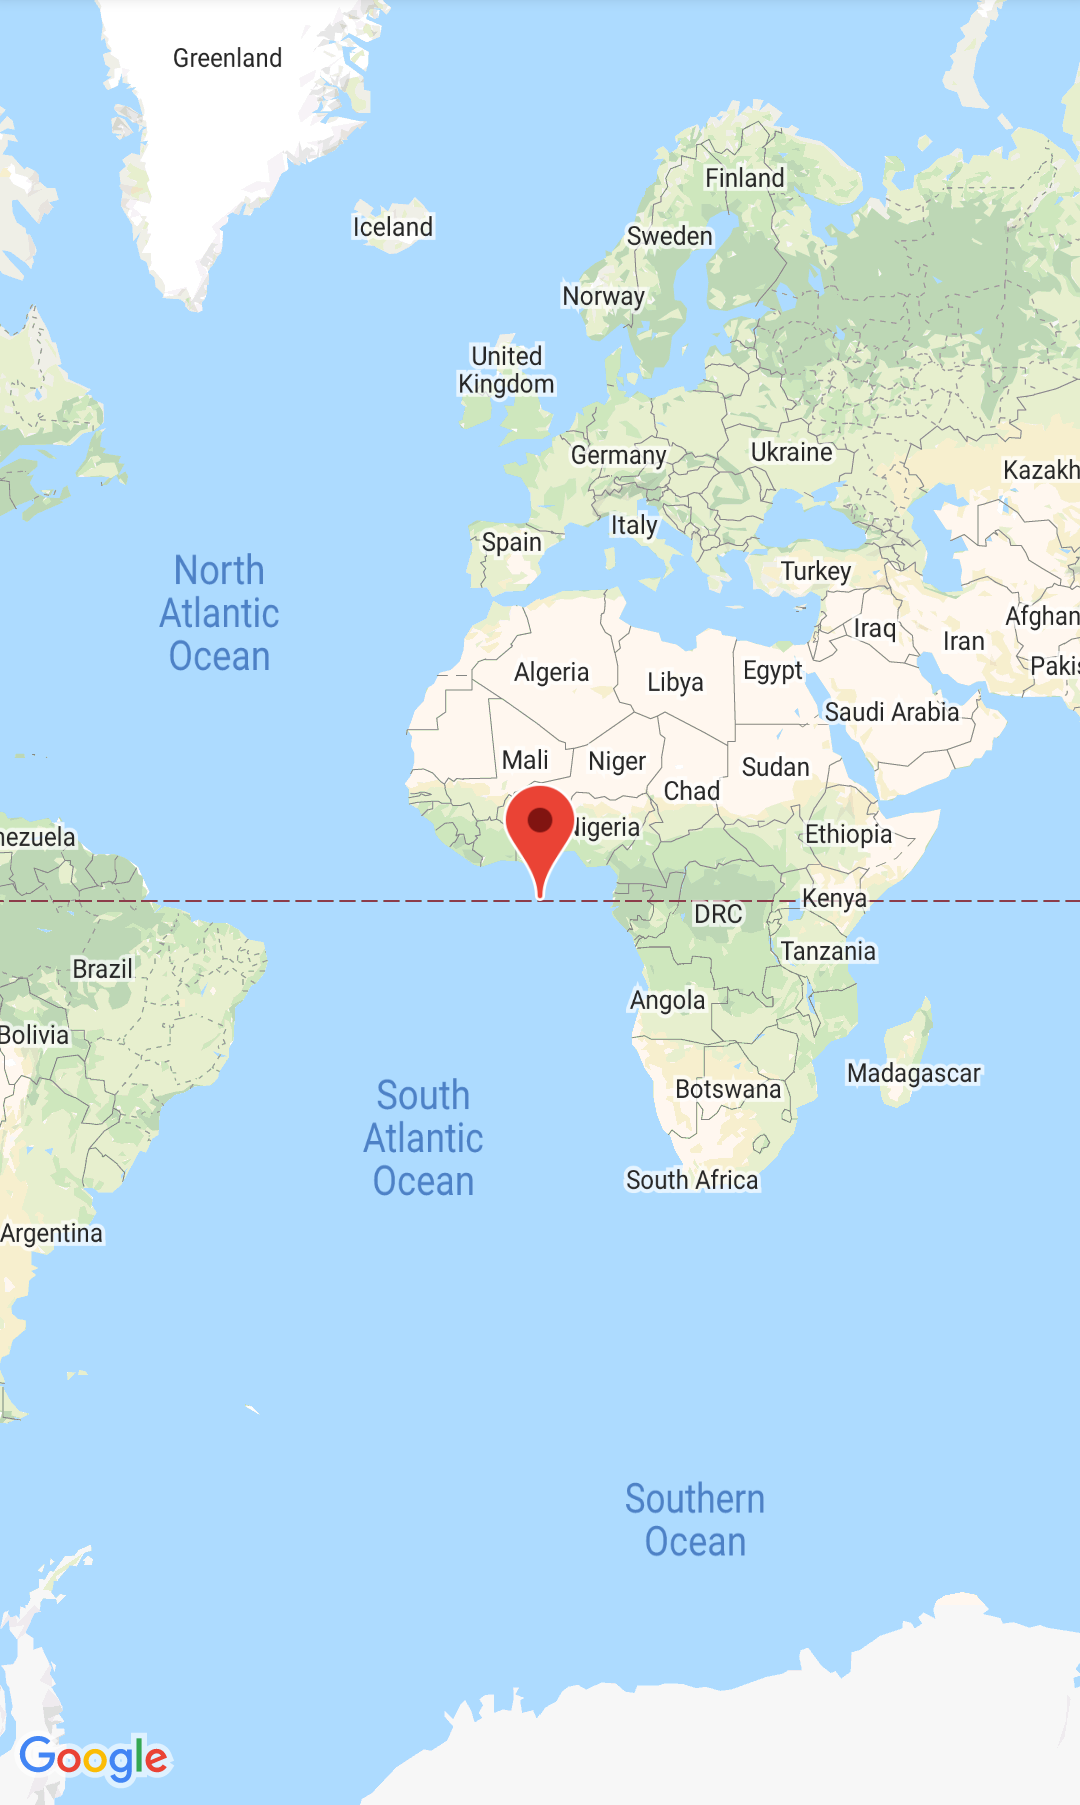
When you successfully build and run the app, it will display a map with a marker on Null Island (zero degrees latitude and zero degrees longitude).
View the code for the complete activity:
What's next
After you complete these steps, you can configure the map settings.