Page Summary
-
Migrate Floodlight tags to a server container in Google Tag Manager to enhance page load speed by offloading client-side processing.
-
Set up Conversion Linker, Floodlight Counter, and Floodlight Sales tags within the server container, utilizing data from your Campaign Manager 360 account.
-
Optionally implement Enhanced Conversions for improved tracking accuracy by collecting and assigning user-provided data.
-
Floodlight Sales tags can be customized to pull revenue data from various sources and incorporate custom parameters for detailed reporting.
-
Thoroughly validate your server-side Floodlight setup using Tag Assistant to ensure accurate data transmission and prevent duplication by removing redundant web container tags.
This article is for developers who want to move Floodlight tags from a Tag Manager web container into a server container.
Server-side Tag Manager allows you to move your Google Floodlight sales and counter tags from the web page to the server. Moving these tags to the server will reduce the amount of code you have to run in the page, and helps improve page load times.
Before you begin
Before you can move tags into your server, make sure that you have:
- Admin access to Google Tag Manager and Floodlight
- Set up and installed Google Tag Manager
- Set up a server container
- Set up the Google Analytics: GA4 client
Step 1: Set up the Conversion Linker tag
Your Floodlight account can only send conversion data to Google Tag Manager when you have set up a Conversion Linker tag.
If you already have a Conversion Linker tag configured in your server container, you can skip this step.
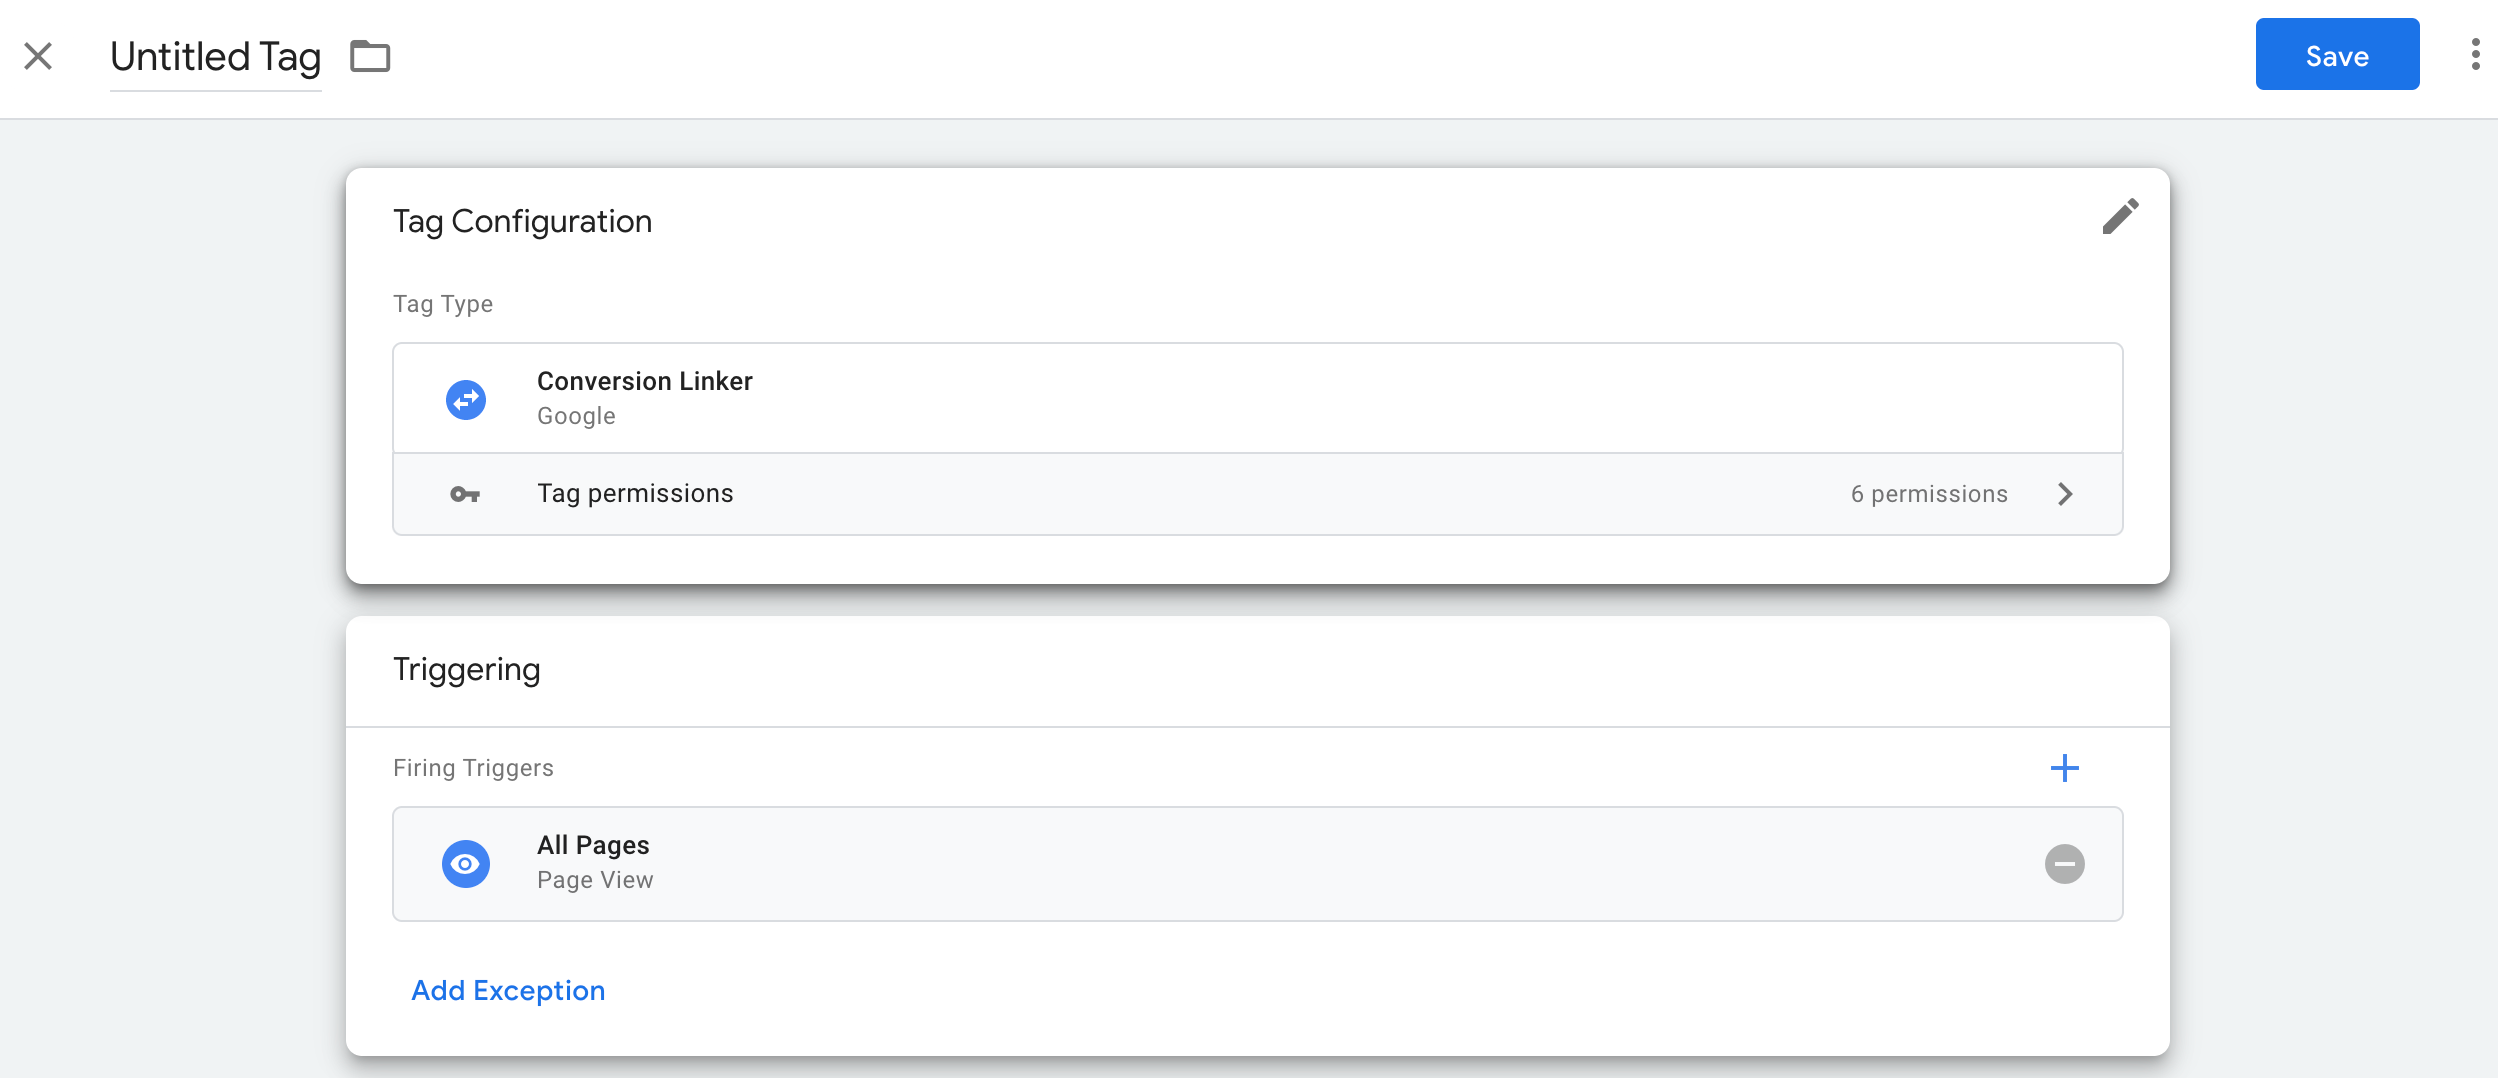
To set up the Conversion Linker tag:
- From your server container workspace, open the Tags menu on the left side of the page.
- Click New to add a new tag.
- Select the Conversion Linker tag type.
- Set up the trigger that will cause the Conversion Linker server-side tag to
fire.
In most cases, the All pages trigger is the best option. - Name the tag and click Save.
Step 2: Set up Floodlight tags
Google Tag Manager supports Floodlight Counter tags and Floodlight Sales tags in the server container.
Floodlight Counter
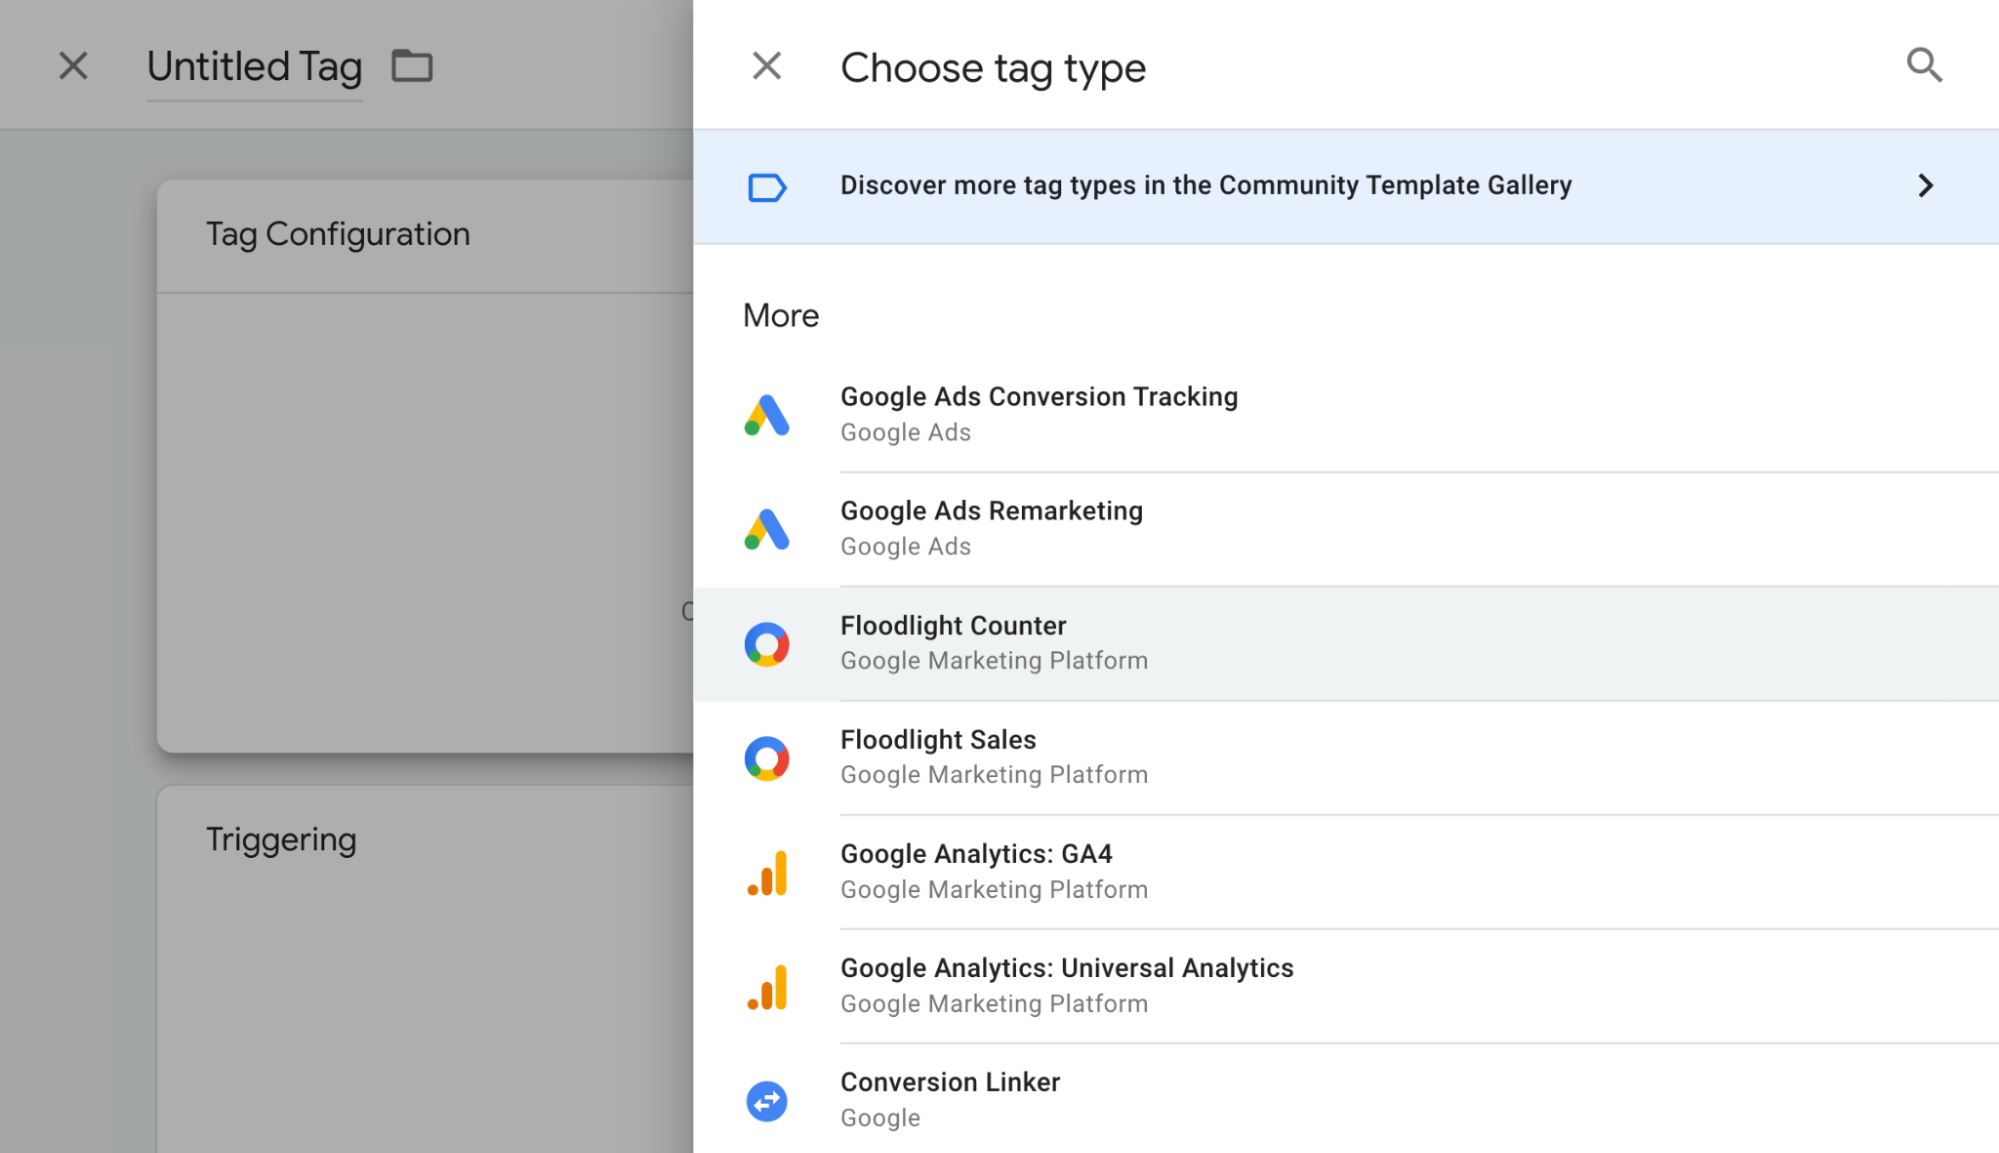
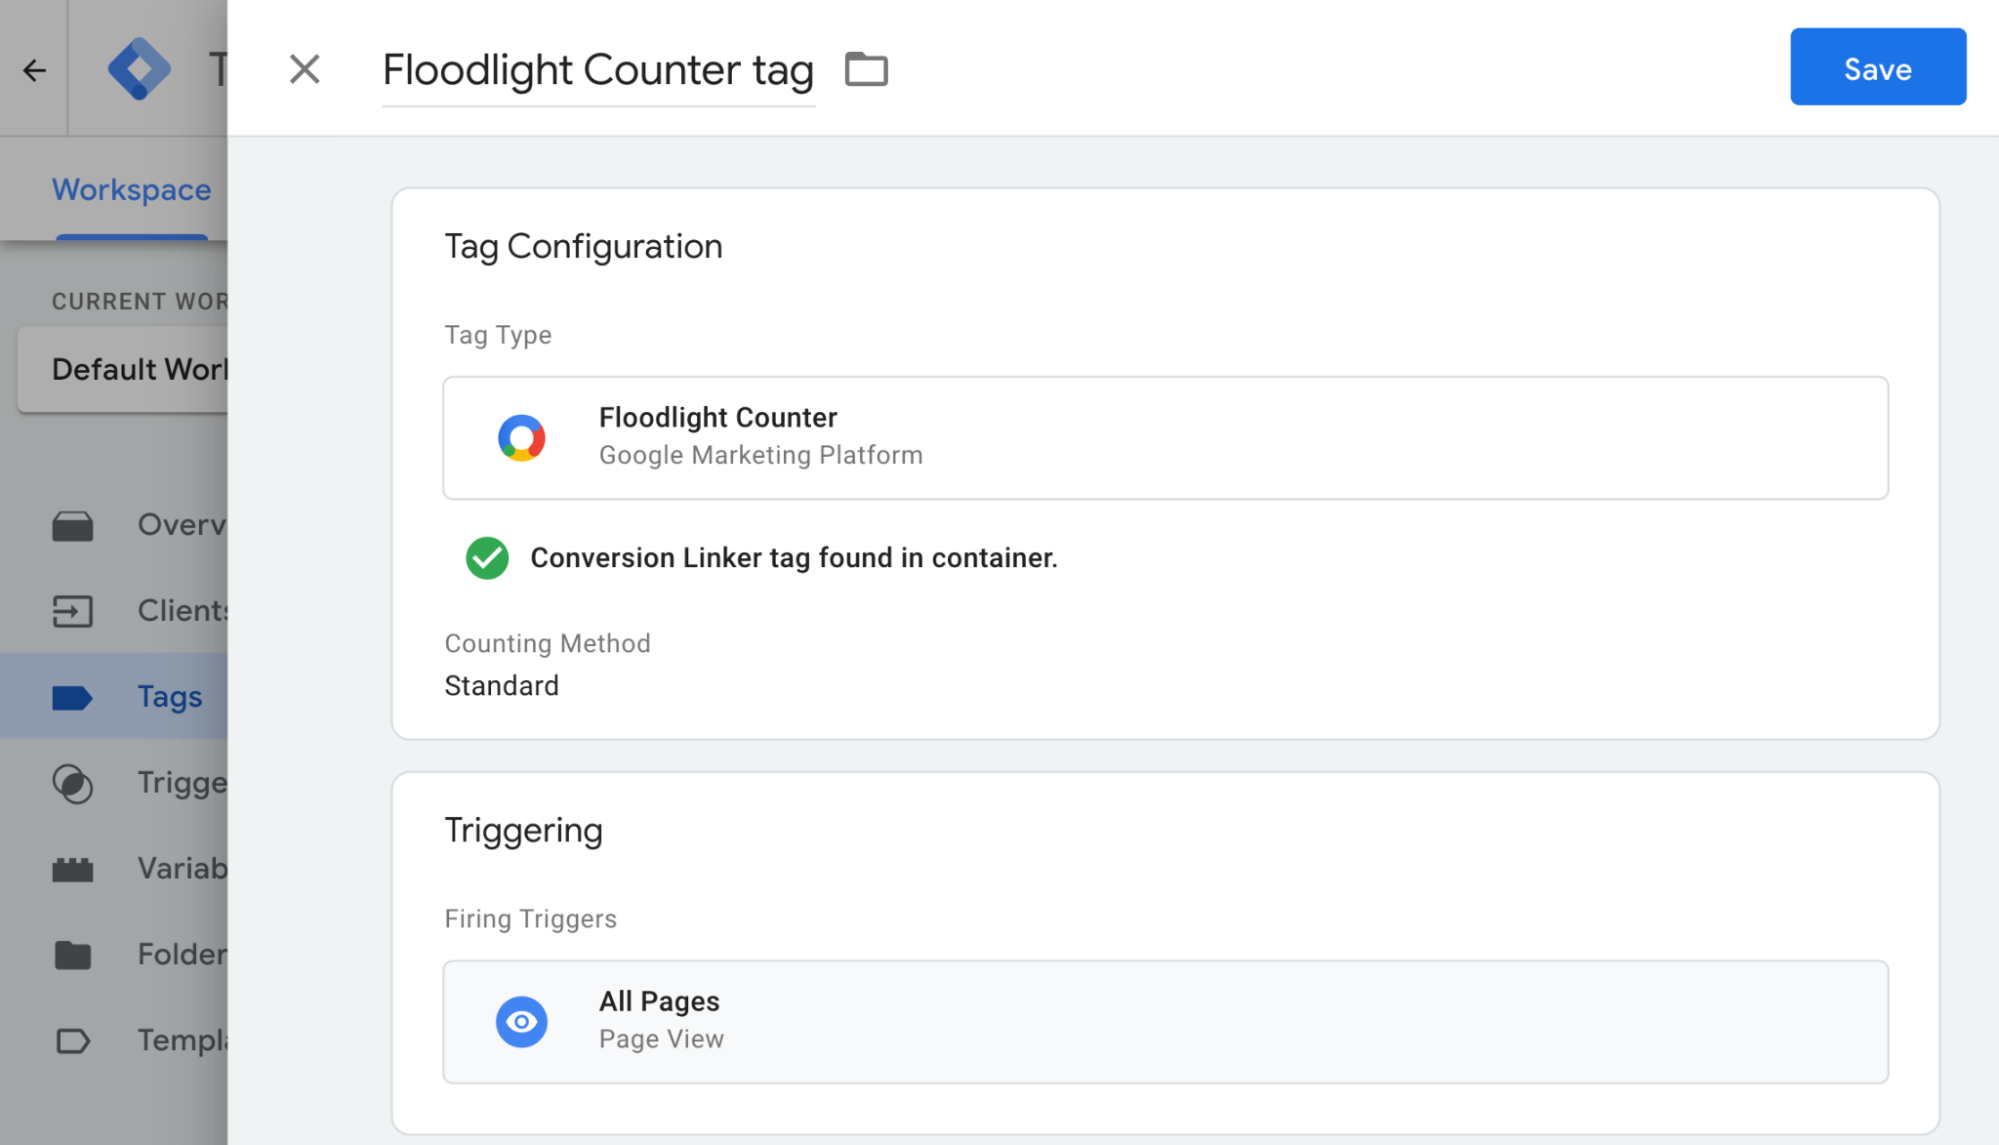
To set up a Floodlight Counter tag:
- In your server container workspace, select the Tags menu on the left side of the page.
- Click New to add a new tag.
Select the Floodlight Counter tag type.
To gather the values required for tag configuration, open another browser window and sign in to Campaign Manager 360. Click Advertisers, and then click the name of the advertiser. Enter these values in your new Tag Manager Floodlight Counter tag:
- Advertiser ID: The Advertiser ID will appear on the advertiser
details page just below the advertiser's name. This value is
also found as the value of
src=in a generated Floodlight tag snippet. - Group Tag String: In the Activity table, identify the activity
you want to work with and find the group tag string listed in
a column to the right. This is also found as the value of
type=in a generated Floodlight tag snippet. - Activity Tag String: In the Activity table, identify the
activity you want to work with and find the activity tag
string listed in a column to the right. This is also found as
the value of
cat=in a generated Floodlight tag snippet.
- Advertiser ID: The Advertiser ID will appear on the advertiser
details page just below the advertiser's name. This value is
also found as the value of
Set the desired Counting Method:
- Standard: Counts every conversion.
- Unique: Counts the first conversion for each unique user during each 24-hour day, from midnight to midnight, Eastern Time (US).
- Per session: Counts one conversion per user per session. Session length is set by the site where the Floodlight tag is deployed.
Open the Choose a trigger window.
In the Trigger configuration menu, select a trigger. In most cases, the All Pages is the best option.

Enter a tag name and click Save.
Floodlight Sales
To set up a Floodlight Sales tag:
- In your server container workspace, select the Tags menu on the left side of the page.
- Click New to add a new tag.
Select the Floodlight Sales tag type. Note: The Floodlight Sales tag automatically collects the following values automatically from the corresponding ecommerce field:
*   Order ID (Transaction ID)
*   Revenue (Value)
To gather the values required for tag configuration, open another browser window and sign in to Campaign Manager 360. Click Advertisers, and then click the name of the advertiser. Enter these values in your new Tag Manager Floodlight Counter tag:
- Advertiser ID: The Advertiser ID will appear on the advertiser
details page just below the advertiser's name. This value is
also found as the value of
src=in a generated Floodlight tag snippet. - Group Tag String: In the Activity table, identify the activity
you want to work with and find the group tag string listed in
a column to the right. This is also found as the value of
type=in a generated Floodlight tag snippet. - Activity Tag String: In the Activity table, identify the
activity you want to work with and find the activity tag
string listed in a column to the right. This is also found as
the value of
cat=in a generated Floodlight tag snippet.
- Advertiser ID: The Advertiser ID will appear on the advertiser
details page just below the advertiser's name. This value is
also found as the value of
Set the desired Counting Method:
- Standard: Counts every conversion.
- Unique: Counts the first conversion for each unique user during each 24-hour day, from midnight to midnight, Eastern Time (US).
- Per session: Counts one conversion per user per session. Session length is set by the site where the Floodlight tag is deployed.
Open the Choose a trigger window.
In the Trigger configuration menu, select a trigger. In most cases, the All Pages is the best option.
Enter a tag name and click Save.
Optional: Set up conversions with cart data
You can configure your Floodlight Sales tag to send conversions with cart data. Conversions with cart data provide granular details of conversion events at the SKU level. By sending the Merchant ID, feed label, feed language, and product data, you can identify which items are selling well and which ones might need more support.
Step 1 of 2: Send cart data parameters to the data layer
Create a JSON
ecommerce.purchase.productsarray. For example:'ecommerce':{ 'purchase':{ 'products': [{ 'id': 'String', 'price': 'Floating point', 'quantity': Integer, 'country': 'String', // Optional 'accountId': 'String' // Optional }, { … // Each SKU (product) in the transaction // is in its own array item. }] } }'Use the
dataLayer.pushmethod to make the data available in Google Tag Manager's data layer.
Step 2 of 2: Configure the Floodlight Sales tag
Event data
- In your server container, open your Floodlight Sales tag.
- Under "Product Reporting", select the Provide product-level sales data checkbox.
- Select Event data from the "Data Source" drop-down. Google Tag
Manager will automatically use the data pushed to the data layer in the
ecommerce.purchase.productsarray. - Click Save.
Custom configuration
- In your server container, open your Floodlight Sales tag.
- Under "Product Reporting", select the Provide product-level sales data checkbox.
- Select Custom configuration from the "Data Source" drop-down.
- Select a dynamic variable or manually enter a value on the following
fields:
- Product Data: The formatted string containing the product data.
- Merchant ID: The Google Merchant Center ID of the retailer.
- Feed Label: A label identifying the specific feed used within Google Merchant Center.
- Feed Language: The language of the feed, represented using the 2-letter ISO 639-1 code.
- Click Save.
Optional: Set up Enhanced Conversions
If you don't use Enhanced Conversions, skip ahead to Validate your setup.
To configure Enhanced Conversions follow the steps below.
Set up a user-provided data variable
There are 3 ways in which you can implement enhanced conversions in Tag Manager. You only need to choose one option to collect user-provided data.
| Automatic collection | Manual configuration | Code configuration | |
|---|---|---|---|
| Collection method | Automatically collects user-provided data based on the code of your
website. If you need control over where to collect inputs, opt for a manual or code setup. |
Specify select CSS properties or JavaScript variables to collect
user-provided data. If you need to take control over data formatting and hashing, opt for code configuration. |
Add a code snippet on your website that sends hashed customer data
for matching. This method is the best choice for maximizing the accuracy of enhanced conversions by letting you send consistently formatted data whenever your conversion tag fires. |
| Complexity | Simple | Medium | Complex |
| Skills | No special skills needed | HTML and CSS | Web development |
Automatic collection
- In your web container, open the Variables menu.
- Create a new User-Defined Variable of the type User-Provided Data.
- Set the Type to Automatic collection.
- Name the variable, for example,
My user-defined data. - Click Save.
Manual configuration
- In your web container, open the Variables menu.
- Create a new User-Defined Variable of the type User-Provided Data.
- Set the Type to Manual configuration.
For the relevant user data field that you would like to provide via enhanced conversions, add a new or existing variable.
To specify an element from the DOM, create a New Variable > Variable Configuration > DOM Element.
Under Selection Method, you can either use a CSS Selector or ID. Tip: If your CSS variables change frequently, add an HTML ID to your site and use the ID variable.
Enter the CSS selector or ID name. You can leave the Attribute name field blank.
Name and Save the DOM Element variable. Your screen will then return to the User-Provided Data settings.
Name the User-Provided Data variable, for example,
My user-defined data.Click Save.
Code configuration
Step 1: Identify and define your enhanced conversions variables
You can either send unhashed data, which Google will hash before the data
reaches the servers, or pre-hashed data. If you decide to send pre-hashed data,
please encode the data using hex-encoded SHA256. In either case, provide at
least one of the following fields: email or phone_ number.
To push unhashed data to the data layer:
On your website, store user-provided data as key-value pairs in a JavaScript variable. For example:
var leadsUserData = {
  'email': 'name@example.com',
  'phone_number': '+11234567890',
  'address': {
    first_name: 'John',
    last_name: 'Doe',
    street: '123 Lemon',
    city: 'Some city',
    region: 'CA',
    country: 'US',
    postal_code: '12345',
  },
};
Send the user data together with an event using dataLayer.push(). For example:
<script>
  dataLayer.push({
    'event': 'formSubmitted',
    'leadsUserData': {
      'email': 'name@example.com',
      'phone_number': '+11234567890',
      'address': {
         first_name: 'John',
         last_name: 'Doe',
         street: '123 Lemon',
         city: 'Some city',
         region: 'CA',
         country: 'US',
        postal_code: '12345',
       },
     },
  });
<script>
The variable leadsUserData is now available in Google Tag Manager.
To push pre-hashed data to the data layer:
On your website, hash user-provided using hex-encoded SHA256. The key for encoded data needs to start with
sha256_. For example:{'sha256_email_address':await hashEmail(email.trim()), }Send the user data together with an event using
dataLayer.push(). The example below shows a data layer implementation that assumes you have written a hashing function yourself, which you run asynchronously.<script> dataLayer.push({ 'event': 'formSubmitted', 'leadsUserData': { 'sha256_email_address': await hashEmail(email.trim()), 'sha256_phone_number': await hashPhoneNumber(phoneNumber), 'address': { sha265_first_name: await hashString(firstname), sha256_last_name: await hashString(lastname), sha256_street: await hashString(streetAddress), postal_code: '12345', }, }, }); <script>
The variable leadsUserData is now available in Google Tag Manager.
Step 2: Create the user-provided data variable
- In your web container, open the Variables menu.
- Create a new User-Defined Variable of the type User-Provided Data.
- Set the Type to Code.
- For the relevant user data field you want to provide, click the drop-down menu and select New Variable.
- Under Choose Variable Type, select Data Layer Variable.
- In the Data Layer Variable, reference your stored user data. For example,
leadsUserData. - Name and Save the Data Layer variable. Your screen will then return to the User-Provided Data settings.
- Name the User-Provided Data variable, for example,
My user-defined data. - Click Save.
Assign the variable to the Google tag
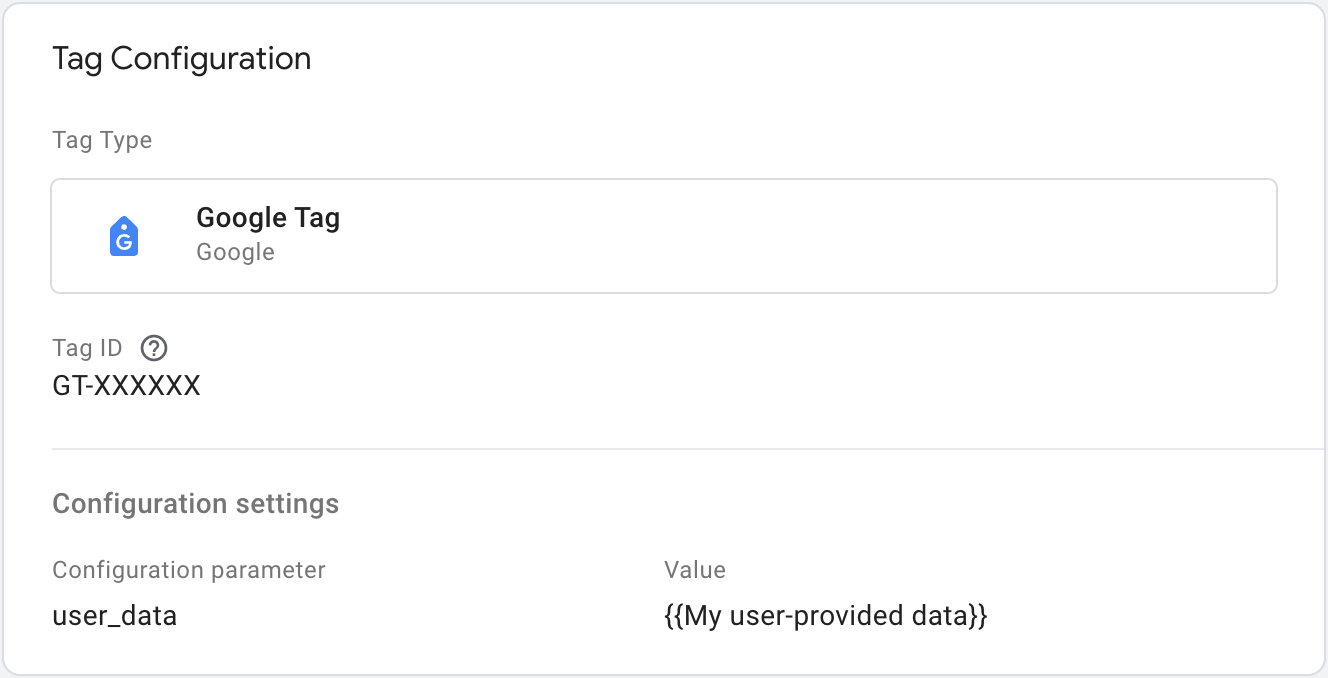
- In your web container, open the Tags menu.
- Edit the Google tag you use to send data to the tagging server.
- Under Configuration settings, add a new Configuration parameter
called
user_data. Set the Value to the User-provided Data variable, for example,{{My user-provided data}}. Save your changes. Your tag should look like this:
Configure server-side Floodlight tag
In your server container enable Enhanced Conversions by setting up the Floodlight Sales or Floodlight Counter tag.
![]()
User-provided data lets you improve the accuracy of your measurement by sending hashed first-party user-provided data from your website. To implement this, you need to agree to the user-provided data terms and policies in your Search Ads 360 account first.
If you want to include user-provided data for enhanced conversions for web, Personally Identifiable Information (PII) should be sent from the website (client-side container), which is, in turn, dispatched by server-side container. If you don't want the PII to be dispatched by a specific tag, use "Transformations" to redact the PII for the selected tags.
Optional: Revenue Value
The Floodlight Sales tag uses the event's value parameter as the default
amount to calculate revenue. To specify a different basis to calculate the
revenue value, you need to set up a variable to pull data from your database in
and assign it to your Floodlight Sales tag.
To create a new variable:
- In your server container, open the Variables menu.
- Create a new user-defined variable for the data input. For example, if you want to use a value from a Firestore database, create a {{Firestore Lookup}} variable.
- Specify the data sources for the variable.
- Name the variable, for example, "Profit lookup" and Save it.
To use the variable in the Floodlight Sales tag:
- In your server container, open the Tags menu.
- Edit the Floodlight Sales tag.
In the Unique Parameters section:
- For Data Source, pick Custom configuration.
- For Revenue, select the variable you've created before.
- For Order ID, enter an ID or use a variable to dynamically populate the order ID.

Save the tag.
Optional: Custom parameters
You can pass custom
fields from
your web page to the Google Marketing Platform, such as match_id.
Google Tag Manager
To configure custom fields for Floodlight, prepend x-dc- to a
parameter name:
- In your web container, open the Tags menu.
- Edit a GA4 Event tag or create a new one.
In Event Parameters, add the parameter name. To signal that it goes to Floodlight, prepend
x-dc-. For example, if you would normally sendmatch_id, change it tox-dc-match_id.
Save the tag.
gtag.js
To configure custom fields for Floodlight, prepend x-dc- to the event
parameter name:
  gtag('event', 'purchase', {
      'x-dc-match_id': [MATCH_ID],
      ...
  })
Step 3: Validate your setup
Once you start sending data with the server container, you can check to see if it’s working properly by following these steps:
- Open your website.
- In your Google Tag Manager server container, select Preview. Tag Assistant will start and load your server container.
- The Tags tab shows you all tags that have fired. Make sure to check if the tag you configured fired.
- The Console tab shows any errors that occurred during the data transmission to the server container. Check for errors and resolve them.
For more help with debugging Tag Manager containers see preview and debug help.
Next steps
Once your Floodlight tag works as intended, you can remove any equivalent Floodlight tags in a web container to avoid data duplication.