
Page Summary
-
This guide provides a step-by-step process for integrating a Google Map into a new Android application using Android Studio.
-
Developers need basic Android knowledge, Android Studio Hedgehog or later, and an Android device or emulator running Android 5.0+ with Google APIs.
-
The process involves creating a new project, adding a Google Maps Activity, setting up a Google Cloud project with an API key, and securely adding the API key to the app.
-
The resulting application will display a basic Google Map, allowing for further customization and interaction.
-
Developers can find more advanced resources for map customization and features within the guide.
Create an Android app that displays a map by using the Google Maps Views template for Android Studio. If you have an existing Android Studio project that you'd like to set up, see Set up an Android Studio project.
This quickstart is intended for developers who are familiar with basic Android development with Kotlin or Java.
About the development environment
This quickstart was developed using Android Studio Hedgehog and the Android Gradle plugin version 8.2.
Set up an Android device
To run an app that uses the Maps SDK for Android, you must deploy it to an Android device or Android emulator that is based on Android 6.0 or higher and includes the Google APIs.
- To use an Android device, follow the instructions at Run apps on a hardware device.
- To use an Android emulator, you can create a virtual device and install the emulator by using the Android Virtual Device (AVD) Manager that comes with Android Studio.
Create a Google Maps project in Android Studio
The procedure to create a Google Maps project in Android Studio was changed in the Flamingo and later releases of Android Studio.
Open Android Studio, and click New Project in the Welcome to Android Studio window.
In the New Project window, under the Phone and Tablet category, select No Activity, and then click Next.
Complete the New Project form:
Set Language to Java or Kotlin. Both languages are fully supported by the Maps SDK for Android. To learn more about Kotlin, see Develop Android apps with Kotlin.
Set Minimum SDK to an SDK version compatible with your test device. You must select a version greater than the minimum version required by the Maps SDK for Android version 20.0.x, which is Android API Level 23 ("Marshmallow"; Android 6.0) or higher. See the Release Notes for the latest information on the SDK version requirements.
Set the Build configuration language to Kotlin DSL or Groovy DSL. Snippets for both build configurations languages are shown in the following procedures.
Click Finish.
Android Studio starts Gradle and builds the project. This may take some time.
Add the Google Maps Views Activity:
- Right-click on the
appfolder in your project. Select New > Google > Google Maps Views Activity.
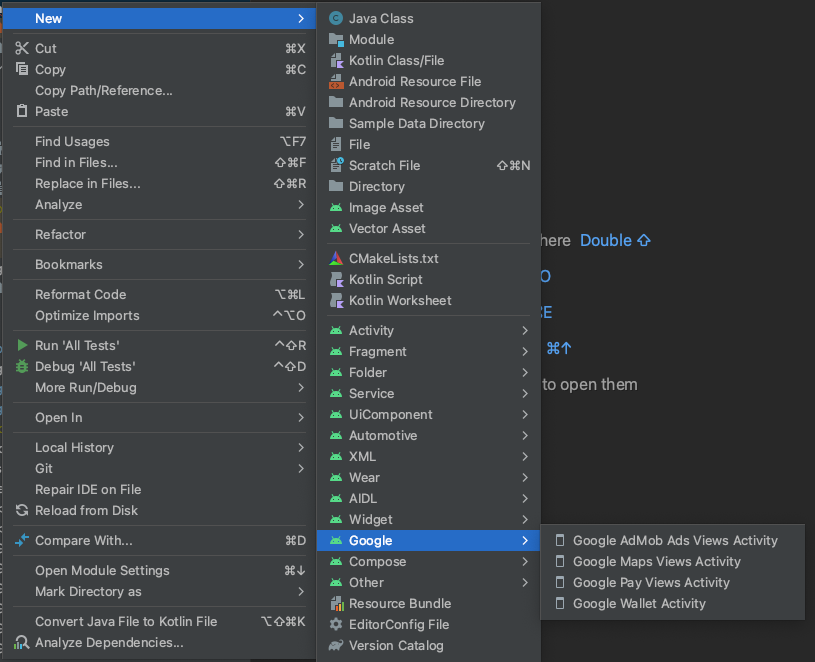
In the New Android Activity dialog box, select the Launcher Activity checkbox.
Select Finish.
For more information, see Add code from a template
- Right-click on the
When the build is finished, Android Studio opens the
AndroidManifest.xmlandMapsActivityfiles. Your activity may have a different name, but it is the one you configured during setup.
Set up your Google Cloud project
Complete the required Cloud console setup steps by clicking through the following tabs:
Step 1
Console
-
In the Google Cloud console, on the project selector page, click Create Project to begin creating a new Cloud project.
-
Make sure that billing is enabled for your Cloud project. Confirm that billing is enabled for your project.
Google Cloud offers a $0.00 charge trial. The trial expires at either end of 90 days or after the account has accrued $300 worth of charges, whichever comes first. Cancel anytime. For more information, see Billing account credits and Billing.
Cloud SDK
gcloud projects create "PROJECT"
Read more about the Google Cloud SDK , Cloud SDK installation , and the following commands:
Step 2
To use Google Maps Platform, you must enable the APIs or SDKs you plan to use with your project.
Console
Cloud SDK
gcloud services enable \
    --project "PROJECT" \
    "maps-android-backend.googleapis.com"
Read more about the Google Cloud SDK , Cloud SDK installation , and the following commands:
Step 3
This step only goes through the API Key creation process. If you use your API Key in production, we strongly recommend that you restrict your API key. You can find more information in the product-specific Using API Keys page.
The API key is a unique identifier that authenticates requests associated with your project for usage and billing purposes. You must have at least one API key associated with your project.
To create an API key:
Console
-
Go to the Google Maps Platform > Credentials page.
-
On the Credentials page, click Create credentials > API key.
The API key created dialog displays your newly created API key. -
Click Close.
The new API key is listed on the Credentials page under API keys.
(Remember to restrict the API key before using it in production.)
Cloud SDK
gcloud services api-keys create \
    --project "PROJECT" \
    --display-name "DISPLAY_NAME"
Read more about the Google Cloud SDK , Cloud SDK installation , and the following commands:
Add the API key to your app
This section describes how to store your API key so that it can be securely referenced by
your app. You shouldn't check your API key into your version control system, so we recommend
storing it in the secrets.properties file, which is located in the root directory of your
project. For more information about the secrets.properties file, see
Gradle properties files.
To streamline this task, we recommend that you use the Secrets Gradle Plugin for Android.
To install the Secrets Gradle Plugin for Android and store your API key:
-
In Android Studio, open your root-level
build.gradlefile and add the following code to thedependencieselement underbuildscript.Groovy
buildscript {
    dependencies {
        // ...
        classpath "com.google.android.libraries.mapsplatform.secrets-gradle-plugin:secrets-gradle-plugin:2.0.1"
    }
}
Kotlin
buildscript {
    dependencies {
        // ...
        classpath("com.google.android.libraries.mapsplatform.secrets-gradle-plugin:secrets-gradle-plugin:2.0.1")
    }
}
-
Open your app-level
build.gradlefile and add the following code to thepluginselement.Groovy
plugins {
    id 'com.android.application'
    // ...
    id 'com.google.android.libraries.mapsplatform.secrets-gradle-plugin'
}
Kotlin
plugins {
    id("com.android.application")
    // ...
    id("com.google.android.libraries.mapsplatform.secrets-gradle-plugin")
}
- If you use Android Studio, sync your project with Gradle.
-
Open the
local.propertiesin your project level directory, and then add the following code. ReplaceYOUR_API_KEYwith your API key.MAPS_API_KEY=YOUR_API_KEY
-
In your
AndroidManifest.xmlfile, go tocom.google.android.geo.API_KEYand update theandroid:valueattribute as follows:<meta-data android:name="com.google.android.geo.API_KEY" android:value="${MAPS_API_KEY}" />Note:
com.google.android.geo.API_KEYis the recommended metadata name for the API key. A key with this name can be used to authenticate to multiple Google Maps-based APIs on the Android platform, including the Maps SDK for Android. For backwards compatibility, the API also supports the namecom.google.android.maps.v2.API_KEY. This legacy name allows authentication to the Android Maps API v2 only. An application can specify only one of the API key metadata names. If both are specified, the API throws an exception.
Look at the code
Examine the code supplied by the template. In particular, look at the following files in your Android Studio project.
Maps activity file
The maps activity file is the main activity for the app, and
contains the code to manage and display the map. By default, the file that
defines the activity is named MapsActivity.java or if you set Kotlin as the
language for your app, MapsActivity.kt.
The main elements of the maps activity:
The
SupportMapFragmentobject manages the lifecycle of the map and is the parent element of the app's UI.The
GoogleMapobject provides access to the map data and view. This is the main class of the Maps SDK for Android. The Map Objects guide describes theSupportMapFragmentandGoogleMapobjects in more detail.The
moveCamerafunction centers the map at theLatLngcoordinates for Sydney Australia. The first settings to configure when adding a map are usually the map location and camera settings; such as viewing angle, map orientation, and zoom level. See the Camera and View guide for details.The
addMarkerfunction adds a marker to the coordinates for Sydney. See the Markers guide for details.
Module Gradle file
The Module build.gradle.kts file includes the following maps dependency, which
is required by the Maps SDK for Android.
dependencies {

    // Maps SDK for Android
    implementation(libs.play.services.maps)
}
To learn more about managing the Maps dependency, see Versioning.
XML layout file
The activity_maps.xml file is the XML layout file that defines the
structure of the app's UI. The file is located in the res/layout directory.
The activity_maps.xml file declares a fragment that includes the following
elements:
tools:contextsets the default activity of the fragment toMapsActivity, which is defined in the maps activity file.android:namesets the class name of the fragment toSupportMapFragment, which is the fragment type used in the maps activity file.
The XML layout file contains the following code:
<fragment xmlns:android="http://schemas.android.com/apk/res/android"
    xmlns:map="http://schemas.android.com/apk/res-auto"
    xmlns:tools="http://schemas.android.com/tools"
    android:id="@+id/map"
    android:name="com.google.android.gms.maps.SupportMapFragment"
    android:layout_width="match_parent"
    android:layout_height="match_parent"
    tools:context=".MapsActivity" />
Deploy and run the app
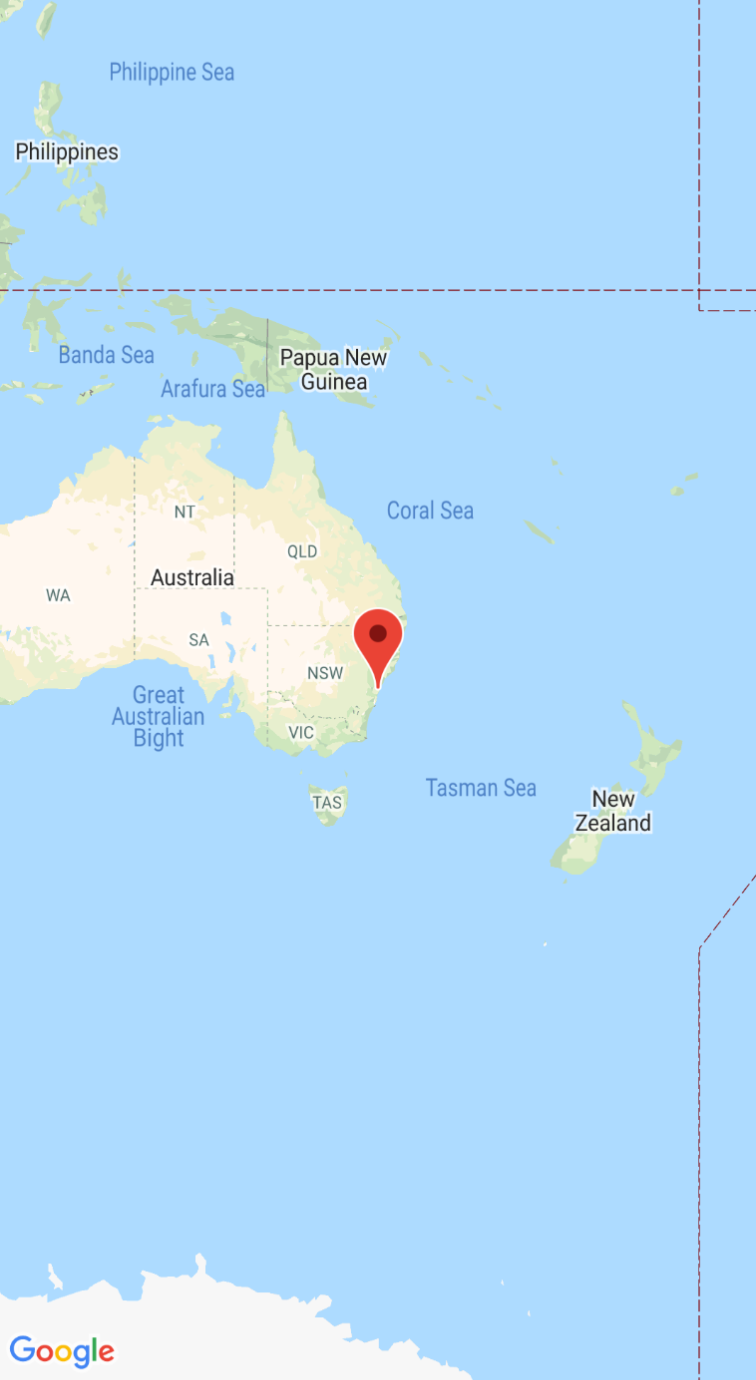
When you run the app successfully, it will display a map that is centered on Sydney Australia with a marker on the city as seen in the following screenshot.
To deploy and run the app:
- In Android Studio, click the Run menu option (or the play button icon) to run your app.
- When prompted to choose a device, choose one of the following options:
- Select the Android device that's connected to your computer.
- Alternatively, select the Launch emulator radio button and choose the virtual device that you set up.
- Click OK. Android Studio will start Gradle to build your app, and then display the results on your device or emulator. It can take several minutes before the app launches.
Next steps
Set up a map: This document describes how to set up the initial and runtime settings for your map, such as the camera position, map type, UI components, and gestures.
Add a map to your Android app (Kotlin): This codelab walks you through an app that demonstrates some additional features of the Maps SDK for Android.
Use the Maps Android KTX library: This Kotlin extensions (KTX) library lets you take advantage of several Kotlin language features while using the Maps SDK for Android.