A test ID lets you run the full presentation flow and verify that your service accepts and validates a Google Wallet response, without needing a real government-issued ID. You create the test ID by scanning a simulated ePassport into Google Wallet on your sandbox device.
Choose your path RP, VR, or In-Person
Steps on this page
Step A: Set up your two Android devices
You need two Android devices: the first device simulates an ePassport, and the second device is where you add the ID pass derived from the simulated ePassport.
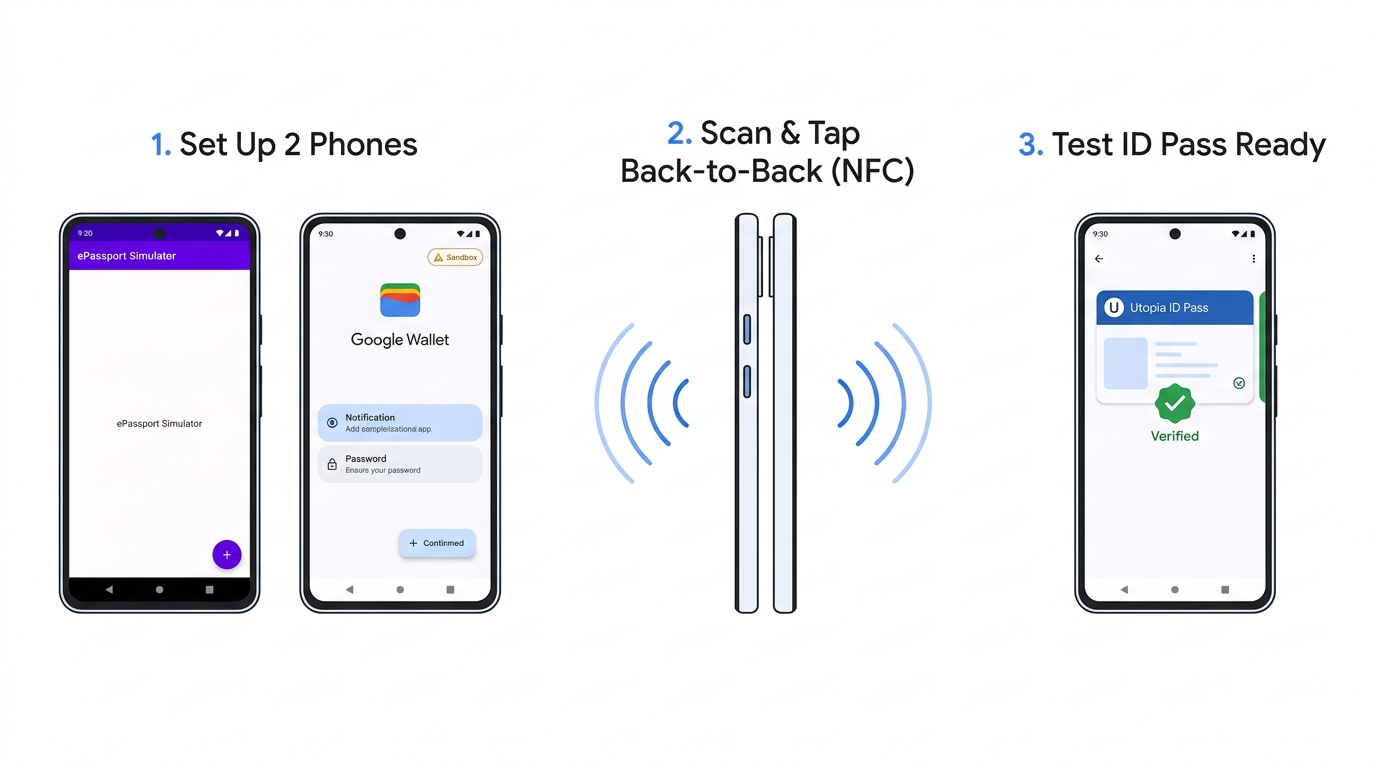
| Requirement | Device 1: Passport simulator | Device 2: Your test Google Wallet |
|---|---|---|
| Role | Simulates an NFC ePassport | Holds the test ID pass in Google Wallet |
| Setup steps |
|
|
Step B: Add the test ID to Wallet
- On Device 2, open the Google Wallet app and tap Add to Wallet.
- Select ID > ID pass.
- Follow the on-screen instructions to completion:
- MRZ scan: On Device 1, tap the entry you created earlier in the simulator app, and manually enter the passport details on Device 2.
- NFC scan: Hold Device 1 (with the simulator app's MRZ page open) against the back of Device 2 during the NFC scan.
Step C: View details in Wallet
- Once your ID pass is in Google Wallet, tap the three-dot menu in the top right corner and select ID pass Info.
- Tap through the options listed and verify they work as expected—in particular, open the card details section to confirm the attributes match the entry you created.
Step D: Use your test ID in requests
Your sandbox test ID is an ID pass. For Google Wallet to match and present
it, your OpenID4VP dcql_query must request an ID pass document type:
com.google.wallet.idcard.1(ID pass), ororg.iso.23220.photoid.1(ID pass using the ISO photo ID document type)
A request that only asks for a mobile Driver's License
(org.iso.18013.5.1.mDL) will not match the Utopia test ID pass. To accept any
eligible credential, use the multi-credential dcql_query sample in
Step 3.A: Format the Request,
and check Supported Credentials & Attributes
for the available claim paths.
Test your new ID pass in two stages:
- Quick check with the Web Verifier Tool: Open verifier.multipaz.org on Device 2 (or on a desktop browser for cross-device QR testing) and request an ID pass. This confirms your device and test ID pass are working before you test your own code.
- Test against your own service: Once you complete Step 3, send a
request signed with the
sandbox test keys
(Relying Parties) or your Sandbox Root CA (Verifier Registrars), and configure
your server to validate
issuerAuthagainst the Utopia Sandbox cert.
Troubleshooting
| Issue | What to check |
|---|---|
| TapAndPay Environment is missing in Settings | Your Google Account isn't on the sandbox allowlist yet. See Step 1.A: Request sandbox access. |
| ID pass option isn't shown under Add to Wallet | Confirm Device 2 is in sandbox mode (Step 1.C), signed in with a @gmail.com account, not rooted/debug, and running Play services 24.38.xx+. |
| "No digital ID available" when testing a request | Confirm your request includes com.google.wallet.idcard.1 or org.iso.23220.photoid.1, and that Device 2 is still in sandbox mode. |
| Request fails before the Google Wallet consent screen | Verify your JWS signature, x5c certificate header, client_id (x509_hash), and gw_rp_metadata_bytes. |
Delete your test ID pass from Wallet
Tap the three-dot menu in the top right of the ID screen and select Delete, then follow the prompts to remove the test ID pass.