
Spring Integration은 MessageChannels을 통해 Messages을 교환하는 메시지 메커니즘을 제공합니다. 채널 어댑터를 사용하여 외부 시스템과 통신합니다.
이 연습에서는 Spring Cloud GCP에서 제공하는 Spring Integration 채널 어댑터를 사용하여 통신하는 두 개의 앱을 만듭니다. 이러한 어댑터를 사용하면 Spring 통합에서 Google Cloud Pub/Sub를 메시지 교환 백엔드로 사용합니다.
Cloud Shell과 Cloud SDK gcloud 명령어를 사용하는 방법을 알아봅니다.
이 튜토리얼에서는 Spring Boot 시작 가이드의 샘플 코드를 사용합니다.
학습할 내용
- Spring Integration 및 Spring Cloud GCP를 사용하여 Google Cloud Pub/Sub로 앱 간에 메시지를 교환하는 방법
필요한 항목
이 튜토리얼을 어떻게 사용하실 계획인가요?
HTML/CSS 웹 앱 빌드 경험을 평가해 주세요.
귀하의 Google Cloud Platform 서비스 사용 경험을 평가해 주세요.
자습형 환경 설정
아직 Google 계정 (Gmail 또는 Google Apps)이 없으면 계정을 만들어야 합니다. Google Cloud Platform 콘솔 (console.cloud.google.com)에 로그인하고 새 프로젝트를 만듭니다.


모든 Google Cloud 프로젝트에서 고유한 이름인 프로젝트 ID를 기억하세요(위의 이름은 이미 사용되었으므로 사용할 수 없습니다). 이 ID는 나중에 이 Codelab에서 PROJECT_ID라고 부릅니다.
그런 다음 Google Cloud 리소스를 사용할 수 있도록 Cloud 콘솔에서 결제를 사용 설정해야 합니다.
이 codelab을 실행하는 과정에는 많은 비용이 들지 않지만 더 많은 리소스를 사용하려고 하거나 실행 중일 경우 비용이 더 들 수 있습니다(이 문서 마지막의 '삭제' 섹션 참조).
Google Cloud Platform 신규 사용자는 $300 상당의 무료 체험판을 사용할 수 있습니다.
Google Cloud Shell
Google Cloud를 노트북에서 원격으로 실행할 수 있지만, 이 Codelab에서는 Cloud에서 실행되는 명령줄 환경인 Google Cloud Shell을 사용합니다.
Google Cloud Shell 활성화하기
GCP 콘솔에서 오른쪽 상단 툴바의 Cloud Shell 아이콘을 클릭합니다.

그런 다음 'Cloud Shell 시작'을 클릭합니다.

환경을 프로비저닝하고 연결하는 데 몇 분 정도 소요됩니다.

가상 머신은 필요한 모든 개발 도구와 함께 로드됩니다. 영구적인 5GB 홈 디렉토리를 제공하고 Google Cloud에서 실행되므로 네트워크 성능과 인증이 크게 개선됩니다. 이 실습에서 대부분의 작업은 브라우저나 Google Chromebook만을 이용하여 수행할 수 있습니다.
Cloud Shell에 연결되면 인증이 완료되었고 프로젝트가 PROJECT_ID로 이미 설정된 것을 확인할 수 있습니다.
Cloud Shell에서 다음 명령어를 실행하여 인증되었는지 확인합니다.
gcloud auth list
명령어 결과
Credentialed accounts:
 - <myaccount>@<mydomain>.com (active)
gcloud config list project
명령어 결과
[core]
project = <PROJECT_ID>
또는 다음 명령어로 설정할 수 있습니다.
gcloud config set project <PROJECT_ID>
명령어 결과
Updated property [core/project].
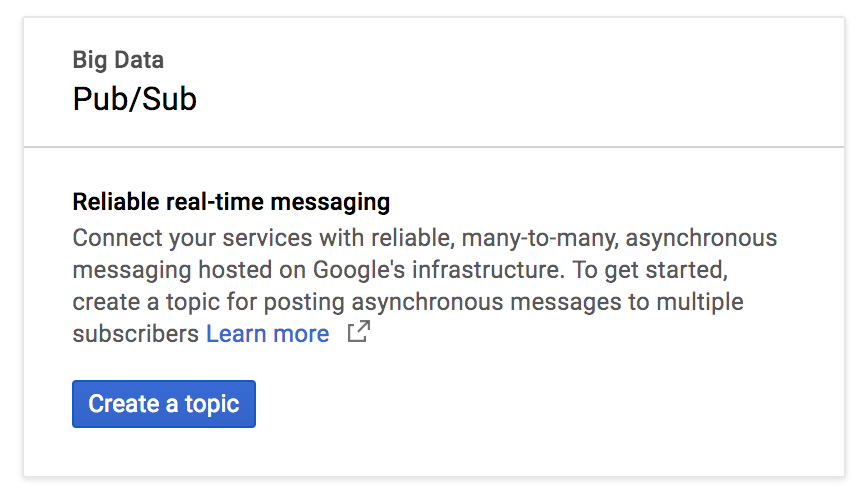
Google Cloud Pub/Sub 주제 페이지로 이동하여 API를 사용 설정합니다.

주제 만들기를 클릭합니다.
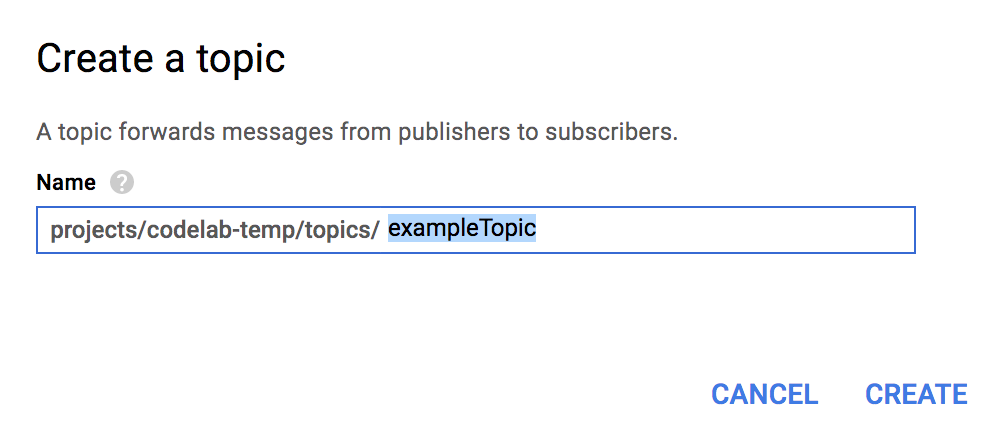
주제 이름으로 exampleTopic를 입력한 다음 만들기를 클릭합니다.
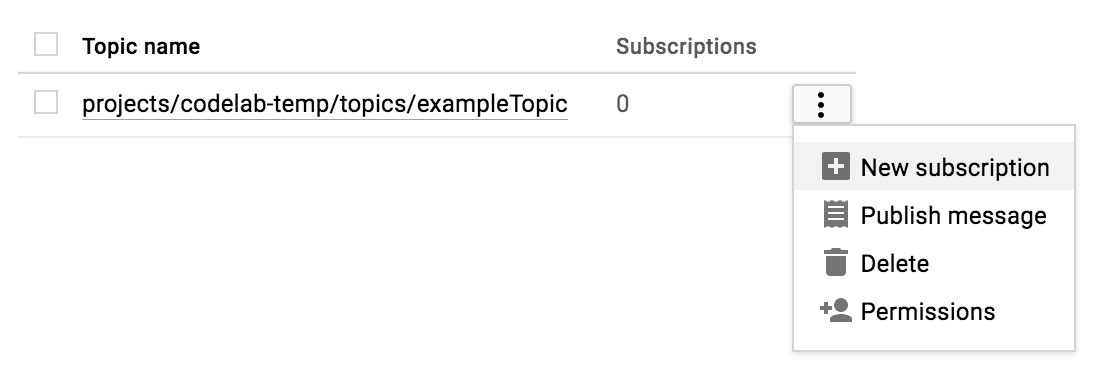
주제를 만든 후 '주제' 페이지에 그대로 있습니다. 방금 만든 주제를 찾아 행 끝에 있는 세로 점 3개를 누르고 새 구독을 클릭합니다.
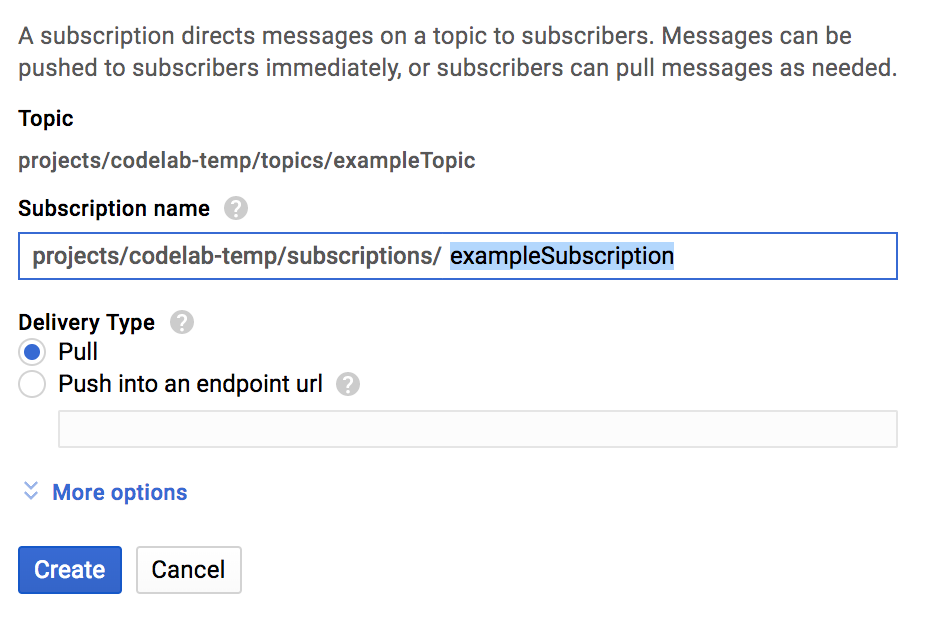
구독 이름 텍스트 상자에 exampleSubscription를 입력하고 만들기를 클릭합니다.
Cloud Shell이 실행되면 명령줄을 사용하여 Spring Initializr로 두 개의 새 Spring Boot 애플리케이션을 생성할 수 있습니다.
$ curl https://start.spring.io/starter.tgz \
  -d bootVersion=2.0.6.RELEASE \
  -d dependencies=web \
  -d baseDir=spring-integration-sender | tar -xzvf -
$ curl https://start.spring.io/starter.tgz \
  -d bootVersion=2.0.6.RELEASE \
  -d baseDir=spring-integration-receiver | tar -xzvf -
이제 메시지 전송 앱을 만들어 보겠습니다. 전송 앱의 디렉터리로 변경합니다.
$ cd spring-integration-sender앱이 채널에 메시지를 작성하도록 하고 싶습니다. 메시지가 채널에 있으면 아웃바운드 채널 어댑터가 이를 선택하여 일반 Spring 메시지에서 Google Cloud Pub/Sub 메시지로 변환하고 Google Cloud Pub/Sub 주제에 게시합니다.
앱이 채널에 쓸 수 있도록 Spring Integration 메시지 게이트웨이를 사용할 수 있습니다. vim, emacs 또는 nano의 텍스트 편집기를 사용하여 DemoApplication 클래스 내에 PubsubOutboundGateway 인터페이스를 선언합니다.
src/main/java/com/example/demo/DemoApplication.java
...
import org.springframework.integration.annotation.MessagingGateway;

@SpringBootApplication
public class DemoApplication {

        ...

        @MessagingGateway(defaultRequestChannel = "pubsubOutputChannel")
        public interface PubsubOutboundGateway {

                void sendToPubsub(String text);
        }
}
이제 채널에 메시지를 보내는 메커니즘이 있지만, 메시지가 채널에 들어간 후에는 어디로 이동할까요?
채널에서 새 메시지를 사용하고 이를 Google Cloud Pub/Sub 주제에 게시하려면 아웃바운드 채널 어댑터가 필요합니다.
src/main/java/com/example/demo/DemoApplication.java
...
import org.springframework.cloud.gcp.pubsub.core.PubSubTemplate;
import org.springframework.context.annotation.Bean;
import org.springframework.integration.annotation.ServiceActivator;
import org.springframework.cloud.gcp.pubsub.integration.outbound.PubSubMessageHandler;
import org.springframework.messaging.MessageHandler;

@SpringBootApplication
public class DemoApplication {

        ...

        @Bean
        @ServiceActivator(inputChannel = "pubsubOutputChannel")
        public MessageHandler messageSender(PubSubTemplate pubsubTemplate) {
                return new PubSubMessageHandler(pubsubTemplate, "exampleTopic");
        }
}
@ServiceActivator 주석으로 인해 이 MessageHandler이 inputChannel의 새 메시지에 적용됩니다. 이 경우 아웃바운드 채널 어댑터 PubSubMessageHandler를 호출하여 Google Cloud Pub/Sub의 exampleTopic 주제에 메시지를 게시합니다.
채널 어댑터가 있으므로 이제 PubsubOutboundGateway 객체를 자동 연결하고 이를 사용하여 채널에 메시지를 쓸 수 있습니다.
src/main/java/com/example/demo/DemoApplication.java
...
import org.springframework.beans.factory.annotation.Autowired;
import org.springframework.web.bind.annotation.PostMapping;
import org.springframework.web.bind.annotation.RequestParam;
import org.springframework.web.servlet.view.RedirectView;

@SpringBootApplication
public class DemoApplication {

...

        @Autowired
        private PubsubOutboundGateway messagingGateway;

        @PostMapping("/postMessage")
        public RedirectView postMessage(@RequestParam("message") String message) {
                this.messagingGateway.sendToPubsub(message);
                return new RedirectView("/");
        }
}
@PostMapping 주석 덕분에 이제 HTTP POST 요청을 수신하는 엔드포인트가 있지만 DemoApplication 클래스에 @RestController 주석을 추가하여 REST 컨트롤러로 표시하지는 않습니다.
src/main/java/com/example/demo/DemoApplication.java
import org.springframework.web.bind.annotation.RestController;

@SpringBootApplication
@RestController
public class DemoApplication {
  ...
}
앱을 실행하려면 필요한 종속 항목을 추가하기만 하면 됩니다.
pom.xml
<project>
  ...
  <!-- Add Spring Cloud GCP Dependency BOM -->
  <dependencyManagement>
        <dependencies>
                <dependency>
                        <groupId>org.springframework.cloud</groupId>
                        <artifactId>spring-cloud-gcp-dependencies</artifactId>
                        <version>1.0.0.RELEASE</version>
                        <type>pom</type>
                        <scope>import</scope>
                </dependency>
        </dependencies>
  </dependencyManagement>

  <dependencies>
        ...
        <!-- Add Pub/Sub Starter -->
        <dependency>
                <groupId>org.springframework.cloud</groupId>
                <artifactId>spring-cloud-gcp-starter-pubsub</artifactId>
        </dependency>

        <!-- Add Spring Integration -->
        <dependency>
                <groupId>org.springframework.integration</groupId>
                <artifactId>spring-integration-core</artifactId>
        </dependency>

  </dependencies>

</project>
전송자 앱을 실행합니다.
# Set the Project ID in environmental variable
$ export GOOGLE_CLOUD_PROJECT=`gcloud config list \
  --format 'value(core.project)'`
$ ./mvnw spring-boot:run
앱은 포트 8080과 엔드포인트 /postMessage에서 메시지가 포함된 POST 요청을 수신 대기하고 있습니다. 이 내용은 나중에 자세히 설명하겠습니다.
Google Cloud Pub/Sub를 통해 메시지를 전송하는 앱을 만들었습니다. 이제 이러한 메시지를 수신하고 처리하는 다른 앱을 만들어 보겠습니다.
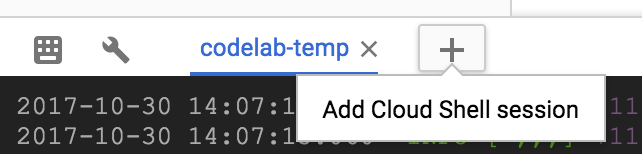
+를 클릭하여 새 Cloud Shell 세션을 엽니다.
그런 다음 새 Cloud Shell 세션에서 디렉터리를 수신자 앱의 디렉터리로 변경합니다.
$ cd spring-integration-receiver이전 앱에서 메시지 게이트웨이 선언은 발신 채널을 만들었습니다. 메시지를 수신하는 데 메시지 게이트웨이를 사용하지 않으므로 수신 메시지가 도착할 자체 MessageChannel를 선언해야 합니다.
src/main/java/com/example/demo/DemoApplication.java
...
import org.springframework.context.annotation.Bean;
import org.springframework.integration.channel.DirectChannel;
import org.springframework.messaging.MessageChannel;

@SpringBootApplication
public class DemoApplication {

        ...

        @Bean
        public MessageChannel pubsubInputChannel() {
                return new DirectChannel();
        }
}
Google Cloud Pub/Sub에서 메시지를 수신하고 이를 pubsubInputChannel로 전달하려면 인바운드 채널 어댑터가 필요합니다.
src/main/java/com/example/demo/DemoApplication.java
...
import org.springframework.beans.factory.annotation.Qualifier;
import org.springframework.cloud.gcp.pubsub.core.PubSubTemplate;
import org.springframework.cloud.gcp.pubsub.integration.inbound.PubSubInboundChannelAdapter;

@SpringBootApplication
public class DemoApplication {
        ...

        @Bean
        public PubSubInboundChannelAdapter messageChannelAdapter(
                        @Qualifier("pubsubInputChannel") MessageChannel inputChannel,
                        PubSubTemplate pubSubTemplate) {
                PubSubInboundChannelAdapter adapter =
                                new PubSubInboundChannelAdapter(pubSubTemplate, "exampleSubscription");
                adapter.setOutputChannel(inputChannel);

                return adapter;
        }
}
이 어댑터는 pubsubInputChannel에 바인딩되고 Google Cloud Pub/Sub exampleSubscription 구독의 새 메시지를 수신합니다.
수신 메시지가 게시되는 채널이 있지만 이러한 메시지를 어떻게 처리해야 할까요?
새 메시지가 pubsubInputChannel에 도착하면 트리거되는 @ServiceActivator로 처리해 보겠습니다.
src/main/java/com/example/demo/DemoApplication.java
...
import org.apache.commons.logging.Log;
import org.apache.commons.logging.LogFactory;
import org.springframework.integration.annotation.ServiceActivator;

@SpringBootApplication
public class DemoApplication {

        ...

        private static final Log LOGGER = LogFactory.getLog(DemoApplication.class);

        @ServiceActivator(inputChannel = "pubsubInputChannel")
        public void messageReceiver(String payload) {
                LOGGER.info("Message arrived! Payload: " + payload);
        }
}
이 경우 메시지 페이로드만 로깅됩니다.
필요한 종속 항목을 추가해야 합니다.
pom.xml
<project>
  ...
  <!-- Add Spring Cloud GCP Dependency BOM -->
  <dependencyManagement>
        <dependencies>
                <dependency>
                        <groupId>org.springframework.cloud</groupId>
                        <artifactId>spring-cloud-gcp-dependencies</artifactId>
                        <version>1.0.0.RELEASE</version>
                        <type>pom</type>
                        <scope>import</scope>
                </dependency>
        </dependencies>
  </dependencyManagement>

  <dependencies>
        ...
        <!-- Add Pub/Sub Starter -->
        <dependency>
                <groupId>org.springframework.cloud</groupId>
                <artifactId>spring-cloud-gcp-starter-pubsub</artifactId>
        </dependency>

        <!-- Add Spring Integration -->
        <dependency>
                <groupId>org.springframework.integration</groupId>
                <artifactId>spring-integration-core</artifactId>
        </dependency>

  </dependencies>

</project>
수신기 앱을 실행합니다.
$ ./mvnw spring-boot:run이제 발신자 앱에 전송하는 메시지가 수신자 앱에 로깅됩니다. 이를 테스트하려면 새 Cloud Shell 세션을 열고 발신자 앱에 HTTP POST 요청을 합니다.
$ curl --data "message=Hello world!" localhost:8080/postMessage그런 다음 수신자 앱이 전송한 메시지를 로깅했는지 확인합니다.
INFO: Message arrived! Payload: Hello world!이 연습의 일부로 만든 구독 및 주제를 삭제합니다.
$ gcloud beta pubsub subscriptions delete exampleSubscription
$ gcloud beta pubsub topics delete exampleTopic
Google Cloud Pub/Sub용 Spring 통합 채널 어댑터를 사용하는 두 개의 Spring Boot 앱을 설정합니다. Google Cloud Pub/Sub API와 상호작용하지 않고 서로 메시지를 교환합니다.
Google Cloud Pub/Sub용 Spring 통합 채널 어댑터를 사용하는 방법을 알아봤습니다.
자세히 알아보기
- Google Cloud Pub/Sub: https://cloud.google.com/pubsub/
- GCP의 Spring 프로젝트: http://cloud.spring.io/spring-cloud-gcp/
- GCP의 Spring GitHub 저장소: https://github.com/spring-cloud/spring-cloud-gcp
- Google Cloud Platform의 Java: https://cloud.google.com/java/
라이선스
이 작업물은 Creative Commons Attribution 2.0 일반 라이선스에 따라 사용이 허가되었습니다.