
OAuth bağlantısı türü, iki endüstri standardı OAuth 2.0 akışını (dolaylı ve yetkilendirme kodu akışları) destekler.
Dolaylı kod akışında Google, yetkilendirme uç noktanızı kullanıcının tarayıcısında açar. Başarılı bir şekilde oturum açtıktan sonra Google'a uzun ömürlü bir erişim jetonu döndürürsünüz. Bu erişim jetonu artık Asistan'dan Action'ınıza gönderilen her isteğe dahil edilir.
Yetkilendirme kodu akışında iki uç noktaya ihtiyacınız vardır:
- Oturum açma kullanıcı arayüzünü henüz oturum açmamış kullanıcılara sunmaktan ve istenen erişime kısa süreli bir yetkilendirme kodu biçiminde izin kaydetmekten sorumlu olan yetkilendirme uç noktası.
- İki tür exchange'den sorumlu olan jeton değişimi uç noktası:
- Yetkilendirme kodunu uzun ömürlü yenileme jetonu ve kısa ömürlü erişim jetonu ile değiştirir. Bu değişim, kullanıcı hesap bağlama akışından geçer.
- Kısa ömürlü bir erişim jetonu için uzun süreli yenileme jetonunu değiştirir. Bu exchange, Google'ın süresi dolmuş olduğundan yeni bir erişim jetonuna ihtiyacı olduğunda gerçekleşir.
Örtülü akış kullanılarak verilen erişim jetonlarının geçerlilik süresinin hiçbir zaman dolmaması, Google'ın örtülü akışla kullanılması nedeniyle kullanıcının hesabını tekrar bağlamayı zorunlu kıldığı için Google, örtülü akış akışının uygulanmasını önerir. Güvenlik nedeniyle jetonun süresinin dolması gerekiyorsa kimlik doğrulama kodu akışını kullanmanız önerilir.
OAuth hesap bağlamayı uygulama
Projeyi yapılandırma
Projenizi OAuth bağlantısı kullanacak şekilde yapılandırmak için aşağıdaki adımları uygulayın:
- Actions Console'u açın ve kullanmak istediğiniz projeyi seçin.
- Geliştir sekmesini tıklayın ve Hesap bağlama'yı seçin.
- Hesap bağlama'nın yanındaki anahtarı etkinleştirin.
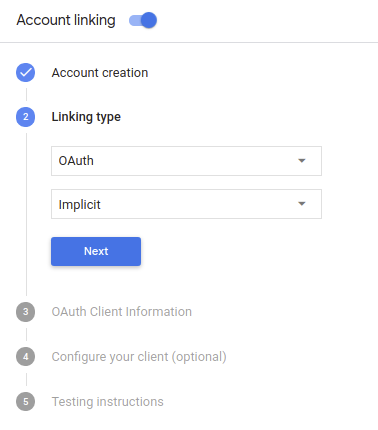
- Hesap oluşturma bölümünde Hayır, yalnızca web sitemde hesap oluşturulmasına izin vermek istiyorum'u seçin.
Bağlantı türü bölümünde OAuth ve Dolaylı'yı seçin.
Müşteri Bilgileri bölümünde:
- Google'dan gelen istekleri tanımlamak için Google'a yönelik İşlemleriniz tarafından verilen istemci kimliği özelliğine bir değer atayın.
- Yetkilendirme ve Jeton Değişimi uç noktalarınızın URL'lerini ekleyin.
- Kaydet'i tıklayın.
OAuth sunucunuzu uygulama
OAuth 2.0 örtülü akışını desteklemek için hizmetiniz bir yetkilendirme yapar uç nokta ile kullanılabilir. Bu uç nokta, kimlik doğrulama ve güvenlikten ve verilere erişim için kullanıcılardan izin alınması gerekir. Yetkilendirme uç noktası Henüz oturum açmamış kullanıcılarınıza bir oturum açma kullanıcı arayüzü sunar ve istenen erişim için izin verin.
İşleminizin, hizmetinizin yetkili API'lerinden birini çağırması gerektiğinde Google, API'leri kendi cihazlarında çağırmak için bu uç noktayı anlamına gelir.
Google tarafından başlatılan tipik bir OAuth 2.0 örtülü akış oturumunda, takip eden akış:
- Google, yetkilendirme uç noktanızı kullanıcının tarayıcısında açar. İlgili içeriği oluşturmak için kullanılan kullanıcı oturum açmış değilse oturum açar ve Google'a erişim için izin verir izin vermedilerse verilerini API'nizle birlikte göndermelerini isteyin.
- Hizmetiniz bir erişim jetonu oluşturur ve bu jetonu Kullanıcının tarayıcısını erişim jetonuyla tekrar Google'a yönlendirerek Google ekleyebilirsiniz.
- Google, hizmetinizin API'lerini çağırır ve erişim jetonunu dikkat edin. Hizmetiniz, erişim jetonunun Google'a ve ardından API çağrısını tamamlar.
Yetkilendirme isteklerini işleme
İşleminizin OAuth 2.0 örtülü akışı üzerinden hesap bağlama yapması gerektiğinde Google, kullanıcıyı yetkilendirme uç noktanıza şunu içeren bir istekle gönderir: şu parametrelere sahip olursunuz:
| Yetkilendirme uç noktası parametreleri | |
|---|---|
client_id |
Google'a atadığınız istemci kimliği. |
redirect_uri |
Bu isteğe yanıt gönderdiğiniz URL. |
state |
yönlendirme URI'si. |
response_type |
Yanıtta döndürülecek değerin türü. OAuth 2.0 dolaylı için
akışında, yanıt türü her zaman token olur. |
Örneğin, yetkilendirme uç noktanız https://myservice.example.com/auth üzerinde mevcutsa,
talep şu şekilde görünebilir:
GET https://myservice.example.com/auth?client_id=GOOGLE_CLIENT_ID&redirect_uri=REDIRECT_URI&state=STATE_STRING&response_type=token
Yetkilendirme uç noktanızın oturum açma isteklerini işlemesi için aşağıdaki adımları uygulayın:
Aşağıdaki işlemler için
client_idveredirect_urideğerlerini doğrulayın: istenmeyen veya yanlış yapılandırılmış istemci uygulamalarına erişim verilmesini önleyin:client_iddeğerinin, kullandığınız istemci kimliğiyle eşleştiğini doğrulayın Google'a atanmıştır.redirect_uritarafından belirtilen URL'yi doğrulayın parametresi aşağıdaki biçimdedir:https://oauth-redirect.googleusercontent.com/r/YOUR_PROJECT_ID
Kullanıcının hizmetinizde oturum açıp açmadığını kontrol edin. Kullanıcı oturum açmamışsa hizmetinizin oturum açma veya kaydolma akışını tamamlayın.
Google'ın API'nize erişmek için kullanacağı bir erişim jetonu oluşturun. İlgili içeriği oluşturmak için kullanılan erişim jetonu herhangi bir dize değeri olabilir, ancak jetonun ait olduğu ve tahmin edilememesi gerekir.
Kullanıcının tarayıcısını URL'ye yönlendiren bir HTTP yanıtı gönderme
redirect_uriparametresiyle belirtilir. Aşağıdakilerin tümünü dahil edin: aşağıdaki parametreleri kullanabilirsiniz:access_token: Az önce oluşturduğunuz erişim jetonutoken_type:bearerdizesistate: Orijinal durumdaki değiştirilmemiş durum değeri istek Sonuçta elde edilen URL'nin bir örneği aşağıda verilmiştir:https://oauth-redirect.googleusercontent.com/r/YOUR_PROJECT_ID#access_token=ACCESS_TOKEN&token_type=bearer&state=STATE_STRING
Google'ın OAuth 2.0 yönlendirme işleyicisi, erişim jetonunu alır ve onay verir
state değerinin değişmediğinden emin olun. Google,
erişim jetonunuz varsa Google, jetonu sonraki çağrılara ekler
AppRequest'in bir parçası olarak İşleminize ekleyin.
Kimlik doğrulama akışı için sesli kullanıcı arayüzünü tasarlama
Kullanıcının doğrulanıp doğrulanmadığını kontrol edin ve hesap bağlama akışını başlatın.
- Actions Builder projenizi Actions Console'da açın.
- İşleminizde hesap bağlama işlemini başlatmak için yeni bir sahne oluşturun:
- Sahneler'i tıklayın.
- Yeni bir sahne eklemek için ekle (+) simgesini tıklayın.
- Yeni oluşturulan sahnede, Koşullar için ekle simgesini add tıklayın.
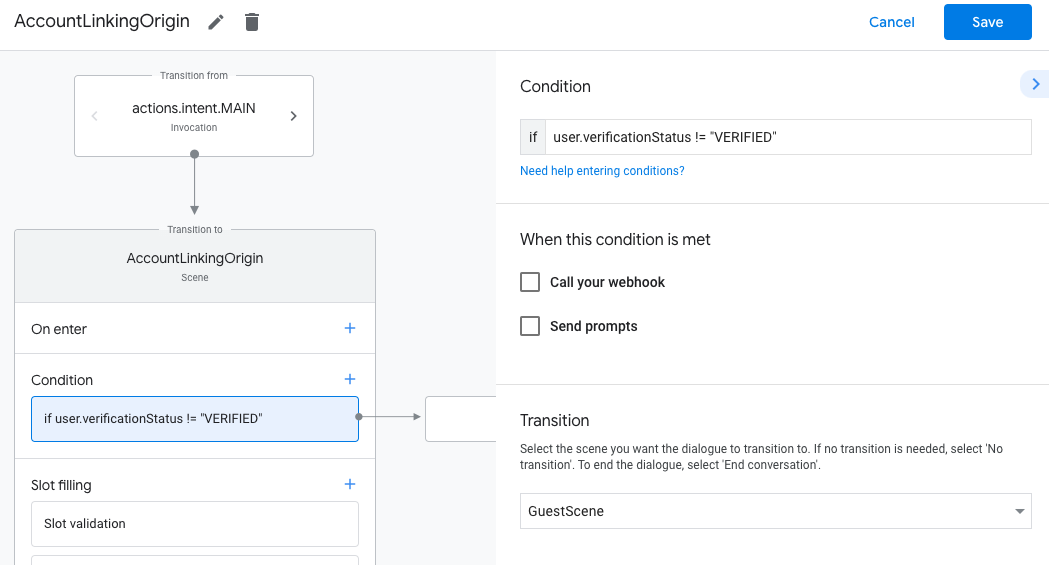
- Sohbetle ilişkili kullanıcının doğrulanmış bir kullanıcı olup olmadığını kontrol eden bir koşul ekleyin. Kontrol başarısız olursa İşleminiz, görüşme sırasında hesap bağlama işlemini gerçekleştiremez ve hesap bağlama gerektirmeyen işlevlere erişim sağlamaya geri dönmelidir.
- Koşul bölümündeki
Enter new expressionalanına aşağıdaki mantığı girin:user.verificationStatus != "VERIFIED" - Geçiş bölümünde, hesap bağlama gerektirmeyen veya yalnızca konuklara özel işlevlerin giriş noktası olan bir sahne seçin.
- Koşul bölümündeki
- Koşullar için ekle simgesini add tıklayın.
- Kullanıcının ilişkili bir kimliği yoksa hesap bağlama akışını tetikleyecek bir koşul ekleyin.
- Koşul bölümündeki
Enter new expressionalanına aşağıdaki mantığı girin:user.verificationStatus == "VERIFIED" - Geçiş bölümünde Hesap Bağlama sistem sahnesini seçin.
- Kaydet'i tıklayın.
- Koşul bölümündeki
![]()
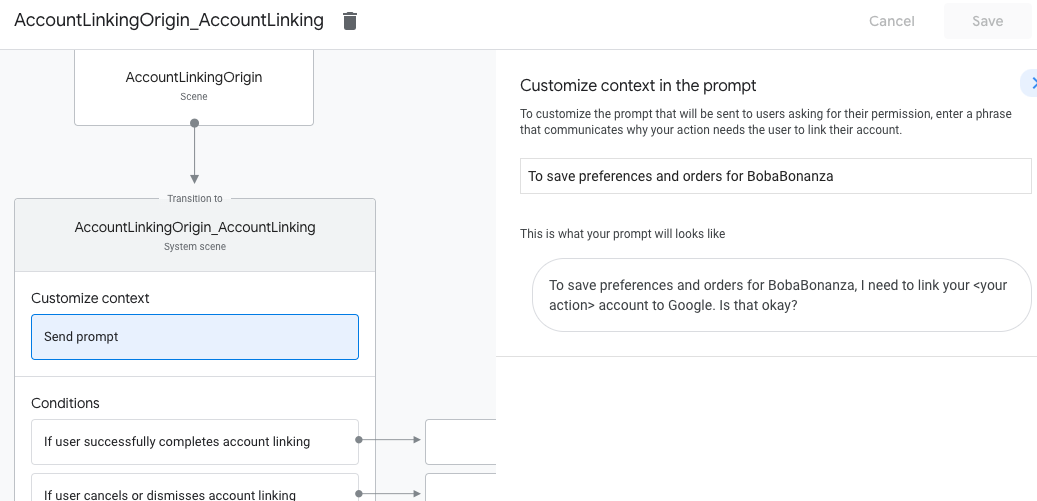
Kaydettikten sonra projenize <SceneName>_AccountLinking adlı yeni bir hesap bağlama sistemi sahnesi eklenir.
Hesap bağlama sahnesini özelleştirme
- Sahneler bölümünde hesap bağlama sistemi sahnesini seçin.
- İstemi gönder'i tıklayın ve kullanıcıya İşlem'in kimliğine neden erişmesi gerektiğini açıklayan kısa bir cümle ekleyin (örneğin, "Tercihlerinizi kaydetmek için").
- Kaydet'i tıklayın.
- Koşullar bölümünde Kullanıcı hesap bağlama işlemini başarıyla tamamlarsa'yı tıklayın.
- Kullanıcı hesabını bağlamayı kabul ederse akışın nasıl devam edeceğini yapılandırın. Örneğin, gerekli özel işletme mantığını işlemek ve başlangıç sahnesine geri dönmek için webhook'u çağırın.
- Kaydet'i tıklayın.

- Koşullar bölümünde Kullanıcı hesap bağlantısını iptal ederse veya kapatırsa'yı tıklayın.
- Kullanıcı hesabını bağlamayı kabul etmezse akışın nasıl devam edeceğini yapılandırın. Örneğin, onay mesajı gönderin ve hesap bağlama gerektirmeyen işlevler sunan sahnelere yönlendirin.
- Kaydet'i tıklayın.

- Koşullar bölümünde Sistem veya ağ hatası oluşursa'yı tıklayın.
- Hesap bağlama akışı, sistem veya ağ hataları nedeniyle tamamlanamazsa akışın nasıl devam edeceğini yapılandırın. Örneğin, onay mesajı gönderin ve hesap bağlama gerektirmeyen işlevler sunan sahnelere yönlendirin.
- Kaydet'i tıklayın.
Veri erişimi isteklerini ele alma
Asistan isteği erişim jetonu içeriyorsa, önce erişim jetonunun geçerli (ve süresinin dolmamış) olup olmadığını kontrol edin, ardından ilişkili kullanıcı hesabını veritabanınızdan alın.