Page Summary
-
An Actions project packages all of your Actions into a single container that you publish to Actions on Google.
-
Low-level components like settings, intents, types, scenes, prompts, webhooks, and Interactive Canvas are used to build your Actions project.
-
You must create a project in the Actions console and define project information before you can develop for Google Assistant.
-
The Actions console provides a simulator to preview your Actions in for testing and debugging.
An Actions project packages all of your Actions into a single container. You publish this project to Actions on Google so Google Assistant knows how to discover and invoke your conversational experiences.

You use the following low-level components to build your Actions project:
Settings and resources define project metadata and resources like project icons. Google uses this information to publish your Actions to the Assistant directory, so that users can discover and invoke them.
Intents represent a task to be carried out, such as some user input or a system event that needs processing. The most common type of intent you'll use are user intents. These intents let you declare training phrases that are naturally expanded by the NLU (natural language understanding) engine to include many more, similar phrases. The NLU uses the aggregation of these phrases to train a language model that the Assistant uses to match user input. During a conversation, if some user input matches the intent's language model, the Assistant runtime sends the intent to your Action, so that it can process it and respond to the user.
Types let you extract structured data from user input. By annotating training phrases with types, the NLU can extract relevant, structured data for you, so you don't have to parse open-ended input.
Scenes process intents and are the main logic executors for your Actions. They can do slot-filling, evaluate conditional logic, return prompts to the user, and even call on external web services to carry out business logic. In combination with intents, scenes give you a powerful way to detect specific user input or system events and to carry out corresponding logic.
Prompts define static or dynamic responses that you use to respond back to users.
Webhooks let you delegate extra work to web services (fulfillment), such as validating data or generating prompts. Your Actions communicate with your fulfillment through a JSON-based, webhook protocol.
Interactive Canvas lets you create rich and immersive experiences with web apps that utilize HTML, CSS, and JavaScript.
Create a project
You must create a project in the Actions console before you can develop for Google Assistant. To create a project:
- Go to the Actions console.
- Click New project.
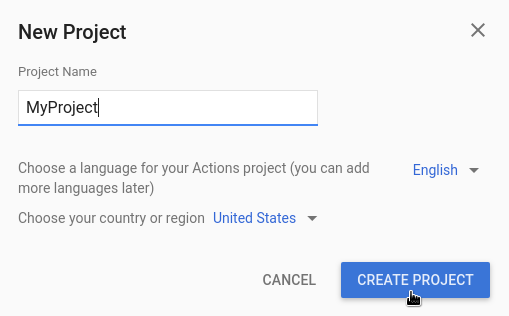
- Enter a name for your project and click Create Project.
- In the What kind of Action do you want to build? screen, select a category that best represents your project and click Next.
- In the How do you want to build it screen, select a way to build and click Start building. For example, you can start with an empty project or with a sample.
Define project information
Your project's settings and resources define information about your project like feature and surface support, supported locales, display name, description, logos, and more. The following table describes the main settings and resources you provide. Actions on Google uses this information to deploy and publish your project to the Assistant directory.
| Name | Description |
|---|---|
| Directory information | Provides information so that Actions on Google can publish your project to the Assistant directory. Includes metadata and desecriptions about your project and image resources for logos and banner images. |
| Location targeting | Configures the locales that your Actions are available in. |
| Surface capabilities | Configures the surfaces that your Actions are available on. |
| Company details | Specifies contact information for your company. |
| Brand verification | Connect a website or Android app that you own to gain extra benefits such as reserved invocation names and website linking within your Actions. |
| Release | Configures different testing and production releases for your Action for testing and production. |
| Assistant links | Let users invoke your Actions from your web properties. |
To define project information:
- Go to the Actions console and open your project.
Click the Deploy tab to specify project information.
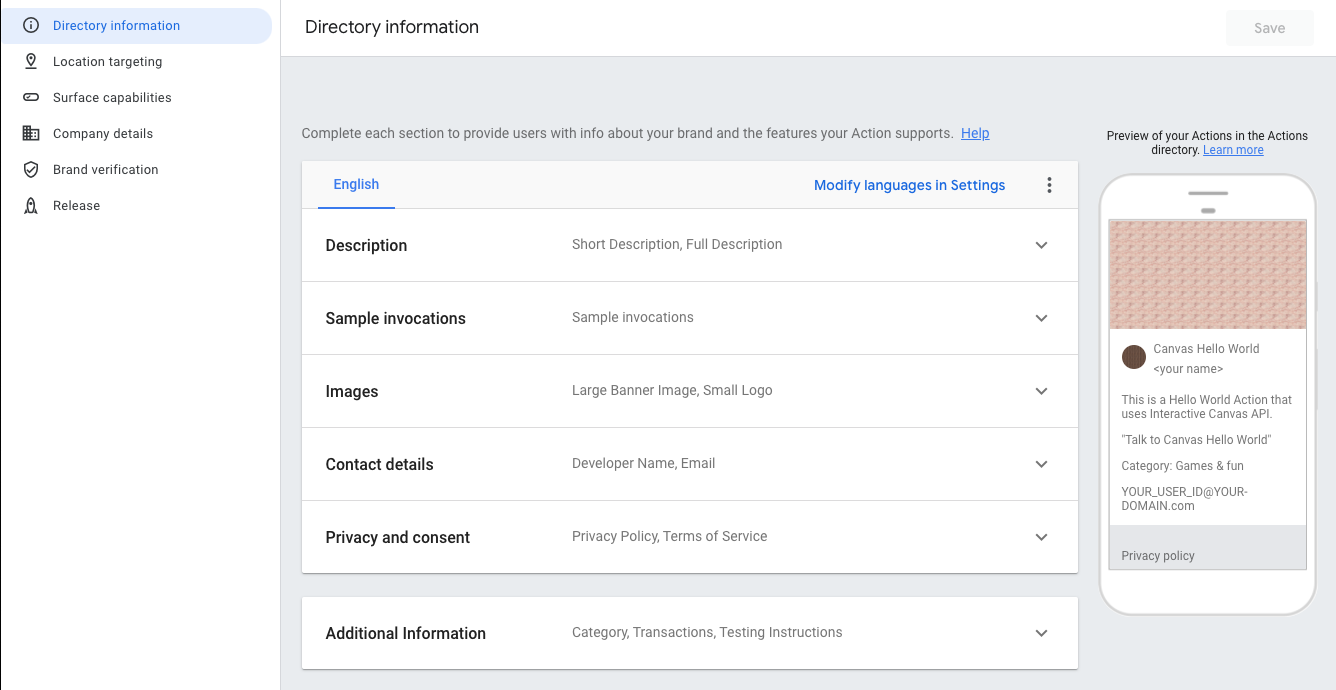
Figure 2. Specify project information in the Deploy section of the console.
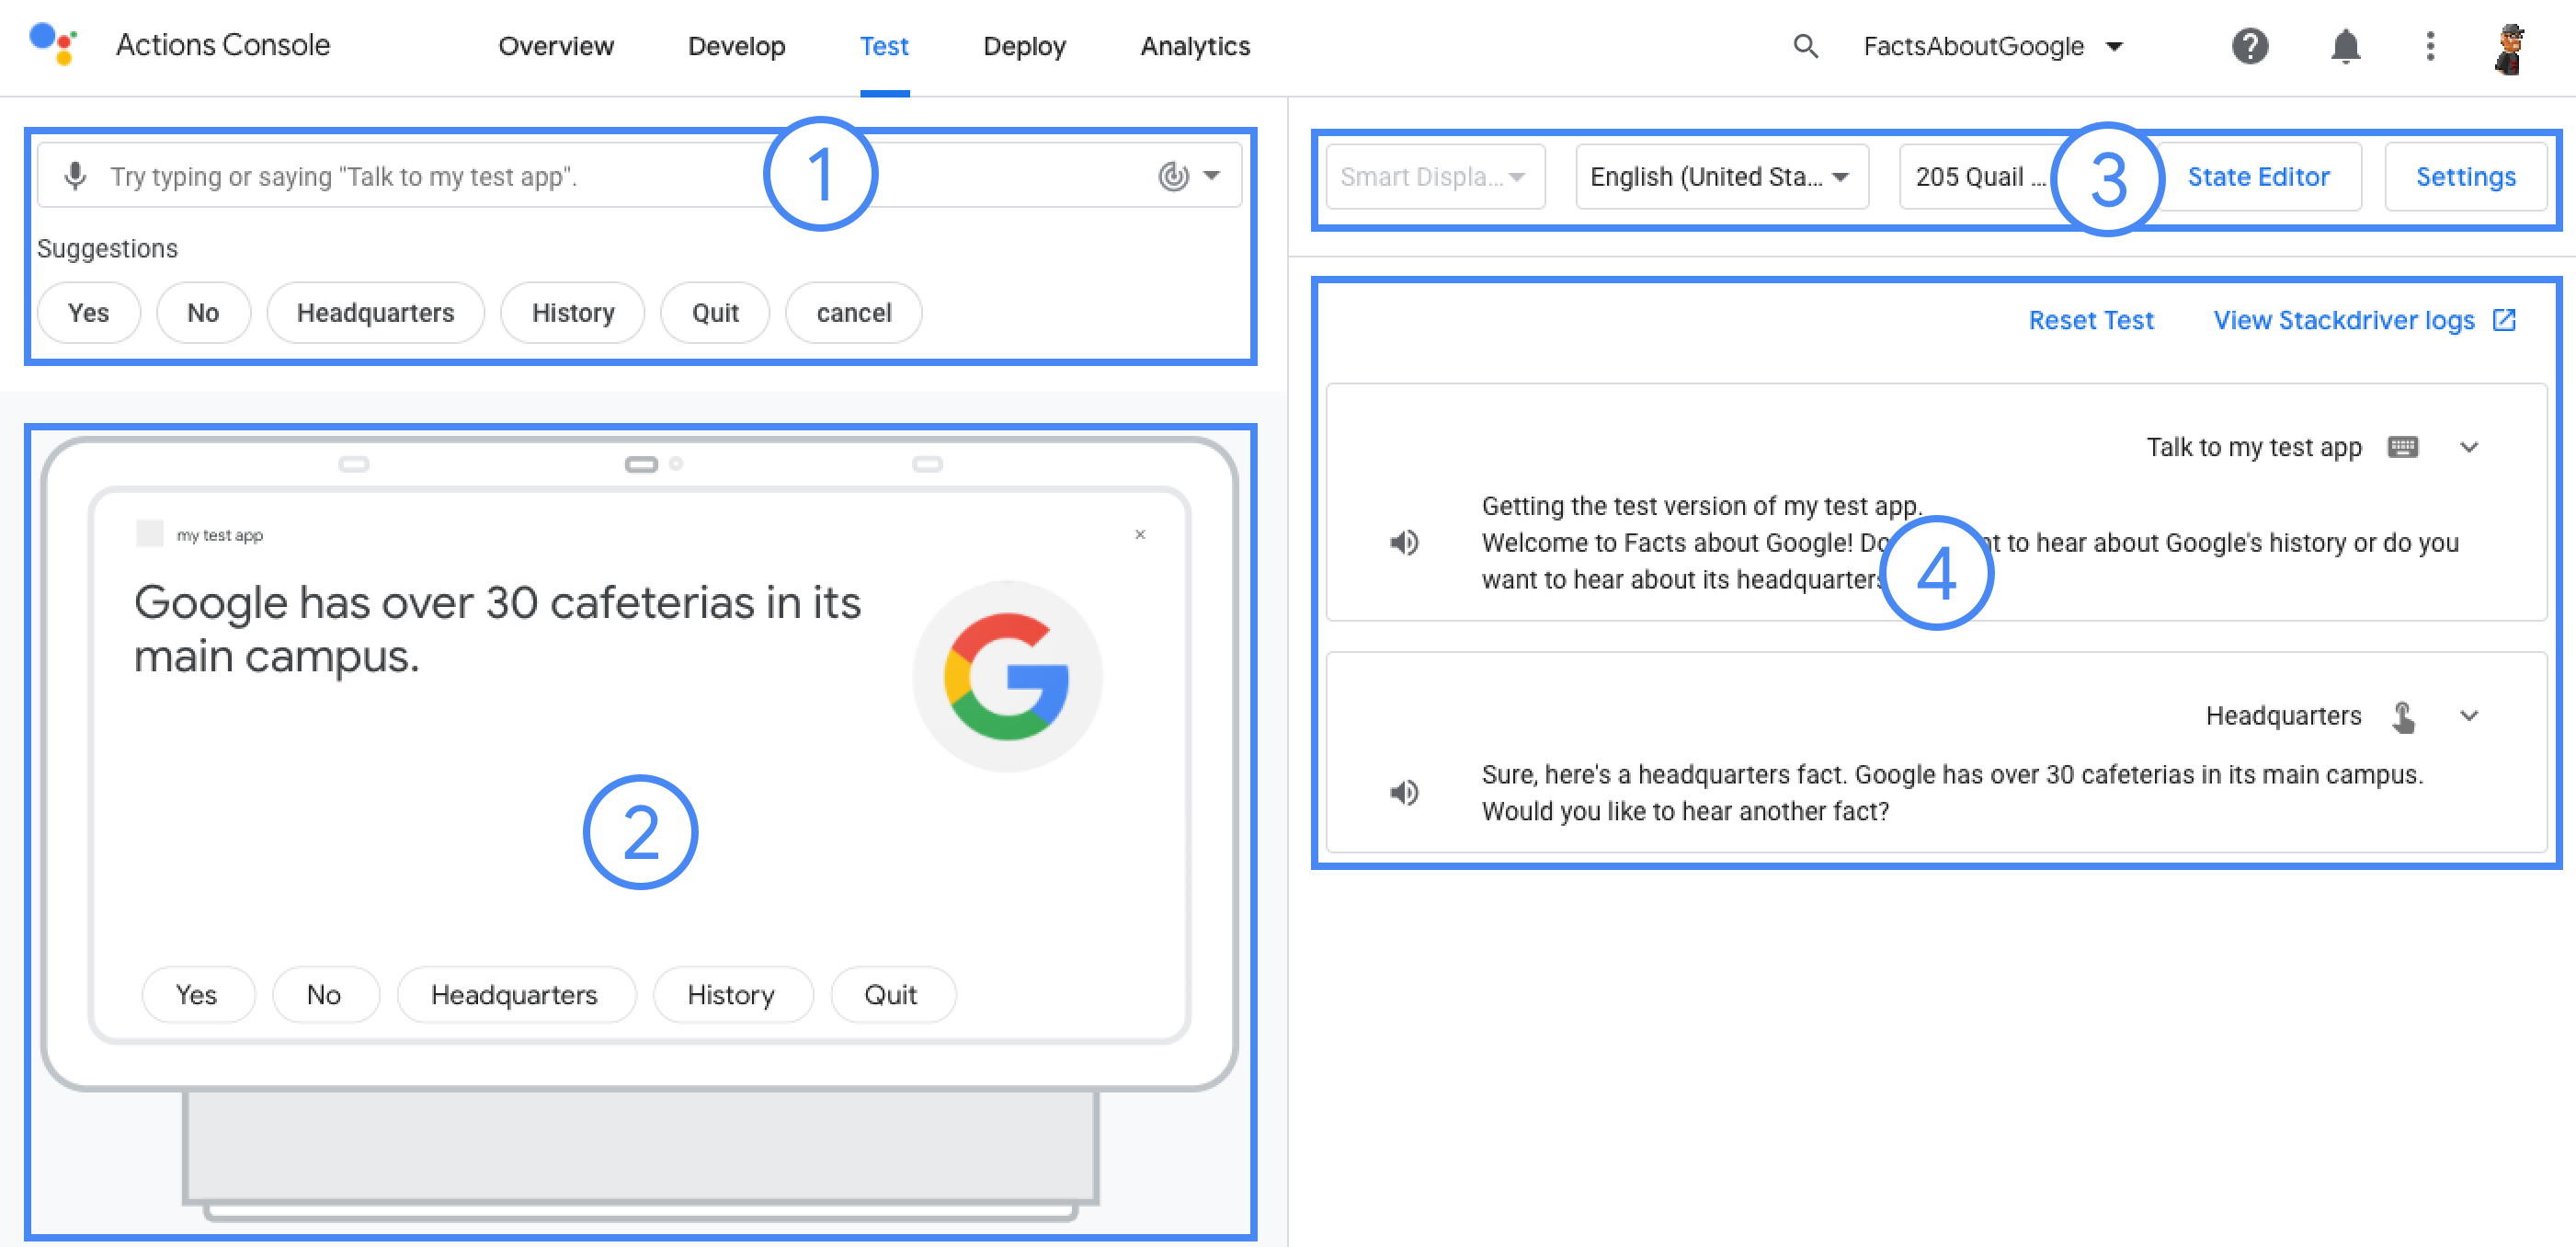
Test projects in the simulator
The Actions console provides a simulator to preview your Actions in. The simulator lets you see debug information, set device capabilities, simulate locale, and more.
To test a project:
- Go to the Actions console and open your project.
- Click the Test tab to access the simulator.