
Page Summary
-
Events measure user interactions on your website or app and the data from events is used by Google Analytics to create reports about your business.
-
This guide explains how to set up recommended and custom events using either the Google tag (gtag.js) or Google Tag Manager.
-
You can use the Google tag (gtag.js) API with the
gtag()function to send events to Google Analytics by specifying the event command, event name, and optional parameters. -
To implement events using gtag.js, you need to add the
gtag()function within your website's JavaScript, ensuring it is placed below the Google tag snippet. -
You can view the events and their parameters in Google Analytics using the Realtime and DebugView reports.
Events let you measure user interactions on your website or app; for example, you can measure when someone loads a page, clicks a link, and makes a purchase. Google Analytics uses data from events to create reports with information about your business. Learn more
This guide shows you how to set up recommended events and custom events on your website using the Google tag (gtag.js) or Google Tag Manager. You don't need to set up automatically collected and enhanced measurement events.
Audience
You've set up Google Analytics and are starting to see data in your reports, but you want to collect more information than what Analytics collects automatically, or you want to unlock certain features and capabilities in Analytics.
Before you begin
This guide assumes that you've done the following:
- Create a Google Analytics account and property
- Create a web data stream for your website
- Place the Tag Manager snippets on your website
- Install the Google tag in Tag Manager
It also assumes that you have the following:
- Access to the Tag Manager container for the website
- The Editor (or above) role to the Google Analytics account
Set up events
To set up an event using Google Tag Manager, you will configure a Google Analytics: GA4 Event tag and then create a trigger that specifies when you want to send the event.
The following steps show you how to send a custom event to a Google Analytics property when a user clicks a button to sign up for your newsletter. The steps show you how to implement the event using Tag Manager and don't require you to implement a data layer object.
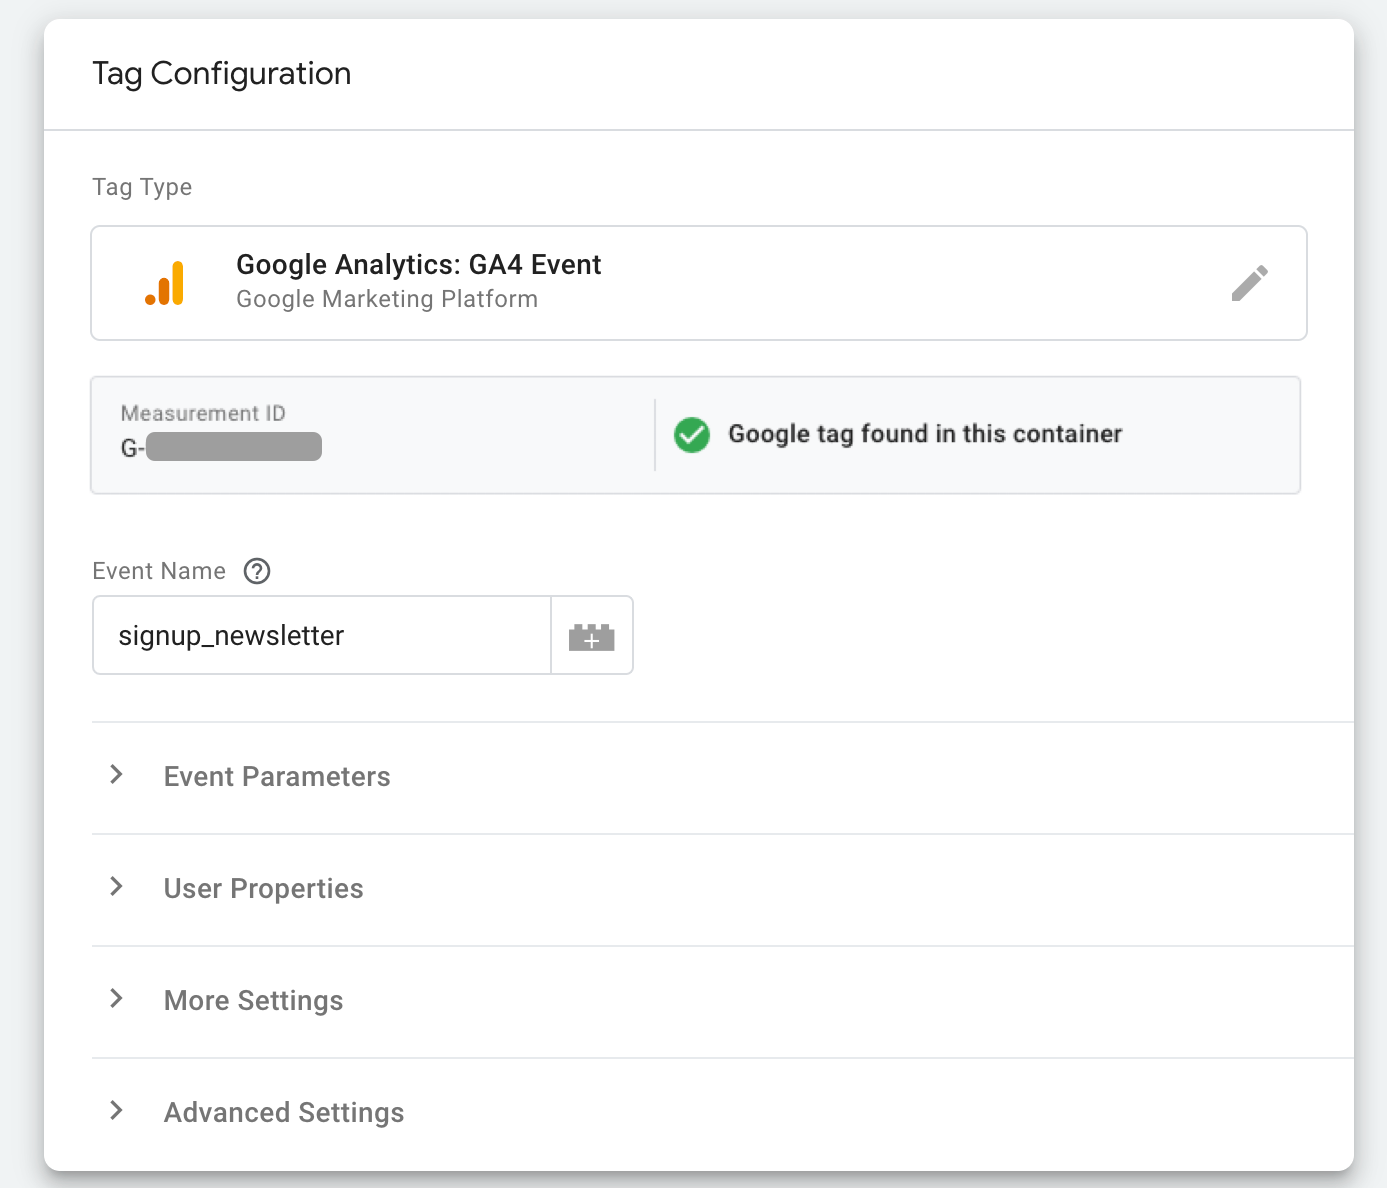
Step 1: Create a Google Analytics: GA4 Event tag
Start by creating a Google Analytics: GA4 Event tag for the new custom event.
- In Google Tag
Manager, click
 Tags > New.
 - Enter a name for the Google Analytics: GA4 Event tag at the top (for example, "Google Analytics Event - Signup newsletter").
- Select Google Analytics: GA4 Event.
- Enter the Measurement ID for your GA4 web data stream.
- In Event Name, enter a name for the event (e.g.
signup_newsletter). This will create a new custom event and the name will appear in your Google Analytics reports. To create a recommended event, use one of the predefined event names.
Your configuration might look something like this:
Step 2: Create a trigger
Next, create a trigger to send the event when someone clicks the button.
- Click the Triggering box in your Google Analytics: GA4 Event tag.
- Click + on the top right.
- Enter a name for the trigger (e.g., "Trigger - Signup newsletter").
You can choose the conditions for sending the event. The following example sends the event based on the button label:
- Click the Trigger Configuration box in your trigger.
- Choose All Elements.
- Click Some Clicks.
Set the following trigger condition: "Click Text contains Sign up for the newsletter".
If you don't see Click Text, click the first drop down and then select Choose Built-In Variable. From the menu, select Click Text.
Save all your changes.
Your configuration might look something like this:
If you want the event to trigger when someone views a page (e.g., on a confirmation page), you could use a Page View trigger instead.
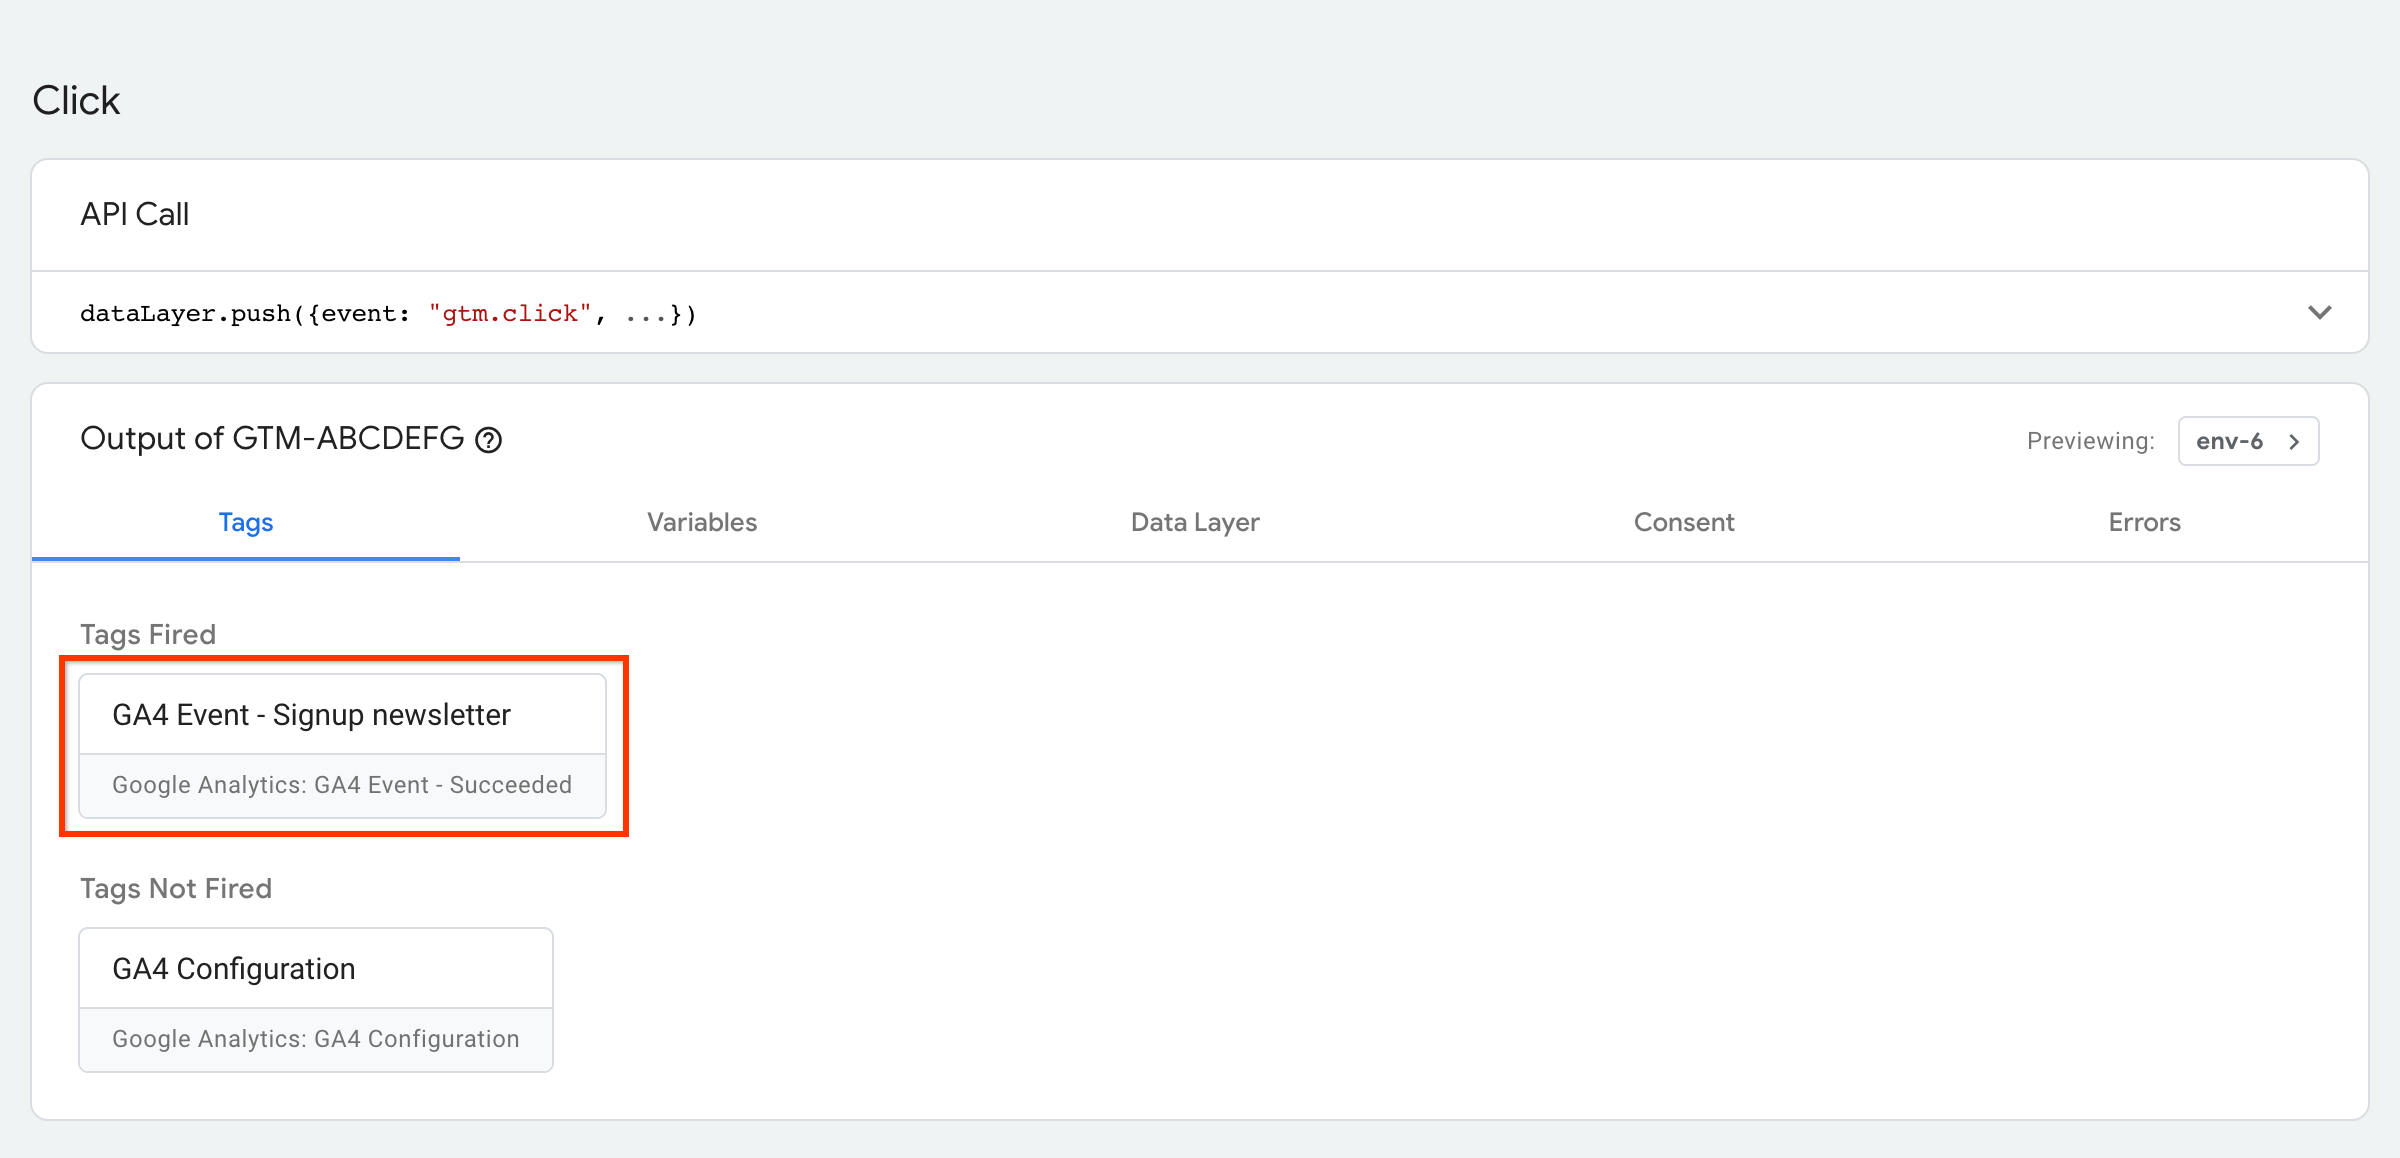
Step 3: Preview your changes
Before you publish your new event in Tag Manager, click Preview to see the data that's recorded when you click the "Sign up for the newsletter" button.
You can use preview mode to test changes to your container before you publish those changes to your website. Learn more about preview mode
See your events in Analytics
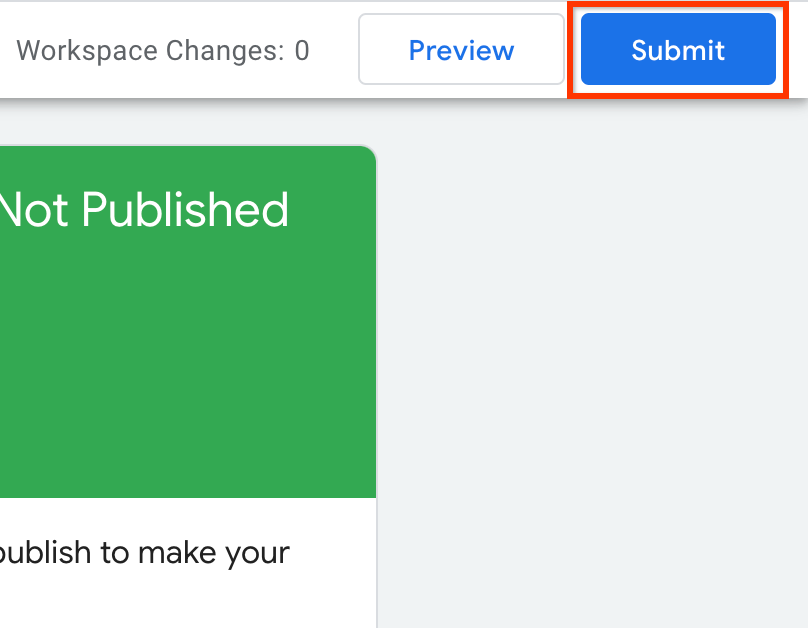
When you are ready to publish your changes, click Submit.
You can see your events and their parameters using the Realtime and DebugView reports. Note that the DebugView report requires some additional configuration before you can use the report. These two reports show you the events users trigger on your website as the events are triggered.
Next steps
- Set up event parameters to add more information to your events.
- Mark events as key events.