Page Summary
-
This guide focuses on using the Audio switch version of the Validator App for testing Fast Pair devices.
-
Setup involves ensuring your device has the correct GmsCore version and your testing emails are registered with the Fast Pair Partner Testing Group.
-
The app tests various aspects of audio switching, including payload verification, message stream communication, and switch back functionality, in both single-point and multi-point scenarios.
-
To submit test results to Google, press the 'SUBMIT' button on the results page after reviewing them.
-
Uploaded results can be viewed on the Nearby Console.
This page is specific to the Audio switch version of the Validator App. See the LE Audio Validator App page for help on the LE Audio version of the Validator App.
Setup
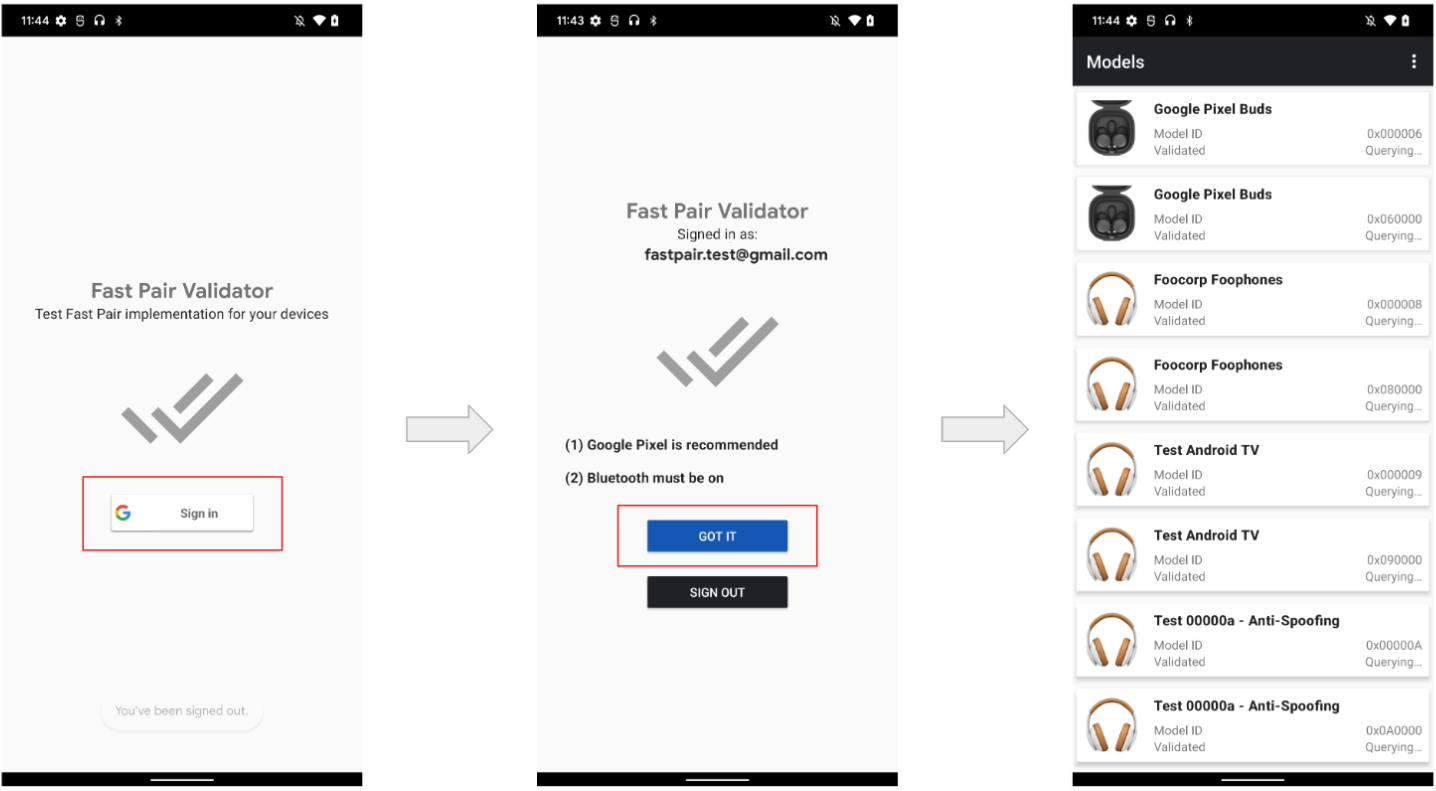
To enable testing in the Validator app:
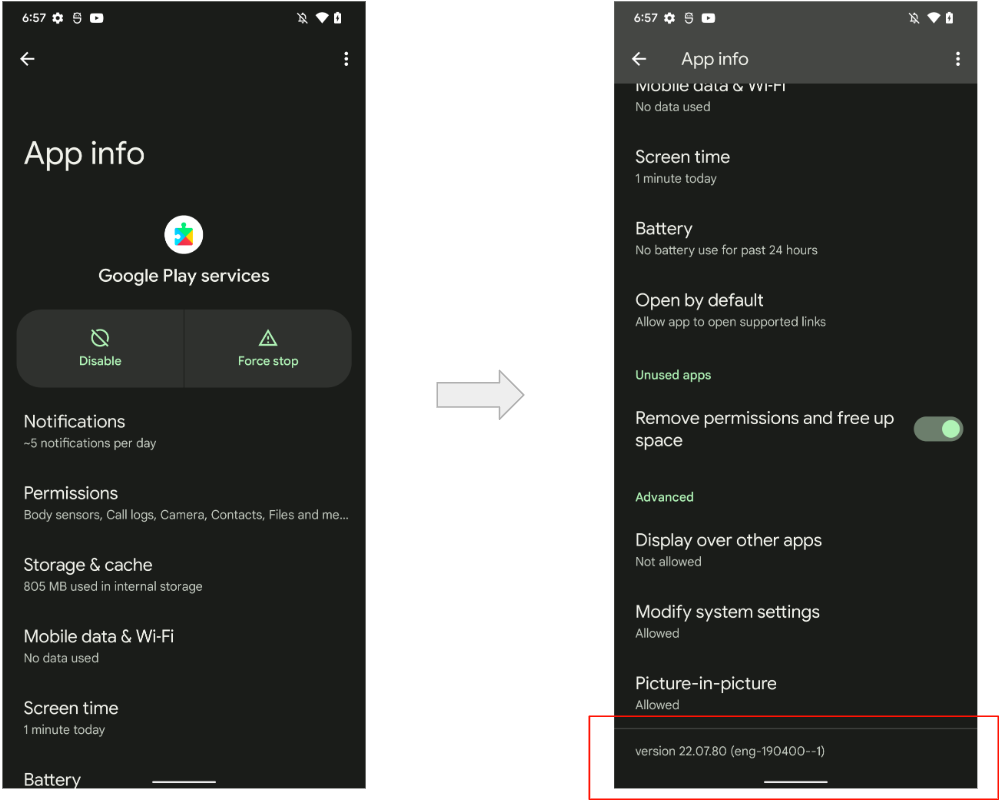
- Ensure the device has GmsCore version 22.08.xx or later.
- Ensure your testing emails are part of the
Fast Pair Partner Testing Group.
- It may take 6-24 hours for newly registered emails and phones to synchronize permissions.
- Logging in and out of the associated Google Account may also trigger an immediate sync.
Example:
Required Devices
Audio switch tests require the phones to be paired using Fast Pair:
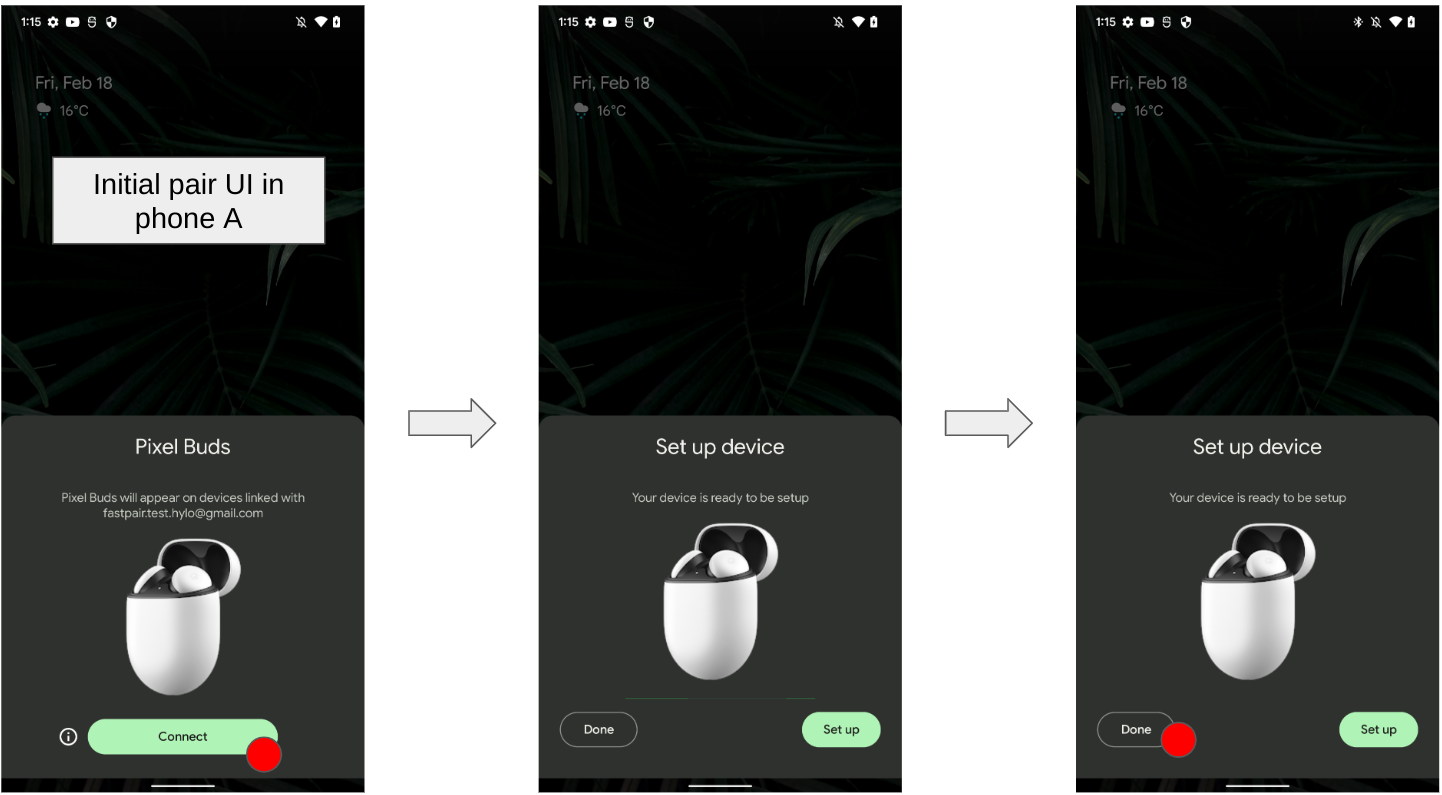
- Prepare two phones, A and B, logged into the same Google Account.
- Pair headset with phone A (Initial pairing).
- Enter pairing mode, wait for Half Sheet UI notification.
- Click Connect.
- Click Done.
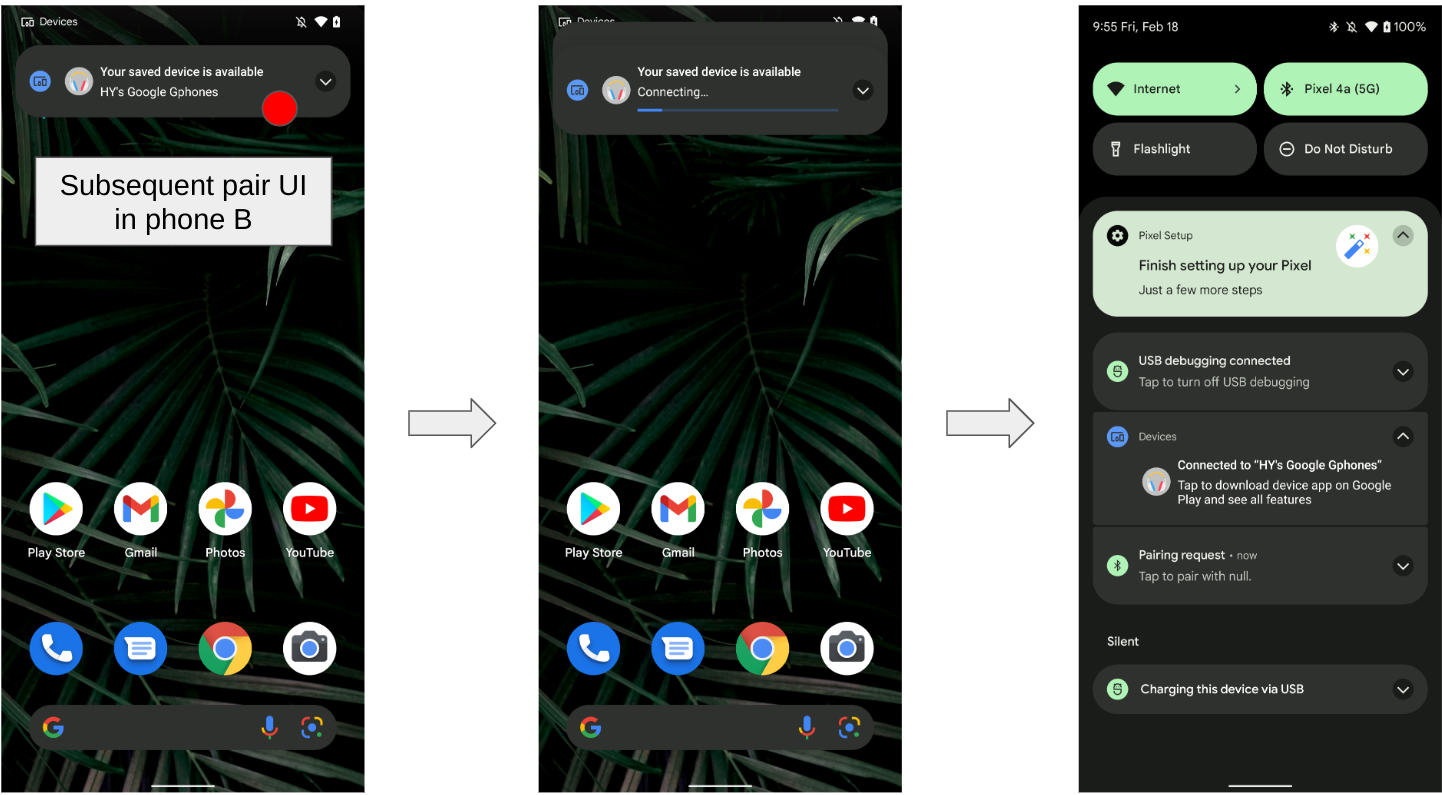
- Pair headset with phone B (Subsequent pairing).
- Wait for notification that both pairings have completed.
- Click system notification.
Example flow:
Basic UI Flow
The following shows the general UI flow:
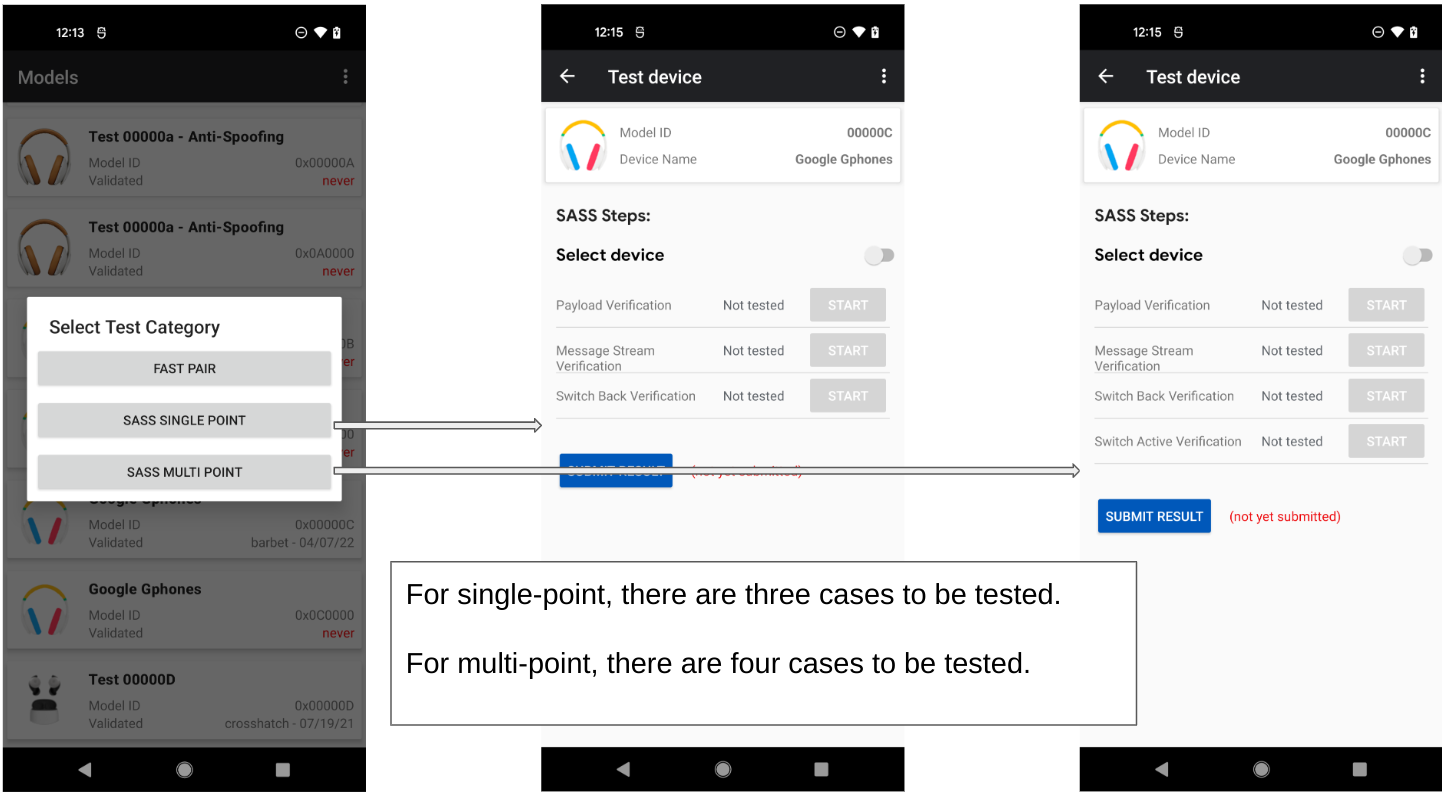
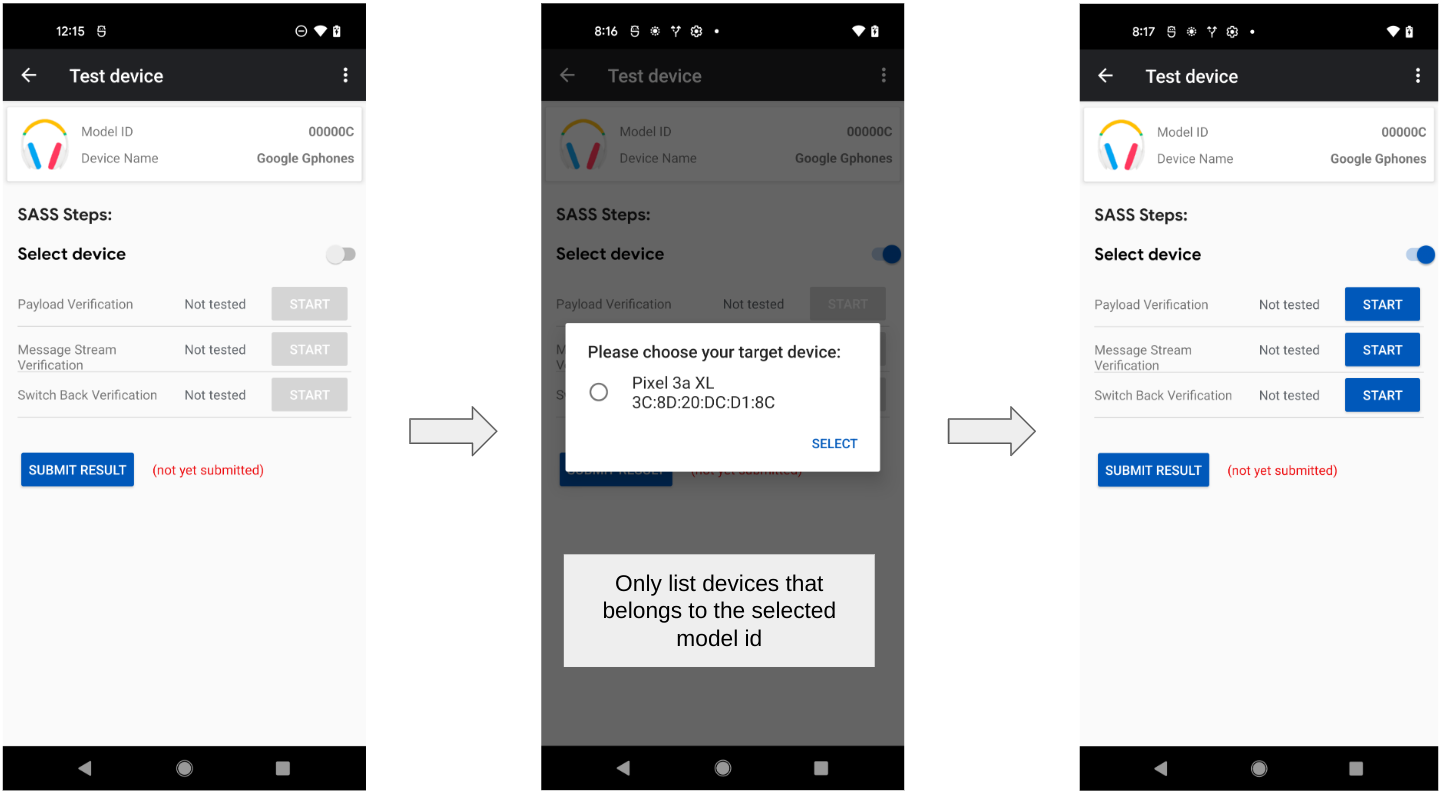
Audio Switch Single-Point Tests
Audio switch Test (Single-Point)
This test performs the following functions:
- Payload verification.
- Verifies the advertising data for different scenarios.
- Message stream verification.
- Verifies message stream communication.
- Switch back.
- Verifies switchback behavior.
Payload Verification (Single-point)
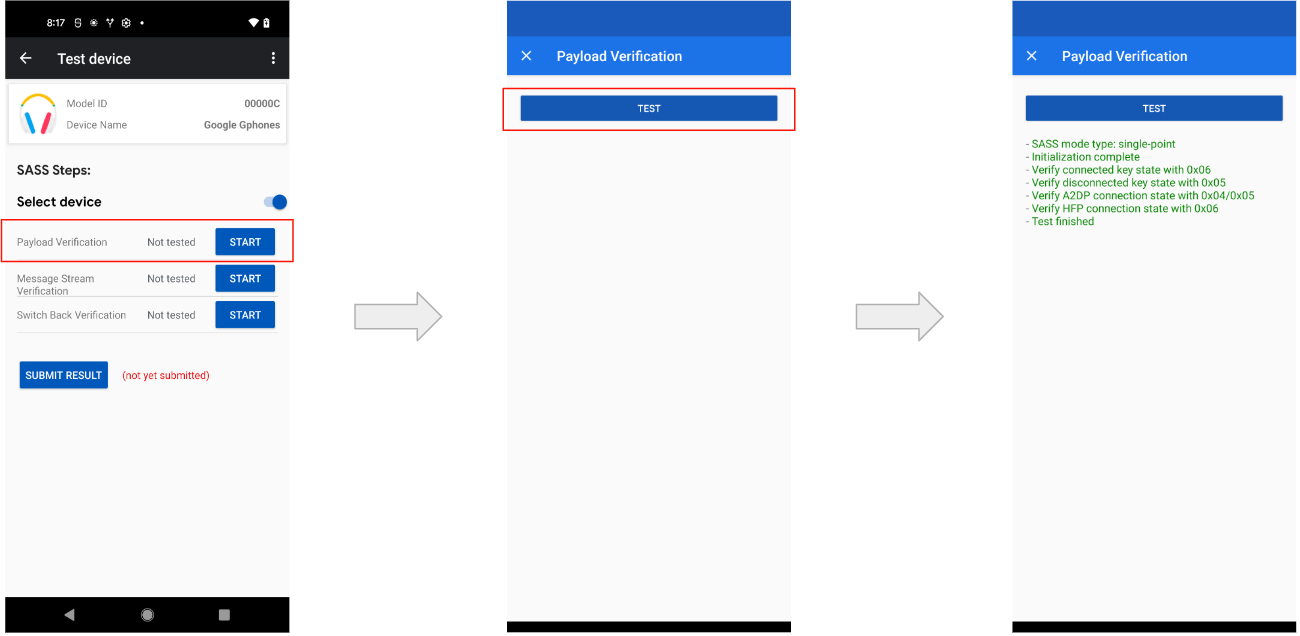
The Payload Verification sequence is as follows:
- Connect to the headset.
- Verify that the first byte of the account key is 0x06, as required by the specification.
- Disconnect from device.
- Verify that the first byte of the account key is 0x05, as required by the specification.
- Re-connect to headset.
- Play music.
- Verify the connection state is one of the following:
- 0x4: A2DP streaming only.
- 0x5: A2DP streaming with AVRCP.
- Start a SCO connection.
- Verify the SCO connected succeeded.
- Verify the connection state is:
- 0x6: HFP (phone/voip call) streaming, including inband and non-inband ringtone.
An Example of Payload Verification (single-point):
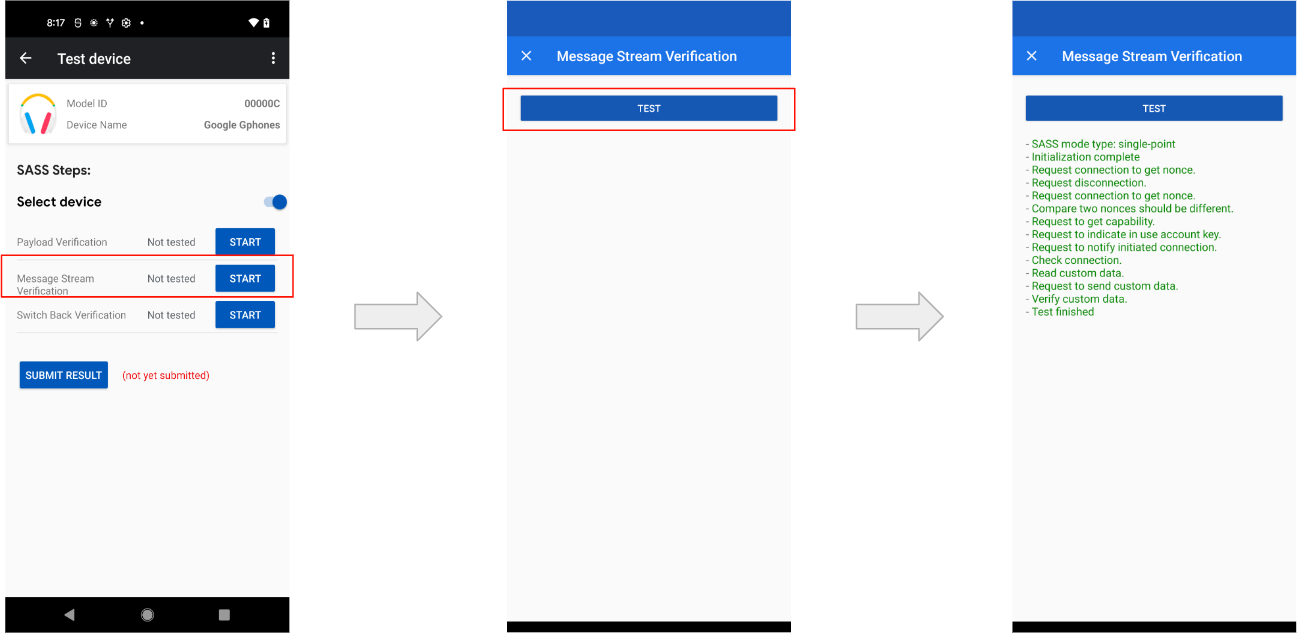
Message Stream Verification (Single-Point)
The Message Stream Verification sequence is as follows:
- Verify session nonces between different Message Stream connections.
- Connect to the headset.
- Get the nonce X from headset (within 5 seconds).
- Reconnect to the headset.
- Get another nonce Y from the headset (within 5 seconds).
- Verify if X and Y are different.
- Send the Get Audio switch Capability request.
- Verify the response was sent within 2 seconds. Contents are not checked.
- Send the Indicate in-use Account Key request.
- Verify the response was sent within 2 seconds. Contents are not checked.
- Send the Notify Initiated Connection request.
- Verify the response was sent within 2 seconds. Contents are not checked.
- Send the Send Custom Data request.
- Verify the ACK is returned within 2 seconds.
- Verify if adv data contains the set custom data (in 10 seconds).
An example of Message Stream verification (single-point):
Switch Back (Single-Point)
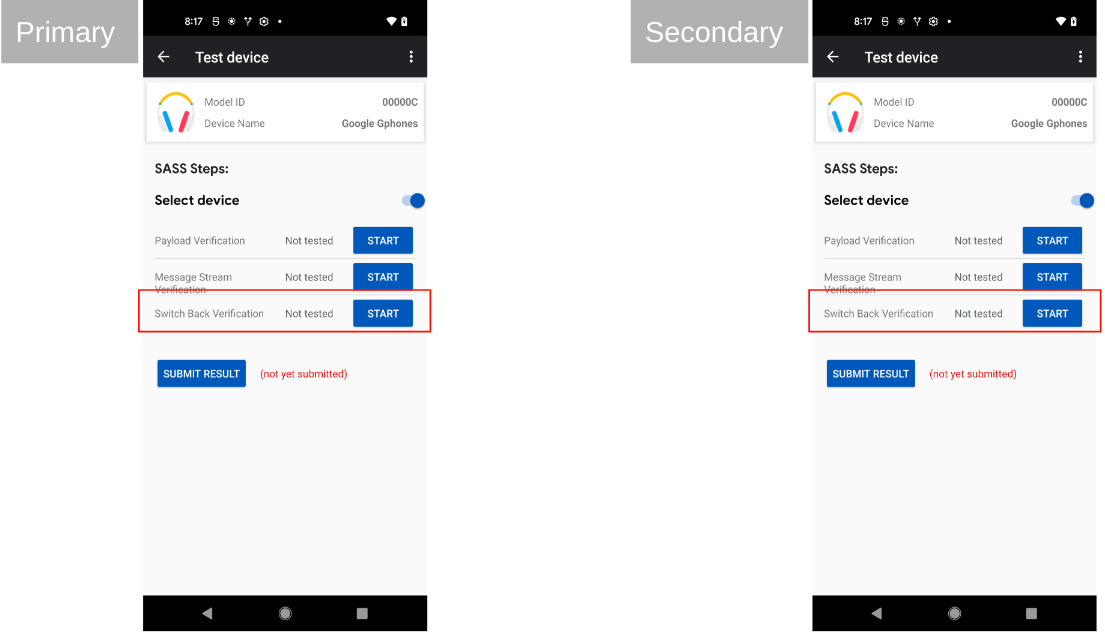
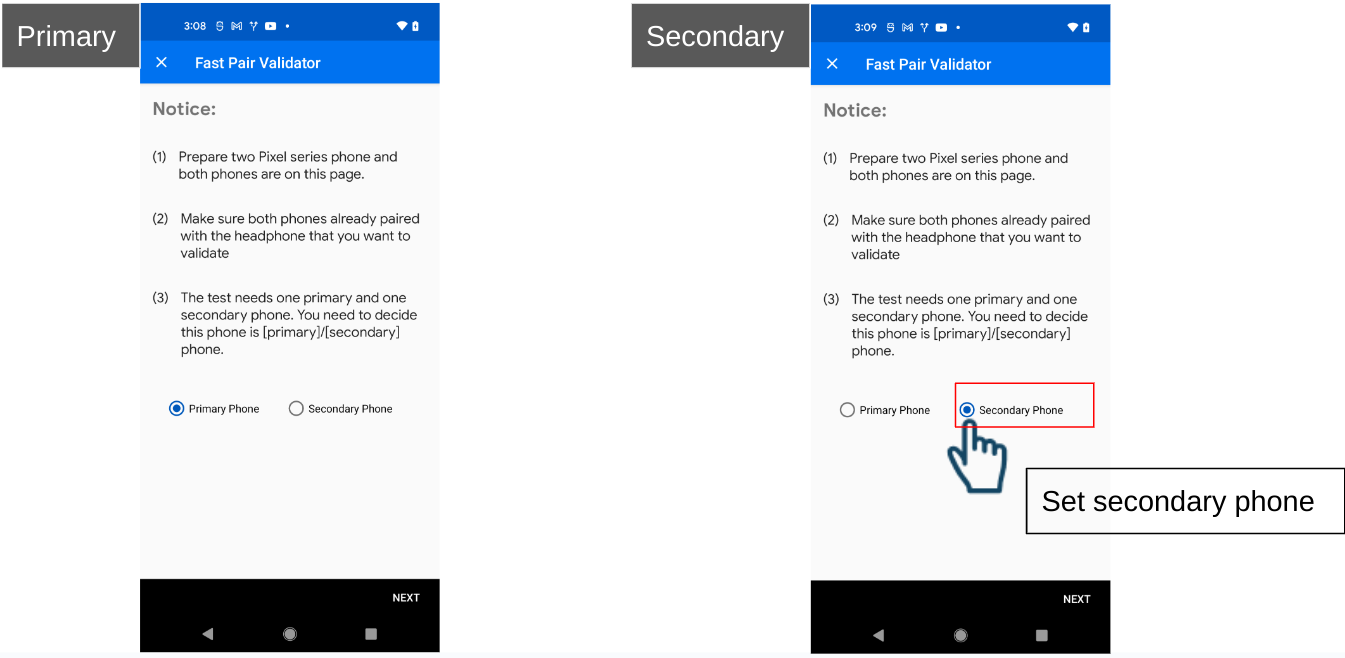
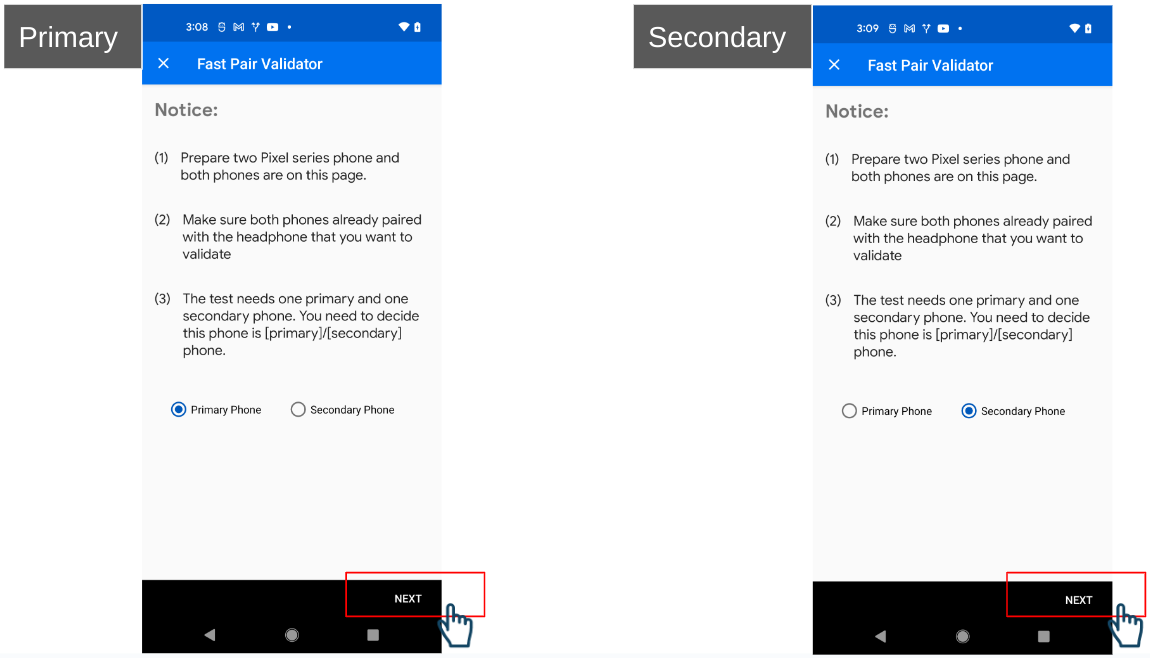
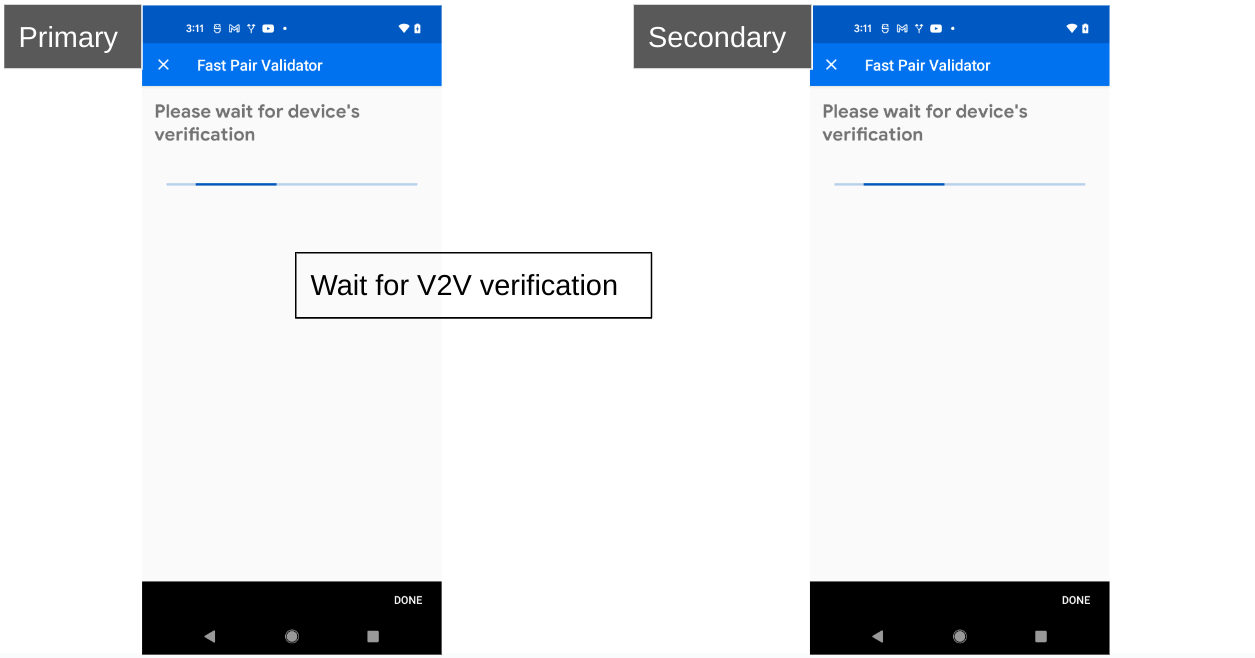
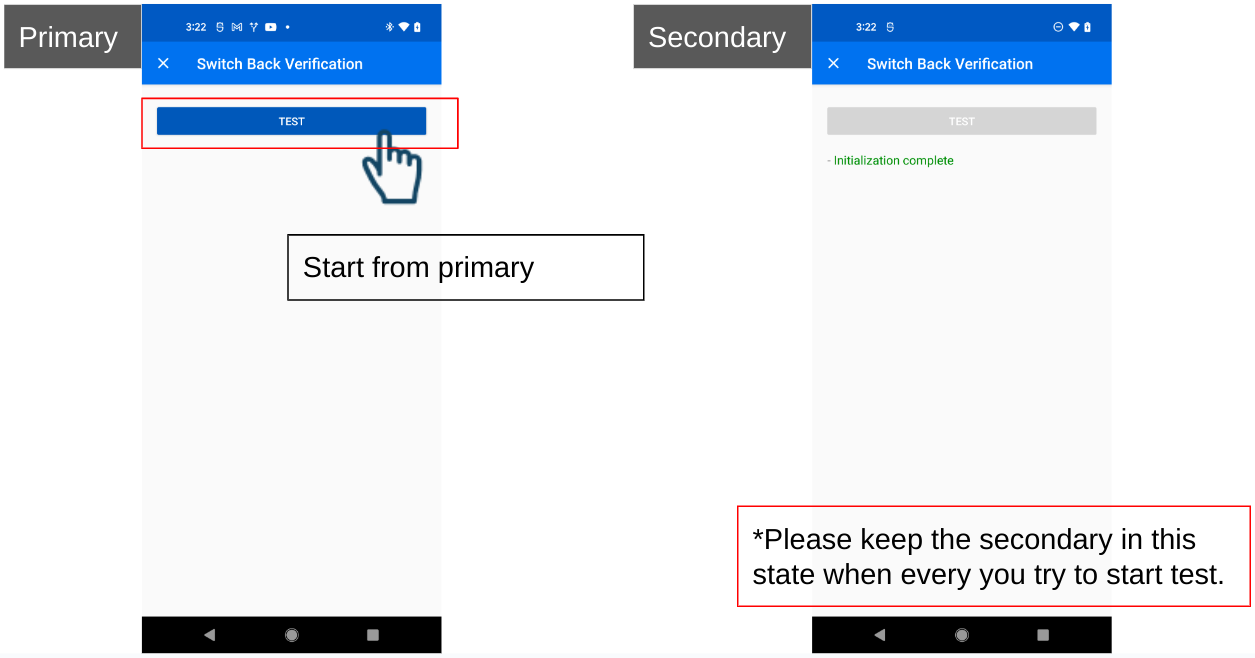
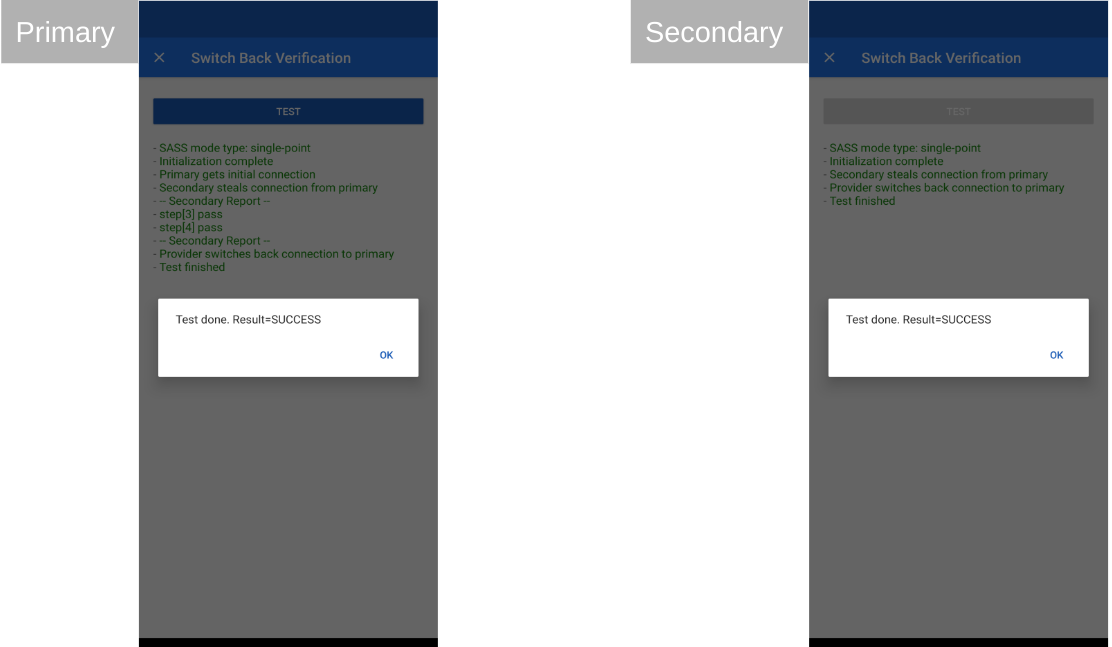
This test requires two devices: a Primary and Secondary Seeker. The test sequence is as follows:
- The Primary Seeker connects to the headset (within 10 seconds).
- Secondary Seeker connects to the headset (within 10 seconds).
- Secondary Seeker sends switching back request to the headset.
Within 15 seconds, the following should occur:
- Primary Seeker connects back to the headset.
- Secondary Seeker disconnects from the headset.
The following shows an example of the Switch-Back test:
Audio switch Multi-Point Tests
Payload Verification (Multi-Point)
The Payload Verification sequence is as follows:
- Connect to the headset.
- Verify that the first byte of the account key is 0x06, as required by the specification.
- Disconnect from device.
- Verify that the first byte of the account key is 0x05, as required by the specification.
- Re-connect to headset.
- Play music.
- Verify the connection state is one of the following:
- 0x4: A2DP streaming only.
- 0x5: A2DP streaming with AVRCP.
- Start a SCO connection.
- Verify the SCO connected succeeded.
- Verify the connection state is:
- 0x6: HFP (phone/voip call) streaming, including inband and non-inband ringtone.
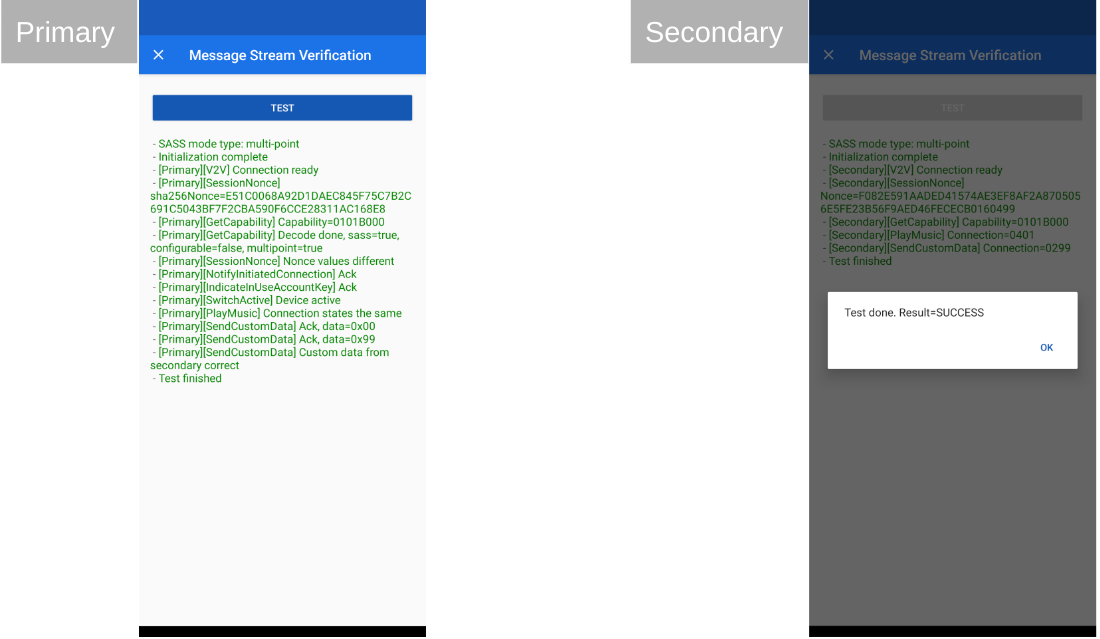
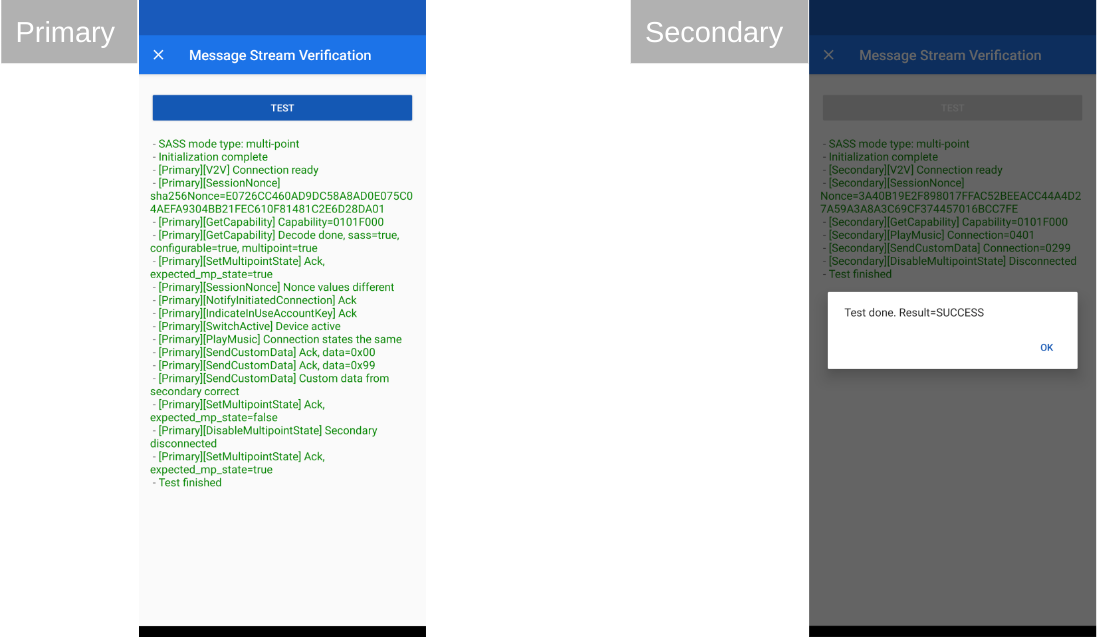
Message Stream (Multi-Point)
This test requires a Primary and Secondary Seeker. Tests with the
multipoint configurability flag set TRUE will have
additional steps to test this state through the message stream command.
An example of a Non-configurable Message Stream test (Multi-point):
An example of a Configurable Message Stream test (Multi-point):
Switch Back (Multi-Point)
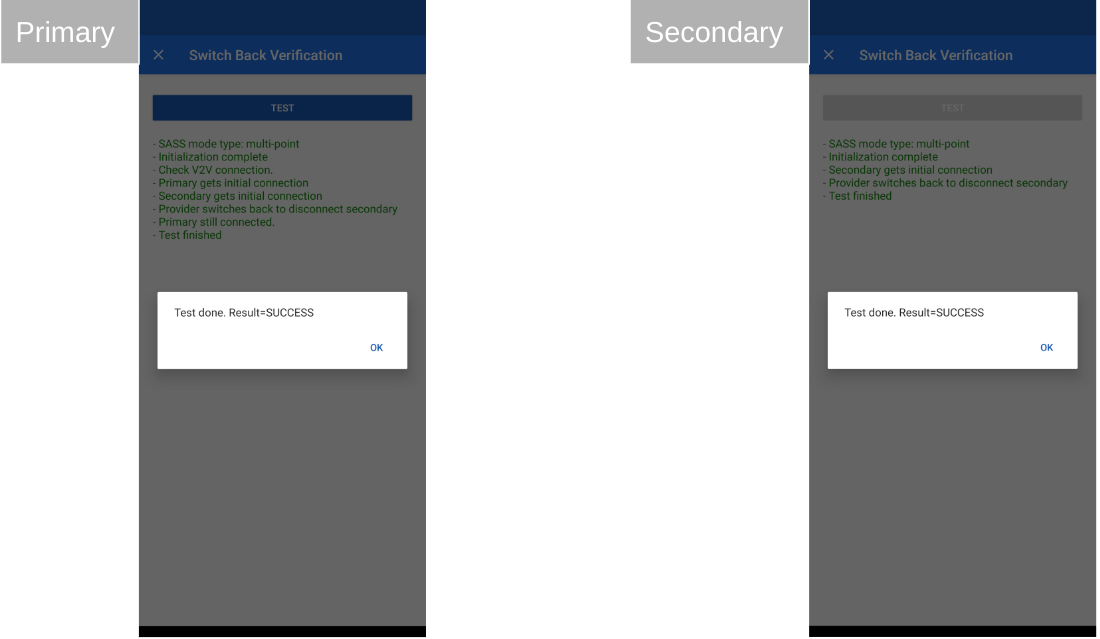
This test requires a Primary and Secondary Seeker. This test is nearly identical to the single-point version. The only difference is: since the Provider supports multiple connections, when Secondary Seeker connects to the Provider, the Primary Seeker will still connect to the Provider.
An example of the Multi-point Switch-Back test:
Switch Active (Multi-Point Only)
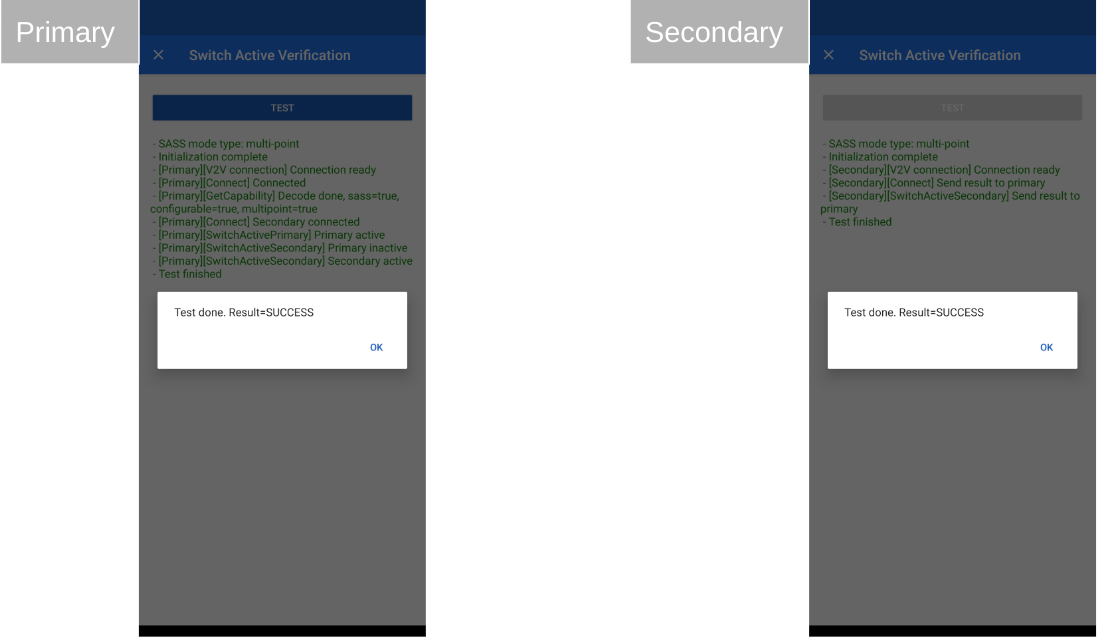
This test requires a Primary and Secondary Seeker.
This test only verifies that the Provider sends the expected messages using the message stream channel.
Test steps:
- The Primary Seeker connects to the Provider
- The Primary Seeker checks the capability of the Provider.
- If Multi-Point is off AND Multi-Point Configurable is
TRUEit will try to enable Multi-Point.
- If Multi-Point is off AND Multi-Point Configurable is
- The Primary Seeker will invoke Switch active audio source (to connected device) (0x30) to self.
- The Secondary Seeker connects to the Provider.
- The Primary Seeker will invoke Switch active audio source (to connected device) (0x30) to another device.
- The Provider will ACK the Primary Seeker.
- The Secondary Seeker will receive Notify multipoint-switch event (0x32) with the active state.
An example of the Switch Active (Multi-point Only) test:
How to Upload Results to the Device Console
How to Submit Your Results
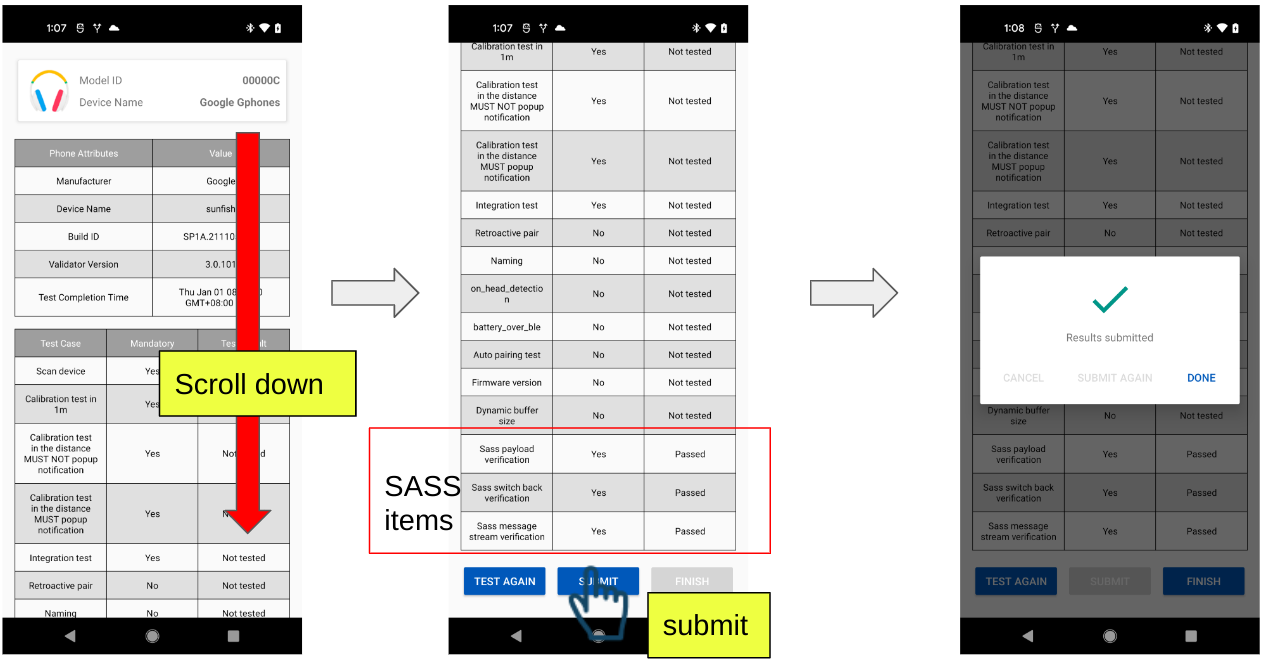
The "SUBMIT RESULT' button will present a summary of the test results but does not actually submit the results to Google.
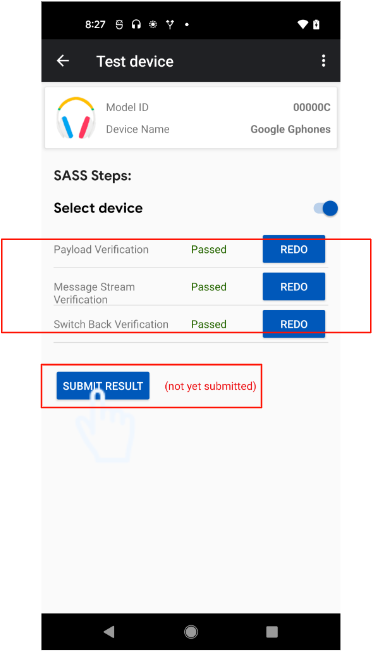
After reviewing all results, press the 'SUBMIT' button at the bottom of the results page to submit results to Google.
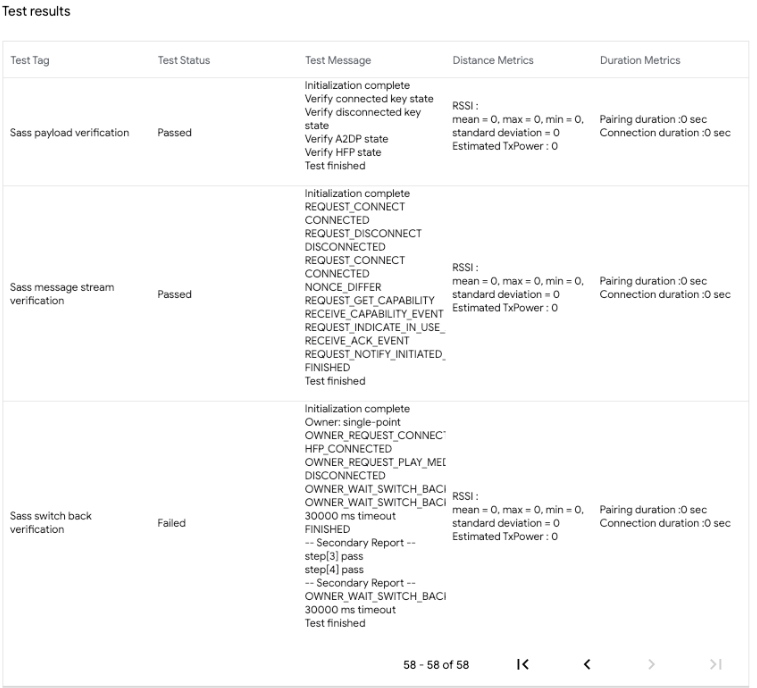
Viewing Uploaded Results in the Device Console
Submitted test results can be found on the Nearby Console. (Distance Metrics & Duration Metrics will be removed for Audio switch test cases). For example:
Troubleshooting
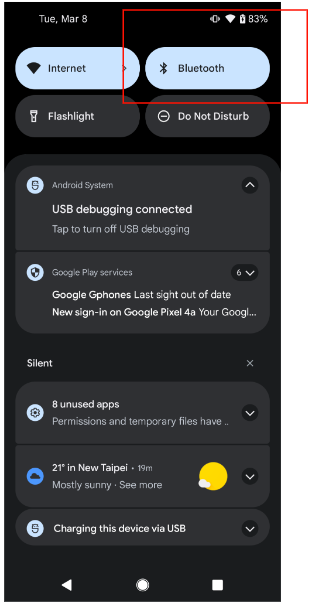
Try toggling Bluetooth off and on if all your tests failed.
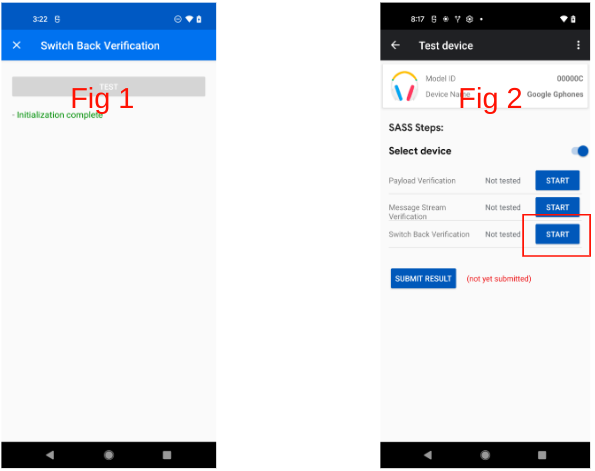
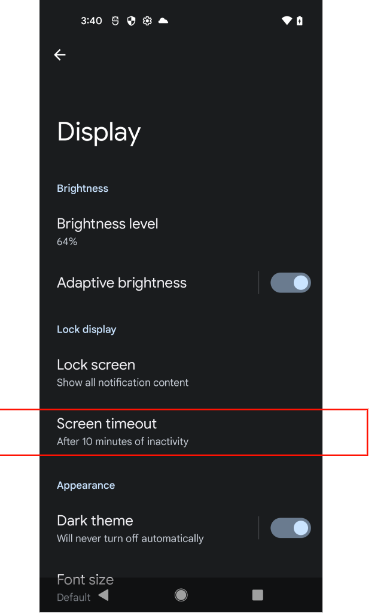
Switch-Back Test
If your Switch-Back test failed and is stuck like shown in fig1: Try going back to the Test-device page (fig2) and retesting:
