

マーカー付きの地図を追加する
このチュートリアルでは、マーカーが配置された Google マップを iOS アプリに追加する方法を説明します。Swift または Objective-C について初級から中級の知識があり、Xcode についても一般的な知識がある方に適しています。地図の作成に関する高度なガイドについては、デベロッパー ガイドをご覧ください。
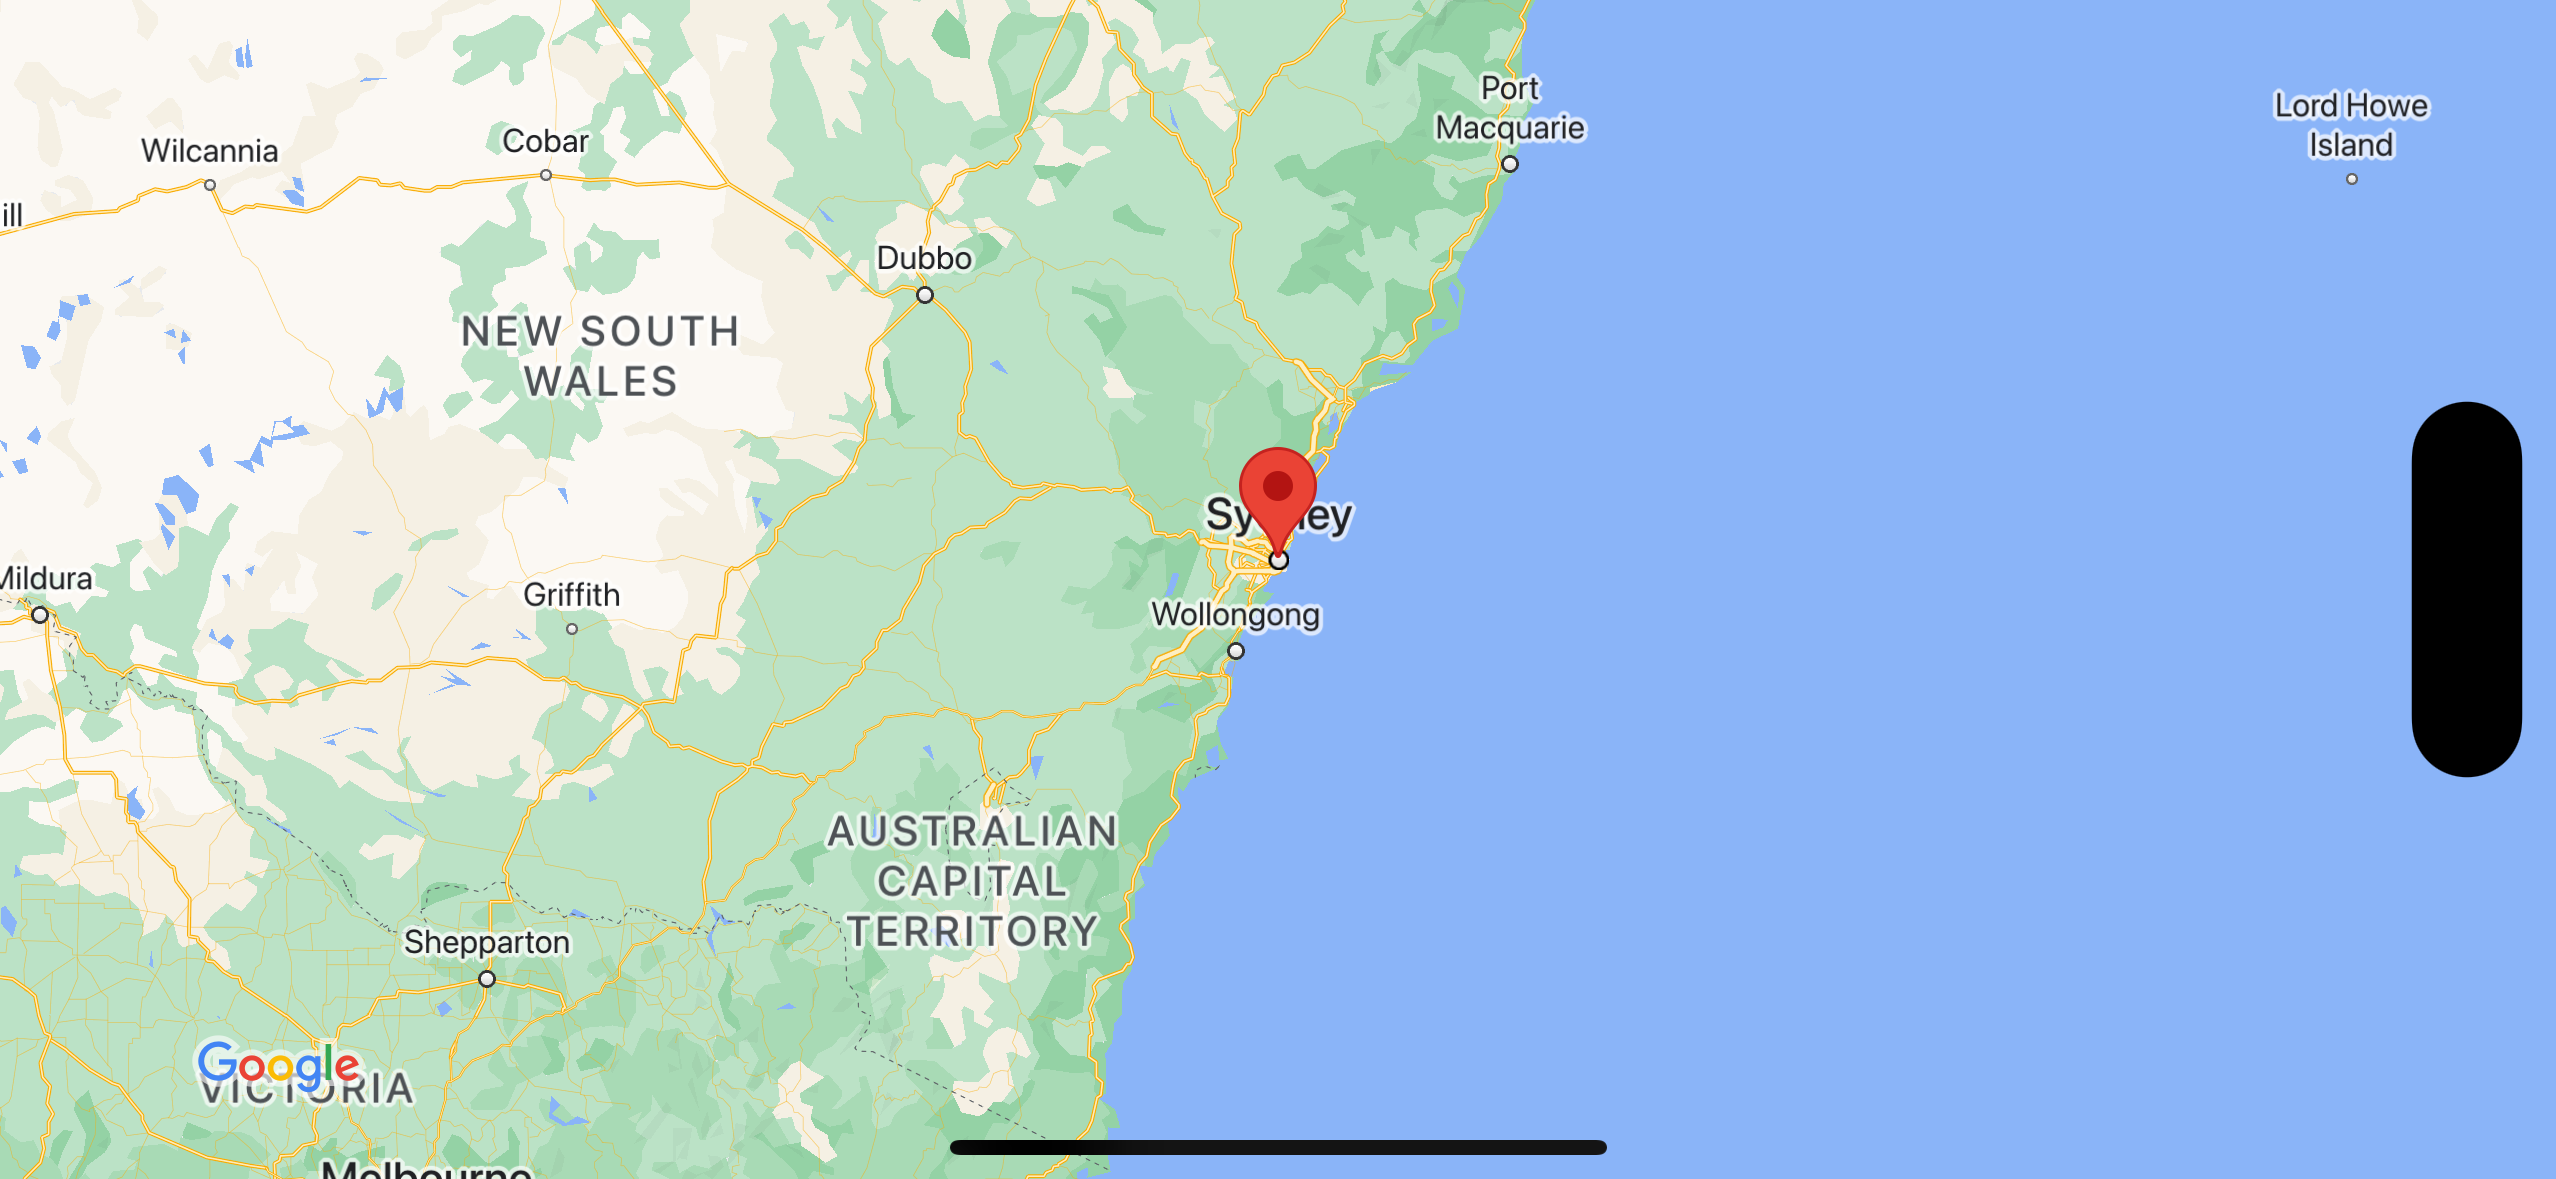
このチュートリアルでは、次の地図を作成します。マーカーはオーストラリアのシドニーに配置されます。
コードを取得する
GitHub で Google Maps iOS サンプル リポジトリをダウンロードするか、クローンを作成します。
または、次のボタンをクリックしてソースコードをダウンロードします。
Swift
import UIKit
import GoogleMaps

class ViewController: UIViewController {

    override func viewDidLoad() {
        super.viewDidLoad()
        // Do any additional setup after loading the view.
        // Create a GMSCameraPosition that tells the map to display the
        // coordinate -33.86,151.20 at zoom level 6.
        let camera = GMSCameraPosition.camera(withLatitude: -33.86, longitude: 151.20, zoom: 6.0)
        let options = GMSMapViewOptions()
        options.camera = camera
        options.frame = self.view.frame
        let mapView = GMSMapView(options: options)
        self.view.addSubview(mapView)

        // Creates a marker in the center of the map.
        let marker = GMSMarker()
        marker.position = CLLocationCoordinate2D(latitude: -33.86, longitude: 151.20)
        marker.title = "Sydney"
        marker.snippet = "Australia"
        marker.map = mapView
  }
}
Objective-C
#import "ViewController.h"
#import <GoogleMaps/GoogleMaps.h>

@interface ViewController ()

@end

@implementation ViewController

- (void)viewDidLoad {
    [super viewDidLoad];
  // Do any additional setup after loading the view.
  // Create a GMSCameraPosition that tells the map to display the
  // coordinate -33.86,151.20 at zoom level 6.
  GMSCameraPosition *camera = [GMSCameraPosition cameraWithLatitude:-33.86
                                                          longitude:151.20
                                                               zoom:6];
  GMSMapViewOptions *options = [[GMSMapViewOptions alloc] init];
  options.camera = camera;
  options.frame = self.view.frame;
  GMSMapView *mapView = [[GMSMapView alloc] initWithOptions:options];
  mapView.myLocationEnabled = YES;
  [self.view addSubview:mapView];

  // Creates a marker in the center of the map.
  GMSMarker *marker = [[GMSMarker alloc] init];
  marker.position = CLLocationCoordinate2DMake(-33.86, 151.20);
  marker.title = @"Sydney";
  marker.snippet = @"Australia";
  marker.map = mapView;
}

@end
始める
Swift Package Manager
Maps SDK for iOS は、Swift Package Manager を使用してインストールできます。
- 既存の Maps SDK for iOS の依存関係を削除します。
- ターミナル ウィンドウを開いて、
tutorials/map-with-markerディレクトリに移動します。 - Xcode ワークスペースを閉じて、次のコマンドを実行します。
sudo gem install cocoapods-deintegrate cocoapods-clean
pod deintegrate
pod cache clean --all
rm Podfile
rm map-with-marker.xcworkspace
- Xcode プロジェクトを開き、podfile を削除します。
- [File] > [Add Package Dependencies] の順に移動します。
- URL として https://github.com/googlemaps/ios-maps-sdk を入力し、Enter キーを押してパッケージをプルし、[パッケージを追加] をクリックします。
- [File] > [Packages] > [Reset Package Cache] を使用して、パッケージ キャッシュをリセットする必要がある場合があります。
API キーを取得して必要な API を有効にする
このチュートリアルを完了するには、Maps SDK for iOS の使用が承認されている Google API キーが必要です。次のボタンをクリックしてキーを取得し、API を有効にしてください。
使ってみる詳細については、API キーを取得するをご覧ください。
API キーをアプリに追加する
次のように、API キーを AppDelegate.swift に追加します。
- 以下のインポート文がファイルに追加済みであることを確認します。
import GoogleMaps
application(_:didFinishLaunchingWithOptions:)メソッドで次の行を編集し、「YOUR_API_KEY」YOUR_API_KEYをお客様の API キーに置き換えます。GMSServices.provideAPIKey("YOUR_API_KEY")
アプリをビルドして実行する
- iOS デバイスをパソコンに接続するか、Xcode スキーム メニューからシミュレータを選択します。
- デバイスを使用している場合は、位置情報サービスが有効になっていることを確認してください。 シミュレータを使用している場合は、[機能] メニューから場所を選択します。
- Xcode で、[Product/Run] メニュー オプション(またはプレイボタン アイコン)をクリックします。
- Xcode がアプリをビルドし、デバイスまたはシミュレータ上で実行します。
- このページの画像のように、オーストラリア東海岸のシドニーにマーカーが立った地図が表示されます。
トラブルシューティング:
- 地図が表示されない場合は、前述のとおりに API キーを取得してアプリに追加していることを確認してください。Xcode のデバッグ コンソールで、API キーに関するエラー メッセージを確認します。
- API キーに iOS バンドル ID による制限をかけている場合は、今回のアプリのバンドル ID(
com.google.examples.map-with-marker)を追加して許可してください。 - Wi-Fi または GPS の接続状態が良好であることを確認します。
- ログを表示してアプリをデバッグするには、Xcode デバッグツールを使用します。
コードを理解する
- マップを作成し、
viewDidLoad()でビューとして設定します。Swift
// Create a GMSCameraPosition that tells the map to display the
// coordinate -33.86,151.20 at zoom level 6.
let camera = GMSCameraPosition.camera(withLatitude: -33.86, longitude: 151.20, zoom: 6.0)
let options = GMSMapViewOptions()
options.camera = camera
let mapView = GMSMapView(options: options)
view = mapView
Objective-C
// Create a GMSCameraPosition that tells the map to display the
// coordinate -33.86,151.20 at zoom level 6.
GMSCameraPosition *camera = [GMSCameraPosition cameraWithLatitude:-33.86
                                                        longitude:151.20
                                                             zoom:6.0];
GMSMapViewOptions *options = [[GMSMapViewOptions alloc] init];
options.camera = camera;
GMSMapView *mapView = [[GMSMapView alloc] initWithOptions:options];
self.view = mapView;
viewDidLoad()で地図にマーカーを追加します。Swift
// Creates a marker in the center of the map.
let marker = GMSMarker()
marker.position = CLLocationCoordinate2D(latitude: -33.86, longitude: 151.20)
marker.title = "Sydney"
marker.snippet = "Australia"
marker.map = mapView
Objective-C
// Creates a marker in the center of the map.
GMSMarker *marker = [[GMSMarker alloc] init];
marker.position = CLLocationCoordinate2DMake(-33.86, 151.20);
marker.title = @"Sydney";
marker.snippet = @"Australia";
marker.map = mapView;
デフォルトでは、Maps SDK for iOS は、ユーザーがマーカーをタップすると、情報ウィンドウのコンテンツを表示します。このデフォルト動作で問題ない場合は、マーカーのクリック リスナーを追加する必要はありません。
これで完了です。特定の場所を示すマーカーが配置された Google マップを表示する iOS アプリが作成されました。また、 Maps SDK for iOS の使用方法も確認しました。
次のステップ
地図オブジェクトと、マーカーを使ってできることについて、詳しく確認します。