
您可以通过多种方式在 Google Cloud 中部署网站,每种解决方案都可以提供不同的功能、功能和控制级别。Google Compute Engine(也称为 GCE)可让您对用于运行网站的基础架构进行更深入的控制,但与 Google Kubernetes Engine (GKE)、Google App Engine (GAE) 等解决方案相比,它还需要更多的操作管理。借助 Compute Engine,我们可以精确控制基础架构的各个方面,包括虚拟机和负载平衡器等。今天,我们将部署一个示例应用(即 Fancy Store 电子商务网站),展示如何使用 Compute Engine 轻松部署和扩缩网站。
学习内容
- 如何创建 Compute Engine 实例
- 如何从源实例创建实例模板
- 如何创建代管式实例组
- 如何创建和测试代管式实例组运行状况检查
- 如何创建 HTTP(S) 负载平衡器
- 如何创建负载平衡器运行状况检查
- 如何使用内容分发网络 (CDN) 进行缓存
在此 Codelab 结束时,我们将在代管式实例组内添加实例,以便为我们的网站提供自动修复、负载均衡、自动扩缩和滚动更新功能。
前提条件
- 如需简要了解我们将在本实验中使用的概念,请参阅以下资料:
- 欢迎使用 Google Cloud Platform - GCP 基础知识
- Google Cloud Compute Engine 使用入门
- Google Cloud Storage 使用入门
- 使用入门:Cloud Shell
自定进度的环境设置
如果您还没有 Google 帐号(Gmail 或 Google Apps),则必须创建一个。登录 Google Cloud Platform Console (console.cloud.google.com) 并创建一个新项目:


请记住项目 ID,它在所有 Google Cloud 项目中都是唯一名称(很抱歉,上述名称已被占用,您无法使用!)。它稍后将在此 Codelab 中被称为 PROJECT_ID。
接下来,您需要在 Cloud Console 中启用结算功能,才能使用 Google Cloud 资源。
在此 Codelab 中运行仅花费几美元,但是如果您决定使用更多资源或继续让它们运行,费用可能更高(请参阅本文档末尾的“清理”部分)。
Google Cloud Platform 的新用户有资格获享 $300 免费试用。
启用 Compute Engine API
接下来,您需要启用 Compute Engine API。启用某个 API 需要您接受该 API 的服务条款和结算责任。
Google Cloud Shell
虽然 Google Cloud 和 Kubernetes 可以从笔记本电脑远程操作,但在此 Codelab 中,我们将使用 Google Cloud Shell,这是一个在云端运行的命令行环境。
基于 Debian 的这个虚拟机已加载了您需要的所有开发工具。它提供了一个持久的 5GB 主目录,并在 Google Cloud 上运行,大大增强了网络性能和身份验证。这意味着在本 Codelab 中,您只需要一个浏览器(没错,它适用于 Chromebook)。
要激活 Google Cloud Shell,只需在开发者控制台中点击右上方的按钮(配置和连接到环境应该只需要片刻时间):

点击“启动 Cloud Shell”按钮:


在连接到 Cloud Shell 后,您应该会看到自己已通过身份验证,并且相关项目已设置为您的 PROJECT_ID:
gcloud auth list
命令输出
Credentialed accounts:
 - <myaccount>@<mydomain>.com (active)
gcloud config list project
命令输出
[core]
project = <PROJECT_ID>
默认情况下,Cloud Shell 还会设置一些环境变量,这对您日后运行命令可能会很有用。
echo $GOOGLE_CLOUD_PROJECT
命令输出
<PROJECT_ID>
如果出于某种原因未设置项目,只需发出以下命令即可:
gcloud config set project <PROJECT_ID>
正在查找您的 PROJECT_ID?请查看您在设置步骤中使用的 ID,或在控制台信息中心内查找:

重要提示:最后,设置默认可用区和项目配置:
gcloud config set compute/zone us-central1-f
您可以选择各种不同的可用区。如需了解详情,请参阅“区域和可用区”文档。
创建 GCS 存储桶
我们将使用 Google Cloud Storage 存储分区来存储我们构建的代码和启动脚本。在 Cloud Shell 中,执行以下操作,创建新的 GCS 存储分区:
gsutil mb gs://fancy-store-$DEVSHELL_PROJECT_ID
我们将使用基于单体到微服务代码库的现有 Fancy Store 电子商务网站作为网站的基础。我们将从 Git 代码库中克隆源代码,以便专注于部署到 GCE 的方面。在本 Codelab 的后半部分,我们将对代码稍作更新,以演示 GCE 的更新简单。
点击下方按钮,将代码库克隆到项目中,并打开 Cloud Shell 和内置的代码编辑器。

在 Cloud Shell 命令提示符处,运行代码的初始 build 以允许应用在本地运行。此脚本可能需要几分钟的时间才能运行。
./setup.sh
让我们进行尽职调查并测试应用,然后运行以下命令启动我们的网络服务器:
cd microservices
npm start
输出:
Products microservice listening on port 8092!
Frontend microservice listening on port 8090!
Orders microservice listening on port 8091!
要预览您的应用,您可以点击网络预览图标,然后选择“更改端口”并输入“前端”微服务的端口:8090。选择“更改并预览”。


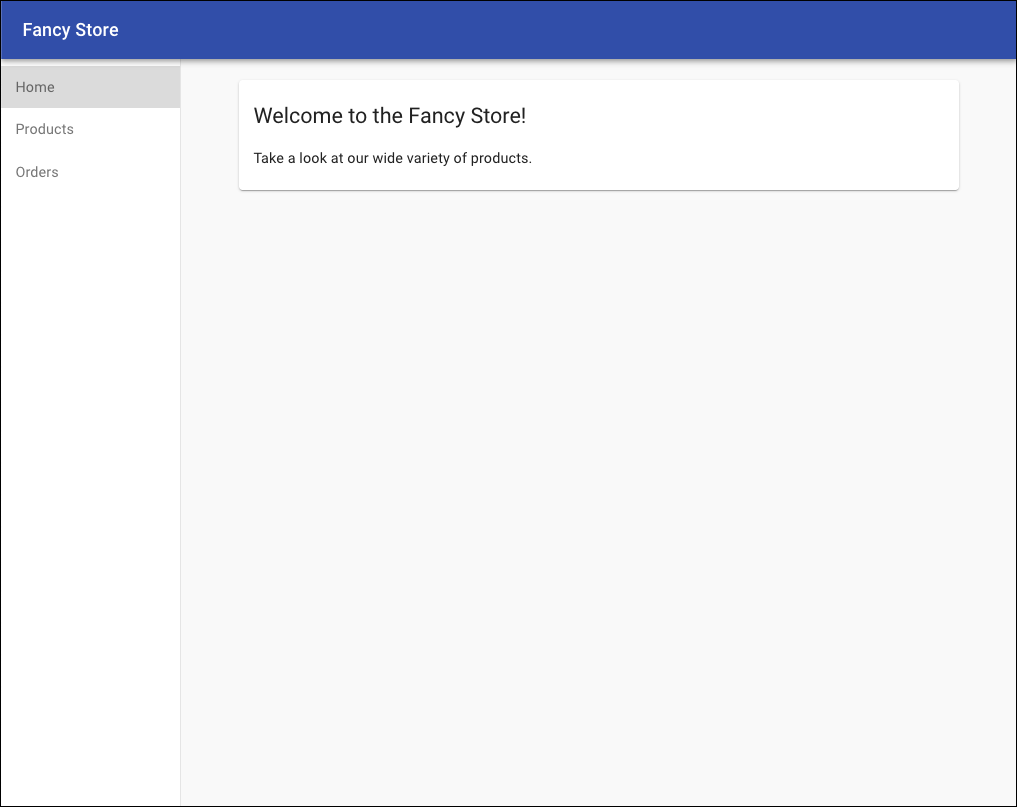
这应该会打开一个新窗口,您可以在其中看到 Fancy Store 的前端的实际运用!
您可在查看网站后关闭此窗口,也可在终端窗口中按 CTRL+C 以停止网络服务器进程。
现在,您已经有了正常运行的开发者环境,可以开始部署一些 Compute Engine 实例了!请按以下步骤操作:
- 创建启动脚本以配置实例
- 克隆源代码并上传到 Google Cloud Storage
- 部署 Compute Engine 实例以托管后端微服务
- 重新配置前端代码以利用后端微服务实例
- 部署 Compute Engine 实例以托管前端微服务
- 将网络配置为允许通信
创建启动脚本
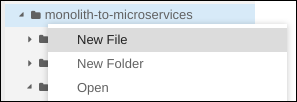
为了让实例自动按照需要配置,我们将使用启动脚本,指示实例在每次启动时要执行的操作。在 Cloud Shell 内的代码编辑器中,导航到 monolith-to-microservices 文件夹,然后创建一个名为“startup-script.sh”的文件。
在这个新文件中,粘贴以下代码。我们会在粘贴后修改一些代码。
#!/bin/bash

# Install logging monitor. The monitor will automatically pick up logs sent to
# syslog.
curl -s "https://storage.googleapis.com/signals-agents/logging/google-fluentd-install.sh" | bash
service google-fluentd restart &

# Install dependencies from apt
apt-get update
apt-get install -yq ca-certificates git build-essential supervisor psmisc

# Install nodejs
mkdir /opt/nodejs
curl https://nodejs.org/dist/v8.12.0/node-v8.12.0-linux-x64.tar.gz | tar xvzf - -C /opt/nodejs --strip-components=1
ln -s /opt/nodejs/bin/node /usr/bin/node
ln -s /opt/nodejs/bin/npm /usr/bin/npm

# Get the application source code from the Google Cloud Storage bucket.
mkdir /fancy-store
gsutil -m cp -r gs://fancy-store-[DEVSHELL_PROJECT_ID]/monolith-to-microservices/microservices/* /fancy-store/

# Install app dependencies.
cd /fancy-store/
npm install

# Create a nodeapp user. The application will run as this user.
useradd -m -d /home/nodeapp nodeapp
chown -R nodeapp:nodeapp /opt/app

# Configure supervisor to run the node app.
cat >/etc/supervisor/conf.d/node-app.conf << EOF
[program:nodeapp]
directory=/fancy-store
command=npm start
autostart=true
autorestart=true
user=nodeapp
environment=HOME="/home/nodeapp",USER="nodeapp",NODE_ENV="production"
stdout_logfile=syslog
stderr_logfile=syslog
EOF

supervisorctl reread
supervisorctl update
现在,在编辑器中找到文本 [DEVSHELL_PROJECT_ID],并将其替换为以下命令的输出:
echo $DEVSHELL_PROJECT_ID
输出示例:
my-gce-codelab-253520
startup-script.sh 中的代码行现在应类似于以下内容:
gs://fancy-store-my-gce-codelab-253520/monolith-to-microservices/microservices/* /fancy-store/启动脚本会执行以下任务:
- 安装 Logging 代理。该代理会自动从 syslog 收集日志。
- 安装 Node.js 和 Supervisor。超级用户将该应用作为守护程序运行。
- 从 GCS 存储分区克隆应用源代码并安装依赖项。
- 配置 Supervisor 以运行应用。如果应用意外退出或被管理员或进程停止,Supervisor 将确保应用重启。它还会将应用的 stdout 和 stderr 发送到 syslog,以供 Logging 代理收集。
现在,将创建的启动脚本.sh 文件复制到我们之前创建的 GCS 存储分区中:
gsutil cp startup-script.sh gs://fancy-store-$DEVSHELL_PROJECT_ID
此文件现在可以通过以下网址访问:https://storage.googleapis.com/[BUCKET_NAME]/startup-script.sh。[BUCKET_NAME] 表示 Cloud Storage 存储分区的名称。默认情况下,只有授权用户和服务帐号才能查看,因此无法通过网络浏览器访问。Google Compute Engine 实例将自动通过其服务帐号访问此内容。
将代码复制到 GCS 存储分区中
当实例启动时,它们将从 GCS 存储分区中提取代码,以便我们在代码的“.env'”文件中存储一些配置变量。
将克隆的代码复制到 GCS 存储分区:
cd ~
rm -rf monolith-to-microservices/*/node_modules
gsutil -m cp -r monolith-to-microservices gs://fancy-store-$DEVSHELL_PROJECT_ID/
部署后端实例
我们要部署的第一个实例是包含“订单”和“商品”微服务的后端实例。
在 Cloud Shell 中运行以下命令,创建一个 f1-micro 实例,配置为使用我们之前创建的启动脚本,该实例还会被标记为“后端”实例,以便我们以后对其应用特定防火墙规则:
gcloud compute instances create backend \
    --machine-type=f1-micro \
    --image=debian-9-stretch-v20190905 \
    --image-project=debian-cloud \
    --tags=backend \
    --metadata=startup-script-url=https://storage.googleapis.com/fancy-store-$DEVSHELL_PROJECT_ID/startup-script.sh
配置与后端的连接
在部署应用的前端之前,我们需要更新配置以指向我们刚部署的后端。
检索后端的外部 IP 地址,可在后端实例的 EXTERNAL_IP 标签页下使用以下命令进行查看:
gcloud compute instances list
输出示例:
NAME     ZONE           MACHINE_TYPE  PREEMPTIBLE  INTERNAL_IP  EXTERNAL_IP   STATUS
backend  us-central1-a  f1-micro                   10.128.0.2   34.68.223.88  RUNNING
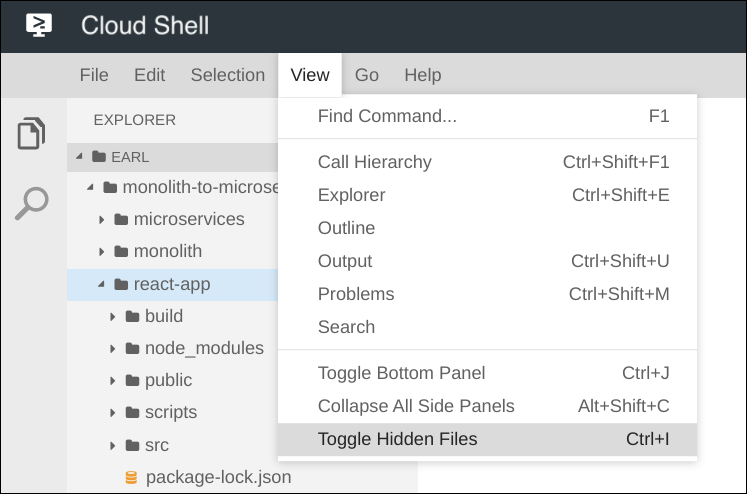
返回 Cloud Shell 的代码编辑器,导航到文件夹“nonolith-to-microservices”→“react-app”。在代码编辑器菜单中,选择查看 → 切换隐藏文件,以便能够查看“.env”文件。
修改 .env' 文件,使其指向后端的外部 IP。下面的 [BACKEND_ADDRESS] 表示通过上述 gcloud 命令确定的后端实例的外部 IP 地址。
REACT_APP_ORDERS_URL=http://[BACKEND_ADDRESS]:8091/api/orders
REACT_APP_PRODUCTS_URL=http://[BACKEND_ADDRESS]:8092/api/products
重新构建 React 应用,以更新前端代码:
npm install && npm run-script build
将应用代码复制回 GCS 存储分区:
cd ~
rm -rf monolith-to-microservices/*/node_modules
gsutil -m cp -r monolith-to-microservices gs://fancy-store-$DEVSHELL_PROJECT_ID/
部署前端实例
现在,代码已配置完毕,我们可以部署前端实例了。执行以下命令,使用与之前类似的命令部署前端实例,但此实例被标记为“frontend”,用于防火墙。
gcloud compute instances create frontend \
    --machine-type=f1-micro \
    --image=debian-9-stretch-v20190905 \
    --image-project=debian-cloud \
    --tags=frontend \
    --metadata=startup-script-url=https://storage.googleapis.com/fancy-store-$DEVSHELL_PROJECT_ID/startup-script.sh
配置网络
创建防火墙规则以允许访问前端的端口 8090,后端访问端口 8091-8092。这些防火墙命令会使用在应用创建实例期间分配的标记。
gcloud compute firewall-rules create fw-fe \
    --allow tcp:8090 \
    --target-tags=frontend
gcloud compute firewall-rules create fw-be \
    --allow tcp:8091-8092 \
    --target-tags=backend
网站现在应正常运行。导航到前端的外部 IP。可以通过查找前端实例的 EXTERNAL_IP 来确定此地址:
gcloud compute instances list
输出示例:
NAME      ZONE           MACHINE_TYPE  PREEMPTIBLE  INTERNAL_IP  EXTERNAL_IP      STATUS
backend   us-central1-a  f1-micro                   10.128.0.2   104.198.235.171  RUNNING
frontend  us-central1-a  f1-micro                   10.128.0.3   34.69.141.9      RUNNING
导航到 http://[FRONTEND_ADDRESS]:8090 以访问网站,其中 [FRONTEND_ADDRESS] 是上面确定的 EXTERNAL_IP。启动和配置实例可能需要几分钟的时间。
请尝试转到“商品”和“订单”页面;这些页面应该也可以成功打开。
为了让我们的应用实现扩缩,系统会创建代管式实例组,并使用前端和后端实例作为实例模板。
代管式实例组 (MIG) 包含可以作为单个可用区中的单个实体进行管理的相同实例。代管式实例组会主动让您的实例保持可用(即处于“正在运行”状态),以保持应用的高可用性。我们将对前端和后端实例使用代管式实例组,以实现自动修复、负载均衡、自动扩缩和滚动更新。
从源实例创建实例模板
创建代管式实例组之前,我们首先必须创建一个实例模板,以作为该实例组的基础。通过实例模板,您可以定义创建新虚拟机实例时使用的机器类型、启动磁盘映像或容器映像、网络和其他实例属性。您可以使用实例模板在代管式实例组中创建实例,甚至可以创建单独的实例。
如需创建实例模板,我们将使用之前创建的现有实例。首先,我们必须停止这两个实例:
gcloud compute instances stop frontend
gcloud compute instances stop backend
然后,我们可以根据源实例创建实例模板:
gcloud compute instance-templates create fancy-fe \
    --source-instance=frontend \
    --source-instance-zone=us-central1-a
gcloud compute instance-templates create fancy-be \
    --source-instance=backend \
    --source-instance-zone=us-central1-a
确认实例模板已创建:
gcloud compute instance-templates list
输出示例:
NAME      MACHINE_TYPE  PREEMPTIBLE  CREATION_TIMESTAMP
fancy-be  f1-micro                   2019-09-12T07:52:57.544-07:00
fancy-fe  f1-micro                   2019-09-12T07:52:48.238-07:00
创建代管式实例组
我们将创建两个代管式实例组,一个用于前端,一个用于后端。这些代管式实例组将使用之前创建的实例模板,并为每个组中的两个实例进行配置,以启动实例。系统将根据附加了随机字符的“base-instance-name”自动命名这些实例。
gcloud compute instance-groups managed create fancy-fe-mig \
    --base-instance-name fancy-fe \
    --size 2 \
    --template fancy-fe
gcloud compute instance-groups managed create fancy-be-mig \
    --base-instance-name fancy-be \
    --size 2 \
    --template fancy-be
对于我们的应用,前端微服务在端口 8090 上运行,后端微服务在端口 8091(对于订单)和端口 8092(对于产品)运行。由于这些是非标准端口,因此我们将指定已命名的端口以标识这些端口。已命名的端口是键值对元数据,表示运行该服务的服务名称和端口。已命名的端口可以分配给实例组,这表示组中的所有实例都可以使用该服务。此信息会被稍后配置的 HTTP 负载均衡服务使用。
gcloud compute instance-groups set-named-ports fancy-fe-mig \
    --named-ports frontend:8090
gcloud compute instance-groups set-named-ports fancy-be-mig \
    --named-ports orders:8091,products:8092
配置自动修复
要提高应用本身的可用性以及验证应用是否正在响应,可以为代管式实例组配置自动修复政策。
自动修复政策依赖于基于应用的健康检查来验证应用是否按预期响应。与仅验证实例是否处于 RUNNING 状态(这是默认行为)相比,检查应用是否响应可以获得更加精准的结果。
创建健康检查,以便在前端和后端连续多次返回运行状况不佳时对实例进行修复:
gcloud compute health-checks create http fancy-fe-hc \
    --port 8090 \
    --check-interval 30s \
    --healthy-threshold 1 \
    --timeout 10s \
    --unhealthy-threshold 3
gcloud compute health-checks create http fancy-be-hc \
    --port 8091 \
    --request-path=/api/orders \
    --check-interval 30s \
    --healthy-threshold 1 \
    --timeout 10s \
    --unhealthy-threshold 3
创建防火墙规则以允许健康检查探测连接到端口 8090-8091 的微服务:
gcloud compute firewall-rules create allow-health-check \
    --allow tcp:8090-8091 \
    --source-ranges 130.211.0.0/22,35.191.0.0/16 \
    --network default
将运行状况检查应用于其各自的服务:
gcloud compute instance-groups managed update fancy-fe-mig \
    --health-check fancy-fe-hc \
    --initial-delay 300
gcloud compute instance-groups managed update fancy-be-mig \
    --health-check fancy-be-hc \
    --initial-delay 300
模拟失败
如需确认运行状况检查是否正常,请登录实例并停止服务。如需查找实例名称,请执行以下命令:
gcloud compute instance-groups list-instances fancy-fe-mig
然后,将 shell 安全连接到其中一个实例,其中 INSTANCE_NAME 是列表中的一个实例:
gcloud compute ssh [INSTANCE_NAME]
在实例中,使用 supervisorctl 停止应用:
sudo supervisorctl stop nodeapp; sudo killall node
退出实例:
exit
监控修复操作:
watch -n 5 gcloud compute operations list \
--filter='operationType~compute.instances.repair.*'
查找以下示例输出:
NAME                                                  TYPE                                       TARGET                                 HTTP_STATUS  STATUS  TIMESTAMP
repair-1568314034627-5925f90ee238d-fe645bf0-7becce15  compute.instances.repair.recreateInstance  us-central1-a/instances/fancy-fe-1vqq  200          DONE    2019-09-12T11:47:14.627-07:00
发现问题后,按 Ctrl+C 退出观看命令。此时,代管实例组将重新创建实例以进行修复。
为了完善我们的代管式实例组,我们将使用 HTTP(S) 负载平衡器来将流量发送到前端和后端微服务,并使用映射根据路径规则将流量发送到适当的后端服务。这将公开所有服务的单个负载均衡 IP。
https://cloud.google.com/load-Balance/docs/load-Balance-overview。
创建 HTTP(S) 负载均衡器
Google Cloud Platform 提供了许多不同类型的负载平衡器,但我们要为流量使用 HTTP(S) 负载平衡器。HTTP 负载平衡器的结构如下:
- 转发规则将传入的请求定向到目标 HTTP 代理。
- 目标 HTTP 代理根据网址映射检查每个请求,以确定请求的相应后端服务。
- 后端服务根据所关联后端的服务容量、地区和实例健康状况将每个请求定向到相应的后端。系统会使用 HTTP 运行状况检查验证每个后端实例的健康状况。如果后端服务配置为使用 HTTPS 或 HTTP/2 健康检查,则请求将在传输到后端实例的过程中经过加密。
- 负载平衡器和实例之间的会话可以使用 HTTP、HTTPS 或 HTTP/2 协议。如果您使用 HTTPS 或 HTTP/2,则后端服务中的每个实例都必须具有 SSL 证书。
创建运行状况检查,用于确定哪些实例能够处理每项服务的流量。
gcloud compute http-health-checks create fancy-fe-frontend-hc \
  --request-path / \
  --port 8090
gcloud compute http-health-checks create fancy-be-orders-hc \
  --request-path /api/orders \
  --port 8091
gcloud compute http-health-checks create fancy-be-products-hc \
  --request-path /api/products \
  --port 8092
创建后端服务作为负载均衡流量的目标。此后端服务将使用我们创建的运行状况检查和已命名的端口。
gcloud compute backend-services create fancy-fe-frontend \
  --http-health-checks fancy-fe-frontend-hc \
  --port-name frontend \
  --global
gcloud compute backend-services create fancy-be-orders \
  --http-health-checks fancy-be-orders-hc \
  --port-name orders \
  --global
gcloud compute backend-services create fancy-be-products \
  --http-health-checks fancy-be-products-hc \
  --port-name products \
  --global
添加后端服务:
gcloud compute backend-services add-backend fancy-fe-frontend \
  --instance-group fancy-fe-mig \
  --instance-group-zone us-central1-a \
  --global
gcloud compute backend-services add-backend fancy-be-orders \
  --instance-group fancy-be-mig \
  --instance-group-zone us-central1-a \
  --global
gcloud compute backend-services add-backend fancy-be-products \
  --instance-group fancy-be-mig \
  --instance-group-zone us-central1-a \
  --global
创建网址映射。网址映射定义了将哪些网址引导至哪些后端服务。
gcloud compute url-maps create fancy-map \
  --default-service fancy-fe-frontend
创建路径匹配器以允许“/api/orders'”和“/api/products' 路径路由到相应的服务:
gcloud compute url-maps add-path-matcher fancy-map \
   --default-service fancy-fe-frontend \
   --path-matcher-name orders \
   --path-rules "/api/orders=fancy-be-orders,/api/products=fancy-be-products"
创建与已创建的网址映射关联的代理。
gcloud compute target-http-proxies create fancy-proxy \
  --url-map fancy-map
创建一条将公共 IP 地址和端口绑定到代理的全局转发规则。
gcloud compute forwarding-rules create fancy-http-rule \
  --global \
  --target-http-proxy fancy-proxy \
  --ports 80
更新配置
现在我们有了新的静态 IP 地址,接下来需要更新前端上的代码以指向此新地址,而不是之前指向后端实例的临时地址。
在 Cloud Shell 中,切换到包含“.env'”文件的 react-app 文件夹,该文件包含配置:
cd ~/monolith-to-microservices/react-app/
查找负载平衡器的 IP 地址:
gcloud compute forwarding-rules list --global
输出示例:
NAME                    REGION  IP_ADDRESS     IP_PROTOCOL  TARGET
fancy-http-rule          34.102.237.51  TCP          fancy-proxy
使用您的首选文本编辑器(例如 nano)修改 .env 来指向负载平衡器的公共 IP。[LB_IP] 代表上面确定的后端实例的外部 IP 地址。
REACT_APP_ORDERS_URL=http://[LB_IP]/api/orders
REACT_APP_PRODUCTS_URL=http://[LB_IP]/api/products重新构建 React 应用,以更新前端代码:
npm install && npm run-script build
将应用代码复制回 GCS 存储分区:
cd ~
rm -rf monolith-to-microservices/*/node_modules
gsutil -m cp -r monolith-to-microservices gs://fancy-store-$DEVSHELL_PROJECT_ID/
更新前端实例
现在有了新的代码和配置,我们希望代管式实例组中的前端实例能够拉取此新代码。由于我们的实例会在启动时拉取代码,因此我们可以发出滚动式重启命令:
gcloud compute instance-groups managed rolling-action restart fancy-fe-mig \
    --max-unavailable 100%
测试网站
检查代管式实例组的状态,直到列表中出现实例为止:
watch -n 5 gcloud compute instance-groups list-instances fancy-fe-mig
列表中出现相关内容后,按 Ctrl+C 退出观看命令。
确认服务已列为健康状况良好:
gcloud compute backend-services get-health fancy-fe-frontend --global
输出示例:
---
backend: https://www.googleapis.com/compute/v1/projects/my-gce-codelab/zones/us-central1-a/instanceGroups/fancy-fe-mig
status:
  healthStatus:
  - healthState: HEALTHY
    instance: https://www.googleapis.com/compute/v1/projects/my-gce-codelab/zones/us-central1-a/instances/fancy-fe-x151
    ipAddress: 10.128.0.7
    port: 8090
  - healthState: HEALTHY
    instance: https://www.googleapis.com/compute/v1/projects/my-gce-codelab/zones/us-central1-a/instances/fancy-fe-cgrt
    ipAddress: 10.128.0.11
    port: 8090
  kind: compute#backendServiceGroupHealth
然后,可以通过 http://[LB_IP] 访问该应用,其中 [LB_IP] 是为负载平衡器指定的 IP_ADDRESS,可通过以下命令找到:
gcloud compute forwarding-rules list --global
到目前为止,我们已经创建了两个代管式实例组,每个实例组包含两个实例;此配置完全正常,但是一个静态配置,无论负载如何。现在,我们将创建基于利用率的自动扩缩政策,以自动扩缩每个代管式实例组。
按利用率自动调整尺寸
如需创建自动扩缩政策,请在 Cloud Shell 中执行以下命令。这些命令会在代管式实例组上创建自动扩缩器,以便在利用率高于 60% 时自动添加实例,并在负载平衡器的利用率低于 60% 时移除实例。
gcloud compute instance-groups managed set-autoscaling \
  fancy-fe-mig \
  --max-num-replicas 5 \
  --target-load-balancing-utilization 0.60
gcloud compute instance-groups managed set-autoscaling \
  fancy-be-mig \
  --max-num-replicas 5 \
  --target-load-balancing-utilization 0.60
启用内容分发网络
另一个有助于调节的功能是启用 Cloud CDN(一项内容分发网络服务),以便为前端提供缓存。为此,我们可以在前端服务上执行以下命令:
gcloud compute backend-services update fancy-fe-frontend \
    --enable-cdn --global
现在,当用户从 HTTP(S) 负载平衡器请求内容时,请求会到达 Google Front End (GFE),该前端最先在 Cloud CDN 缓存中查找对用户请求的响应。如果 GFE 找到缓存的响应,则 GFE 会将缓存的响应发送给用户。这称为缓存命中。
否则,如果 GFE 找不到该请求的缓存响应,则 GFE 会直接向后端发出请求。如果此请求的响应可以缓存,则 GFE 会将响应存储在 Cloud CDN 缓存中,以便此缓存可用于后续请求。
更新实例模板
现有的实例模板不可修改;但是,由于我们的实例是无状态的,且所有配置都是通过启动脚本完成的,因此,我们只有在需要更改核心映像本身时,才需要真正更改实例模板。为了演示此过程,我们将做出一个简单的更改并将其推送到浏览器中。
在本节中,我们将更新前端实例,该实例是实例模板的基础。在更新期间,我们会将一个文件放到更新版实例模板的文件中,然后更新实例模板,发布新模板,然后确认该文件现已存在于代管式实例组实例上。
启动前端实例(如果该实例尚未运行):
gcloud compute instances start frontend
将 shell 保护到实例中:
gcloud compute ssh frontend
在实例中,我们来创建文件以证明其已更新:
echo "Updated" > ~/updated_proof
退出实例:
exit
关停实例:
gcloud compute instances stop frontend
新建实例模板:
gcloud compute instance-templates create fancy-fe-new \
    --source-instance=frontend \
    --source-instance-zone=us-central1-a
将更新后的实例模板发布到代管式实例组:
gcloud compute instance-groups managed rolling-action start-update fancy-fe-mig \
    --version template=fancy-fe-new
监控更新的状态:
gcloud compute instance-groups managed list-instances fancy-fe-mig
当实例处于 RUNNING 状态且 INSTANCE_Templates 设置为 fancy-fe-new 时,请登录新创建的实例,查看 'updated_proof' 文件是否已存在,其中 [VM_NAME] 是新创建的实例:
gcloud compute ssh [VM_NAME]
如果代管实例组实例上现已包含“updated_proof'”文件,则表明更新已成功推送。
更改网站
您的营销团队要求您更改网站的首页。他们认为应该在更多的信息中说明你的公司是谁,以及你实际销售什么。在本部分中,我们将在首页上添加一些文字,让营销团队满意!我们的一位开发者似乎已创建了名为“index.js.new”的更改。我们只需将该文件复制到 index.js,即可反映我们的更改。请按照以下说明做出适当的更改。
运行以下命令将更新后的文件复制到正确的文件名,然后输出其内容以验证更改:
cd ~/monolith-to-microservices/react-app/src/pages/Home
mv index.js.new index.js
cat ~/monolith-to-microservices/react-app/src/pages/Home/index.js
生成的代码应如下所示:
/*
Copyright 2019 Google LLC
Licensed under the Apache License, Version 2.0 (the "License");
you may not use this file except in compliance with the License.
You may obtain a copy of the License at
https://www.apache.org/licenses/LICENSE-2.0
Unless required by applicable law or agreed to in writing, software
distributed under the License is distributed on an "AS IS" BASIS,
WITHOUT WARRANTIES OR CONDITIONS OF ANY KIND, either express or implied.
See the License for the specific language governing permissions and
limitations under the License.
*/
import React from "react";
import { makeStyles } from "@material-ui/core/styles";
import Paper from "@material-ui/core/Paper";
import Typography from "@material-ui/core/Typography";
const useStyles = makeStyles(theme => ({
root: {
flexGrow: 1
},
paper: {
width: "800px",
margin: "0 auto",
padding: theme.spacing(3, 2)
}
}));
export default function Home() {
const classes = useStyles();
return (
<div className={classes.root}>
<Paper className={classes.paper}>
<Typography variant="h5">
Fancy Fashion & Style Online
</Typography>
<br />
<Typography variant="body1">
Tired of mainstream fashion ideas, popular trends and societal norms?
This line of lifestyle products will help you catch up with the Fancy trend and express your personal style.
Start shopping Fancy items now!
</Typography>
</Paper>
</div>
);
}我们更新了 React 组件,但需要构建 React 应用才能生成静态文件。运行以下命令以构建 React 应用,并将其复制到单体式公共目录中:
cd ~/monolith-to-microservices/react-app
npm install && npm run-script build
然后,我们将此代码重新推送到 GCS 存储分区:
cd ~
rm -rf monolith-to-microservices/*/node_modules
gsutil -m cp -r monolith-to-microservices gs://fancy-store-$DEVSHELL_PROJECT_ID/
使用滚动更新推送更改
现在,我们可以强制所有实例重启以提取更新:
gcloud compute instance-groups managed rolling-action restart fancy-fe-mig
现在,这种滚动重启操作会在离开缓冲区时重启实例,这样不会影响访问。通过控制台监控实例的循环。更新时,状态将进入转换状态;完成后,代管式实例组将在 Compute Engine - 实例组下显示为“就绪”:

清理完毕后,如需清理执行的所有活动,最简单的方法是删除项目。删除项目会删除在此 Codelab 中创建的所有负载平衡器、实例、模板等,以确保不会产生意外的周期性费用。在 Cloud Shell 中执行以下操作,其中 PROJECT_ID 是完整的项目 ID,而不仅仅是项目名称。
gcloud projects delete [PROJECT_ID]
出现提示时,输入“Y”以确认删除。
您已成功在 GCE 上部署、扩缩和更新您的网站。您现在已经熟悉 Compute Engine、代管式实例组、负载平衡器和健康检查了!