Google Wallet pass development flow
The Google Wallet API provides a pre-defined set of pass types that are optimized for specific use cases, such as gift cards, boarding passes, event tickets, and more. There is also a Generic pass type that intended for use cases where a specific pass type is not available.
This article is intended to familiarize you with the basic steps required to create and issue a pass using the Google Wallet API. There are multiple ways to accomplish some of the step detailed below, but at a high level all pass types are created by following the same basic development flow.
For a detailed walkthrough of creating a pass, see the guides for web, email, and SMS or Android apps.
1. Create a Passes Class
What it's for
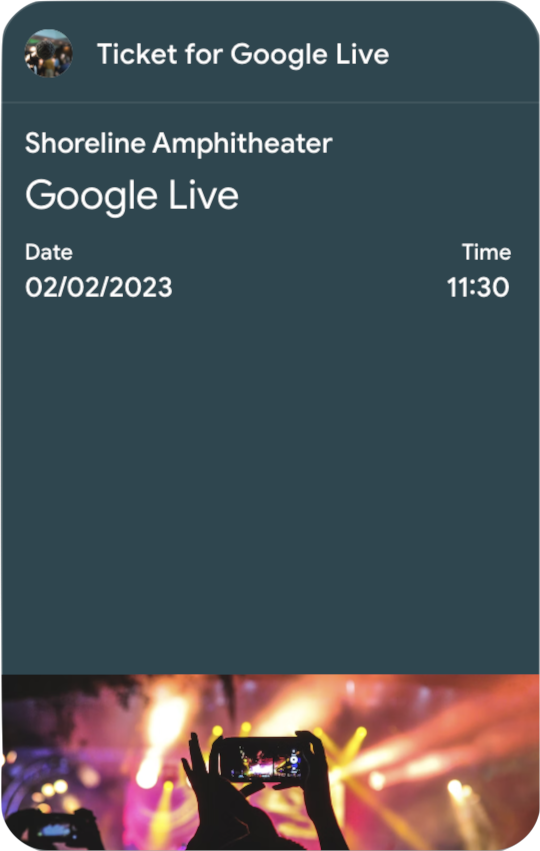
A Passes Class defines a set of properties that are common across multiple passes, similar to a template. For example, if you were issuing tickets of an event, the Passes Class would define fields that are the same across all tickets, such as the event name, date, and time.
Every pass you issue must reference a Passes Class. You must also assign a unique ID to every Passes Class you create, which is used to reference it in when creating passes.
How it's done
A Passes Class is defined in JSON format, and can be created with the Google Wallet REST API, Android SDK, or in the Google Wallet Business Console.
Show example Passes Class
{
  "id": "ISSUER_ID.EVENT_CLASS_ID",
  "issuerName": "[TEST ONLY] Heraldic Event",
  "localizedIssuerName": {
    "defaultValue": {
      "language": "en-US",
      "value": "[TEST ONLY] Heraldic Event"
    }
  },
  "logo": {
    "sourceUri": {
      "uri": "https://images.unsplash.com/photo-1475721027785-f74eccf877e2?ixlib=rb-4.0.3&ixid=MnwxMjA3fDB8MHxwaG90by1wYWdlfHx8fGVufDB8fHx8&auto=format&fit=crop&w=660&h=660"
    },
    "contentDescription": {
      "defaultValue": {
        "language": "en-US",
        "value": "LOGO_IMAGE_DESCRIPTION"
      }
    }
  },
  "eventName": {
    "defaultValue": {
      "language": "en-US",
      "value": "Google Live"
    }
  },
  "venue": {
    "name": {
      "defaultValue": {
        "language": "en-US",
        "value": "Shoreline Amphitheater"
      }
    },
    "address": {
      "defaultValue": {
        "language": "en-US",
        "value": "ADDRESS_OF_THE_VENUE"
      }
    }
  },
  "dateTime": {
    "start": "2023-04-12T11:30"
  },
  "reviewStatus": "UNDER_REVIEW",
  "hexBackgroundColor": "#264750",
  "heroImage": {
    "sourceUri": {
      "uri": "https://images.unsplash.com/photo-1501281668745-f7f57925c3b4?ixlib=rb-4.0.3&ixid=MnwxMjA3fDB8MHxwaG90by1wYWdlfHx8fGVufDB8fHx8&auto=format&fit=crop&w=1032&h=336"
    },
    "contentDescription": {
      "defaultValue": {
        "language": "en-US",
        "value": "HERO_IMAGE_DESCRIPTION"
      }
    }
  }
}
2. Create a Passes Object
What it's for
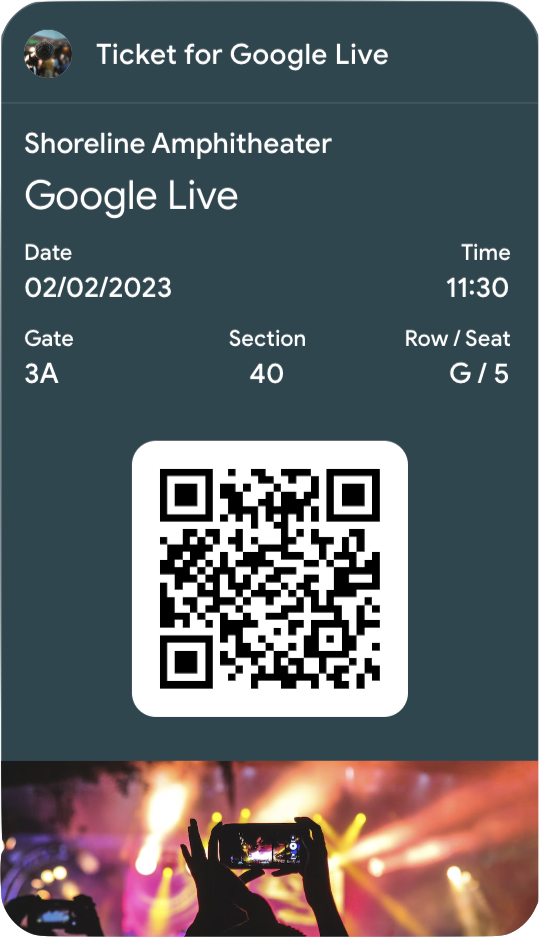
A Passes Object defines the properties of a unique pass that will be issued to a specific user. For example, the Passes Object for an event ticket would define fields that are unique to a specific ticket, such as the seat number or a QR code for that ticket.
When a Passes Object is created, the Google Wallet API stores a new pass and associates it with your Issuer account. This stored pass is a combination of the unique properties of the Passes Object and the template properties of the associated Passes Class.
You must also assign each Passes Object a unique ID, which is used to reference it when issuing a pass.
How it's done
A Passes Object is defined JSON format, and can be created with the Google Wallet REST API or Android SDK.
Show example Passes Object
{
  "id": "ISSUER_ID.OBJECT_ID",
  "classId": "ISSUER_ID.EVENT_CLASS_ID",
  "state": "ACTIVE",
  "seatInfo": {
    "seat": {
      "defaultValue": {
        "language": "en-us",
        "value": "5"
      }
    },
    "row": {
      "defaultValue": {
        "language": "en-us",
        "value": "G"
      }
    },
    "section": {
      "defaultValue": {
        "language": "en-us",
        "value": "40"
      }
    },
    "gate": {
      "defaultValue": {
        "language": "en-us",
        "value": "3A"
      }
    }
  },
  "barcode": {
    "type": "QR_CODE",
    "value": "BARCODE_VALUE",
    "alternateText": ""
  }
}
3. Encode the pass in a JSON Web Token (JWT)
What it's for
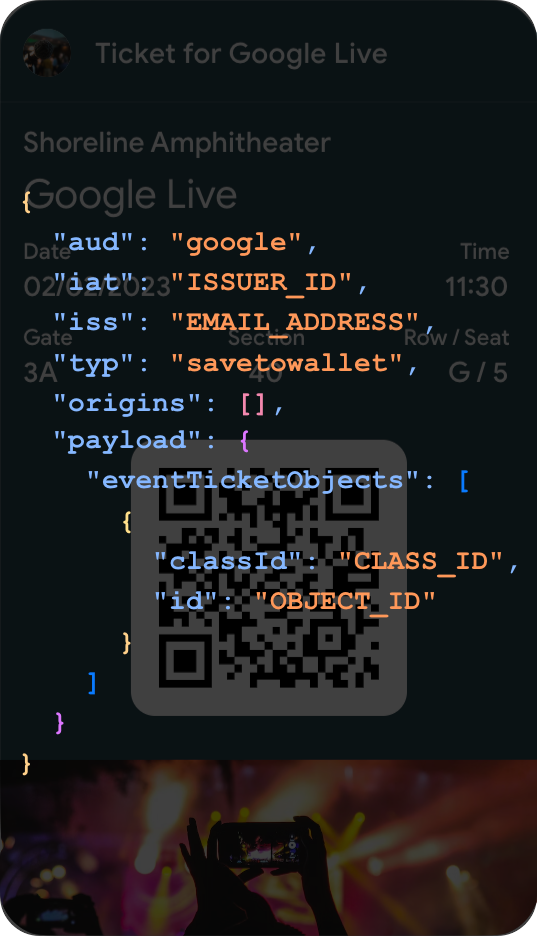
To issue a pass to a user, a Passes Class and Passes Object must be encoded in a JSON Web Token (JWT). The JWT format is a common and open standard for representing claims between two parties. In the case of issuing passes with the Google Wallet API, JWTs are used to send a claim that a user has a right to access a specific pass that is associated with your Issuer account.
When a JWT is sent to the Google Wallet API, the encoded data is used to identify a specific pass and issue it to the user. If the pass has already been issued, this data also allows the Google Wallet API to identify that the pass is a duplicate so that it is not added to the user's Google Wallet more than once.
How it's done
JWTs are defined in JSON format based on the JWT specification. To define a JWT for issuing a pass with the Google Wallet API, you provide the information about the pass you wish to issue in the payload property of the JWT.
Show example JWT
{
  "iss": "issuer@example.com",
  "aud": "google",
  "typ": "savetowallet",
  "iat": 1696877738,
  "origins": [
    "www.example.com"
  ],
  "payload": {
    "eventTicketObjects": [
      {
        "id": "ISSUER_ID.LOYALTY_OBJECT_SUFFIX"
      }
    ]
  }
}
4. Sign the JWT with your credentials
What it's for
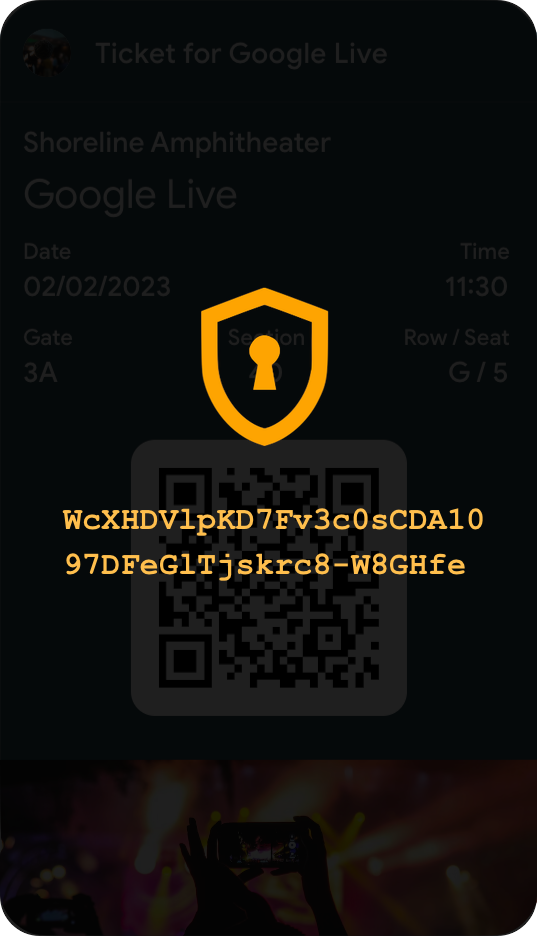
All JWTs sent to the Google Wallet API to issue a pass must be signed with credentials you have previously provided in the Google Wallet Business Console. Signing uses your credentials to encrypt the JWT so that your passes remain secure, and to allow the Google Wallet API to authenticate that the the pass details encoded in it are valid and associated with your Issuer account.
How it's done
The Google Wallet client libraries and the Android SDK provide convenience methods to sign your JWTs. There are also numerous open-source libraries available that handle the complexity of code signing for you to choose from.
For those using the Google Wallet REST API to issue passes, the JWT is signed with a Google Cloud Service Account key. For those using the Google Wallet Android SDK, the SDK automatically handles signing the JWT with the SHA-1 fingerprint of your app signing certificate.
To protect your credentials, JWTs should only be signed on your server or using the Google Wallet Android SDK in your app.
Show example code signing
Java
  // Create the JWT as a HashMap object
  HashMap<String, Object> claims = new HashMap<String, Object>();
  claims.put("iss", ((ServiceAccountCredentials) credentials).getClientEmail());
  claims.put("aud", "google");
  claims.put("origins", Arrays.asList("www.example.com"));
  claims.put("typ", "savetowallet");

  // Create the Google Wallet payload and add to the JWT
  HashMap<String, Object> payload = new HashMap<String, Object>();
  payload.put("eventTicketObjects", Arrays.asList(newObject));
  claims.put("payload", payload);

  // Google Cloud service account credentials are used to sign the JWT
  Algorithm algorithm =
      Algorithm.RSA256(
          null, (RSAPrivateKey) ((ServiceAccountCredentials) credentials).getPrivateKey());
  String token = JWT.create().withPayload(claims).sign(algorithm);
Node.JS
  // Create the JWT claims
  let claims = {
    iss: this.credentials.client_email,
    aud: 'google',
    origins: ['www.example.com'],
    typ: 'savetowallet',
    payload: {
      eventTicketObjects: [newObject]
    },
  };

  // The service account credentials are used to sign the JWT
  let token = jwt.sign(claims, this.credentials.private_key, { algorithm: 'RS256' });
Python
  # Create the JWT claims
  claims = {
      'iss': self.credentials.service_account_email,
      'aud': 'google',
      'origins': ['www.example.com'],
      'typ': 'savetowallet',
      'payload': {
          # The listed classes and objects will be created
          'eventTicketObjects': [new_object]
      }
  }

  # The service account credentials are used to sign the JWT
  signer = crypt.RSASigner.from_service_account_file(self.key_file_path)
  token = jwt.encode(signer, claims).decode('utf-8')
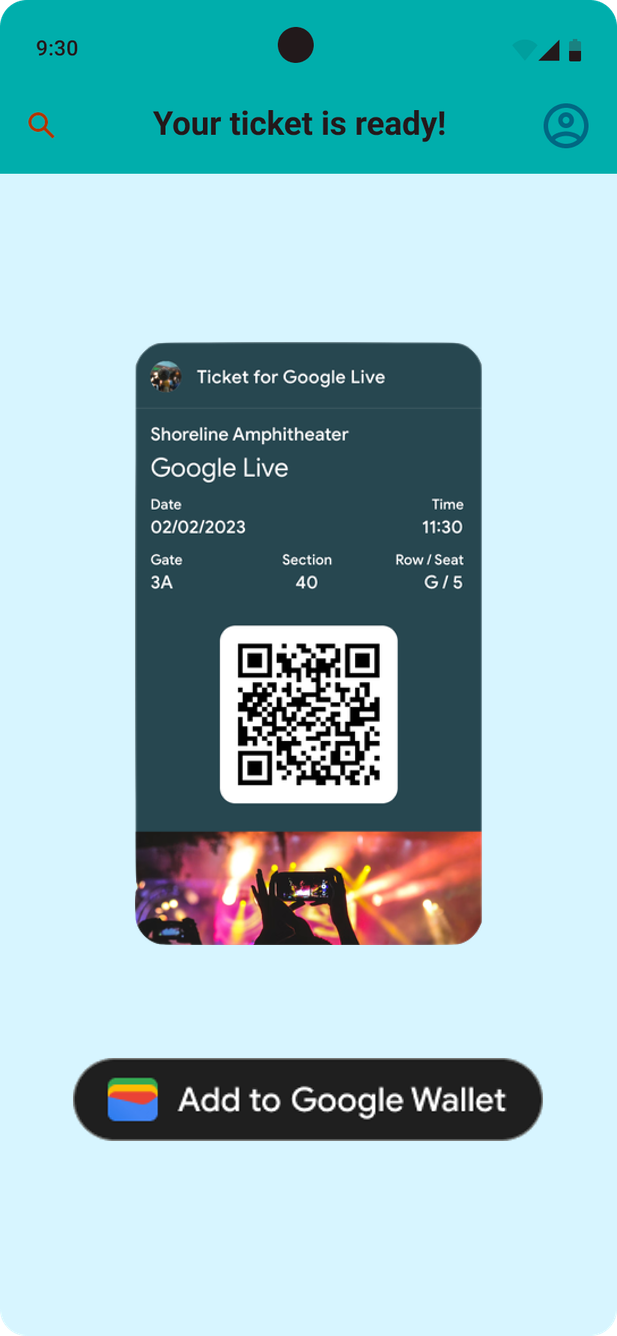
5. Issue the pass with an 'Add to Google Wallet' button or link
What it's for
Once you have created a signed JWT, you are ready to issue your pass to a Google Wallet user! This is done by either presenting the user with a 'Add to Google Wallet' button or link. When a user clicks the button or hyperlink, the signed JWT is sent to the Google Wallet API, which then decrypts it using your saved credentials. Once the JWT signature is authenticated, the pass will be issued to the user to save in their Google Wallet.
How it's done
To create a 'Add to Google Wallet' button for an Android app, use the Google Wallet Android SDK, which provides methods for generating the button. For all other platforms, including web, email, and text message, create a hyperlink in the format https://pay.google.com/gp/v/save/<signed_jwt>. Where possible, it is best to deliver this link to the user as a 'Add to Google Wallet' button.
For more information on using the 'Add to Google Wallet' button, see the Google Wallet API Brand guidelines
Show example code
Hyperlink
https://pay.google.com/gp/v/save/<signed_jwt>
Android SDK
  private lateinit var walletClient: PayClient
  private val addToGoogleWalletRequestCode = 1000
  private lateinit var addToGoogleWalletButton: View

  override fun onCreate(savedInstanceState: Bundle?) {
    super.onCreate(savedInstanceState)
    walletClient = Pay.getClient(this)
    addToGoogleWalletButton.setOnClickListener {
      walletClient.savePasses(newObjectJson, this, addToGoogleWalletRequestCode)
    }
  }
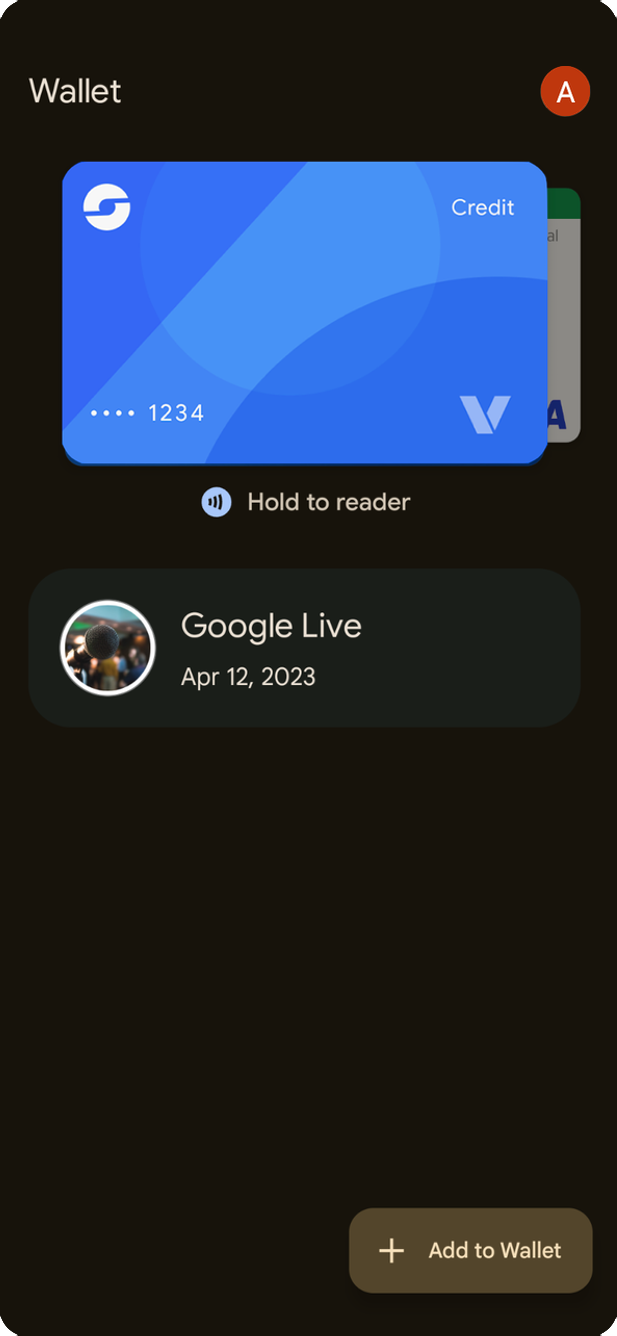
6. View in Google Wallet
Once your user has saved the issued pass, it will appear in their Google Wallet app along with any other passes they have saved.
Creating Passes Objects and Passes Classes in the JWT
Passes Classes and Passes Objects may be created in advance using the Google Wallet REST API or Android SDK. Once created, they are then used to issue passes by referencing their ID.
Alternatively, you may also create Passes Classes and Passes Objects 'just in time' by embedding their JSON directly in the JWT that is used to issue the pass to a user. In this method, the Passes Classes and Passes Objects are created by the Google Wallet API when the signed JWT is sent using a 'Add to Google Wallet' button or link.
For example, the following shows a JWT with a new Passes Class and Passes Object defined using the payload.eventTicketClasses and payload.eventTicketObjects properties. Notice that these properties are arrays, so they can accept one or more Passes Classes or Passes Objects. You may also specify just a new Passes Object in the JWT that references an existing Passes Class by its ID. Show example JWT
  {
    "iss": "issuer@example.com",
    "aud": "google",
    "typ": "savetowallet",
    "iat": 1696877738,
    "origins": [
      "www.example.com"
    ],
    "payload": {
      "eventTicketClasses": [{
        "id": "ISSUER_ID.EVENT_CLASS_ID",
        "issuerName": "[TEST ONLY] Heraldic Event",
        "localizedIssuerName": {
          "defaultValue": {
            "language": "en-US",
            "value": "[TEST ONLY] Heraldic Event"
          }
        },
        "logo": {
          "sourceUri": {
            "uri": "https://images.unsplash.com/photo-1475721027785-f74eccf877e2?ixlib=rb-4.0.3&ixid=MnwxMjA3fDB8MHxwaG90by1wYWdlfHx8fGVufDB8fHx8&auto=format&fit=crop&w=660&h=660"
          },
          "contentDescription": {
            "defaultValue": {
              "language": "en-US",
              "value": "LOGO_IMAGE_DESCRIPTION"
            }
          }
        },
        "eventName": {
          "defaultValue": {
            "language": "en-US",
            "value": "Google Live"
          }
        },
        "venue": {
          "name": {
            "defaultValue": {
              "language": "en-US",
              "value": "Shoreline Amphitheater"
            }
          },
          "address": {
            "defaultValue": {
              "language": "en-US",
              "value": "ADDRESS_OF_THE_VENUE"
            }
          }
        },
        "dateTime": {
          "start": "2023-04-12T11:30"
        },
        "reviewStatus": "UNDER_REVIEW",
        "hexBackgroundColor": "#264750",
        "heroImage": {
          "sourceUri": {
            "uri": "https://images.unsplash.com/photo-1501281668745-f7f57925c3b4?ixlib=rb-4.0.3&ixid=MnwxMjA3fDB8MHxwaG90by1wYWdlfHx8fGVufDB8fHx8&auto=format&fit=crop&w=1032&h=336"
          },
          "contentDescription": {
            "defaultValue": {
              "language": "en-US",
              "value": "HERO_IMAGE_DESCRIPTION"
            }
          }
        }
      }],
      "eventTicketObjects": [{
        "id": "ISSUER_ID.OBJECT_ID",
        "classId": "ISSUER_ID.EVENT_CLASS_ID",
        "state": "ACTIVE",
        "seatInfo": {
          "seat": {
            "defaultValue": {
              "language": "en-us",
              "value": "5"
            }
          },
          "row": {
            "defaultValue": {
              "language": "en-us",
              "value": "G"
            }
          },
          "section": {
            "defaultValue": {
              "language": "en-us",
              "value": "40"
            }
          },
          "gate": {
            "defaultValue": {
              "language": "en-us",
              "value": "3A"
            }
          }
        },
        "barcode": {
          "type": "QR_CODE",
          "value": "BARCODE_VALUE",
          "alternateText": ""
        }
      }]
    }
  }