Upgrade your servers for live traffic
So far, you have set up a tagging server in Cloud Run in a test environment. If you are interested in switching to a production environment, follow these steps.
We recommend running a minimum of 3 instances to support your production traffic. Autoscaling from a minimum of 3 to a maximum of 6 instances should be able to manage 50–200 requests per second, although ultimately this depends on how many tags your requests trigger and what those tags do.
Upgrade your server
To change your service configuration:
- Open Cloud Run.
- Select the service you need to adjust.
- Click Edit & Deploy New Revision.
- Make changes and click Deploy.
Map a custom domain to your service
One of the key features of server-side tagging is that it can be run in a subdomain of the websites that send data to it.
This is referred to as a first-party context between the server-side tagging server and the website.
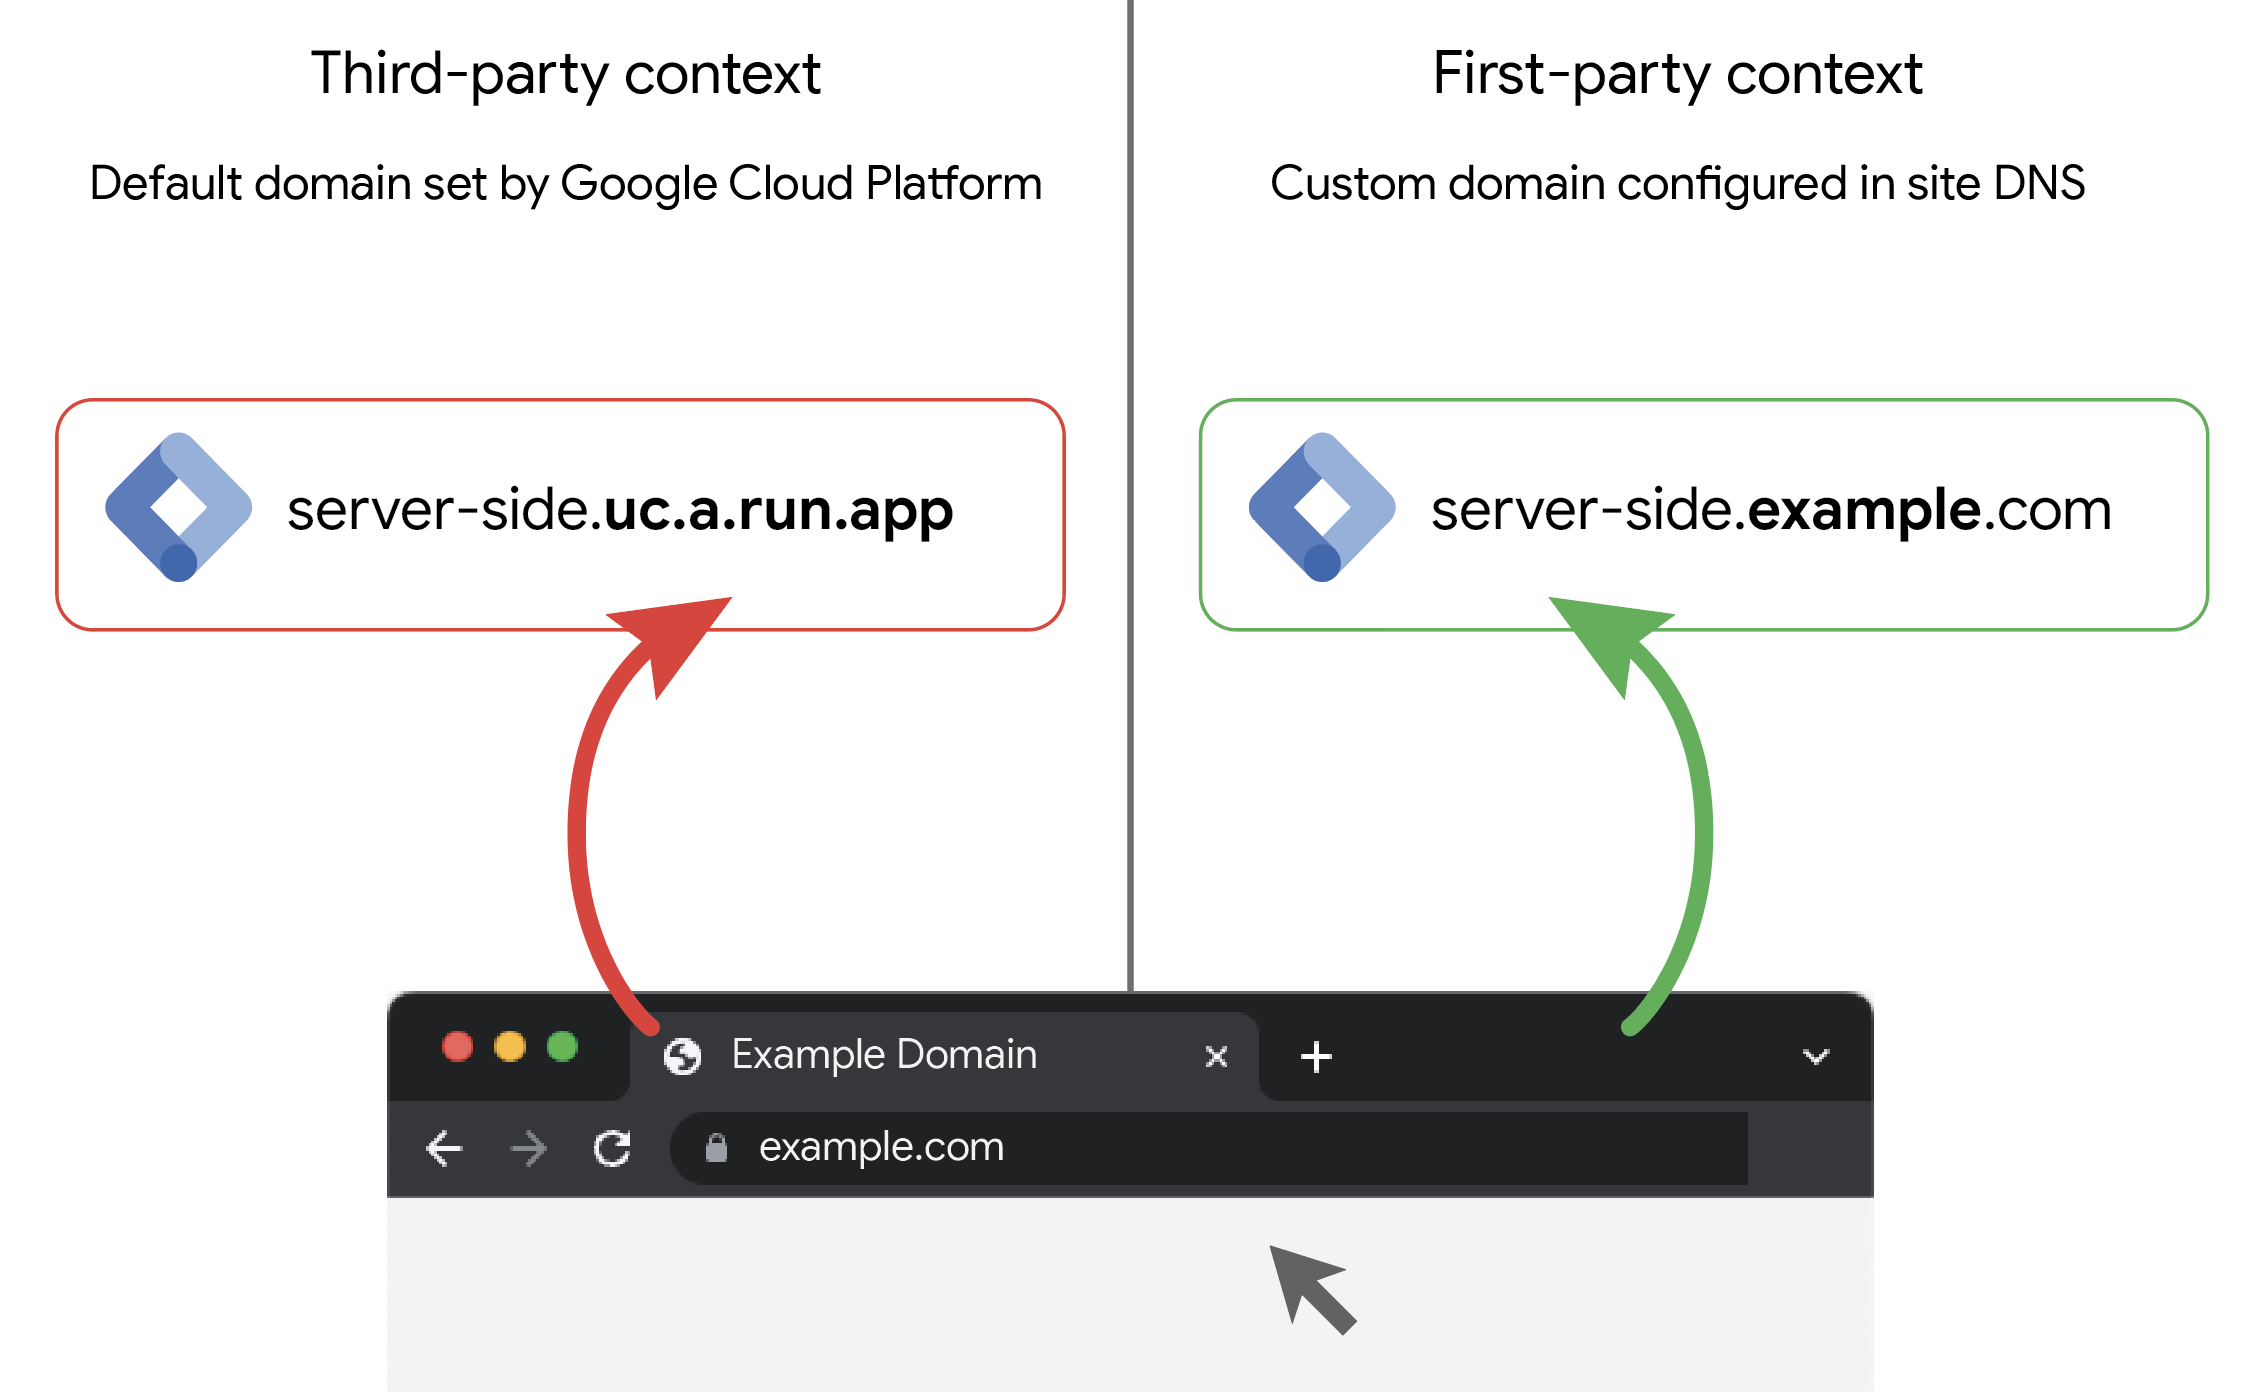
You can add multiple custom domains to your service. This is useful if you are using the same server container to receive requests from multiple different websites.
One of the main benefits of the server-side environment being in a first-party context with the website is that browser cookies read and written by your server container are considered first-party cookies. As many browsers today restrict access to cookies in a third-party context, this can greatly improve the quality of your data collection.
Map a subdomain to your service
Set up a custom domain to use a domain other than the default address that Cloud Run provides.
Update your client-side tags to send data to the new domain
Once you have mapped a custom domain to your upgraded environment, remember to update your browser tags to communicate with this new subdomain rather than with the default Cloud Run domain.
In Tag Manager, the option can be found in the Google Analytics 4: Configuration tag, under the setting labeled Send to server container.
Refer to chapter 5 in this learning pathway for more information on how to update your browser tags.
Deploy additional tags
Once you have your Google Analytics 4 browser tags configured to send data to your server-side tagging environment, you can use this data flow to fire other tags, too.
This is a unique feature of server-side tagging. You can build a more efficient and user-friendly tagging setup by sending your requests to your server. From there, requests are distributed to multiple vendors, and you can remove vendor tags from your web container.
For example, with the Google Analytics 4 client now parsing the incoming requests into the event data format, you can create tags for Google Ads and Floodlight which trigger upon these events.
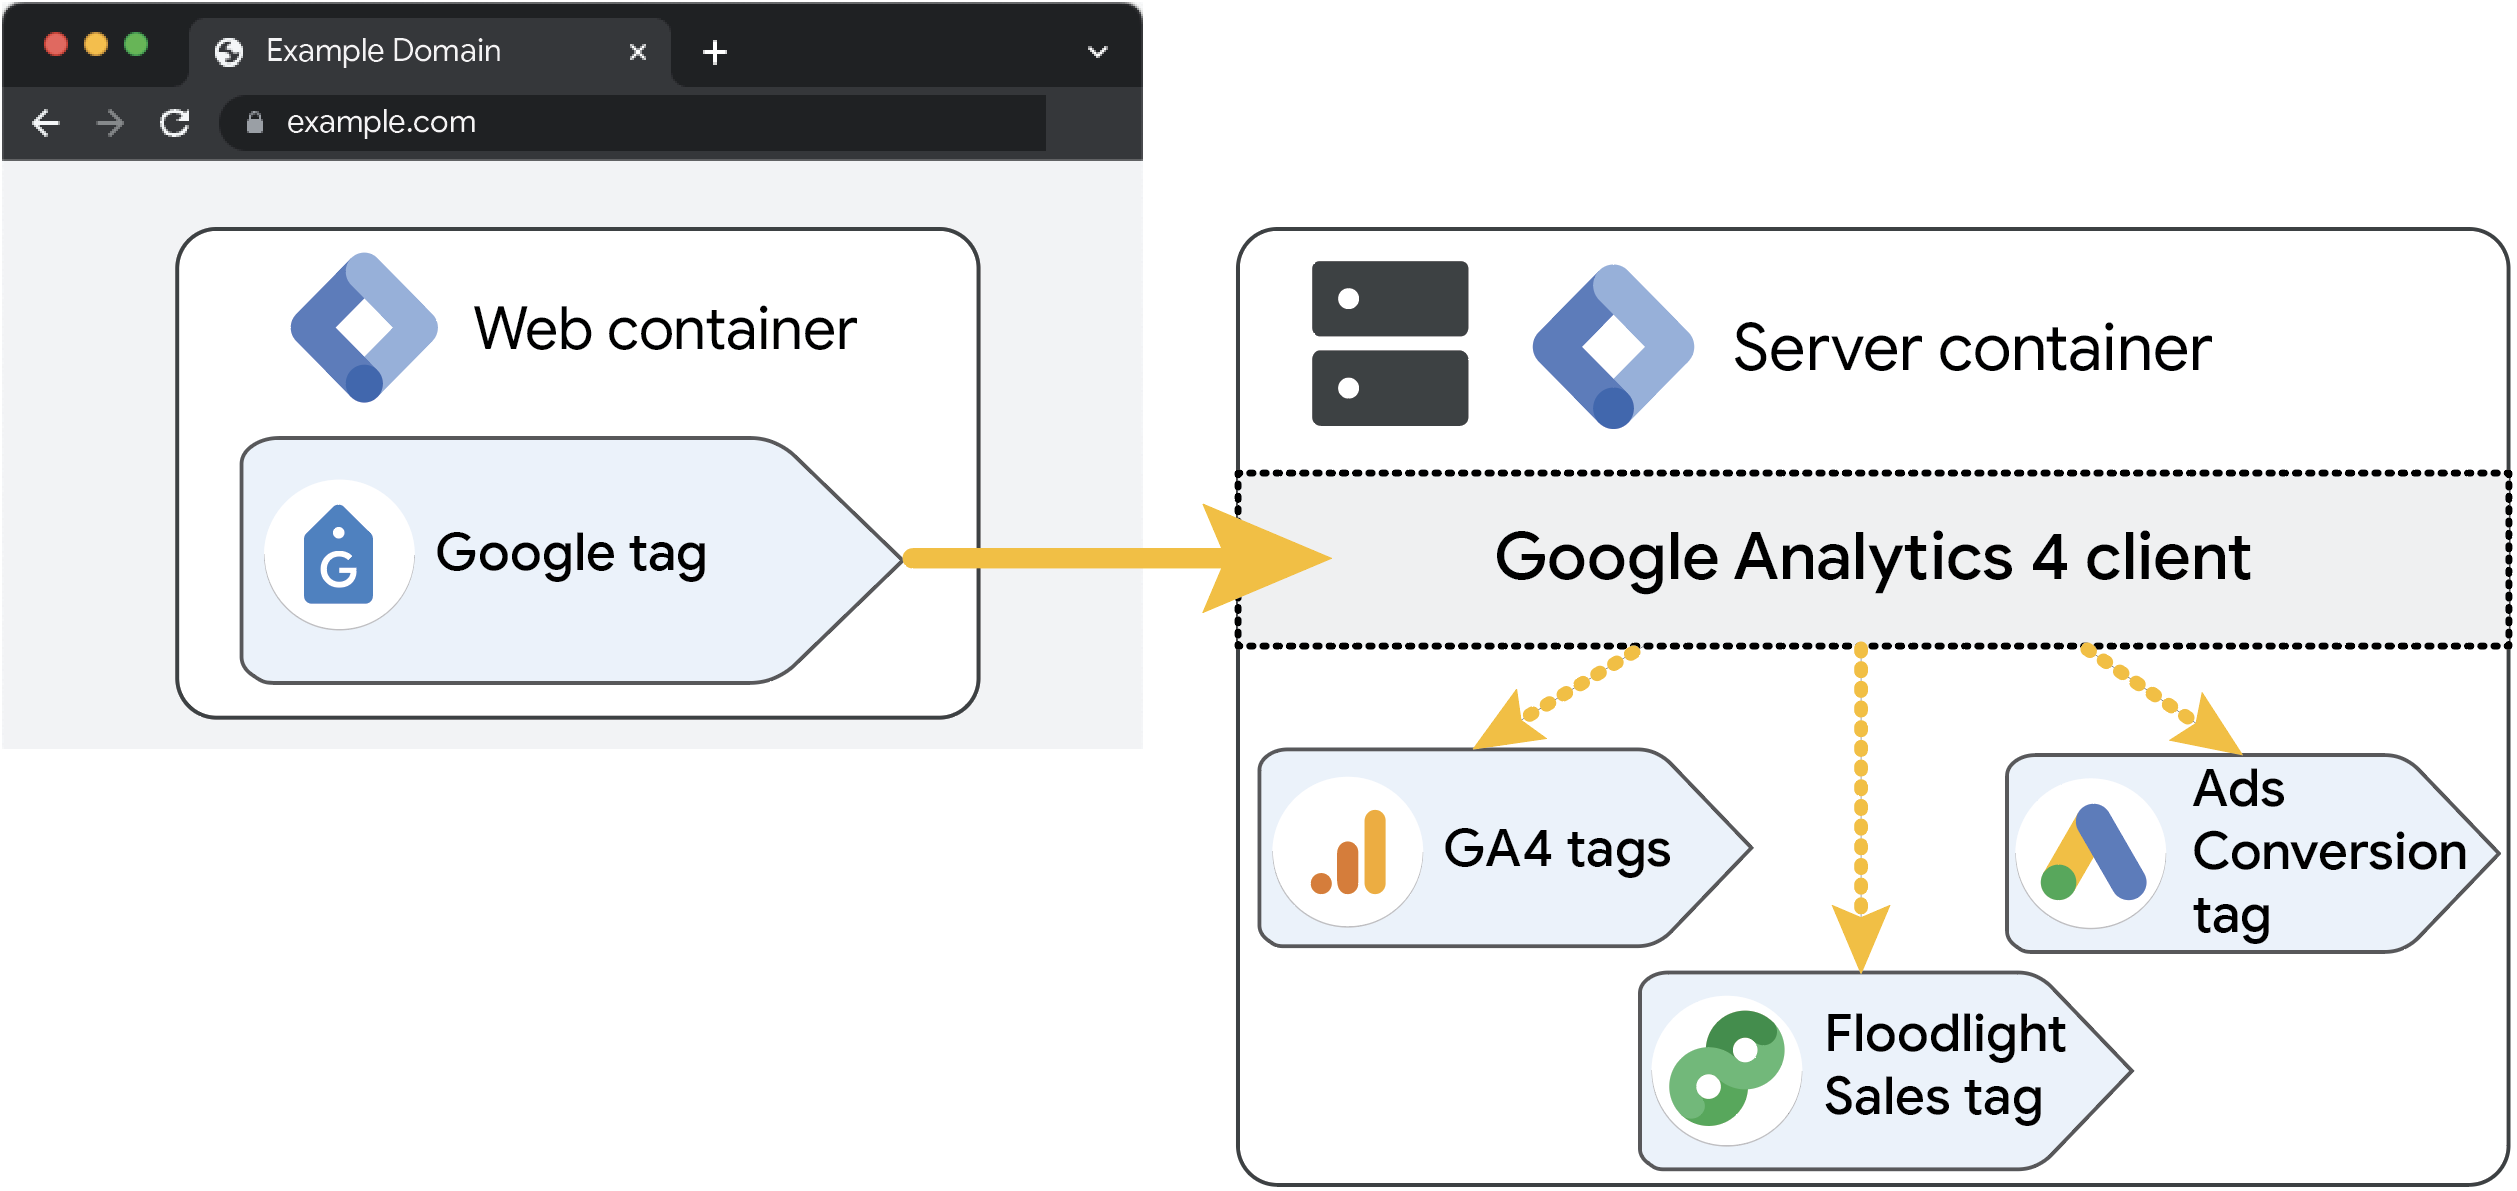
In the example above, a single key event from the web browser is distributed to three destinations: Google Analytics 4, Google Ads, and Floodlight. In the web container, it is no longer necessary to add Google Ads and Floodlight as separate marketing tags, because the logic is now handled server-side.
In addition to the built-in templates available in the server container, there are many other templates for tags and variables in the Community Template Gallery, created by the Tag Manager user community. To minimize possible security issues, these templates run in sandboxed JavaScript. As an extra layer of security, you can set up policies. A template will only run if it complies with all policies and permissions.
If you want to set up additional tags before you start the next chapter, these resources might be interesting for you:
Summary
This chapter showed you two integral parts of server-side tagging:
- How to upgrade and configure your servers
- How to tag from within a first-party context.
Now that you have a production-grade infrastructure, we will take a closer look at monitoring your servers.