
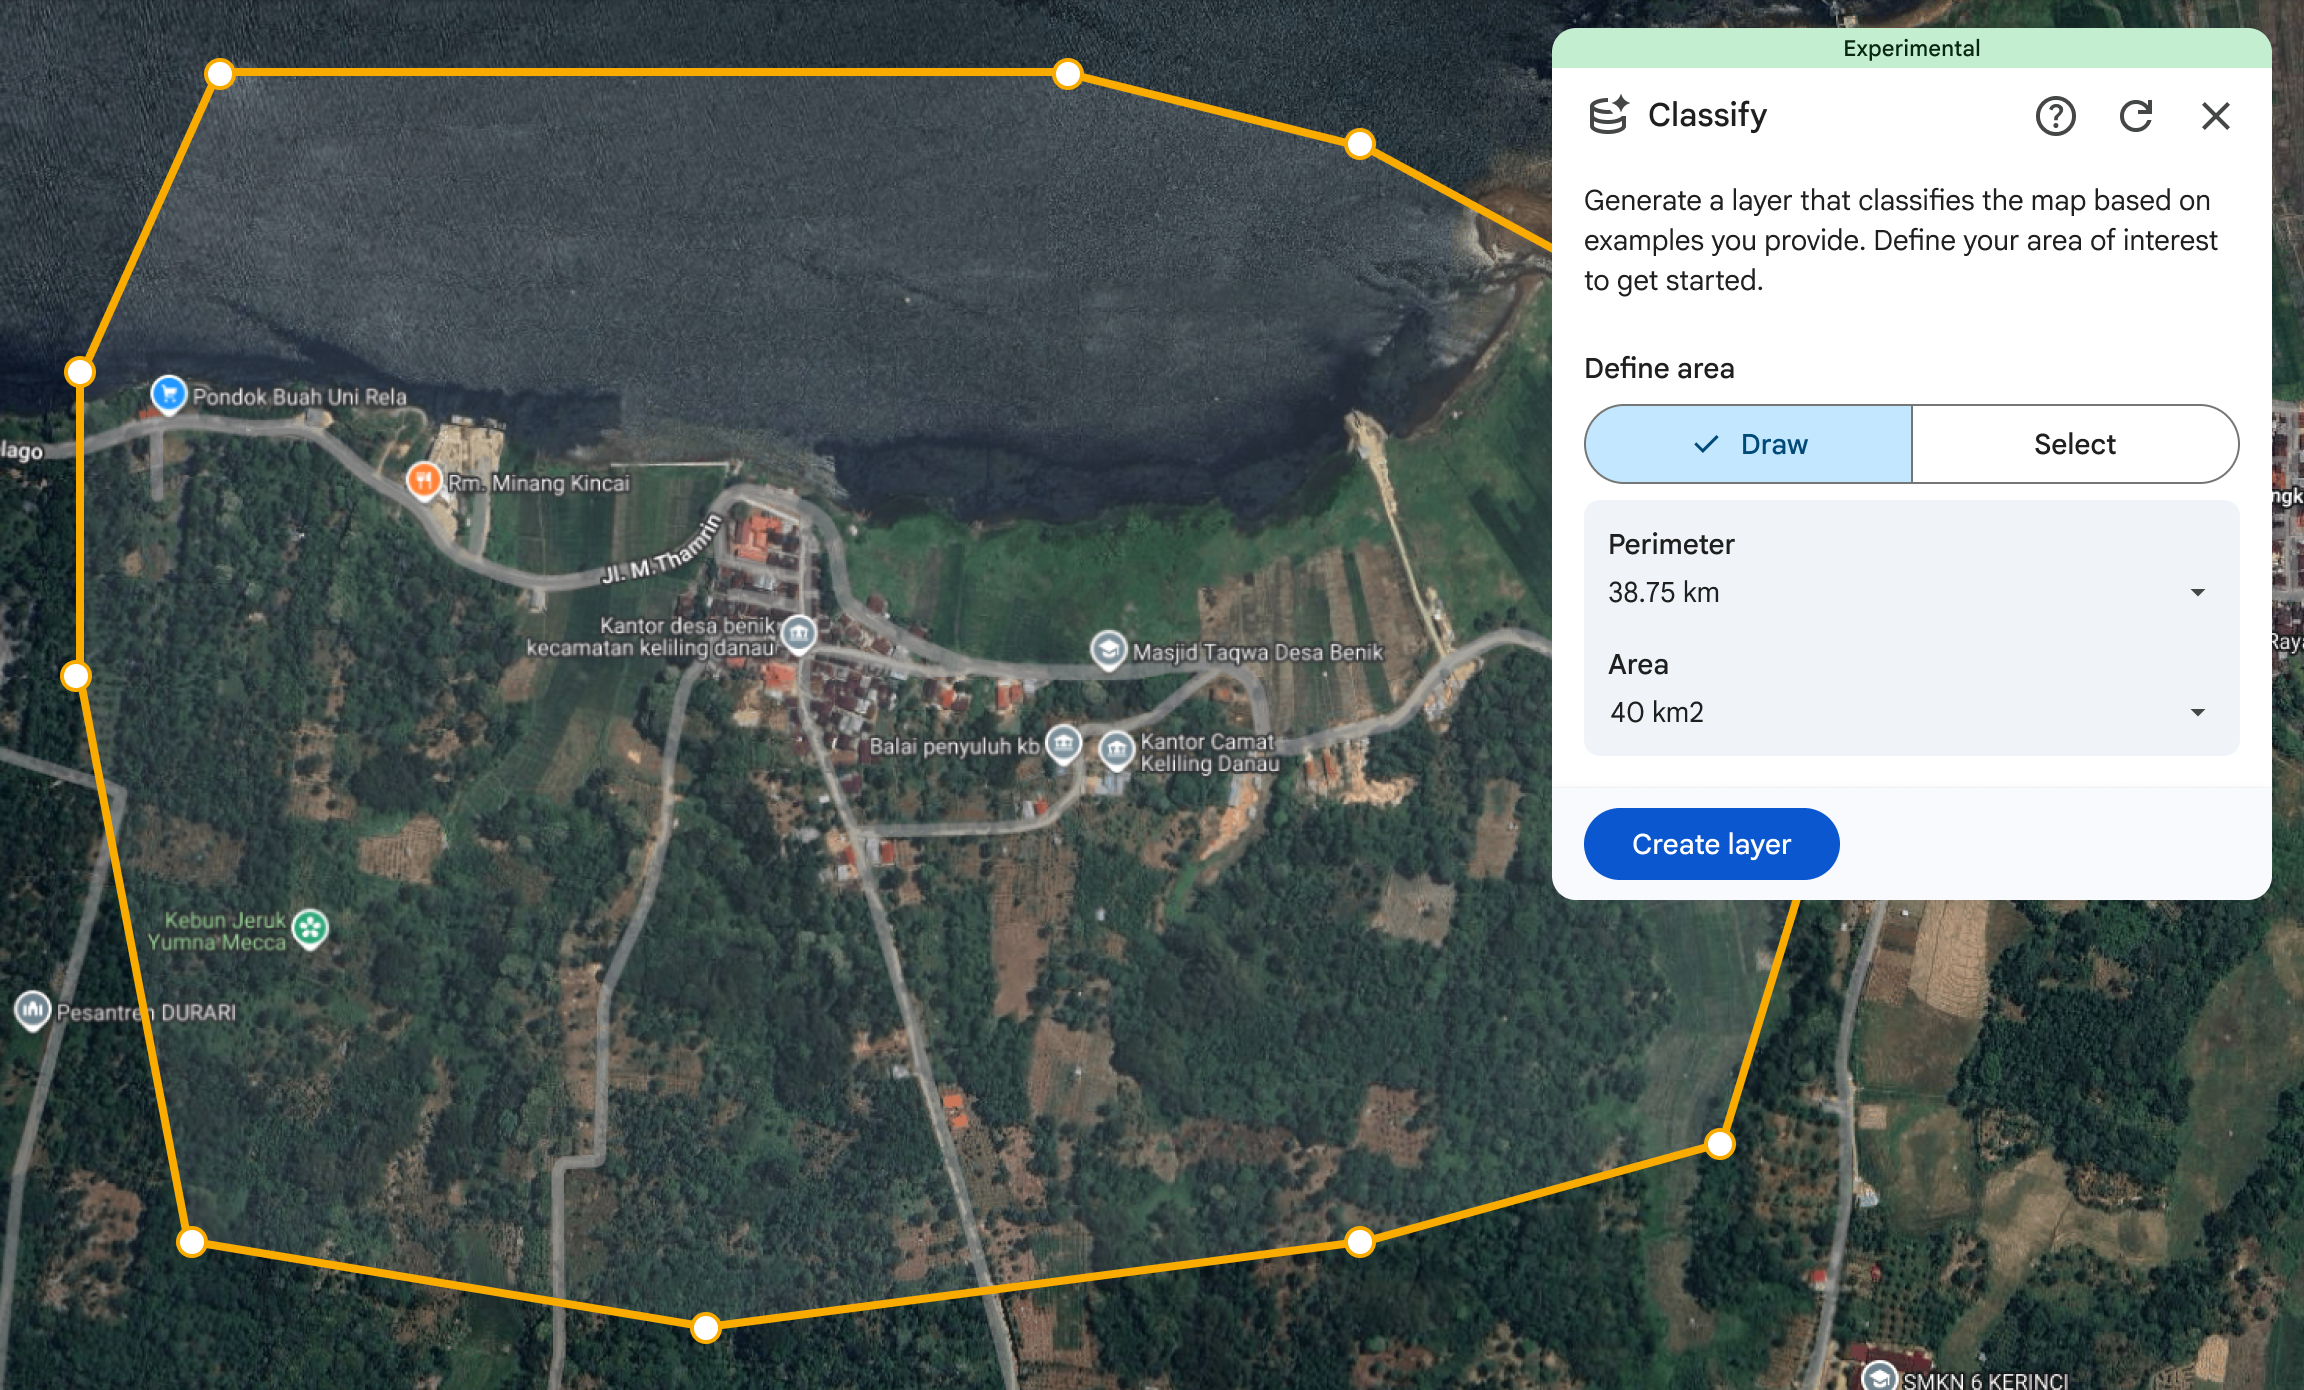
The classify tool in Google Earth uses AI to create a custom map layer (a "classification") for a given area by defining land cover categories. Whether you want to map different crop types, track forest cover, or differentiate urban neighborhoods, this tool turns your labeled examples into a wall-to-wall map.
How it works
- Add classes and give examples: Drop points on the map to tell the tool what's there (for example, "Forest" or "Urban"). Think of this as "teaching" the AI what different landscapes look like, based on your own definitions.
- AI analysis: Behind the scenes, the tool pairs your points with the AlphaEarth Foundations Satellite Embedding dataset, a specialized global AI model that understands unique patterns of satellite imagery.
- Predictive mapping: A machine learning model ("Random Forest") analyzes every 10-meter square within your area. It compares those squares to your examples and automatically fills in the rest of the map.
Generate custom classification layer
- Open an existing project or create a new one in Google Earth.
- Go to Tools
 Classify.
 Draw a polygon around your area of interest, or select an existing polygon to get started.
- Click points on the map to draw an area of interest.
- To remove a point, click undo Undo.
- To redraw the area of interest, click refresh Start new.
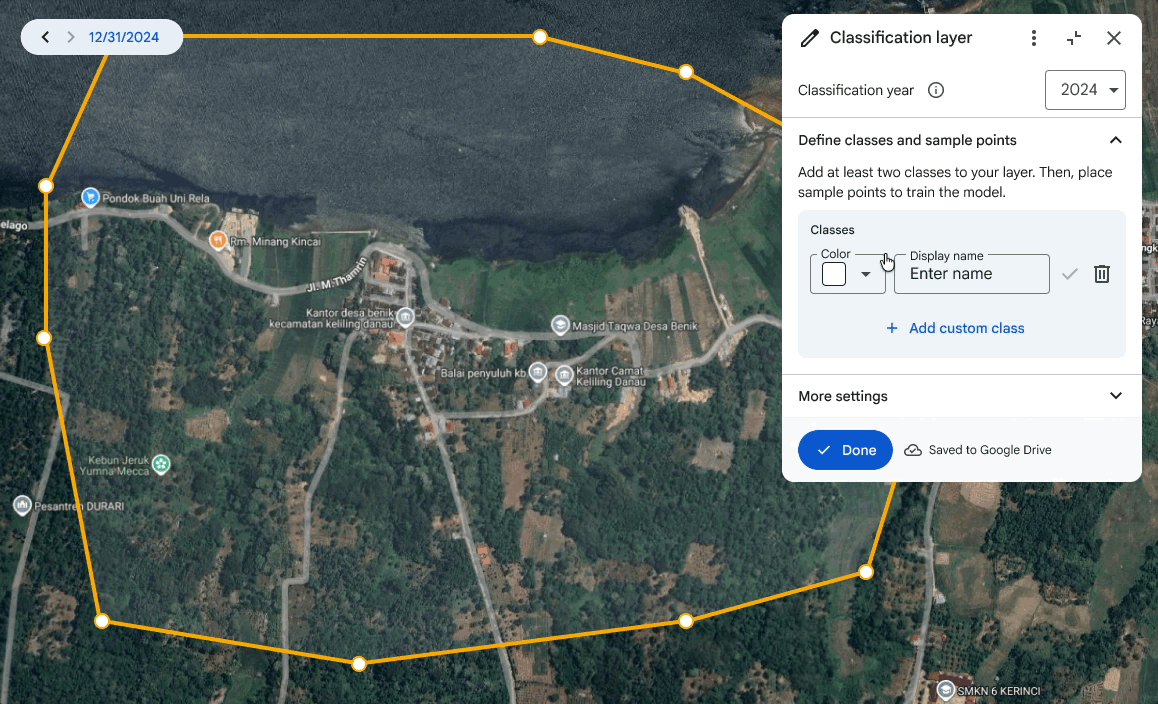
Select the Add classes button to start creating your classification layer.
Select to title your new layer.
Select the classification year.
- Choose the year you want to map. The tool uses satellite data from this period for the classification and assumes all sample points you provide reflect the ground conditions of that year.
Add at least two classes to your classification layer.
- You can enter your own Display name and style the classification with a color.
- Learn more about how to style data layers.
Select Done to save the class.
Next, place sample points on the map for the class you have selected to show the tool exactly what you are looking for.
- Place at least three sample points for each class.
You can define your own custom classes or select classes from an existing classification system. A classification system provides a standardized set of predefined categories, allowing you to make apples-to-apples comparisons with other maps using that classification system.
To use a classification system, select the menu and choose list_alt Use a classification system.
- Then select a classification system and search for classes within that system. Choose the classes you want to use, and select Done to add them.
- You can enter your own Display name and customize the color.

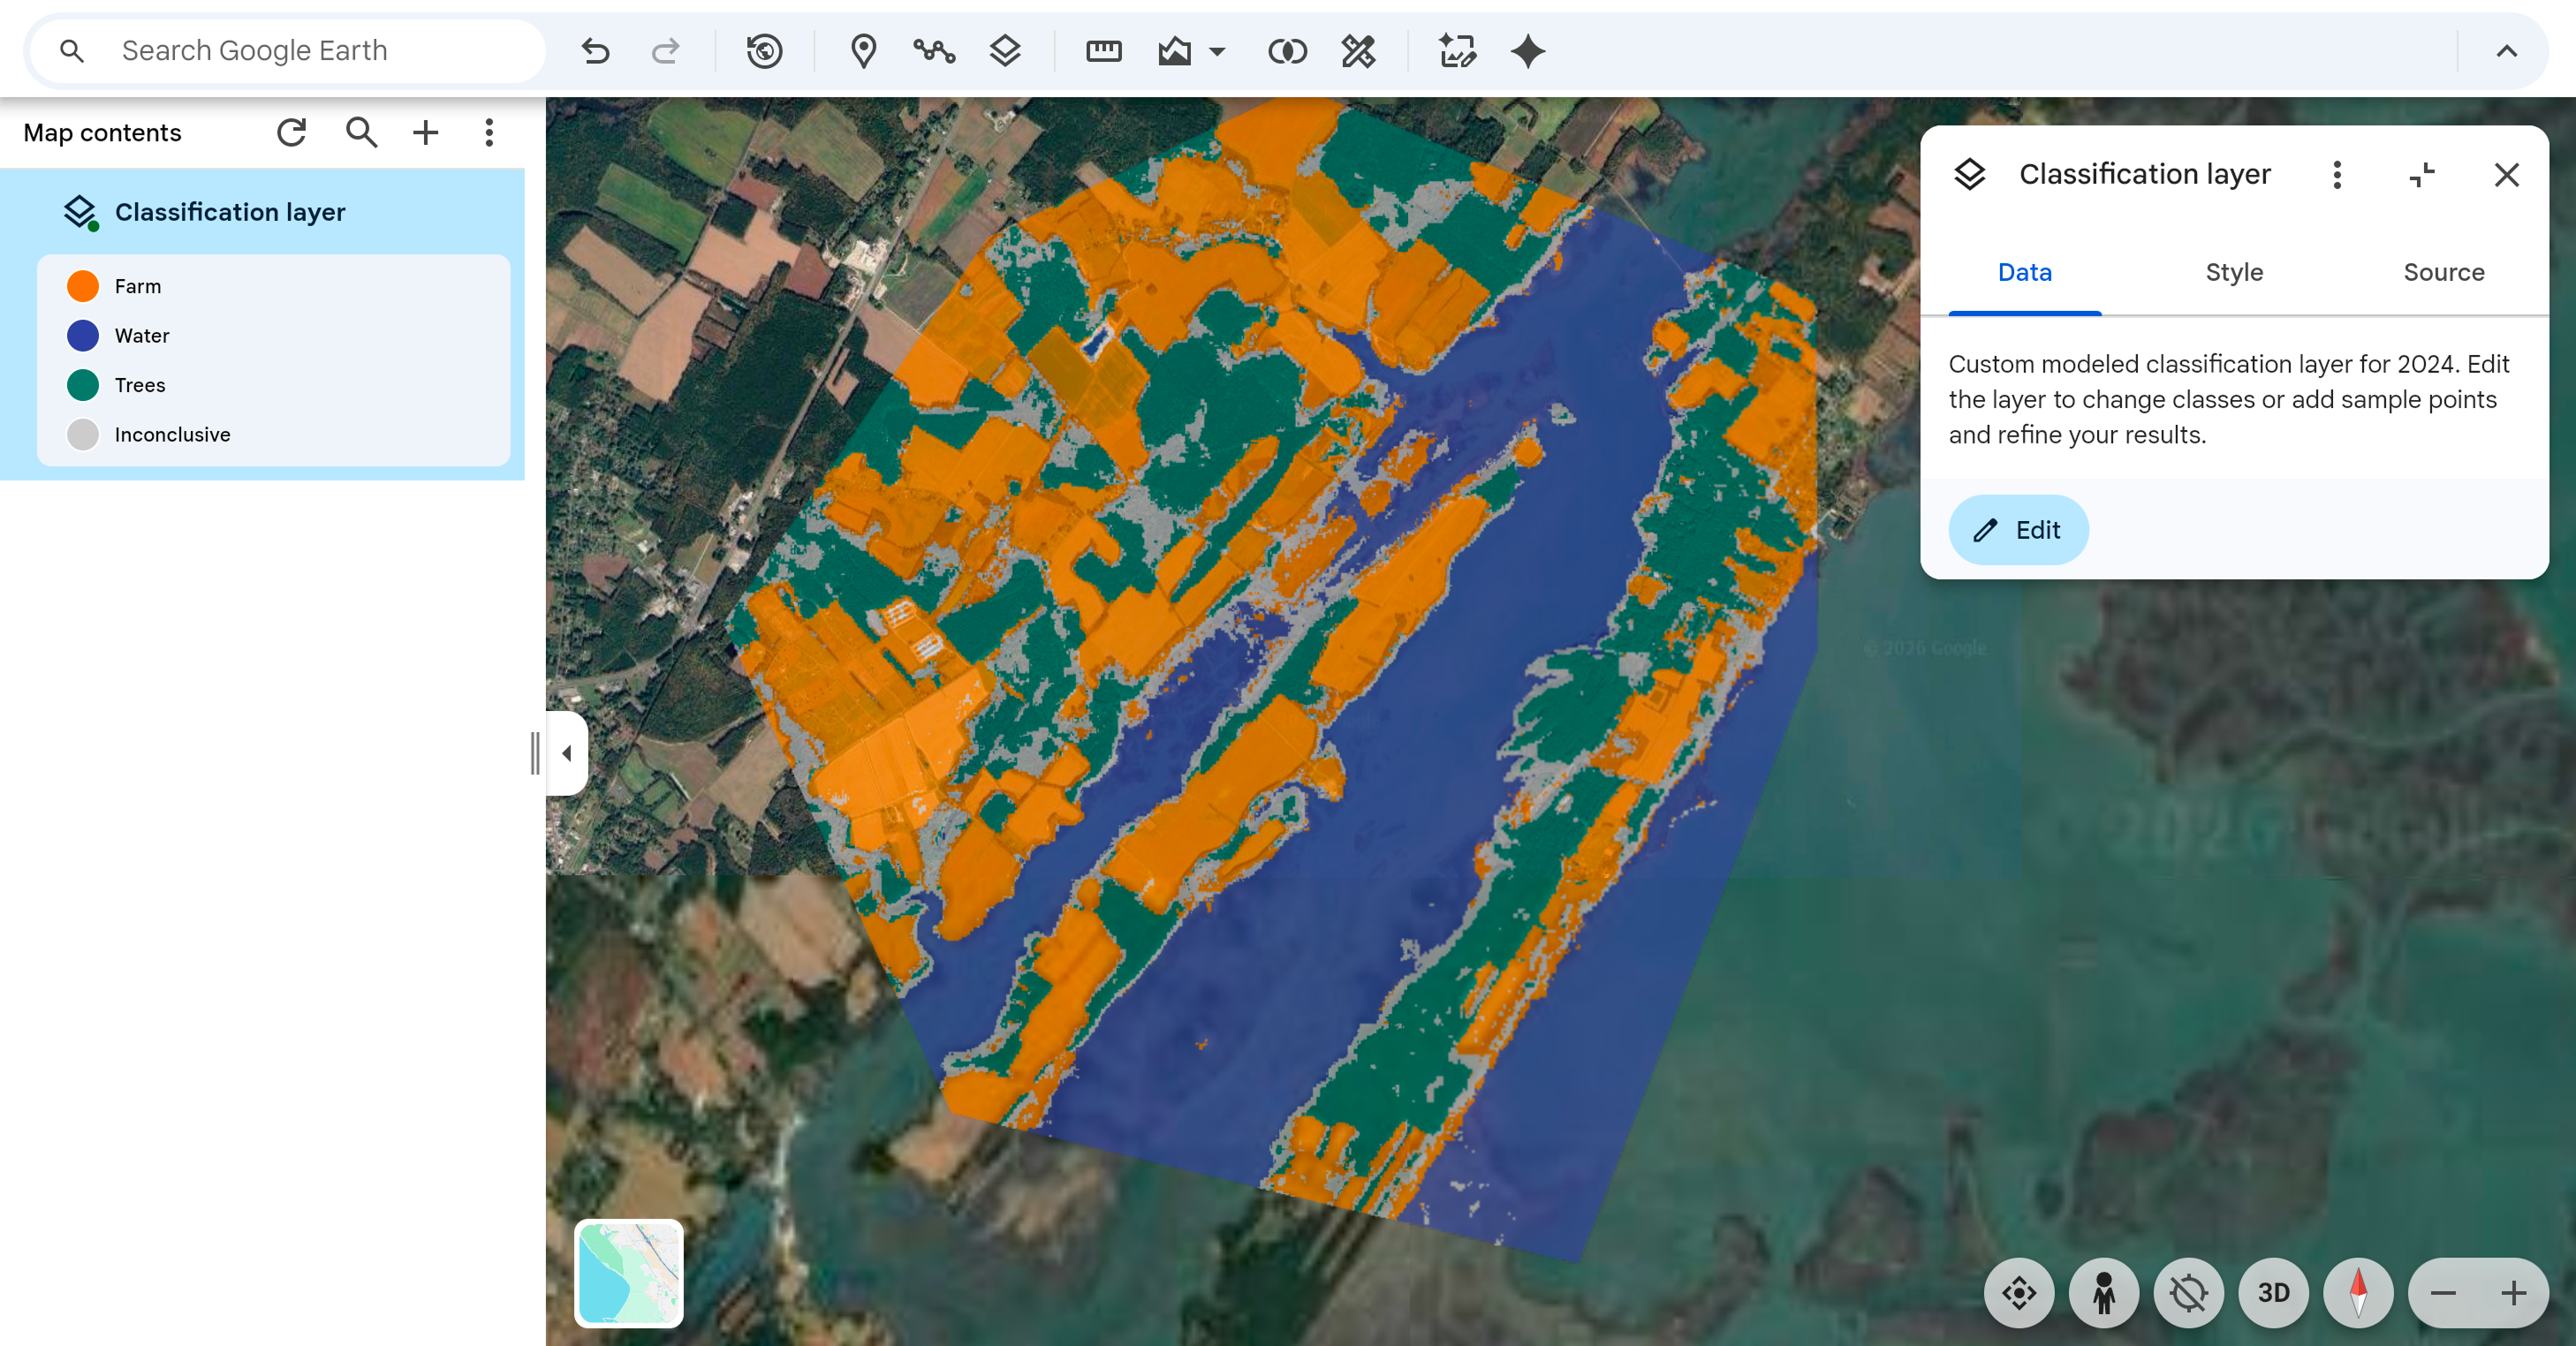
View the classified map. The map reflects the classification year you have selected.
- The layer is continuously updated as you add sample points.
If the tool incorrectly classifies an area, or shows "inconclusive" areas, add a few more sample points to correct its mistakes. The model will instantly learn from your new examples to produce a more accurate map.
- The "inconclusive" class shown in the legend represents areas where the model requires more information to distinguish between classes. These pixels are highlighted to help you identify exactly where more sample points are needed.
- Once you provide labels for these locations, the layer is updated.
Select Done when you have finished creating your layer.
You can update the layer by selecting the Edit button in the layer's inspector panel. Edit to add more sample points for areas that look incorrect or incomplete. This will help the model produce a better map.
Tips for good mapping
- The map is only as good as the points you provide. To get the best results, your points should capture the full range of variation for each class. Select a wide variety of locations which represent different varied examples of the class over the entire year. For example, if you're mapping forests, include points for both dense and scattered trees. The more examples, the better!
- The tool is intended for iterative classification. If the results look "off" in a certain area, drop more points there to correct the AI model. Reduce "inconclusive" areas by adding labeled points in these areas.
- The results you see are powered by the AlphaEarth Foundations Satellite Embeddings, a feature-packed dataset at 10-meter resolution made from several satellite data sources. While you use the high-resolution basemap in Google Earth to place points, the AI analyzes the landscape at the 10-meter embedding scale to ensure broad accuracy. For best results, focus on labeling features that cover areas larger than 10-meter squares.Learn more about AlphaEarth Foundations.
Limitations
- The earliest year you can create a classification layer for is 2017.
- The tool generates classifications for 10-meter squares. Objects smaller than this, such as parked cars, backyard sheds, and single small trees, are unlikely to be detected and classified.