Page Summary
-
This documentation provides step-by-step instructions to set up OAuth2.0 for accessing hotel APIs like Travel Partner API and Price Feeds API.
-
Setting up OAuth 2.0 involves creating a project in Google Cloud console, creating a service account and its credentials, and giving the service account access to your hotel data in Hotel Center.
-
Service accounts are used for server-to-server interactions and identified by a generated email address and a downloaded JSON key file.
-
Access tokens obtained through OAuth 2.0 are valid for one hour and are used in the
AuthorizationHTTP header when making API calls. -
The scopes for the Hotels APIs are specific, and using the correct scope is essential for successful authorization.
This documentation provides step-by-step instructions to set up OAuth2.0 in your application when accessing the hotel APIs such as Travel Partner API and Price Feeds API. Refer to Using OAuth 2.0 to Access Google APIs to authorize your application.
OAuth 2.0 setup
OAuth 2.0 requires that you identify yourself using a service account associated with your Google Account. The service account sends your private key in exchange for an OAuth 2.0 access token. You can then use this token in calls to the hotel APIs for read-only data, such as pricing, hotel, and diagnostic reporting data about your hotel price feed.
Access tokens are good for an hour (3,600 seconds).
If you previously implemented ClientLogin, the OAuth 2.0 approach is similar, with the following differences:
- Your application uses a Google service account to access the API.
- You pass an OAuth 2.0 access token in the
AuthorizationHTTP header when calling APIs.
To set up your account to use OAuth 2.0 with any Hotels API, perform these steps:
Each of these steps is described in the sections that follow.
Step 1: Create a new Google Cloud console Project
The Google Cloud console is used for managing and viewing traffic data, authentication, and billing information for the Google APIs that your projects use.
In the Google Cloud console, a project is a collection of settings, credentials, and metadata about the application that you're working on which uses Google Developer APIs and Google Cloud resources.
Google Cloud console is also used for generating API credentials, activating APIs, and managing team and billing information associated with your project.
To create a new Google Cloud console project:
Sign in to your Gmail or Google Account.
Open the Google Cloud console. If this is your first project, the main view displays a CREATE PROJECT button:
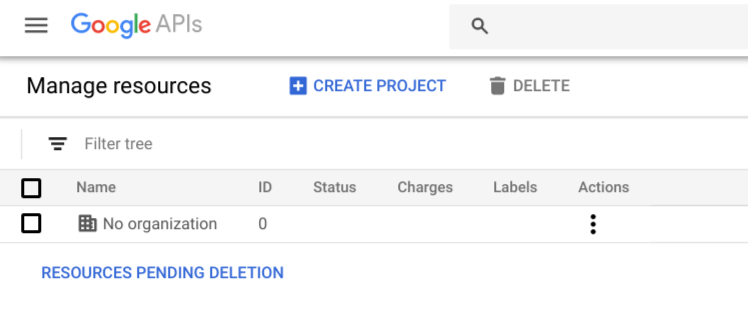
Click the CREATE PROJECT button. Google Cloud console displays the New Project dialog:
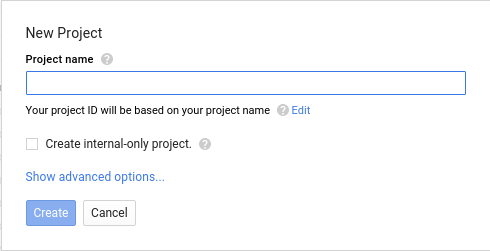
Enter a friendly name for your new project in the Project name input field. Below the field, the Google Cloud console generates a project ID for you, ensuring that the ID is unique across all projects. For example, if you enter "My New Project", Google Cloud console assigns an ID like
my-new-project-266022.Click the Create button to create your new project.
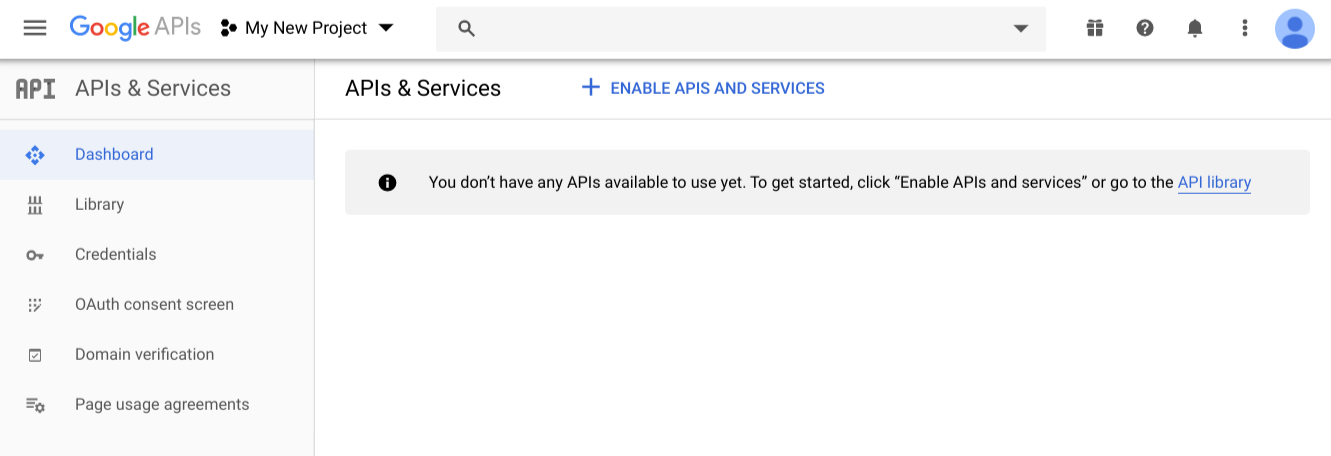
Use the navigation menu to select APIs & Services > Dashboard.
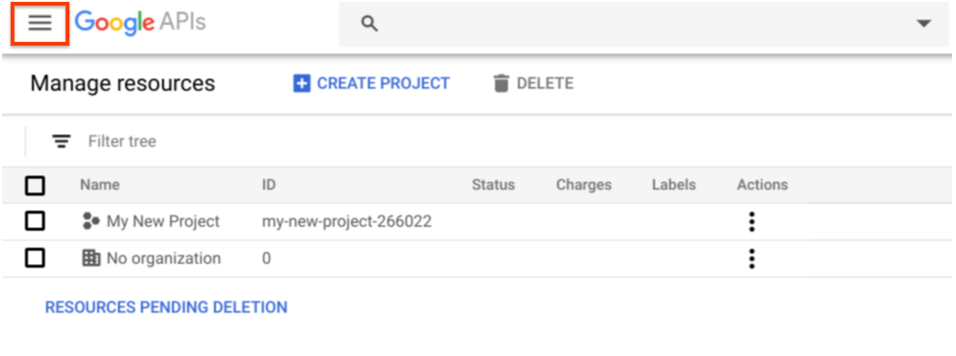
The following image shows the navigation menu in the upper left of the Google Cloud console. This displays the Dashboard view for your project:
For more information, refer to Creating and managing projects.
Step 2: Create a service account and generate its credentials
Service accounts are used by server-to-server interactions such as those between a web application and your hotel data.
To create and configure a service account:
In the Google API Console main view, click Credentials in the left-hand navigation. Google Cloud console displays the Credentials view.
The Credentials view displays client IDs and credentials for your project. Your application uses the client ID when requesting an OAuth 2.0 access token. New projects don't have any clients or credentials yet.
Click the Credentials in APIs and services link.
Click the Create credentials button, and select Service account key from the filter. The Create service account key view is displayed.
From the Service account filter, select New service account.
Enter a service account name and service account ID.
The name can be anything you want, but the account ID must be unique across all projects. Google Cloud console generates a unique account ID for you, based on the name that you entered.
Select JSON for the key type. JSON is required.
Click the Create button. Google Cloud console generates a private or public key pair for your project. The private key is saved to the default location that your browser stores downloads. You must download the
.JSONformat file.You use the private key in your scripts or other applications that access your API.
Google Cloud console displays the "Service account created" message when it finishes generating the keys.
Click the OK, got it button. Google Cloud console returns you to the Credentials view. To confirm the details about your service account and to see the service account associated with your project, click Manage service accounts in this view.
The service account now has the following credentials associated with it:
- Client ID: A unique identifier that your application uses when requesting an OAuth 2.0 access token.
- Email address: A generated email address for the service account, in the form "account_name@project_name.google.com.iam.gserviceaccount.com".
- Certificate fingerprints: The ID of the private key that you downloaded.
For more information, refer to Using OAuth 2.0 for Server to Server Applications.
Step 3: Give the service account access to your Hotel Center data
The final step is to provide the new service account with access to your Hotel Center. The service account is identified by the generated email address that you created in the previous step. You provide access to this account by using the Hotel Center sharing settings.
If you don't have proper access to add users to the account, contact the Google Hotels team using the contact us form and request to set up an ownership for your account. You can request one or more emails to be made to an owner. For more information on Hotel Center access, refer to Link Hotel Center and Google Ads.
To give a service account access to your Hotel Center data:
In a new browser window, open the Hotel Center.

On the Hotel Center by Google banner, click the add user icon to open the sharing dialog.
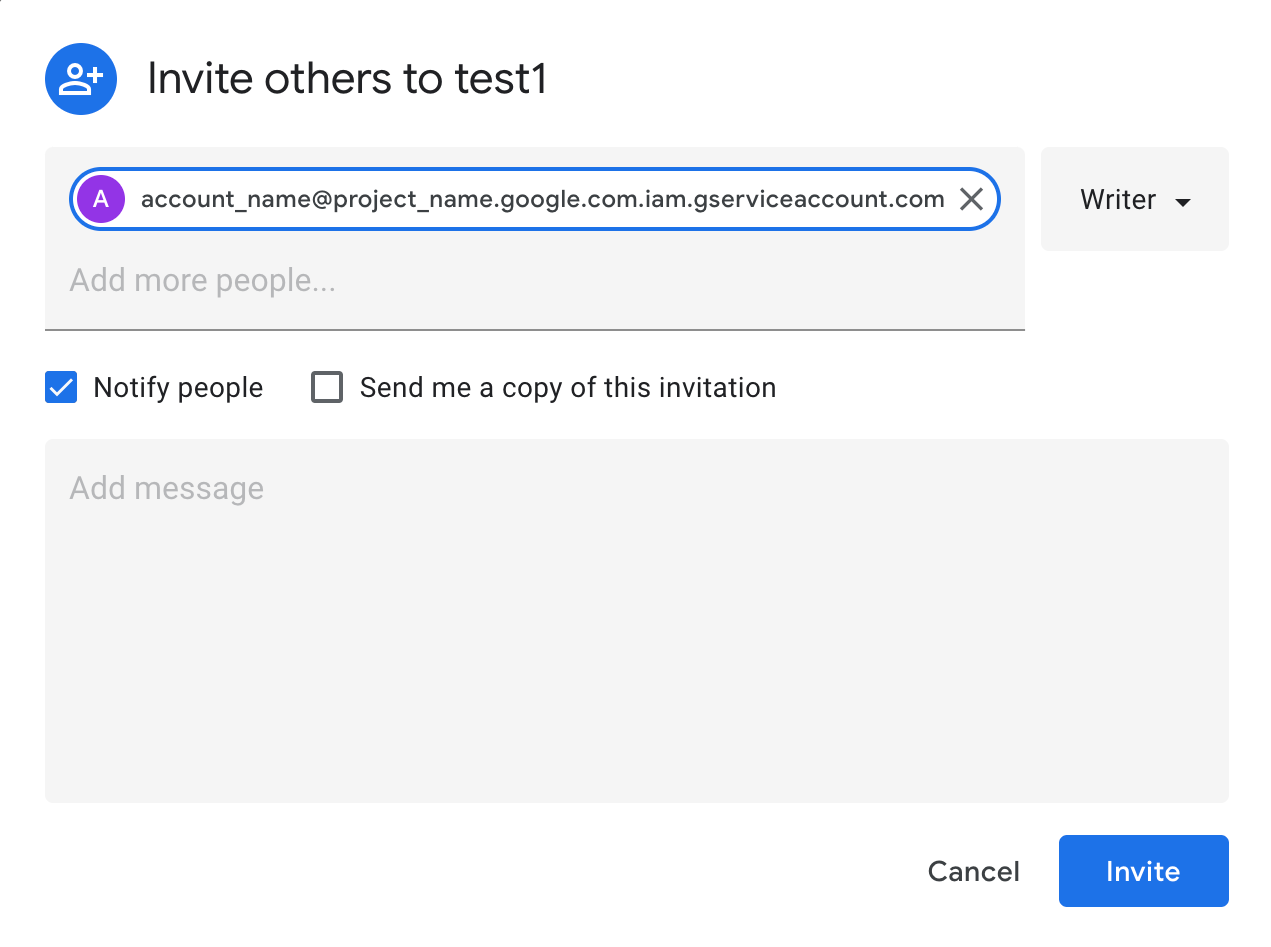
In the Add more people field, enter the email address of the service account you want to add to your Hotel Center.
Keep the Notify people option selected.
Select Manage from the filter.
Click the Invite button.
After you add users to your Hotel Center, your service account should be enabled for API access within about 24 hours.
After Google notifies you that API access is enabled for your service account, you can start accessing the API with OAuth 2.0.
How to use OAuth 2.0
To access the API, your application must identify itself to Google with the
service account's generated email address and private key. Google's
authentication mechanism exchanges this key for an OAuth 2.0 access token that
you pass in the Authorization header in your app's API calls.
Refer to Prepare to make a delegated API Call.
Scopes
The following are the SCOPES for Hotels API:
Travel Partner API: "https://www.googleapis.com/auth/travelpartner"
Price Feeds API: "https://www.googleapis.com/auth/travel-partner-price-upload"
You should specify the service account when creating the credentials. Refer to Create a service account and generate its credentials.
When developing your application, be sure to follow the best practices to authenticate your application using API keys. Learn more.
Example
from google.oauth2 import service_account
from google.auth.transport.requests import Request

# You can use a single or multiple scopes
SCOPES =
['https://www.googleapis.com/auth/travel-partner-price-upload','https://www.googleapis.com/auth/travelpartner']
SERVICE_ACCOUNT_FILE = 'service_account_key_file.json'

cred = service_account.Credentials.from_service_account_file(
                        SERVICE_ACCOUNT_FILE,
                        scopes=SCOPES)
cred.refresh(Request())
headers = {}
cred.apply(headers)
Travel Partner API
The Travel Partner API allows lodging partners to retrieve Hotel Center information and change Hotel Center data for managing large or complex accounts.
Follow the OAUTH 2.0 setup instructions to get authorization for your Travel Partner API.
When you create a new project for Travel Partners API, you need to enable access to your new Google Cloud console project.
Follow the steps to enable access to Travel Partners API:
Go to the Dashboard view of your project.
Click Enable APIs and Services. This displays the API Library welcome page.
In the search field, start typing "Travel Partner API", and then, the console displays a list of APIs that match what you type.
Click the API that matches in the table. Google Cloud console displays a description about that API.
Click the Enable API button to enable this API for your project.
For more information, see Enabling and Disabling Services.
The Travel Partner API is now enabled for your Google Account's new project.
The scope of the Travel Partner API is:
"https://www.googleapis.com/auth/travelpartner"
The endpoint for Travel Partner API is:
"https://travelpartner.googleapis.com/v3/accounts/<account_id>/<path>"
Price Feeds API
Price Feeds API allows lodging partners to provide customized pricing data for every hotel. Google lodging partners can use OAuth2.0 to authenticate and authorize themselves when uploading prices to Google. Follow the OAUTH 2.0 setup instructions to get authorization for Price Feeds API.
Points to Remember
Note the important differences in the authorization instructions for Price Feeds API.
Partners should create a new Price Feeds OAuth2.0 project in Google Cloud console using the same instructions as provided in the OAuth 2.0 setup.
Enabling the Price Feeds API in Google Cloud console is NOT required and can be ignored. You only need one service account & key and then use the same service account & key to grant Price Feeds project access to your Hotel Center data. Follow the remaining steps mentioned in the OAuth2.0 setup to complete configuring your API.
Get OAuth2.0 access token for Price Feeds
The next step is to get an OAuth2.0 access token with the lodging price upload
scope using the service account key file. You can authorize requests to your
Price Feeds project by following the instructions provided in
Preparing to make a delegated API call
and then extract the access token from the credentials acquired and set it in
the "Authorization" HTTP header.
The scope for lodging price upload is:
"https://www.googleapis.com/auth/travel-partner-price-upload"
Upload Prices
After getting the access token, partners can upload their price feed similar to using static IP for authentication and authorization with the following modification:
- Set access token in the
"Authorization"HTTP header
curl -X POST -H "Authorization: Bearer <access token>"
www.google.com/travel/lodging/uploads/accounts/<account_id>/ota/hotel_rate_amount_notif --data-binary @<price_feed_file_location>
Test OAuth2.0 setup for Price Feeds API
You can test your OAuth2.0 setup by uploading an empty file or with real prices data to any of the upload paths. Use the table to check your HTTP response status.
| HTTP Response status | Message |
|---|---|
| 200 | Successful (OK) |
| 401 | Service account creation or access token fetch was not successful |
| 403 | Service account access wasn't granted to the Hotel Center account or both the service account key and access token has expired |
Troubleshooting
Running into problems? Doing a quick check on the following items may solve the problem.
- Did you create a project in the Google Cloud console?
- Did you enable the service in your project?
- Did you download a
.JSONfile—a private key after clicking Create client ID and selecting Service account? - Did you get a service account client ID email address of a form:
nnnnnnn@app_name.google.com.iam.gserviceaccount.com? - Did you share your Hotel Ads Center account with the service account by clicking the Share this account button?
- Did you send the service account's email address and your partner ID to your Technical Account Manager (TAM)?
- Are your API calls passing a recently-obtained token in the
Authorizationheader? - Is your token more than 1 hour old?
The following table lists some common errors and possible resolutions:
| Error | Description |
|---|---|
| Invalid credentials | This could mean a number of things. If you encounter this error,
check that:
|
| Not found | Your endpoint is most likely malformed. Check that you are submitting
a GET request, and that the request URL is valid (it conforms
to the API syntax that you're trying to access). |
| Invalid string value | One or more parts of the endpoint contains invalid syntax. For example, you might have misspelled part of the path. Check that you used the correct underscores, capitalization, and wording in your entire path. |
| Unsupported output format | This error most commonly occurs when using the Reports API. You must
specify "alt=csv" in the URL of your GET
request. The Reports API doesn't support JSON. |
| AccessTokenRefreshError/Invalid grant | When running your app, this error might be caused because of the
following:
|
| HotelAdsAPIConnection object has no attribute credentials | When running the app, the path to your .JSON file is
incorrect. |
| Invalid scope | When running the app, your API scope must be one of the following:
|
| Forbidden | The account ID that you use is one that you don't have authorization to access. If you are a sub-account owner, you might not be able to access the parent or root account ID. |