Page Summary
-
Glass provides three ways to utilize voice input: main voice commands, contextual voice commands, and the system's speech recognition activity.
-
Main voice commands launch Glassware from the Home card and automatically create a touch menu fallback.
-
Contextual voice commands allow users to perform actions within activities using the standard Android menu APIs invoked by voice.
-
The system's speech recognition activity can be started to receive free-form voice input from users.
Voice input lets you create a truly hands-free interface. Glass gives you three ways to utilize voice input.
Main voice commands start Glassware from the Home card, contextual voice commands can execute actions within an activity, and the system's speech recognition activity lets you receive free-form voice input from users.
Main voice commands
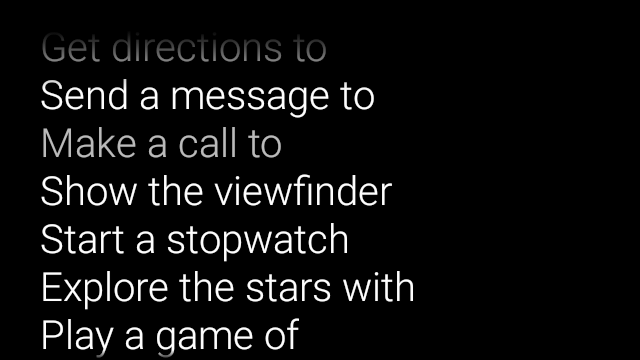
These voice commands launch Glassware from the Home card (Clock card). When you declare a main voice command, Glass automatically creates a touch menu item as a fallback if users decide to start your Glassware with tapping on the Home card.


To add a voice command to the ok glass voice main menu:
Create an XML resource for the voice command in
res/xml/<my_voice_trigger>.xmlthat uses one of the existing voice commands defined inVoiceTriggers.Command. For example, here's how to use "Start a run".<?xml version="1.0" encoding="utf-8"?> <trigger command="START_A_RUN" />To create a voice command that prompts the user to speak an additional phrase before starting your activity or service, include an
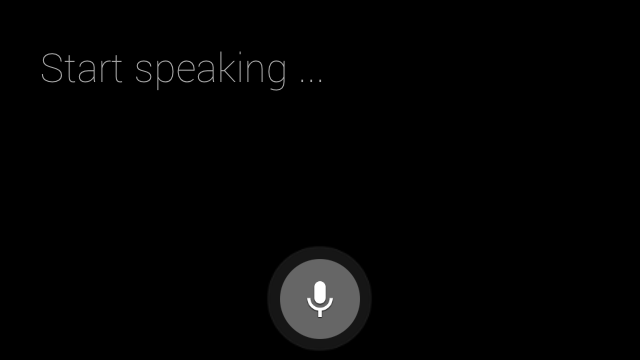
inputelement as well. For example, you might want to do this if you are using "Post an update".<?xml version="1.0" encoding="utf-8"?> <trigger command="POST_AN_UPDATE"> <input prompt="@string/glass_voice_prompt" /> </trigger>Register an intent filter using the
com.google.android.glass.action.VOICE_TRIGGERaction in your Android manifest. The intent filter starts your activity or service if it detects users speaking your voice command.<?xml version="1.0" encoding="utf-8"?> <application ...> <activity | service ...> <intent-filter> <action android:name= "com.google.android.glass.action.VOICE_TRIGGER" /> </intent-filter> <meta-data android:name="com.google.android.glass.VoiceTrigger" android:resource="@xml/my_voice_trigger" /> </activity | service> // ... </application>Declare an
android:iconattribute for your activity or service. This allows Glass to display an icon for your Glassware in the ok, glass touch menu.<activity |service android:icon="@drawable/my_icon" ...> ... </activity | service>If your voice command uses a voice prompt and starts an activity, obtain any transcribed text with the following code (such as in
onResume()):ArrayList<String> voiceResults = getIntent().getExtras() .getStringArrayList(RecognizerIntent.EXTRA_RESULTS);If the voice command starts a service, the intent extra is available in the
onStartCommand()callback:@Override public int onStartCommand(Intent intent, int flags, int startId) { ArrayList<String> voiceResults = intent.getExtras() .getStringArrayList(RecognizerIntent.EXTRA_RESULTS); // ... }
Setting constraints
If you need one or all of the following features to start your Glassware,
specify them in the res/xml/<my_voice_trigger>.xml resource.
If the features are not available, Glass disables the voice command:
cameranetworkmicrophone<trigger command="POST_AN_UPDATE"> <constraints camera="true" network="true" /> </trigger>
Contextual voice commands
Contextual voice commands allow users to carry out actions from activities. You build contextual voice commands with the standard Android menu APIs but users can invoke the menu items with voice commands instead of touch.
To enable contextual voice commands for a particular activity:
Call
getWindow().requestFeature(WindowUtils.FEATURE_VOICE_COMMANDS)in the desired activity to enable contextual voice commands. With this feature enabled, the "ok glass" menu appears in the footer area of the screen whenever this activity receives focus.Override
onCreatePanelMenu()and handle the case whereWindowUtils.FEATURE_VOICE_COMMANDSis enabled. If enabled, this is where you do one-time menu setup, like inflating a menu resource or calling theMenu.add()methods to create your voice menu system.Override
onMenuItemSelected()to handle the voice commands when users speak them. When users are done selecting a menu item, the "ok, glass" voice command automatically reappears in the footer section of the screen, ready to accept a new voice command, as long as the activity remains in focus.The following code enables contextual voice commands, inflates a menu resource when appropriate, and handles voice commands when they are spoken:
public class ContextualMenuActivity extends Activity {

    @Override
    protected void onCreate(Bundle bundle) {
        super.onCreate(bundle);

        // Requests a voice menu on this activity. As for any other
        // window feature, be sure to request this before
        // setContentView() is called
        getWindow().requestFeature(WindowUtils.FEATURE_VOICE_COMMANDS);
        setContentView(R.layout.activity_main);
    }

    @Override
    public boolean onCreatePanelMenu(int featureId, Menu menu) {
        if (featureId == WindowUtils.FEATURE_VOICE_COMMANDS) {
            getMenuInflater().inflate(R.menu.main, menu);
            return true;
        }
        // Pass through to super to setup touch menu.
        return super.onCreatePanelMenu(featureId, menu);
    }

    @Override
    public boolean onCreateOptionsMenu(Menu menu) {
        getMenuInflater().inflate(R.menu.main, menu);
        return true;
    }

    @Override
    public boolean onMenuItemSelected(int featureId, MenuItem item) {
        if (featureId == WindowUtils.FEATURE_VOICE_COMMANDS) {
            switch (item.getItemId()) {
                case R.id.dogs_menu_item:
                    // handle top-level dogs menu item
                    break;
                case R.id.cats_menu_item:
                    // handle top-level cats menu item
                    break;
                case R.id.lab_menu_item:
                    // handle second-level labrador menu item
                    break;
                case R.id.golden_menu_item:
                    // handle second-level golden menu item
                    break;
                case R.id.calico_menu_item:
                    // handle second-level calico menu item
                    break;
                case R.id.cheshire_menu_item:
                    // handle second-level cheshire menu item
                    break;
                default:
                    return true;
            }
            return true;
        }
        // Good practice to pass through to super if not handled
        return super.onMenuItemSelected(featureId, item);
    }
}
Here's an example of the menu resource used by the previous activity. Notice how you can create nested menu items for a hierarchical voice menu system. In the following example, the first menu item can be accessed as: ok glass, Show me dogs, Labrador.
<menu xmlns:android="http://schemas.android.com/apk/res/android"> <!-- Use the constants defined in the ContextualMenus.Command enum--> <item android:id="@+id/dogs_menu_item" android:title="@string/show_me_dogs"> <menu> <item android:id="@+id/lab_menu_item" android:title="@string/labrador" /> <item android:id="@+id/golden_menu_item" android:title="@string/golden" /> </menu> </item> <item android:id="@+id/cats_menu_item" android:title="@string/show_me_cats"> <menu> <item android:id="@+id/cheshire_menu_item" android:title="@string/cheshire" /> <item android:id="@+id/calico_menu_item" android:title="@string/calico" /> </menu> </item> </menu><menu xmlns:android="http://schemas.android.com/apk/res/android"> <!-- Use the constants defined in the ContextualMenus.Command enum--> <item android:id="@+id/play_menu_item" android:title="PLAY_MUSIC" /> <item android:id="@+id/pause_menu_item" android:title="PAUSE_MUSIC" /> </menu>(Optional) Override
onPreparePanel(), checking whether or notWindowUtils.FEATURE_VOICE_COMMANDSis enabled. If enabled, this is where you can do other logic to set up the menu system, such as adding and removing certain menu items based on some criteria. You can also toggle contextual voice menus on (returntrue) and off (returnfalse) based on some criteria. For example:private boolean mVoiceMenuEnabled; ... @Override public boolean onPreparePanel(int featureId, View view, Menu menu) { if (featureId == WindowUtils.FEATURE_VOICE_COMMANDS) { // toggle this boolean on and off based on some criteria return mVoiceMenuEnabled; } // Good practice to call through to super for other cases return super.onPreparePanel(featureId, view, menu); }
Supporting voice and touch menus simultaneously
Because contextual voice commands use the existing Android menu APIs, you can reuse a lot of the code and resources you already have for touch menus and simultaneously support both types of menus.
All you need to do is check for the Window.FEATURE_OPTIONS_PANEL feature
in addition to the WindowUtils.FEATURE_VOICE_COMMANDS feature that you already
are checking for in a few methods and then add in logic to open the touch
menu on some user action, such as a tap.
For example, you can change the previous activity example to add support for touch menus like this (changes are commented):
// 1. Check for Window.FEATURE_OPTIONS_PANEL
// to inflate the same menu resource for touch menus.
@Override
public boolean onCreatePanelMenu(int featureId, Menu menu) {
    if (featureId == WindowUtils.FEATURE_VOICE_COMMANDS ||
            featureId == Window.FEATURE_OPTIONS_PANEL) {
    ...
}

// 2. Check for Window.FEATURE_OPTIONS_PANEL
// to handle touch menu item selections.
@Override
public boolean onMenuItemSelected(int featureId, MenuItem item) {
    if (featureId == WindowUtils.FEATURE_VOICE_COMMANDS ||
            featureId == Window.FEATURE_OPTIONS_PANEL) {
    ...
}
With these changes, you can either tap or say ok glass to display your menu.
Using unlisted voice commands for development
When you want to distribute your Glassware, you must use the approved main
voice commands in
VoiceTriggers.Command
and approved contextual voice commands in
ContextualMenus.Command.
If you want to use voice commands that are not available in the GDK,
you can request an Android permission in your AndroidManifest.xml file:
<uses-permission
     android:name="com.google.android.glass.permission.DEVELOPMENT" />
Using unlisted main voice commands
Declare a string value in
res/values/strings.xmlthat defines the name of your voice trigger. Optionally declare a voice prompt to display the speech recognition Glassware before starting your Glassware.<?xml version="1.0" encoding="utf-8"?> <resources> <string name="glass_voice_trigger">read me a story</string> <string name="glass_voice_prompt">what story?</string> </resources>Create an XML resource for the voice trigger in
res/xml/<my_voice_trigger>.xml. For unlisted voice commands, you should use thekeywordattribute instead of thecommandattribute used for approved voice commands. Thekeywordattribute should be a reference to the string resource defining the voice command. For a simple voice trigger that starts an activity or service immediately, simply specify thetriggerelement:<?xml version="1.0" encoding="utf-8"?> <trigger keyword="@string/glass_voice_trigger" />To create a voice trigger that prompts the user to speak an additional phrase before starting your activity or service, include an input element as well:
<?xml version="1.0" encoding="utf-8"?>
<trigger keyword="@string/glass_voice_trigger">
    <input prompt="@string/glass_voice_prompt" />
</trigger>
Using unlisted contextual voice commands
When creating menu items, use any text for the title of the menu item. For example:
<menu xmlns:android="http://schemas.android.com/apk/res/android">
    <!-- Use the constants defined in the ContextualMenus.Command enum-->
    <item
        android:id="@+id/pizza_menu_item"
        android:title="@string/find_pizza" />
</menu>
Starting speech recognition

The speech recognition Glassware waits for users to speak and returns the transcribed text after they are done. To start the activity:
- Call
startActivityForResult()with theACTION_RECOGNIZE_SPEECHintent. The following intent extras are supported when starting the activity: Override the
onActivityResult()callback to receive the transcribed text from theEXTRA_RESULTSintent extra. This callback is called when users finish speaking.private static final int SPEECH_REQUEST = 0; private void displaySpeechRecognizer() { Intent intent = new Intent(RecognizerIntent.ACTION_RECOGNIZE_SPEECH); startActivityForResult(intent, SPEECH_REQUEST); } @Override protected void onActivityResult(int requestCode, int resultCode, Intent data) { if (requestCode == SPEECH_REQUEST && resultCode == RESULT_OK) { List<String> results = data.getStringArrayListExtra( RecognizerIntent.EXTRA_RESULTS); String spokenText = results.get(0); // Do something with spokenText. } super.onActivityResult(requestCode, resultCode, data); }
