
Material Components (MDC) ช่วยให้นักพัฒนาแอปใช้งาน Material Design ได้ MDC สร้างขึ้นโดยทีมวิศวกรและนักออกแบบ UX ที่ Google โดยมีคอมโพเนนต์ UI ที่สวยงามและใช้งานได้หลายสิบรายการ และพร้อมใช้งานสำหรับ Android, iOS, เว็บ และ Flutter material.io/develop |
Material Design และคอมโพเนนต์ Material สำหรับ Android คืออะไร
Material Design คือระบบสำหรับการสร้างผลิตภัณฑ์ดิจิทัลที่โดดเด่นและสวยงาม การรวมสไตล์ การสร้างแบรนด์ การโต้ตอบ และการเคลื่อนไหวภายใต้ชุดหลักการและคอมโพเนนต์ที่สอดคล้องกันจะช่วยให้ทีมผลิตภัณฑ์ตระหนักถึงศักยภาพด้านการออกแบบที่ยิ่งใหญ่ที่สุด
สำหรับแอปพลิเคชัน Android Material Components สำหรับ Android (MDC Android) จะรวมการออกแบบและวิศวกรรมเข้ากับไลบรารีของคอมโพเนนต์เพื่อสร้างความสอดคล้องกันในแอปพลิเคชัน เมื่อระบบ Material Design พัฒนาขึ้น เราจะอัปเดตคอมโพเนนต์เหล่านี้เพื่อให้มั่นใจว่าการติดตั้งใช้งานจะมีความแม่นยำระดับพิกเซลอย่างสม่ำเสมอและเป็นไปตามมาตรฐานการพัฒนาส่วนหน้าของ Google นอกจากนี้ MDC ยังพร้อมใช้งานสำหรับเว็บ, iOS และ Flutter ด้วย
ใน Codelab นี้ คุณจะได้สร้างหน้าเข้าสู่ระบบโดยใช้คอมโพเนนต์หลายอย่างของ MDC Android
สิ่งที่คุณจะสร้าง
Codelab นี้เป็น Codelab แรกใน 4 รายการที่จะแนะนำวิธีสร้างแอปชื่อ Shrine ซึ่งเป็นแอป Android อีคอมเมิร์ซที่ขายเสื้อผ้าและของใช้ในบ้าน โดยจะแสดงวิธีปรับแต่งคอมโพเนนต์ให้สอดคล้องกับแบรนด์หรือสไตล์ใดก็ได้โดยใช้ MDC-Android
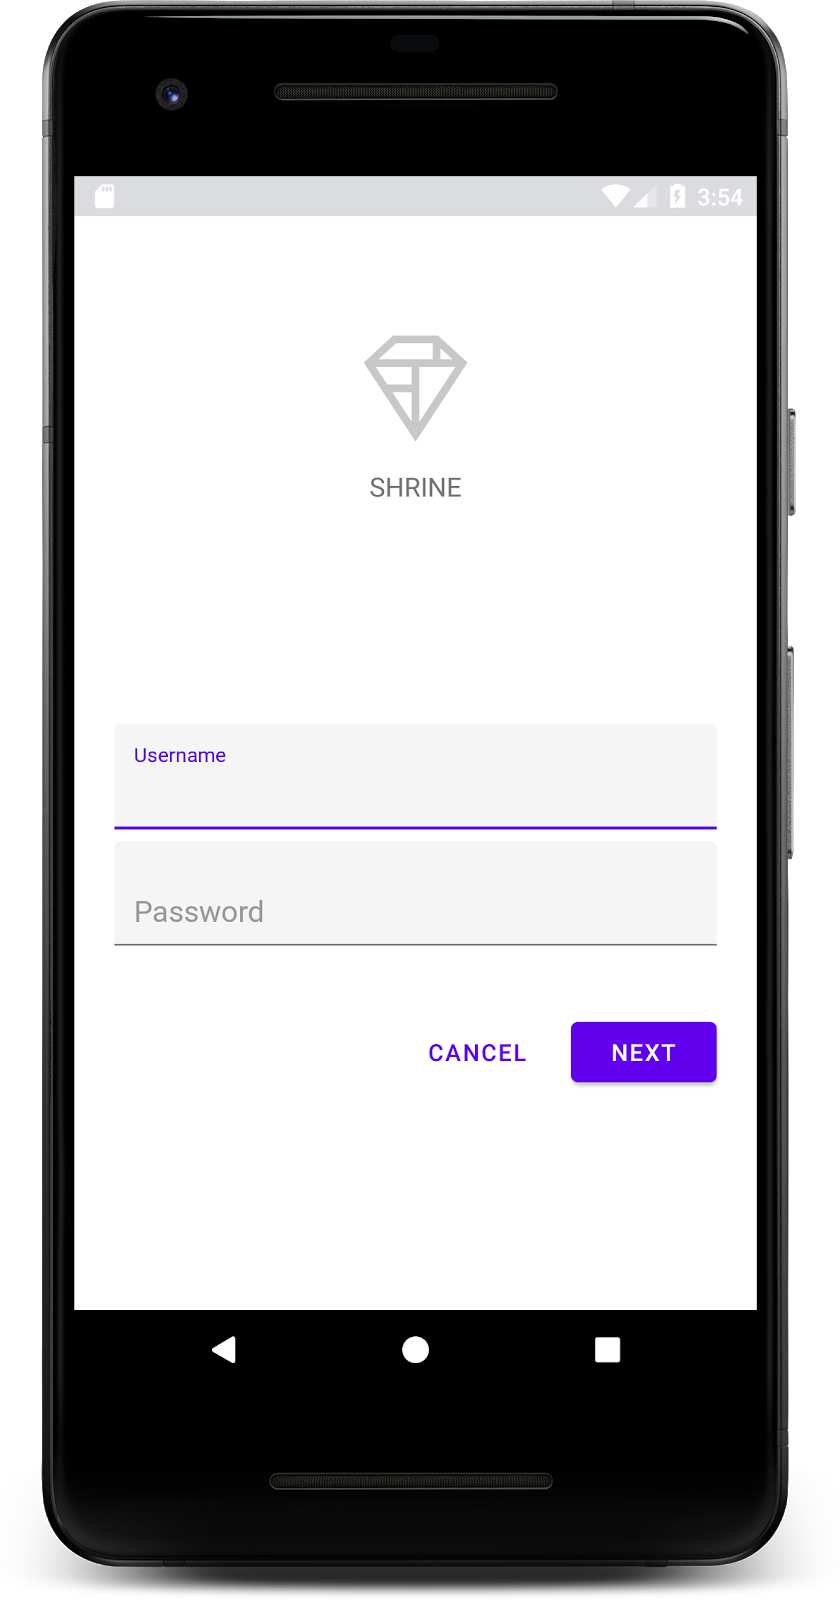
ในโค้ดแล็บนี้ คุณจะได้สร้างหน้าเข้าสู่ระบบสำหรับ Shrine ซึ่งมีองค์ประกอบต่อไปนี้
- ช่องข้อความ 2 ช่อง ช่องหนึ่งสำหรับป้อนชื่อผู้ใช้และอีกช่องสำหรับป้อนรหัสผ่าน
- ปุ่ม 2 ปุ่ม ปุ่มหนึ่งสำหรับ "ยกเลิก" และอีกปุ่มสำหรับ "ถัดไป"
- ชื่อของแอป (Shrine)
- รูปภาพโลโก้ของ Shrine
คอมโพเนนต์ MDC Android ใน Codelab นี้
- ช่องข้อความ
- ปุ่ม
สิ่งที่ต้องมี
- ความรู้พื้นฐานเกี่ยวกับการพัฒนาแอป Android
- Android Studio (ดาวน์โหลดที่นี่หากยังไม่มี)
- โปรแกรมจำลองหรืออุปกรณ์ Android (พร้อมใช้งานผ่าน Android Studio)
- โค้ดตัวอย่าง (ดูขั้นตอนถัดไป)
คุณจะให้คะแนนระดับประสบการณ์ในการสร้างแอป Android เท่าใด
เริ่มต้นใช้งาน Android Studio
เมื่อเปิด Android Studio คุณควรเห็นหน้าต่างชื่อ "ยินดีต้อนรับสู่ Android Studio" อย่างไรก็ตาม หากคุณเปิดใช้ Android Studio เป็นครั้งแรก ให้ทำตามขั้นตอนวิซาร์ดการตั้งค่า Android Studio โดยใช้ค่าเริ่มต้น ขั้นตอนนี้อาจใช้เวลาหลายนาทีในการดาวน์โหลดและติดตั้งไฟล์ที่จำเป็น คุณจึงปล่อยให้ขั้นตอนนี้ทำงานในเบื้องหลังขณะทำส่วนถัดไปได้
ดาวน์โหลดแอป Codelab สำหรับผู้เริ่มต้น
แอปเริ่มต้นจะอยู่ในไดเรกทอรี material-components-android-codelabs-101-starter/java
...หรือโคลนจาก GitHub
หากต้องการโคลนโค้ดแล็บนี้จาก GitHub ให้เรียกใช้คำสั่งต่อไปนี้
git clone https://github.com/material-components/material-components-android-codelabs
cd material-components-android-codelabs/
git checkout 101-starter
โหลดโค้ดเริ่มต้นใน Android Studio
- เมื่อวิซาร์ดการตั้งค่าเสร็จสิ้นและหน้าต่างยินดีต้อนรับสู่ Android Studio ปรากฏขึ้น ให้คลิกเปิดโปรเจ็กต์ Android Studio ที่มีอยู่ ไปที่ไดเรกทอรีที่คุณติดตั้งโค้ดตัวอย่าง แล้วเลือก java -> shrine (หรือค้นหา shrine ในคอมพิวเตอร์) เพื่อเปิดโปรเจ็กต์ Shrine
- รอสักครู่เพื่อให้ Android Studio สร้างและซิงค์โปรเจ็กต์ ดังที่แสดงโดยตัวบ่งชี้กิจกรรมที่ด้านล่างของหน้าต่าง Android Studio
- ในขั้นตอนนี้ Android Studio อาจแสดงข้อผิดพลาดในการสร้างบางอย่างเนื่องจากคุณไม่มี Android SDK หรือเครื่องมือบิลด์ เช่น เครื่องมือที่แสดงด้านล่าง ทำตามวิธีการใน Android Studio เพื่อติดตั้ง/อัปเดตไลบรารีเหล่านี้และซิงค์โปรเจ็กต์

เพิ่มการพึ่งพาโปรเจ็กต์
โปรเจ็กต์ต้องมีทรัพยากร Dependency ในไลบรารีการรองรับ MDC Android โค้ดตัวอย่างที่คุณดาวน์โหลดควรมีรายการการอ้างอิงนี้อยู่แล้ว แต่แนวทางปฏิบัติแนะนำคือการทำตามขั้นตอนต่อไปนี้เพื่อให้แน่ใจ
- ไปที่ไฟล์
build.gradleของโมดูลappและตรวจสอบว่าบล็อกdependenciesมีการอ้างอิง MDC Android
api 'com.google.android.material:material:1.1.0-alpha06'
- (ไม่บังคับ) หากจำเป็น ให้แก้ไขไฟล์
build.gradleเพื่อเพิ่มการอ้างอิงต่อไปนี้และซิงค์โปรเจ็กต์
dependencies {
    api 'com.google.android.material:material:1.1.0-alpha06'
    implementation 'androidx.legacy:legacy-support-v4:1.0.0'
    implementation 'com.android.volley:volley:1.1.1'
    implementation 'com.google.code.gson:gson:2.8.5'
    implementation "org.jetbrains.kotlin:kotlin-stdlib-jdk7:1.3.21"
    testImplementation 'junit:junit:4.12'
    androidTestImplementation 'androidx.test:core:1.1.0'
    androidTestImplementation 'androidx.test.ext:junit:1.1.0'
    androidTestImplementation 'androidx.test:runner:1.2.0-alpha05'
    androidTestImplementation 'androidx.test.espresso:espresso-core:3.2.0-alpha05'
}
เรียกใช้แอปเริ่มต้น
|

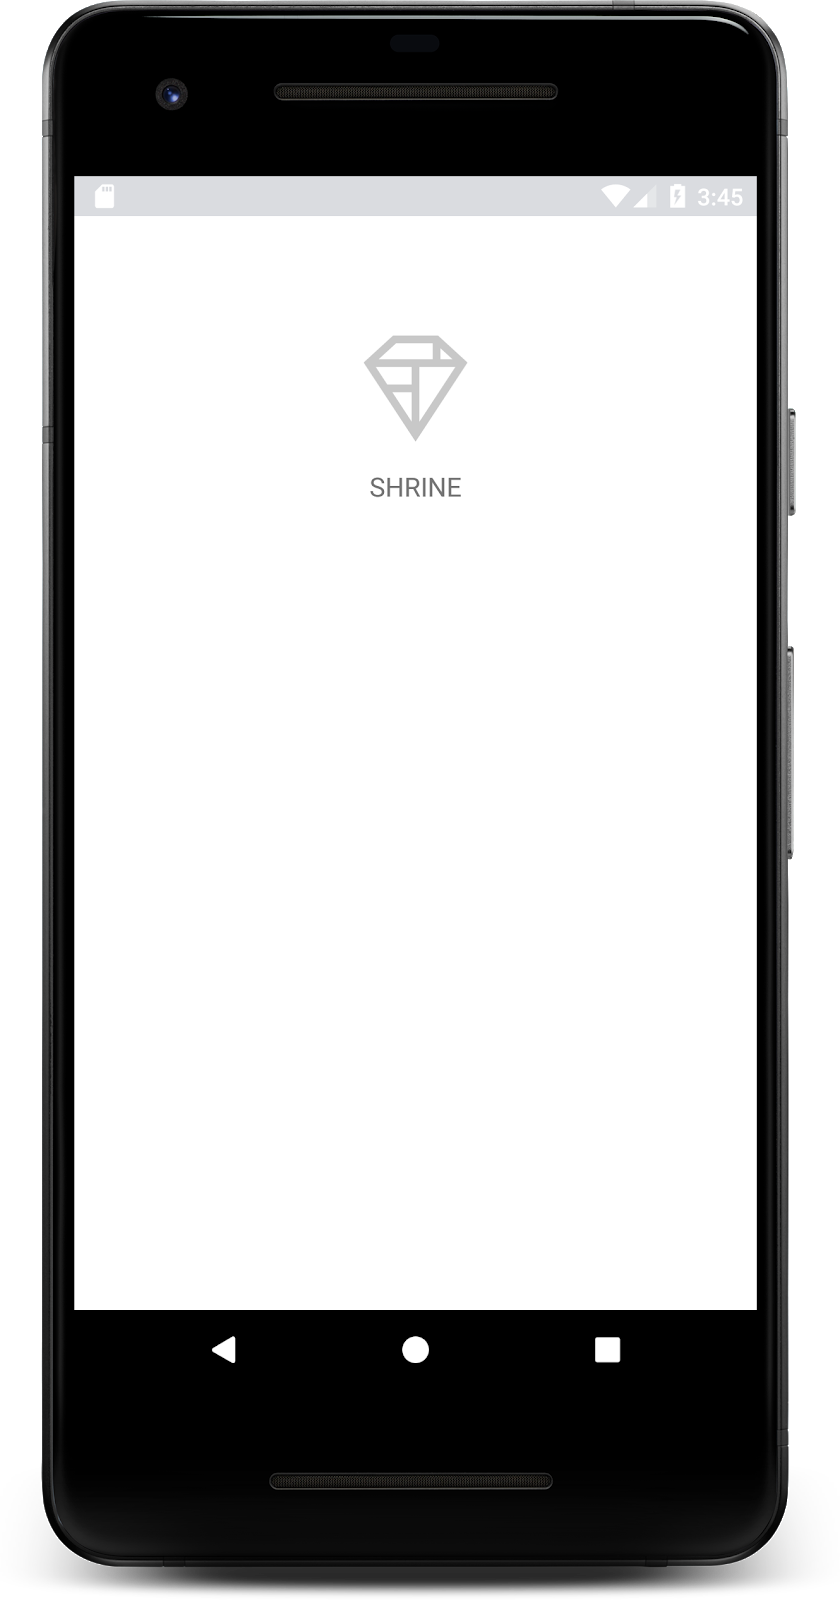
สำเร็จ! โค้ดเริ่มต้นสำหรับหน้าเข้าสู่ระบบของ Shrine ควรทำงานในโปรแกรมจำลอง คุณควรเห็นชื่อ "Shrine" และโลโก้ Shrine อยู่ด้านล่าง
มาดูโค้ดกัน เราได้จัดเตรียมFragmentเฟรมเวิร์กการนำทางอย่างง่ายในโค้ดตัวอย่างเพื่อแสดง Fragment และไปยัง Fragment ต่างๆ
เปิด MainActivity.java ในไดเรกทอรี shrine -> app -> src -> main -> java -> com.google.codelabs.mdc.java.shrine โดยควรมีข้อมูลต่อไปนี้
MainActivity.java
package com.google.codelabs.mdc.java.shrine;

import android.os.Bundle;
import androidx.appcompat.app.AppCompatActivity;
import androidx.fragment.app.Fragment;
import androidx.fragment.app.FragmentTransaction;

public class MainActivity extends AppCompatActivity implements NavigationHost {

   @Override
   protected void onCreate(Bundle savedInstanceState) {
       super.onCreate(savedInstanceState);
       setContentView(R.layout.shr_main_activity);

       if (savedInstanceState == null) {
           getSupportFragmentManager()
                   .beginTransaction()
                   .add(R.id.container, new LoginFragment())
                   .commit();
       }
   }

   /**
    * Navigate to the given fragment.
    *
    * @param fragment       Fragment to navigate to.
    * @param addToBackstack Whether or not the current fragment should be added to the backstack.
    */
   @Override
   public void navigateTo(Fragment fragment, boolean addToBackstack) {
       FragmentTransaction transaction =
               getSupportFragmentManager()
                       .beginTransaction()
                       .replace(R.id.container, fragment);

       if (addToBackstack) {
           transaction.addToBackStack(null);
       }

       transaction.commit();
   }
}กิจกรรมนี้จะแสดงR.layout.shr_main_activityไฟล์เลย์เอาต์ที่กำหนดไว้ใน shr_main_activity.xml
คุณจะเห็นว่าใน onCreate(), MainActivity.java เริ่มธุรกรรม Fragment เพื่อแสดง LoginFragment LoginFragment. ซึ่งเป็นสิ่งที่เราจะแก้ไขใน Codelab นี้ กิจกรรมยังใช้เมธอด navigateTo(Fragment) ที่กำหนดไว้ใน NavigationHost ซึ่งช่วยให้ Fragment ใดก็ตามไปยัง Fragment อื่นได้
Command + คลิก (หรือ Control + คลิก) shr_main_activity ในไฟล์กิจกรรมเพื่อเปิดไฟล์เลย์เอาต์ หรือไปที่ไฟล์เลย์เอาต์ใน app -> res -> layout -> shr_main_activity.xml
shr_main_activity.xml
<?xml version="1.0" encoding="utf-8"?>
<FrameLayout xmlns:android="http://schemas.android.com/apk/res/android"
   xmlns:tools="http://schemas.android.com/tools"
   android:id="@+id/container"
   android:layout_width="match_parent"
   android:layout_height="match_parent"
   tools:context=".MainActivity" />
ในที่นี้ เราจะเห็น <FrameLayout> อย่างง่าย ซึ่งทำหน้าที่เป็นคอนเทนเนอร์สำหรับ Fragment ที่กิจกรรมแสดง มาเปิด LoginFragment.java กัน
LoginFragment.java
package com.google.codelabs.mdc.java.shrine;

import android.os.Bundle;
import android.view.LayoutInflater;
import android.view.View;
import android.view.ViewGroup;
import androidx.annotation.NonNull;
import androidx.fragment.app.Fragment;

/**
* Fragment representing the login screen for Shrine.
*/
public class LoginFragment extends Fragment {

   @Override
   public View onCreateView(
           @NonNull LayoutInflater inflater, ViewGroup container, Bundle savedInstanceState) {
       // Inflate the layout for this fragment
       View view = inflater.inflate(R.layout.shr_login_fragment, container, false);

       // Snippet from "Navigate to the next Fragment" section goes here.

       return view;
   }

   // "isPasswordValid" from "Navigate to the next Fragment" section method goes here
}
LoginFragment จะขยายไฟล์เลย์เอาต์ shr_login_fragment และแสดงใน onCreateView() มาดูshr_login_fragment.xmlไฟล์เลย์เอาต์เพื่อดูว่าหน้าเข้าสู่ระบบมีลักษณะอย่างไร
shr_login_fragment.xml
<?xml version="1.0" encoding="utf-8"?>
<ScrollView xmlns:android="http://schemas.android.com/apk/res/android"
   xmlns:app="http://schemas.android.com/apk/res-auto"
   xmlns:tools="http://schemas.android.com/tools"
   android:layout_width="match_parent"
   android:layout_height="match_parent"
   android:background="@color/loginPageBackgroundColor"
   tools:context=".LoginFragment">

   <LinearLayout
       android:layout_width="match_parent"
       android:layout_height="wrap_content"
       android:clipChildren="false"
       android:clipToPadding="false"
       android:orientation="vertical"
       android:padding="24dp"
       android:paddingTop="16dp">

       <ImageView
           android:layout_width="64dp"
           android:layout_height="64dp"
           android:layout_gravity="center_horizontal"
           android:layout_marginTop="48dp"
           android:layout_marginBottom="16dp"
           app:srcCompat="@drawable/shr_logo" />

       <TextView
           android:layout_width="wrap_content"
           android:layout_height="wrap_content"
           android:layout_gravity="center_horizontal"
           android:layout_marginBottom="132dp"
           android:text="@string/shr_app_name"
           android:textAllCaps="true"
           android:textSize="16sp" />

       <!-- Snippet from "Add text fields" section goes here. -->

       <!-- Snippet from "Add buttons" section goes here. -->

   </LinearLayout>
</ScrollView>
ในที่นี้ เราจะเห็น <LinearLayout> ที่มี <ImageView> อยู่ด้านบน ซึ่งแสดงถึงโลโก้ "Shrine"
จากนั้นจะมีแท็ก <TextView> ซึ่งแสดงถึงป้ายกำกับ "SHRINE" ข้อความสำหรับป้ายกำกับนี้คือทรัพยากรสตริงชื่อ @string/shr_app_name หากคุณCommand + คลิก (หรือ Control + คลิก) ชื่อทรัพยากรสตริง หรือเปิด app -> res -> values -> strings.xml คุณจะเห็นไฟล์ strings.xml ที่กำหนดทรัพยากรสตริง เมื่อมีการเพิ่มทรัพยากรสตริงในอนาคต ระบบจะกำหนดทรัพยากรเหล่านั้นไว้ที่นี่ ทรัพยากรทุกรายการในไฟล์นี้ควรมีคำนำหน้า shr_ เพื่อระบุว่าทรัพยากรเหล่านั้นเป็นส่วนหนึ่งของแอป Shrine
เมื่อคุณคุ้นเคยกับโค้ดเริ่มต้นแล้ว มาใช้คอมโพเนนต์แรกกัน
ก่อนอื่น เราจะเพิ่มช่องข้อความ 2 ช่องในหน้าเข้าสู่ระบบเพื่อให้ผู้ใช้ป้อนชื่อผู้ใช้และรหัสผ่าน เราจะใช้คอมโพเนนต์ช่องข้อความ MDC ซึ่งมีฟังก์ชันการทำงานในตัวที่แสดงป้ายกำกับแบบลอยและข้อความแสดงข้อผิดพลาด
เพิ่ม XML
ใน shr_login_fragment.xml ให้เพิ่มองค์ประกอบ TextInputLayout 2 รายการที่มีองค์ประกอบย่อย TextInputEditText อยู่ภายใน <LinearLayout> ใต้ป้ายกำกับ "SHRINE" <TextView> ดังนี้
shr_login_fragment.xml
<com.google.android.material.textfield.TextInputLayout
   android:layout_width="match_parent"
   android:layout_height="wrap_content"
   android:layout_margin="4dp"
   android:hint="@string/shr_hint_username">

   <com.google.android.material.textfield.TextInputEditText
       android:layout_width="match_parent"
       android:layout_height="wrap_content"
       android:inputType="text"
       android:maxLines="1" />
</com.google.android.material.textfield.TextInputLayout>

<com.google.android.material.textfield.TextInputLayout
   android:id="@+id/password_text_input"
   android:layout_width="match_parent"
   android:layout_height="wrap_content"
   android:layout_margin="4dp"
   android:hint="@string/shr_hint_password">

   <com.google.android.material.textfield.TextInputEditText
       android:id="@+id/password_edit_text"
       android:layout_width="match_parent"
       android:layout_height="wrap_content" />
</com.google.android.material.textfield.TextInputLayout>ข้อมูลโค้ดข้างต้นแสดงฟิลด์ข้อความ 2 ฟิลด์ ซึ่งแต่ละฟิลด์ประกอบด้วยองค์ประกอบ <TextInputLayout> และองค์ประกอบย่อย <TextInputEditText> ข้อความคำใบ้สำหรับช่องข้อความแต่ละช่องจะระบุไว้ในแอตทริบิวต์ android:hint
เราได้รวมทรัพยากรสตริงใหม่ 2 รายการสำหรับช่องข้อความ ได้แก่ @string/shr_hint_username และ @string/shr_hint_password เปิด strings.xml เพื่อดูแหล่งข้อมูลสตริงเหล่านี้
strings.xml
...
<string name="shr_hint_username">Username</string>
<string name="shr_hint_password">Password</string>
...
เพิ่มการตรวจสอบอินพุต
TextInputLayout มีฟังก์ชันการแสดงความคิดเห็นเกี่ยวกับข้อผิดพลาดในตัว
หากต้องการแสดงความคิดเห็นเกี่ยวกับข้อผิดพลาด ให้ทำการเปลี่ยนแปลงต่อไปนี้ใน shr_login_fragment.xml
- ตั้งค่าแอตทริบิวต์
app:errorEnabledเป็น true ในองค์ประกอบรหัสผ่านTextInputLayoutซึ่งจะเป็นการเพิ่มระยะห่างเพิ่มเติมสำหรับข้อความแสดงข้อผิดพลาดใต้ช่องข้อความ - ตั้งค่าแอตทริบิวต์
android:inputTypeเป็น "textPassword" ในองค์ประกอบรหัสผ่านTextInputEditTextซึ่งจะเป็นการซ่อนข้อความที่ป้อนในช่องรหัสผ่าน
การเปลี่ยนแปลงเหล่านี้จะทำให้ช่องข้อความใน shr_login_fragment.xml มีลักษณะดังนี้
shr_login_fragment.xml
<com.google.android.material.textfield.TextInputLayout
android:layout_width="match_parent"
android:layout_height="wrap_content"
android:layout_margin="4dp"
android:hint="@string/shr_hint_username">
<com.google.android.material.textfield.TextInputEditText
android:layout_width="match_parent"
android:layout_height="wrap_content"
android:inputType="text"
android:maxLines="1" />
</com.google.android.material.textfield.TextInputLayout>
<com.google.android.material.textfield.TextInputLayout
android:id="@+id/password_text_input"
android:layout_width="match_parent"
android:layout_height="wrap_content"
android:layout_margin="4dp"
android:hint="@string/shr_hint_password"
app:errorEnabled="true">
<com.google.android.material.textfield.TextInputEditText
android:id="@+id/password_edit_text"
android:layout_width="match_parent"
android:layout_height="wrap_content"
android:inputType="textPassword"/>
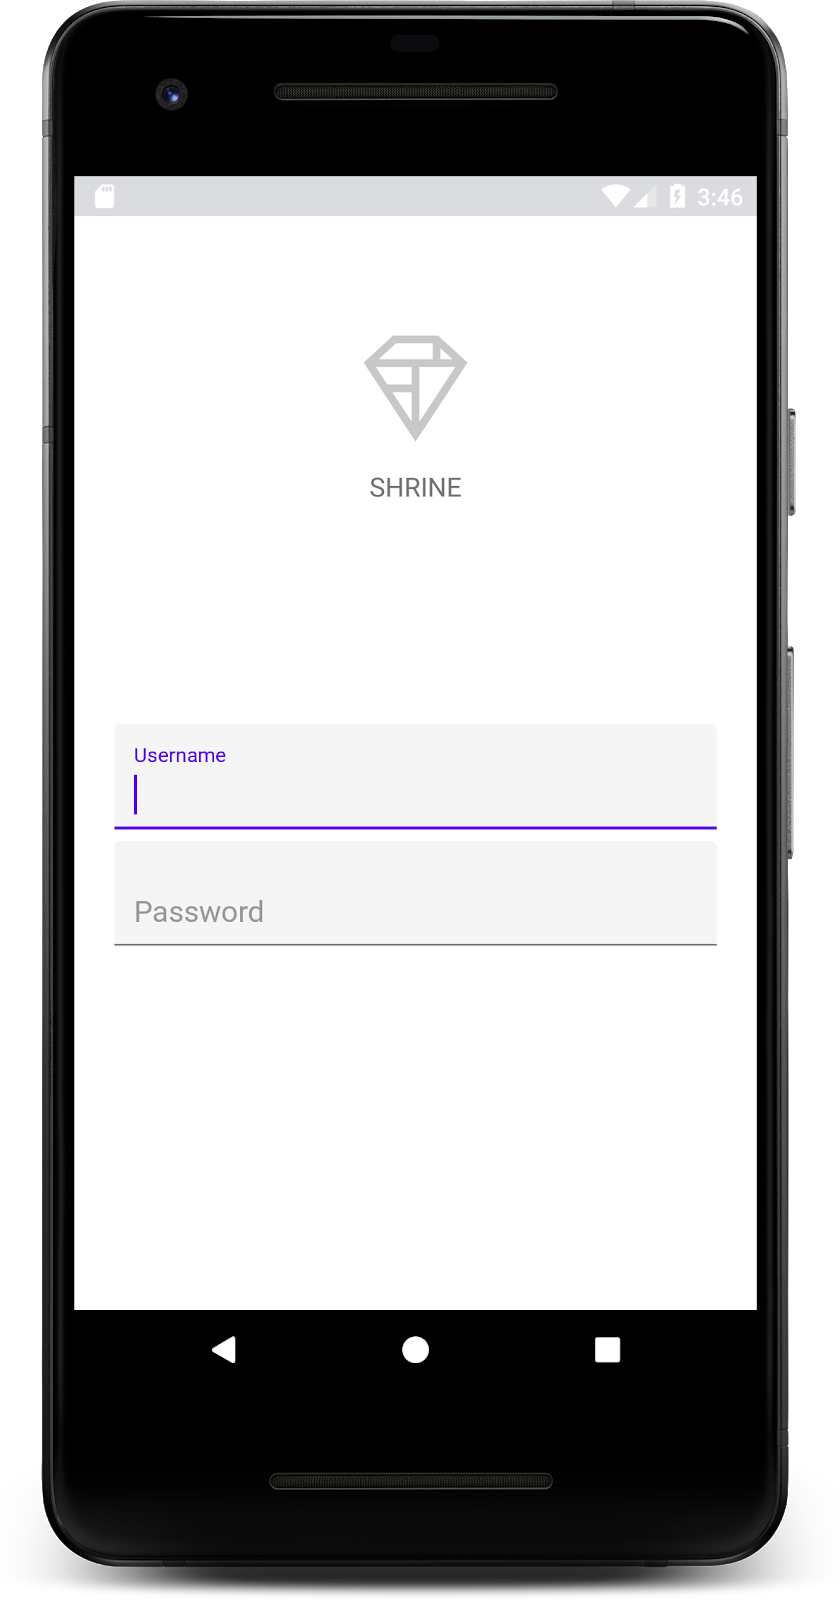
</com.google.android.material.textfield.TextInputLayout>ตอนนี้ลองเรียกใช้แอป คุณควรเห็นหน้าที่มีช่องข้อความ 2 ช่องสำหรับ "ชื่อผู้ใช้" และ "รหัสผ่าน"
ดูภาพเคลื่อนไหวของป้ายกำกับแบบลอย
จากนั้นเราจะเพิ่มปุ่ม 2 ปุ่มลงในหน้าเข้าสู่ระบบ ได้แก่ "ยกเลิก" และ "ถัดไป" เราจะใช้คอมโพเนนต์ปุ่ม MDC ซึ่งมาพร้อมกับเอฟเฟกต์ระลอกหมึกของ Material Design อันเป็นเอกลักษณ์ในตัว
เพิ่ม XML
ใน shr_login_fragment.xml ให้เพิ่ม <RelativeLayout> ไปยัง <LinearLayout> ใต้องค์ประกอบ TextInputLayout จากนั้นเพิ่มองค์ประกอบ <MaterialButton> 2 รายการลงใน <RelativeLayout>
ไฟล์ XML ที่ได้ควรมีลักษณะดังนี้
shr_login_fragment.xml
<RelativeLayout
   android:layout_width="match_parent"
   android:layout_height="wrap_content">

   <com.google.android.material.button.MaterialButton
       android:id="@+id/next_button"
       android:layout_width="wrap_content"
       android:layout_height="wrap_content"
       android:layout_alignParentEnd="true"
       android:layout_alignParentRight="true"
       android:text="@string/shr_button_next" />

   <com.google.android.material.button.MaterialButton
       android:id="@+id/cancel_button"
       style="@style/Widget.MaterialComponents.Button.TextButton"
       android:layout_width="wrap_content"
       android:layout_height="wrap_content"
       android:layout_marginEnd="12dp"
       android:layout_marginRight="12dp"
       android:layout_toStartOf="@id/next_button"
       android:layout_toLeftOf="@id/next_button"
       android:text="@string/shr_button_cancel" />

</RelativeLayout>เท่านี้ก็เรียบร้อย เมื่อเรียกใช้แอป หมึกจะกระเพื่อมเมื่อคุณแตะปุ่มแต่ละปุ่ม
สุดท้าย เราจะเพิ่มโค้ด Java บางส่วนลงใน LoginFragment.java เพื่อเชื่อมต่อปุ่ม "ถัดไป" กับ Fragment อื่น คุณจะเห็นว่าคอมโพเนนต์แต่ละรายการที่เราเพิ่มลงในเลย์เอาต์มี id กำหนดไว้ เราจะใช้ ids เหล่านี้เพื่ออ้างอิงคอมโพเนนต์ในโค้ดของเรา และเพิ่มการตรวจสอบข้อผิดพลาดและการนำทาง
มาเพิ่มเมธอดบูลีนส่วนตัว isPasswordValid ใน LoginFragment.java ใต้ onCreateView() พร้อมตรรกะเพื่อพิจารณาว่ารหัสผ่านใช้ได้หรือไม่ ในการสาธิตนี้ เราจะตรวจสอบว่ารหัสผ่านมีความยาวอย่างน้อย 8 อักขระ
LoginFragment.java
/*
   In reality, this will have more complex logic including, but not limited to, actual
   authentication of the username and password.
*/
private boolean isPasswordValid(@Nullable Editable text) {
   return text != null && text.length() >= 8;
}
จากนั้นเพิ่มเครื่องมือฟังการคลิกไปยังปุ่ม "ถัดไป" ซึ่งจะตั้งค่าและล้างข้อผิดพลาดตามisPasswordValid()เมธอดที่เราเพิ่งสร้าง ใน onCreateView() ตัวตรวจจับการคลิกนี้ควรวางไว้ระหว่างบรรทัดของโปรแกรมขยายและบรรทัด return view
จากนั้นมาเพิ่มเครื่องมือฟังคีย์ไปยังรหัสผ่าน TextInputEditText เพื่อฟังเหตุการณ์คีย์ที่จะล้างข้อผิดพลาด โดย Listener นี้ควรใช้ isPasswordValid() เพื่อตรวจสอบว่ารหัสผ่านถูกต้องหรือไม่ด้วย คุณเพิ่มโค้ดนี้ได้โดยตรงใต้เครื่องมือฟังการคลิกใน onCreateView()
ตอนนี้เมธอด onCreateView() ควรมีลักษณะดังนี้
LoginFragment.java
@Override
public View onCreateView(
       @NonNull LayoutInflater inflater, ViewGroup container, Bundle savedInstanceState) {
   // Inflate the layout for this fragment
   View view = inflater.inflate(R.layout.shr_login_fragment, container, false);
   final TextInputLayout passwordTextInput = view.findViewById(R.id.password_text_input);
   final TextInputEditText passwordEditText = view.findViewById(R.id.password_edit_text);
   MaterialButton nextButton = view.findViewById(R.id.next_button);

   // Set an error if the password is less than 8 characters.
   nextButton.setOnClickListener(new View.OnClickListener() {
       @Override
       public void onClick(View view) {
           if (!isPasswordValid(passwordEditText.getText())) {
               passwordTextInput.setError(getString(R.string.shr_error_password));
           } else {
               passwordTextInput.setError(null); // Clear the error
           }
       }
   });

   // Clear the error once more than 8 characters are typed.
   passwordEditText.setOnKeyListener(new View.OnKeyListener() {
       @Override
       public boolean onKey(View view, int i, KeyEvent keyEvent) {
           if (isPasswordValid(passwordEditText.getText())) {
               passwordTextInput.setError(null); //Clear the error
           }
           return false;
       }
   });
   return view;
} ตอนนี้เราไปยัง Fragment อื่นได้แล้ว อัปเดต OnClickListener ใน onCreateView() เพื่อไปยังอีก Fragment เมื่อการตรวจสอบข้อผิดพลาดสำเร็จ คุณทำได้โดยเพิ่มบรรทัดต่อไปนี้เพื่อไปยังเคส ProductGridFragment ของเครื่องมือฟังการคลิก:else
LoginFragment.java
...
((NavigationHost) getActivity()).navigateTo(new ProductGridFragment(), false); // Navigate to the next Fragment
...
ตอนนี้เครื่องมือฟังการคลิกควรมีลักษณะดังนี้
LoginFragment.java
...
MaterialButton nextButton = view.findViewById(R.id.next_button);

// Set an error if the password is less than 8 characters.
nextButton.setOnClickListener(new View.OnClickListener() {
   @Override
   public void onClick(View view) {
       if (!isPasswordValid(passwordEditText.getText())) {
           passwordTextInput.setError(getString(R.string.shr_error_password));
       } else {
           passwordTextInput.setError(null); // Clear the error
           ((NavigationHost) getActivity()).navigateTo(new ProductGridFragment(), false); // Navigate to the next Fragment
       }
   }
});
...
โค้ดบรรทัดใหม่นี้เรียกใช้เมธอด navigateTo() จาก MainActivity เพื่อไปยัง Fragment ใหม่ ซึ่งก็คือ ProductGridFragment ปัจจุบันหน้านี้ว่างเปล่า ซึ่งคุณจะทำงานใน MDC-102
ตอนนี้ก็สร้างแอปได้เลย กดปุ่มถัดไปได้เลย
สำเร็จแล้ว! หน้าจอนี้จะเป็นจุดเริ่มต้นของโค้ดแล็บถัดไปที่คุณจะใช้ใน MDC-102
การใช้มาร์กอัป XML พื้นฐานและ Java ประมาณ 30 บรรทัด ไลบรารี Material Components สำหรับ Android ช่วยให้คุณสร้างหน้าเข้าสู่ระบบที่สวยงามซึ่งเป็นไปตามหลักเกณฑ์การออกแบบ Material รวมถึงมีลักษณะและทำงานอย่างสอดคล้องกันในอุปกรณ์ทุกเครื่อง
ขั้นตอนถัดไป
ช่องข้อความและปุ่มเป็นคอมโพเนนต์หลัก 2 รายการในไลบรารี MDC Android แต่ยังมีอีกมากมาย คุณสามารถสำรวจคอมโพเนนต์อื่นๆ ใน MDC Android ได้ หรือไปที่ MDC 102: โครงสร้างและเลย์เอาต์ของดีไซน์ Material เพื่อดูข้อมูลเกี่ยวกับแถบแอปด้านบน มุมมองการ์ด และเลย์เอาต์ตารางกริด ขอขอบคุณที่ลองใช้ Material Components เราหวังว่าคุณจะชอบ Codelab นี้