
This codelab is part of the Android Kotlin Fundamentals course. You'll get the most value out of this course if you work through the codelabs in sequence. All the course codelabs are listed on the Android Kotlin Fundamentals codelabs landing page.
Introduction
In the previous codelab, you learned how to get data from a web service and parse the response into a data object. In this codelab, you build on that knowledge to load and display photos from a web URL. You also revisit how to build a RecyclerView and use it to display a grid of images on the overview page.
What you should already know
- How to create and use fragments.
- How to use architecture components including view models, view model factories, transformations, and
LiveData. - How to retrieve JSON from a REST web service and parse that data into Kotlin objects using the Retrofit and Moshi libraries.
- How to construct a grid layout with a
RecyclerView. - How
Adapter,ViewHolder, andDiffUtilwork.
What you'll learn
- How to use the Glide library to load and display an image from a web URL.
- How to use a
RecyclerViewand a grid adapter to display a grid of images. - How to handle potential errors as the images download and display.
What you'll do
- Modify the MarsRealEstate app to get the image URL from the Mars property data, and use Glide to load and display that image.
- Add a loading animation and error icon to the app.
- Use a
RecyclerViewto display a grid of Mars property images. - Add status and error handling to the
RecyclerView.
In this codelab (and related codelabs), you work with an app called MarsRealEstate, which shows properties for sale on Mars. The app connects to an internet server to retrieve and display property data, including details such as the price and whether the property is available for sale or rent. The images representing each property are real-life photos from Mars captured from NASA's Mars rovers.
The version of the app you build in this codelab fills in the overview page, which displays a grid of images. The images are part of the property data that your app gets from the Mars real estate web service. Your app will use the Glide library to load and display the images, and a RecyclerView to create the grid layout for the images. Your app will also handle network errors gracefully.
Displaying a photo from a web URL might sound straightforward, but there is quite a bit of engineering to make it work well. The image has to be downloaded, buffered, and decoded from its compressed format to an image that Android can use. The image should be cached to an in-memory cache, a storage-based cache, or both. All this has to happen in low-priority background threads so the UI remains responsive. Also, for best network and CPU performance, you might want to fetch and decode more than one image at once. Learning how to effectively load images from the network could be a codelab in itself.
Fortunately, you can use a community-developed library called Glide to download, buffer, decode, and cache your images. Glide leaves you with a lot less work than if you had to do all of this from scratch.
Glide basically needs two things:
- The URL of the image you want to load and show.
- An
ImageViewobject to display that image.
In this task, you learn how to use Glide to display a single image from the real estate web service. You display the image that represents the first Mars property in the list of properties that the web service returns. Here are the before and after screenshots:

Step 1: Add Glide dependency
- Open the MarsRealEstate app from the last codelab. (You can download MarsRealEstateNetwork here if you don't have the app.)
- Run the app to see what it does. (It displays text details of a property that is hypothetically available on Mars.)
- Open build.gradle (Module: app).
- In the
dependenciessection, add this line for the Glide library:
implementation "com.github.bumptech.glide:glide:$version_glide"
Notice that the version number is already defined separately in the project Gradle file.
- Click Sync Now to rebuild the project with the new dependency.
Step 2: Update the view model
Next you update the OverviewViewModel class to include live data for a single Mars property.
- Open
overview/OverviewViewModel.kt. Just below theLiveDatafor the_response, add both internal (mutable) and external (immutable) live data for a singleMarsPropertyobject.
Import theMarsPropertyclass (com.example.android.marsrealestate.network.MarsProperty) when requested.
private val _property = MutableLiveData<MarsProperty>()

val property: LiveData<MarsProperty>
get() = _property- In the
getMarsRealEstateProperties()method, find the line inside thetry/catch {}block that sets_response.valueto the number of properties. Add the test shown below. IfMarsPropertyobjects are available, this test sets the value of the_propertyLiveDatato the first property in thelistResult.
if (listResult.size > 0) {
    _property.value = listResult[0]
}
The complete try/catch {} block now looks like this:
try {
   var listResult = getPropertiesDeferred.await()
   _response.value = "Success: ${listResult.size} Mars properties retrieved"
   if (listResult.size > 0) {
       _property.value = listResult[0]
   }
 } catch (e: Exception) {
    _response.value = "Failure: ${e.message}"
}- Open the
res/layout/fragment_overview.xmlfile. In the<TextView>element, changeandroid:textto bind to theimgSrcUrlcomponent of thepropertyLiveData:
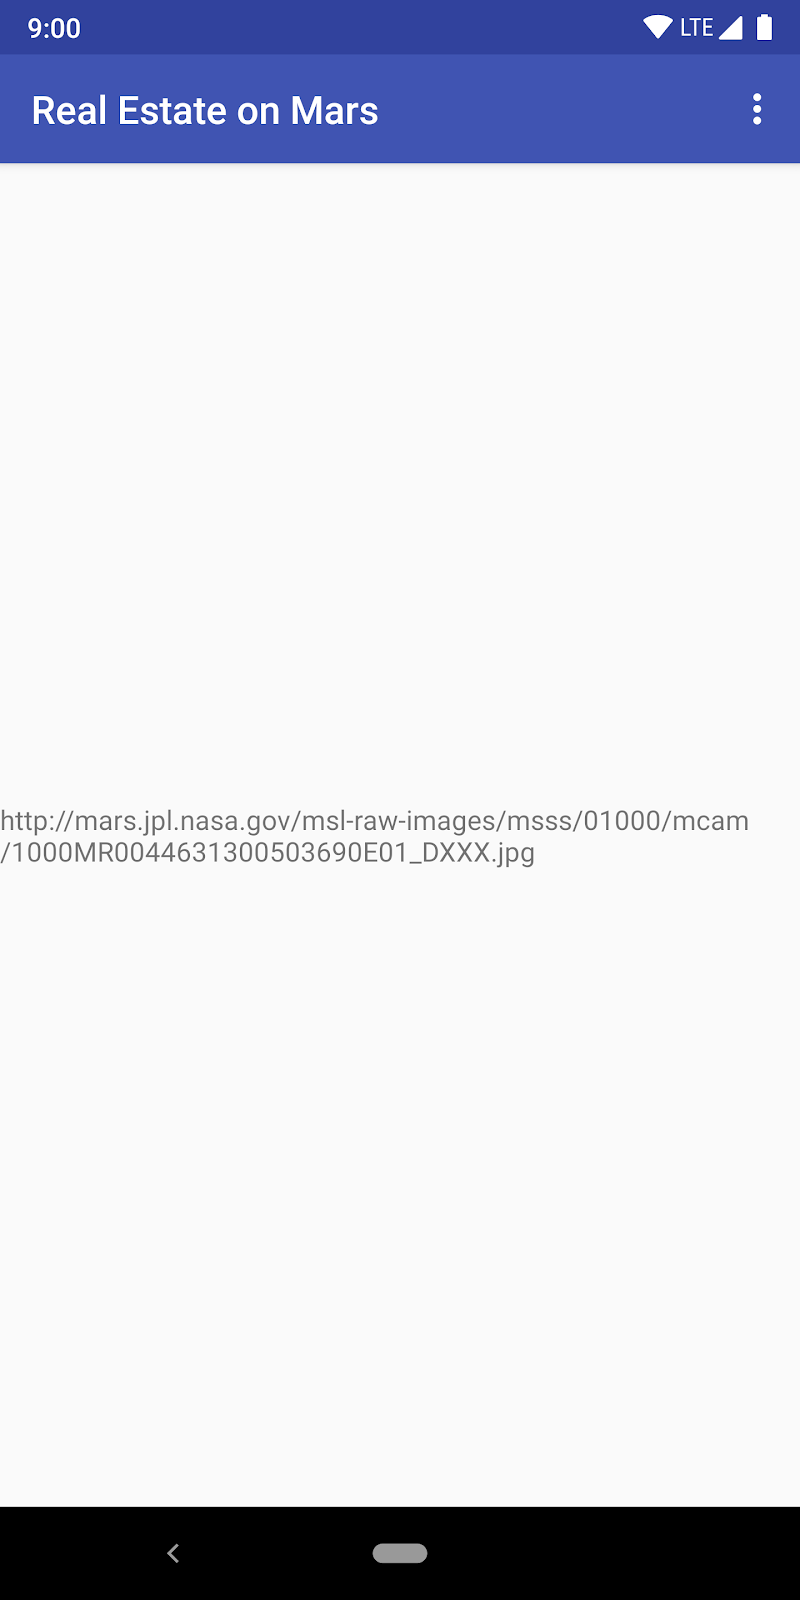
android:text="@{viewModel.property.imgSrcUrl}"- Run the app. The
TextViewdisplays only the URL of the image in the first Mars property. All you've done so far is set up the view model and the live data for that URL.
Step 3: Create a binding adapter and call Glide
Now you have the URL of an image to display, and it's time to start working with Glide to load that image. In this step, you use a binding adapter to take the URL from an XML attribute associated with an ImageView, and you use Glide to load the image. Binding adapters are extension methods that sit between a view and bound data to provide custom behavior when the data changes. In this case, the custom behavior is to call Glide to load an image from a URL into an ImageView.
- Open
BindingAdapters.kt. This file will hold the binding adapters that you use throughout the app. - Create a
bindImage()function that takes anImageViewand aStringas parameters. Annotate the function with@BindingAdapter. The@BindingAdapterannotation tells data binding that you want this binding adapter executed when an XML item has theimageUrlattribute.
Importandroidx.databinding.BindingAdapterandandroid.widget.ImageViewwhen requested.
@BindingAdapter("imageUrl")
fun bindImage(imgView: ImageView, imgUrl: String?) {

}- Inside the
bindImage()function, add alet {}block for theimgUrlargument:
imgUrl?.let {
}- Inside the
let {}block, add the line shown below to convert the URL string (from the XML) to aUriobject. Importandroidx.core.net.toUriwhen requested.
You want the finalUriobject to use the HTTPS scheme, because the server you pull the images from requires that scheme. To use the HTTPS scheme, appendbuildUpon.scheme("https")to thetoUribuilder. ThetoUri()method is a Kotlin extension function from the Android KTX core library, so it just looks like it's part of theStringclass.
val imgUri = imgUrl.toUri().buildUpon().scheme("https").build()- Still inside
let {}, callGlide.with()to load the image from theUriobject into to theImageView. Importcom.bumptech.glide.Glidewhen requested.
Glide.with(imgView.context)
       .load(imgUri)
       .into(imgView)
Step 4: Update the layout and fragments
Although Glide has loaded the image, there's nothing to see yet. The next step is to update the layout and the fragments with an ImageView to display the image.
- Open
res/layout/gridview_item.xml. This is the layout resource file you'll use for each item in theRecyclerViewlater in the codelab. You use it temporarily here to show just the single image. - Above the
<ImageView>element, add a<data>element for the data binding, and bind to theOverviewViewModelclass:
<data>
   <variable
       name="viewModel"
       type="com.example.android.marsrealestate.overview.OverviewViewModel" />
</data>- Add an
app:imageUrlattribute to theImageViewelement to use the new image loading binding adapter:
app:imageUrl="@{viewModel.property.imgSrcUrl}"- Open
overview/OverviewFragment.kt. In theonCreateView()method, comment out the line that inflates theFragmentOverviewBindingclass and assigns it to the binding variable. This is only temporary; you'll go back to it later.
//val binding = FragmentOverviewBinding.inflate(inflater)- Add a line to inflate the
GridViewItemBindingclass instead. Importcom.example.android.marsrealestate. databinding.GridViewItemBindingwhen requested.
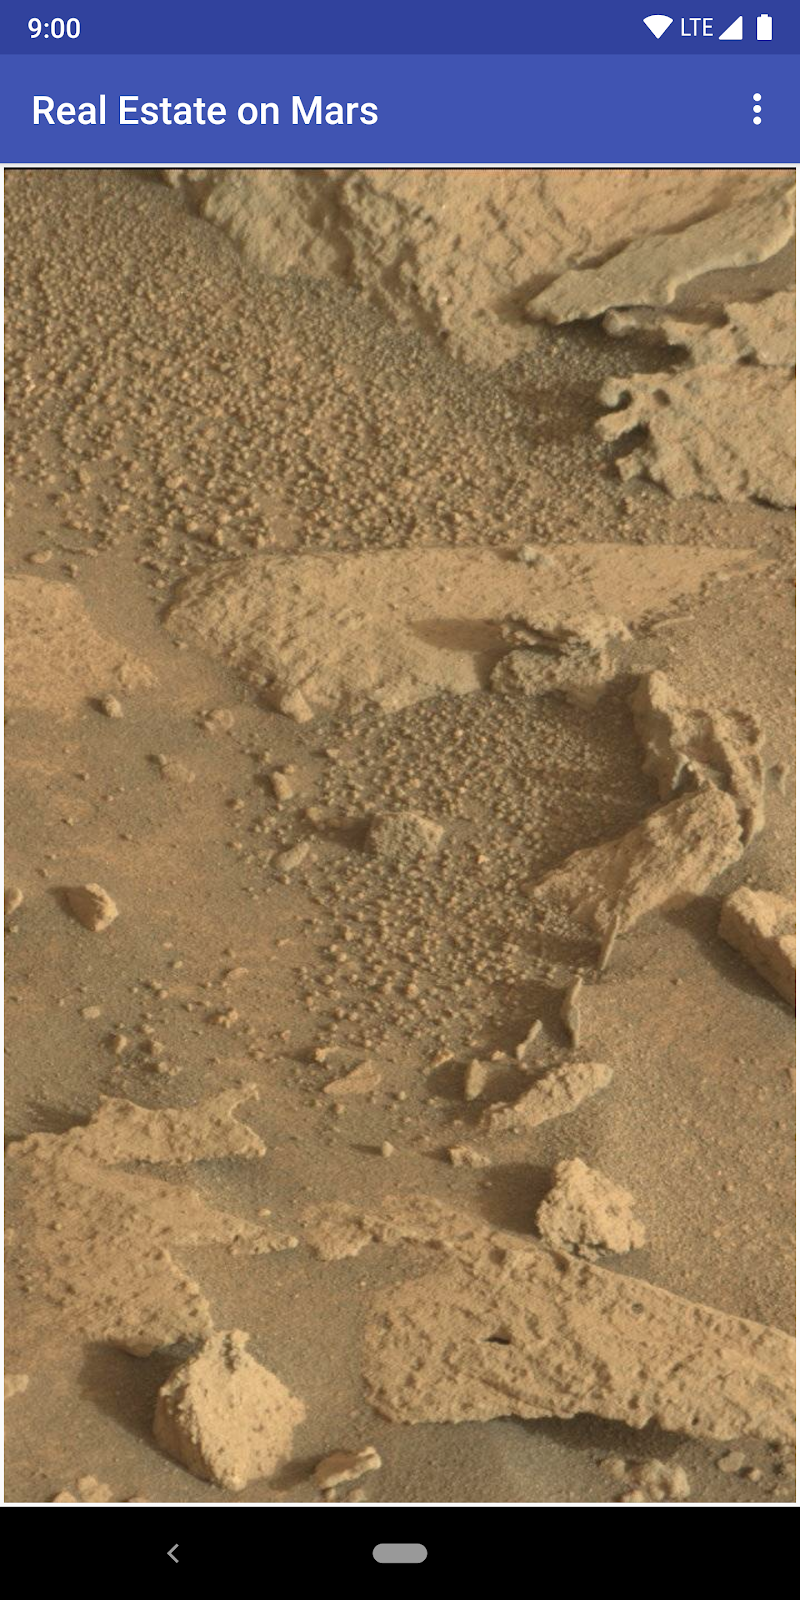
val binding = GridViewItemBinding.inflate(inflater)- Run the app. Now you should see photo of the image from the first
MarsPropertyin the result list.
Step 5: Add simple loading and error images
Glide can improve the user experience by showing a placeholder image while loading the image and an error image if the loading fails, for example if the image is missing or corrupt. In this step, you add that functionality to the binding adapter and to the layout.
- Open
res/drawable/ic_broken_image.xml, and click the Preview tab on the right. For the error image, you're using the broken-image icon that's available in the built-in icon library. This vector drawable uses theandroid:tintattribute to color the icon gray.

- Open
res/drawable/loading_animation.xml. This drawable is an animation that's defined with the<animate-rotate>tag. The animation rotates an image drawable,loading_img.xml, around the center point. (You don't see the animation in the preview.)

- Return to the
BindingAdapters.ktfile. In thebindImage()method, update the call toGlide.with()to call theapply()function betweenload()andinto(). Importcom.bumptech.glide.request.RequestOptionswhen requested.
This code sets the placeholder loading image to use while loading (theloading_animationdrawable). The code also sets an image to use if image loading fails (thebroken_imagedrawable). The completebindImage()method now looks like this:
@BindingAdapter("imageUrl")
fun bindImage(imgView: ImageView, imgUrl: String?) {
    imgUrl?.let {
        val imgUri =
           imgUrl.toUri().buildUpon().scheme("https").build()
        Glide.with(imgView.context)
                .load(imgUri)
                .apply(RequestOptions()
                        .placeholder(R.drawable.loading_animation)
                        .error(R.drawable.ic_broken_image))
                .into(imgView)
    }
}
- Run the app. Depending on the speed of your network connection, you might briefly see the loading image as Glide downloads and displays the property image. But you won't see the broken-image icon yet, even if you turn off your network—you fix that in the last part of the codelab.
Your app now loads property information from the internet. Using data from the first MarsProperty list item, you've created a LiveData property in the view model, and you've used the image URL from that property data to populate an ImageView. But the goal is for your app to display a grid of images, so you want to use a RecyclerView with a GridLayoutManager.
Step 1: Update the view model
Right now the view model has a _property LiveData that holds one MarsProperty object—the first one in the response list from the web service. In this step, you change that LiveData to hold the entire list of MarsProperty objects.
- Open
overview/OverviewViewModel.kt. - Change the private
_propertyvariable to_properties. Change the type to be a list ofMarsPropertyobjects.
private val _properties = MutableLiveData<List<MarsProperty>>()- Replace the external
propertylive data withproperties. Add the list to theLiveDatatype here as well:
 val properties: LiveData<List<MarsProperty>>
get() = _properties- Scroll down to the
getMarsRealEstateProperties()method. Inside thetry {}block, replace the entire test that you added in the previous task with the line shown below. Because thelistResultvariable holds a list ofMarsPropertyobjects, you can just assign it to_properties.valueinstead of testing for a successful response.
_properties.value = listResultThe entire try/catch block now looks like this:
try {
   var listResult = getPropertiesDeferred.await()
   _response.value = "Success: ${listResult.size} Mars properties retrieved"
   _properties.value = listResult
} catch (e: Exception) {
   _response.value = "Failure: ${e.message}"
}
Step 2: Update the layouts and fragments
The next step is to change the app's layout and fragments to use a recycler view and a grid layout, rather than the single image view.
- Open
res/layout/gridview_item.xml. Change the data binding from theOverviewViewModeltoMarsProperty, and rename the variable to"property".
<variable
   name="property"
type="com.example.android.marsrealestate.network.MarsProperty" />- In the
<ImageView>, change theapp:imageUrlattribute to refer to the image URL in theMarsPropertyobject:
app:imageUrl="@{property.imgSrcUrl}"- Open
overview/OverviewFragment.kt. InonCreateview(), uncomment the line that inflatesFragmentOverviewBinding. Delete or comment out the line that inflatesGridViewBinding. These changes undo the temporary changes you made in the last task.
val binding = FragmentOverviewBinding.inflate(inflater)
// val binding = GridViewItemBinding.inflate(inflater)- Open
res/layout/fragment_overview.xml. Delete the entire<TextView>element. - Add this
<RecyclerView>element instead, which uses aGridLayoutManagerand thegrid_view_itemlayout for a single item:
<androidx.recyclerview.widget.RecyclerView
            android:id="@+id/photos_grid"
            android:layout_width="0dp"
            android:layout_height="0dp"
            android:padding="6dp"
            android:clipToPadding="false"
            app:layoutManager=
               "androidx.recyclerview.widget.GridLayoutManager"
            app:layout_constraintBottom_toBottomOf="parent"
            app:layout_constraintLeft_toLeftOf="parent"
            app:layout_constraintRight_toRightOf="parent"
            app:layout_constraintTop_toTopOf="parent"
            app:spanCount="2"
            tools:itemCount="16"
            tools:listitem="@layout/grid_view_item" />
Step 3: Add the photo grid adapter
Now the fragment_overview layout has a RecyclerView while the grid_view_item layout has a single ImageView. In this step, you bind the data to the RecyclerView through a RecyclerView adapter.
- Open
overview/PhotoGridAdapter.kt. - Create the
PhotoGridAdapterclass, with the constructor parameters shown below. ThePhotoGridAdapterclass extendsListAdapter, whose constructor needs the list item type, the view holder, and aDiffUtil.ItemCallbackimplementation.
Import theandroidx.recyclerview.widget.ListAdapterandcom.example.android.marsrealestate.network.MarsPropertyclasses when requested. In the following steps, you implement the other missing parts of this constructor that are producing errors.
class PhotoGridAdapter : ListAdapter<MarsProperty,
        PhotoGridAdapter.MarsPropertyViewHolder>(DiffCallback) {

}- Click anywhere in the
PhotoGridAdapterclass and pressControl+ito implement theListAdaptermethods, which areonCreateViewHolder()andonBindViewHolder().
override fun onCreateViewHolder(parent: ViewGroup, viewType: Int): PhotoGridAdapter.MarsPropertyViewHolder {
   TODO("not implemented")
}

override fun onBindViewHolder(holder: PhotoGridAdapter.MarsPropertyViewHolder, position: Int) {
   TODO("not implemented")
}- At the end of the
PhotoGridAdapterclass definition, after the methods you just added, add a companion object definition forDiffCallback, as shown below.
Importandroidx.recyclerview.widget.DiffUtilwhen requested.
TheDiffCallbackobject extendsDiffUtil.ItemCallbackwith the type of object you want to compare—MarsProperty.
companion object DiffCallback : DiffUtil.ItemCallback<MarsProperty>() {
}- Press
Control+ito implement the comparator methods for this object, which areareItemsTheSame()andareContentsTheSame().
override fun areItemsTheSame(oldItem: MarsProperty, newItem: MarsProperty): Boolean {
   TODO("not implemented")
}

override fun areContentsTheSame(oldItem: MarsProperty, newItem: MarsProperty): Boolean {
TODO("not implemented") }- For the
areItemsTheSame()method, remove the TODO. Use Kotlin's referential equality operator (===), which returnstrueif the object references foroldItemandnewItemare the same.
override fun areItemsTheSame(oldItem: MarsProperty,
                  newItem: MarsProperty): Boolean {
   return oldItem === newItem
}- For
areContentsTheSame(), use the standard equality operator on just the ID ofoldItemandnewItem.
override fun areContentsTheSame(oldItem: MarsProperty,
                  newItem: MarsProperty): Boolean {
   return oldItem.id == newItem.id
}- Still inside the
PhotoGridAdapterclass, below the companion object, add an inner class definition forMarsPropertyViewHolder, which extendsRecyclerView.ViewHolder.
Importandroidx.recyclerview.widget.RecyclerViewandcom.example.android.marsrealestate.databinding.GridViewItemBindingwhen requested.
You need theGridViewItemBindingvariable for binding theMarsPropertyto the layout, so pass the variable into theMarsPropertyViewHolder. Because the baseViewHolderclass requires a view in its constructor, you pass it the binding root view.
class MarsPropertyViewHolder(private var binding:
                   GridViewItemBinding):
       RecyclerView.ViewHolder(binding.root) {

}- In
MarsPropertyViewHolder, create abind()method that takes aMarsPropertyobject as an argument and setsbinding.propertyto that object. CallexecutePendingBindings()after setting the property, which causes the update to execute immediately.
fun bind(marsProperty: MarsProperty) {
   binding.property = marsProperty
   binding.executePendingBindings()
}- In
onCreateViewHolder(), remove the TODO and add the line shown below. Importandroid.view.LayoutInflaterwhen requested.
TheonCreateViewHolder()method needs to return a newMarsPropertyViewHolder, created by inflating theGridViewItemBindingand using theLayoutInflaterfrom your parentViewGroupcontext.
   return MarsPropertyViewHolder(GridViewItemBinding.inflate(
LayoutInflater.from(parent.context)))- In the
onBindViewHolder()method, remove the TODO and add the lines shown below. Here you callgetItem()to get theMarsPropertyobject associated with current theRecyclerViewposition, and then pass that property to thebind()method in theMarsPropertyViewHolder.
val marsProperty = getItem(position)
holder.bind(marsProperty)
Step 4: Add the binding adapter and connect the parts
Finally, use a BindingAdapter to initialize the PhotoGridAdapter with the list of MarsProperty objects. Using a BindingAdapter to set the RecyclerView data causes data binding to automatically observe the LiveData for the list of MarsProperty objects. Then the binding adapter is called automatically when the MarsProperty list changes.
- Open
BindingAdapters.kt. - At the end of the file, add a
bindRecyclerView()method that takes aRecyclerViewand a list ofMarsPropertyobjects as arguments. Annotate that method with a@BindingAdapter.
Importandroidx.recyclerview.widget.RecyclerViewandcom.example.android.marsrealestate.network.MarsPropertywhen requested.
@BindingAdapter("listData")
fun bindRecyclerView(recyclerView: RecyclerView,
    data: List<MarsProperty>?) {
}- Inside the
bindRecyclerView()function, castrecyclerView.adaptertoPhotoGridAdapter, and calladapter.submitList()with the data. This tells theRecyclerViewwhen a new list is available.
Import com.example.android.marsrealestate.overview.PhotoGridAdapter when requested.
val adapter = recyclerView.adapter as PhotoGridAdapter
adapter.submitList(data)- Open
res/layout/fragment_overview.xml. Add theapp:listDataattribute to theRecyclerViewelement and set it toviewmodel.propertiesusing data binding.
app:listData="@{viewModel.properties}"- Open
overview/OverviewFragment.kt. InonCreateView(), just before the call tosetHasOptionsMenu(), initialize theRecyclerViewadapter inbinding.photosGridto a newPhotoGridAdapterobject.
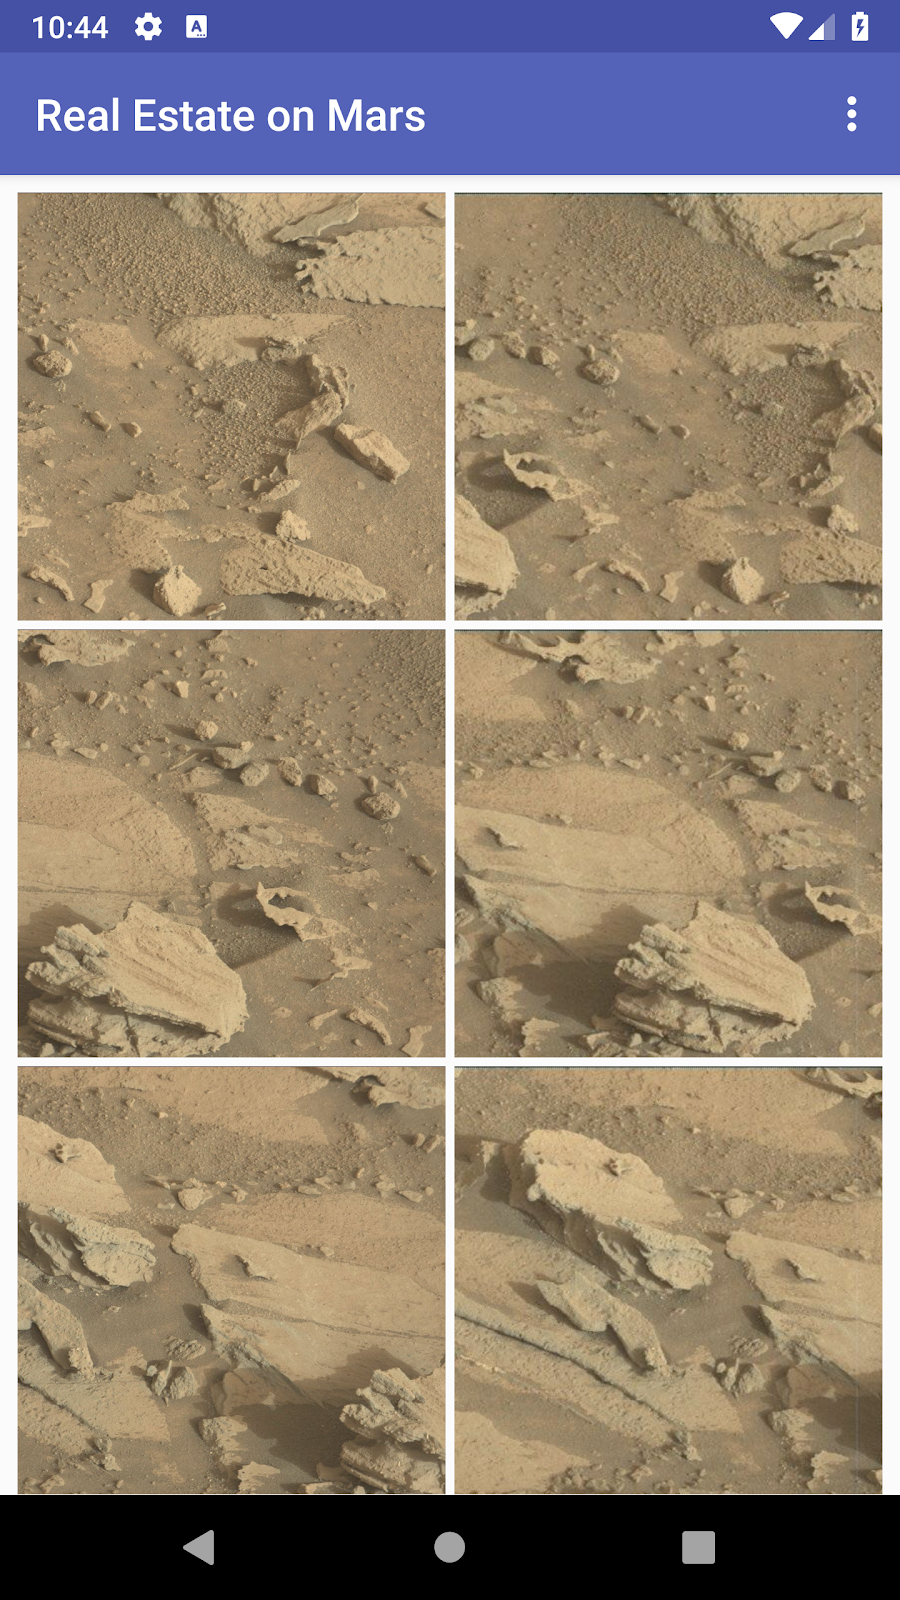
binding.photosGrid.adapter = PhotoGridAdapter()- Run the app. You should see a grid of
MarsPropertyimages. As you scroll to see new images, the app shows the loading-progress icon before displaying the image itself. If you turn on airplane mode, images that have not yet loaded appear as broken-image icons.

The MarsRealEstate app displays the broken-image icon when an image cannot be fetched. But when there's no network, the app shows a blank screen.

This isn't a great user experience. In this task, you add basic error handling, to give the user a better idea of what's happening. If the internet isn't available, the app will show the connection-error icon. While the app is fetching the MarsProperty list, the app will show the loading animation.
Step 1: Add status to the view model
To start, you create a LiveData in the view model to represent the status of the web request. There are three states to consider—loading, success, and failure. The loading state happens while you're waiting for data in the call to await().
- Open
overview/OverviewViewModel.kt. At the top of the file (after the imports, before the class definition), add anenumto represent all the available statuses:
enum class MarsApiStatus { LOADING, ERROR, DONE }- Rename both the internal and external
_responselive data definitions throughout theOverviewViewModelclass to_status. Because you added support for the_propertiesLiveDataearlier in this codelab, the complete web service response has been unused. You need aLiveDatahere to keep track of the current status, so you can just rename the existing variables.
Also, change the types from String to MarsApiStatus.
private val _status = MutableLiveData<MarsApiStatus>()

val status: LiveData<MarsApiStatus>
get() = _status- Scroll down to the
getMarsRealEstateProperties()method and update_responseto_statushere as well. Change the"Success"string to theMarsApiStatus.DONEstate, and the"Failure"string toMarsApiStatus.ERROR. - Add a
MarsApiStatus.LOADINGstatus to the top of thetry {}block, before the call toawait(). This is the initial status while the coroutine is running and you're waiting for data. The completetry/catch {}block now looks like this:
try {
    _status.value = MarsApiStatus.LOADING
   var listResult = getPropertiesDeferred.await()
   _status.value = MarsApiStatus.DONE
   _properties.value = listResult
} catch (e: Exception) {
   _status.value = MarsApiStatus.ERROR
}- After the error state in the
catch {}block, set the_propertiesLiveDatato an empty list. This clears theRecyclerView.
} catch (e: Exception) {
   _status.value = MarsApiStatus.ERROR
   _properties.value = ArrayList()
}
Step 2: Add a binding adapter for the status ImageView
Now you have a status in the view model, but it's just a set of states. How do you make it appear in the app itself? In this step, you use an ImageView, connected to data binding, to display icons for the loading and error states. When the app is in the loading state or the error state, the ImageView should be visible. When the app is done loading, the ImageView should be invisible.
- Open
BindingAdapters.kt. Add a new binding adapter calledbindStatus()that takes anImageViewand aMarsApiStatusvalue as arguments. Importcom.example.android.marsrealestate.overview.MarsApiStatuswhen requested.
@BindingAdapter("marsApiStatus")
fun bindStatus(statusImageView: ImageView,
          status: MarsApiStatus?) {
}- Add a
when {}inside thebindStatus()method to switch between the different statuses.
when (status) {

}- Inside the
when {}, add a case for the loading state (MarsApiStatus.LOADING). For this state, set theImageViewto visible, and assign it the loading animation. This is the same animation drawable you used for Glide in the previous task. Importandroid.view.Viewwhen requested.
when (status) {
   MarsApiStatus.LOADING -> {
      statusImageView.visibility = View.VISIBLE
      statusImageView.setImageResource(R.drawable.loading_animation)
   }
}- Add a case for the error state, which is
MarsApiStatus.ERROR. Similarly to what you did for theLOADINGstate, set the statusImageViewto visible and reuse the connection-error drawable.
MarsApiStatus.ERROR -> {
   statusImageView.visibility = View.VISIBLE
   statusImageView.setImageResource(R.drawable.ic_connection_error)
}- Add a case for the done state, which is
MarsApiStatus.DONE. Here you have a successful response, so turn off the visibility of the statusImageViewto hide it.
MarsApiStatus.DONE -> {
   statusImageView.visibility = View.GONE
}
Step 3: Add the status ImageView to the layout
- Open
res/layout/fragment_overview.xml. Below theRecyclerViewelement, inside theConstraintLayout, add theImageViewshown below.
ThisImageViewhas the same constraints as theRecyclerView. However, the width and height usewrap_contentto center the image rather than stretch the image to fill the view. Also notice theapp:marsApiStatusattribute, which has the view call yourBindingAdapterwhen the status property in the view model changes.
<ImageView
   android:id="@+id/status_image"
    android:layout_width="wrap_content"
    android:layout_height="wrap_content"
    app:layout_constraintBottom_toBottomOf="parent"
    app:layout_constraintLeft_toLeftOf="parent"
    app:layout_constraintRight_toRightOf="parent"
    app:layout_constraintTop_toTopOf="parent"
app:marsApiStatus="@{viewModel.status}" />- Turn on airplane mode in your emulator or device to simulate a missing network connection. Compile and run the app, and notice that the error image appears:

- Tap the Back button to close the app, and turn off airplane mode. Use the recents screen to return the app. Depending on the speed of your network connection, you may see an extremely brief loading spinner when the app queries the web service before the images begin to load.
Android Studio project: MarsRealEstateGrid
- To simplify the process of managing images, use the Glide library to download, buffer, decode, and cache images in your app.
- Glide needs two things to load an image from the internet: the URL of an image, and an
ImageViewobject to put the image in. To specify these options, use theload()andinto()methods with Glide. - Binding adapters are extension methods that sit between a view and that view's bound data. Binding adapters provide custom behavior when the data changes, for example, to call Glide to load an image from a URL into an
ImageView. - Binding adapters are extension methods annotated with the
@BindingAdapterannotation. - To add options to the Glide request, use the
apply()method. For example, useapply()withplaceholder()to specify a loading drawable, and useapply()witherror()to specify an error drawable. - To produce a grid of images, use a
RecyclerViewwith aGridLayoutManager. - To update the list of properties when it changes, use a binding adapter between the
RecyclerViewand the layout.
Udacity course:
Android developer documentation:
Other:
This section lists possible homework assignments for students who are working through this codelab as part of a course led by an instructor. It's up to the instructor to do the following:
- Assign homework if required.
- Communicate to students how to submit homework assignments.
- Grade the homework assignments.
Instructors can use these suggestions as little or as much as they want, and should feel free to assign any other homework they feel is appropriate.
If you're working through this codelab on your own, feel free to use these homework assignments to test your knowledge.
Answer these questions
Question 1
Which Glide method do you use to indicate the ImageView that will contain the loaded image?
▢ into()
▢ with()
▢ imageview()
▢ apply()
Question 2
How do you specify a placeholder image to show when Glide is loading?
▢ Use the into() method with a drawable.
▢ Use RequestOptions() and call the placeholder() method with a drawable.
▢ Assign the Glide.placeholder property to a drawable.
▢ Use RequestOptions() and call the loadingImage() method with a drawable.
Question 3
How do you indicate that a method is a binding adapter?
▢ Call the setBindingAdapter() method on the LiveData.
▢ Put the method into a Kotlin file called BindingAdapters.kt.
▢ Use the android:adapter attribute in the XML layout.
▢ Annotate the method with @BindingAdapter.
Start the next lesson:
For links to other codelabs in this course, see the Android Kotlin Fundamentals codelabs landing page.