
架構元件的用途是提供應用程式架構的相關指引,並提供生命週期管理和資料持續性等常見工作的程式庫。架構元件可協助您建構應用程式,減少樣板程式碼,同時確保應用程式穩定、可測試且易於維護。架構元件程式庫是 Android Jetpack 的一部分。
這是本程式碼實驗室的 Kotlin 版本。如要查看 Java 程式設計語言版本,請前往這裡。
進行本程式碼研究室時,如果你遇到任何問題 (例如程式碼錯誤、文法錯誤或用詞不明確等),請透過程式碼研究室左下角的「回報錯誤」連結回報問題。
必要條件
您必須熟悉 Kotlin、物件導向設計概念和 Android 開發基礎知識,尤其是:
RecyclerView和轉接頭- SQLite 資料庫和 SQLite 查詢語言
- 基本協同程式 (如果不熟悉協同程式,可以參閱「在 Android 應用程式中使用 Kotlin 協同程式」)
此外,熟悉可將資料與使用者介面分離的軟體架構模式 (例如 MVP 或 MVC) 也很有幫助。本程式碼研究室會實作應用程式架構指南中定義的架構。
本程式碼研究室著重於 Android 架構元件。我們會事先準備好與本主題無關的概念和程式碼,屆時您只要複製及貼上即可。
如果您不熟悉 Kotlin,可以按這裡查看以 Java 程式設計語言編寫的程式碼研究室版本。
執行步驟
在本程式碼研究室中,您將瞭解如何使用 Room、ViewModel 和 LiveData 等架構元件,設計及建構應用程式,並建構可執行下列操作的應用程式:
- 使用 Android 架構元件實作建議架構。
- 與資料庫搭配運作,可取得及儲存資料,並預先填入部分字詞。
- 顯示
MainActivity中RecyclerView的所有字詞。 - 使用者輕觸「+」按鈕時,系統會開啟第二項活動。使用者輸入字詞後,系統會將該字詞新增至資料庫和清單。
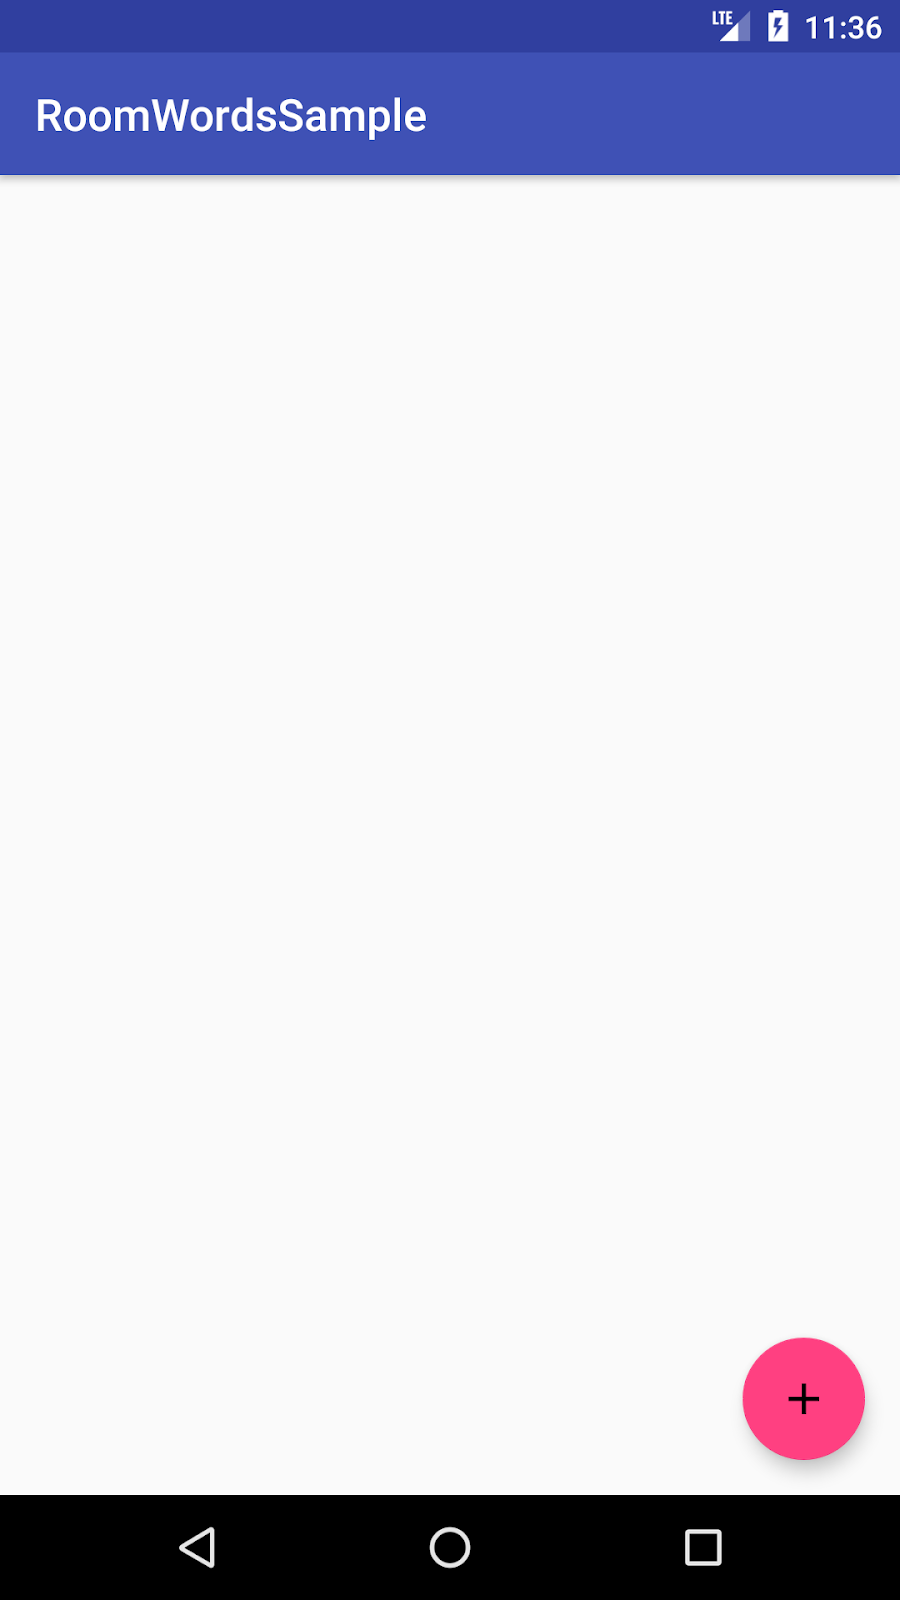
這個應用程式雖然簡單,但複雜程度足以做為範本,供您進一步建構。預覽畫面如下:
|
|
|


軟硬體需求
- Android Studio 3.0 以上版本,並瞭解如何使用。請務必更新 Android Studio、SDK 和 Gradle。
- Android 裝置或模擬器。
本程式碼研究室會提供建構完整應用程式所需的所有程式碼。
使用架構元件及實作建議架構的步驟相當多,最重要的是建立心理模型,瞭解發生了什麼事、各個部分如何組合在一起,以及資料如何流動。在完成本程式碼研究室的過程中,請不要只是複製及貼上程式碼,而是嘗試建立內在理解。
建議使用的架構元件有哪些?
為介紹相關術語,以下簡要說明架構元件,以及這些元件如何共同運作。請注意,本程式碼研究室著重於部分元件,也就是 LiveData、ViewModel 和 Room。使用時,系統會進一步說明各項元件。
下圖為架構的基本形式:

SQLite 資料庫:儲存在裝置儲存空間中。Room 持續性程式庫會為您建立及維護這個資料庫。
DAO:資料存取物件。SQL 查詢與函式的對應關係。使用 DAO 時,您只要呼叫方法,其餘工作就交給 Room 處理。
Room 資料庫:簡化資料庫工作,並做為基礎 SQLite 資料庫的存取點 (隱藏 SQLiteOpenHelper)。Room 資料庫會使用 DAO 對 SQLite 資料庫發出查詢。
存放區:您建立的類別,主要用於管理多個資料來源。
ViewModel:做為存放區 (資料) 和 UI 之間的通訊中心。UI 不再需要擔心資料來源。ViewModel 執行個體不會因為重新建立活動/片段而消失。
LiveData:可觀察的資料容器類別。一律會保留/快取最新版本的資料,並在資料變更時通知觀察者。LiveData 可感知生命週期。使用者介面元件只會觀測相關資料,無法停止或繼續觀測作業。LiveData 會在觀測到相關生命週期狀態變更時,自動管理上述所有事務。
RoomWordSample 架構總覽
下圖顯示應用程式的所有部分。每個封閉方塊 (SQLite 資料庫除外) 代表您要建立的類別。

- 開啟 Android Studio,然後按一下「Start a new Android Studio project」。
- 在「Create New Project」視窗中,選擇「Empty Activity」,然後按一下「Next」。
- 在下一個畫面中,將應用程式命名為 RoomWordSample,然後按一下「Finish」。

接著,您必須將元件程式庫新增至 Gradle 檔案。
- 在 Android Studio 中,按一下「Projects」分頁標籤,然後展開「Gradle Scripts」資料夾。
開啟 build.gradle (Module: app)。
- 在
build.gradle(Module: app) 檔案頂端定義其他外掛程式後,加入kapt註解處理工具 Kotlin 外掛程式。
apply plugin: 'kotlin-kapt'- 在
android區塊內新增packagingOptions區塊,從套件中排除 atomic functions 模組,並避免出現警告。
android {
    // other configuration (buildTypes, defaultConfig, etc.)

    packagingOptions {
        exclude 'META-INF/atomicfu.kotlin_module'
    }
}- 在
dependencies區塊結尾新增下列程式碼。
// Room components
implementation "androidx.room:room-runtime:$rootProject.roomVersion"
kapt "androidx.room:room-compiler:$rootProject.roomVersion"
androidTestImplementation "androidx.room:room-testing:$rootProject.roomVersion"

// Lifecycle components
implementation "androidx.lifecycle:lifecycle-extensions:$rootProject.archLifecycleVersion"
kapt "androidx.lifecycle:lifecycle-compiler:$rootProject.archLifecycleVersion"
implementation "androidx.lifecycle:lifecycle-viewmodel-ktx:$rootProject.archLifecycleVersion"

// Kotlin components
implementation "org.jetbrains.kotlin:kotlin-stdlib-jdk7:$kotlin_version"
api "org.jetbrains.kotlinx:kotlinx-coroutines-core:$rootProject.coroutines"
api "org.jetbrains.kotlinx:kotlinx-coroutines-android:$rootProject.coroutines"

// Material design
implementation "com.google.android.material:material:$rootProject.materialVersion"

// Testing
testImplementation 'junit:junit:4.12'
androidTestImplementation "androidx.arch.core:core-testing:$rootProject.coreTestingVersion"- 在
build.gradle(Project: RoomWordsSample) 檔案中,將版本號碼加到檔案結尾,如下列程式碼所示。
ext {
    roomVersion = '2.2.5'
    archLifecycleVersion = '2.2.0'
    coreTestingVersion = '2.1.0'
    materialVersion = '1.1.0'
    coroutines = '1.3.4'
}
這個應用程式的資料是字詞,您需要一個簡單的資料表來保存這些值:

您可以使用 Entity 建立 Room 資料表。現在就來瞭解吧!
- 建立名為
Word的新 Kotlin 類別檔案,其中包含Word資料類別。
這個類別會說明單字實體 (代表 SQLite 資料表)。類別中的每個屬性都代表資料表中的一個資料欄。Room 最終會使用這些屬性建立資料表,並從資料庫中的資料列例項化物件。
程式碼如下:
data class Word(val word: String)如要讓 Word 類別對 Room 資料庫有意義,您需要為其加上註解。註解會指出這個類別的每個部分與資料庫中的項目有何關聯。Room 會使用這項資訊產生程式碼。
如果您自行輸入註解 (而非貼上),Android Studio 會自動匯入註解類別。
- 使用註解更新
Word類別,如以下程式碼所示:
@Entity(tableName = "word_table")
class Word(@PrimaryKey @ColumnInfo(name = "word") val word: String)我們來看看這些註解的作用:
@Entity(tableName ="word_table")
每個@Entity類別都代表一個 SQLite 資料表。為類別宣告加上註解,表示這是實體。如果想讓資料表名稱與類別名稱不同,可以指定資料表名稱。這會將表格命名為「word_table」。@PrimaryKey
每個實體都需要主鍵。為簡化流程,每個字詞都會做為自己的主鍵。@ColumnInfo(name ="word")
如果您希望資料表中的資料欄名稱與成員變數名稱不同,請指定資料欄名稱。這會將資料欄命名為「word」。- 儲存在資料庫中的每個屬性都必須具有公開瀏覽權限,這是 Kotlin 的預設設定。
如需完整的註解清單,請參閱 Room 套件摘要參考資料。
什麼是 DAO?
在 DAO (資料存取物件) 中,您可以指定 SQL 查詢,並將其與方法呼叫建立關聯。編譯器會檢查 SQL,並從常見查詢的便利註解 (例如 @Insert) 生成查詢。Room 會使用 DAO 為程式碼建立乾淨的 API。
DAO 必須是介面或抽象類別。
根據預設,所有查詢都必須在個別執行緒上執行。
Room 支援協同程式,因此您可以使用 suspend 修飾符註解查詢,然後從協同程式或其他暫停函式呼叫查詢。
實作 DAO
我們來編寫 DAO,提供下列查詢:
- 依字母順序排列所有單字
- 插入字詞
- 刪除所有字詞
- 建立名為
WordDao的新 Kotlin 類別檔案。 - 複製下列程式碼並貼到
WordDao中,然後視需要修正匯入項目,使其能夠編譯。
@Dao
interface WordDao {

    @Query("SELECT * from word_table ORDER BY word ASC")
    fun getAlphabetizedWords(): List<Word>

    @Insert(onConflict = OnConflictStrategy.IGNORE)
    suspend fun insert(word: Word)

    @Query("DELETE FROM word_table")
    suspend fun deleteAll()
}
以下是具體做法:
WordDao是介面,DAO 必須是介面或抽象類別。@Dao註解會將其識別為 Room 的 DAO 類別。suspend fun insert(word: Word):宣告 suspend 函式,插入一個字詞。@Insert註解是特殊的 DAO 方法註解,您不必提供任何 SQL!(此外,還有用於刪除和更新資料列的@Delete和@Update註解,但您不會在這個應用程式中使用這些註解)。onConflict = OnConflictStrategy.IGNORE:如果新字詞與清單中的字詞完全相同,系統會根據所選的 onConflict 策略忽略新字詞。如要進一步瞭解可用的衝突策略,請參閱說明文件。suspend fun deleteAll():宣告用來刪除所有字詞的暫停函式。- 刪除多個實體沒有便利的註解,因此會以一般
@Query註解。 @Query("DELETE FROM word_table"):@Query要求您將 SQL 查詢做為註解的字串參數提供,以便進行複雜的讀取查詢和其他作業。fun getAlphabetizedWords(): List<Word>:取得所有字詞的方法,並傳回Words的List。@Query("SELECT * from word_table ORDER BY word ASC"):查詢,傳回依遞增順序排序的字詞清單。
資料變更時,您通常會想採取某些動作,例如在 UI 中顯示更新後的資料。也就是說,您必須觀察資料,以便在資料變更時做出反應。
視資料儲存方式而定,這項作業可能相當棘手。觀察應用程式多個元件的資料變更,可能會在元件之間建立明確的嚴格依附路徑。這會導致測試和偵錯作業難以進行。
LiveData 是用於資料觀察的生命週期程式庫 類別,可解決這個問題。在方法說明中使用 LiveData 類型的傳回值,資料庫更新時,Room 會產生更新 LiveData 的所有必要程式碼。
在 WordDao 中,變更 getAlphabetizedWords() 方法簽章,使傳回的 List<Word> 包裝在 LiveData 中。
   @Query("SELECT * from word_table ORDER BY word ASC")
   fun getAlphabetizedWords(): LiveData<List<Word>>
在本程式碼研究室的後續部分,您會透過 MainActivity 中的 Observer 追蹤資料變更。
什麼是 Room 資料庫?
- Room 是 SQLite 資料庫頂端的資料庫層。
- Room 會處理你過去使用
SQLiteOpenHelper處理的日常工作。 - Room 會使用 DAO 對資料庫發出查詢。
- 根據預設,為避免 UI 效能不佳,Room 不允許您在主執行緒上發出查詢。如果 Room 查詢傳回
LiveData,系統會自動在背景執行緒上非同步執行查詢。 - Room 提供 SQLite 陳述式的編譯時間檢查。
實作 Room 資料庫
您的 Room 資料庫類別必須是抽象類別,並擴充 RoomDatabase。一般來說,整個應用程式只需要一個 Room 資料庫執行個體。
現在就來建立一個。
- 建立名為
WordRoomDatabase的 Kotlin 類別檔案,然後在檔案中加入下列程式碼:
// Annotates class to be a Room Database with a table (entity) of the Word class
@Database(entities = arrayOf(Word::class), version = 1, exportSchema = false)
public abstract class WordRoomDatabase : RoomDatabase() {

   abstract fun wordDao(): WordDao

   companion object {
        // Singleton prevents multiple instances of database opening at the
        // same time.
        @Volatile
        private var INSTANCE: WordRoomDatabase? = null

        fun getDatabase(context: Context): WordRoomDatabase {
            val tempInstance = INSTANCE
            if (tempInstance != null) {
                return tempInstance
            }
            synchronized(this) {
                val instance = Room.databaseBuilder(
                        context.applicationContext,
                        WordRoomDatabase::class.java,
                        "word_database"
                    ).build()
                INSTANCE = instance
                return instance
            }
        }
   }
}
讓我們逐步瞭解程式碼:
- Room 的資料庫類別必須是
abstract,並擴充RoomDatabase - 您可以使用
@Database為類別加上註解,使其成為 Room 資料庫,並使用註解參數宣告屬於資料庫的實體,以及設定版本號碼。每個實體都會對應到資料庫中建立的資料表。資料庫遷移不在本程式碼研究室的範圍內,因此我們在此將exportSchema設為 false,以免出現建構警告。在實際應用程式中,您應考慮為 Room 設定目錄,以便匯出結構定義,並將目前的結構定義簽入版本管控系統。 - 資料庫會透過每個 @Dao 的抽象「getter」方法公開 DAO。
- 我們定義了 單例
WordRoomDatabase,,避免同時開啟多個資料庫執行個體。 getDatabase會傳回單例模式。第一次存取資料庫時,系統會使用 Room 的資料庫建構工具,在應用程式環境中從WordRoomDatabase類別建立RoomDatabase物件,並將其命名為"word_database"。
什麼是存放區?
存放區類別會抽離多個資料來源的存取權。存放區不屬於架構元件程式庫,但建議您採用這個最佳做法,將程式碼和架構分開。存放區類別提供簡潔的 API,方便存取應用程式其餘部分的資料。

為什麼要使用存放區?
存放區會管理查詢,並允許您使用多個後端。最常見的例子是,存放區會實作邏輯,以判斷是否要從網路擷取資料,或使用本機資料庫中的快取結果。
實作存放區
建立名為 WordRepository 的 Kotlin 類別檔案,然後將下列程式碼貼入其中:
// Declares the DAO as a private property in the constructor. Pass in the DAO
// instead of the whole database, because you only need access to the DAO
class WordRepository(private val wordDao: WordDao) {

    // Room executes all queries on a separate thread.
    // Observed LiveData will notify the observer when the data has changed.
    val allWords: LiveData<List<Word>> = wordDao.getAlphabetizedWords()

    suspend fun insert(word: Word) {
        wordDao.insert(word)
    }
}
主要重點:
- DAO 會傳遞至存放區建構函式,而非整個資料庫。這是因為 DAO 包含資料庫的所有讀取/寫入方法,因此只需要存取 DAO 即可。您不需要將整個資料庫公開給存放區。
- 字詞清單是公開屬性,方法會先從 Room 取得
LiveData字詞清單,然後進行初始化;這是因為我們在「LiveData 類別」步驟中,定義了getAlphabetizedWords方法來傳回LiveData。Room 會在個別執行緒上執行所有查詢。接著,觀察到的LiveData會在資料變更時,透過主執行緒通知觀察器。 suspend修飾符會告知編譯器,此函式必須從協同程式或其他暫停函式呼叫。
什麼是 ViewModel?
ViewModel 的角色是向 UI 提供資料,並在設定變更後仍然有效。ViewModel 可做為存放區和 UI 之間的通訊中心。您也可以使用 ViewModel 在片段之間共用資料。ViewModel 是生命週期程式庫的一部分。

如需這個主題的入門指南,請參閱 ViewModel Overview 或「ViewModels:簡易範例」網誌文章。
為何要使用 ViewModel?
ViewModel 會以生命週期感知方式保存應用程式的 UI 資料,因此設定變更後資料仍會保留。將應用程式的 UI 資料與 Activity 和 Fragment 類別分離,以便您充分遵循單一責任原則:活動和片段負責在畫面中產生資料,ViewModel 則負責保留及處理 UI 所需的所有資料。
在 ViewModel 中,請使用 LiveData 處理 UI 會使用或顯示的可變動資料。使用 LiveData 有幾個好處:
- 您可以觀察資料 (而非輪詢變更),並只在資料實際變更時更新
UI。 - 存放區和 UI 完全由
ViewModel分隔。 ViewModel中沒有資料庫呼叫 (這一切都在 Repository 中處理),因此程式碼更容易測試。
viewModelScope
在 Kotlin 中,所有協同程式都會在 CoroutineScope 中執行。scope 會透過工作控制協同程式的生命週期。取消範圍的工作時,會同時取消在該範圍中啟動的協同程式。
AndroidX lifecycle-viewmodel-ktx 程式庫會將 viewModelScope 新增為 ViewModel 類別的擴充功能函式,讓您能夠使用範圍。
如要進一步瞭解如何在 ViewModel 中使用協同程式,請參閱「在 Android 應用程式中使用 Kotlin 協同程式」程式碼研究室的步驟 5,或「Android 中的簡易協同程式:viewModelScope」網誌文章。
實作 ViewModel
建立 WordViewModel 的 Kotlin 類別檔案,並在檔案中加入下列程式碼:
class WordViewModel(application: Application) : AndroidViewModel(application) {

    private val repository: WordRepository
    // Using LiveData and caching what getAlphabetizedWords returns has several benefits:
    // - We can put an observer on the data (instead of polling for changes) and only update the
    //   the UI when the data actually changes.
    // - Repository is completely separated from the UI through the ViewModel.
    val allWords: LiveData<List<Word>>

    init {
        val wordsDao = WordRoomDatabase.getDatabase(application).wordDao()
        repository = WordRepository(wordsDao)
        allWords = repository.allWords
    }

    /**
     * Launching a new coroutine to insert the data in a non-blocking way
     */
    fun insert(word: Word) = viewModelScope.launch(Dispatchers.IO) {
        repository.insert(word)
    }
}
我們在此:
- 建立名為
WordViewModel的類別,將Application做為參數,並擴充AndroidViewModel。 - 新增私有成員變數,用於保留存放區的參照。
- 新增公開
LiveData成員變數,用於快取字詞清單。 - 建立
init區塊,從WordRoomDatabase取得WordDao的參照。 - 在
init區塊中,根據WordRoomDatabase建構WordRepository。 - 在
init區塊中,使用存放區初始化allWordsLiveData。 - 建立包裝函式
insert()方法,呼叫 Repository 的insert()方法。這樣一來,insert()的實作方式就會與 UI 封裝在一起。我們不希望插入作業封鎖主執行緒,因此啟動了新的協同程式,並呼叫存放區的插入作業 (暫停函式)。如前所述,ViewModel 會根據生命週期建立協同程式範圍,稱為viewModelScope,我們在此使用這個範圍。
接著,您需要為清單和項目新增 XML 版面配置。
本程式碼研究室假設您已熟悉如何使用 XML 建立版面配置,因此我們只會提供程式碼。
將 AppTheme 父項設為 Theme.MaterialComponents.Light.DarkActionBar,即可將應用程式主題設為 Material。在 values/styles.xml 中新增清單項目的樣式:
<resources>

    <!-- Base application theme. -->
    <style name="AppTheme" parent="Theme.MaterialComponents.Light.DarkActionBar">
        <!-- Customize your theme here. -->
        <item name="colorPrimary">@color/colorPrimary</item>
        <item name="colorPrimaryDark">@color/colorPrimaryDark</item>
        <item name="colorAccent">@color/colorAccent</item>
    </style>

    <!-- The default font for RecyclerView items is too small.
    The margin is a simple delimiter between the words. -->
    <style name="word_title">
        <item name="android:layout_width">match_parent</item>
        <item name="android:layout_marginBottom">8dp</item>
        <item name="android:paddingLeft">8dp</item>
        <item name="android:background">@android:color/holo_orange_light</item>
        <item name="android:textAppearance">@android:style/TextAppearance.Large</item>
    </style>
</resources>
新增 layout/recyclerview_item.xml 版面配置:
<?xml version="1.0" encoding="utf-8"?>
<LinearLayout xmlns:android="http://schemas.android.com/apk/res/android"
    android:orientation="vertical"
    android:layout_width="match_parent"
    android:layout_height="wrap_content">

    <TextView
        android:id="@+id/textView"
        style="@style/word_title"
        android:layout_width="match_parent"
        android:layout_height="wrap_content"
        android:background="@android:color/holo_orange_light" />
</LinearLayout>
在 layout/activity_main.xml 中,將 TextView 替換為 RecyclerView,然後新增懸浮動作按鈕 (FAB)。現在版面配置應如下所示:
<androidx.constraintlayout.widget.ConstraintLayout
    xmlns:android="http://schemas.android.com/apk/res/android"
    xmlns:app="http://schemas.android.com/apk/res-auto"
    xmlns:tools="http://schemas.android.com/tools"
    android:layout_width="match_parent"
    android:layout_height="match_parent"
    tools:context=".MainActivity">

    <androidx.recyclerview.widget.RecyclerView
        android:id="@+id/recyclerview"
        android:layout_width="0dp"
        android:layout_height="0dp"
        tools:listitem="@layout/recyclerview_item"
        android:padding="@dimen/big_padding"
        app:layout_constraintBottom_toBottomOf="parent"
        app:layout_constraintLeft_toLeftOf="parent"
        app:layout_constraintRight_toRightOf="parent"
        app:layout_constraintTop_toTopOf="parent" />

    <com.google.android.material.floatingactionbutton.FloatingActionButton
        android:id="@+id/fab"
        app:layout_constraintBottom_toBottomOf="parent"
        app:layout_constraintEnd_toEndOf="parent"
        android:layout_width="wrap_content"
        android:layout_height="wrap_content"
        android:layout_margin="16dp"
        android:contentDescription="@string/add_word"/>

</androidx.constraintlayout.widget.ConstraintLayout>
FAB 的外觀應與可用的動作相符,因此我們會將圖示替換為「+」符號。
首先,我們需要新增向量資產:
- 依序選取「File」>「New」>「Vector Asset」。
- 按一下「Clip Art」 欄位中的 Android 機器人圖示。

- 搜尋「add」,然後選取「+」資產。按一下「確定」
 。
。 - 然後按一下「下一步」。

- 確認圖示路徑為
main > drawable,然後按一下「完成」新增資產。
- 仍在
layout/activity_main.xml中,更新 FAB 以納入新的可繪項目:
<com.google.android.material.floatingactionbutton.FloatingActionButton
        android:id="@+id/fab"
        app:layout_constraintBottom_toBottomOf="parent"
        app:layout_constraintEnd_toEndOf="parent"
        android:layout_width="wrap_content"
        android:layout_height="wrap_content"
        android:layout_margin="16dp"
        android:contentDescription="@string/add_word"
        android:src="@drawable/ic_add_black_24dp"/>
您將在 RecyclerView 中顯示資料,這比直接將資料放入 TextView 中稍微好一些。本程式碼研究室假設您瞭解 RecyclerView、RecyclerView.LayoutManager、RecyclerView.ViewHolder 和 RecyclerView.Adapter 的運作方式。
請注意,轉接器中的 words 變數會快取資料。在下一個工作中,您將新增可自動更新資料的程式碼。
建立 WordListAdapter 的 Kotlin 類別檔案,並擴充 RecyclerView.Adapter。程式碼如下:
class WordListAdapter internal constructor(
        context: Context
) : RecyclerView.Adapter<WordListAdapter.WordViewHolder>() {

    private val inflater: LayoutInflater = LayoutInflater.from(context)
    private var words = emptyList<Word>() // Cached copy of words

    inner class WordViewHolder(itemView: View) : RecyclerView.ViewHolder(itemView) {
        val wordItemView: TextView = itemView.findViewById(R.id.textView)
    }

    override fun onCreateViewHolder(parent: ViewGroup, viewType: Int): WordViewHolder {
        val itemView = inflater.inflate(R.layout.recyclerview_item, parent, false)
        return WordViewHolder(itemView)
    }

    override fun onBindViewHolder(holder: WordViewHolder, position: Int) {
        val current = words[position]
        holder.wordItemView.text = current.word
    }

    internal fun setWords(words: List<Word>) {
        this.words = words
        notifyDataSetChanged()
    }

    override fun getItemCount() = words.size
}
在 MainActivity 的 onCreate() 方法中新增 RecyclerView。
在 onCreate() 方法中,於 setContentView 之後:
   val recyclerView = findViewById<RecyclerView>(R.id.recyclerview)
   val adapter = WordListAdapter(this)
   recyclerView.adapter = adapter
   recyclerView.layoutManager = LinearLayoutManager(this)
執行應用程式,確認一切正常。由於您尚未連結資料,因此沒有任何項目。
資料庫中沒有資料。您將透過兩種方式新增資料:在資料庫開啟時新增一些資料,以及新增用於新增字詞的 Activity。
如要在應用程式啟動時刪除所有內容並重新填入資料庫,請建立 RoomDatabase.Callback 並覆寫 onOpen()。由於您無法在 UI 執行緒上執行 Room 資料庫作業,onOpen() 會在 IO Dispatcher 上啟動協同程式。
如要啟動協同程式,我們需要 CoroutineScope。更新 WordRoomDatabase 類別的 getDatabase 方法,一併取得協同程式範圍做為參數:
fun getDatabase(
       context: Context,
       scope: CoroutineScope
  ): WordRoomDatabase {
...
}
更新 WordViewModel 的 init 區塊中的資料庫擷取初始化器,一併傳遞範圍:
val wordsDao = WordRoomDatabase.getDatabase(application, viewModelScope).wordDao()在 WordRoomDatabase 中,我們建立 RoomDatabase.Callback() 的自訂實作項目,該項目也會取得 CoroutineScope 做為建構函式參數。接著,我們覆寫 onOpen 方法來填入資料庫。
以下是在 WordRoomDatabase 類別內建立回呼的程式碼:
private class WordDatabaseCallback(
    private val scope: CoroutineScope
) : RoomDatabase.Callback() {

    override fun onOpen(db: SupportSQLiteDatabase) {
        super.onOpen(db)
        INSTANCE?.let { database ->
            scope.launch {
                populateDatabase(database.wordDao())
            }
        }
    }

    suspend fun populateDatabase(wordDao: WordDao) {
        // Delete all content here.
        wordDao.deleteAll()

        // Add sample words.
        var word = Word("Hello")
        wordDao.insert(word)
        word = Word("World!")
        wordDao.insert(word)

        // TODO: Add your own words!
    }
}
最後,在 Room.databaseBuilder() 上呼叫 .build() 之前,將回呼新增至資料庫建構序列:
.addCallback(WordDatabaseCallback(scope))最終程式碼應如下所示:
@Database(entities = arrayOf(Word::class), version = 1, exportSchema = false)
abstract class WordRoomDatabase : RoomDatabase() {

   abstract fun wordDao(): WordDao

   private class WordDatabaseCallback(
       private val scope: CoroutineScope
   ) : RoomDatabase.Callback() {

       override fun onOpen(db: SupportSQLiteDatabase) {
           super.onOpen(db)
           INSTANCE?.let { database ->
               scope.launch {
                   var wordDao = database.wordDao()

                   // Delete all content here.
                   wordDao.deleteAll()

                   // Add sample words.
                   var word = Word("Hello")
                   wordDao.insert(word)
                   word = Word("World!")
                   wordDao.insert(word)

                   // TODO: Add your own words!
                   word = Word("TODO!")
                   wordDao.insert(word)
               }
           }
       }
   }

   companion object {
       @Volatile
       private var INSTANCE: WordRoomDatabase? = null

       fun getDatabase(
           context: Context,
           scope: CoroutineScope
       ): WordRoomDatabase {
            // if the INSTANCE is not null, then return it,
            // if it is, then create the database
            return INSTANCE ?: synchronized(this) {
                val instance = Room.databaseBuilder(
                        context.applicationContext,
                        WordRoomDatabase::class.java,
                        "word_database"
                )
                 .addCallback(WordDatabaseCallback(scope))
                 .build()
                INSTANCE = instance
                // return instance
                instance
        }
     }
   }
}
在 values/strings.xml 中新增下列字串資源:
<string name="hint_word">Word...</string>
<string name="button_save">Save</string>
<string name="empty_not_saved">Word not saved because it is empty.</string>
在 value/colors.xml 中新增這個顏色資源:
<color name="buttonLabel">#FFFFFF</color>建立新的維度資源檔案:
- 在「Project」視窗中,按一下應用程式模組。
- 依序選取「File」>「New」>「Android Resource File」
- 從「Available Qualifiers」中選取「Dimension」
- 設定檔案名稱:dimens

在 values/dimens.xml 中新增下列維度資源:
<dimen name="small_padding">8dp</dimen>
<dimen name="big_padding">16dp</dimen>
使用「Empty Activity」範本建立新的空白 Android Activity:
- 依序選取「File」>「New」>「Activity」>「Empty Activity」
- 輸入
NewWordActivity做為活動名稱。 - 確認新活動已新增至 Android 資訊清單。
<activity android:name=".NewWordActivity"></activity>使用下列程式碼更新版面配置資料夾中的 activity_new_word.xml 檔案:
<LinearLayout xmlns:android="http://schemas.android.com/apk/res/android"
    android:orientation="vertical"
    android:layout_width="match_parent"
    android:layout_height="match_parent">

    <EditText
        android:id="@+id/edit_word"
        android:layout_width="match_parent"
        android:layout_height="wrap_content"
        android:minHeight="@dimen/min_height"
        android:fontFamily="sans-serif-light"
        android:hint="@string/hint_word"
        android:inputType="textAutoComplete"
        android:layout_margin="@dimen/big_padding"
        android:textSize="18sp" />

    <Button
        android:id="@+id/button_save"
        android:layout_width="match_parent"
        android:layout_height="wrap_content"
        android:background="@color/colorPrimary"
        android:text="@string/button_save"
        android:layout_margin="@dimen/big_padding"
        android:textColor="@color/buttonLabel" />

</LinearLayout>
更新活動的程式碼:
class NewWordActivity : AppCompatActivity() {

    private lateinit var editWordView: EditText

    public override fun onCreate(savedInstanceState: Bundle?) {
        super.onCreate(savedInstanceState)
        setContentView(R.layout.activity_new_word)
        editWordView = findViewById(R.id.edit_word)

        val button = findViewById<Button>(R.id.button_save)
        button.setOnClickListener {
            val replyIntent = Intent()
            if (TextUtils.isEmpty(editWordView.text)) {
                setResult(Activity.RESULT_CANCELED, replyIntent)
            } else {
                val word = editWordView.text.toString()
                replyIntent.putExtra(EXTRA_REPLY, word)
                setResult(Activity.RESULT_OK, replyIntent)
            }
            finish()
        }
    }

    companion object {
        const val EXTRA_REPLY = "com.example.android.wordlistsql.REPLY"
    }
}
最後一個步驟是將 UI 連線至資料庫,方法是儲存使用者輸入的新字詞,並在 RecyclerView 中顯示字詞資料庫的目前內容。
如要顯示資料庫目前的內容,請新增觀察器,觀察 ViewModel 中的 LiveData。
每當資料變更時,系統就會叫用 onChanged() 回呼,進而呼叫配接器的 setWords() 方法,更新配接器的快取資料並重新整理顯示的清單。
在 MainActivity 中,為 ViewModel 建立成員變數:
private lateinit var wordViewModel: WordViewModel使用 ViewModelProvider 將 ViewModel 與 Activity 建立關聯。
Activity 首次啟動時,ViewModelProviders 會建立 ViewModel。活動遭到終止時 (例如透過設定變更),ViewModel 會持續存在。活動重新建立時,ViewModelProviders 會傳回現有的 ViewModel。詳情請參閱 ViewModel。
在 RecyclerView 程式碼區塊下方的 onCreate() 中,從 ViewModelProvider 取得 ViewModel:
wordViewModel = ViewModelProvider(this).get(WordViewModel::class.java)同樣在 onCreate() 中,為 WordViewModel 的 allWords LiveData 屬性新增觀察器。
當觀察到的資料變更且活動位於前景時,系統會觸發 onChanged() 方法 (Lambda 的預設方法):
wordViewModel.allWords.observe(this, Observer { words ->
            // Update the cached copy of the words in the adapter.
            words?.let { adapter.setWords(it) }
})
我們希望在輕觸懸浮動作按鈕時開啟 NewWordActivity,並在返回 MainActivity 後,將新字詞插入資料庫或顯示 Toast。為此,請先定義要求代碼:
private val newWordActivityRequestCode = 1在 MainActivity 中,為 NewWordActivity 新增 onActivityResult() 程式碼。
如果活動傳回 RESULT_OK,請呼叫 WordViewModel 的 insert() 方法,將傳回的字詞插入資料庫:
override fun onActivityResult(requestCode: Int, resultCode: Int, data: Intent?) {
    super.onActivityResult(requestCode, resultCode, data)

    if (requestCode == newWordActivityRequestCode && resultCode == Activity.RESULT_OK) {
        data?.getStringExtra(NewWordActivity.EXTRA_REPLY)?.let {
            val word = Word(it)
            wordViewModel.insert(word)
        }
    } else {
        Toast.makeText(
            applicationContext,
            R.string.empty_not_saved,
            Toast.LENGTH_LONG).show()
    }
}
在 MainActivity,start NewWordActivity 中,使用者輕觸 FAB 時,在 MainActivity onCreate 中找出 FAB,並使用下列程式碼新增 onClickListener:
val fab = findViewById<FloatingActionButton>(R.id.fab)
fab.setOnClickListener {
  val intent = Intent(this@MainActivity, NewWordActivity::class.java)
  startActivityForResult(intent, newWordActivityRequestCode)
}
完成的程式碼應如下所示:
class MainActivity : AppCompatActivity() {

   private const val newWordActivityRequestCode = 1
   private lateinit var wordViewModel: WordViewModel

   override fun onCreate(savedInstanceState: Bundle?) {
       super.onCreate(savedInstanceState)
       setContentView(R.layout.activity_main)
       setSupportActionBar(toolbar)

       val recyclerView = findViewById<RecyclerView>(R.id.recyclerview)
       val adapter = WordListAdapter(this)
       recyclerView.adapter = adapter
       recyclerView.layoutManager = LinearLayoutManager(this)

       wordViewModel = ViewModelProvider(this).get(WordViewModel::class.java)
       wordViewModel.allWords.observe(this, Observer { words ->
           // Update the cached copy of the words in the adapter.
           words?.let { adapter.setWords(it) }
       })

       val fab = findViewById<FloatingActionButton>(R.id.fab)
       fab.setOnClickListener {
           val intent = Intent(this@MainActivity, NewWordActivity::class.java)
           startActivityForResult(intent, newWordActivityRequestCode)
       }
   }

   override fun onActivityResult(requestCode: Int, resultCode: Int, data: Intent?) {
       super.onActivityResult(requestCode, resultCode, data)

       if (requestCode == newWordActivityRequestCode && resultCode == Activity.RESULT_OK) {
           data?.getStringExtra(NewWordActivity.EXTRA_REPLY)?.let {
               val word = Word(it)
               wordViewModel.insert(word)
           }
       } else {
           Toast.makeText(
               applicationContext,
               R.string.empty_not_saved,
               Toast.LENGTH_LONG).show()
       }
   }
}
現在執行應用程式!在 NewWordActivity 中將字詞新增至資料庫時,使用者介面會自動更新。
現在您已建構出可正常運作的應用程式,讓我們回顧一下您建構的內容。應用程式結構如下:
應用程式的元件如下:
MainActivity:使用RecyclerView和WordListAdapter在清單中顯示字詞。在MainActivity中,有一個Observer會觀察資料庫中的字詞 LiveData,並在字詞變更時收到通知。NewWordActivity:將新字詞新增至清單。WordViewModel:提供存取資料層的方法,並傳回 LiveData,因此 MainActivity 可以設定觀察器關係。*LiveData<List<Word>>:可讓 UI 元件自動更新。在MainActivity中,有一個Observer會觀察資料庫中的字詞 LiveData,並在字詞變更時收到通知。Repository:管理一或多個資料來源。Repository會公開 ViewModel 的方法,以便與基礎資料供應商互動。在這個應用程式中,後端是 Room 資料庫。Room:是 SQLite 資料庫的包裝函式,並實作該資料庫。Room 會為您代勞許多過去必須自行完成的工作。- DAO:將方法呼叫對應至資料庫查詢,因此當 Repository 呼叫
getAlphabetizedWords()等方法時,Room 可以執行SELECT * from word_table ORDER BY word ASC。 Word:是包含單一字詞的實體類別。
* Views 和 Activities (以及 Fragments) 只會透過 ViewModel 與資料互動。因此資料來源並不重要。
自動更新 UI 的資料流程 (反應式 UI)
我們使用 LiveData,因此可以自動更新。在 MainActivity 中,有一個 Observer 會觀察資料庫中的字詞 LiveData,並在字詞變更時收到通知。如有變更,系統會執行觀察器的 onChange() 方法,並更新 WordListAdapter 中的 mWords。
您可以觀察到資料,因為資料是 LiveData。觀察到的則是 WordViewModel allWords 屬性傳回的 LiveData<List<Word>>。
WordViewModel會向 UI 層隱藏後端的所有資訊。這個介面提供存取資料層的方法,並傳回 LiveData,以便 MainActivity 設定觀察器關係。Views、Activities 和 Fragments 只會透過 ViewModel 與資料互動。因此資料來源並不重要。
在本例中,資料來自 Repository。ViewModel 不需要知道該 Repository 與什麼互動。只需要知道如何透過 Repository 公開的方法與 Repository 互動即可。
存放區會管理一或多個資料來源。在 WordListSample 應用程式中,後端是 Room 資料庫。Room 是 SQLite 資料庫的包裝函式,並實作了 SQLite 資料庫。Room 會為您代勞許多過去必須自行完成的工作。舉例來說,Room 可執行您過去在 SQLiteOpenHelper 類別中執行的所有作業。
DAO 會將方法呼叫對應至資料庫查詢,因此當 Repository 呼叫 getAllWords() 等方法時,Room 就能執行 SELECT * from word_table ORDER BY word ASC。
由於查詢傳回的結果會觀察 LiveData,因此每當 Room 中的資料變更時,系統就會執行 Observer 介面的 onChanged() 方法,並更新 UI。
[選用] 下載解決方案程式碼
如果還沒看過,可以查看程式碼研究室的解決方案程式碼。您可以查看 GitHub 存放區,或從這裡下載程式碼:
將下載的 ZIP 檔案解壓縮。這會解壓縮根資料夾 android-room-with-a-view-kotlin,其中包含完整的應用程式。