
This codelab is part of the Developing Progressive Web Apps training course, developed by the Google Developers Training team. You will get the most value out of this course if you work through the codelabs in sequence.
For complete details about the course, see the Developing Progressive Web Apps overview.
Introduction
This lab covers the basics of caching files with the service worker. The technologies involved are the Cache API and the Service Worker API.
What you'll learn
- How to use the Cache API to access and manipulate data in the cache
- How to cache an application shell and offline pages
- How to intercept network requests and respond with resources in the cache
- How to remove unused caches on service worker activation
What you should know
- Basic JavaScript and HTML
- Familiarity with the concept and basic syntax of ES2015 Promises
What you will need
- Computer with terminal/shell access
- Connection to the internet
- A browser that supports
caches - A text editor
Download or clone the pwa-training-labs repository from github and install the LTS version of Node.js, if needed.
Navigate into the cache-api-lab/app/ directory and start a local development server:
cd cache-api-lab/app
npm install
node server.js
You can terminate the server at any time with Ctrl-c.
Open your browser and navigate to localhost:8081/. You should see a simple picture blog site.
Note: Unregister any service workers and clear all service worker caches for localhost so that they do not interfere with the lab. In Chrome DevTools, you can achieve this by clicking Clear site data from the Clear storage section of the Application tab.
Open the cache-api-lab/app/ folder in your preferred text editor. The app/ folder is where you will be building the lab.
This folder contains:
images/folder contains sample imagespages/folder contains sample pages and a custom offline pagestyle/folder contains the app's cascading stylesheetindex.htmlis the main HTML page for our sample site/applicationpackage.jsonandpackage-lock.jsontrack dependencies for the local development serverserver.jsconfigures a local development serversw.jsis the service worker file where we set up the interactions with the cache (currently empty)
The service worker's "install" event is a strategic time to cache static assets. Caching the application shell on install ensures that the service worker has access to all shell assets (if any assets fail to cache, the service worker installation is aborted).
Paste the following code into sw.js to cache the application shell during the install event:
const filesToCache = [
'/',
'style/main.css',
'images/still_life_medium.jpg',
'index.html',
'pages/offline.html',
'pages/404.html'
];
const staticCacheName = 'pages-cache-v1';
self.addEventListener('install', event => {
console.log('Attempting to install service worker and cache static assets');
event.waitUntil(
caches.open(staticCacheName)
.then(cache => {
return cache.addAll(filesToCache);
})
);
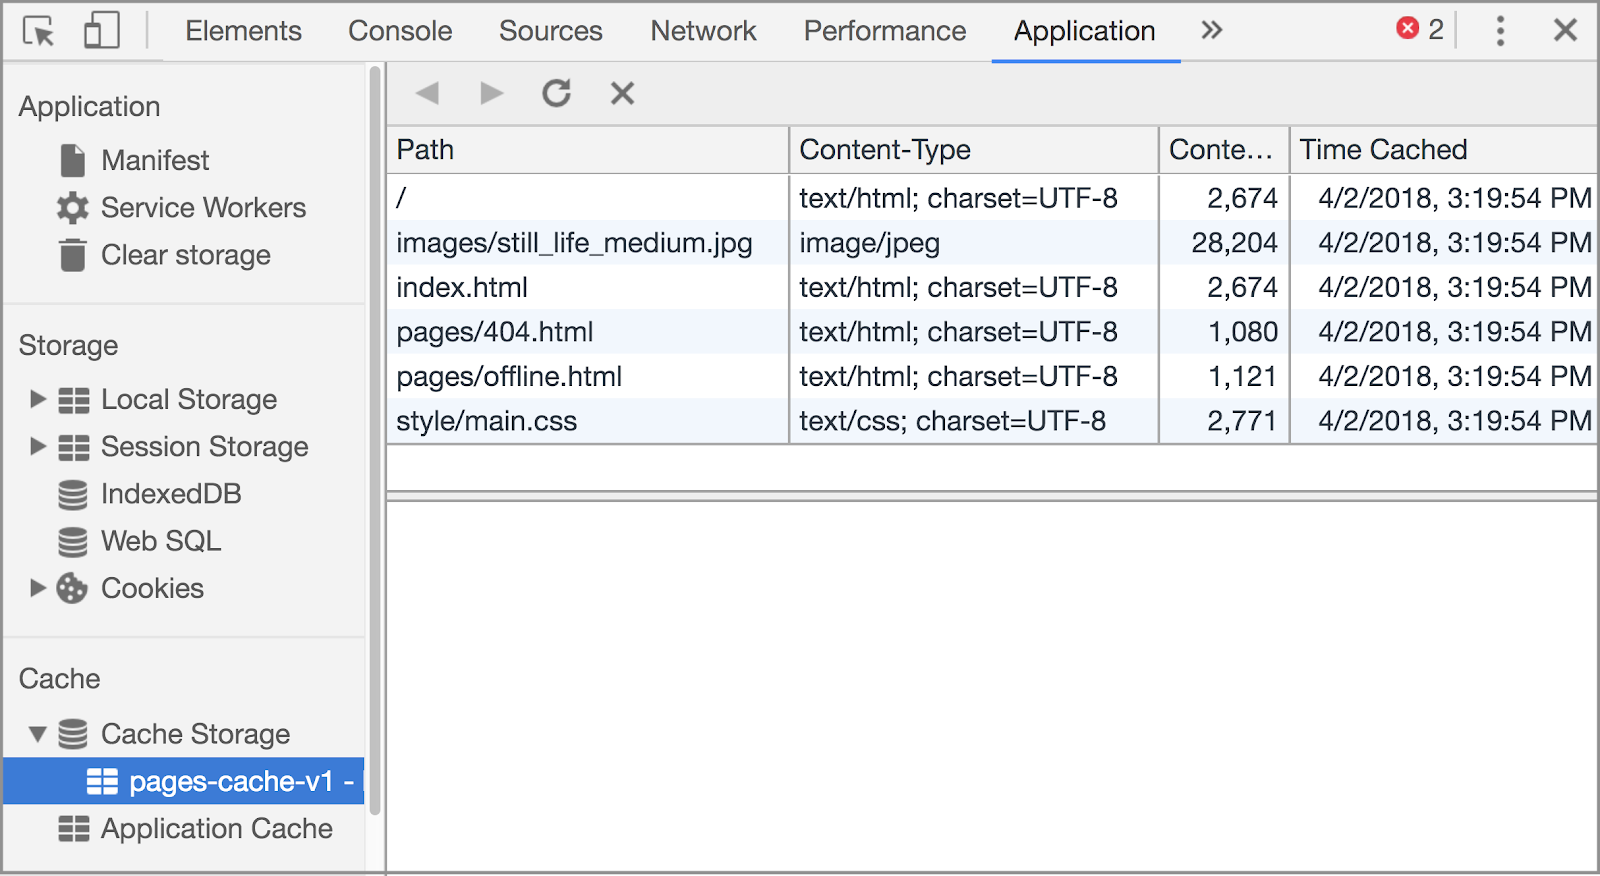
});Save the code and reload the page in the browser. Activate the new service worker and then show cache storage in the browser. You should see the files appear in the table. You may need to refresh the cache for the changes to appear. In Chrome, the cache storage section of developer tools should look like:
Note: In Chrome, you can delete the cache in DevTools.
Explanation
We first define the files to cache and assign them to the filesToCache variable. These files make up the "application shell" (the static HTML,CSS, and image files that give your app a unified look and feel). We also assign a cache name to a variable so that updating the cache name (and by extension the cache version) happens in one place.
In the install event handler we create the cache with caches.open and use the addAll method to add the files to the cache. We wrap this in event.waitUntil to extend the lifetime of the event until all of the files are added to the cache and addAll resolves successfully.
For more information
Now that we have the files cached, we can intercept requests for those files from the network and respond with the files from the cache.
Add the following fetch listener in sw.js:
self.addEventListener('fetch', event => {
  console.log('Fetch event for ', event.request.url);
  event.respondWith(
    caches.match(event.request)
    .then(response => {
      if (response) {
        console.log('Found ', event.request.url, ' in cache');
        return response;
      }
      console.log('Network request for ', event.request.url);
      return fetch(event.request)

      // TODO 4 - Add fetched files to the cache

    }).catch(error => {

      // TODO 6 - Respond with custom offline page

    })
  );
});
Save the code and activate the updated service worker in the browser. Refresh the page to see the network requests being logged to the console. Now take the app offline by terminating the server with Ctrl+c and refresh the page. The page should load normally!
Explanation
The fetch event listener intercepts all requests. We use event.respondWith to create a custom response to the request. Here we are using the Cache falling back to network strategy: we first check the cache for the requested resource (with caches.match) and then, if that fails, we send the request to the network.
For more information
In addition to caching predetermined files, we can also dynamically add files to the cache as they are requested.
Replace TODO 4 in the fetch event handler with code to dynamically cache files:
.then(response => {
  // TODO 5 - Respond with custom 404 page
  return caches.open(staticCacheName).then(cache => {
    cache.put(event.request.url, response.clone());
    return response;
  });
});
Save the file. Take the app back online by restarting the server (node server.js) and activate the updated service worker. Visit one of the links on the homepage, then take the app offline again. Now if you reload the visited page, it should load normally! Try navigating to the pages you haven't visited before to confirm that they don't work offline.
Take the app back online before continuing.
Explanation
Here we are taking the responses returned from the network requests and putting them into the cache.
We need to pass a clone of the response to cache.put, because the response is a stream and can only be read once. See Jake Archibald's What happens when you read a response article for a more comprehensive explanation.
For more information
Below TODO 5 in service-worker.js, write your own code to respond with the 404.html page from the cache if the response status is 404. You can check the response status with response.status.
To test your code, save what you've written and then update the service worker in the browser. Click the Non-existent file link to request a resource that doesn't exist.
Explanation
Network response errors do not cause a fetch promise to reject. Instead, fetch promises resolve with the response object containing the network error code. This means we handle network errors explicitly by checking the response status. fetch promises only reject when the browser cannot reach the network in the first place (user is offline).
Note: When intercepting a network request and serving a custom response, the service worker does not redirect the user to the address of the new response. The response is served at the address of the original request. For example, if the user requests a nonexistent file at www.example.com/non-existent.html and the service worker responds with a custom 404 page, 404.html, the custom page will display at www.example.com/non-existent.html, not www.example.com/404.html.
For more information
Solution code
The solution code can be found in the 05-404-page/ directory.
Below TODO 6 in sw.js, update the .catch block to respond with the offline.html page from the cache. The catch will trigger if the fetch to the network fails.
To test your code, save what you've written and then update the service worker in the browser. Take the app offline and navigate to a page you haven't visited before to see the custom offline page.
Explanation
If fetch cannot reach the network, it rejects with an error and triggers the .catch.
Solution code
The solution code can be found in the 06-offline-page/ directory.
We can get rid of unused caches in the service worker "activate" event.
Add the following activate event listener to sw.js:
self.addEventListener('activate', event => {
  console.log('Activating new service worker...');

  const cacheWhitelist = [staticCacheName];

  event.waitUntil(
    caches.keys().then(cacheNames => {
      return Promise.all(
        cacheNames.map(cacheName => {
          if (cacheWhitelist.indexOf(cacheName) === -1) {
            return caches.delete(cacheName);
          }
        })
      );
    })
  );
});
Change the name of the cache to "pages-cache-v2":
var staticCacheName = 'pages-cache-v2';Save the file and update the service worker in the browser. Inspect the cache storage in your browser. You should see just the new cache. The old cache, pages-cache-v1, has been removed.
Explanation
It's important to remove outdated resources to conserve space on users' devices. We delete old caches in the activate event to ensure that we aren't deleting caches before the new service worker has taken over the page (in case the new service worker activation fails, in which case we don't want to remove the existing service worker's caches). To remove outdated caches, we create an array of caches that are currently in use and delete all other caches.
For more information
Solution code
The solution code can be found in the solution/ directory.
You have learned how to use the Cache API in the service worker.
What we've covered
You have learned the basics of using the Cache API in the service worker. We have covered caching the application shell, intercepting network requests and responding with items from the cache, adding resources to the cache as they are requested, responding to network errors with a custom pages, and deleting unused caches.
Resources
Learn more about caching and the Cache API
Learn more about using service workers
To see all the codelabs in the PWA training course, see the Welcome codelab for the course/