
This codelab is part of the Android Kotlin Fundamentals course. You'll get the most value out of this course if you work through the codelabs in sequence. All the course codelabs are listed on the Android Kotlin Fundamentals codelabs landing page.
Introduction
One of the main strengths of RecyclerView is that it lets you use layout managers to control and modify your layout strategy. A LayoutManager manages how the items in the RecyclerView are arranged.
RecyclerView comes with out-of-the-box layout managers for common use cases. For example, you can use LinearLayout for horizontal and vertical lists, or GridLayout for grids. For more complicated use cases, you need to implement a custom LayoutManager.
In this codelab, you learn how to display data using a grid layout instead of a list, building on the sleep-tracker app from the previous codelab. (If you don't have the app from the previous codelab, you can download starter code for this codelab.)
What you should already know
You should be familiar with:
- Building a basic user interface using an
Activity,Fragments, andViews - Navigating between fragments and using
safeArgsto pass data between fragments - View models, view model factories, and transformations
LiveDataand their observers- How to create a
Roomdatabase, create a DAO, and define entities - How to use coroutines for database tasks and other long-running tasks
- How to implement a basic
RecyclerViewwith anAdapter,ViewHolder, and item layout - How to implement data binding for
RecyclerView - How to create and use binding adapters to transform data
What you'll learn
- How to use a different
LayoutManagerto change how your data is displayed in theRecyclerView - How to create a grid layout for your sleep data
What you'll do
- Build on the sleep-tracker app from the previous codelab in this series.
- Replace the list of sleep data displayed by the
RecyclerViewin the app with a grid of sleep data.
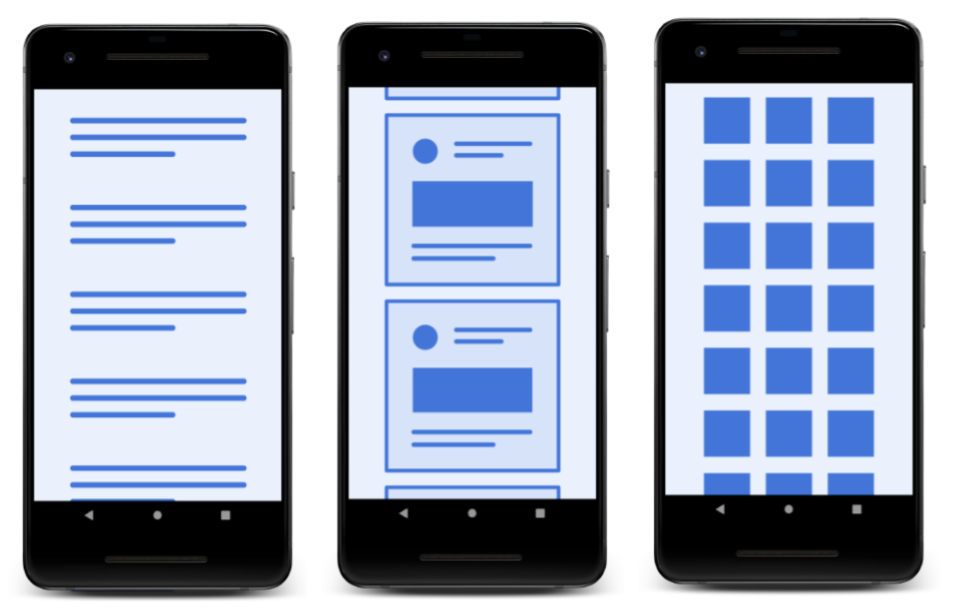
The sleep-tracker app has two screens, represented by fragments, as shown in the figure below.
|
|
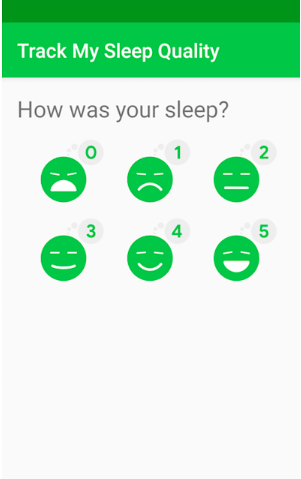
The first screen, shown on the left, has buttons for starting and stopping tracking. The screen shows some of the user's sleep data. The Clear button permanently deletes all the data that the app has collected for the user. The second screen, shown on the right, is for selecting a sleep-quality rating.
This app uses a simplified architecture with a UI controller, view model and LiveData, and a Room database to persist sleep data.

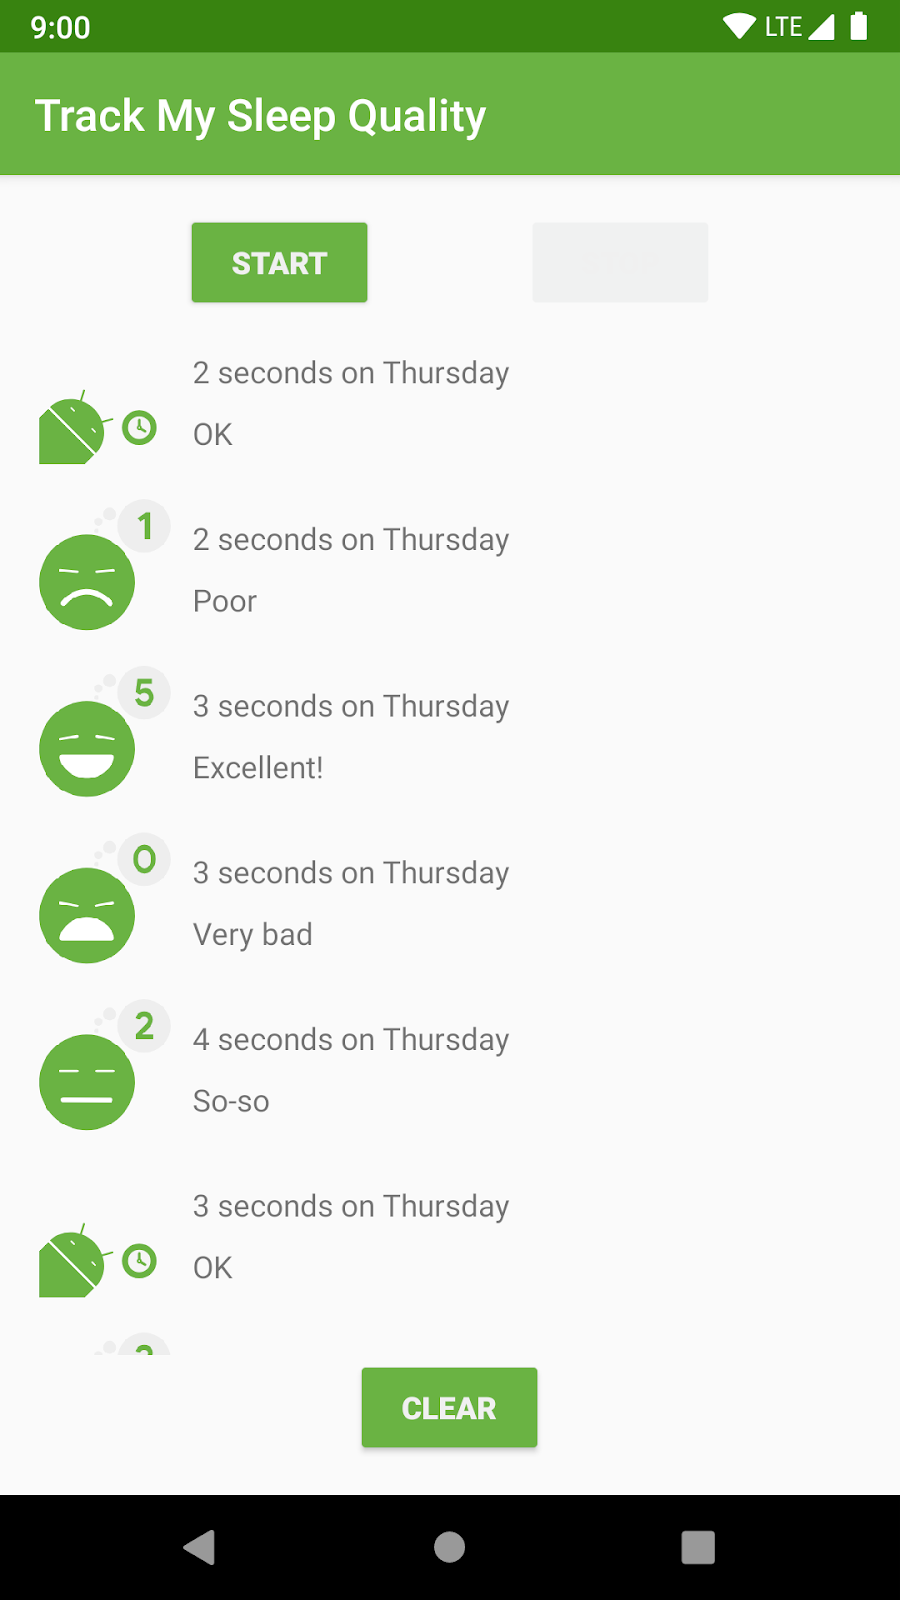
The sleep data is displayed in a RecyclerView. In this codelab, you change the app to use a GridLayout. The final screen will look like the screenshot below.
In a previous codelab, when you added the RecyclerView to fragment_sleep_tracker.xml, you added a LinearLayoutManager without any customizations. This code displays the data as a vertical list.
app:layoutManager="androidx.recyclerview.widget.LinearLayoutManager"LinearLayoutManager is the most common and straightforward layout manager for RecyclerView, and it supports both horizontal and vertical placement of child views. For example, you could use LinearLayoutManager to create a carousel of images that the user scrolls horizontally.
GridLayout
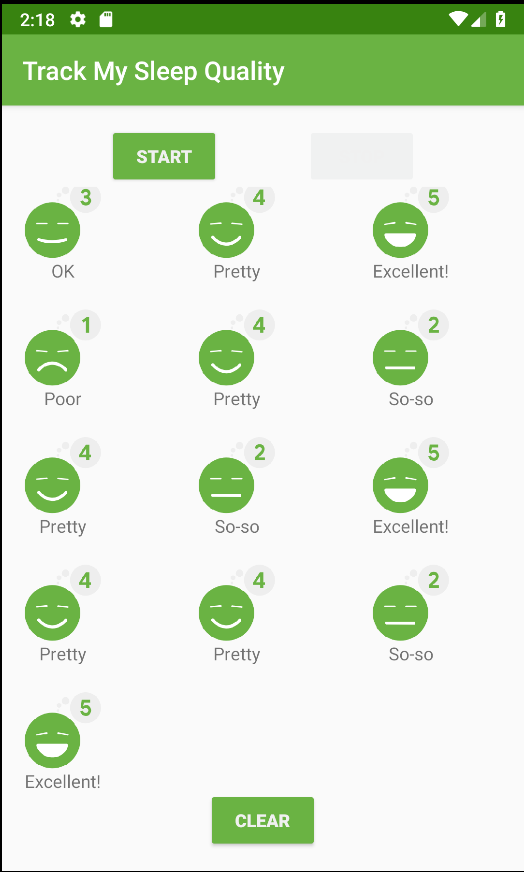
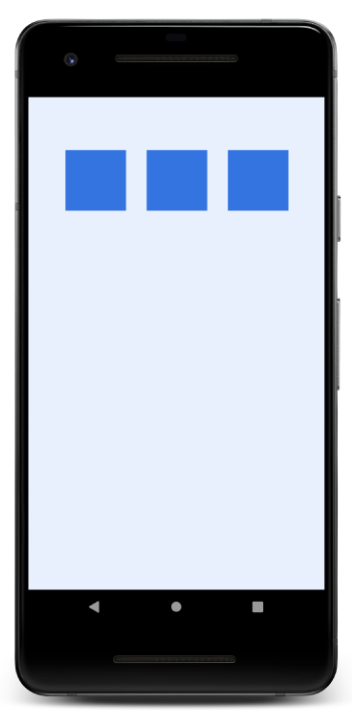
Another common use case is needing to show a lot of data to the user, which you can do using GridLayout. The GridLayoutManager for RecyclerView lays out the data as a scrollable grid, as shown below.
From a design perspective, GridLayout is best for lists that can be represented as icons or images, such as lists within a photo browsing app. In the sleep-tracker app, you could show each night of sleep as a grid of large icons. This design would give the user an overview of their sleep quality at a glance.
How GridLayout lays out items
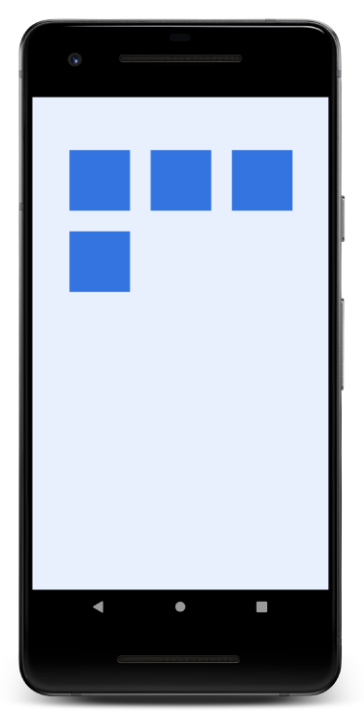
GridLayout arranges items in a grid of rows and columns. Assuming vertical scrolling, by default, each item in a row takes up one "span." (In this case, one span is equivalent to the width of one column.)
In the first two examples shown below, each row is made up of three spans. By default, the GridLayoutManager lays out each item in one span until the span count, which you specify. When it reaches the span count, it wraps to the next line.
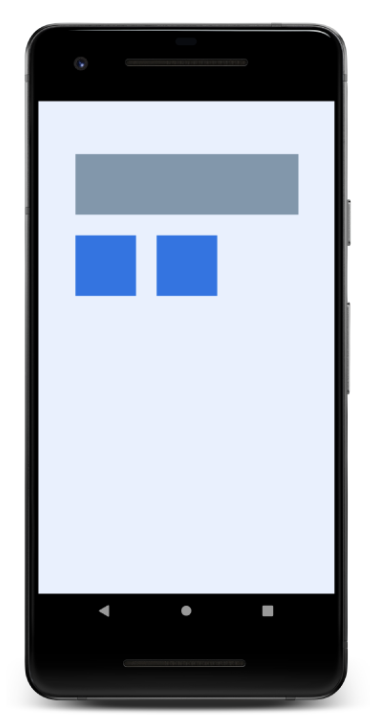
By default, each item takes up one span, but you can make an item wider by specifying how many spans it is to occupy. For example, the top item in the rightmost screen (shown below) takes up three spans.
|
|
|
In this task, you take the RecyclerView that you finished in the last exercise and update it to display data using a GridLayoutManager. You can continue using the sleep-tracker app from the previous codelab, or you can download the RecyclerViewGridLayout-Starter app from GitHub.
Step 1: Change the LayoutManager
- If needed, download the RecyclerViewGridLayout-Starter app for this codelab from GitHub and open the project in Android Studio.
- Open the
fragment_sleep_tracker.xmllayout file. - Remove the layout manager from the
sleep_listRecyclerViewdefinition.
Code to delete:
app:layoutManager="androidx.recyclerview.widget.LinearLayoutManager- Open
SleepTrackerFragment.kt. - In
OnCreateView(), just before thereturnstatement, create a new vertical, top-to-bottomGridLayoutManagerwith 3 spans.
TheGridLayoutManagerconstructor takes up to four arguments: a context, which is theactivity, the number spans (columns, in the default vertical layout), an orientation (default is vertical), and whether it's a reverse layout (default isfalse).
val manager = GridLayoutManager(activity, 3)- Below that line, tell the
RecyclerViewto use thisGridLayoutManager. TheRecyclerViewis in the binding object and is calledsleepList. (Seefragment_sleep_tracker.xml.)
binding.sleepList.layoutManager = managerStep 2: Change the layout
The current layout in list_item_sleep_night.xml displays the data by using a whole row per night. In this step, you define a more compact square item layout for the grid.
- Open
list_item_sleep_night.xml. - Delete the
sleep_lengthTextView, because the new design doesn't need it. - Move the
quality_stringTextViewso that it displays beneath theImageView. To do that, you have to update quite a few things. Here is the final layout for thequality_stringTextView:
<TextView
   android:id="@+id/quality_string"
   android:layout_width="0dp"
   android:layout_height="20dp"
   android:textAlignment="center"
   app:layout_constraintBottom_toBottomOf="parent"
   app:layout_constraintEnd_toEndOf="@+id/quality_image"
   app:layout_constraintHorizontal_bias="0.0"
   app:layout_constraintStart_toStartOf="@+id/quality_image"
   app:layout_constraintTop_toBottomOf="@+id/quality_image"
   tools:text="Excellent!!!"
app:sleepQualityString="@{sleep}" />- Verify in the Design view that the
quality_stringTextViewis positioned below theImageView.

Because you used data binding, you don't need to change anything in the Adapter. The code should just work, and your list should display as a grid.
- Run the app and observe how the sleep data is displayed in a grid.
Note that theConstraintLayoutstill takes the entire width. TheGridLayoutManagergives your view a fixed width, based on its span.GridLayoutManagerdoes its best to meet all constraints when laying out the grid, adding whitespace or clipping items.
- In
SleepTrackerFragment, in the code that creates theGridLayoutManager, change the number of spans forGridLayoutMangerto 1. Run the app, and you get a list.
val manager = GridLayoutManager(activity, 1)- Change the number of spans for
GridLayoutManagerto 10 and run the app. Notice that theGridLayoutManagerwill fit 10 items in a row, but the items are now clipped. - Change the span count to 5 and the direction to
GridLayoutManager.VERTICAL. Run the app and notice how you can scroll horizontally. You would need a different layout to make this look good.
val manager = GridLayoutManager(activity, 5, GridLayoutManager.HORIZONTAL, false)- Don't forget to set the span count back to 3 and the orientation to vertical!
Android Studio project: RecyclerViewGridLayout
- Layout managers manage how the items in the
RecyclerVieware arranged. RecyclerViewcomes with out-of-the-box layout managers for common use cases such asLinearLayoutfor horizontal and vertical lists, andGridLayoutfor grids.- For more complicated use cases, implement a custom
LayoutManager. - From a design perspective,
GridLayoutis best used for lists of items that can be represented as icons or images. GridLayoutarranges items in a grid of rows and columns. Assuming vertical scrolling, each item in a row takes up what's called a "span."- You can customize how many spans an item takes up, creating more interesting grids without the need for a custom layout manager.
- Create an item layout for one item in the grid, and the layout manager takes care of arranging the items.
- You can set the
LayoutManagerfor theRecyclerVieweither in the XML layout file that contains the<RecyclerView>element, or programmatically.
Udacity courses:
Android developer documentation:
This section lists possible homework assignments for students who are working through this codelab as part of a course led by an instructor. It's up to the instructor to do the following:
- Assign homework if required.
- Communicate to students how to submit homework assignments.
- Grade the homework assignments.
Instructors can use these suggestions as little or as much as they want, and should feel free to assign any other homework they feel is appropriate.
If you're working through this codelab on your own, feel free to use these homework assignments to test your knowledge.
Answer these questions
Question 1
Which of the following are layout managers provided by Android? Select all that apply.
▢ LinearLayouManager
▢ GridLayoutManager
▢ CircularLayoutManager
▢ StaggeredGridLayoutManager
Question 2
What is a "span"?
▢ The size of a grid created by GridLayoutManager.
▢ The width of a column in the grid.
▢ The dimensions of an item in a grid.
▢ The number of columns in a grid that has a vertical orientation.
Start the next lesson: