
This codelab is part of the Android Kotlin Fundamentals course. You'll get the most value out of this course if you work through the codelabs in sequence. All the course codelabs are listed on the Android Kotlin Fundamentals codelabs landing page.
Introduction
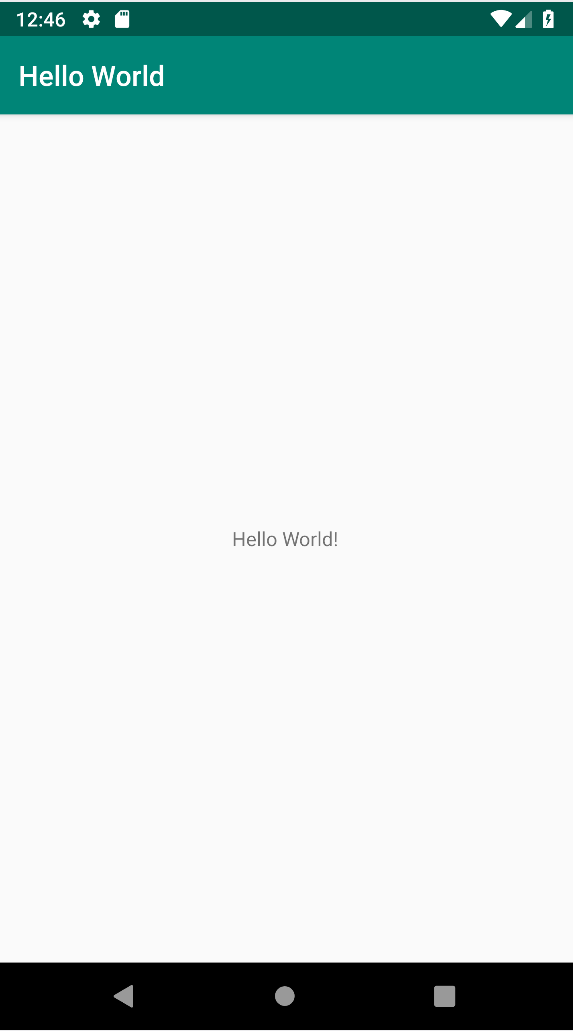
In this codelab you create and run your first Android app, HelloWorld, on an emulator and on a physical device. You also explore what an Android project looks like.
What you should already know
- You should understand the general software development process for object-oriented apps using an IDE (integrated development environment) such as Android Studio.
- You should have at least one year of experience in object-oriented programming, with at least an understanding of Java and Kotlin.
What you'll learn
- How to build a basic Android app in Android Studio.
- How to create an Android project from a template.
- How to find the major components of an Android project.
- How to run an Android app on an emulator or physical device.
What you'll do
- Create a new Android project and a default app called HelloWorld.
- Create an emulator (a virtual device) so you can run your app on your computer.
- Run the HelloWorld app on virtual and physical devices.
- Explore the project layout.
- Explore the
AndroidManifest.xmlfile.
The HelloWorld app displays the string "Hello World" on the screen of an Android virtual device or physical device. Here's what the app looks like:
In this task, you create a new app project to verify that Android Studio is correctly installed.
- Open Android Studio if it is not already opened.
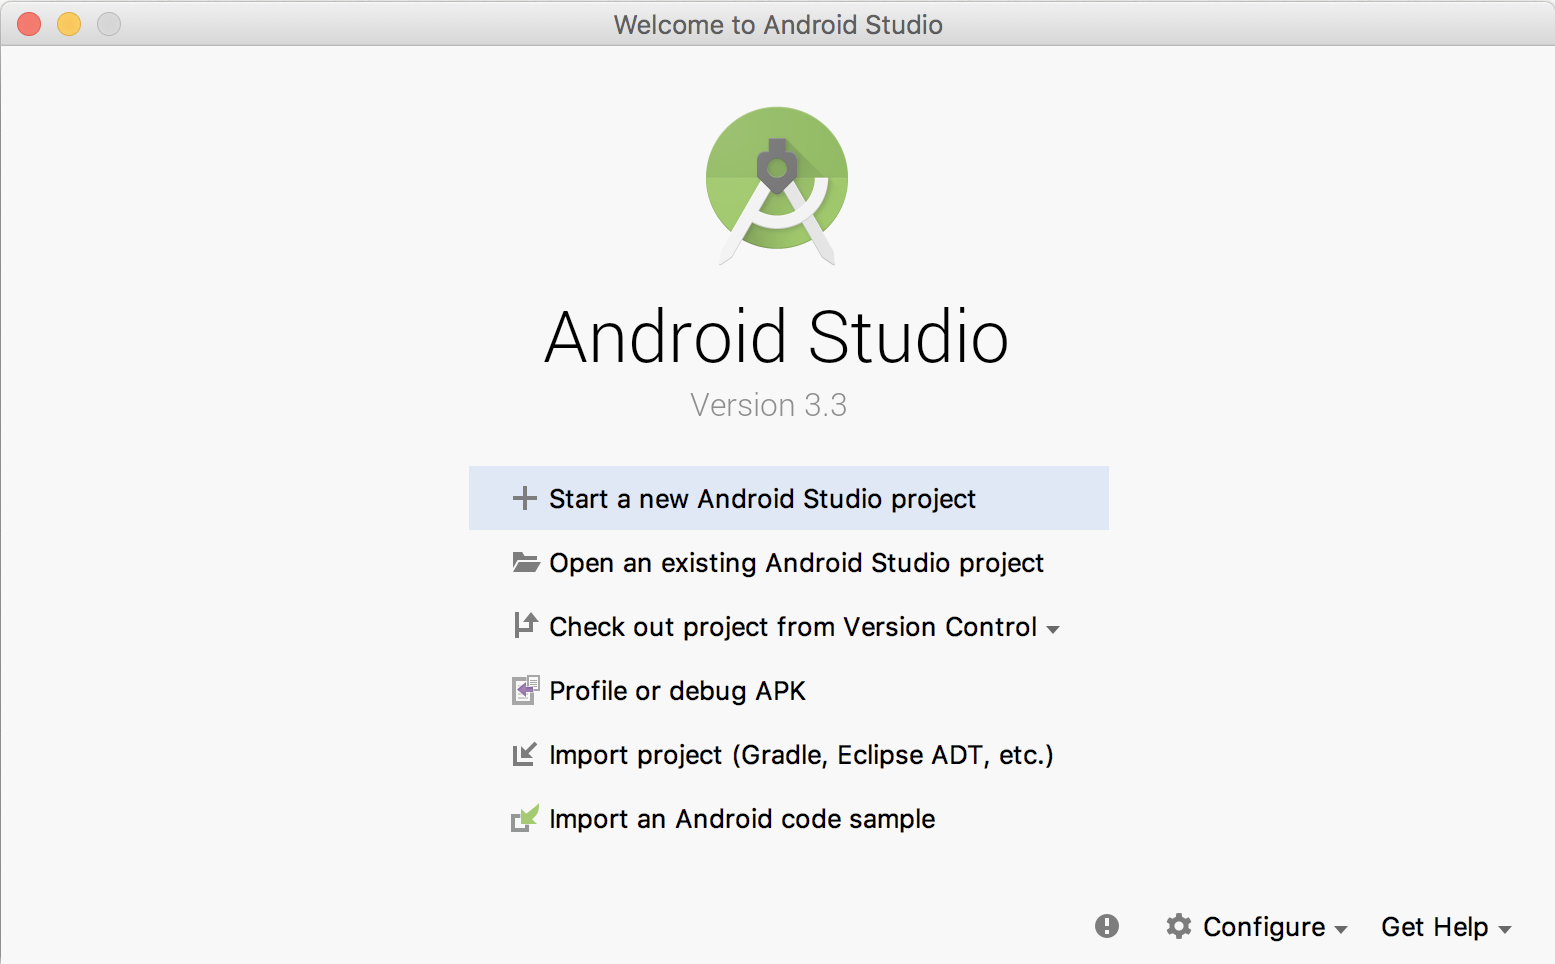
- In the main Welcome to Android Studio dialog, click Start a new Android Studio project.
- The Choose your project dialog appears. Select Empty Activity as shown below, and click Next.
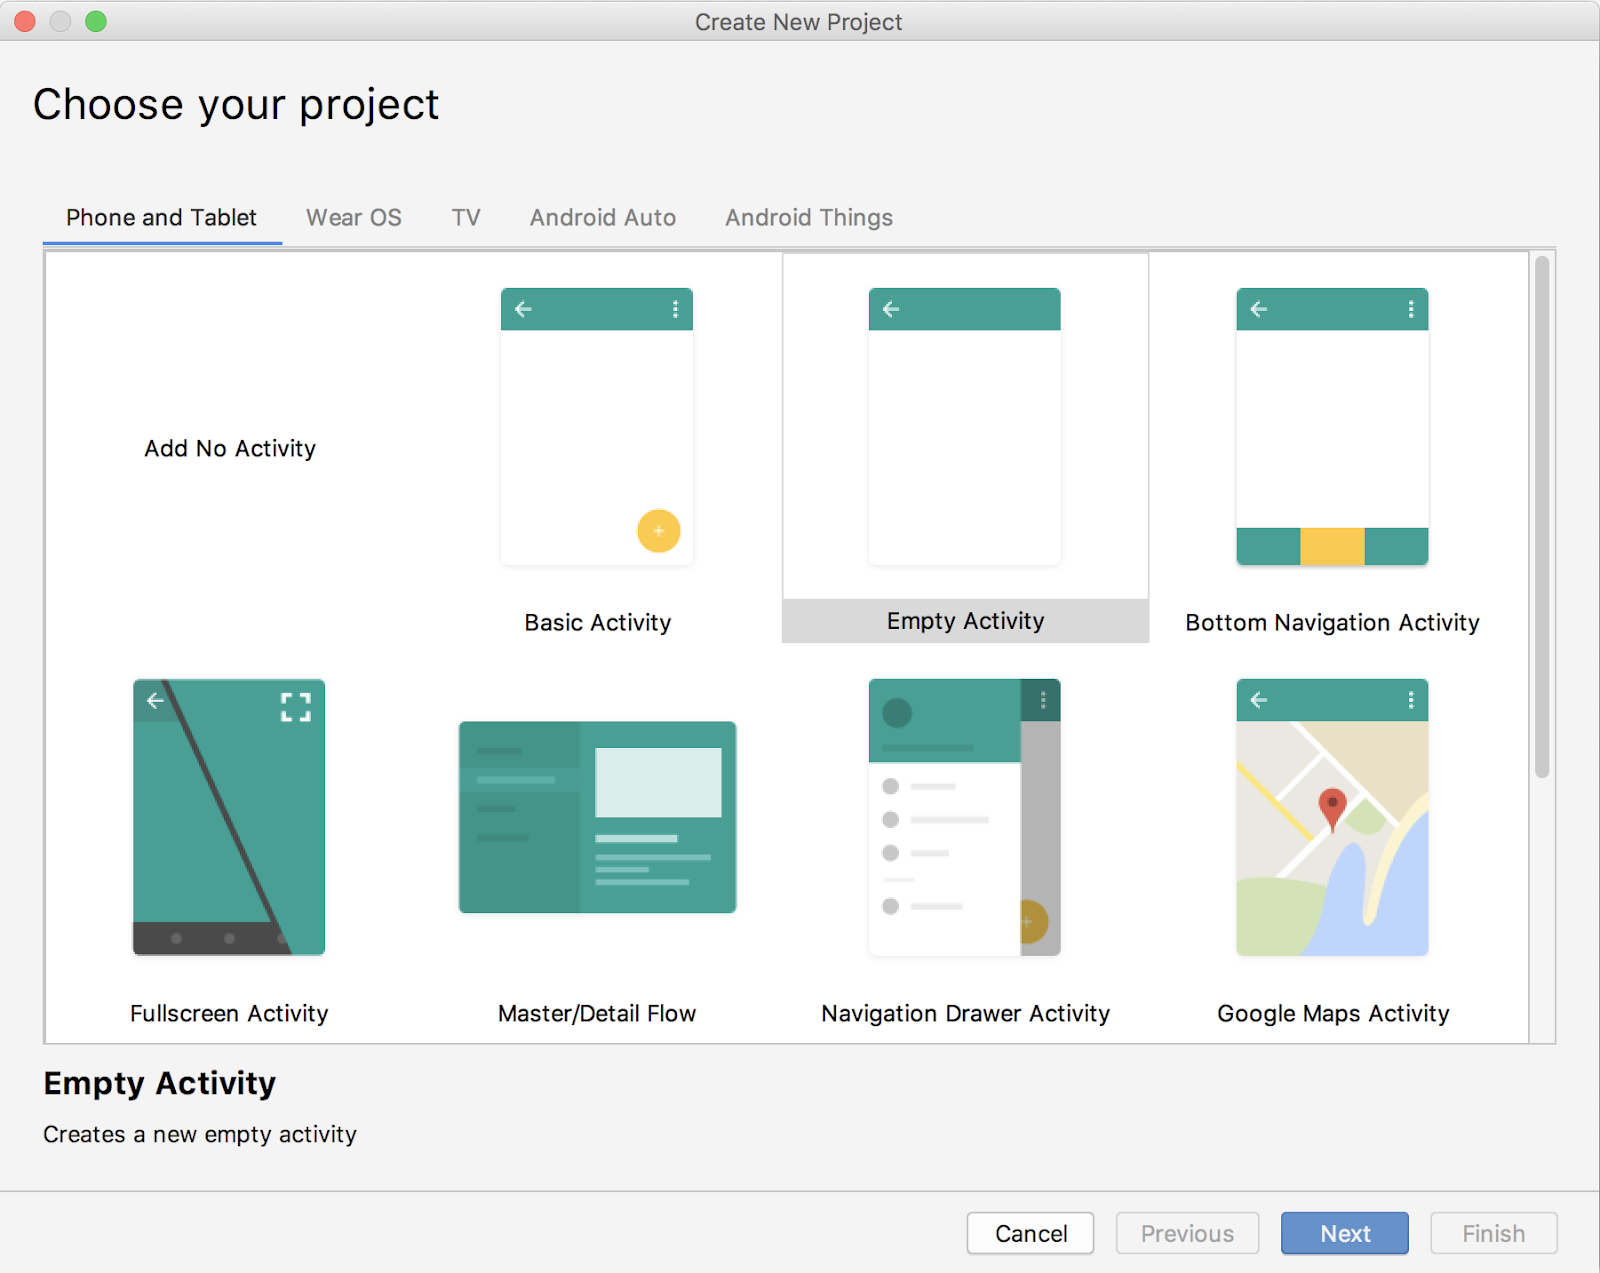
AnActivityis a single, focused thing that the user can do. Every app must have at least one activity as its entry point. Think of this entry-point activity as themain()function in other programs. An activity typically has a layout associated with it that defines how user interface (UI) elements appear on a screen. Android Studio provides severalActivitytemplates to help you get started. - In the Configure your project dialog, enter "HelloWorld" for the Name.
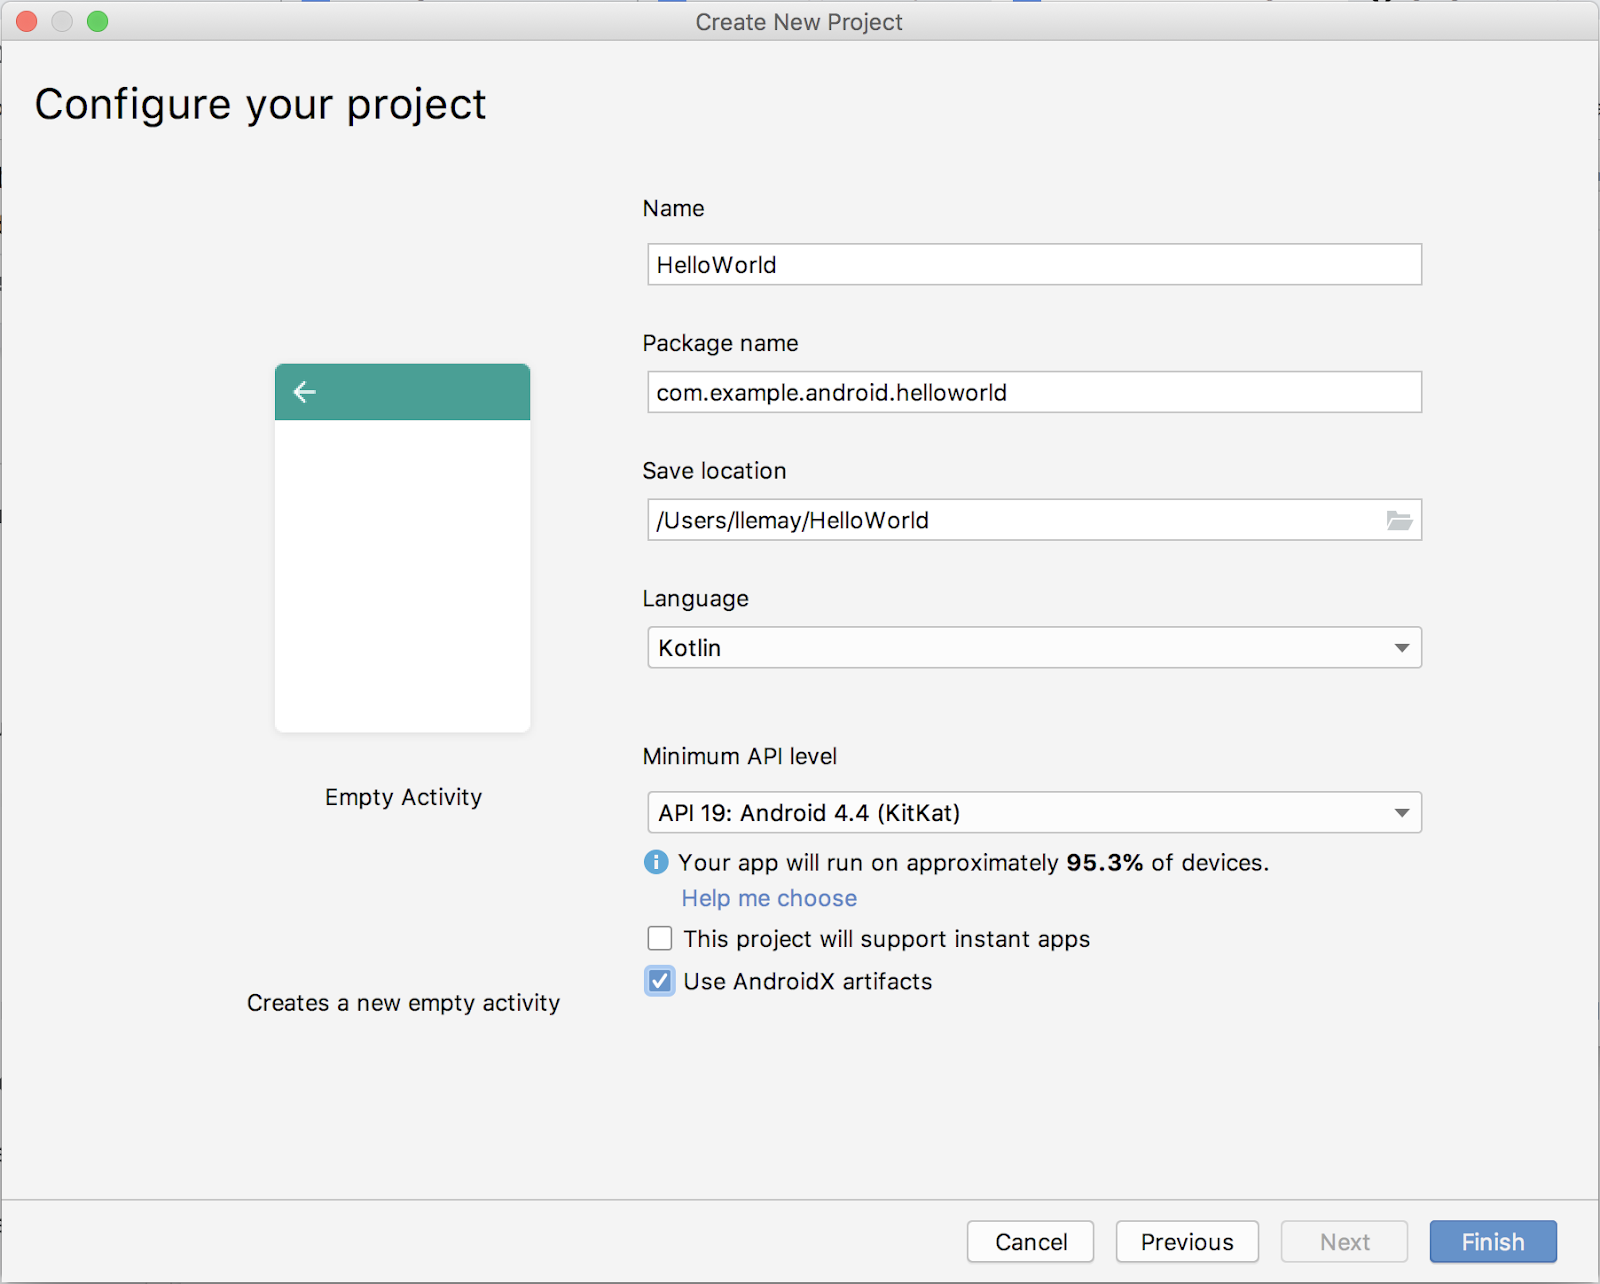
- Accept the default android.example.com for Company domain, or create a unique company domain. This value plus the name of the app is the package name for your app. If you are not planning to publish your app, accept the default. You can change the package name of your app later, but it is extra work.
- Verify that the default Save location is where you want to store your app. If not, change the location to your preferred directory.
- Make sure the Language is Kotlin.
- Make sure the Minimum API level is API 19: Android 4.4 (KitKat). At the time this codelab was written, Android Studio indicated that with this API level, the app would run on approximately 95.3% of devices.
(You learn more about minimum API levels in a later codelab. To learn more right now, click Help me choose, which opens a window with information about the API levels.) - Select the Use AndroidX artifacts checkbox.
- Leave all the other checkboxes cleared, and click Finish. If your project requires more components for your chosen target SDK, Android Studio installs them automatically, which might take a while. Follow the prompts and accept the default options.
Android Studio now creates your project, which can take some time. You should not get any errors. If you get any warnings, ignore them.
In this task, you explore the HelloWorld project in Android Studio and learn the basics of developing with Android Studio.
Step 1: Explore the Project pane
- If the Project tab is not already selected, select it. The Project tab is in the vertical tab column on the left side of the Android Studio window. The Project pane opens.
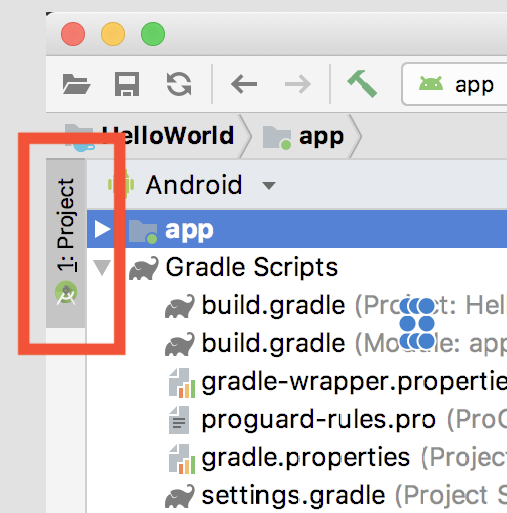
- To view the project as a standard Android project hierarchy, select Android from the drop-down menu at the top of the Project pane. (Android is the default.) You can view the project files in many different ways, including viewing the files how they appear in the filesystem hierarchy. However, the project is easier to work with using the Android view.

Step 2: Explore the app folder
All code and resources for your app are located within the app folder.
- In the Project > Android pane, expand the app folder. Inside the
appfolder are four subfolders:manifests,java,generatedJava, andres. - Expand the java folder, and then expand the com.example.android.HelloWorld folder to see the MainActivity Kotlin file.
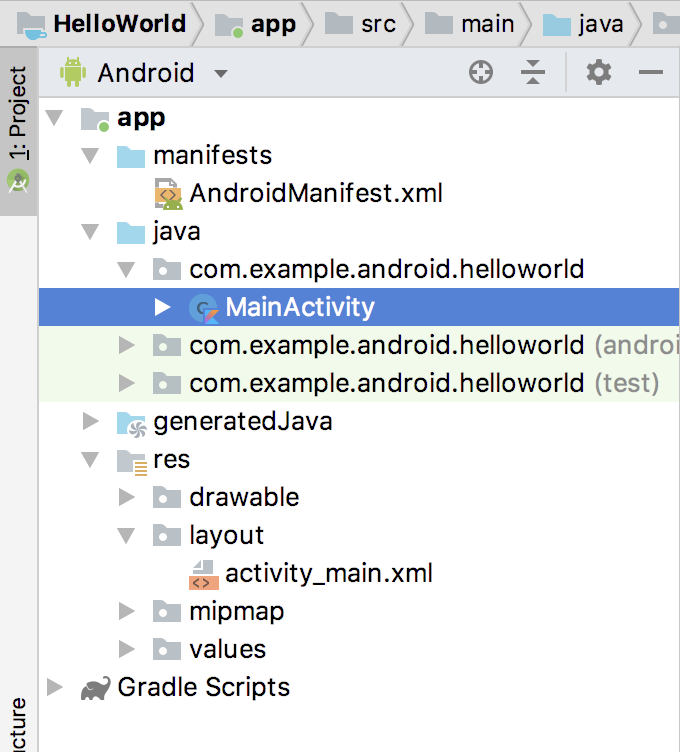
The java folder contains all the main Kotlin code for an Android app. There are historical reasons why your Kotlin code appears in the java folder. That convention allows Kotlin to interoperate seamlessly with code written in the Java programming language, even in the same project and app.
Your app's class files are contained in three subfolders, as shown in the figure above. The com.example.hello.helloworld (or the domain name you have specified) folder contains all the files for an app package. In particular, theMainActivityclass is the main entry point for your app. You learn more aboutMainActivityin the next codelab. The other two folders in thejavafolder are used for code related to testing, such as unit tests.
- Note the generatedJava folder. This folder contains files that Android Studio generates when it builds the app. Don't edit anything in this folder, because your changes might be overridden when you rebuild the app. But it's useful to know about this folder when you need to look at these files during debugging.
Step 3: Explore the res folder
- In the Project > Android pane, expand the res folder.
The res folder holds resources. Resources in Android are static content used in your apps. Resources include images, text strings, screen layouts, styles, and values such as hexadecimal colors or standard dimensions.
Android apps separate Kotlin code and resources as much as possible. That makes it much easier to find all the strings or icons that are used in the app's UI. Also, when you change one of these resource files, the change takes effect everywhere that the file is used in the app. - Within the res folder, expand the layout folder to see the
activity_main.xmlfile.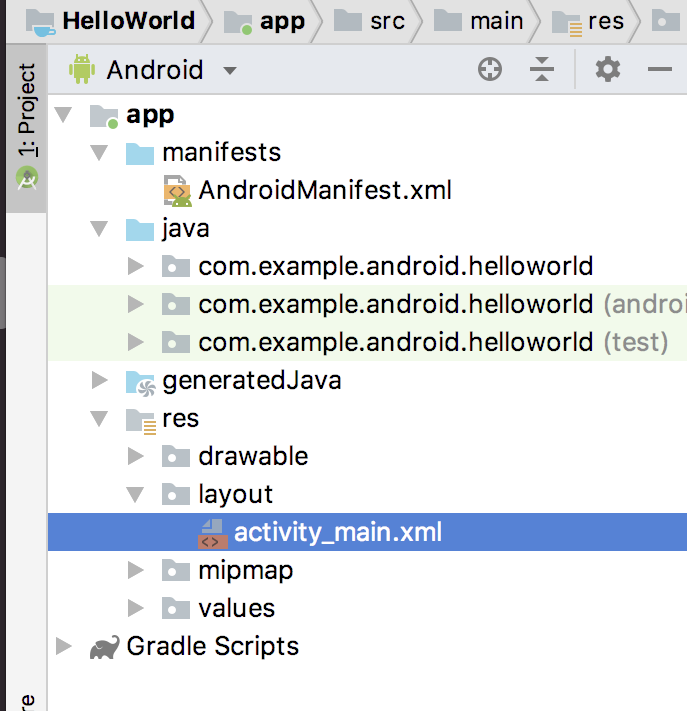
Your Activity is usually associated with a UI layout file, defined as an XML file in the res/layout directory. That layout file is usually named after its activity. In this case, the activity name is MainActivity, so the associated layout is activity_main.
Step 4: Explore the manifests folder and AndroidManifest.xml
The manifests folder contains files that provide essential information about your app to the Android system.
- Expand the manifests folder and double-click AndroidManifest.xml to open it. The
AndroidManifest.xmlfile includes details that the Android system needs in order to run your app, including what activities are part of the app.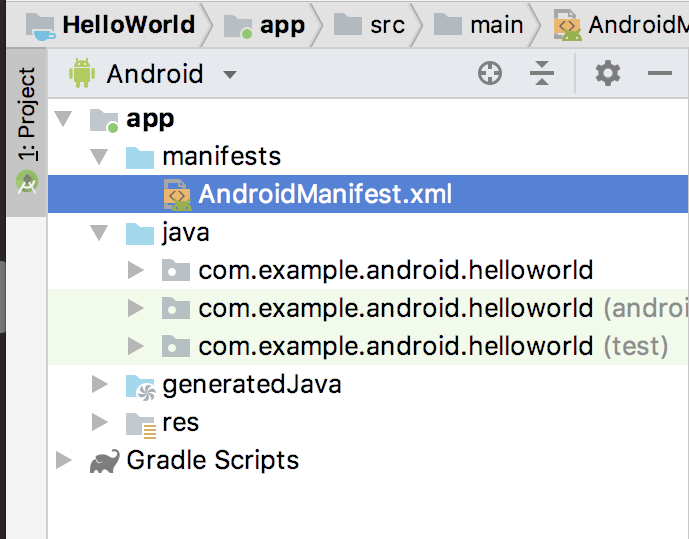
- Note that
MainActivityis referenced in the<activity>element. AnyActivityin your app must be declared in the manifest. Here's an example forMainActivity:
<activity android:name=".MainActivity">
   <intent-filter>
       <action android:name="android.intent.action.MAIN"/>

       <category android:name="android.intent.category.LAUNCHER"/>
   </intent-filter>
</activity>- Note the
<intent-filter>element inside<activity>. The<action>and<category>elements in this intent filter tell Android where to start the app when the user clicks the launcher icon. You learn more about intent filters in a later codelab.
The AndroidManifest.xml file is also the place where you would define any permissions that your app needed. Permissions include the ability for your app to read phone contacts, send data over the internet, or access hardware such as the device's camera.
Gradle is a build automation system that uses a domain-specific language to describe the app's project structure, configuration, and dependencies. When you compile and run your app, you see information about the Gradle build running. You also see information about the Android Package Kit (APK) being installed. (APK is the package file format that the Android operating system uses to distribute and install mobile apps.)
Explore the Gradle system:
- Expand the Gradle Scripts folder. In the Project > Android pane, this folder contains all the files that the build system needs.

- Look for the build.gradle(Project: HelloWorld) file.
This file contains the configuration options that are common to all the modules that make up your project. Every Android Studio project contains a single, top-level Gradle build file. This file defines the Gradle repositories and dependencies that are common to all modules in the project. - Look for the build.gradle(Module:app) file.
In addition to the project-levelbuild.gradlefile, each module has abuild.gradlefile of its own. The module-levelbuild.gradlefile allows you to configure build settings for each module. (The HelloWorld app has only one module, the module for the app itself.) Thisbuild.gradlefile is the one you most often edit when changing app-level build configurations. For example, you edit thisbuild.gradlefile when you change the SDK level that your app supports, or when you declare new dependencies in thedependenciessection. You learn more about both these things in a later codelab.
In this task, you use the Android Virtual Device (AVD) manager to create a virtual device (an emulator). The virtual device simulates the configuration for a particular type of Android device. Then you use that virtual device to run the app.
The Android Emulator is an independent application, and it has its own system requirements. Virtual devices can use up a lot of disk space. If you run into any issues, see Run apps on the Android Emulator.
Step 1: Create an Android virtual device (AVD)
To run an emulator on your computer, you have to create a configuration that describes the virtual device.
- In Android Studio, select Tools > AVD Manager, or click the AVD Manager icon
 in the toolbar. The Your Virtual Devices dialog appears. If you've already created virtual devices, the dialog shows them (as shown in the figure below), Otherwise, you see a blank list.
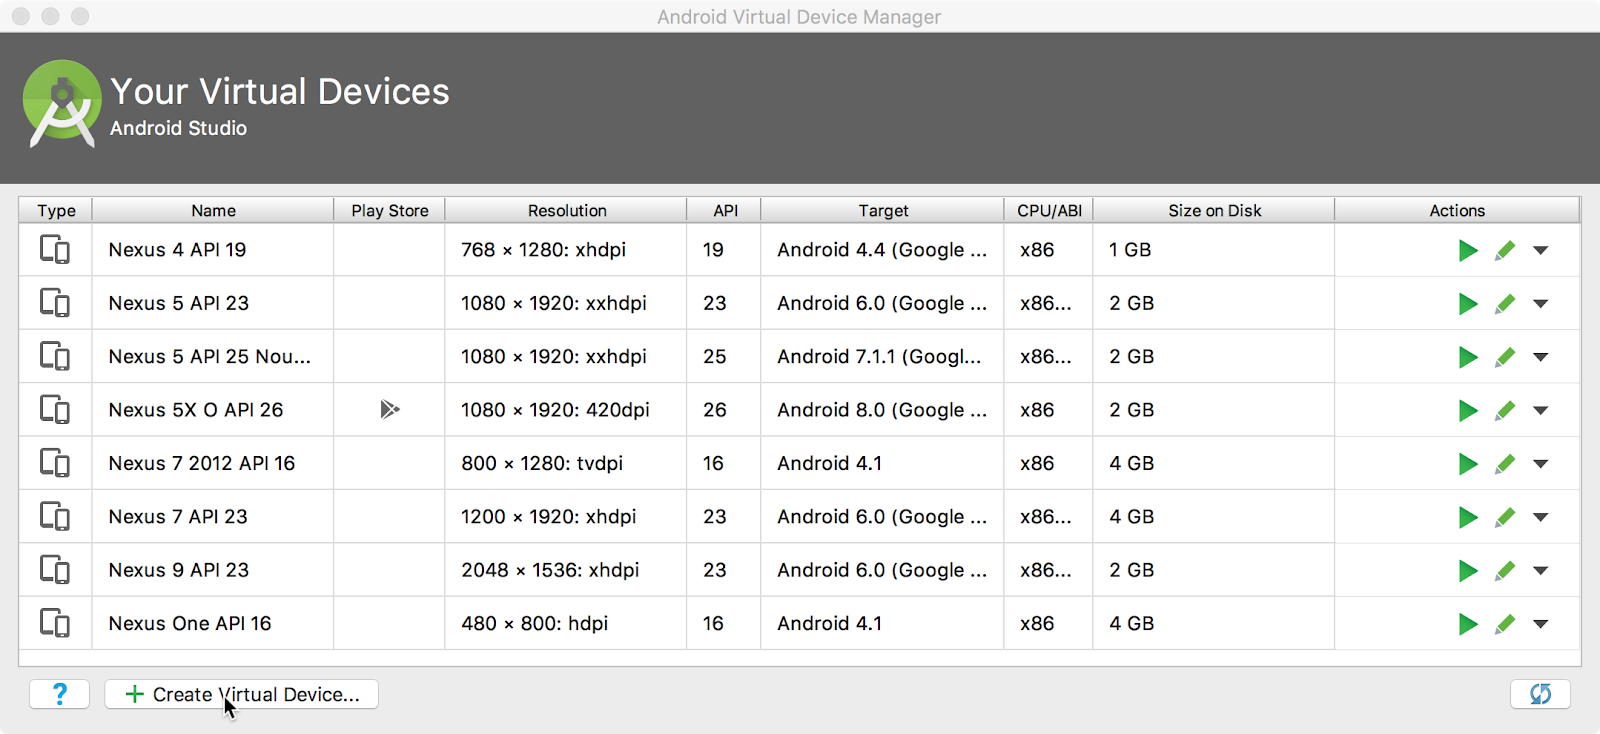
- Click +Create Virtual Device at the bottom left of the dialog. The Select Hardware dialog appears, showing a list of pre-configured hardware devices. For each device, the table provides a column for its diagonal display size (Size), screen resolution in pixels (Resolution), and pixel density (Density).
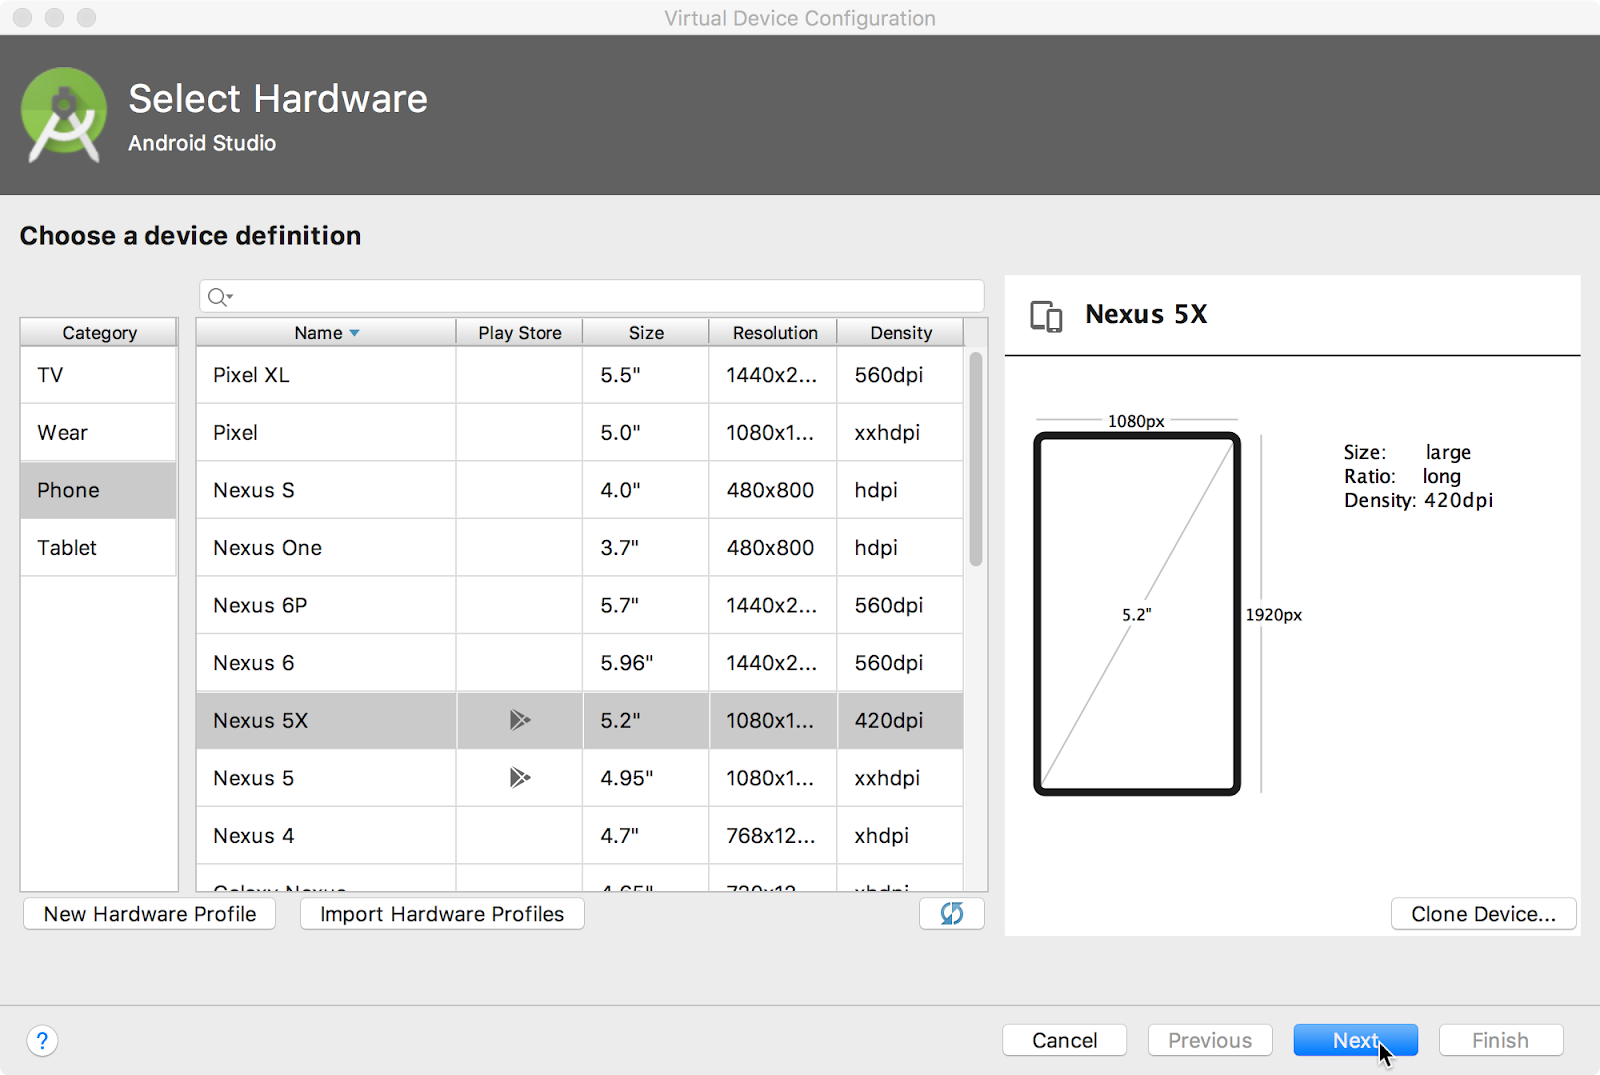
- Select a device such as Nexus 5x or Pixel XL, and click Next. The System Image dialog appears.
- Click the Recommended tab, and choose which version of the Android system to run on the virtual device (such as Pie).
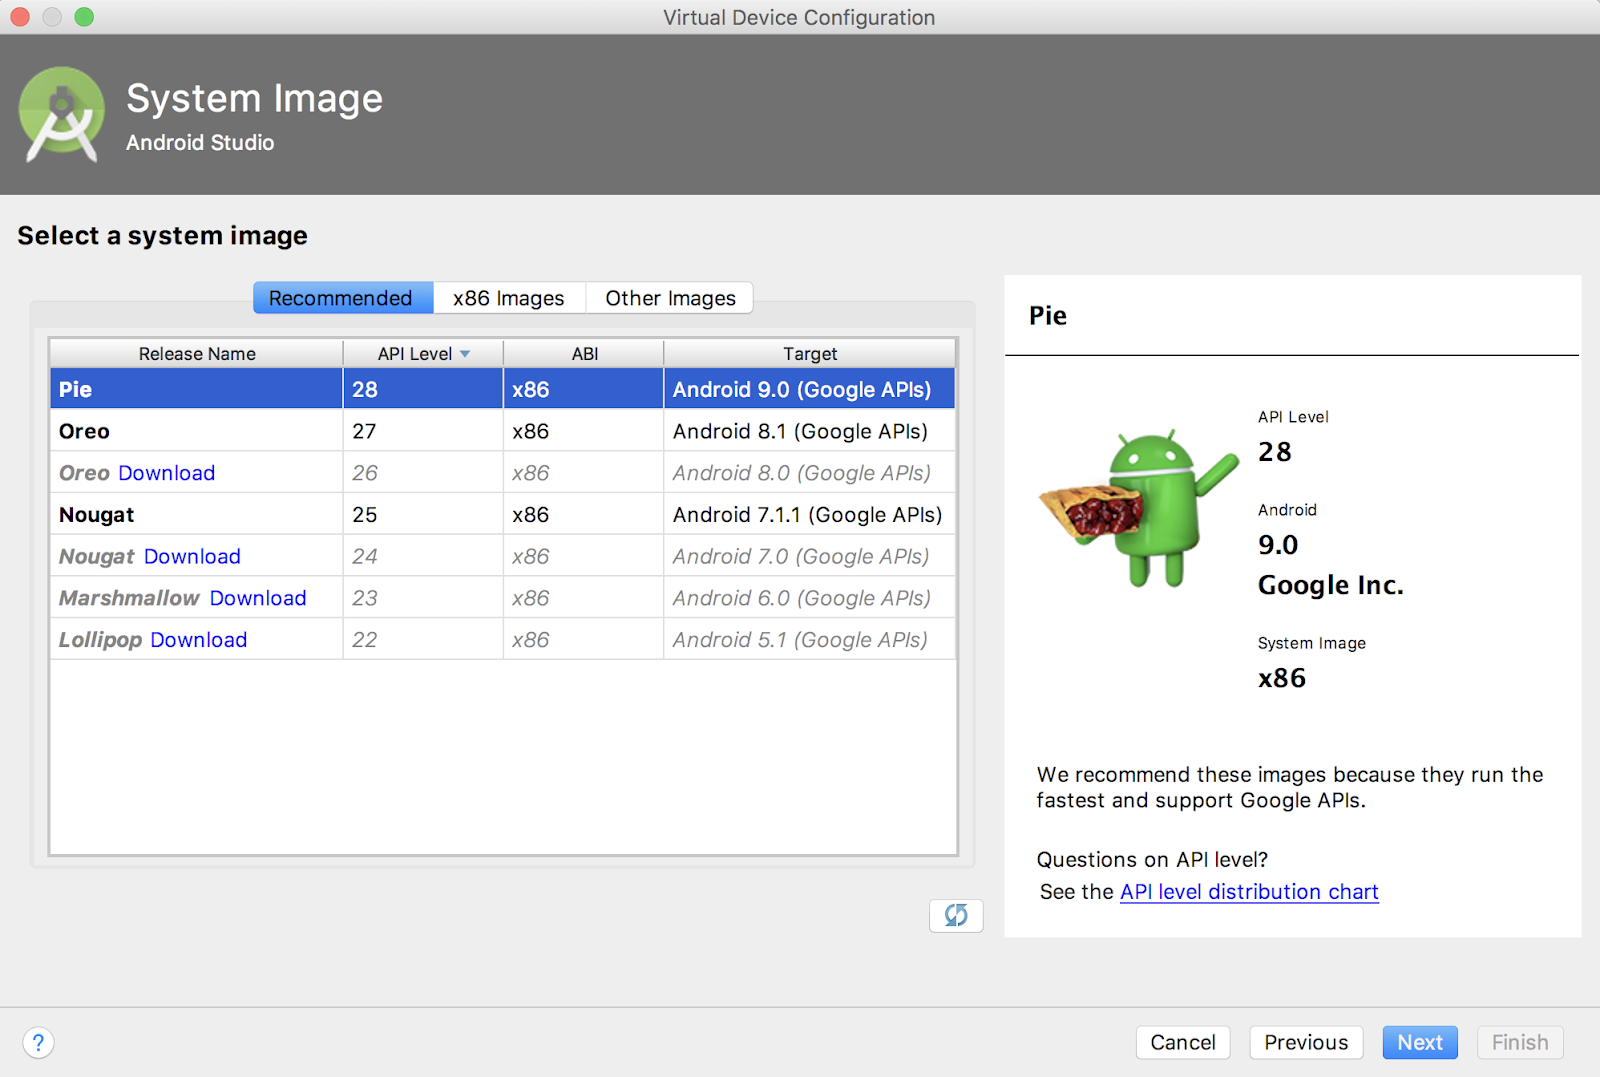
- After you choose a system image, click Next. The Android Virtual Device (AVD) dialog opens. Check your configuration and click Finish.
Step 2: Run the app on the virtual device
In this task, you finally run your new app.
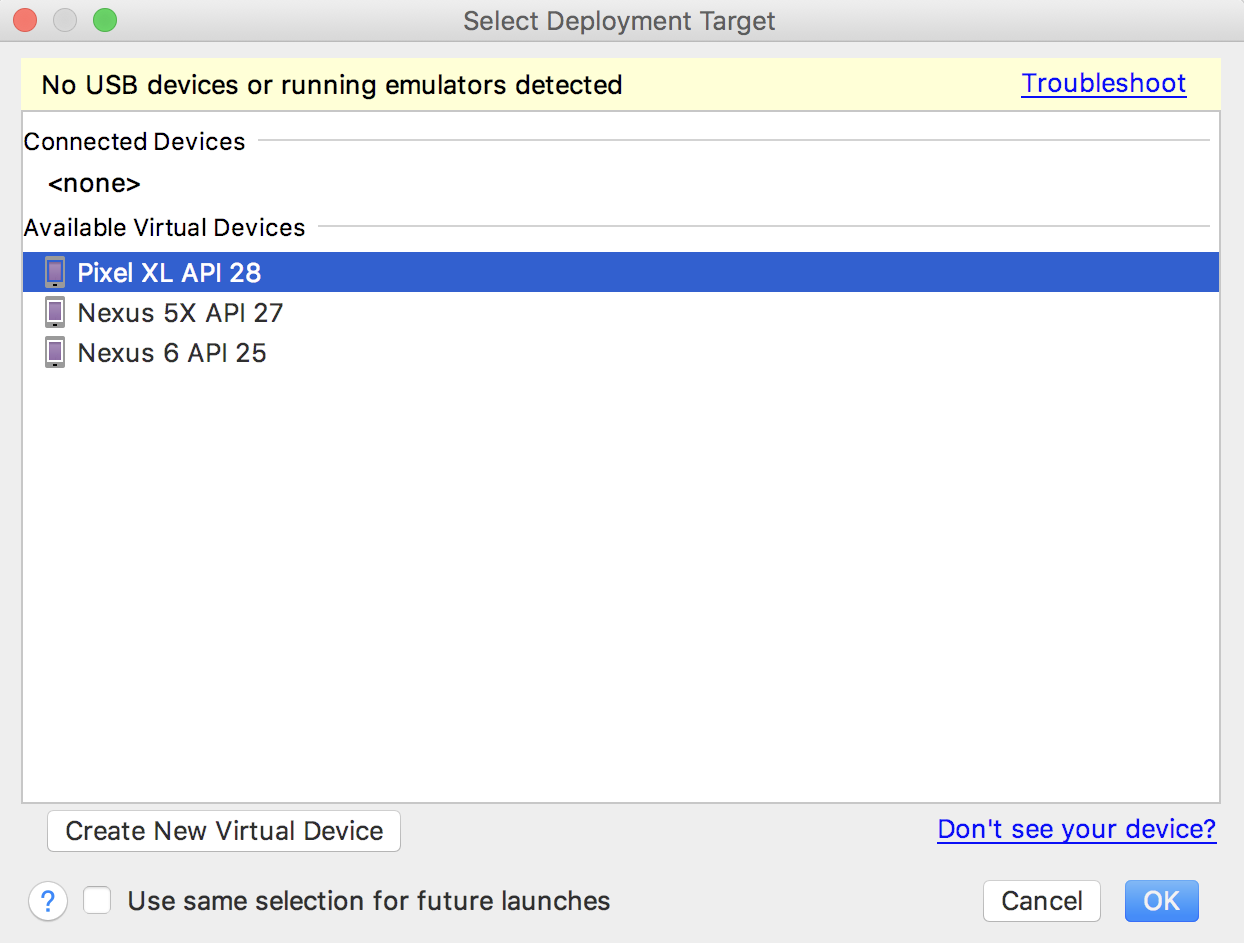
- In Android Studio, select Run > Run app or click the Run icon Run app or click the Run icon [ICON HERE] in the toolbar. [IMAGEINFO]: ic_run.png, Android Studio Run icon" style="width: 24.00px" src="img/6c65750f2ce7f651.png"> in the toolbar. The Select Deployment Target dialog appears and warns you that no devices are available. You see this warning if you do not have a physical device connected to your development computer, or if you have not yet launched a virtual device.
- In the Select Deployment Target dialog, under Available Virtual Devices, select the virtual device you created. Click OK.
The emulator starts and boots just like a physical device. Depending on the speed of your computer, this process may take a while. Your app builds, and when the emulator is ready, Android Studio uploads the app APK to the emulator and runs it.
You should see the HelloWorld app as shown in the following figure.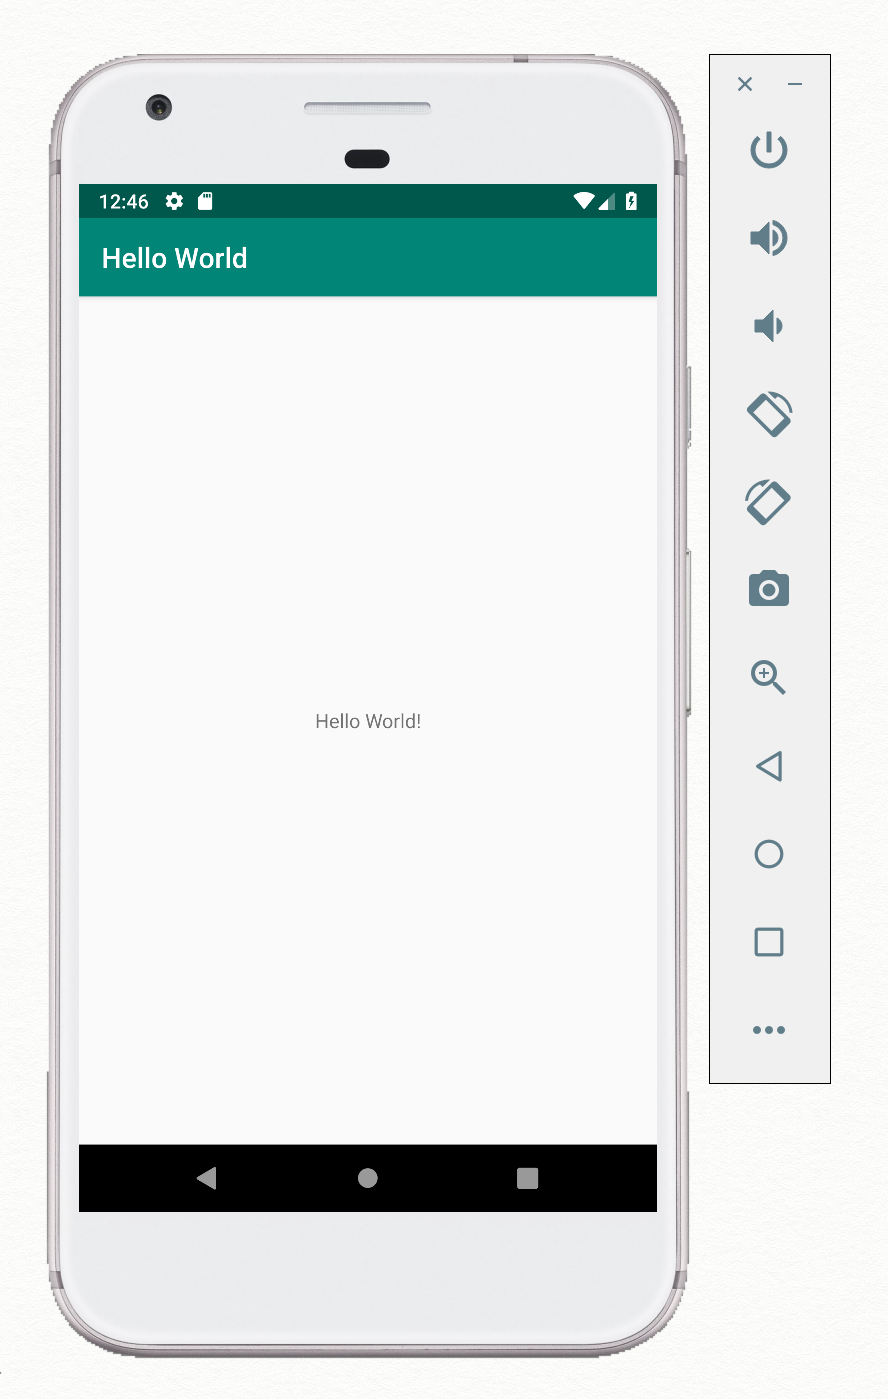
In this task, you run your app on a physical mobile device such as a phone or tablet, if you have one. Always test your apps on both virtual and physical devices.
What you need:
- An Android device such as a phone or tablet.
- A USB data cable to connect your Android device to your computer via the USB port.
- If you are using a Linux or Windows system, you may need to perform extra steps. See the Run apps on a hardware device documentation. You may also need to install the appropriate USB driver for your device. For Windows-based USB drivers, see Install OEM USB drivers.
Step 1: Turn on USB debugging
To let Android Studio communicate with your Android device, you must enable USB debugging in the Developer options settings of the device.
On Android 4.2 (Jellybean) and higher, the Developer options settings are hidden by default. To show developer options and enable USB debugging:
- On your device, open Settings, search for About phone, tap on About phone, and tap Build number seven times.
- Return to the previous page (Settings / System). Developer options appears in the list. Tap Developer options.
- Select USB debugging.
Step 2: Run your app on the Android device
Now you can connect your device and run the app from Android Studio.
- Connect the Android device to your development machine with a USB cable. A dialog should appear on the device, asking to allow USB debugging.
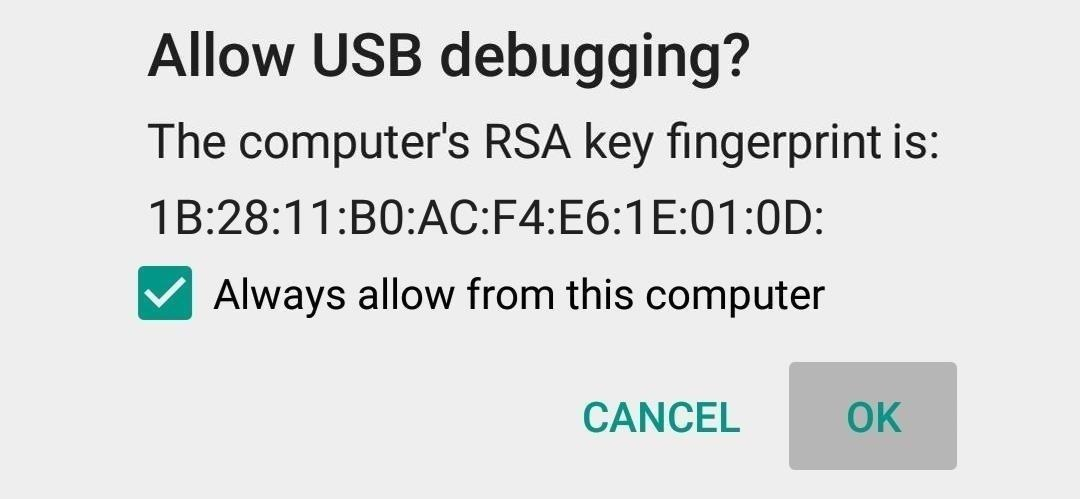
- Select the Always allow option to remember this computer. Tap OK.
- On your computer, in the Android Studio toolbar, click the Run button
 . The Select Deployment Target dialog opens with the list of available emulators and connected devices. You should see your physical device along with any emulators.
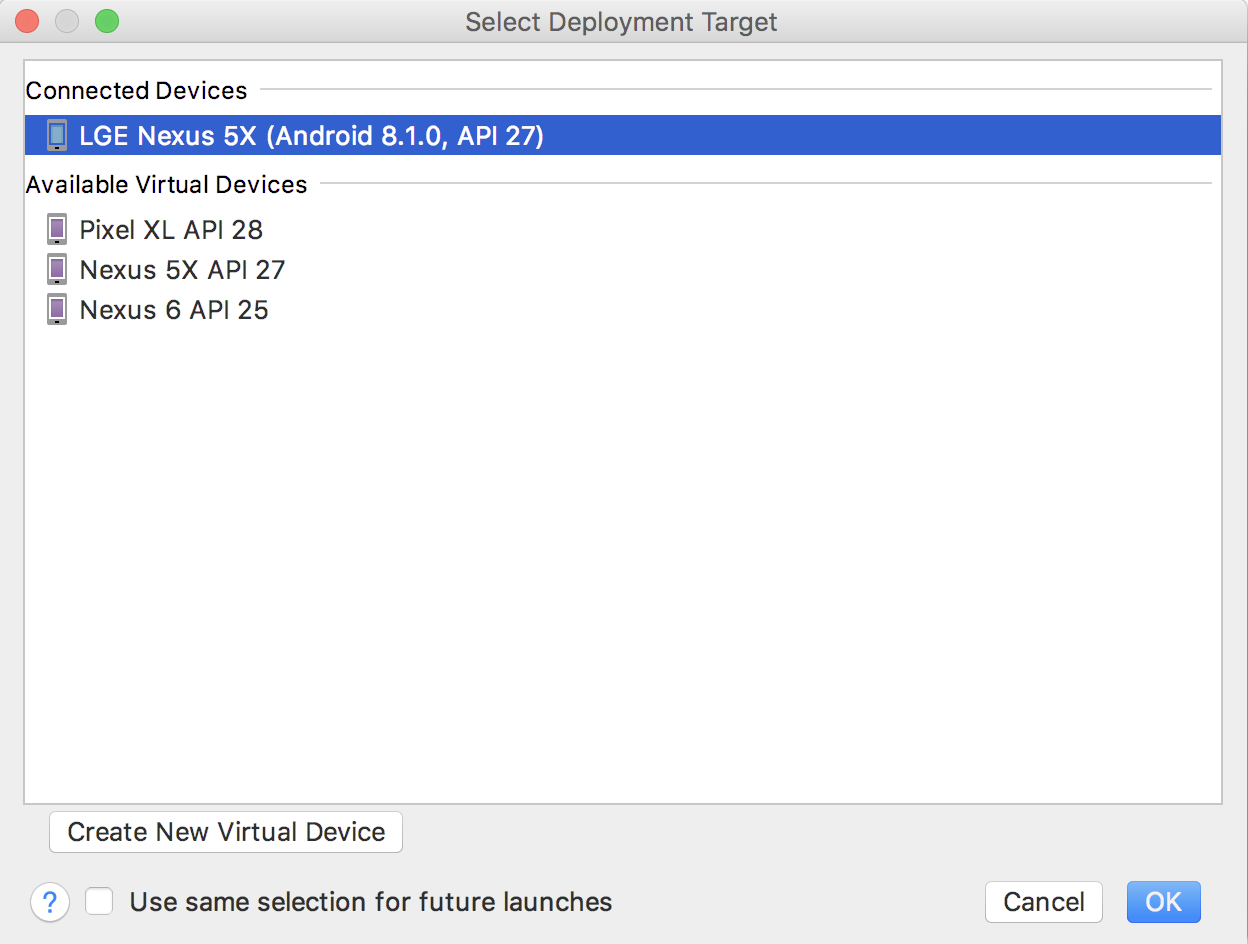
- Select your device, and click OK. Android Studio installs the app on your device and runs it.
Troubleshooting
If Android Studio does not recognize your device, try the following:
- Unplug the USB cable and plug it back in.
- Restart Android Studio.
If your computer still does not find the device or declares it "unauthorized," follow these steps:
- Disconnect the USB cable.
- On the device, open the Developer options in the Settings app.
- Tap Revoke USB debugging authorizations.
- Reconnect the device to your computer.
- When prompted, grant authorizations.
You may need to install the appropriate USB driver for your device. See the Run apps on a hardware device.
Challenge: Now that you are set up and familiar with the basic development workflow, do the following:
- Create a new project in Android Studio.
- Change the "Hello World" greeting to "Happy Birthday to " and the name of someone with a recent birthday.
- To install Android Studio, go to Android Studio and follow the instructions to download and install it.
- To see an app's Android hierarchy in the Project pane, click the Project tab in the vertical tab column. Then select Android in the drop-down menu at the top.
- When you need to add new dependencies to your project or change dependency versions, edit the
build.gradle(Module:app)file. - All code and resources for an app are located within the
appandresfolders. Thejavafolder includes activities, tests, and other components in Kotlin or Java source code (or both). Theresfolder holds resources, such as layouts, strings, and images. - To add features, components, and permissions to your Android app, edit the
AndroidManifest.xmlfile. All app components, such as additional activities, must be declared in this XML file. - To create an Android virtual device (an emulator) to run your app, use the AVD Manager.
- To run your app on a physical Android device using Android Studio, enable USB debugging on the device. To do this, open Settings > About phone and tap Build number seven times. Then open Settings > Developer options and select USB debugging.
Udacity course:
Android Studio documentation:
- Android Studio download page
- Android Studio release notes
- Meet Android Studio
- Create and manage virtual devices
- App Manifest Overview
- Configure your build
- Create and manage virtual devices
Other:
This section lists possible homework assignments for students who are working through this codelab as part of a course led by an instructor. It's up to the instructor to do the following:
- Assign homework if required.
- Communicate to students how to submit homework assignments.
- Grade the homework assignments.
Instructors can use these suggestions as little or as much as they want, and should feel free to assign any other homework they feel is appropriate.
If you're working through this codelab on your own, feel free to use these homework assignments to test your knowledge.
Build and run an app
- Create a new Android project from the Empty Template.
- Open the
res/strings.xmlfile. - Change the value of the
app_namestring to "My Dice Roller". This name appears in the title bar. - Create an emulator for a device, targeting any version of Android you like, and run the app. Note how the title of the app changed.
Answer these questions
Question 1
What is the name of the layout file for the main activity?
MainActivity.javaAndroidManifest.xmlactivity_main.xmlbuild.gradle
Question 2
What is the name of the string resource that specifies the app's name?
app_namexmlns:appandroid:nameapplicationId
Question 3
Which tool do you use to create a new emulator?
- Android Device Monitor
- AVD Manager
- SDK Manager
- Theme Editor
Submit your app for grading
Check to make sure the app has the following:
- An
Activitythat displays "Hello World" on the screen. - A title bar that says "My Dice Roller."
Start the next lesson:
For links to other codelabs in this course, see the Android Kotlin Fundamentals codelabs landing page.