
This codelab is part of the Android Kotlin Fundamentals course. You'll get the most value out of this course if you work through the codelabs in sequence. All the course codelabs are listed on the Android Kotlin Fundamentals codelabs landing page.
Introduction
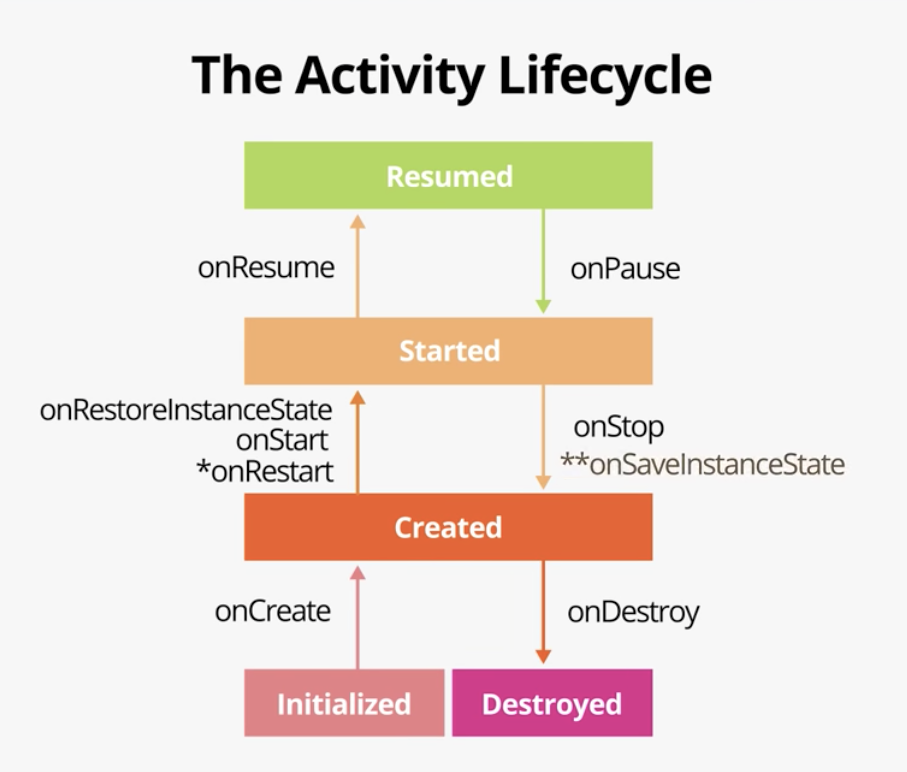
In the last codelab, you learned about the Activity and Fragment lifecycles, and you explored the methods that are called when the lifecycle state changes in activities and fragments. In this codelab, you explore the activity lifecycle in greater detail. You also learn about Android Jetpack's lifecycle library, which can help you manage lifecycle events with code that's better organized and easier to maintain.
What you should already know
- What an activity is, and how to create one in your app.
- The basics of the
ActivityandFragmentlifecycles, and the callbacks that are invoked when an activity moves between states. - How to override the
onCreate()andonStop()lifecycle callback methods to perform operations at different times in the activity or fragment lifecycle.
What you'll learn
- How to set up, start, and stop parts of your app in the lifecycle callbacks.
- How to use the Android lifecycle library to create a lifecycle observer, and make the activity and fragment lifecycle easier to manage.
- How Android process shutdowns affect the data in your app, and how to save and restore that data automatically when Android closes your app.
- How device rotation and other configuration changes create changes to lifecycle states and affect the state of your app.
What you'll do
- Modify the DessertClicker app to include a timer function, and start and stop that timer at various times in the activity lifecycle.
- Modify the app to use the Android lifecycle library, and convert the
DessertTimerclass into a lifecycle observer. - Set up and use the Android Debug Bridge (
adb) to simulate your app's process shutdown and the lifecycle callbacks that occur then. - Implement the
onSaveInstanceState()method to retain app data that may be lost if the app is unexpectedly closed. Add code to restore that data when the app starts again.
In this codelab, you expand on the DessertClicker app from the previous codelab. You add a background timer, then convert the app to use the Android lifecycle library.
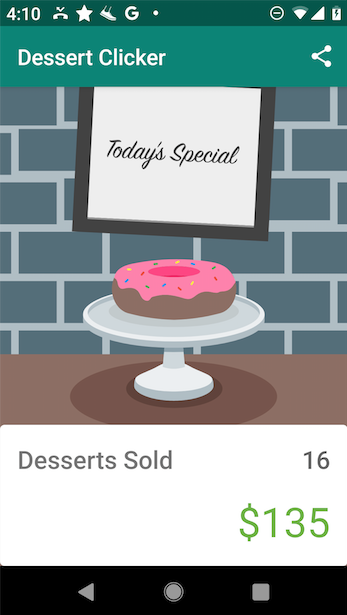
In the previous codelab, you learned how to observe the activity and fragment lifecycles by overriding various lifecycle callbacks, and logging when the system invokes those callbacks. In this task, you explore a more complex example of managing lifecycle tasks in the DessertClicker app. You use a timer that prints a log statement every second, with the count of the number of seconds it has been running.
Step 1: Set up DessertTimer
- Open the DessertClicker app from the last codelab. (You can download DessertClickerLogs here if you don't have the app.)
- In the Project view, expand java > com.example.android.dessertclicker and open
DessertTimer.kt. Notice that right now all the code is commented out, so it doesn't run as part of the app. - Select all the code in the editor window. Select Code > Comment with Line Comment, or press
Control+/(Command+/on a Mac). This command uncomments all the code in the file. (Android Studio might show unresolved reference errors until you rebuild the app.) - Notice that the
DessertTimerclass includesstartTimer()andstopTimer(), which start and stop the timer. WhenstartTimer()is running, the timer prints a log message every second, with the total count of the seconds the time has been running. ThestopTimer()method, in turn, stops the timer and the log statements.
- Open
MainActivity.kt. At the top of the class, just below thedessertsSoldvariable, add a variable for the timer:
private lateinit var dessertTimer : DessertTimer;- Scroll down to
onCreate()and create a newDessertTimerobject, just after the call tosetOnClickListener():
dessertTimer = DessertTimer()
Now that you have a dessert timer object, consider where you should start and stop the timer to get it to run only when the activity is on-screen. You look at a few options in the next steps.
Step 2: Start and stop the timer
The onStart() method is called just before the activity becomes visible. The onStop() method is called after the activity stops being visible. These callbacks seem like good candidates for when to start and stop the timer.
- In the
MainActivityclass, start the timer in theonStart()callback:
override fun onStart() {
   super.onStart()
   dessertTimer.startTimer()

   Timber.i("onStart called")
}- Stop the timer in
onStop():
override fun onStop() {
   super.onStop()
   dessertTimer.stopTimer()

   Timber.i("onStop Called")
}- Compile and run the app. In Android Studio, click the Logcat pane. In the Logcat search box, enter
dessertclicker, which will filter by both theMainActivityandDessertTimerclasses. Notice that once the app starts, the timer also starts running immediately.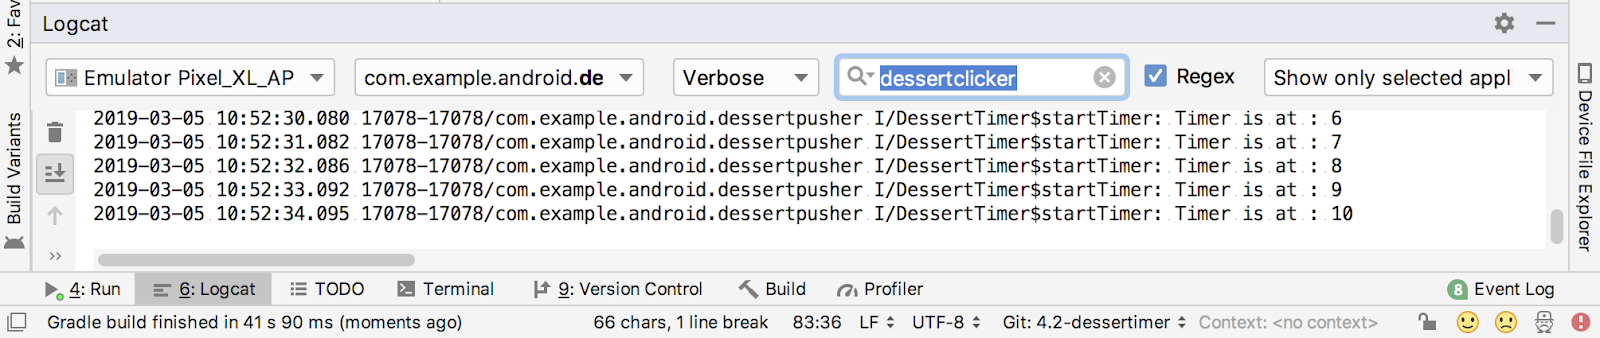
- Click the Back button and notice that the timer stops again. The timer stops because both the activity and the timer it controls have been destroyed.
- Use the recents screen to return to the app. Notice in Logcat that the timer restarts from 0.
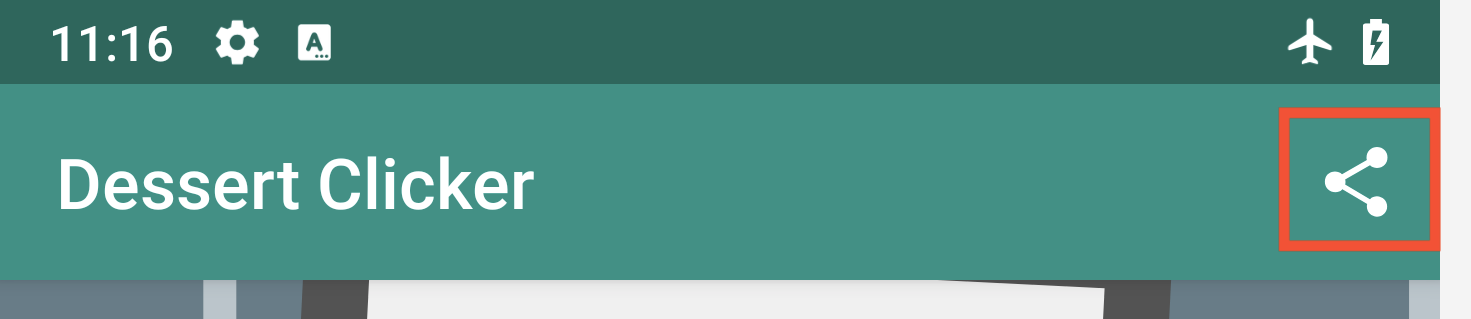
- Click the Share button. Notice in Logcat that the timer is still running.
- Click the Home button. Notice in Logcat that the timer stops running.
- Use the recents screen to return to the app. Notice in Logcat that the timer starts up again from where it left off.
- In
MainActivity, in theonStop()method, comment out the call tostopTimer(). Commenting outstopTimer()demonstrates the case where you start an operation inonStart(), but forget to stop it again inonStop(). - Compile and run the app, and click the Home button after the timer starts. Even though the app is in the background, the timer is running, and continually using system resources. Having the timer continue to run is a memory leak for your app, and probably not the behavior you want.
The general pattern is that when you set up or start something in a callback, you stop or remove that thing in the corresponding callback. This way, you avoid having anything running when it's no longer needed.
- Uncomment the line in
onStop()where you stop the timer. - Cut and paste the
startTimer()call fromonStart()toonCreate(). This change demonstrates the case where you both initialize and start a resource inonCreate(), rather than usingonCreate()to initialize it andonStart()to start it. - Compile and run the app. Notice that the timer starts running, as you would expect.
- Click Home to stop the app. The timer stops running, as you would expect.
- Use the recents screen to return to the app. Notice that the timer does not start again in this case, because
onCreate()is only called when the app starts—it's not called when an app returns to the foreground.
Key points to remember:
- When you set up a resource in a lifecycle callback, also tear the resource down.
- Do setup and teardown in corresponding methods.
- If you set up something in
onStart(), stop or tear it down again inonStop().
In the DessertClicker app, it's fairly easy to see that if you started the timer in onStart(), then you need to stop the timer in onStop(). There's only one timer, so stopping the timer is not difficult to remember.
In a more complex Android app, you might set up many things in onStart() or onCreate(), then tear them all down in onStop() or onDestroy(). For example, you might have animations, music, sensors, or timers that you need to both set up and tear down, and start and stop. If you forget one, that leads to bugs and headaches.
The lifecycle library, which is part of Android Jetpack, simplifies this task. The library is especially useful in cases where you have to track many moving parts, some of which are at different lifecycle states. The library flips around the way lifecycles work: Usually the activity or fragment tells a component (such as DessertTimer) what to do when a lifecycle callback occurs. But when you use the lifecycle library, the component itself watches for lifecycle changes, then does what's needed when those changes happen.
There are three main parts of the lifecycle library:
- Lifecycle owners, which are the components that have (and thus "own") a lifecycle.
ActivityandFragmentare lifecycle owners. Lifecycle owners implement theLifecycleOwnerinterface. - The
Lifecycleclass, which holds the actual state of a lifecycle owner and triggers events when lifecycle changes happen. - Lifecycle observers, which observe the lifecycle state and perform tasks when the lifecycle changes. Lifecycle observers implement the
LifecycleObserverinterface.
In this task, you convert the DessertClicker app to use the Android lifecycle library, and learn how the library makes working with the Android activity and fragment lifecycles easier to manage.
Step 1: Turn DessertTimer into a LifecycleObserver
A key part of the lifecycle library is the concept of lifecycle observation. Observation enables classes (such as DessertTimer) to know about the activity or fragment lifecycle, and start and stop themselves in response to changes to those lifecycle states. With a lifecycle observer, you can remove the responsibility of starting and stopping objects from the activity and fragment methods.
- Open the
DesertTimer.ktclass. - Change the class signature of the
DessertTimerclass to look like this:
class DessertTimer(lifecycle: Lifecycle) : LifecycleObserver {This new class definition does two things:
- The constructor takes a
Lifecycleobject, which is the lifecycle that the timer is observing. - The class definition implements the
LifecycleObserverinterface.
- Below the
runnablevariable, add aninitblock to the class definition. In theinitblock, use theaddObserver()method to connect the lifecycle object passed in from the owner (the activity) to this class (the observer).
 init {
   lifecycle.addObserver(this)
}- Annotate
startTimer()with the@OnLifecycleEvent annotation, and use theON_STARTlifecycle event. All the lifecycle events that your lifecycle observer can observe are in theLifecycle.Eventclass.
@OnLifecycleEvent(Lifecycle.Event.ON_START)
fun startTimer() {- Do the same thing to
stopTimer(), using theON_STOPevent:
@OnLifecycleEvent(Lifecycle.Event.ON_STOP)
fun stopTimer()
Step 2: Modify MainActivity
Your MainActivity class is already a lifecycle owner through inheritance, because the FragmentActivity superclass implements LifecycleOwner. Therefore, there's nothing you need to do to make your activity lifecycle-aware. All you have to do is pass the activity's lifecycle object into the DessertTimer constructor.
- Open
MainActivity. In theonCreate()method, modify the initialization ofDessertTimerto includethis.lifecycle:
dessertTimer = DessertTimer(this.lifecycle)The lifecycle property of the activity holds the Lifecycle object this activity owns.
- Remove the call to
startTimer()inonCreate(), and the call tostopTimer()inonStop(). You don't need to tellDessertTimerwhat to do in the activity anymore, becauseDessertTimeris now observing the lifecycle itself and is automatically notified when the lifecycle state changes. All you do in these callbacks now is log a message. - Compile and run the app, and open the Logcat. Notice that the timer has started running, as expected.
- Click the home button to put the app into the background. Notice that the timer has stopped running, as expected.
What happens to your app and its data if Android shuts down that app while it is in the background? This tricky edge case is important to understand.
When your app goes into the background, it's not destroyed, it's only stopped and waiting for the user to return to it. But one of the Android OS's main concerns is keeping the activity that's in the foreground running smoothly. For example, if your user is using a GPS app to help them catch a bus, it's important to render that GPS app quickly and keep showing the directions. It's less important to keep the DessertClicker app, which the user might not have looked at for a few days, running smoothly in the background.
Android regulates background apps so that the foreground app can run without problems. For example, Android limits the amount of processing that apps running in the background can do.
Sometimes Android even shuts down an entire app process, which includes every activity associated with the app. Android does this kind of shutdown when the system is stressed and in danger of visually lagging, so no additional callbacks or code is run at this point. Your app's process is simply shut down, silently, in the background. But to the user, it doesn't look like the app has been closed. When the user navigates back to an app that the Android OS has shut down, Android restarts that app.
In this task, you simulate an Android process shutdown and examine what happens to your app when it starts up again.
Step 1: Use adb to simulate a process shutdown
The Android Debug Bridge (adb) is a command-line tool that lets you send instructions to emulators and devices attached to your computer. In this step, you use adb to close your app's process and see what happens when Android shuts down your app.
- Compile and run your app. Click the cupcake a few times.
- Press the Home button to put your app into the background. Your app is now stopped, and the app is subject to being closed if Android needs the resources that the app is using.
- In Android Studio, click the Terminal tab to open the command-line terminal.
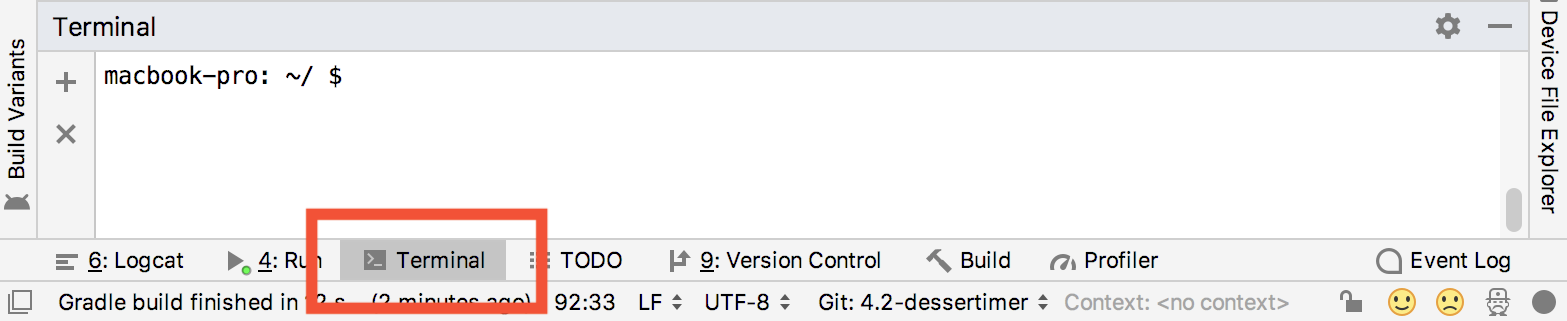
- Type
adband press Return.
If you see a lot of output that begins withAndroid Debug Bridge version X.XX.Xand ends withtags to be used by logcat (see logcat —help), everything is fine. If instead you seeadb: command not found, make sure theadbcommand is available in your execution path. For instructions, see "Add adb to your execution path" in the Utilities chapter. - Copy and paste this comment into the command line and press Return:
adb shell am kill com.example.android.dessertclickerThis command tells any connected devices or emulators to stop the process with the dessertclicker package name, but only if the app is in the background. Because your app was in the background, nothing shows on the device or emulator screen to indicate that your process has been stopped. In Android Studio, click the Run tab to see a message that says "Application terminated." Click the Logcat tab to see that the onDestroy() callback was never run—your activity simply ended.
- Use the recents screen to return to the app. Your app appears in recents whether it has been put into the background or has been stopped altogether. When you use the recents screen to return to the app, the activity is started up again. The activity goes through the entire set of startup lifecycle callbacks, including
onCreate(). - Notice that when the app restarted, it resets your "score" (both the number of desserts sold and the total dollars) to the default values (0). If Android shut down your app, why didn't it save your state?
When the OS restarts your app for you, Android tries its best to reset your app to the state it had before. Android takes the state of some of your views and saves it in a bundle whenever you navigate away from the activity. Some examples of data that's automatically saved are the text in an EditText (as long as they have an ID set in the layout), and the back stack of your activity.
However, sometimes the Android OS doesn't know about all your data. For example, if you have a custom variable likerevenuein the DessertClicker app, the Android OS doesn't know about this data or its importance to your activity. You need to add this data to the bundle yourself.
Step 2: Use onSaveInstanceState() to save bundle data
The onSaveInstanceState() method is the callback you use to save any data that you might need if the Android OS destroys your app. In the lifecycle callback diagram, onSaveInstanceState() is called after the activity has been stopped. It's called every time your app goes into the background.
Think of the onSaveInstanceState() call as a safety measure; it gives you a chance to save a small amount of information to a bundle as your activity exits the foreground. The system saves this data now because if it waited until it was shutting down your app, the OS might be under resource pressure. Saving the data each time ensures that update data in the bundle is available to restore, if it is needed.
- In
MainActivity, override theonSaveInstanceState()callback, and add aTimberlog statement.
override fun onSaveInstanceState(outState: Bundle) {
   super.onSaveInstanceState(outState)

   Timber.i("onSaveInstanceState Called")
}- Compile and run the app, and click the Home button to put it into the background. Notice that the
onSaveInstanceState()callback occurs just afteronPause()andonStop():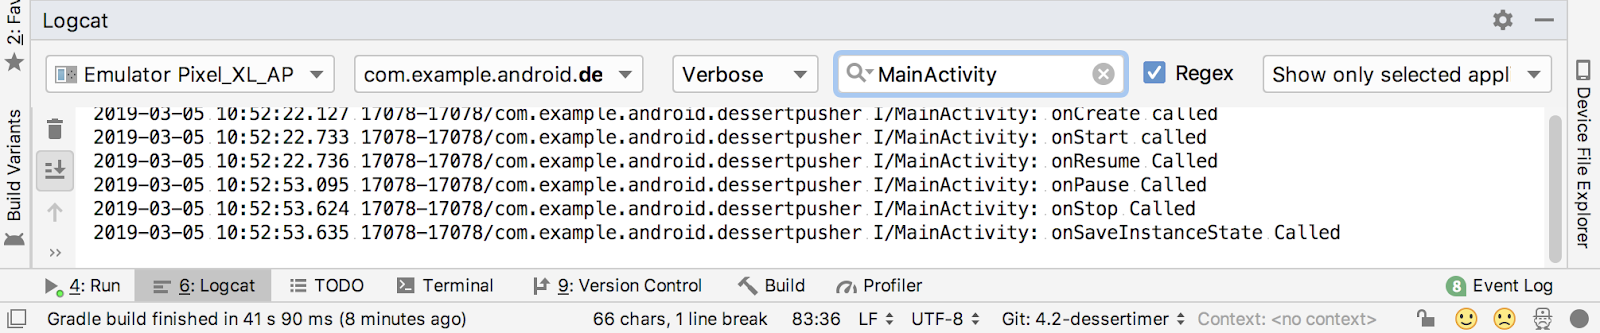
- At the top of the file, just before the class definition, add these constants:
const val KEY_REVENUE = "revenue_key"
const val KEY_DESSERT_SOLD = "dessert_sold_key"
const val KEY_TIMER_SECONDS = "timer_seconds_key"
You will use these keys for both saving and retrieving data from the instance state bundle.
- Scroll down to
onSaveInstanceState(), and notice theoutStateparameter, which is of typeBundle.
A bundle is a collection of key-value pairs, where the keys are always strings. You can put primitive values, such asintandbooleanvalues, into the bundle.
Because the system keeps this bundle in RAM, it's a best practice to keep the data in the bundle small. The size of this bundle is also limited, though the size varies from device to device. Generally you should store far less than 100k, otherwise you risk crashing your app with theTransactionTooLargeExceptionerror. - In
onSaveInstanceState(), put therevenuevalue (an integer) into the bundle with theputInt()method:
outState.putInt(KEY_REVENUE, revenue)The putInt() method (and similar methods from the Bundle class like putFloat() and putString() takes two arguments: a string for the key (the KEY_REVENUE constant), and the actual value to save.
- Repeat the same process with the number of desserts sold, and the status of the timer:
outState.putInt(KEY_DESSERT_SOLD, dessertsSold)
outState.putInt(KEY_TIMER_SECONDS, dessertTimer.secondsCount)
Step 3: Use onCreate() to restore bundle data
- Scroll up to
onCreate(), and examine the method signature:
override fun onCreate(savedInstanceState: Bundle) {Notice that onCreate() gets a Bundle each time it is called. When your activity is restarted due to a process shut-down, the bundle that you saved is passed to onCreate(). If your activity was starting fresh, this bundle in onCreate() is null. So if the bundle is not null, you know you're "re-creating" the activity from a previously known point.
- Add this code to
onCreate(), after theDessertTimersetup:
if (savedInstanceState != null) {
   revenue = savedInstanceState.getInt(KEY_REVENUE, 0)
}
The test for null determines whether there is data in the bundle, or if the bundle is null, which in turn tells you if the app has been started fresh or has been re-created after a shutdown. This test is a common pattern for restoring data from the bundle.
Notice that the key you used here (KEY_REVENUE) is the same key you used for putInt(). To make sure you use the same key each time, it is a best practice to define those keys as constants. You use getInt() to get data out of the bundle, just as you used putInt() to put data into the bundle. The getInt() method takes two arguments:
- A string that acts as the key, for example
"key_revenue"for the revenue value. - A default value in case no value exists for that key in the bundle.
The integer you get from the bundle is then assigned to the revenue variable, and the UI will use that value.
- Add
getInt()methods to restore the number of desserts sold and the value of the timer:
if (savedInstanceState != null) {
   revenue = savedInstanceState.getInt(KEY_REVENUE, 0)dessertsSold = savedInstanceState.getInt(KEY_DESSERT_SOLD, 0)
   dessertTimer.secondsCount =
       savedInstanceState.getInt(KEY_TIMER_SECONDS, 0)
}- Compile and run the app. Press the cupcake at least five times until it switches to a donut. Click Home to put the app into the background.
- In the Android Studio Terminal tab, run
adbto shut down the app's process.
adb shell am kill com.example.android.dessertclicker- Use the recents screen to return to the app. Notice that this time the app returns with the correct revenue and desserts sold values from the bundle. But also notice that the dessert has returned to a cupcake. There's one more thing left to do to ensure that the app returns from a shutdown exactly the way it was left.
- In
MainActivity, examine theshowCurrentDessert()method. Notice that this method determines which dessert image should be displayed in the activity based on the current number of desserts sold and the list of desserts in theallDessertsvariable.
for (dessert in allDesserts) {
   if (dessertsSold >= dessert.startProductionAmount) {
       newDessert = dessert
   }
    else break
}
This method relies on the number of desserts sold to choose the right image. Therefore, you don't need to do anything to store a reference to the image in the bundle in onSaveInstanceState(). In that bundle, you're already storing the number of desserts sold.
- In
onCreate(), in the block that restores the state from the bundle, callshowCurrentDessert():
 if (savedInstanceState != null) {
   revenue = savedInstanceState.getInt(KEY_REVENUE, 0)
   dessertsSold = savedInstanceState.getInt(KEY_DESSERT_SOLD, 0)
   dessertTimer.secondsCount =
      savedInstanceState.getInt(KEY_TIMER_SECONDS, 0)
   showCurrentDessert()
}- Compile and run the app, and put it in the background. Use
adbto shut down the process. Use the recents screen to return to the app. Note now that both the values for desserts told, total revenue, and the dessert image are correctly restored.
There's one last special case in managing the activity and fragment lifecycle that is important to understand: how configuration changes affect the lifecycle of your activities and fragments.
A configuration change happens when the state of the device changes so radically that the easiest way for the system to resolve the change is to completely shut down and rebuild the activity. For example, if the user changes the device language, the whole layout might need to change to accommodate different text directions. If the user plugs the device into a dock or adds a physical keyboard, the app layout may need to take advantage of a different display size or layout. And if the device orientation changes—if the device is rotated from portrait to landscape or back the other way—the layout may need to change to fit the new orientation.
Step 1: Explore device rotation and the lifecycle callbacks
- Compile and run your app, and open Logcat.
- Rotate the device or emulator to landscape mode. You can rotate the emulator left or right with the rotation buttons, or with the
Controland arrow keys (Commandand arrow keys on a Mac).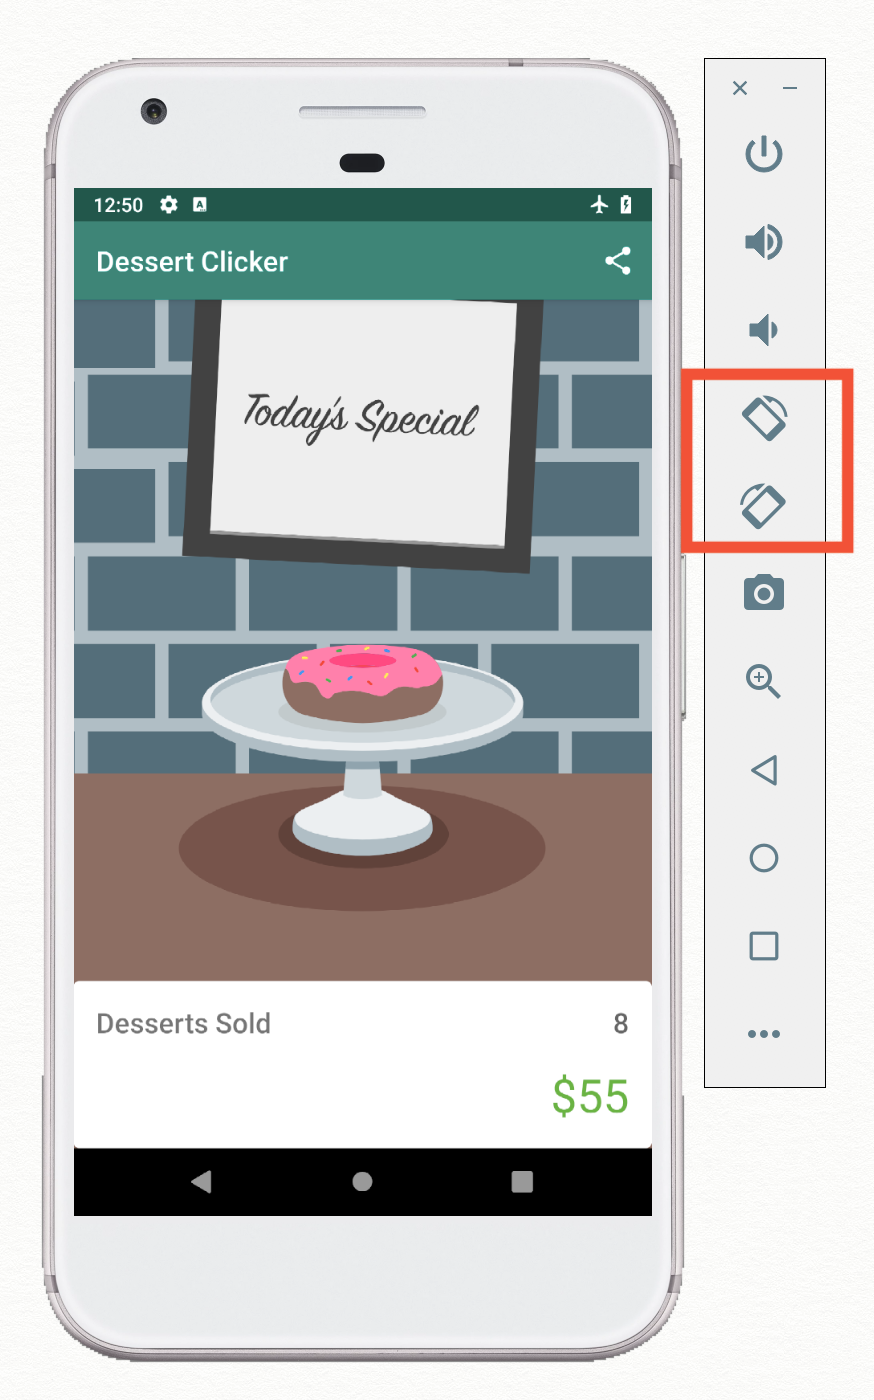
- Examine the output in Logcat. Filter the output on
MainActivity.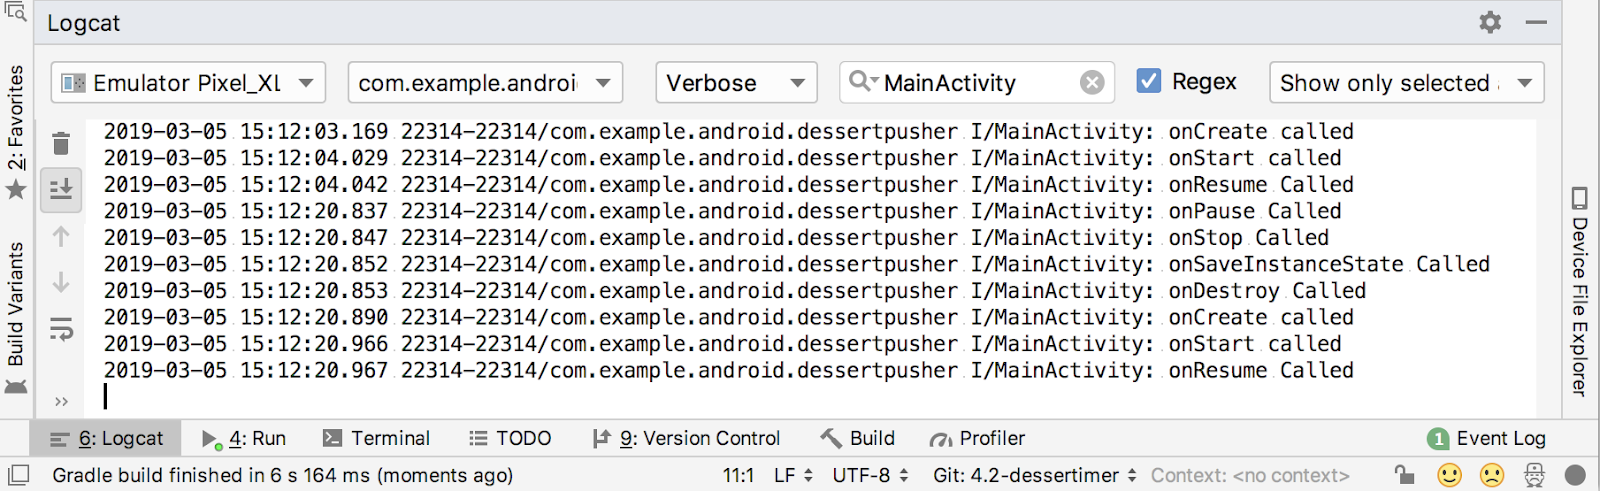
Notice that when the device or emulator rotates the screen, the system calls all the lifecycle callbacks to shut down the activity. Then, as the activity is re-created, the system calls all the lifecycle callbacks to start the activity. - In
MainActivity, comment out the entireonSaveInstanceState()method. - Compile and run your app again. Click the cupcake a few times, and rotate the device or emulator. This time, when the device is rotated and the activity is shut down and re-created, the activity starts up with default values.
When a configuration change occurs, Android uses the same instance state bundle that you learned about in the previous task to save and restore the state of the app. As with a process shutdown, useonSaveInstanceState()to put your app's data into the bundle. Then restore the data inonCreate(), to avoid losing activity state data if the device is rotated. - In
MainActivity, uncomment theonSaveInstanceState()method, run the app, click the cupcake, and rotate the app or device. Notice this time the dessert data is retained across activity rotation.
Android Studio project: DessertClickerFinal
Lifecycle tips
- If you set up or start something in a lifecycle callback, stop or remove that thing in the corresponding callback. By stopping the thing, you make sure it doesn't keep running when it's no longer needed. For example, if you set up a timer in
onStart(), you need to pause or stop the timer inonStop(). - Use
onCreate()only to initialize the parts of your app that run once, when the app first starts. UseonStart()to start the parts of your app that run both when the app starts, and each time the app returns to the foreground.
Lifecycle library
- Use the Android lifecycle library to shift lifecycle control from the activity or fragment to the actual component that needs to be lifecycle-aware.
- Lifecycle owners are components that have (and thus "own") lifecycles, including
ActivityandFragment. Lifecycle owners implement theLifecycleOwnerinterface. - Lifecycle observers pay attention to the current lifecycle state and perform tasks when the lifecycle changes. Lifecycle observers implement the
LifecycleObserverinterface. Lifecycleobjects contain the actual lifecycle states, and they trigger events when the lifecycle changes.
To create a lifecycle-aware class:
- Implement the
LifecycleObserverinterface in classes that need to be lifecycle-aware. - Initialize a lifecycle observer class with the lifecycle object from the activity or fragment.
- In the lifecycle observer class, annotate lifecycle-aware methods with the lifecycle state change they are interested in.
For example, the@OnLifecycleEvent(Lifecycle.Event.ON_START)annotation indicates that the method is watching theonStartlifecycle event.
Process shutdowns and saving activity state
- Android regulates apps running in the background so that the foreground app can run without problems. This regulation includes limiting the amount of processing that apps in the background can do, and sometimes even shutting down your entire app process.
- The user cannot tell if the system has shut down an app in the background. The app still appears in the recents screen and should restart in the same state in which the user left it.
- The Android Debug Bridge (
adb) is a command-line tool that lets you send instructions to emulators and devices attached to your computer. You can useadbto simulate a process shutdown in your app. - When Android shuts down your app process, the
onDestroy()lifecycle method is not called. The app just stops.
Preserving activity and fragment state
- When your app goes into the background, just after
onStop()is called, app data is saved to a bundle. Some app data, such as the contents of anEditText, is automatically saved for you. - The bundle is an instance of
Bundle, which is a collection of keys and values. The keys are always strings. - Use the
onSaveInstanceState()callback to save other data to the bundle that you want to retain, even if the app was automatically shut down. To put data into the bundle, use the bundle methods that start withput, such asputInt(). - You can get data back out of the bundle in the
onRestoreInstanceState()method, or more commonly inonCreate(). TheonCreate()method has asavedInstanceStateparameter that holds the bundle. - If the
savedInstanceStatevariable containsnull, the activity was started without a state bundle and there is no state data to retrieve. - To retrieve data from the bundle with a key, use the
Bundlemethods that start withget, such asgetInt().
Configuration changes
- A configuration change happens when the state of the device changes so radically that the easiest way for the system to resolve the change is to shut down and rebuild the activity.
- The most common example of a configuration change is when the user rotates the device from portrait to landscape mode, or from landscape to portrait mode. A configuration change can also occur when the device language changes or a hardware keyboard is plugged in.
- When a configuration change occurs, Android invokes all the activity lifecycle's shutdown callbacks. Then Android restarts the activity from scratch, running all the lifecycle startup callbacks.
- When Android shuts down an app because of a configuration change, it restarts the activity with the state bundle that is available to
onCreate(). - As with process shutdown, save your app's state to the bundle in
onSaveInstanceState().
Udacity course:
Android developer documentation:
- Activities (API guide)
Activity(API reference)- Understand the Activity Lifecycle
- Handling Lifecycles with Lifecycle-Aware Components
LifecycleOwnerLifecycleLifecycleObserveronSaveInstanceState()- Handle configuration changes
- Saving UI States
Other:
- Timber (GitHub)
This section lists possible homework assignments for students who are working through this codelab as part of a course led by an instructor. It's up to the instructor to do the following:
- Assign homework if required.
- Communicate to students how to submit homework assignments.
- Grade the homework assignments.
Instructors can use these suggestions as little or as much as they want, and should feel free to assign any other homework they feel is appropriate.
If you're working through this codelab on your own, feel free to use these homework assignments to test your knowledge.
Change an app
Open the DiceRoller app from Lesson 1. (You can download the app here if you don't have it.) Compile and run the app, and note that if you rotate the device, the current value of the dice is lost. Implement onSaveInstanceState() to retain that value in the bundle, and restore that value in onCreate().
Answer these questions
Question 1
Your app contains a physics simulation that requires heavy computation to display. Then the user gets a phone call. Which of the following is true?
- During the phone call, you should continue computing the positions of objects in the physics simulation.
- During the phone call, you should stop computing the positions of objects in the physics simulation.
Question 2
Which lifecycle method should you override to pause the simulation when the app is not on the screen?
onDestroy()onStop()onPause()onSaveInstanceState()
Question 3
To make a class lifecycle-aware through the Android lifecycle library, which interface should the class implement?
LifecycleLifecycleOwnerLifecycle.EventLifecycleObserver
Question 4
Under which circumstances does the onCreate() method in your activity receive a Bundle with data in it (that is, the Bundle is not null)? More than one answer might apply.
- The activity is restarted after the device is rotated.
- The activity is started from scratch.
- The activity is resumed after returning from the background.
- The device is rebooted.
Start the next lesson:
For links to other codelabs in this course, see the Android Kotlin Fundamentals codelabs landing page.