
This codelab is part of the Android Kotlin Fundamentals course. You'll get the most value out of this course if you work through the codelabs in sequence. All the course codelabs are listed on the Android Kotlin Fundamentals codelabs landing page.
Introduction
Thus far you've set everything up and Android Studio has created a lot of code for you. Before you modify all that code, it's important to know what you just created and how to navigate the source files of an Android app.
In this codelab, you learn more about the major components of an Android app and add simple interactivity to an app with a button.
What you should already know
- How to install and open Android Studio.
- How to create a new app project.
- How to run an app on an emulator or a physical device.
What you'll learn
- How to edit the app's layout file.
- How to create an app with interactive behavior.
- A lot of new terminology. Check out the Vocabulary Glossary for friendly explanations of terms and concepts.
What you'll do
- Explore the
MainActivityKotlin file and the activity's layout file. - Edit the activity's layout in XML.
- Add a
Buttonelement to the activity's layout. - Extract hardcoded strings into a file of string resources.
- Implement click-handler methods to display messages on the screen when the user taps a
Button.
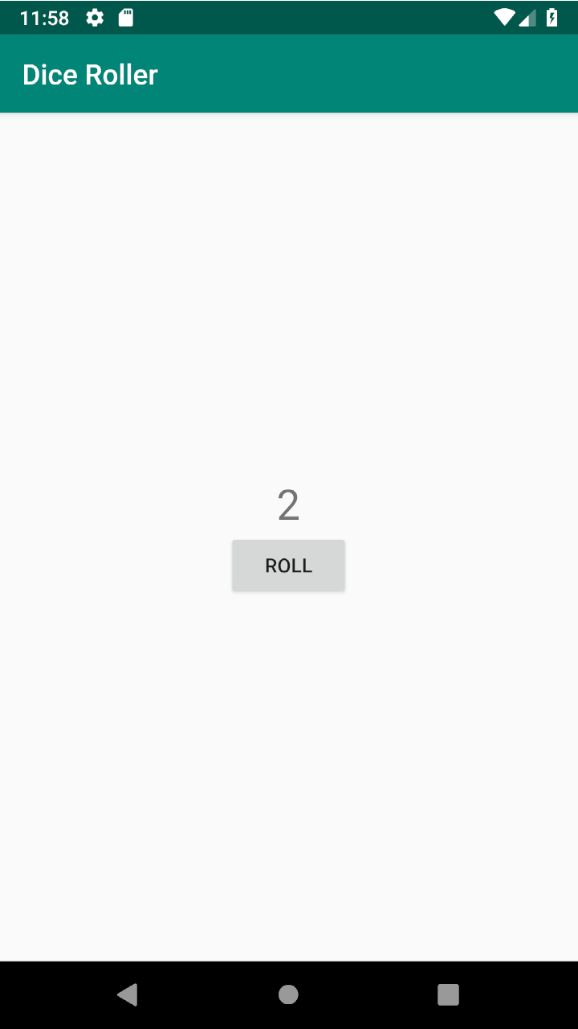
In this codelab, you create a new app project called DiceRoller and add basic interactivity with a button. Each time the button is clicked, the value of the displayed text changes. The final DiceRoller app for this codelab looks like this:
In the last codelab, you learned about the main parts of an app project, including the java and res directories. In this task, you focus on the two most important files that make up your app: The MainActivity Kotlin file, and the activity_main.xml layout file.
Step 1: Examine MainActivity
MainActivity is an example of an Activity. An Activity is a core Android class that draws an Android app user interface (UI) and receives input events. When your app launches, it launches the activity specified in the AndroidManifest.xml file.
Many programming languages define a main method that starts the program. Android apps don't have a main method. Instead, the AndroidManifest.xml file indicates that MainActivity should be launched when the user taps the app's launcher icon. To launch an activity, the Android OS uses the information in the manifest to set up the environment for the app and construct the MainActivity. Then the MainActivity does some setup in turn.
Each activity has an associated layout file. The activity and the layout are connected by a process known as layout inflation. When the activity starts, the views that are defined in the XML layout files are turned into (or "inflated" into) Kotlin view objects in memory. Once this happens, the activity can draw these objects to the screen and also dynamically modify them.
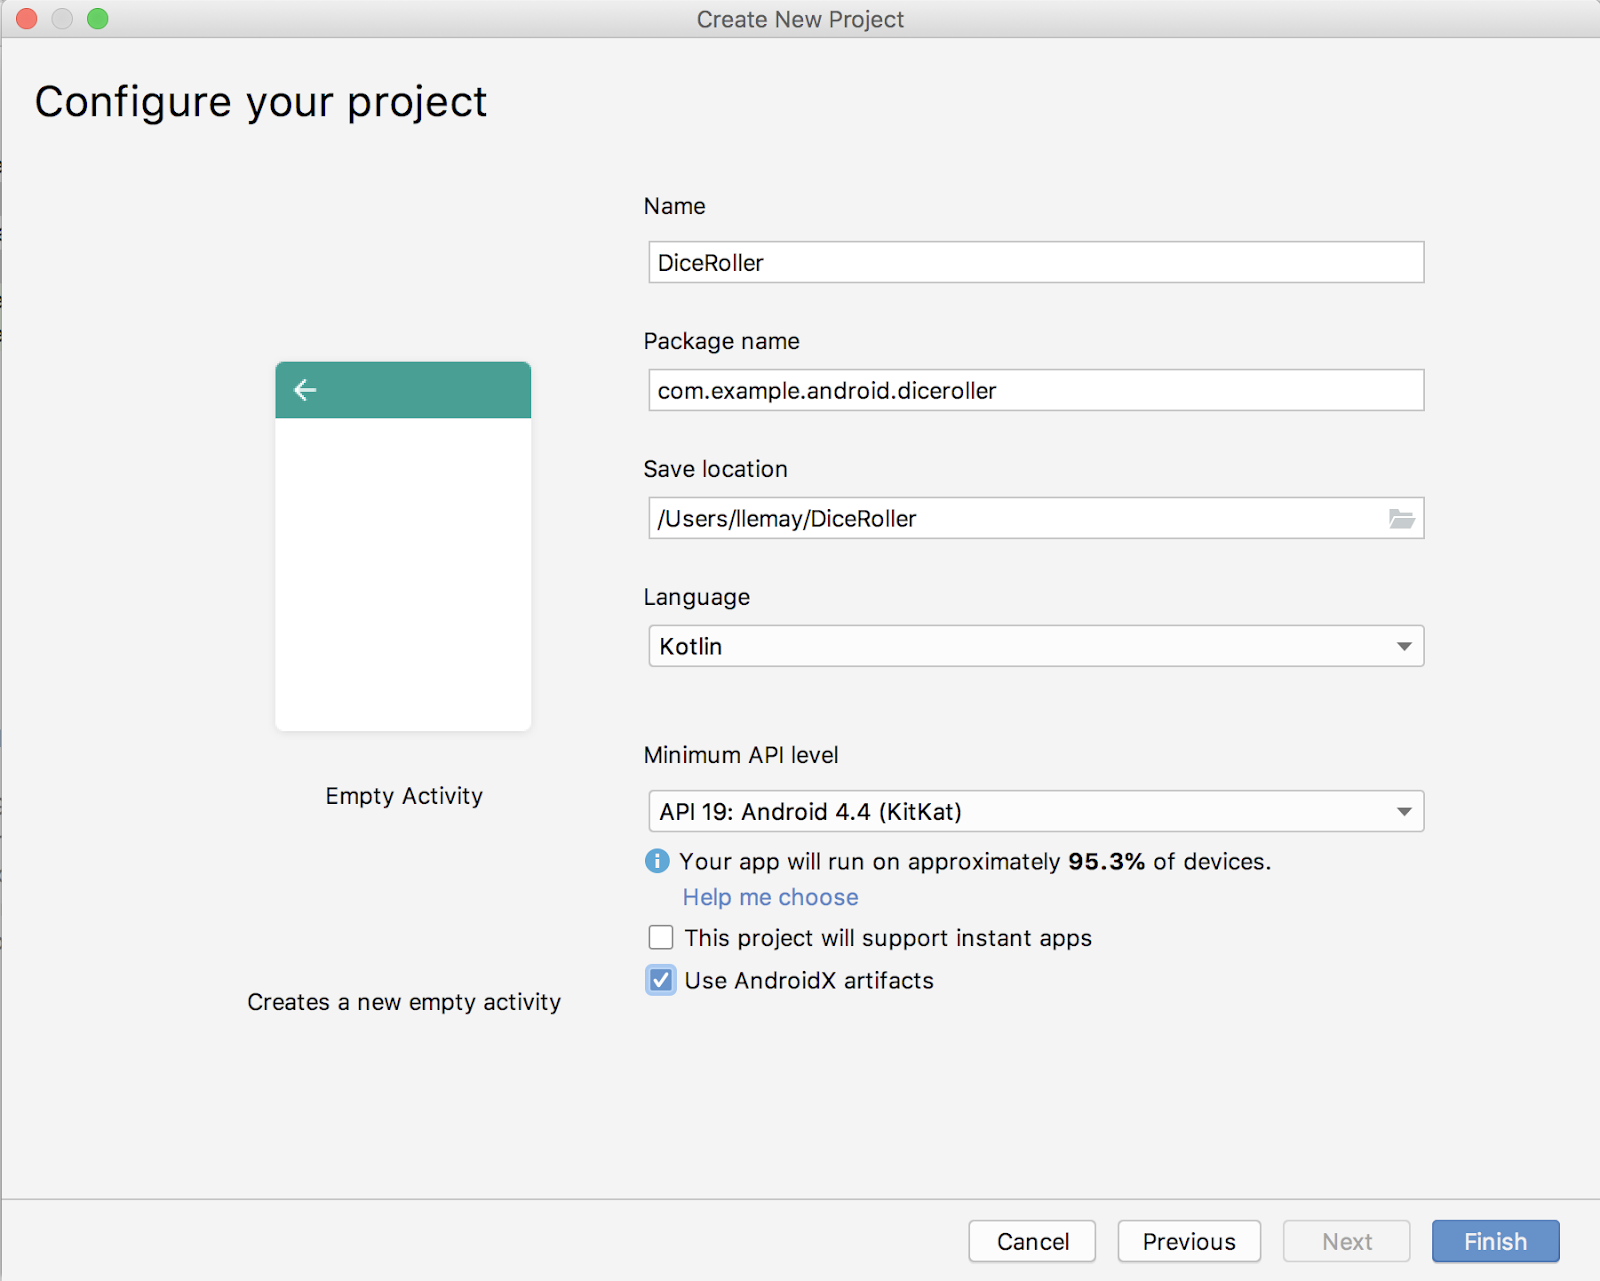
- In Android Studio, select File > New > New Project to create a new project. Use the Empty activity and click Next.
- Call the project DiceRoller, and verify all the other values for project name project location. Make sure "Use AndroidX Artifacts" is checked. Click Finish.
- In the Project > Android pane, expand java > com.example.android.diceroller. Double-click MainActivity. The code editor shows the code in
MainActivity.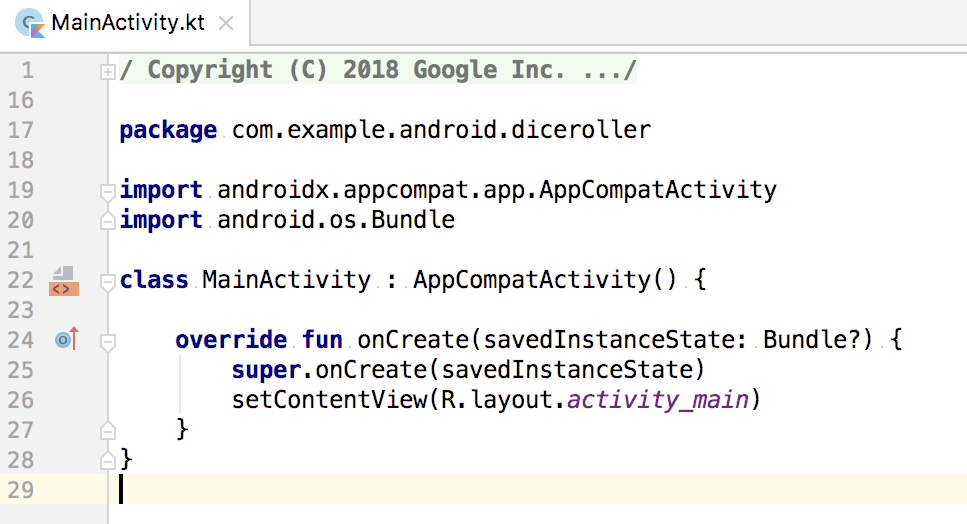
- Below the package name and import statements is the class declaration for
MainActivity. TheMainActivityclass extendsAppCompatActivity.
class MainActivity : AppCompatActivity() { ...- Notice the
onCreate()method. Activities do not use a constructor to initialize the object. Instead, a series of predefined methods (called "lifecycle methods") are called as part of the activity setup. One of those lifecycle methods isonCreate(), which you always override in your own app. You learn more about the lifecycle methods in a later codelab.
InonCreate(), you specify which layout is associated with the activity, and you inflate the layout. ThesetContentView()method does both those things.
override fun onCreate(savedInstanceState: Bundle?) {
   super.onCreate(savedInstanceState)
   setContentView(R.layout.activity_main)
}
The setContentView() method references the layout using R.layout.activity_main, which is actually an integer reference. The R class is generated when you build your app. The R class includes all the app's assets, including the contents of the res directory.
In this case, R.layout.activity_main refers to the generated R class, the layout folder, and the activity_main.xml layout file. (Resources do not include file extensions.) You'll refer to many of the app's resources (including images, strings, and elements within the layout file) using similar references in the R class.
Step 2: Examine and explore the app layout file
All the activities in your app have an associated layout file in the app's res/layout directory. A layout file is an XML file that expresses what an activity actually looks like. A layout file does this by defining views and defining where the views appear on the screen.
Views are things like text, images, and buttons that extend the View class. There are many types of views, including TextView, Button, ImageView, and CheckBox.
In this task, you examine and modify the app layout file.
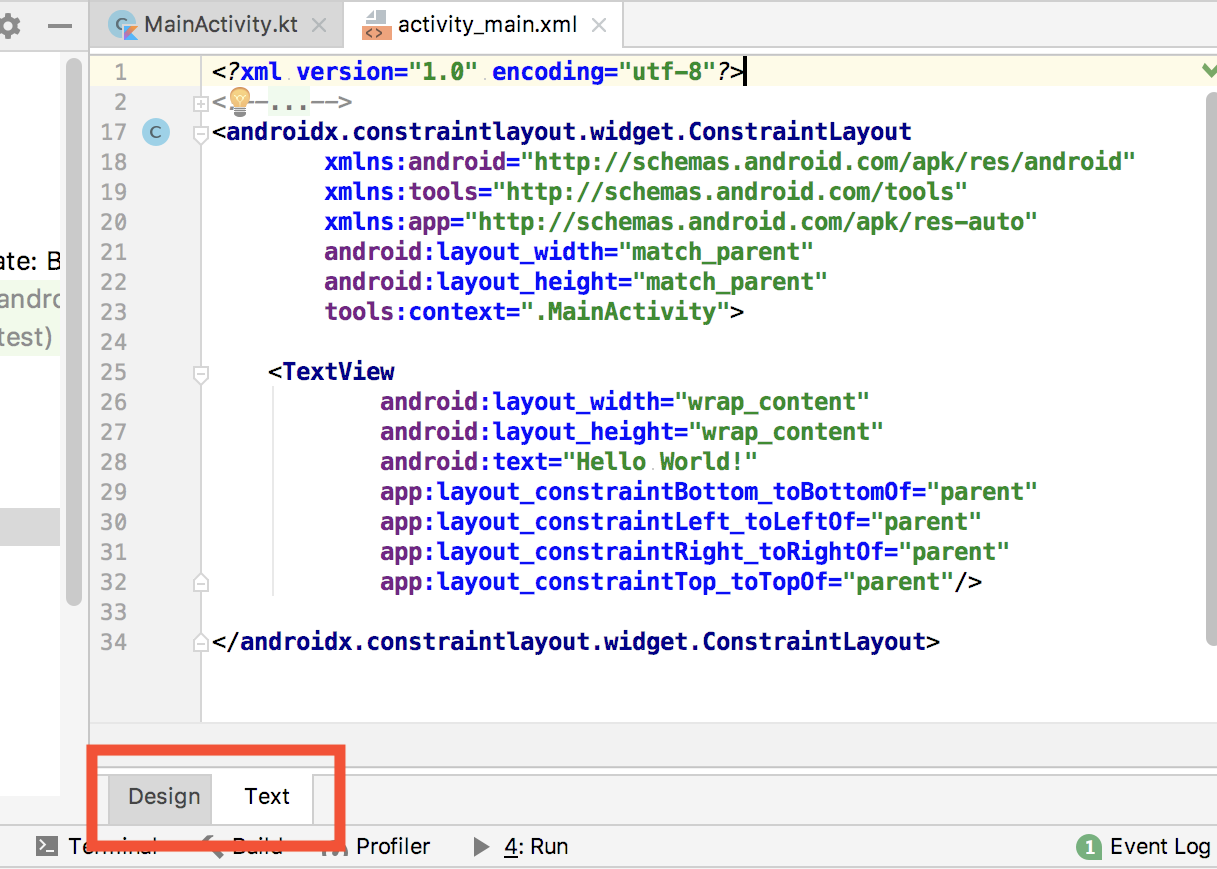
- In the Project > Android pane, expand res > layout and double-click activity_main.xml. The layout design editor opens. Android Studio includes this editor, which lets you build your app's layout in a visual way and preview the layout design. You learn more about the design editor in a later codelab.
- To view the layout file as XML, click the Text tab at the bottom of the window.
- Delete all the existing XML code in the layout editor. The default layout you get with a new project is a good starting point if you're working with the Android Studio design editor. For this lesson you'll work with the underlying XML to build a new layout from scratch.
- Copy and paste this code into the layout:
<?xml version="1.0" encoding="utf-8"?>

<LinearLayout
    xmlns:android="http://schemas.android.com/apk/res/android"
    xmlns:tools="http://schemas.android.com/tools"
    android:layout_width="match_parent"
    android:layout_height="wrap_content"
    tools:context=".MainActivity" >

    <TextView
        android:layout_width="wrap_content"
        android:layout_height="wrap_content"
        android:text="Hello World!" />

</LinearLayout>
Now examine the code:
- The top-level or root element of the layout is a
<LinearLayout>element. TheLinearLayoutview is aViewGroup. View groups are containers that hold other views and help specify the views' positions on the screen.
All the views and view groups you add to your layout are organized in a view hierarchy, with the topmost XML element as the root of that hierarchy. The root view can contain other views and view groups, and the contained view groups can contain other views and view groups. When your app runs the view hierarchy in your XML layout file becomes a hierarchy of objects when the layout is inflated. In this case the root view group is a linear layout, which organizes its child views linearly, one after another (either vertically or horizontally).
The default root you get for a new Android project is aConstraintLayout, which works well in coordination with the design editor. For this app, you use aLinearLayoutview group, which is simpler than the constraint layout. You learn a lot more about view groups and constraint layout in the next lesson. - Inside the
LinearLayouttag, notice theandroid:layout_widthattribute. The width of thisLinearLayoutis set tomatch parent, which makes it the same width as its parent. As this is the root view, the layout expands to the full width of the screen. - Notice the
android:layout_heightattribute, which is set towrap_content. This attribute makes the height of theLinearLayoutmatch the combined height of all the views it contains, which for now is only theTextView. - Examine the
<TextView>element. ThisTextView, which displays text, is the only visual element in your DiceRoller app. Theandroid:textattribute holds the actual string to display, in this case the string"Hello World!" - Notice the
android:layout_widthandandroid:layout_heightattributes in the<TextView>element, which are both set towrap_content. The content of text view is the text itself, so the view will take up only the space required for the text.
The dice-rolling app isn't very useful without a way for the user to roll the dice and see what they rolled. To start, add a button to the layout to roll the dice, and add text that shows the dice value that the user rolled.
Step 1: Add a button to the layout
- Add a
Buttonelement to the layout below the text view by entering <Button and then press Return. AButtonblock appears that ends with/>and includes thelayout_widthandlayout_heightattributes.
<Button
   android:layout_width=""
android:layout_height="" />- Set both the
layout_widthandlayout_heightattributes to"wrap_content". With these values the button is the same width and height as the text label it contains. - Add an
android:textattribute to the button, and give it a value of "Roll". The Button element now looks like this:
<Button
   android:layout_width="wrap_content"
   android:layout_height="wrap_content"
   android:text="Roll" />
For Button views the text attribute is the label of the button. In the layout editor, the attribute is highlighted in yellow, which indicates a tip or a warning. In this case, the yellow highlighting is because the string "Roll" is hardcoded in the button label, but the string should be a resource. You learn about string resources in the next section.
Step 2: Extract string resources
Instead of hardcoding strings in your layout or code files, it's a best practice to put all your app strings into a separate file. This file is called strings.xml, and it is located among the app's resources, in the res/values/ directory.
Having the strings in a separate file makes it easier to manage them, especially if you use these strings more than once. Also, string resources are mandatory for translating and localizing your app, because you need to create a string resource file for each language.
Android Studio helps you remember to put your strings into a resource file with hints and warnings.
- Click once on the "Roll" string in the
android:textattribute of the<Button>tag. - Press
Alt+Enter(Option+Enterin macOS) and select Extract string resource from the popup menu. - Enter
roll_labelfor the Resource name. - Click OK. A string resource is created in the
res/values/string.xmlfile, and the string in the Button element is replaced with a reference to that resource:android:text="@string/roll_label" - In the Project > Android pane, expand res > values, and then double-click strings.xml to see your string resources in the
strings.xmlfile:
<resources>
   <string name="app_name">DiceRoller</string>
   <string name="roll_label">Roll</string>
</resources>Step 3: Style and position views
Your layout now contains one TextView and one Button view. In this task, you arrange the views within the view group to look more attractive.
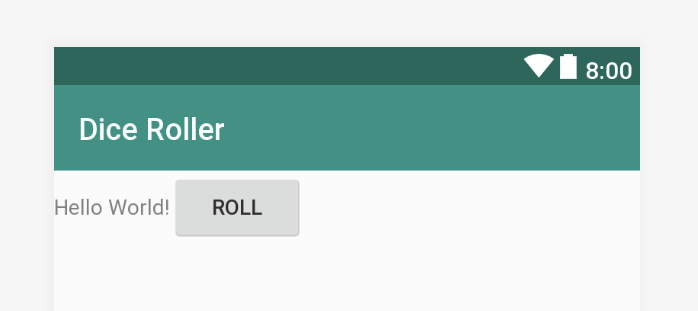
- Click the Design tab to see a preview of the layout. Right now both views are next to each other and pushed up into the top of the screen.
- Click the Text tab to return to the XML editor. Add the
android:orientationattribute to theLinearLayouttag, and give it a value of"vertical". The<LinearLayout>element should now look like this:
<LinearLayout
xmlns:android="http://schemas.android.com/apk/res/android"
android:layout_width="match_parent"
android:layout_height="wrap_content"
android:orientation="vertical"
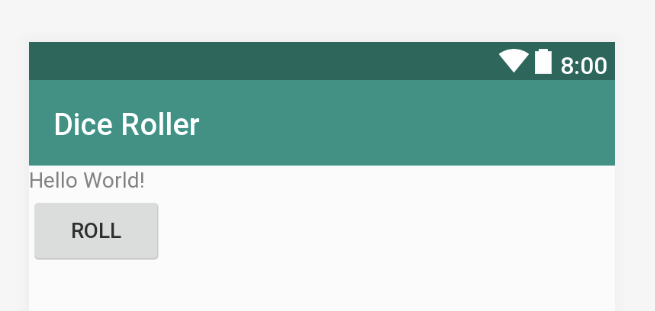
tools:context=".MainActivity">The LinearLayout view group positions the views it contains one after another in a line, either horizontally in a row, or vertically in a stack. Horizontal is the default. Because you want the TextView stacked on top of the Button, you set the orientation to vertical. The design now looks something like this, with the button below the text:
- Add the
android:layout_gravityattribute to both theTextViewand theButton, and give it the value"center_horizontal". This aligns both views along the center of the horizontal axis. The TextView and Button elements should now look like this:
<TextView
   android:layout_width="wrap_content"
   android:layout_height="wrap_content"
   android:layout_gravity="center_horizontal"
   android:text="Hello World!" />

<Button
   android:layout_width="wrap_content"
    android:layout_height="wrap_content"
    android:layout_gravity="center_horizontal"
android:text="@string/roll_label" />- Add the
android:layout_gravityattribute to the linear layout, and give it the value of"center_vertical". YourLinearLayoutelement should now look like this:
<LinearLayout
   xmlns:android="http://schemas.android.com/apk/res/android"
   xmlns:tools="http://schemas.android.com/tools"
   android:layout_width="match_parent"
   android:layout_height="wrap_content"
   android:orientation="vertical"
   android:layout_gravity="center_vertical"
tools:context=".MainActivity">- To increase the size of the text in the text view, add the
android:textSizeattribute to the<TextView>element with the value"30sp". The sp abbreviation stands for scalable pixels, which is a measure for sizing text independently of the device's display quality. The TextView element should now look like this:
<TextView
   android:layout_width="wrap_content"
   android:layout_height="wrap_content"
   android:layout_gravity="center_horizontal"
   android:textSize="30sp"
android:text="Hello World!" />- Compile and run your app.
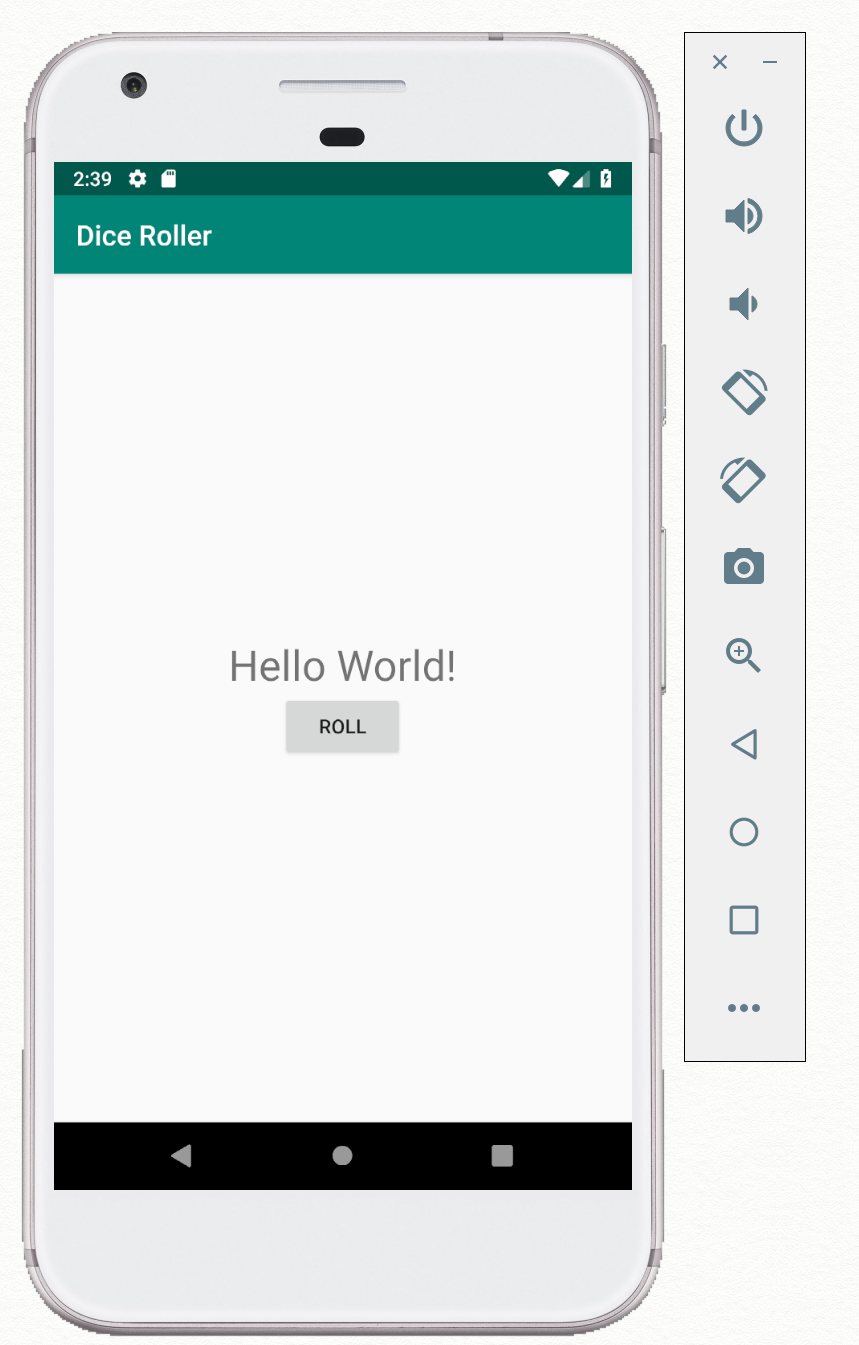
Now both the text and button are nicely placed, and there is larger text in the text view. The button doesn't have any functionality yet, so nothing happens when you click it. You work on that next.
Step 4: Get a reference to the button in code
The Kotlin code in MainActivity is responsible for defining the interactive parts of your app, such as what happens when you tap a button. To write a function that executes when the button is clicked, you need to get a reference to the Button object in your inflated layout in MainActivity. To get a reference to the button:
- Assign the
Buttonan ID in the XML file. - Use the
findViewById()method in your code to get a reference to theViewwith a specific ID.
Once you have a reference to the Button view, you can call methods on that view to dynamically change it as the app runs. For example, you can add a click handler that executes code when the button is tapped.
- Open the
activity_main.xmllayout file, if it is not already open, and click the Text tab. - Add the
android:idattribute to the button, and give it a name (in this case, "@+id/roll_button"). Your<Button>element now looks like this:
<Button
   android:id="@+id/roll_button"
   android:layout_width="wrap_content"
   android:layout_height="wrap_content"
   android:layout_gravity="center_horizontal"
   android:text="@string/roll_label" />
When you create an ID for a view in the XML layout file, Android Studio creates an integer constant with that ID's name in the generated R class. So if you name a view roll_button, Android Studio generates and creates an integer constant called roll_button in the R class. The "@+id" prefix for the ID name tells the compiler to add that ID constant to the R class. All the view IDs in your XML file must have this prefix..
- Open the
MainActivityKotlin file. InsideonCreate(), aftersetContentView(), add this line:
val rollButton: Button = findViewById(R.id.roll_button)Use the findViewById() method to get a View reference for the view that you defined in the XML class. In this case, you get the Button reference from the R class and the ID roll_button, and you assign that reference to the rollButton variable.
- Notice that Android Studio highlights the
Buttonclass in red and underlines it, to indicate it is an unresolved reference and that you need to import this class before you can use it. A tooltip indicating the fully qualified class name may also appear: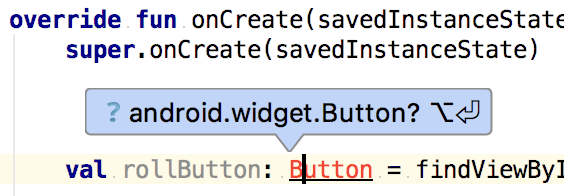
- Press
Alt+Enter(Option+Enteron a Mac), to accept the fully qualified class name.
Step 5: Add a click handler to display a toast
A click handler is a method that is invoked each time the user clicks or taps on a clickable UI element, such as a button. To create a click handler you need:
- A method that performs some operation.
- The
setOnClickHandler()method, which connects theButtonto the handler method.
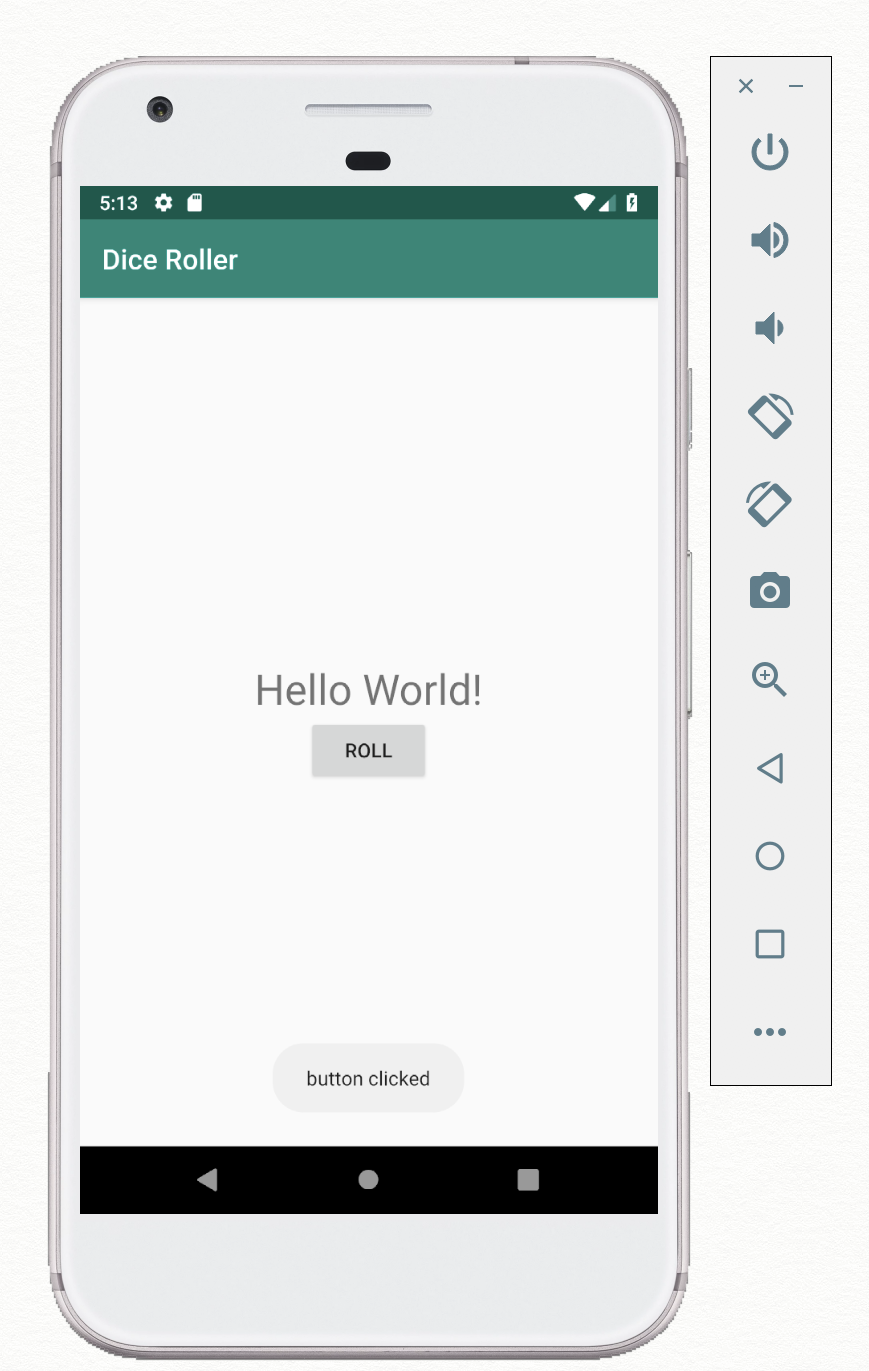
In this task, you create a click-handler method to display a Toast. (A toast is a message that pops up the screen for a short time.) You connect the click-handler method to the Button.
- In your
MainActivityclass afteronCreate(), create a private function calledrollDice().
private fun rollDice() {

}- Add this line to the
rollDice()method to display aToastwhenrollDice()is called:
Toast.makeText(this, "button clicked",
   Toast.LENGTH_SHORT).show()
To create a toast, call the Toast.makeText() method. This method requires three things:
- A
Contextobject. TheContextobject allows you to communicate with and get information about the current state of the Android OS. You need aContexthere so that theToastobject can tell the OS to display the toast. BecauseAppCompatActivityis a subclass ofContext, you can just use the keywordthisfor the context. - The message to be shown, here
"button clicked". - the duration to show the message. The
show()method at the end displays the toast.
- In
onCreate(), after the call tofindViewById()add this line to assignrollDice()as a click handler to therollButtonobject:
rollButton.setOnClickListener { rollDice() }The full definition of your MainActivity class now looks like this:
class MainActivity : AppCompatActivity() {

    override fun onCreate(savedInstanceState: Bundle?) {
        super.onCreate(savedInstanceState)
        setContentView(R.layout.activity_main)

        val rollButton: Button = findViewById(R.id.roll_button)
        rollButton.setOnClickListener { rollDice() }
    }

    private fun rollDice() {
        Toast.makeText(this, "button clicked",
            Toast.LENGTH_SHORT).show()
    }
}- Compile and run your app. Each time you tap the button, a toast should appear.
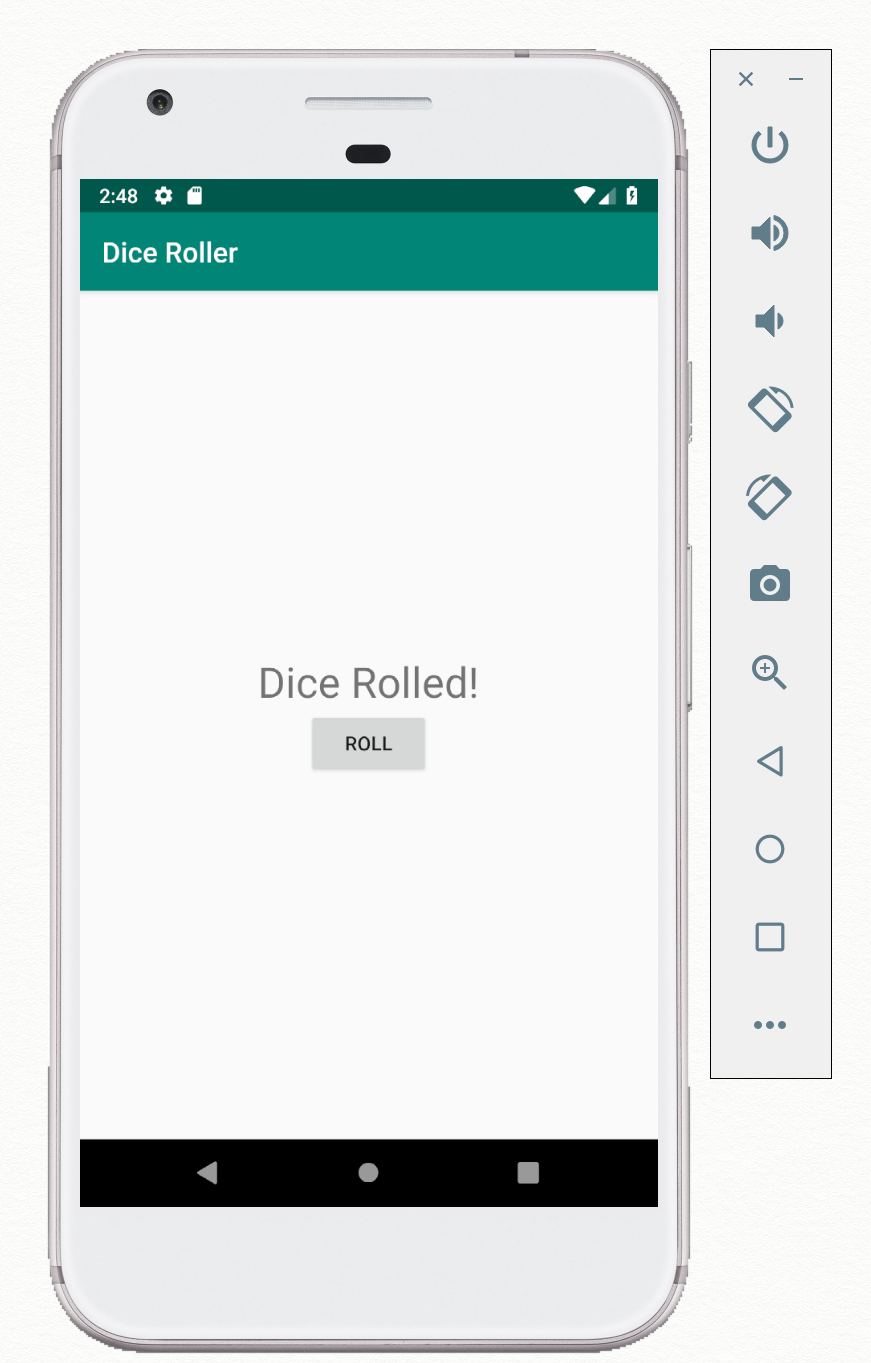
In this task, you modify the rollDice() method to change the text in the TextView. For the first step, you change that text from "Hello World!" to the string "Dice Rolled!". For the second step, you display a random number between one and six.
Step 1: Display a string
- Open
activity_main.xml, and add an ID to theTextView.
android:id="@+id/result_text"- Open
MainActivity. In therollDice()method, comment out the line to display theToast. - Use the
findViewById()method to get a reference to theTextViewby its ID. Assign the reference to aresultTextvariable.
val resultText: TextView = findViewById(R.id.result_text)- Assign a new string to the
resultText.textproperty to change the displayed text. You can ignore the hint to extract that string into a resource; this is just a temporary string.
resultText.text = "Dice Rolled!"- Compile and run the app. Note that tapping the Roll button now updates the
TextView.
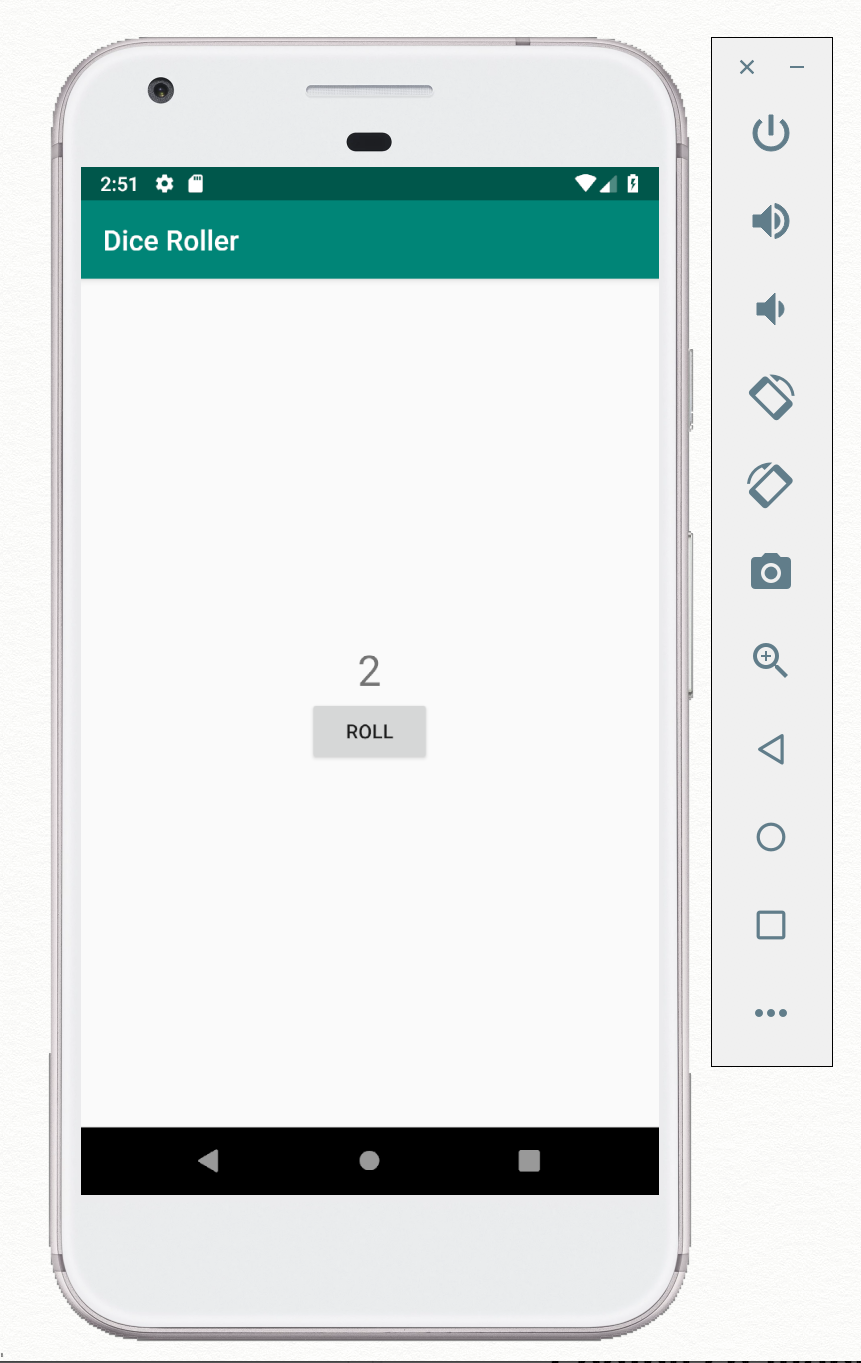
Step 2: Display a random number
Finally, in this task you add randomness to the button click, to simulate the roll of the dice. Each time the button is clicked or tapped your code picks a random number from 1 to 6 and updates the TextView. The task of generating a random number isn't Android-specific, and you use the Random class to do it.
- At the top of the
rollDice()method, use theRandom.nextInt()method to get a random number between 1 and 6:
val randomInt = Random().nextInt(6) + 1- Set the
textproperty to the value of the random integer, as a string:
resultText.text = randomInt.toString()- Compile and run the app. Each time you tap the Roll button, the number in the text view changes.
Android Studio project: DiceRoller
Challenge: Add a second button to the app labeled "Count Up" that appears just below the Roll button. When tapped, the Count Up button should get the current value of the result text view, add 1 to it, and update the text view. Make sure you handle these edge cases:
- If the result text view does not yet contain a number (that is, if the text view still has the default "Hello World" string), set the result text to 1.
- If the number is already 6, do nothing.
Coding challenge solution code
Android Studio project: DiceRoller-challenge
Activities
MainActivityis a subclass ofAppCompatActivity, which in turn is a subclass ofActivity. AnActivityis a core Android class that is responsible for drawing an Android app UI and receiving input events.- All activities have an associated layout file, which is an XML file in the app's resources. The layout file is named for the activity, for example
activity_main.xml. - The
setContentView()method inMainActivityassociates the layout with the activity, and inflates that layout when the activity is created. - Layout inflation is a process where the views defined in the XML layout files are turned into (or "inflated" into) Kotlin view objects in memory. Once layout inflation happens, the
Activitycan draw these objects to the screen and dynamically modify them.
Views
- All UI elements in the app layout are subclasses of the
Viewclass and are called views.TextViewandButtonare examples of views. Viewelements can be grouped inside aViewGroup. A view group acts as a container for the views, or other view groups, within it.LinearLayoutis an example of a view group that arranges its views linearly.
View attributes
- The
android:layout_widthandandroid:layout_heightattributes indicate the weight and height of a view. Thematch_parentvalue stretches the view to its parent's width or height. Thewrap_contentvalue shrinks the view to fit the view's contents. - The
android:textattribute indicates the text that a view should display (if that view displays text.) For buttons,android:textis the button label. - The
android:orientationattribute in aLinearLayoutview group arranges the view elements it contains. A value ofhorizontalarranges views left to right. A value ofverticalarranges the views top to bottom. - The
android:layout_gravityattribute determines the placement of a view and all that view's children. - The
android:textSizeattribute defines the size of the text in a text view. Text sizes are specified in sp units (scalable pixels). By using sp units, you can size text independently of the device's display quality.
Strings
- Instead of hardcoding strings in the layout, it's a best practice to use string resources.
- String resources are contained in the
values/res/string.xmlfile. - To extract strings, use
Alt+Enter(Option+Enteron a Mac). Select Extract string resources from the popup menu.
Using views
- To connect your Kotlin code to a view that you defined in the layout, you need to get a reference to the view object after the view has been inflated. Assign an ID (
android:id) to the view in the layout, then use thefindViewById()method to get the associated view object. - When you create an ID for a view in the XML layout file, Android Studio creates an integer constant with that ID's name in the generated
Rclass. You can then use thatR.idreference in thefindViewById()method. - You can set the attributes of a view object in your Kotlin code directly by property name. For example, the text in a text view is defined by the
android:textattribute in the XML, and it is defined by thetextproperty in Kotlin. - A click handler is a method that is invoked when the user clicks or taps on a UI element. To attach a click-handler method to a view such as a button, use the
setOnClickListener()method.
Using toasts
A toast is a view that shows the user a simple message in a small popup window.
To create a toast, call the makeText() factory method on the Toast class with three arguments:
- The context of the app
Activity - The message to display, for example a string resource
- A duration, for example
Toast.LENGTH_SHORT
To display the toast, call show().
Udacity course:
Android developer documentation:
- Meet Android Studio
- Layouts
ViewButtonTextView- App resources overview
- Input events overview
findViewById()setOnClickListener()Context
Other:
This section lists possible homework assignments for students who are working through this codelab as part of a course led by an instructor. It's up to the instructor to do the following:
- Assign homework if required.
- Communicate to students how to submit homework assignments.
- Grade the homework assignments.
Instructors can use these suggestions as little or as much as they want, and should feel free to assign any other homework they feel is appropriate.
If you're working through this codelab on your own, feel free to use these homework assignments to test your knowledge.
Change an app
Open the DiceRoller app. Add a button to the app labeled "Reset" that appears just below the Roll button. Have that button reset the result text view to 0.
Answer these questions
Question 1
Which method on an Activity inflates the app's layout and makes its views available as objects?
onCreate()setClickListener()setContentView()show()
Question 2
Which view attribute do you use to set the width of a view so that it adjusts to fit the content?
android:view_width="wrap"android:layout_width="wrap_content"android:layout_height="wrap_content"android:layout_width="match_parent"
Submit your app for grading
Check to make sure the app has the following:
- The app layout should include one text view and two buttons.
- The app's code should set two click handlers, one for each button.
- The click handler that resets the text view should set the text property to 0.
Start the next lesson:
For links to other codelabs in this course, see the Android Kotlin Fundamentals codelabs landing page.