
Google Cloud Datastore is a NoSQL document database built for automatic scaling, high performance, and ease of application development.
What you'll learn
- How to use Cloud Datastore to save and retrieve java objects in Spring Boot
What you'll need
How will you use this tutorial?
How would you rate your experience with using Google Cloud Platform services?
Self-paced environment setup
If you don't already have a Google Account (Gmail or Google Apps), you must create one. Sign-in to Google Cloud Platform console (console.cloud.google.com) and create a new project:


Remember the project ID, a unique name across all Google Cloud projects (the name above has already been taken and will not work for you, sorry!). It will be referred to later in this codelab as PROJECT_ID.
Next, you'll need to enable billing in the Cloud Console in order to use Google Cloud resources.
Running through this codelab shouldn't cost you more than a few dollars, but it could be more if you decide to use more resources or if you leave them running (see "cleanup" section at the end of this document).
New users of Google Cloud Platform are eligible for a $300 free trial.
Activate Google Cloud Shell
From the GCP Console click the Cloud Shell icon on the top right toolbar:

Then click "Start Cloud Shell":

It should only take a few moments to provision and connect to the environment:

This virtual machine is loaded with all the development tools you'll need. It offers a persistent 5GB home directory, and runs on the Google Cloud, greatly enhancing network performance and authentication. Much, if not all, of your work in this lab can be done with simply a browser or your Google Chromebook.
Once connected to Cloud Shell, you should see that you are already authenticated and that the project is already set to your PROJECT_ID.
Run the following command in Cloud Shell to confirm that you are authenticated:
gcloud auth list
Command output
Credentialed accounts:
 - <myaccount>@<mydomain>.com (active)
gcloud config list project
Command output
[core]
project = <PROJECT_ID>
If it is not, you can set it with this command:
gcloud config set project <PROJECT_ID>
Command output
Updated property [core/project].
In GCP Console, navigate to Menu -> Datastore (in the Storage section).
If you've never used Datastore in the current project, you will see the "Select a Cloud Firestore mode" screen. Select the "Datastore mode" option.
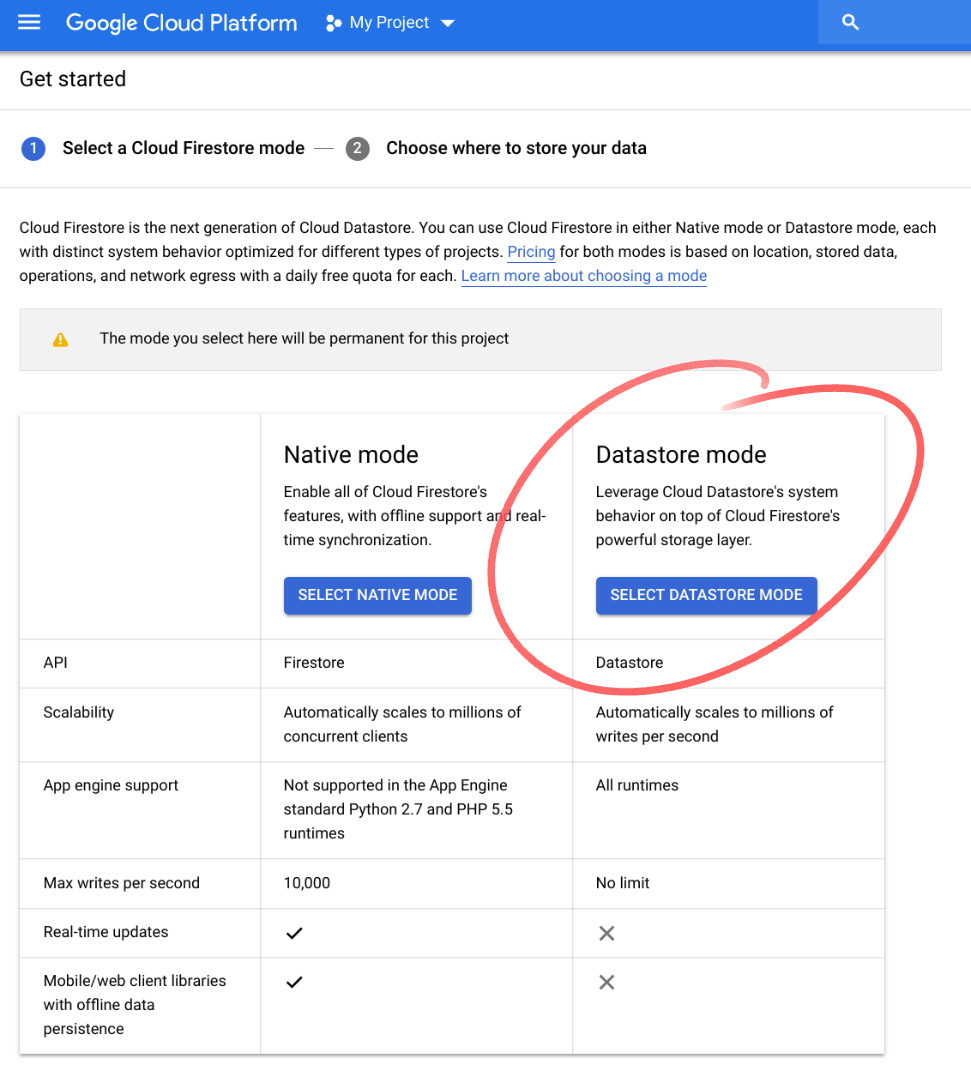
After that, you will see "Choose where to store your data" screen. Select us-east1 or any other regional location and click "Create Database":

From the CloudShell environment, use the following command to initialize and bootstrap a new Spring Boot application:
$ curl https://start.spring.io/starter.tgz \
  -d packaging=war \
  -d dependencies=cloud-gcp \
  -d baseDir=datastore-example \
  -d bootVersion=2.1.1.RELEASE | tar -xzvf -
This will create a new datastore-example/ directory with a new Maven project, along with Maven's pom.xml, a Maven wrapper, as well as an application entrypoint.
Our application will provide a CLI for users to enter commands and see results. We will create a class to represent a book and then will save it to Cloud Datastore using Datastore Repository.
We also we need to add one more necessary dependency to the pom.xml.
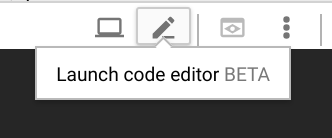
Open the Web Code Editor by clicking Launch code editor from the Cloud Shell menu.
After the editor loads, modify the pom.xml file to add the Spring Data Cloud Datastore Spring Boot starter dependency:
pom.xml
<project>
  ...
  <dependencies>
        ...
        <!-- Add GCP Datastore Starter -->
        <dependency>
                <groupId>org.springframework.cloud</groupId>
                <artifactId>spring-cloud-gcp-starter-data-datastore</artifactId>
        </dependency>

        <!-- Add Spring Shell Starter -->
        <dependency>
                <groupId>org.springframework.shell</groupId>
                <artifactId>spring-shell-starter</artifactId>
                <version>2.0.0.RELEASE</version>
        </dependency>

  </dependencies>
</project>
Using the editor, create the Book class with the following content:
datastore-example/src/main/java/com/example/demo/Book.java
package com.example.demo;

import org.springframework.cloud.gcp.data.datastore.core.mapping.Entity;
import org.springframework.data.annotation.Id;


@Entity(name = "books")
public class Book {
        @Id
        Long id;

        String title;

        String author;

        int year;

        public Book(String title, String author, int year) {
                this.title = title;
                this.author = author;
                this.year = year;
        }

        public long getId() {
                return this.id;
        }

        @Override
        public String toString() {
                return "Book{" +
                                "id=" + this.id +
                                ", title='" + this.title + '\'' +
                                ", author='" + this.author + '\'' +
                                ", year=" + this.year +
                                '}';
        }
}
As you can see, this is a simple POJO. The class is annotated with @Entity to indicate that it can be stored in Datastore and provide the kind name (think of a kind as a table in SQL databases, see documentation for more details). The kind name is optional - if it's omitted, the kind name will be generated based on the class name.
Note that we annotated id property with @Id. That indicates that we want this field to be used as the identifier part of the Datastore Key. Every Datastore entity needs an identifier. Supported types are String and Long.
We override the toString method to make the string representation of the objects more readable; this will be useful when we print them out.
Don't forget to save the file!
Create the BookRepository class with the following content:
datastore-example/src/main/java/com/example/demo/BookRepository.java
package com.example.demo;

import java.util.List;

import org.springframework.cloud.gcp.data.datastore.repository.DatastoreRepository;


public interface BookRepository extends DatastoreRepository<Book, Long> {

  List<Book> findByAuthor(String author);

  List<Book> findByYearGreaterThan(int year);

  List<Book> findByAuthorAndYear(String author, int year);

}
The interface extends DatastoreRepository<Book, Long> where Book is the domain class and Long is the Id type. We declare three query methods in our repository for which implementations are generated automatically behind the scenes.
The first one is findByAuthor. As you can guess, the implementation of this method will execute a query that will use a user-provided value in the condition filter for equality to author field.
findByYearGreaterThan method executes a query that filters for year field greater than user provided value.
findByAuthorAndYear executes a query that looks for entities where author and year fields match to user provided values.
Open the main application DemoApplication class and modify it to look like this:
datastore-example/src/main/java/com/example/demo/DemoApplication.java
package com.example.demo;

import java.util.List;

import com.google.common.collect.Lists;

import org.springframework.beans.factory.annotation.Autowired;
import org.springframework.boot.SpringApplication;
import org.springframework.boot.autoconfigure.SpringBootApplication;
import org.springframework.shell.standard.ShellComponent;
import org.springframework.shell.standard.ShellMethod;

@ShellComponent
@SpringBootApplication
public class DemoApplication {
  @Autowired
  BookRepository bookRepository;

  public static void main(String[] args) {
     SpringApplication.run(DemoApplication.class, args);
  }

  @ShellMethod("Saves a book to Cloud Datastore: save-book <title> <author> <year>")
  public String saveBook(String title, String author, int year) {
     Book savedBook = this.bookRepository.save(new Book(title, author, year));
     return savedBook.toString();
  }

  @ShellMethod("Loads all books")
  public String findAllBooks() {
     Iterable<Book> books = this.bookRepository.findAll();
     return Lists.newArrayList(books).toString();
  }

  @ShellMethod("Loads books by author: find-by-author <author>")
  public String findByAuthor(String author) {
     List<Book> books = this.bookRepository.findByAuthor(author);
     return books.toString();
  }

  @ShellMethod("Loads books published after a given year: find-by-year-after <year>")
  public String findByYearAfter(int year) {
     List<Book> books = this.bookRepository.findByYearGreaterThan(year);
     return books.toString();
  }

  @ShellMethod("Loads books by author and year: find-by-author-year <author> <year>")
  public String findByAuthorYear(String author, int year) {
     List<Book> books = this.bookRepository.findByAuthorAndYear(author, year);
     return books.toString();
  }

  @ShellMethod("Removes all books")
  public void removeAllBooks() {
     this.bookRepository.deleteAll();
  }
}
Note how we annotated the class with @ShellComponent. That informs Spring that we want to use this class as a source for CLI commands. The methods annotated with @ShellMethod will be exposed as CLI commands in our application.
Here we use the methods we declared in the BookRepository interface: findByAuthor, findByYearGreaterThan, findByAuthorAndYear. Also we use three built-in methods: save, findAll and deleteAll.
Let's look at the saveBook method. We create a Book object using user-provided values for title, author and year. As you can see, we do not provide an id value, so it will be automatically allocated and assigned to the id field on save. The save method accepts an object of type Book and saves it to Cloud Datastore. It returns a Book object with all fields populated, including the id field. In the end we return a string representation of this object.
The rest of the methods work similarly: they accept passed in parameters to the appropriate repository methods and return stringified results.
To build and start the application, execute this command in Cloud Shell (from the root of the project datastore-example/ where the pom.xml is located) :
$ mvn spring-boot:run
After a successful build stage, the spring logo will show up and the shell prompt will appear:
 .   ____          _            __ _ _
 /\\ / ___'_ __ _ _(_)_ __  __ _ \ \ \ \
( ( )\___ | '_ | '_| | '_ \/ _` | \ \ \ \
 \\/  ___)| |_)| | | | | || (_| |  ) ) ) )
  '  |____| .__|_| |_|_| |_\__, | / / / /
 =========|_|==============|___/=/_/_/_/
 :: Spring Boot ::        (v2.1.1.RELEASE)


shell:>
Now you can experiment with the commands we defined earlier. To see the list of commands, use the help command:
shell:> help
...
find-all-books: Loads all books
find-by-author: Loads books by author: find-by-author <author>
find-by-author-year: Loads books by author and year: find-by-author-year <author> <year>
find-by-year-after: Loads books published after a given year: find-by-year-after <year>
remove-all-books: Removes all books
save-book: Saves a book to Cloud Datastore: save-book <title> <author> <year>
Try the following:
- Create a few books using
save-bookcommand - Run a search using
find-all-bookscommand - Find books by specific author (
find-by-author <author>) - Find books published after specific year (
find-by-year-after <year>) - Find books by specific author and year (
find-by-author-year <author> <year>)
To see how the entities are stored in Cloud Datastore, go to GCP Console and navigate to Menu -> Datastore (in the Storage section) -> Entities (select "[default]" namespace, and "books" kind, if necessary).
To clean up, remove all books using the aptly named remove-all-books command from the application shell.
shell:> remove-all-books
To exit the application use the quit command, then Ctrl+C.
In this codelab, you've created an interactive CLI application that can store and retrieve objects from Cloud Datastore!
Learn More
- Cloud Datastore: https://cloud.google.com/datastore/
- Spring Shell: https://projects.spring.io/spring-shell/
- Spring on GCP project: http://cloud.spring.io/spring-cloud-gcp/
- Spring on GCP GitHub repository: https://github.com/spring-cloud/spring-cloud-gcp
- Java on Google Cloud Platform: https://cloud.google.com/java/
License
This work is licensed under a Creative Commons Attribution 2.0 Generic License.