
The Cloud Natural Language API lets you extract entities from text, perform sentiment and syntactic analysis, and classify text into categories.
In this lab, we'll learn how to use the Natural Language API to analyze entities, sentiment, and syntax.
What you'll learn
- Creating a Natural Language API request and calling the API with curl
- Extracting entities and running sentiment analysis on text with the Natural Language API
- Performing linguistic analysis on text with the Natural Language API
- Creating a Natural Language API request in a different language
What you'll need
How will you use this tutorial?
How would rate your experience with Google Cloud Platform?
Self-paced environment setup
If you don't already have a Google Account (Gmail or Google Apps), you must create one. Sign-in to Google Cloud Platform console (console.cloud.google.com) and create a new project:


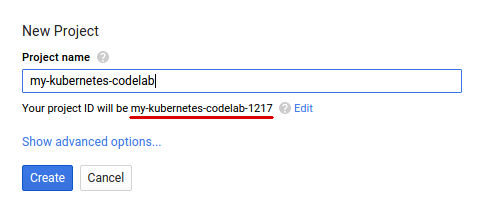
Remember the project ID, a unique name across all Google Cloud projects (the name above has already been taken and will not work for you, sorry!). It will be referred to later in this codelab as PROJECT_ID.
Next, you'll need to enable billing in the Cloud Console in order to use Google Cloud resources.
Running through this codelab shouldn't cost you more than a few dollars, but it could be more if you decide to use more resources or if you leave them running (see "cleanup" section at the end of this document).
New users of Google Cloud Platform are eligible for a $300 free trial.
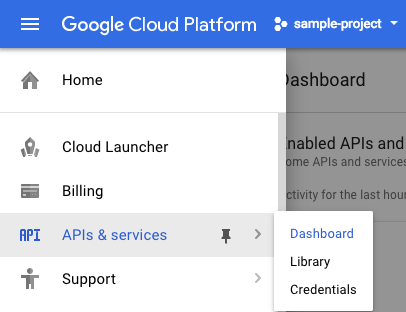
Click on the menu icon in the top left of the screen.

Select APIs & services from the drop down and click on Dashboard
Click on Enable APIs and services.

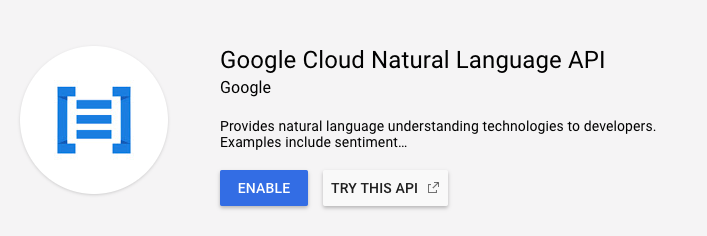
Then, search for "language" in the search box. Click on Google Cloud Natural Language API:

Click Enable to enable the Cloud Natural Language API:
Wait for a few seconds for it to enable. You will see this once it's enabled:

Google Cloud Shell is a command line environment running in the Cloud. This Debian-based virtual machine is loaded with all the development tools you'll need (gcloud, bq, git and others) and offers a persistent 5GB home directory. We'll use Cloud Shell to create our request to the Natural Language API.
To get started with Cloud Shell, Click on the "Activate Google Cloud Shell"  icon in top right hand corner of the header bar

A Cloud Shell session opens inside a new frame at the bottom of the console and displays a command-line prompt. Wait until the user@project:~$ prompt appears
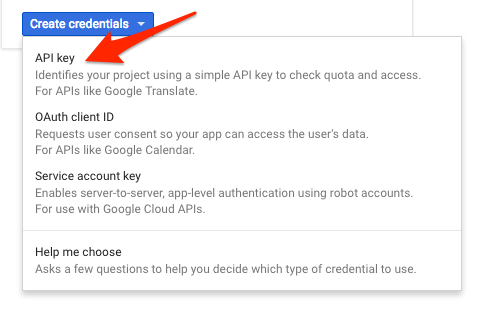
Since we'll be using curl to send a request to the Natural Language API, we'll need to generate an API key to pass in our request URL. To create an API key, navigate to the Credentials section of APIs & services in your Cloud console:

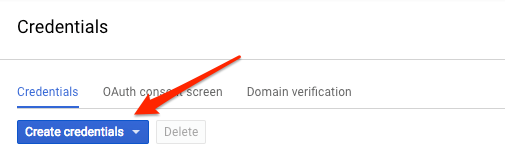
In the drop down menu, select API key:
Next, copy the key you just generated. You will need this key later in the lab.
Now that you have an API key, save it to an environment variable to avoid having to insert the value of your API key in each request. You can do this in Cloud Shell. Be sure to replace <your_api_key> with the key you just copied.
export API_KEY=<YOUR_API_KEY>The first Natural Language API method we'll use is analyzeEntities. With this method, the API can extract entities (like people, places, and events) from text. To try it out the API's entity analysis, we'll use the following sentence:
Joanne Rowling, who writes under the pen names J. K. Rowling and Robert Galbraith, is a British novelist and screenwriter who wrote the Harry Potter fantasy series.
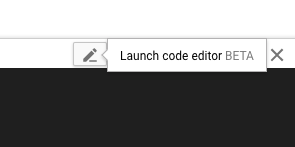
We'll build our request to the Natural Language API in a request.json file. In your Cloud Shell environment, create the request.json file with the code below. You can either create the file using one of your preferred command line editors (nano, vim, emacs) or use the built-in Orion editor in Cloud Shell:
request.json
{
  "document":{
    "type":"PLAIN_TEXT",
    "content":"Joanne Rowling, who writes under the pen names J. K. Rowling and Robert Galbraith, is a British novelist and screenwriter who wrote the Harry Potter fantasy series."
  },
  "encodingType":"UTF8"
}
In the request, we tell the Natural Language API about the text we'll be sending. Supported type values are PLAIN_TEXT or HTML. In content, we pass the text to send to the Natural Language API for analysis. The Natural Language API also supports sending files stored in Cloud Storage for text processing. If we wanted to send a file from Cloud Storage, we would replace content with gcsContentUri and give it a value of our text file's uri in Cloud Storage. encodingType tells the API which type of text encoding to use when processing our text. The API will use this to calculate where specific entities appear in our text.
You can now pass your request body, along with the API key environment variable you saved earlier, to the Natural Language API with the following curl command (all in one single command line):
curl "https://language.googleapis.com/v1/documents:analyzeEntities?key=${API_KEY}" \
  -s -X POST -H "Content-Type: application/json" --data-binary @request.json
The beginning of your response should look like the following:
{
  "entities": [
     {
      "name": "Robert Galbraith",
      "type": "PERSON",
      "metadata": {
        "mid": "/m/042xh",
        "wikipedia_url": "https://en.wikipedia.org/wiki/J._K._Rowling"
      },
      "salience": 0.7980405,
      "mentions": [
        {
          "text": {
            "content": "Joanne Rowling",
            "beginOffset": 0
          },
          "type": "PROPER"
        },
        {
          "text": {
            "content": "Rowling",
            "beginOffset": 53
          },
          "type": "PROPER"
        },
        {
          "text": {
            "content": "novelist",
            "beginOffset": 96
          },
          "type": "COMMON"
        },
        {
          "text": {
            "content": "Robert Galbraith",
            "beginOffset": 65
          },
          "type": "PROPER"
        }
      ]
    },

    ...
  ]
}
For each entity in the response, we get the entity type, the associated Wikipedia URL if there is one, the salience, and the indices of where this entity appeared in the text. Salience is a number in the [0,1] range that refers to the centrality of the entity to the text as a whole. The Natural Language API can also recognize the same entity mentioned in different ways. Take a look at the mentions list in the response: the API is able to tell that "Joanne Rowling", "Rowling", "novelist" and "Robert Galbriath" all point to the same thing.
In addition to extracting entities, the Natural Language API also lets you perform sentiment analysis on a block of text. Our JSON request will include the same parameters as our request above, but this time we'll change the text to include something with a stronger sentiment. Replace your request.json file with the following, and feel free to replace the content below with your own text:
request.json
 {
  "document":{
    "type":"PLAIN_TEXT",
    "content":"Harry Potter is the best book. I think everyone should read it."
  },
  "encodingType": "UTF8"
}
Next we'll send the request to the API's analyzeSentiment endpoint:
curl "https://language.googleapis.com/v1/documents:analyzeSentiment?key=${API_KEY}" \
  -s -X POST -H "Content-Type: application/json" --data-binary @request.json
Your response should look like this:
{
  "documentSentiment": {
    "magnitude": 0.8,
    "score": 0.4
  },
  "language": "en",
  "sentences": [
    {
      "text": {
        "content": "Harry Potter is the best book.",
        "beginOffset": 0
      },
      "sentiment": {
        "magnitude": 0.7,
        "score": 0.7
      }
    },
    {
      "text": {
        "content": "I think everyone should read it.",
        "beginOffset": 31
      },
      "sentiment": {
        "magnitude": 0.1,
        "score": 0.1
      }
    }
  ]
}
Notice that we get two types of sentiment values: sentiment for our document as a whole, and sentiment broken down by sentence. The sentiment method returns two values: score and magnitude. score is a number from -1.0 to 1.0 indicating how positive or negative the statement is. magnitude is a number ranging from 0 to infinity that represents the weight of sentiment expressed in the statement, regardless of being positive or negative. Longer blocks of text with heavily weighted statements have higher magnitude values. The score for our first sentence is positive (0.7), whereas the score for the second sentence is neutral (0.1).
In addition to providing sentiment details on the entire text document we send the NL API, it can also break down sentiment by the entities in our text. Let's use this sentence as an example:
I liked the sushi but the service was terrible.
In this case, getting a sentiment score for the entire sentence as we did above might not be so useful. If this was a restaurant review and there were hundreds of reviews for the same restaurant, we'd want to know exactly which things people liked and didn't like in their reviews. Fortunately the NL API has a method that lets us get the sentiment for each entity in our text, called analyzeEntitySentiment. Update your request.json with the sentence above to try it out:
request.json
 {
  "document":{
    "type":"PLAIN_TEXT",
    "content":"I liked the sushi but the service was terrible."
  },
  "encodingType": "UTF8"
}
Then call the analyzeEntitySentiment endpoint with the following curl command:
curl "https://language.googleapis.com/v1/documents:analyzeEntitySentiment?key=${API_KEY}" \
  -s -X POST -H "Content-Type: application/json" --data-binary @request.json
In the response we get back two entity objects: one for "sushi" and one for "service." Here's the full JSON response:
{
  "entities": [
    {
      "name": "sushi",
      "type": "CONSUMER_GOOD",
      "metadata": {},
      "salience": 0.52716845,
      "mentions": [
        {
          "text": {
            "content": "sushi",
            "beginOffset": 12
          },
          "type": "COMMON",
          "sentiment": {
            "magnitude": 0.9,
            "score": 0.9
          }
        }
      ],
      "sentiment": {
        "magnitude": 0.9,
        "score": 0.9
      }
    },
    {
      "name": "service",
      "type": "OTHER",
      "metadata": {},
      "salience": 0.47283158,
      "mentions": [
        {
          "text": {
            "content": "service",
            "beginOffset": 26
          },
          "type": "COMMON",
          "sentiment": {
            "magnitude": 0.9,
            "score": -0.9
          }
        }
      ],
      "sentiment": {
        "magnitude": 0.9,
        "score": -0.9
      }
    }
  ],
  "language": "en"
}
We can see that the score returned for "sushi" was 0.9, whereas "service" got a score of -0.9. Cool! You also may notice that there are two sentiment objects returned for each entity. If either of these terms were mentioned more than once, the API would return a different sentiment score and magnitude for each mention, along with an aggregate sentiment for the entity.
Looking at the Natural Language API's third method - syntax annotation - we'll dive deeper into the the linguistic details of our text. analyzeSyntax is a method that provides a full set of details on the semantic and syntactic elements of the text. For each word in the text, the API will tell us the part of speech (noun, verb, adjective, etc.) and how it relates to other words in the sentence (Is it the root verb? A modifier?).
Let's try it out with a simple sentence. Our JSON request will be similar to the ones above, with the addition of a features key. This will tell the API that we'd like to perform syntax annotation. Replace your request.json with the following:
request.json
{
  "document":{
    "type":"PLAIN_TEXT",
    "content": "Hermione often uses her quick wit, deft recall, and encyclopaedic knowledge to help Harry and Ron."
  },
  "encodingType": "UTF8"
}
Then call the API's analyzeSyntax method:
curl "https://language.googleapis.com/v1/documents:analyzeSyntax?key=${API_KEY}" \
  -s -X POST -H "Content-Type: application/json" --data-binary @request.json
The response should return an object like the one below for each token in the sentence. Here we'll look at the response for the word "uses":
{
  "text": {
    "content": "uses",
    "beginOffset": 15
  },
  "partOfSpeech": {
    "tag": "VERB",
    "aspect": "ASPECT_UNKNOWN",
    "case": "CASE_UNKNOWN",
    "form": "FORM_UNKNOWN",
    "gender": "GENDER_UNKNOWN",
    "mood": "INDICATIVE",
    "number": "SINGULAR",
    "person": "THIRD",
    "proper": "PROPER_UNKNOWN",
    "reciprocity": "RECIPROCITY_UNKNOWN",
    "tense": "PRESENT",
    "voice": "VOICE_UNKNOWN"
  },
    "dependencyEdge": {
      "headTokenIndex": 2,
      "label": "ROOT"
    },
    "lemma": "use"
}
Let's break down the response. partOfSpeech gives us linguistic details on each word (many are unknown since they don't apply to English or this specific word). tag gives the part of speech of this word, in this case a verb. We also get details on the tense, modality, and whether the word is singular or plural. lemma is the canonical form of the word (for "uses" it's "use"). For example, the words run, runs, ran, and running all have a lemma of run. The lemma value is useful for tracking occurrences of a word in a large piece of text over time.
dependencyEdge includes data that you can use to create a dependency parse tree of the text. This is a diagram showing how words in a sentence relate to each other. A dependency parse tree for the sentence above would look like this:
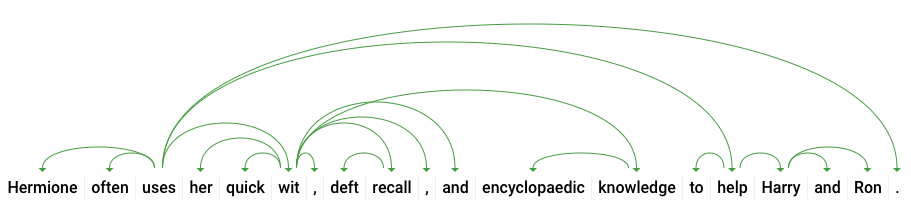
The headTokenIndex in our response above is the index of the token that has an arc pointing at "uses". We can think of each token in the sentence as a word in an array, and the headTokenIndex of 2 for "uses" refers to the word "often," which it is connected to in the tree.
The Natural Language API also supports languages other than English (full list here). Let's try the following entity request with a sentence in Japanese:
request.json
{
  "document":{
    "type":"PLAIN_TEXT",
    "content":"日本のグーグルのオフィスは、東京の六本木ヒルズにあります"
  },
  "encodingType": "UTF8"
}
Notice that we didn't tell the API which language our text is, it can automatically detect it. Next, we'll send it to the analyzeEntities endpoint:
curl "https://language.googleapis.com/v1/documents:analyzeEntities?key=${API_KEY}" \
  -s -X POST -H "Content-Type: application/json" --data-binary @request.json
And here are the first two entities in our response:
{
  "entities": [
    {
      "name": "日本",
      "type": "LOCATION",
      "metadata": {
        "mid": "/m/03_3d",
        "wikipedia_url": "https://en.wikipedia.org/wiki/Japan"
      },
      "salience": 0.23854347,
      "mentions": [
        {
          "text": {
            "content": "日本",
            "beginOffset": 0
          },
          "type": "PROPER"
        }
      ]
    },
    {
      "name": "グーグル",
      "type": "ORGANIZATION",
      "metadata": {
        "mid": "/m/045c7b",
        "wikipedia_url": "https://en.wikipedia.org/wiki/Google"
      },
      "salience": 0.21155767,
      "mentions": [
        {
          "text": {
            "content": "グーグル",
            "beginOffset": 9
          },
          "type": "PROPER"
        }
      ]
    },
    ...
  ]
  "language": "ja"
}
The API extracts Japan as a location and Google as an organization, along with the Wikipedia pages for each.
You've learned how to perform text analysis with the Cloud Natural Language API by extracting entities, analyzing sentiment, and doing syntax annotation.
What we've covered
- Creating a Natural Language API request and calling the API with curl
- Extracting entities and running sentiment analysis on text with the Natural Language API
- Performing linguistic analysis on text to create dependency parse trees
- Creating a Natural Language API request in Japanese
Next Steps
- Check out the Natural Language API tutorials in the documentation.
- Try out the Vision API and Speech API!