
In this codelab, you'll create your first Android app (Happy Birthday) starting from a template for a basic app provided by Android Studio. You'll also explore what an Android project looks like, and learn how to use different windows in Android Studio.
Prerequisites
- Familiarity with setting up, configuring, and using applications, such as a word processor or a spreadsheet
What you'll learn
- How to create an Android Studio project for an Android app using a template.
What you'll build
- A basic Android app from a template
What you need
- A computer with Android Studio installed
In this task you'll create an Android app using a project template provided by Android Studio.
Project templates
In Android Studio, a project template is an Android app that has all the necessary parts, but doesn't do much. The purpose is to help you get started faster and save you some work. Some examples of templates in Android Studio are an app with a map, and an app with multiple screens.
Create an Empty Activity project
In these steps you'll create a new Android Studio project using the Empty Activity project template for your new app.
- Start Android Studio (if it's not already open) by clicking the Android Studio icon
 .
.
The Welcome to Android Studio window displays.
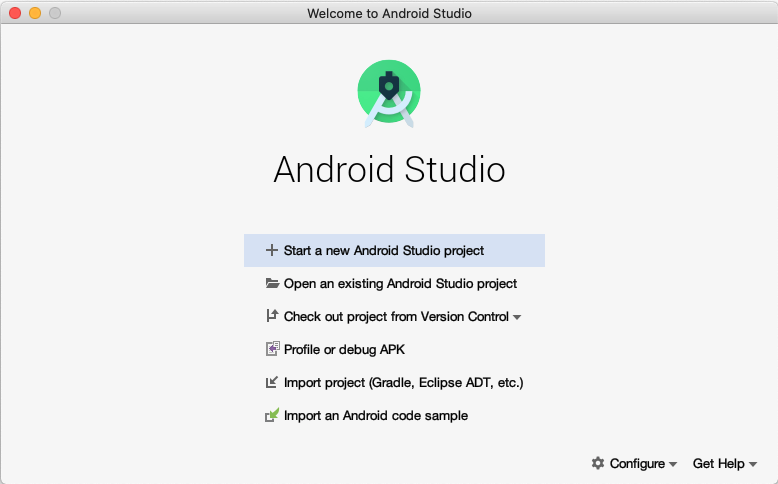
- In the Welcome to Android Studio window, click + Start a new Android Studio project.
The Create New Project window opens with a list of templates provided by Android Studio.
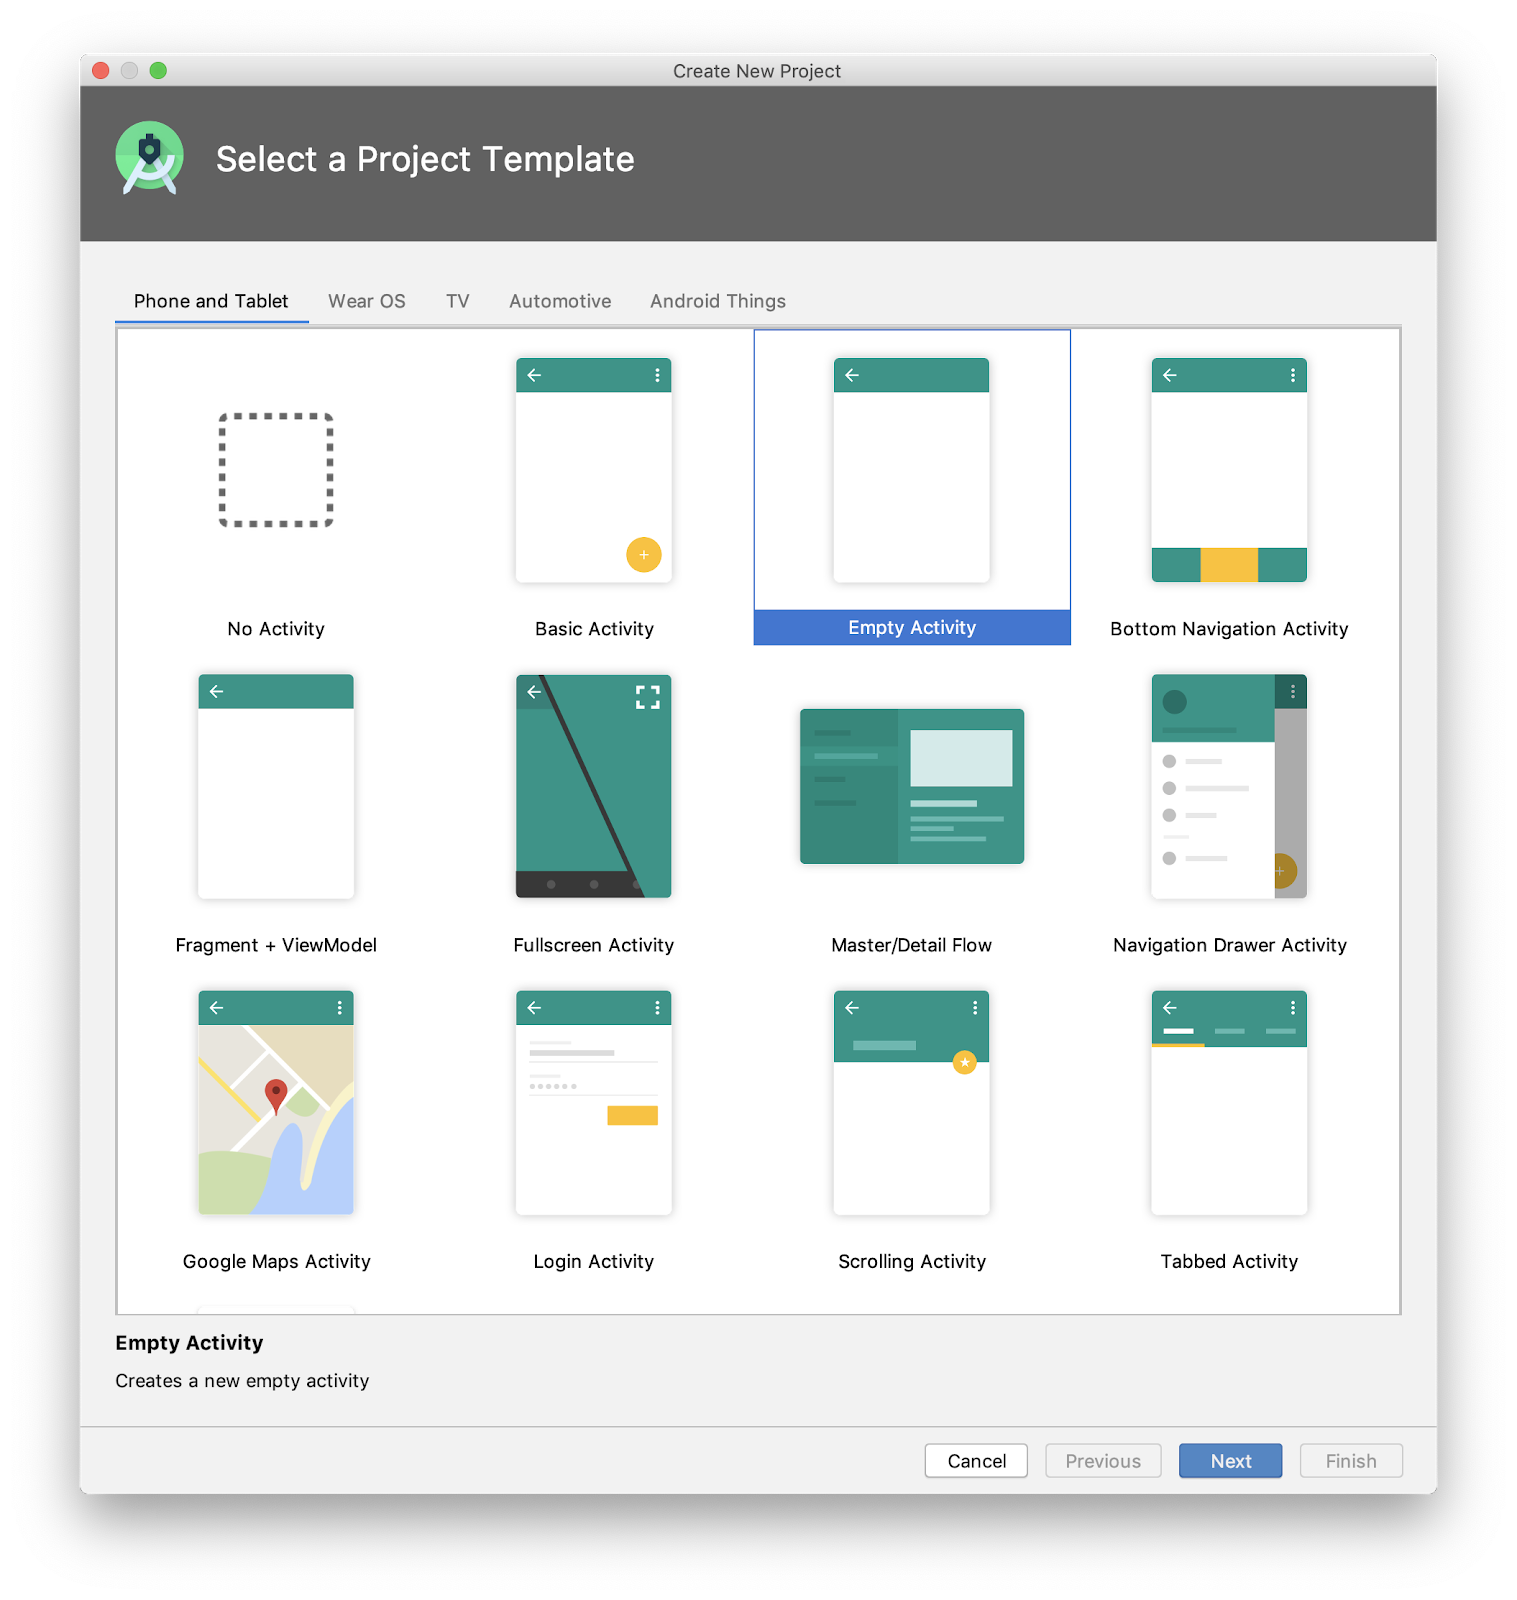
- Click the tabs at the top and scroll through the templates to get an idea of what you could do! There are templates for many different types of devices (such as phones, tablets, and watches), and different types of apps (apps with scrollable screens, apps with maps, and apps with fancy navigation).
- At the top left of the window, click the Phone and Tablet tab.
- In the top row, click the Empty Activity template to select it as the template for your project.
The Empty Activity template is the simplest template that can be used to create an app. It has a single screen and displays a simple "Hello World!" message.
- At the bottom of the window, click Next. The Create New Project dialog opens.
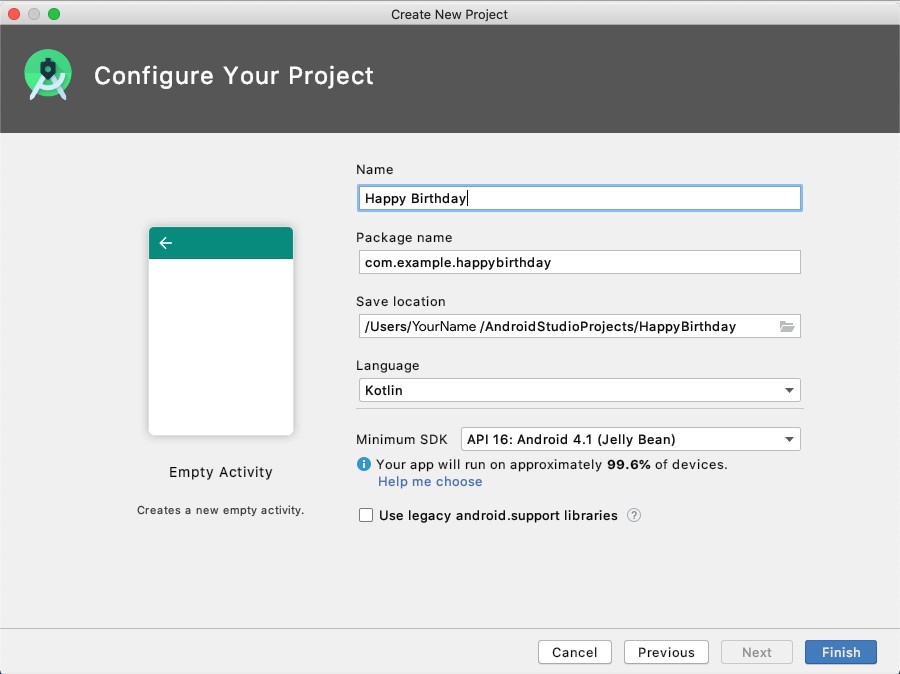
Configure your project as follows:
- Name is the name of your app. In the box below Name, enter
Happy Birthdayas the name for your project. - Package name is the name used by the Android system to uniquely identify your app. Usually, this defaults to the name of your organization followed by the name of the app, all in lowercase (in this case "
com.example.happybirthday"). - Save location is the location where all the files related to your project are saved. Take a note of where that is on your computer, so you can find your files. You can leave the save location also as is for now.
- Language defines which programming language you want to use for your project. Make sure the Language is
Kotlin. - Minimum SDK indicates the minimum version of Android that your app can run on. Select
API 19: Android 4.4 (KitKat)from the dropdown list.
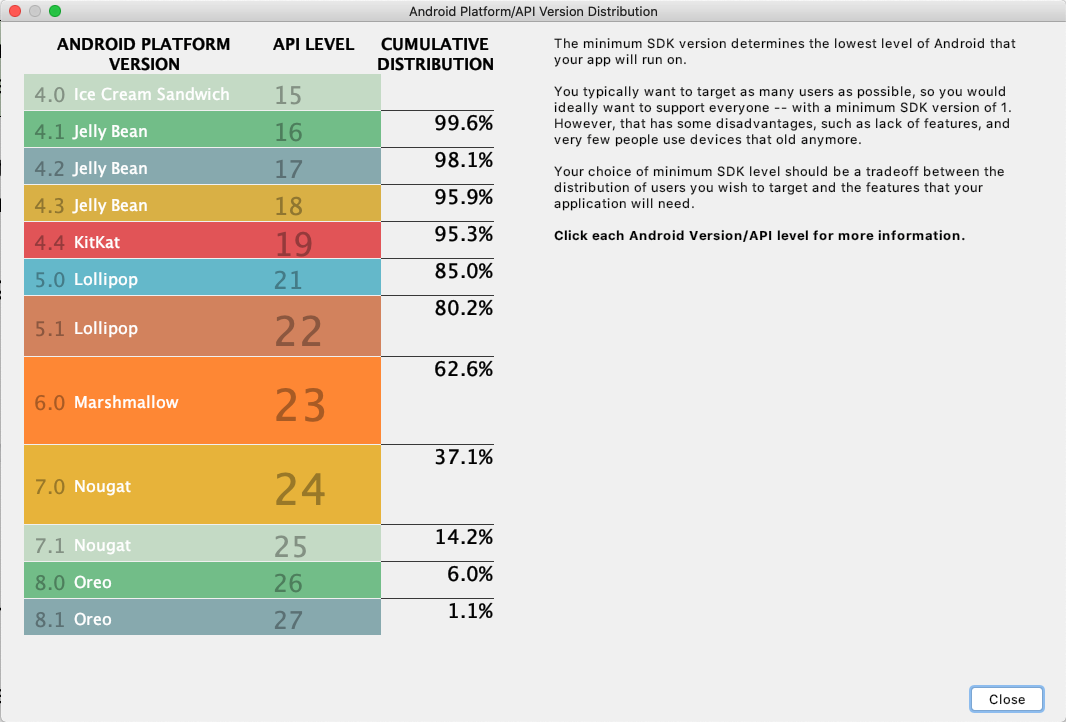
- Below Minimum SDK, notice the informational note on how many devices your app can run on with the chosen API level. If you are curious, click the Help me choose link to display a list of different versions of Android, as shown below. Then return to the New Project window.
- In the Create New Project window, make sure Use legacy android.support libraries is unchecked. Click the question mark if you want to know more about this.
- Click Finish.
Android Studio opens the project and all of its files.
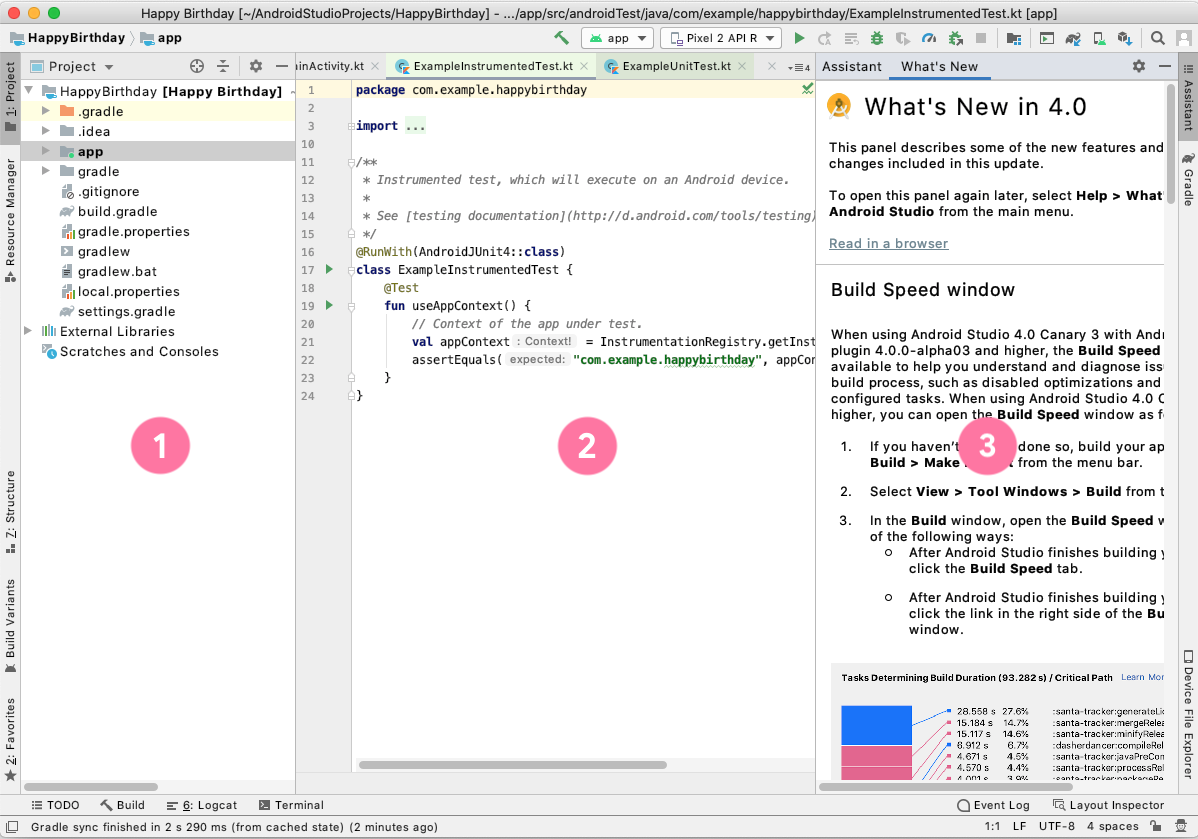
When you first open Android Studio, you'll see three windows:
(1) The Project window shows the files and folders of your project.
(2) The Editing window is for editing code.
(3) The What's New window shows news and useful tips.
In the bottom right corner of Android Studio a progress bar or message indicates whether Android Studio is still working on setting up your project. For example:

- Wait until Android Studio has completed setting up your project. A message in the bottom left corner, like the one shown below, will let you know when the project is complete.

In this task, you'll use the Android Virtual Device (AVD) manager to create a software version (an emulator) of a mobile device and run it on your computer. A virtual device, or emulator, simulates the configuration for a particular type of Android device, such as a phone. This could be any phone or tablet running your choice of Android system versions. You'll then use the virtual device to run the app you created with the Empty Activity template.
Create an Android virtual device (AVD)
The first step towards running an emulator on your computer, is to create a configuration for the virtual device.
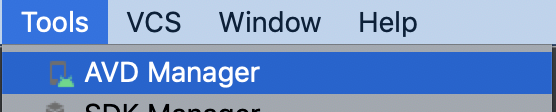
- From the Android Studio menu bar, select Tools > AVD Manager.
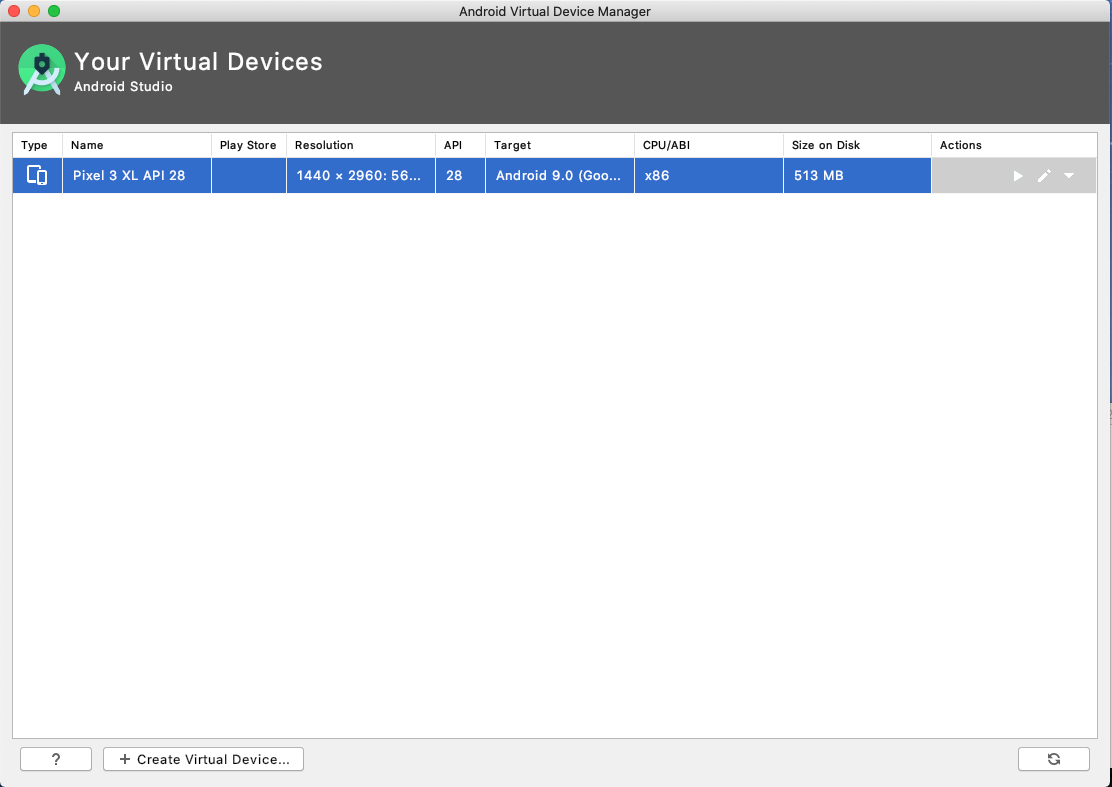
The Your Virtual Devices dialog displays as shown below. (If you created a virtual device previously, it will be listed here.)
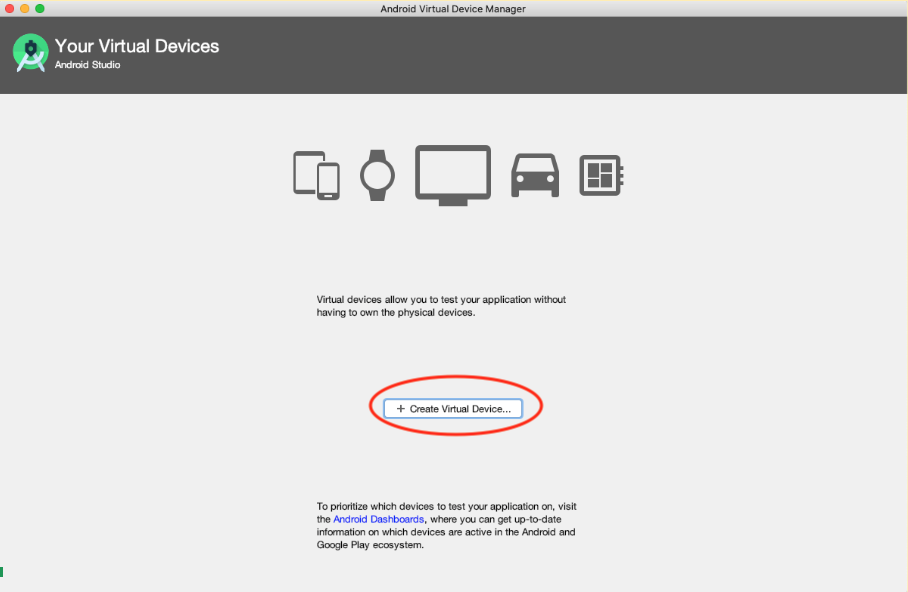
- Click + Create Virtual Device.
The Select Hardware window appears.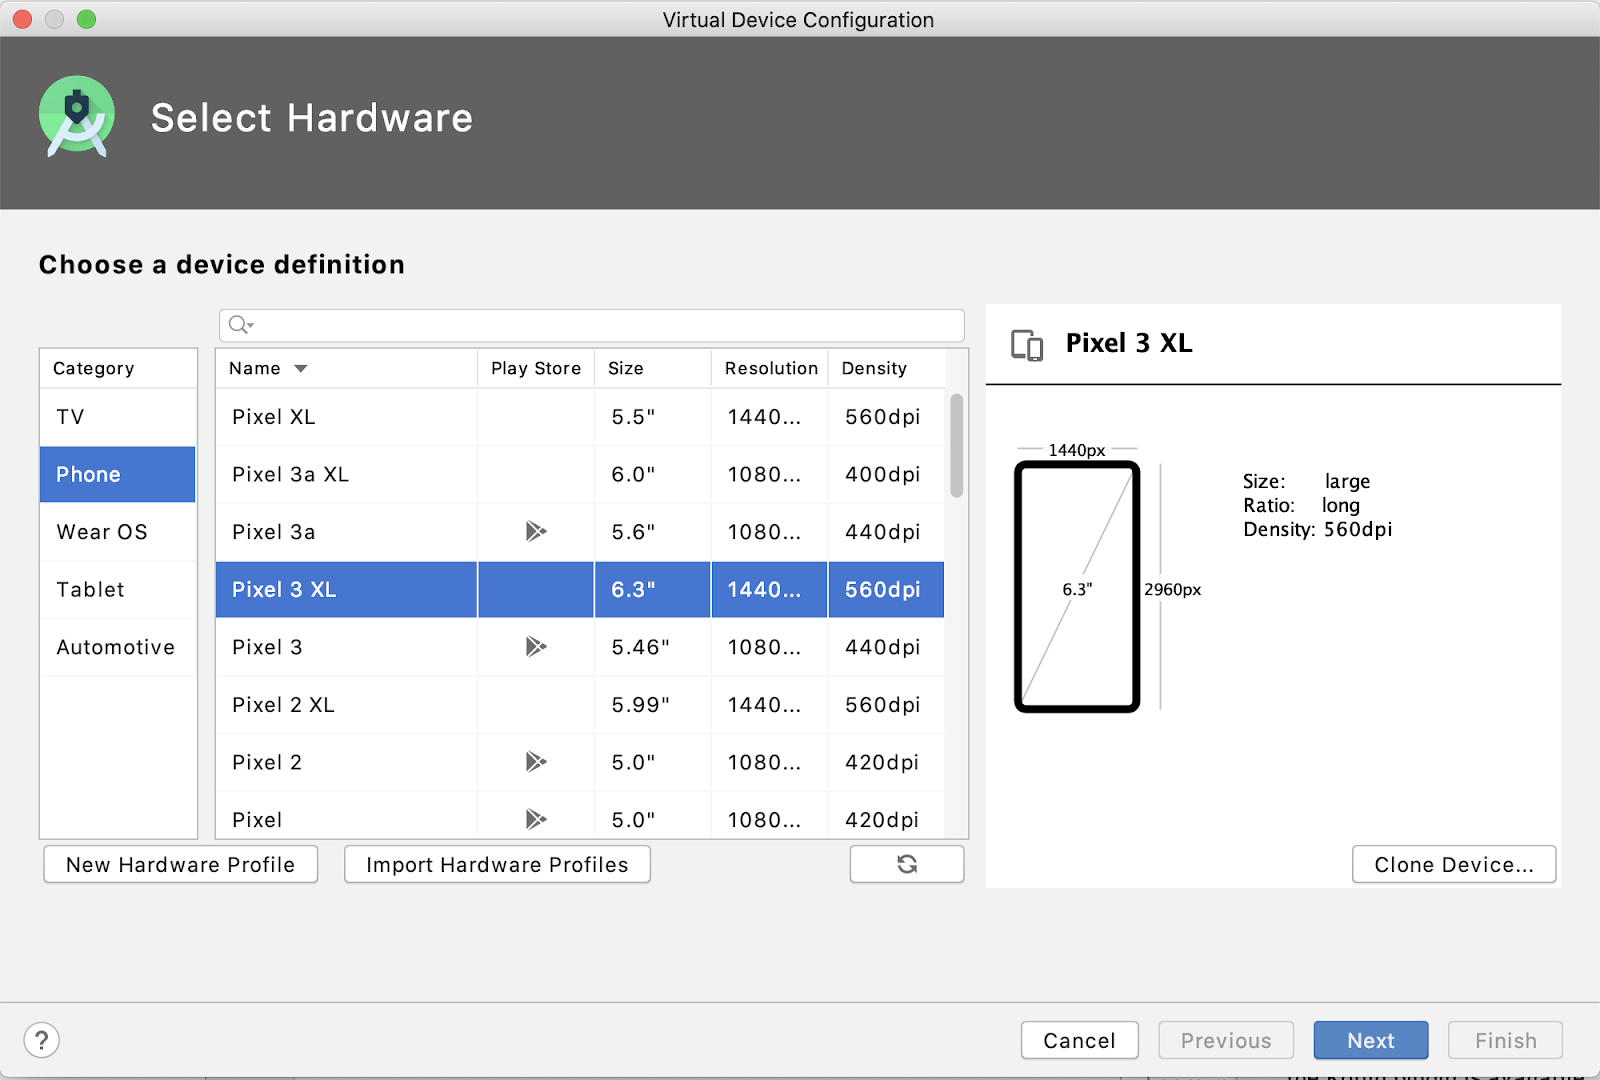
The Select Hardware window shows a list of pre-configured devices organized by Category that you can choose from. For each device, the table provides a column for its display size (Size), screen resolution in pixels (Resolution), and pixel density (Density).
- Select Phone as the category.
- Select a phone (for example, a
Pixel 3 XL), and then click Next. You can choose any phone, but for this codelab, choose a newer device.
The System Image window appears. From here, you choose the version of the Android system to run on your virtual device. This lets you test your app on different versions of the Android system.
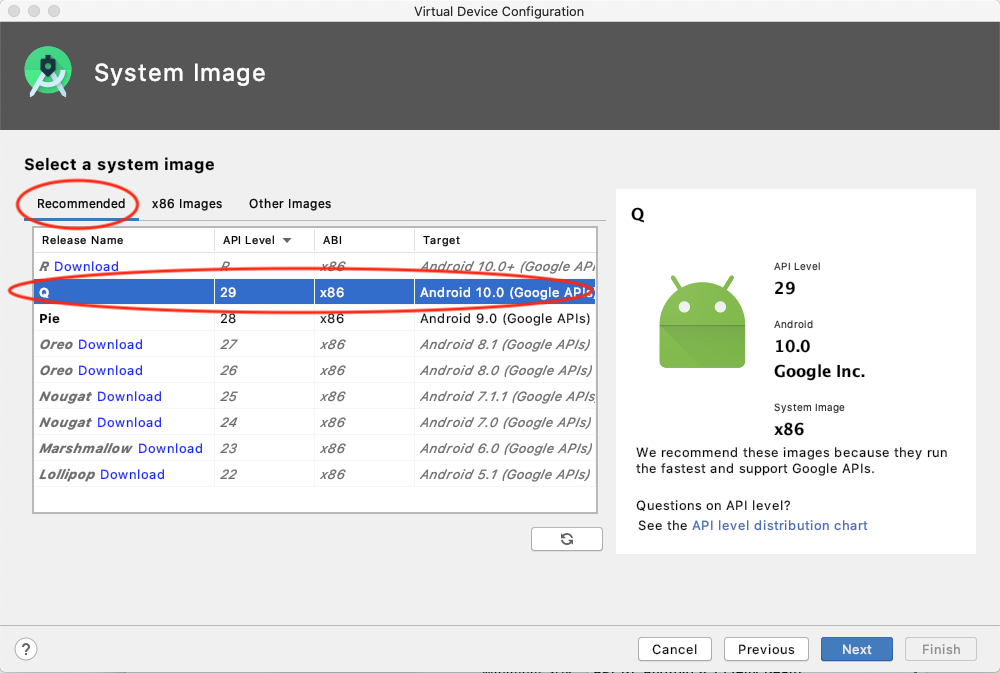
- From the Recommended tab, choose
Qas the version of the Android system to run on the virtual device. This was the latest version of Android at the time of writing, but you can choose any later stable version. Check here for a list of stable versions.
- Click Next.
The Android Virtual Device (AVD) window displays, from where you can choose additional configuration details for your device.
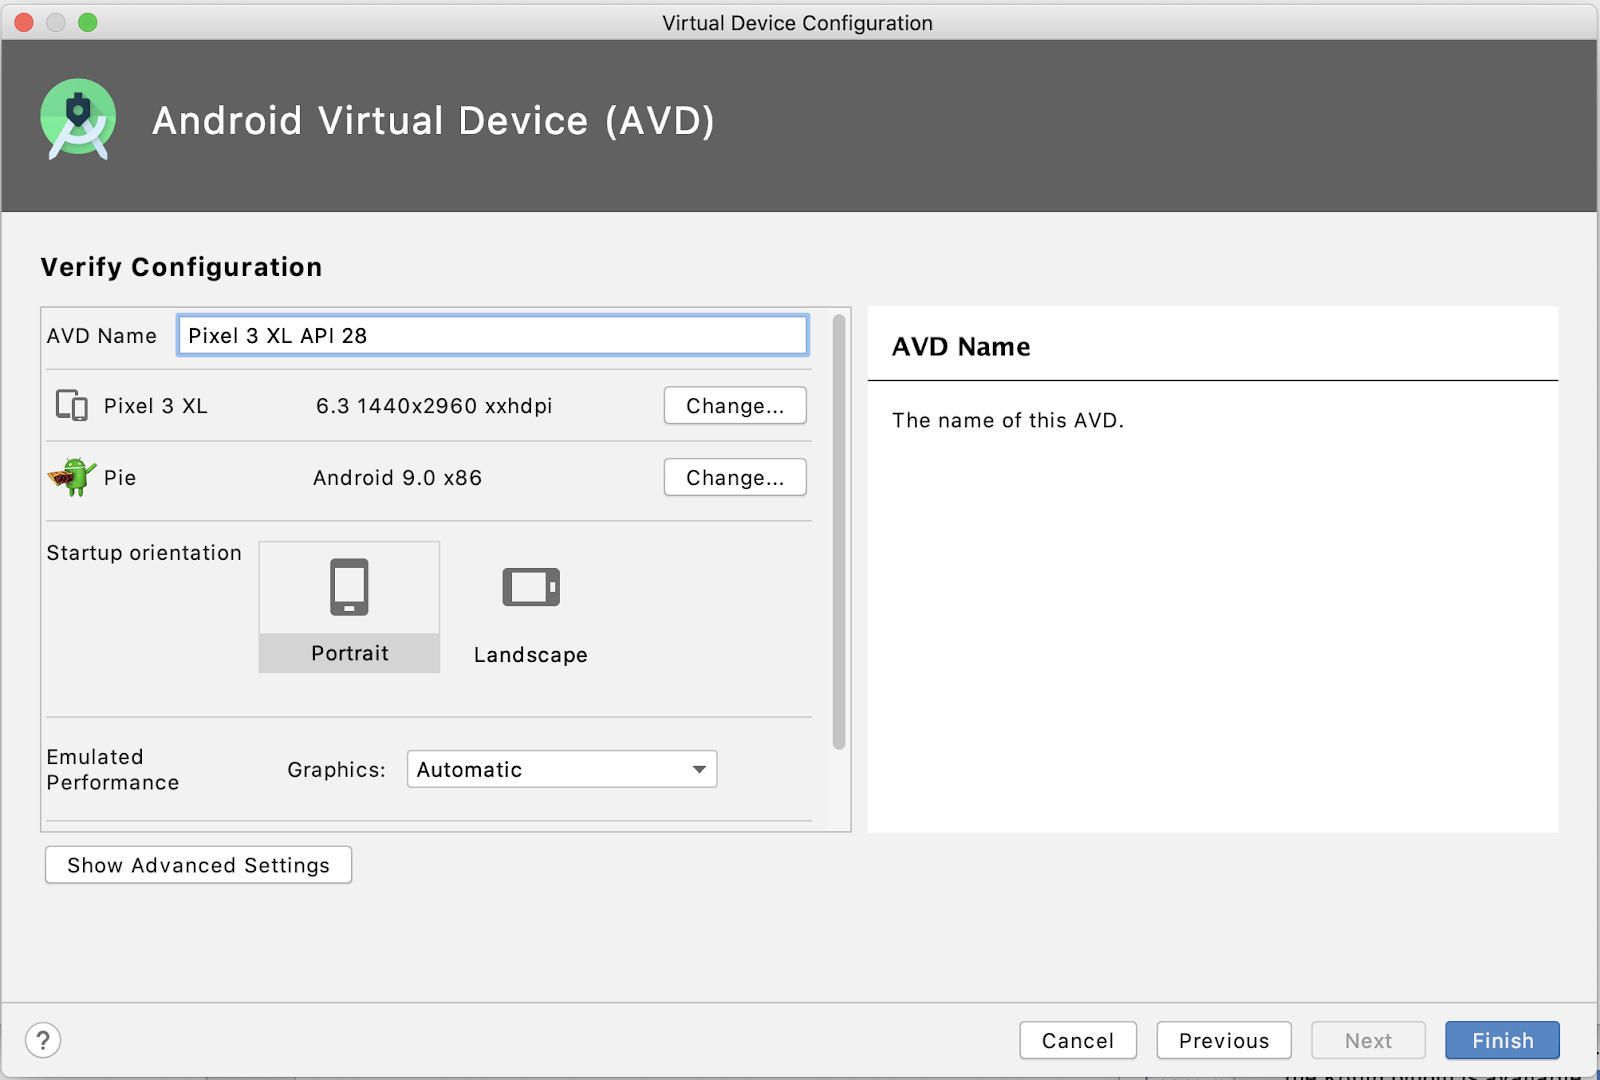
- In the AVD Name field, enter a name for your Android Virtual Device. Leave the rest unchanged.
- Click Finish.
Your new virtual device displays in the Your Virtual Device window and is ready to use.
- Close the Your Virtual Device window.
Run your app on the virtual device
- If it is not already, bring Android Studio to the foreground.
- In Android Studio, in the toolbar, find the virtual device dropdown menu (it will look similar to the example below), and then select the virtual device you created from the dropdown list.
 (Or, click Run > Select Device.. and then select your virtual device from the available devices in the popup.)
 - In Android Studio, select Run > Run app, or click the Run icon Run app or click the Run icon [ICON HERE] in the toolbar. [IMAGEINFO]: ic_run.png, Android Studio Run icon" style="width: 21.56px" src="img/609c3e4473493202.png"> on the toolbar.
The virtual device starts and boots just like a physical device. Depending on the speed of your computer, this may take a bit of time.
When your app is ready, it opens on the virtual device, as shown below.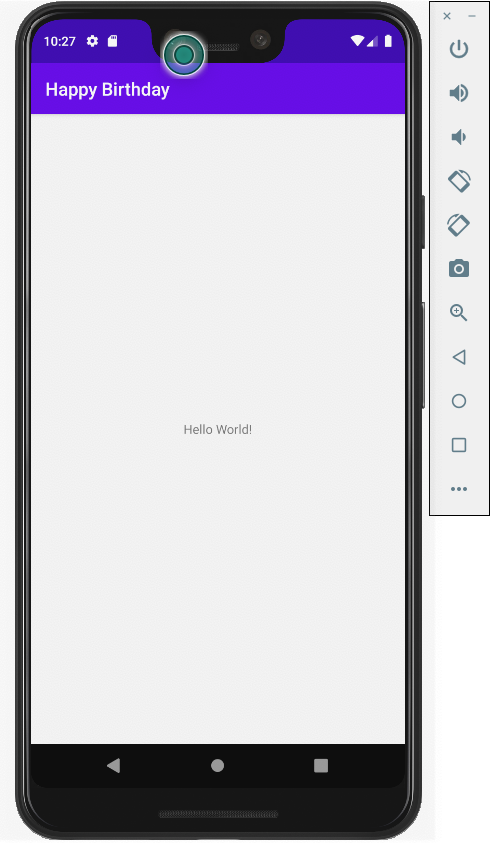
Great job! Your virtual device is now up and running. Notice that the title is now "Happy Birthday", and that "Hello World!" is showing on the screen.
When you configured your project, Android Studio created a folder on your computer for all your Android projects called AndroidStudioProjects. Inside the AndroidStudioProjects folder, Android Studio also creates a folder with the same name as your app (HappyBirthday in this case).
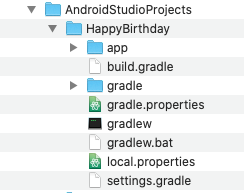
The HappyBirthday folder is your project folder. Android Studio saves both the files you create and the files that are created by Android Studio in your project folder.
- In Android Studio, look at the Project window on the left. The Project window shows the files and folders of your project.
Files in the Project window are organized to make navigation between the project files easier when you write code. However, if you look at the files in a file browser, such as Finder or Windows Explorer, the file hierarchy is organized very differently.
In this task you will explore these two different views of the project folder hierarchy.
- In Android Studio, in the Project window, select Android from the drop-down menu in the top-left corner.
You should see a file listing similar to the following:
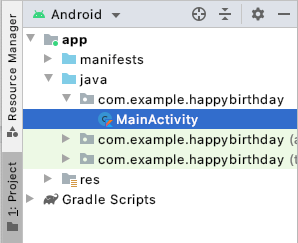
This view and organization of your files is useful when working on writing code for your project.
You can also view your files as they would appear in a file browser, such as Finder (for macOS) or Explorer (for Windows).
- In the Project window, select Project Source Files from the drop-down menu.
Notice that the title changes to the folder where the project files are stored.
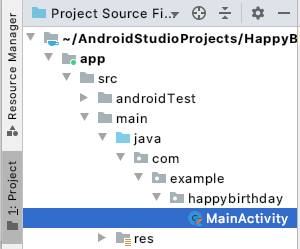
You can now browse the files in the same way as in any file explorer.
- To switch back to the previous view, in the Project window, select Android again.
Great! Now you can create and run an app from a template, and you can find your project files.
- To create a new project, start Android Studio, click + Start a new Android Studio project, name your project, choose a template, and fill in the details.
- To create an Android virtual device (an emulator) to run your app, choose Tools > AVD Manager and then use the AVD Manager to select a hardware device and system image.
- To run your app on a virtual device, make sure you have created a device, select the device from the toolbar dropdown menu, and then run your app by clicking the Run icon Run app or click the Run icon [ICON HERE] in the toolbar. [IMAGEINFO]: ic_run.png, Android Studio Run icon" style="width: 20.00px" src="img/609c3e4473493202.png"> on the toolbar.
- To find your project files, in the Project window, select Project Source Files from the dropdown.