
In this codelab, you will create a Dice Roller Android app where users can click a Button in the app to roll a dice. The outcome of the roll will be shown in a TextView on the screen.
You will use the Layout Editor in Android Studio to build your app layout, and then write Kotlin code for what happens when the Button is clicked.
Prerequisites
- How to create and run a "Hello, World!" app in Android Studio.
- Familiar with using
TextViewsandImageViewsin an app. - How to modify the attributes of a
TextViewin the Layout Editor. - How to extract text into a string resource to make it easier to translate your app and reuse strings.
- Kotlin programming basics as taught in the previous codelabs.
What you'll learn
- How to add a
Buttonto an Android app. - How to add behavior for when a
Buttonis tapped in the app. - How to open and modify the
Activitycode of an app. - How to display a
Toastmessage. - How to update the contents of a
TextViewwhile the app is running.
What you'll build
- A Dice Roller Android app that has a
Buttonto roll a dice and updates the text on the screen with the result of the roll.
What you need
- A computer with Android Studio installed.
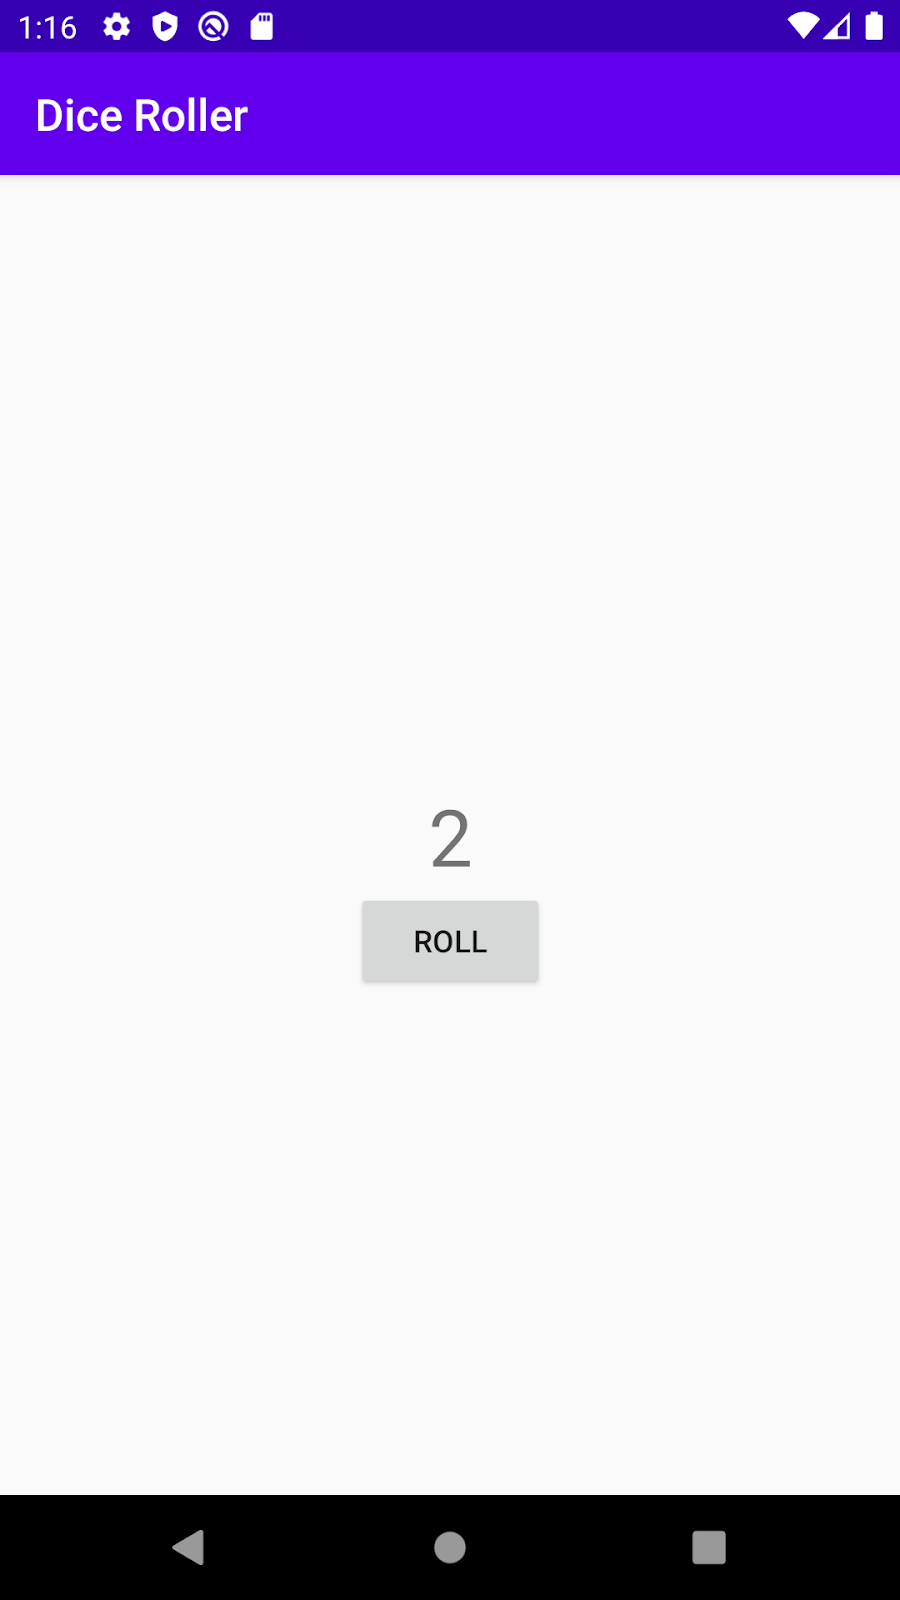
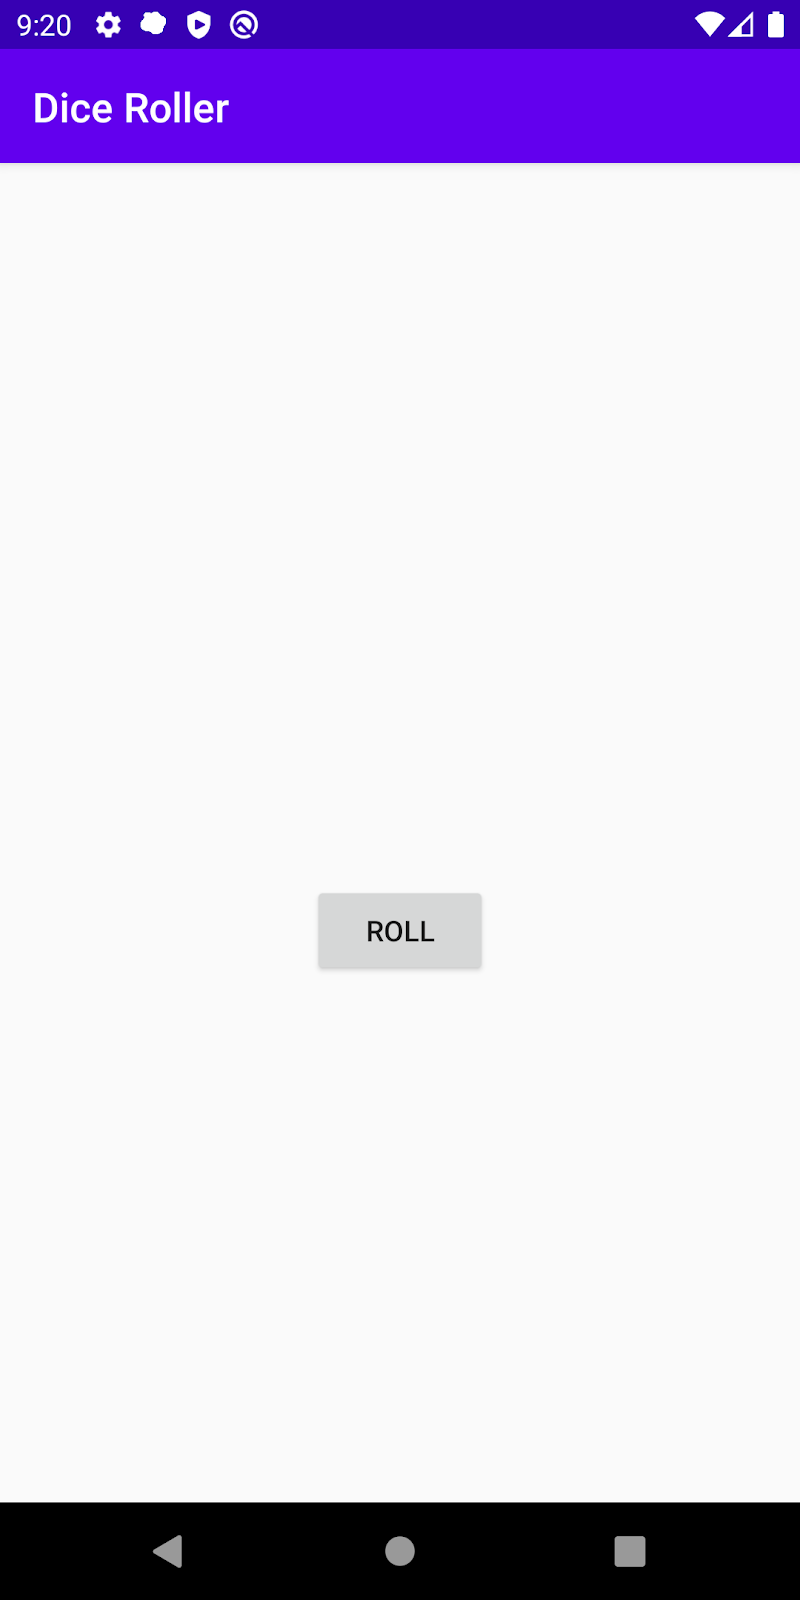
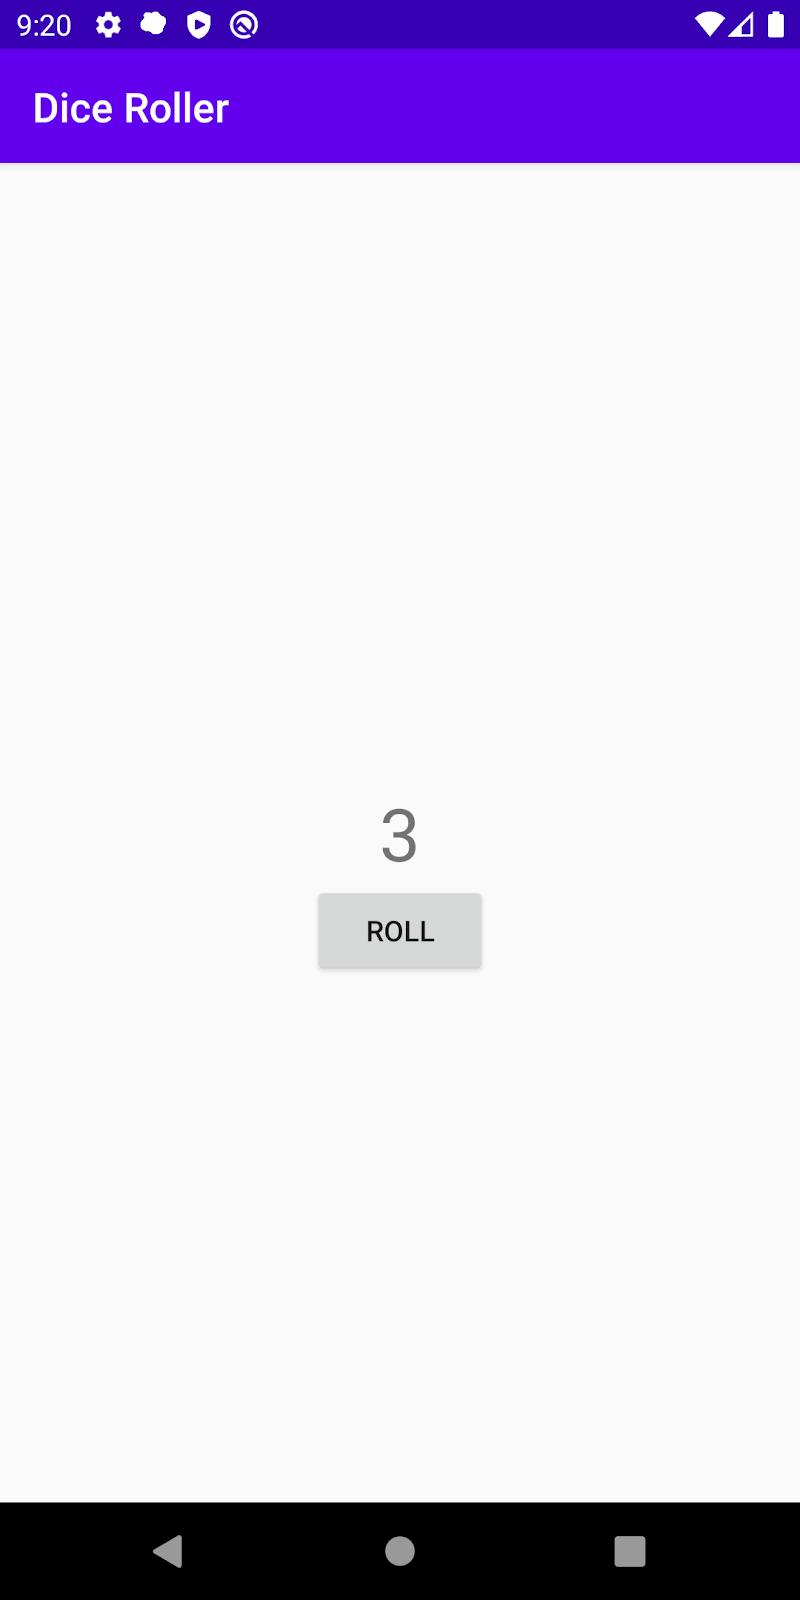
Here is what the app will look like when you have completed this codelab.
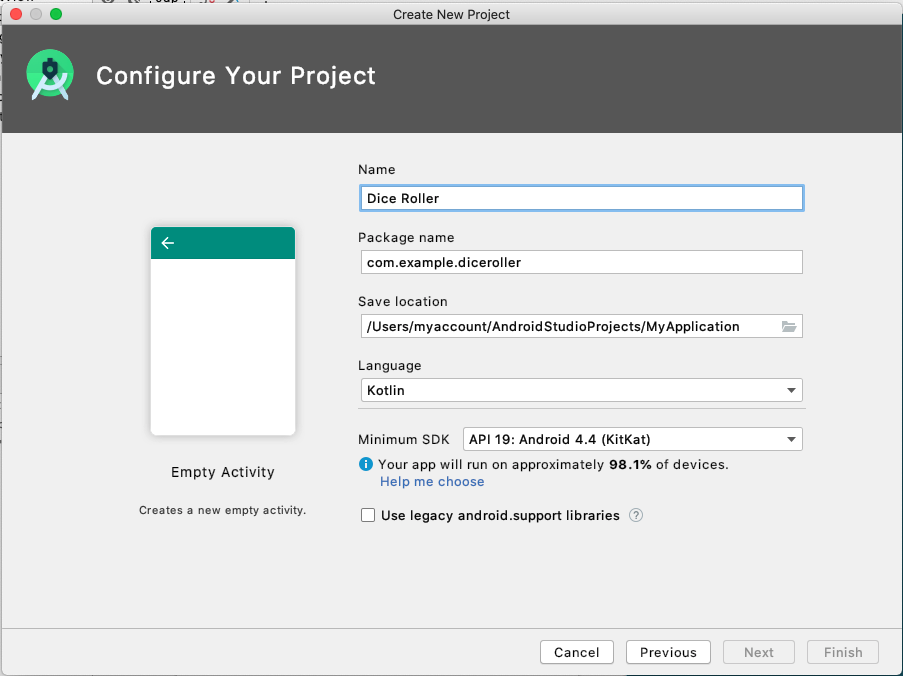
Create an Empty Activity project
- If you already have an existing project open in Android Studio, go to File > New > New Project... to open the Create New Project screen.
- In Create New Project, create a new Kotlin project using the Empty Activity template.
- Call the app "Dice Roller", with a minimum API level of 19 (KitKat).
Important: If you're not familiar with creating a new project in Android Studio, see Create and run your first Android app for details.
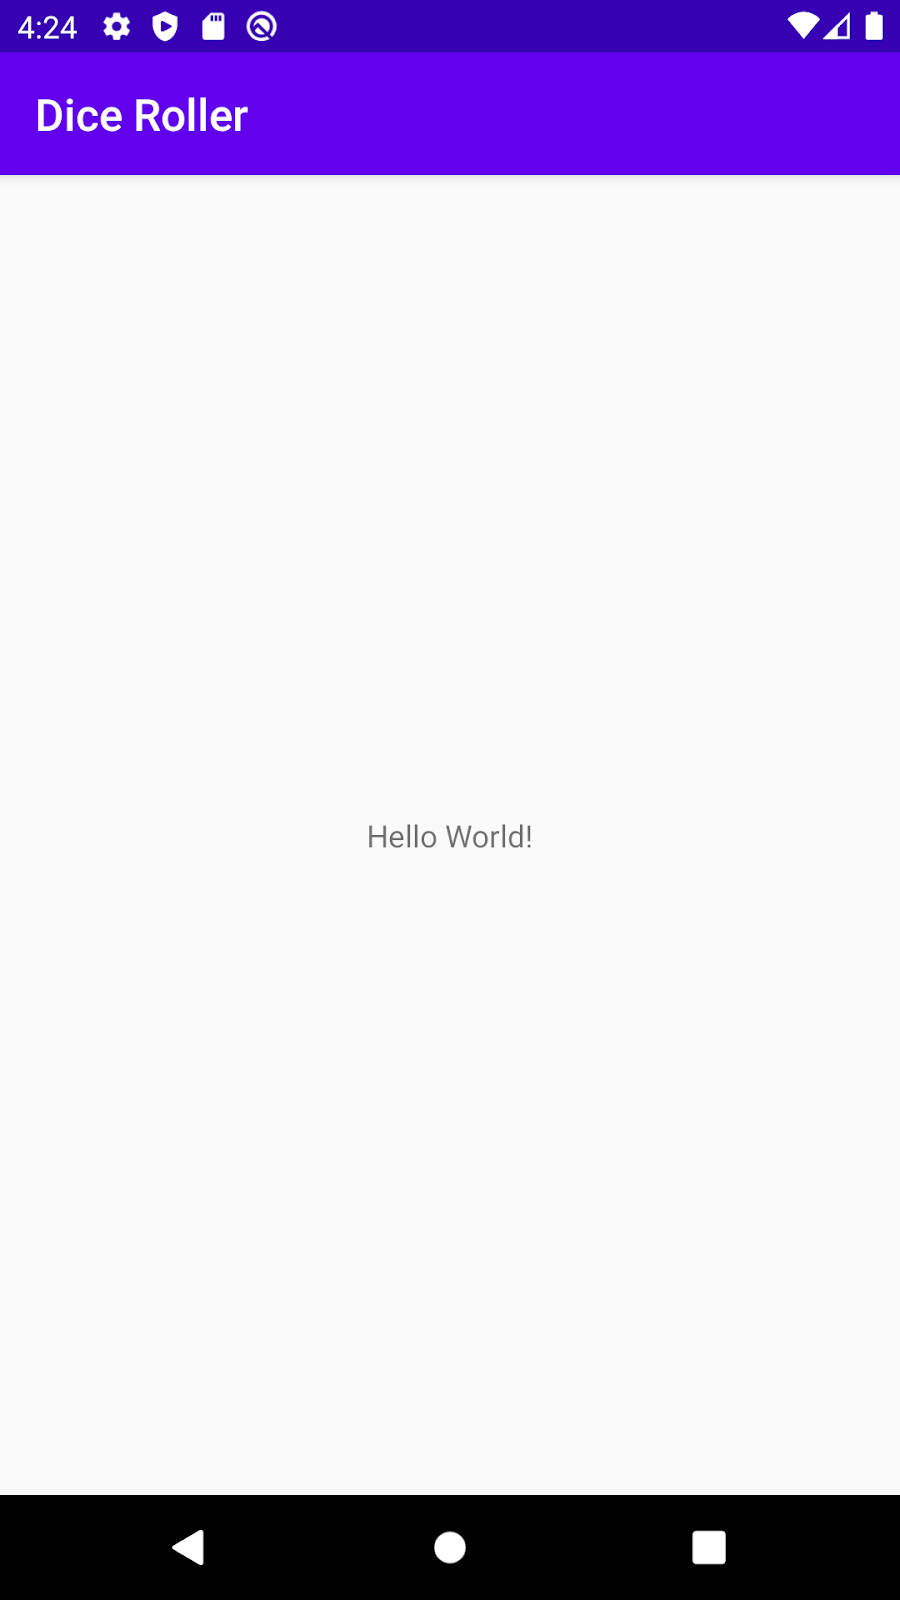
- Run the new app and it should look like this.
Open the Layout Editor
- In the Project window, double-click
activity_main.xml(app > res > layout > activity_main.xml) to open it. You should see the Layout Editor, with only the "Hello World"TextViewin the center of the app.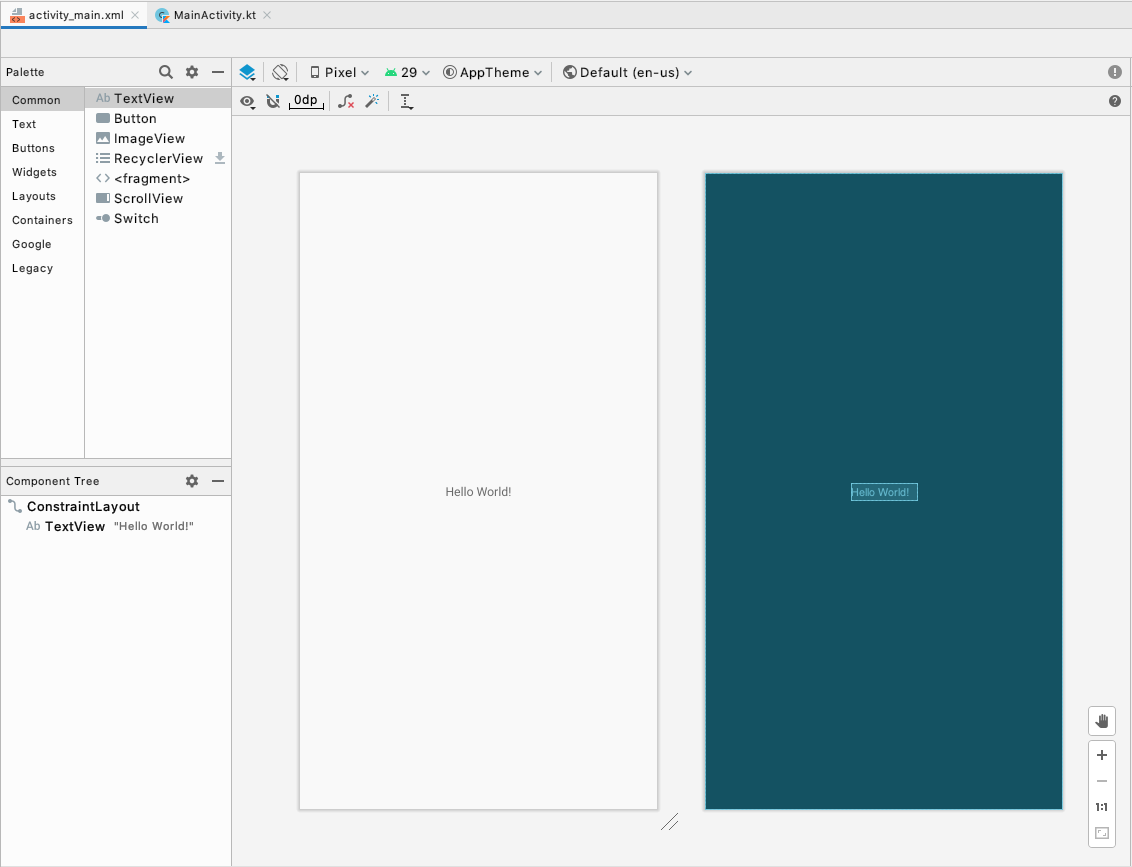
Next you will add a Button to your app. A Button is a user interface (UI) element in Android that the user can tap to perform an action.
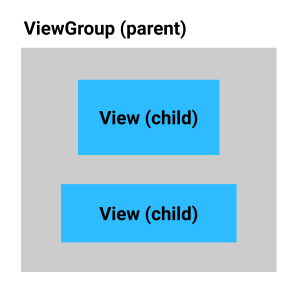
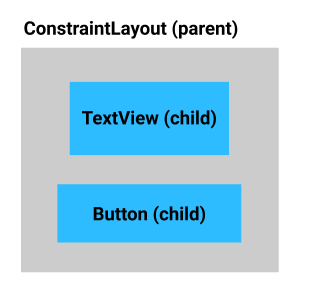
In this task, you add a Button below the "Hello World" TextView. The TextView and the Button will be located within a ConstraintLayout, which is a type of ViewGroup.
When there are Views within a ViewGroup, the Views are considered children of the parent ViewGroup. In the case of your app, the TextView and Button would be considered children of the parent ConstraintLayout.
Go ahead with adding a Button as a child of the existing ConstraintLayout in your app.
Add a Button to the layout
- Drag a
Buttonfrom the Palette onto the Design view, positioning it below the "Hello World"TextView.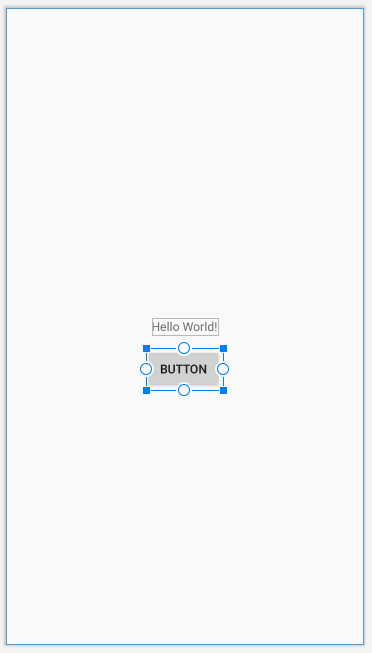
- Below the Palette in the Component Tree, verify that the
ButtonandTextVieware listed under theConstraintLayout(as children of theConstraintLayout). - Notice an error that the
Buttonis not constrained. Since theButtonis sitting within aConstraintLayout, you must set vertical and horizontal constraints to position it.

Position the Button
In this step you'll add a vertical constraint from the top of the Button to the bottom of the TextView. This will position the Button below the TextView.
- In the Design view, at the top edge of the
Button, press and hold the white circle with a blue border. Drag the pointer, and an arrow will follow the pointer. Release when you reach the bottom edge of the "Hello World"TextView. This establishes a layout constraint, and theButtonslides up to just beneath theTextView.
- Look at the Attributes on the right hand side of the Layout Editor.
- In the Constraint Widget, notice a new layout constraint that is set to the bottom of the
TextView, Top → BottomOf textView (0dp). (0dp) means there is a margin of 0. You also have an error for missing horizontal constraints.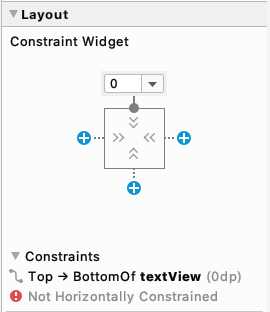
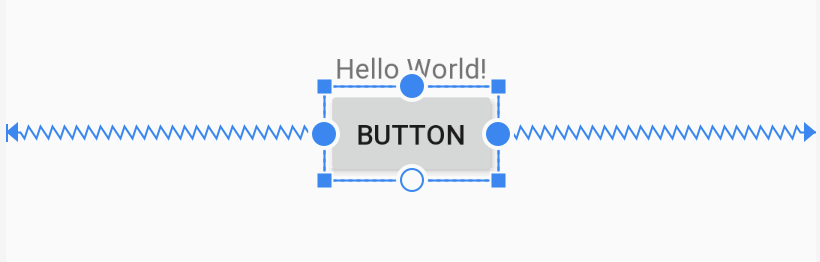
- Add a horizontal constraint from the left side of the
Buttonto the left side of the parentConstraintLayout. - Repeat on the right side, connecting the right edge of the
Buttonto the right edge of theConstraintLayout. The result should look like this:
- With the
Buttonstill selected, the Constraint Widget should look like this. Notice two additional constraints that have been added: Start → StartOf parent (0dp) and End → EndOf parent (0dp). This means theButtonis horizontally centered in its parent, theConstraintLayout.
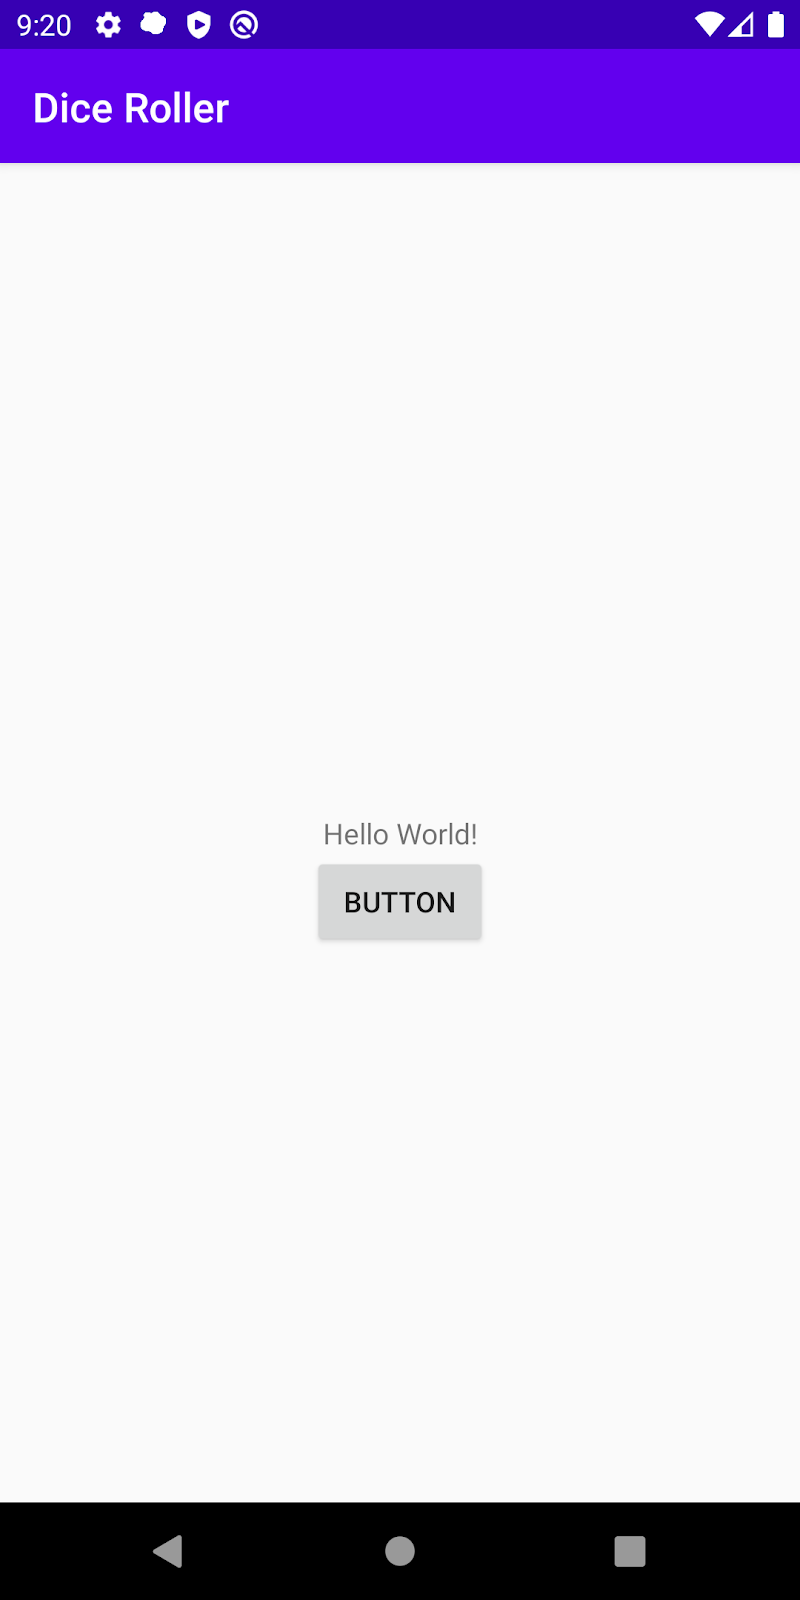
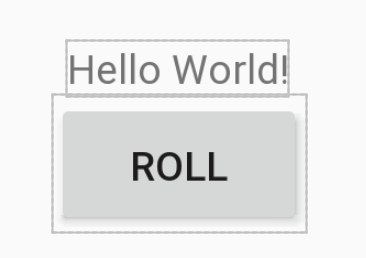
- Run the app. It should look like the screenshot below. You can click on the
Button, but it doesn't do anything yet. Let's keep going!
Change the Button text
You're going to make a couple more UI changes in the Layout Editor.
Instead of having the Button label show "Button", change it to something that indicates what the button is going to do: "Roll".
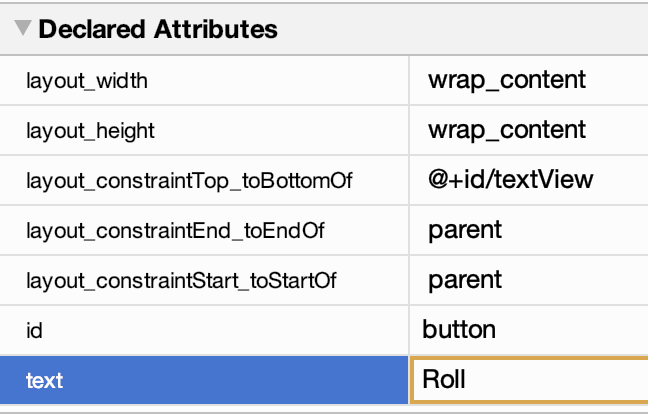
- In the Layout Editor, with the
Buttonselected, go to Attributes, change the text to Roll, and press theEnter(Returnon the Mac) key.
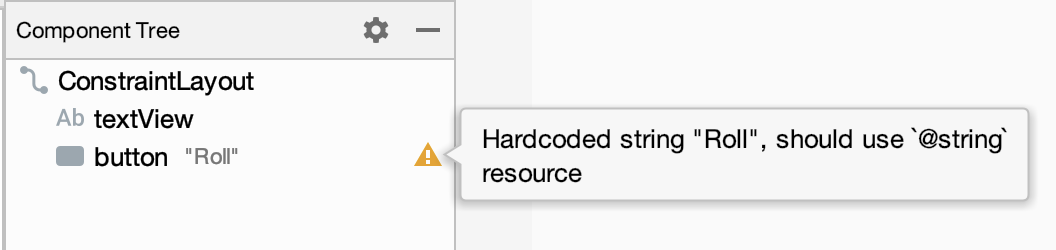
- In the Component Tree, an orange warning triangle appears next to the
Button. If you hover the pointer over the triangle, a message appears. Android Studio has detected a hardcoded string ("Roll") in your app code and suggests using a string resource instead.
Having a hardcoded string means the app will be harder to translate into other languages and it is harder to reuse strings in different parts of your app. Fortunately, Android Studio has an automatic fix for you.
- In the Component Tree, click on the orange triangle.
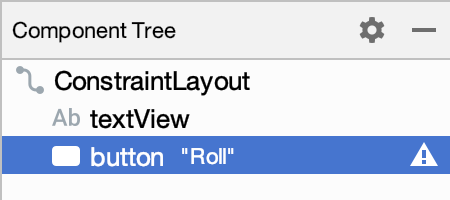
The full warning message opens.
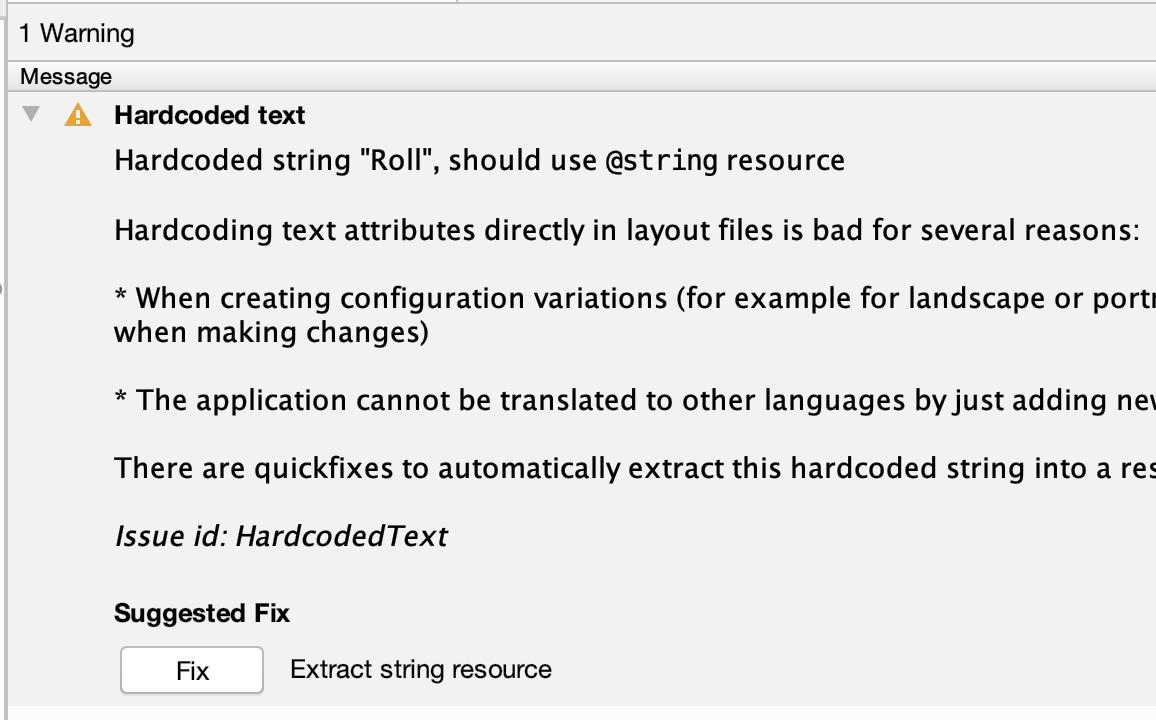
- At the bottom of the message, under Suggested Fix, click the Fix button. (You may need to scroll down.)
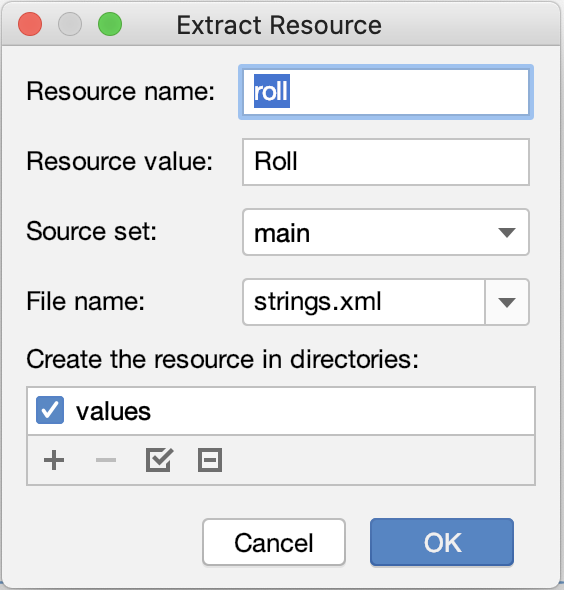
- The Extract Resource dialog opens. To extract a string means to take the "Roll" text and create a string resource called
rollinstrings.xml(app > res > values > strings.xml). The default values are correct, so click OK.
- Notice that in Attributes, the text attribute for the
Buttonnow says@string/roll, referring to the resource you just created.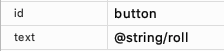
In the Design view, the Button should still say Roll on it.
Style the TextView
The "Hello World!" text is quite small, and the message isn't relevant for your app. In this step you'll replace the small "Hello, World!" message with a number to show the rolled value, and make the font bigger, so it is easier to see.
- In the Design Editor, select the
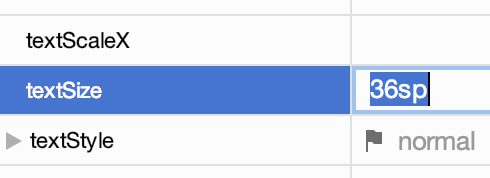
TextViewso that its attributes appear in the Attributes window. - Change the textSize of the
TextViewto 36sp, so that it's large and easy to read. You may need to scroll to find textSize.
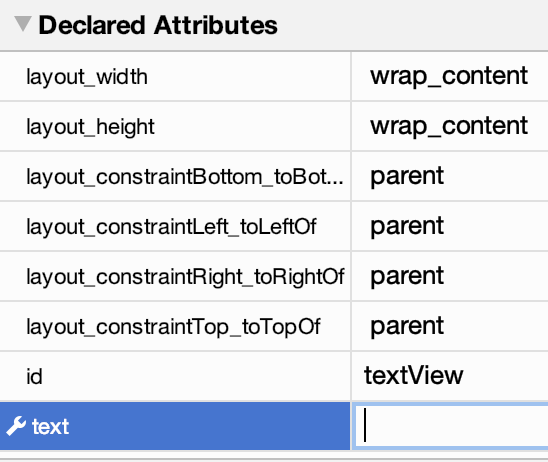
- Clear the text attribute of the
TextView. You don't need to display anything in theTextViewuntil the user rolls the dice.
However, it's very helpful to see some text in the TextView when you're editing the layout and code for your app. For this purpose, you can add text to the TextView that is only visible for the layout preview, but not when the app is running
.
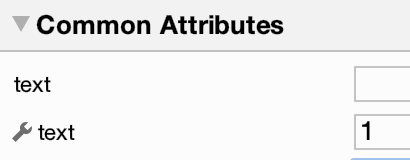
- Select the
TextViewin the Component Tree. - Under Common Attributes, find the text attribute, and below it, another text attribute with a tool icon. The text attribute is what will be displayed to the user when the app is running. The text attribute with a tool icon is the "tools text" attribute that is just for you as a developer.
- Set the tools text to be "1" in the
TextView(to pretend you have a dice roll of 1). The "1" will only appear in the Design Editor within Android Studio, but it will not appear when you run the app on an actual device or emulator.
Note that because this text is only viewed by app developers, you don't need to make a string resource for it.
- Look at your app in the preview. The "1" is showing.

- Run your app. This is what the app looks like when it's run on an emulator. The "1" is not showing. This is the correct behavior.
Great, you're done with the layout changes!
You have an app with a button, but if you tap the button, nothing happens. To change this, you'll need to write some Kotlin code that rolls the dice and updates the screen when the button is tapped.
In order to make this change, you need to understand a little bit more of how an Android app is structured.
An Activity provides the window in which your app draws its UI. Typically, an Activity takes up the whole screen of your running app. Every app has one or more activities. The top-level or first activity is often called the MainActivity and is provided by the project template. For example, when the user scrolls through the list of apps on their device and taps on the "Dice Roller" app icon, the Android System will start up the MainActivity of the app.
In your MainActivity code, you need to provide details on the Activity's layout and how the user should interact with it.
- In the Birthday Card app, there is one
Activitythat displays the birthday message and image. - In the Dice Roller app, there is one
Activitythat displays theTextViewandButtonlayout you just built.
For more complicated apps, there may be multiple screens and more than one Activity. Each Activity has a specific purpose.
For example, in a photo gallery app, you could have an Activity for displaying a grid of photos, a second Activity for viewing an individual photo, and a third Activity for editing an individual photo.

Open the MainActivity.kt file
You will add code to respond to a button tap in the MainActivity. In order to do this correctly, you need to understand more about the MainActivity code that's already in your app.
- Navigate to and open the
MainActivity.ktfile (app > java > com.example.diceroller > MainActivity.kt). Below is what you should see. If you seeimport..., click on the...to expand the imports.
package com.example.diceroller

import androidx.appcompat.app.AppCompatActivity
import android.os.Bundle

class MainActivity : AppCompatActivity() {

   override fun onCreate(savedInstanceState: Bundle?) {
       super.onCreate(savedInstanceState)
       setContentView(R.layout.activity_main)
   }
}
You don't need to understand every single word of the above code, but you do need to have a general idea of what it does. The more you work with Android code, the more familiar it'll become, and the more you'll understand it.
- Look at the Kotlin code for the
MainActivityclass, identified by the keywordclassand then the name.
class MainActivity : AppCompatActivity() {
    ...
}- Notice that there is no
main()function in yourMainActivity.
Earlier, you learned that every Kotlin program must have amain()function. Android apps operate differently. Instead of calling amain()function, the Android system calls theonCreate()method of yourMainActivitywhen your app is opened for the first time. - Find the
onCreate()method, which looks like the code below.
   override fun onCreate(savedInstanceState: Bundle?) {
       super.onCreate(savedInstanceState)
       setContentView(R.layout.activity_main)
   }
You'll learn about override in a later codelab (so don't worry about it for now). The rest of the onCreate() method sets up the MainActivity by using code from the imports and by setting the starting layout with setContentView().
- Notice the lines beginning with
import.
Android provides a framework of numerous classes to make writing Android apps easier, but it needs to know exactly which class you mean. You can specify which class in the framework to use in your code by using an import statement. For example, the Button class is defined in android.widget.Button.
Enable auto imports
It can become a lot of work to remember to add import statements when you use more classes. Fortunately, Android Studio helps you choose the correct imports when you are using classes provided by others. In this step you'll configure Android Studio to automatically add imports when it can, and automatically remove unused imports from your code.
- In Android Studio, open the settings by going to File > Other Settings > Preferences for New Projects.
- Expand Other Settings > Auto Import. In the Java and Kotlin sections, make sure Add unambiguous imports on the fly and Optimize imports on the fly (for current project) are checked. Note that there are two checkboxes in each section.
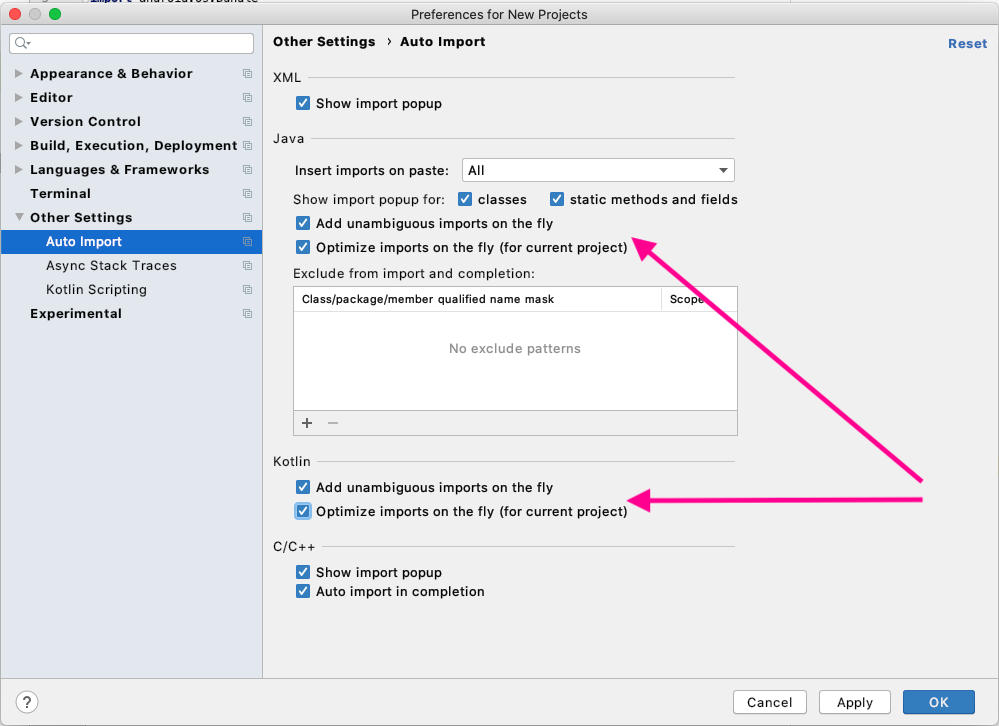
The unambiguous imports settings tell Android Studio to automatically add an import statement, as long as it can determine which one to use. The optimize imports settings tell Android Studio to remove any imports that aren't being used by your code. - Save the changes and close settings by pressing OK.
Now that you know a little more about the MainActivity, you'll modify the app so that clicking the Button does something on the screen.
Display a message when the Button is clicked
In this step, you will specify that when the button is clicked, a brief message shows at the bottom of the screen.
- Add the following code to the
onCreate()method after thesetContentView()call. ThefindViewById()method finds theButtonin the layout.R.id.buttonis the resource ID for theButton, which is a unique identifier for it. The code saves a reference to theButtonobject in a variable calledrollButton, not theButtonobject itself.
val rollButton: Button = findViewById(R.id.button)The code saves the reference to the Button object in a variable called rollButton, not the Button object itself.
The onCreate() method should now look like this.
override fun onCreate(savedInstanceState: Bundle?) {
   super.onCreate(savedInstanceState)
   setContentView(R.layout.activity_main)

   val rollButton: Button = findViewById(R.id.button)
}- Verify that Android Studio automatically added an
importstatement for theButton.
Notice there are 3 import statements now—the third one was automatically added.
import androidx.appcompat.app.AppCompatActivity
import android.os.Bundle
import android.widget.ButtonNext you need to associate code with the Button, so that the code can be executed when the Button is tapped. A click listener is some code for what to do when a tap or click happens. You can think of it as code that is just sitting, "listening" for the user to click, in this case, on the Button.
- Use the
rollButtonobject and set a click listener on it by calling thesetOnClickListener()method.
rollButton.setOnClickListener {
}
As you type, Android Studio may show multiple suggestions. For this case, choose the setOnClickListener {...} option.

Within the curly braces, you put instructions for what should happen when the button is tapped. For now, you'll have your app display a Toast, which is a brief message that appears to the user.
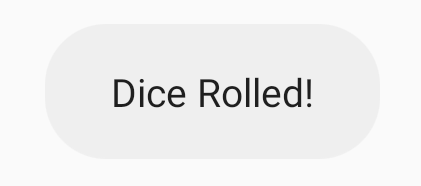
- Create a
Toastwith the text"Dice Rolled!"by callingToast.makeText().
val toast = Toast.makeText(this, "Dice Rolled!", Toast.LENGTH_SHORT)- Then tell the
Toastto display itself by calling theshow()method.
toast.show()This is what your updated the MainActivity class looks like; the package and import statements are still at the top of the file:
class MainActivity : AppCompatActivity() {

   override fun onCreate(savedInstanceState: Bundle?) {
       super.onCreate(savedInstanceState)
       setContentView(R.layout.activity_main)

       val rollButton: Button = findViewById(R.id.button)
       rollButton.setOnClickListener {
           val toast = Toast.makeText(this, "Dice Rolled!", Toast.LENGTH_SHORT)
           toast.show()
       }
   }
}
You could combine the two lines in the click listener into a single line without a variable. This is a common pattern you might find in other code.
Toast.makeText(this, "Dice Rolled!", Toast.LENGTH_SHORT).show()- Run the app and click the Roll button. A toast message should pop up at the bottom of the screen and disappear after a short time.
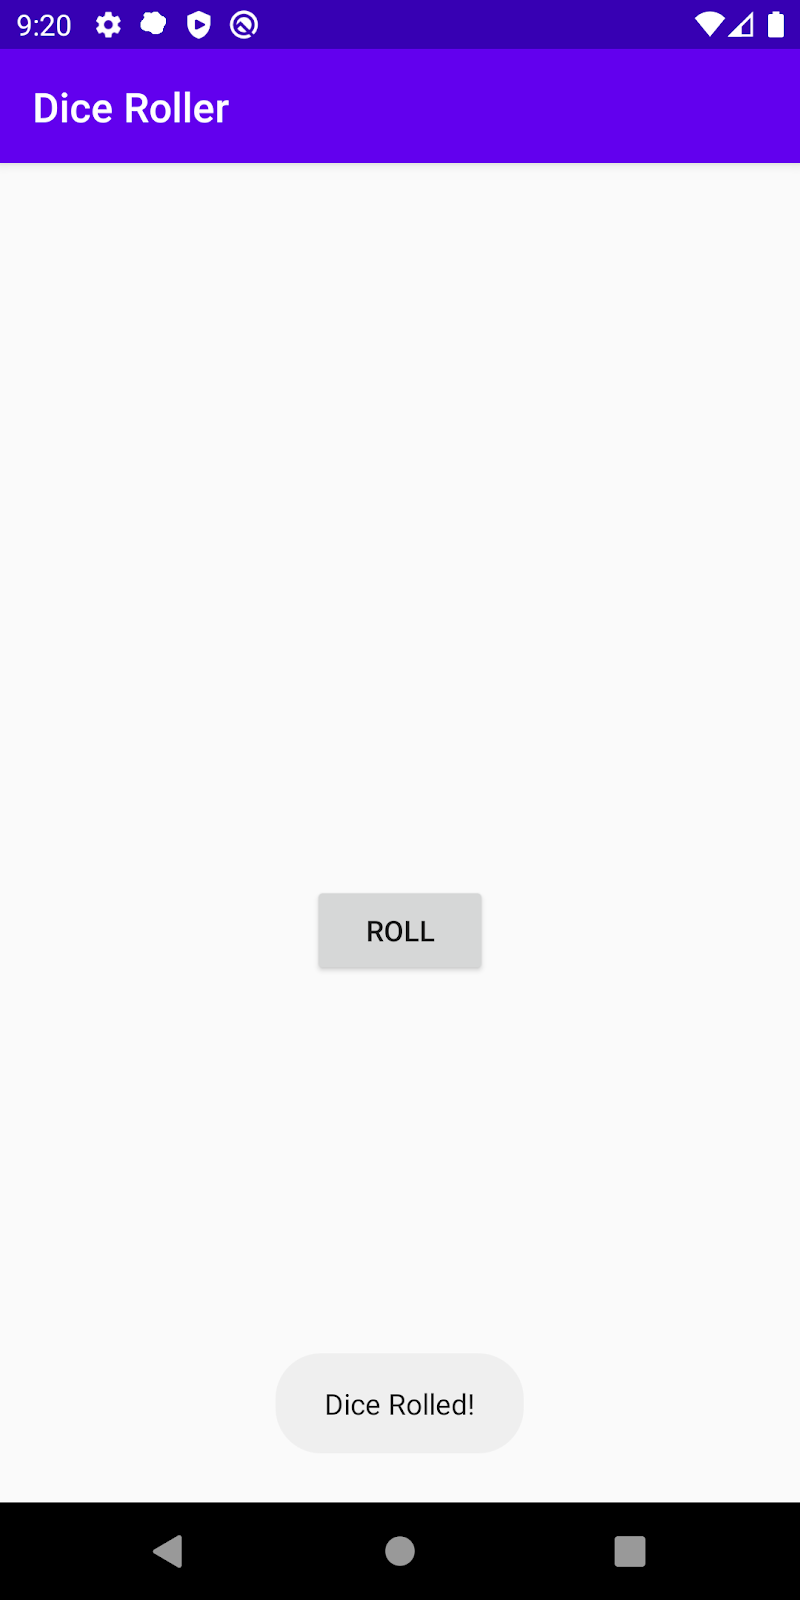
Hooray! The button click made the message pop up! This is the first time you've written Kotlin code for Android!
Update the TextView when the Button is clicked
Instead of showing a temporary Toast message, you'll write code to update the TextView on screen when the Roll button is clicked.
- Go back to
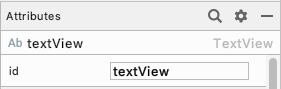
activity_main.xml(app > res > layout >activity_main.xml) - Click on the
TextView. - Note that the id is textView.
- Open
MainActivity.kt(app > java > com.example.diceroller > MainActivity.kt) - Delete the lines of code that create and show the
Toast.
rollButton.setOnClickListener {

}- In their place, create a new variable called
resultTextViewto store theTextView. - Use
findViewById()to findtextViewin the layout using its ID, and store a reference to it.
val resultTextView: TextView = findViewById(R.id.textView)- Set the text on
resultTextViewto be "6" in quotations.
resultTextView.text = "6"This is similar to what you did by setting the text in Attributes, but now it's in your code, so the text needs to be inside double quotation marks. Setting this explicitly means that for now, the TextView always displays 6. You'll add the code to roll the dice and show different values in the next task.
This is what the MainActivity class should look like:
class MainActivity : AppCompatActivity() {

   override fun onCreate(savedInstanceState: Bundle?) {
       super.onCreate(savedInstanceState)
       setContentView(R.layout.activity_main)

       val rollButton: Button = findViewById(R.id.button)
       rollButton.setOnClickListener {
           val resultTextView: TextView = findViewById(R.id.textView)
           resultTextView.text = "6"
       }
   }
}- Run the app. Click the button. It should update the
TextViewto "6".

The only thing that's missing is actually rolling the dice. You can reuse the Dice class from the previous codelab, which handles the logic for rolling a dice.
Add the Dice class
- After the last curly brace in the
MainActivityclass, create theDiceclass with aroll()method.
class Dice(val numSides: Int) {

   fun roll(): Int {
       return (1..numSides).random()
   }
}- Notice that Android Studio underlines
numSideswith a wavy gray line. (This may take a moment to appear.) - Hover your pointer over
numSides, and a popup appears saying Property 'numSides' could be private.
Marking numSides as private will make it only accessible within the Dice class. Since the only code that will be using numSides is inside the Dice class, it's okay to make this argument private for the Dice class. You'll learn more about private versus public variables in the next unit.
- Go ahead and make the suggested fix from Android Studio by clicking Make 'numSides' 'private'.
Create a rollDice() method
Now that you've added a Dice class to your app, you'll update MainActivity to use it. To organize your code better, put all the logic about rolling a dice into one function.
- Replace the code in the click listener that sets the text to "6" with a call to
rollDice().
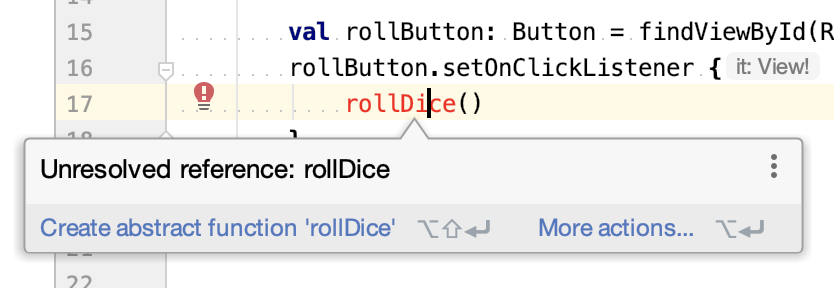
rollButton.setOnClickListener {
   rollDice()
}- Because
rollDice()isn't defined yet, Android Studio flags an error and showsrollDice()in red. - If you hover your pointer over
rollDice(), Android Studio displays the problem and some possible solutions.
- Click on More actions... which brings up a menu. Android Studio offers to do more work for you!
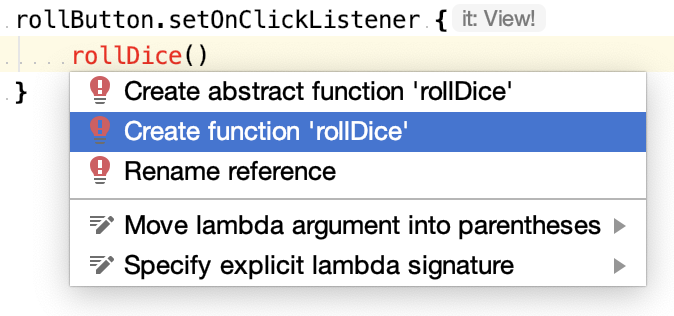
- Select Create function 'rollDice'. Android Studio creates an empty definition for the function inside
MainActivity.
private fun rollDice() {
    TODO("Not yet implemented")
}
Create a new Dice object instance
In this step you'll make the rollDice() method create and roll a dice, and then display the result in the TextView.
- Inside
rollDice(), delete theTODO()call. - Add code to create a dice with 6 sides.
val dice = Dice(6)- Roll the dice by calling the
roll()method, and save the result in a variable calleddiceRoll.
val diceRoll = dice.roll()- Find the
TextViewby callingfindViewById().
val resultTextView: TextView = findViewById(R.id.textView)The variable diceRoll is a number, but the TextView uses text. You can use the toString() method on diceRoll to convert it into a string.
- Convert
diceRollto a string and use that to update the text of theresultTextView.
resultTextView.text = diceRoll.toString()This is what the rollDice() method looks like:
private fun rollDice() {
    val dice = Dice(6)
    val diceRoll = dice.roll()
    val resultTextView: TextView = findViewById(R.id.textView)
    resultTextView.text = diceRoll.toString()
}- Run your app. The dice result should change to other values besides 6! Since it is a random number from 1 to 6, the value 6 might appear sometimes, too.

Hooray, you rock!
It's normal for your code to look a little messy after you tweak parts here and there to get your app to work. But before you walk away from your code, you should do some easy cleanup tasks. Then the app will be in good shape and easier to maintain going forward.
These habits are what professional Android developers practice when they write their code.
Android Style Guide
As you work on teams, it's ideal for team members to write code in a similar way, so there's some consistency across the code. That is why Android has a Style Guide for how to write Android code—naming conventions, formatting, and other good practices to follow. Conform to these guidelines when you write Android code: Kotlin Style Guide for Android Developers.
Below are a couple of ways you can adhere to the style guide.
Clean up your code
Condense your code
You can make your code more concise by condensing code into a shorter number of lines. For example, here is the code that sets the click listener on the Button.
rollButton.setOnClickListener {
    rollDice()
}
Since the instructions for the click listener are only 1 line long, you can condense the rollDice() method call and the curly braces all onto one line. This is what it looks like. One line instead of three lines!
rollButton.setOnClickListener { rollDice() }Reformat your code
Now you'll reformat your code to make sure it follows recommended code formatting conventions for Android.
- In the
MainActivity.ktclass, select all the text in the file with the keyboard shortcutControl+Aon Windows (orCommand+Aon Mac). Or you could go to the menu in Android Studio Edit > Select All. - With all the text selected in the file, go to the Android Studio menu Code > Reformat Code or use the keyboard shortcut
Ctrl+Alt+L(orCommand+Option+Lon Mac).
That updates the formatting of your code, which includes whitespace, indentation, and more. You may not see any change, and that's good. Your code was already formatted correctly then!
Comment your code
Add some comments to your code to describe what is happening in the code you wrote. As code gets more complicated, it's also important to note why you wrote the code to work the way you did. If you come back to the code later to make changes, what the code does may still be clear, but you may not remember why you wrote it the way you did.
It is common to add a comment for each class (MainActivity and Dice are the only classes you have in your app) and each method you write. Use the /** and **/ symbols at the beginning and end of your comment to tell the system that this is not code. These lines will be ignored when the system executes your code.
Example of a comment on a class:
/**
* This activity allows the user to roll a dice and view the result
* on the screen.
*/
class MainActivity : AppCompatActivity() {
Example of a comment on a method:
/**
* Roll the dice and update the screen with the result.
*/
private fun rollDice() {
Within a method, you're free to add comments if that would help the reader of your code. Recall that you can use the // symbol at the start of your comment. Everything after the // symbol on a line is considered a comment.
Example of 2 comments inside a method:
private fun rollDice() {
   // Create new Dice object with 6 sides and roll it
   val dice = Dice(6)
   val diceRoll = dice.roll()

   // Update the screen with the dice roll
   val resultTextView: TextView = findViewById(R.id.textView)
   resultTextView.text = diceRoll.toString()
}- Go ahead and take some time to add comments to your code.
- With all these commenting and formatting changes, it's good practice to run your app again to make sure it still works as expected.
See the solution code for one way that you could have commented your code.
The solution code for this codelab is in the project and module shown below.
To get the code for this codelab from GitHub and open it in Android Studio, do the following.
- Start Android Studio.
- On the Welcome to Android Studio window, click Check out project from version control.
- Choose Git.

- In the Clone Repository dialog, paste the provided code URL into the URL box.
- Click the Test button, wait, and make sure there is a green popup bubble that says Connection successful.
- Optionally, change the Directory to something different than the suggested default.

- Click Clone. Android Studio starts fetching your code.
- In the Checkout from Version Control popup, click Yes.

- Wait for Android Studio to open.
- Select the correct module for your codelab starter or solution code.

- Click the Run button
to build and run your code.
- Add a
Buttonin an Android app using the Layout Editor. - Modify the
MainActivity.ktclass to add interactive behavior to the app. - Pop up a
Toastmessage as a temporary solution to verify you're on the right track. - Set an on-click listener for a
ButtonusingsetOnClickListener()to add behavior for when aButtonis clicked. - When the app is running, you can update the screen by calling methods on the
TextView,Button, or other UI elements in the layout. - Comment your code to help other people who are reading your code understand what your approach was.
- Reformat your code and clean up your code.
ButtonclassToastclassTextViewclass- Kotlin Style Guide for Android Developers
Do the following:
- Add another dice to the app. Clicking on the Roll button should roll 2 dice. The results should be displayed in 2 different
TextViewson screen.
Check your work:
Your finished app should run without errors and show two dice in the app.