
The purpose of Architecture Components is to provide guidance on app architecture, with libraries for common tasks like lifecycle management and data persistence. Architecture components help you structure your app in a way that is robust, testable, and maintainable with less boilerplate code. The Architecture Component libraries are part of Android Jetpack.
This is the Kotlin version of the codelab. The version in the Java programming language can be found here.
If you run into any issues (code bugs, grammatical errors, unclear wording, etc.) as you work through this codelab, please report the issue via the Report a mistake link in the lower left corner of the codelab.
Prerequisites
You need to be familiar with Kotlin, object-oriented design concepts, and Android development fundamentals, in particular:
RecyclerViewand adapters- SQLite database and the SQLite query language
- Basic coroutines (If you're not familiar with coroutines, you can go through Using Kotlin Coroutines in your Android App.)
It also helps to be familiar with software architectural patterns that separate data from the user interface, such as MVP or MVC. This codelab implements the architecture defined in the Guide to app architecture.
This codelab is focused on Android Architecture Components. Off-topic concepts and code are provided for you to simply copy and paste.
If you are not familiar with Kotlin, a version of this codelab is provided in the Java programming language here.
What you'll do
In this codelab, you'll learn how to design and construct an app using the Architecture Components Room, ViewModel, and LiveData, and build an app that does the following:
- Implements our recommended architecture using the Android Architecture Components.
- Works with a database to get and save the data, and pre-populates the database with some words.
- Displays all the words in a
RecyclerViewinMainActivity. - Opens a second activity when the user taps the + button. When the user enters a word, adds the word to the database and the list.
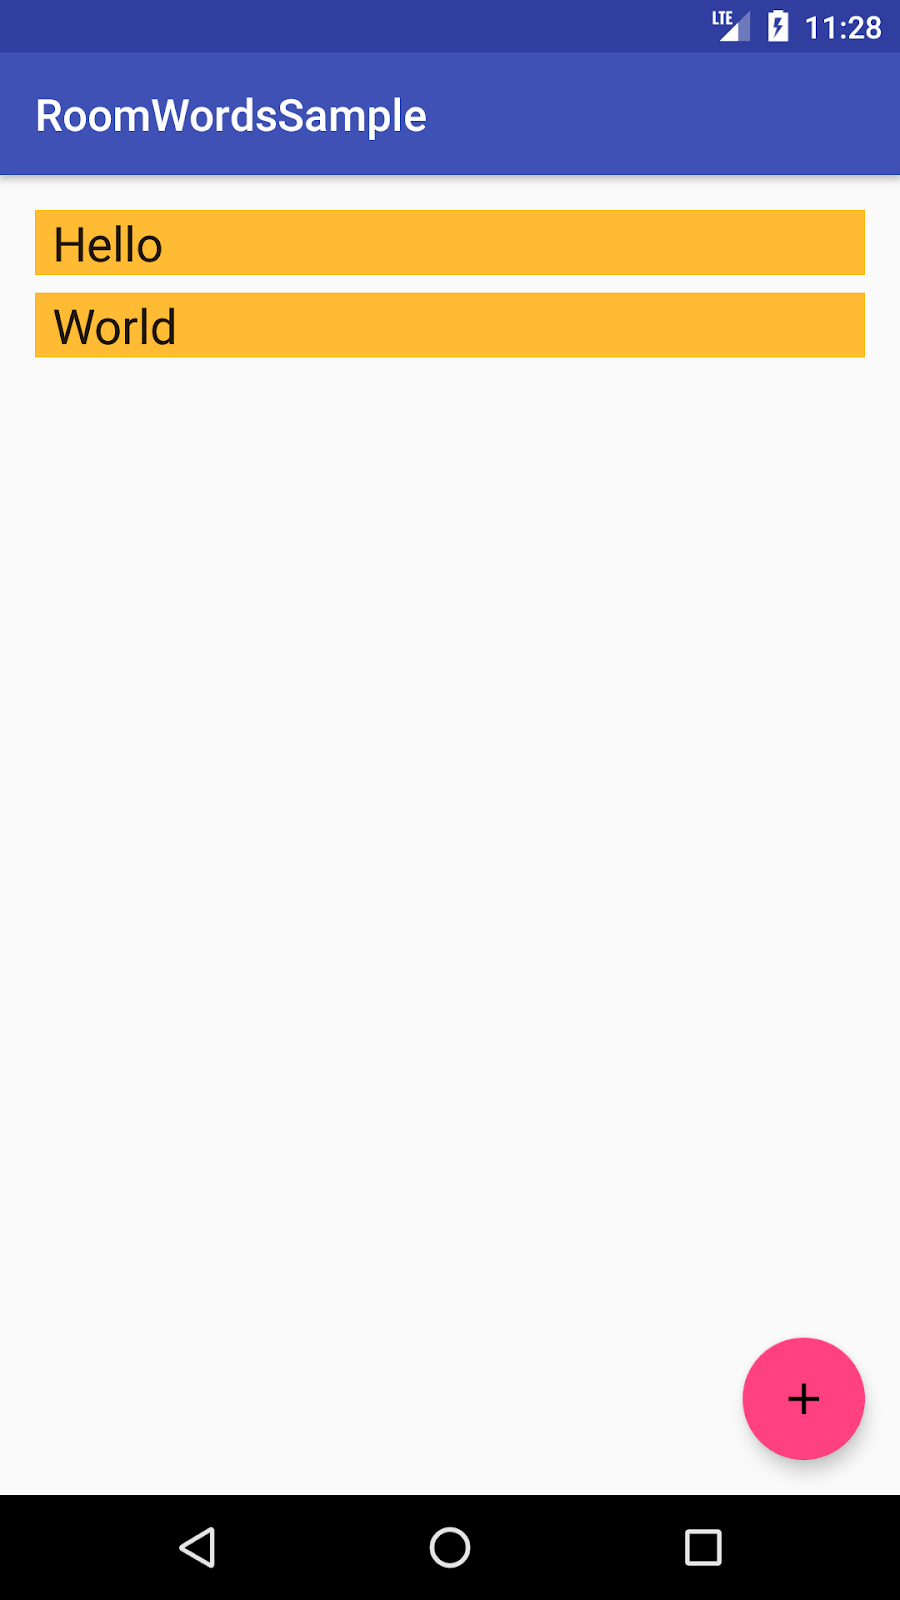
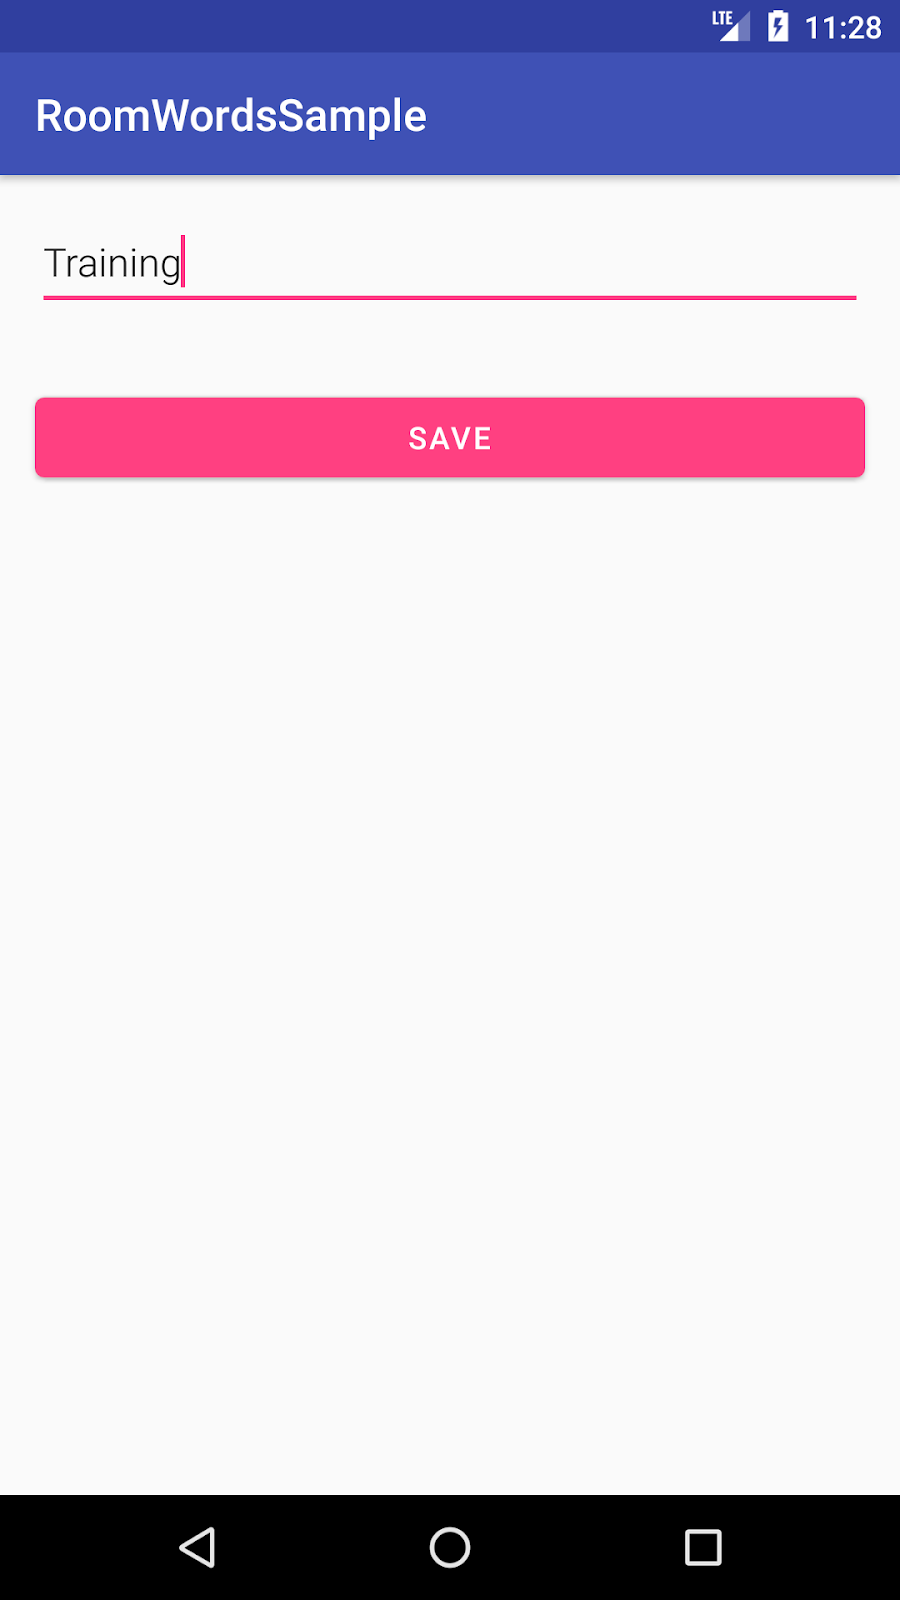
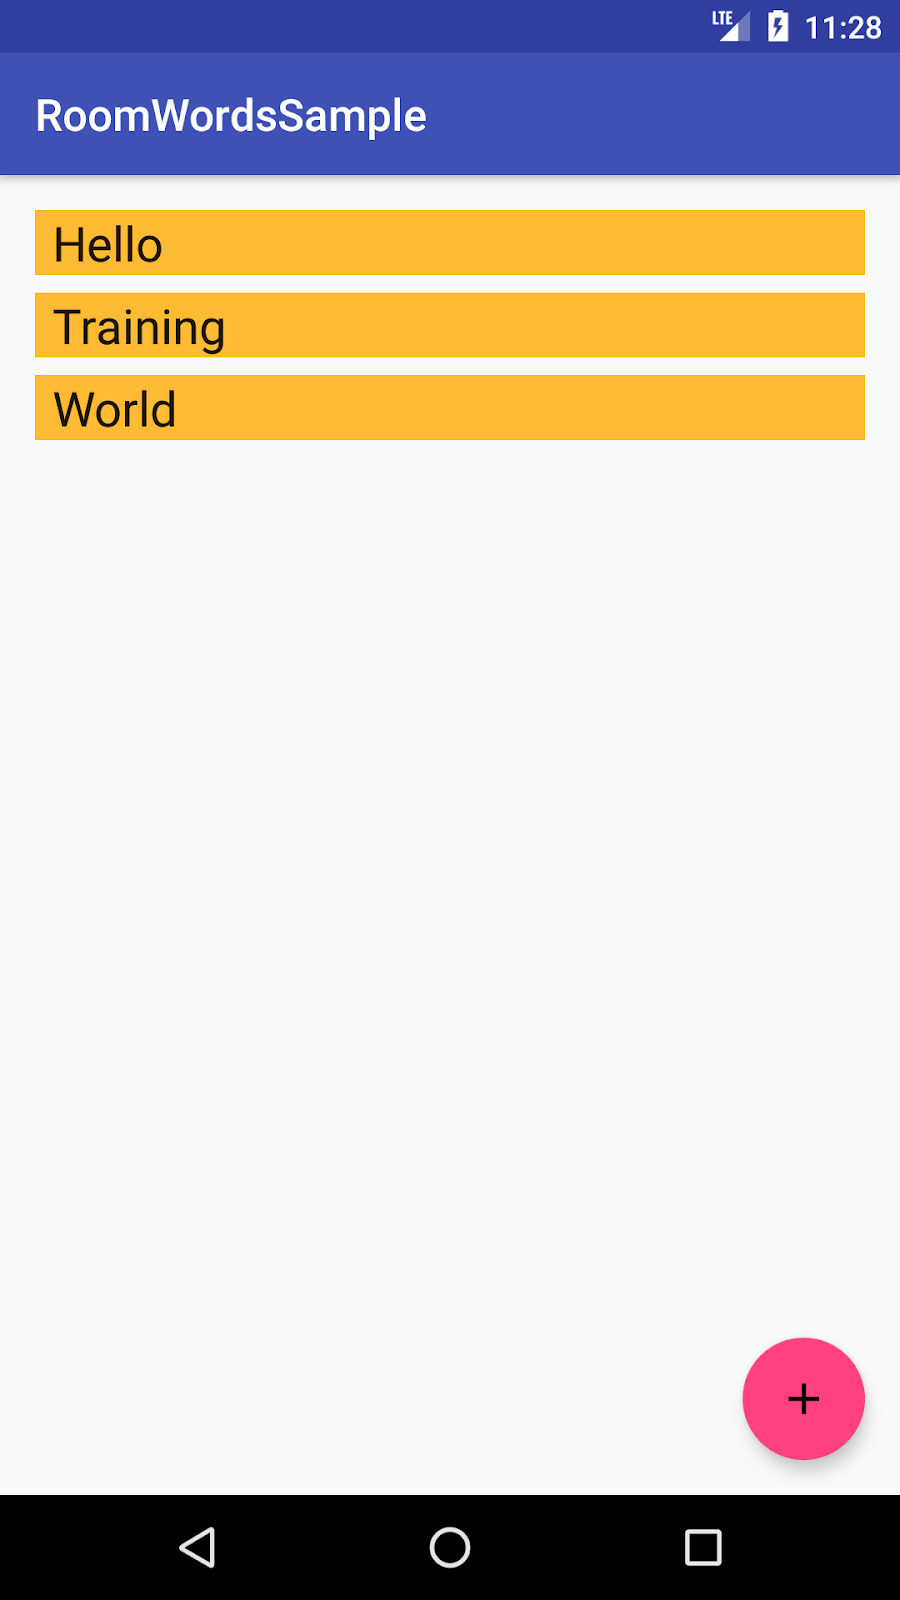
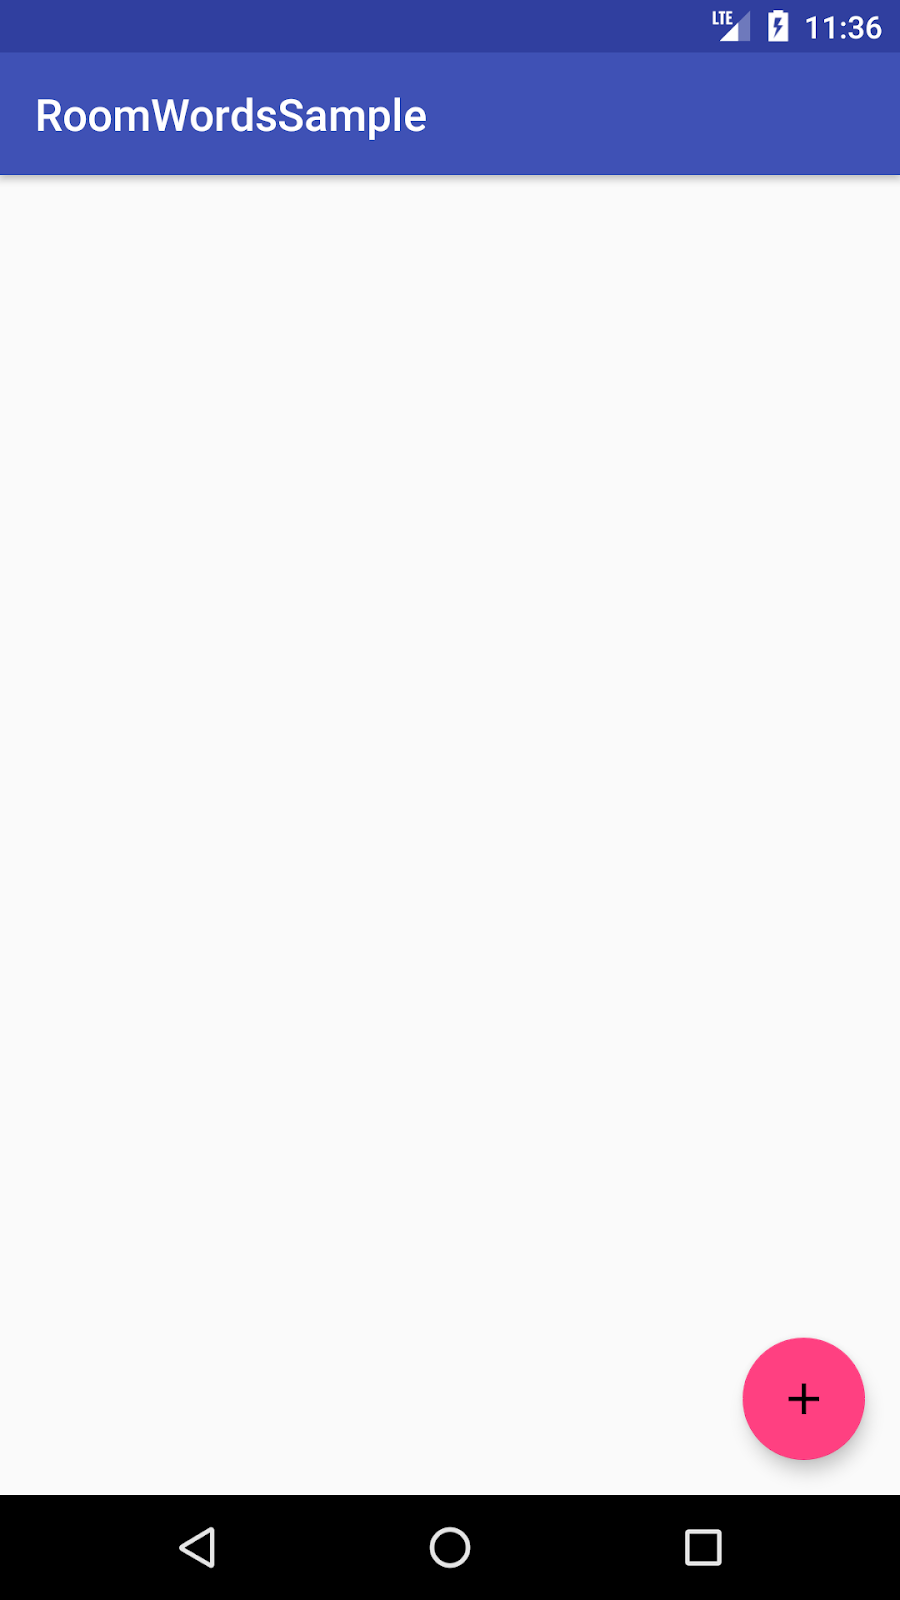
The app is no-frills, but sufficiently complex that you can use it as a template to build upon. Here's a preview:
|
|
|
What you'll need
- Android Studio 3.0 or later and knowledge of how to use it. Make sure Android Studio is updated, as well as your SDK and Gradle.
- An Android device or emulator.
This codelab provides all the code you need to build the complete app.
There are a lot of steps to using the Architecture Components and implementing the recommended architecture. The most important thing is to create a mental model of what is going on, understanding how the pieces fit together and how the data flows. As you work through this codelab, don't just copy and paste the code, but try to start building that inner understanding.
What are the recommended Architecture Components?
To introduce the terminology, here is a short introduction to the Architecture Components and how they work together. Note that this codelab focuses on a subset of the components, namely LiveData, ViewModel and Room. Each component is explained more as you use it.
This diagram shows a basic form of the architecture:
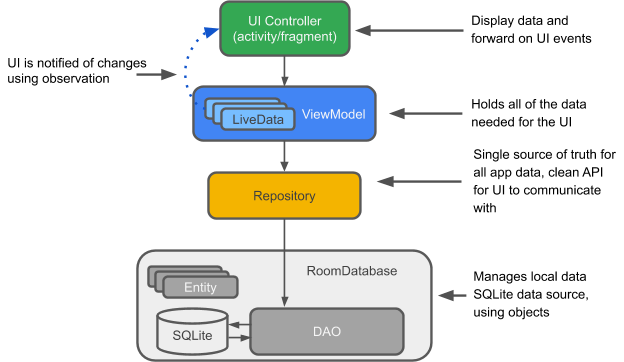
Entity: Annotated class that describes a database table when working with Room.
SQLite database: On device storage. The Room persistence library creates and maintains this database for you.
DAO: Data access object. A mapping of SQL queries to functions. When you use a DAO, you call the methods, and Room takes care of the rest.
Room database: Simplifies database work and serves as an access point to the underlying SQLite database (hides SQLiteOpenHelper). The Room database uses the DAO to issue queries to the SQLite database.
Repository: A class that you create that is primarily used to manage multiple data sources.
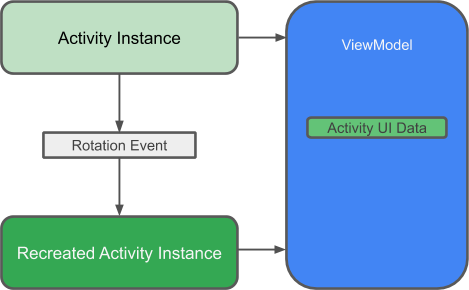
ViewModel: Acts as a communication center between the Repository (data) and the UI. The UI no longer needs to worry about the origin of the data. ViewModel instances survive Activity/Fragment recreation.
LiveData: A data holder class that can be observed. Always holds/caches the latest version of data, and notifies its observers when data has changed. LiveData is lifecycle aware. UI components just observe relevant data and don't stop or resume observation. LiveData automatically manages all of this since it's aware of the relevant lifecycle status changes while observing.
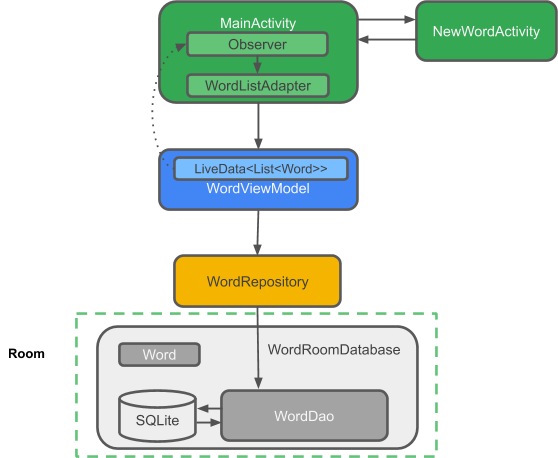
RoomWordSample architecture overview
The following diagram shows all the pieces of the app. Each of the enclosing boxes (except for the SQLite database) represents a class that you will create.
- Open Android Studio and click Start a new Android Studio project.
- In the Create New Project window, choose Empty Activity and click Next.
- On the next screen, name the app RoomWordSample, and click Finish.

Next, you'll have to add the component libraries to your Gradle files.
- In Android Studio, click the Projects tab and expand the Gradle Scripts folder.
Open build.gradle (Module: app).
- Apply the
kaptannotation processor Kotlin plugin by adding it after the other plugins defined on the top of yourbuild.gradle(Module: app) file.
apply plugin: 'kotlin-kapt'- Add the
packagingOptionsblock inside theandroidblock to exclude the atomic functions module from the package and prevent warnings.
android {
    // other configuration (buildTypes, defaultConfig, etc.)

    packagingOptions {
        exclude 'META-INF/atomicfu.kotlin_module'
    }
}- Add the following code at the end of the
dependenciesblock.
// Room components
implementation "androidx.room:room-runtime:$rootProject.roomVersion"
kapt "androidx.room:room-compiler:$rootProject.roomVersion"
androidTestImplementation "androidx.room:room-testing:$rootProject.roomVersion"

// Lifecycle components
implementation "androidx.lifecycle:lifecycle-extensions:$rootProject.archLifecycleVersion"
kapt "androidx.lifecycle:lifecycle-compiler:$rootProject.archLifecycleVersion"
implementation "androidx.lifecycle:lifecycle-viewmodel-ktx:$rootProject.archLifecycleVersion"

// Kotlin components
implementation "org.jetbrains.kotlin:kotlin-stdlib-jdk7:$kotlin_version"
api "org.jetbrains.kotlinx:kotlinx-coroutines-core:$rootProject.coroutines"
api "org.jetbrains.kotlinx:kotlinx-coroutines-android:$rootProject.coroutines"

// Material design
implementation "com.google.android.material:material:$rootProject.materialVersion"

// Testing
testImplementation 'junit:junit:4.12'
androidTestImplementation "androidx.arch.core:core-testing:$rootProject.coreTestingVersion"- In your
build.gradle(Project: RoomWordsSample) file, add the version numbers to the end of the file, as given in the code below.
ext {
roomVersion = '2.2.5'
archLifecycleVersion = '2.2.0'
coreTestingVersion = '2.1.0'
materialVersion = '1.1.0'
coroutines = '1.3.4'
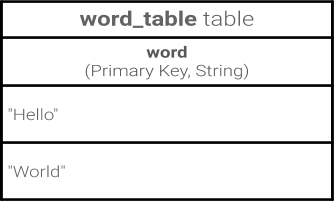
}The data for this app is words, and you will need a simple table to hold those values:
Room allows you to create tables via an Entity. Let's do this now.
- Create a new Kotlin class file called
Wordcontaining theWorddata class.
This class will describe the Entity (which represents the SQLite table) for your words. Each property in the class represents a column in the table. Room will ultimately use these properties to both create the table and instantiate objects from rows in the database.
Here is the code:
data class Word(val word: String)To make the Word class meaningful to a Room database, you need to annotate it. Annotations identify how each part of this class relates to an entry in the database. Room uses this information to generate code.
If you type the annotations yourself (instead of pasting), Android Studio will auto-import the annotation classes.
- Update your
Wordclass with annotations as shown in this code:
@Entity(tableName = "word_table")
class Word(@PrimaryKey @ColumnInfo(name = "word") val word: String)Let's see what these annotations do:
@Entity(tableName ="word_table")
Each@Entityclass represents a SQLite table. Annotate your class declaration to indicate that it's an entity. You can specify the name of the table if you want it to be different from the name of the class. This names the table "word_table".@PrimaryKey
Every entity needs a primary key. To keep things simple, each word acts as its own primary key.@ColumnInfo(name ="word")
Specifies the name of the column in the table if you want it to be different from the name of the member variable. This names the column "word".- Every property that's stored in the database needs to have public visibility, which is the Kotlin default.
You can find a complete list of annotations in the Room package summary reference.
What is the DAO?
In the DAO (data access object), you specify SQL queries and associate them with method calls. The compiler checks the SQL and generates queries from convenience annotations for common queries, such as @Insert. Room uses the DAO to create a clean API for your code.
The DAO must be an interface or abstract class.
By default, all queries must be executed on a separate thread.
Room has coroutines support, allowing your queries to be annotated with the suspend modifier and then called from a coroutine or from another suspension function.
Implement the DAO
Let's write a DAO that provides queries for:
- Getting all words ordered alphabetically
- Inserting a word
- Deleting all words
- Create a new Kotlin class file called
WordDao. - Copy and paste the following code into
WordDaoand fix the imports as necessary to make it compile.
@Dao
interface WordDao {

    @Query("SELECT * from word_table ORDER BY word ASC")
    fun getAlphabetizedWords(): List<Word>

    @Insert(onConflict = OnConflictStrategy.IGNORE)
    suspend fun insert(word: Word)

    @Query("DELETE FROM word_table")
    suspend fun deleteAll()
}
Let's walk through it:
WordDaois an interface; DAOs must either be interfaces or abstract classes.- The
@Daoannotation identifies it as a DAO class for Room. suspend fun insert(word: Word): Declares a suspend function to insert one word.- The
@Insertannotation is a special DAO method annotation where you don't have to provide any SQL! (There are also@Deleteand@Updateannotations for deleting and updating rows, but you are not using them in this app.) onConflict = OnConflictStrategy.IGNORE: The selected onConflict strategy ignores a new word if it's exactly the same as one already in the list. To know more about the available conflict strategies, check out the documentation.suspend fun deleteAll(): Declares a suspend function to delete all the words.- There is no convenience annotation for deleting multiple entities, so it's annotated with the generic
@Query. @Query("DELETE FROM word_table"):@Queryrequires that you provide a SQL query as a string parameter to the annotation, allowing for complex read queries and other operations.fun getAlphabetizedWords(): List<Word>: A method to get all the words and have it return aListofWords.@Query("SELECT * from word_table ORDER BY word ASC"): Query that returns a list of words sorted in ascending order.
When data changes you usually want to take some action, such as displaying the updated data in the UI. This means you have to observe the data so that when it changes, you can react.
Depending on how the data is stored, this can be tricky. Observing changes to data across multiple components of your app can create explicit, rigid dependency paths between the components. This makes testing and debugging difficult, among other things.
LiveData, a lifecycle library class for data observation, solves this problem. Use a return value of type LiveData in your method description, and Room generates all necessary code to update the LiveData when the database is updated.
In WordDao, change the getAlphabetizedWords() method signature so that the returned List<Word> is wrapped with LiveData.
   @Query("SELECT * from word_table ORDER BY word ASC")
   fun getAlphabetizedWords(): LiveData<List<Word>>
Later in this codelab, you track data changes via an Observer in MainActivity.
What is a Room database?
- Room is a database layer on top of an SQLite database.
- Room takes care of mundane tasks that you used to handle with an
SQLiteOpenHelper. - Room uses the DAO to issue queries to its database.
- By default, to avoid poor UI performance, Room doesn't allow you to issue queries on the main thread. When Room queries return
LiveData, the queries are automatically run asynchronously on a background thread. - Room provides compile-time checks of SQLite statements.
Implement the Room database
Your Room database class must be abstract and extend RoomDatabase. Usually, you only need one instance of a Room database for the whole app.
Let's make one now.
- Create a Kotlin class file called
WordRoomDatabaseand add this code to it:
// Annotates class to be a Room Database with a table (entity) of the Word class
@Database(entities = arrayOf(Word::class), version = 1, exportSchema = false)
public abstract class WordRoomDatabase : RoomDatabase() {

   abstract fun wordDao(): WordDao

   companion object {
        // Singleton prevents multiple instances of database opening at the
        // same time.
        @Volatile
        private var INSTANCE: WordRoomDatabase? = null

        fun getDatabase(context: Context): WordRoomDatabase {
            val tempInstance = INSTANCE
            if (tempInstance != null) {
                return tempInstance
            }
            synchronized(this) {
                val instance = Room.databaseBuilder(
                        context.applicationContext,
                        WordRoomDatabase::class.java,
                        "word_database"
                    ).build()
                INSTANCE = instance
                return instance
            }
        }
   }
}
Let's walk through the code:
- The database class for Room must be
abstractand extendRoomDatabase - You annotate the class to be a Room database with
@Databaseand use the annotation parameters to declare the entities that belong in the database and set the version number. Each entity corresponds to a table that will be created in the database. Database migrations are beyond the scope of this codelab, so we setexportSchemato false here to avoid a build warning. In a real app, you should consider setting a directory for Room to use to export the schema so you can check the current schema into your version control system. - The database exposes DAOs through an abstract "getter" method for each @Dao.
- We've defined a singleton,
WordRoomDatabase,to prevent having multiple instances of the database opened at the same time. getDatabasereturns the singleton. It'll create the database the first time it's accessed, using Room's database builder to create aRoomDatabaseobject in the application context from theWordRoomDatabaseclass and names it"word_database".
What is a Repository?
A repository class abstracts access to multiple data sources. The repository is not part of the Architecture Components libraries, but is a suggested best practice for code separation and architecture. A Repository class provides a clean API for data access to the rest of the application.
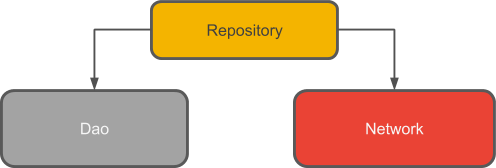
Why use a Repository?
A Repository manages queries and allows you to use multiple backends. In the most common example, the Repository implements the logic for deciding whether to fetch data from a network or use results cached in a local database.
Implementing the Repository
Create a Kotlin class file called WordRepository and paste the following code into it:
// Declares the DAO as a private property in the constructor. Pass in the DAO
// instead of the whole database, because you only need access to the DAO
class WordRepository(private val wordDao: WordDao) {

    // Room executes all queries on a separate thread.
    // Observed LiveData will notify the observer when the data has changed.
    val allWords: LiveData<List<Word>> = wordDao.getAlphabetizedWords()

    suspend fun insert(word: Word) {
        wordDao.insert(word)
    }
}
The main takeaways:
- The DAO is passed into the repository constructor as opposed to the whole database. This is because it only needs access to the DAO, since the DAO contains all the read/write methods for the database. There's no need to expose the entire database to the repository.
- The list of words is a public property. It's initialized by getting the
LiveDatalist of words from Room; we can do this because of how we defined thegetAlphabetizedWordsmethod to returnLiveDatain the "The LiveData class" step. Room executes all queries on a separate thread. Then observedLiveDatawill notify the observer on the main thread when the data has changed. - The
suspendmodifier tells the compiler that this needs to be called from a coroutine or another suspending function.
What is a ViewModel?
The ViewModel's role is to provide data to the UI and survive configuration changes. A ViewModel acts as a communication center between the Repository and the UI. You can also use a ViewModel to share data between fragments. The ViewModel is part of the lifecycle library.
For an introductory guide to this topic, see ViewModel Overview or the ViewModels: A Simple Example blog post.
Why use a ViewModel?
A ViewModel holds your app's UI data in a lifecycle-conscious way that survives configuration changes. Separating your app's UI data from your Activity and Fragment classes lets you better follow the single responsibility principle: Your activities and fragments are responsible for drawing data to the screen, while your ViewModel can take care of holding and processing all the data needed for the UI.
In the ViewModel, use LiveData for changeable data that the UI will use or display. Using LiveData has several benefits:
- You can put an observer on the data (instead of polling for changes) and only update the
the UI when the data actually changes. - The Repository and the UI are completely separated by the
ViewModel. - There are no database calls from the
ViewModel(this is all handled in the Repository), making the code more testable.
viewModelScope
In Kotlin, all coroutines run inside a CoroutineScope. A scope controls the lifetime of coroutines through its job. When you cancel the job of a scope, it cancels all coroutines started in that scope.
The AndroidX lifecycle-viewmodel-ktx library adds a viewModelScope as an extension function of the ViewModel class, enabling you to work with scopes.
To find out more about working with coroutines in the ViewModel, check out Step 5 of the Using Kotlin Coroutines in your Android App codelab or the Easy Coroutines in Android: viewModelScope blogpost.
Implement the ViewModel
Create a Kotlin class file for WordViewModel and add this code to it:
class WordViewModel(application: Application) : AndroidViewModel(application) {

    private val repository: WordRepository
    // Using LiveData and caching what getAlphabetizedWords returns has several benefits:
    // - We can put an observer on the data (instead of polling for changes) and only update the
    //   the UI when the data actually changes.
    // - Repository is completely separated from the UI through the ViewModel.
    val allWords: LiveData<List<Word>>

    init {
        val wordsDao = WordRoomDatabase.getDatabase(application).wordDao()
        repository = WordRepository(wordsDao)
        allWords = repository.allWords
    }

    /**
     * Launching a new coroutine to insert the data in a non-blocking way
     */
    fun insert(word: Word) = viewModelScope.launch(Dispatchers.IO) {
        repository.insert(word)
    }
}
Here we've:
- Created a class called
WordViewModelthat gets theApplicationas a parameter and extendsAndroidViewModel. - Added a private member variable to hold a reference to the repository.
- Added a public
LiveDatamember variable to cache the list of words. - Created an
initblock that gets a reference to theWordDaofrom theWordRoomDatabase. - In the
initblock, constructed theWordRepositorybased on theWordRoomDatabase. - In the
initblock, initialized theallWordsLiveData using the repository. - Created a wrapper
insert()method that calls the Repository'sinsert()method. In this way, the implementation ofinsert()is encapsulated from the UI. We don't want insert to block the main thread, so we're launching a new coroutine and calling the repository's insert, which is a suspend function. As mentioned, ViewModels have a coroutine scope based on their life cycle calledviewModelScope, which we use here.
Next, you need to add the XML layout for the list and items.
This codelab assumes that you are familiar with creating layouts in XML, so we are just providing you with the code.
Make your application theme material by setting the AppTheme parent to Theme.MaterialComponents.Light.DarkActionBar. Add a style for list items in values/styles.xml:
<resources>

    <!-- Base application theme. -->
    <style name="AppTheme" parent="Theme.MaterialComponents.Light.DarkActionBar">
        <!-- Customize your theme here. -->
        <item name="colorPrimary">@color/colorPrimary</item>
        <item name="colorPrimaryDark">@color/colorPrimaryDark</item>
        <item name="colorAccent">@color/colorAccent</item>
    </style>

    <!-- The default font for RecyclerView items is too small.
    The margin is a simple delimiter between the words. -->
    <style name="word_title">
        <item name="android:layout_width">match_parent</item>
        <item name="android:layout_marginBottom">8dp</item>
        <item name="android:paddingLeft">8dp</item>
        <item name="android:background">@android:color/holo_orange_light</item>
        <item name="android:textAppearance">@android:style/TextAppearance.Large</item>
    </style>
</resources>
Add a layout/recyclerview_item.xml layout:
<?xml version="1.0" encoding="utf-8"?>
<LinearLayout xmlns:android="http://schemas.android.com/apk/res/android"
    android:orientation="vertical"
    android:layout_width="match_parent"
    android:layout_height="wrap_content">

    <TextView
        android:id="@+id/textView"
        style="@style/word_title"
        android:layout_width="match_parent"
        android:layout_height="wrap_content"
        android:background="@android:color/holo_orange_light" />
</LinearLayout>
In layout/activity_main.xml, replace the TextView with a RecyclerView and add a floating action button (FAB). Now your layout should look like this:
<androidx.constraintlayout.widget.ConstraintLayout
    xmlns:android="http://schemas.android.com/apk/res/android"
    xmlns:app="http://schemas.android.com/apk/res-auto"
    xmlns:tools="http://schemas.android.com/tools"
    android:layout_width="match_parent"
    android:layout_height="match_parent"
    tools:context=".MainActivity">

    <androidx.recyclerview.widget.RecyclerView
        android:id="@+id/recyclerview"
        android:layout_width="0dp"
        android:layout_height="0dp"
        tools:listitem="@layout/recyclerview_item"
        android:padding="@dimen/big_padding"
        app:layout_constraintBottom_toBottomOf="parent"
        app:layout_constraintLeft_toLeftOf="parent"
        app:layout_constraintRight_toRightOf="parent"
        app:layout_constraintTop_toTopOf="parent" />

    <com.google.android.material.floatingactionbutton.FloatingActionButton
        android:id="@+id/fab"
        app:layout_constraintBottom_toBottomOf="parent"
        app:layout_constraintEnd_toEndOf="parent"
        android:layout_width="wrap_content"
        android:layout_height="wrap_content"
        android:layout_margin="16dp"
        android:contentDescription="@string/add_word"/>

</androidx.constraintlayout.widget.ConstraintLayout>
Your FAB's appearance should correspond to the available action, so we will want to replace the icon with a '+' symbol.
First, we need to add a new Vector Asset:
- Select File > New > Vector Asset.
- Click the Android robot icon in the Clip Art: field.
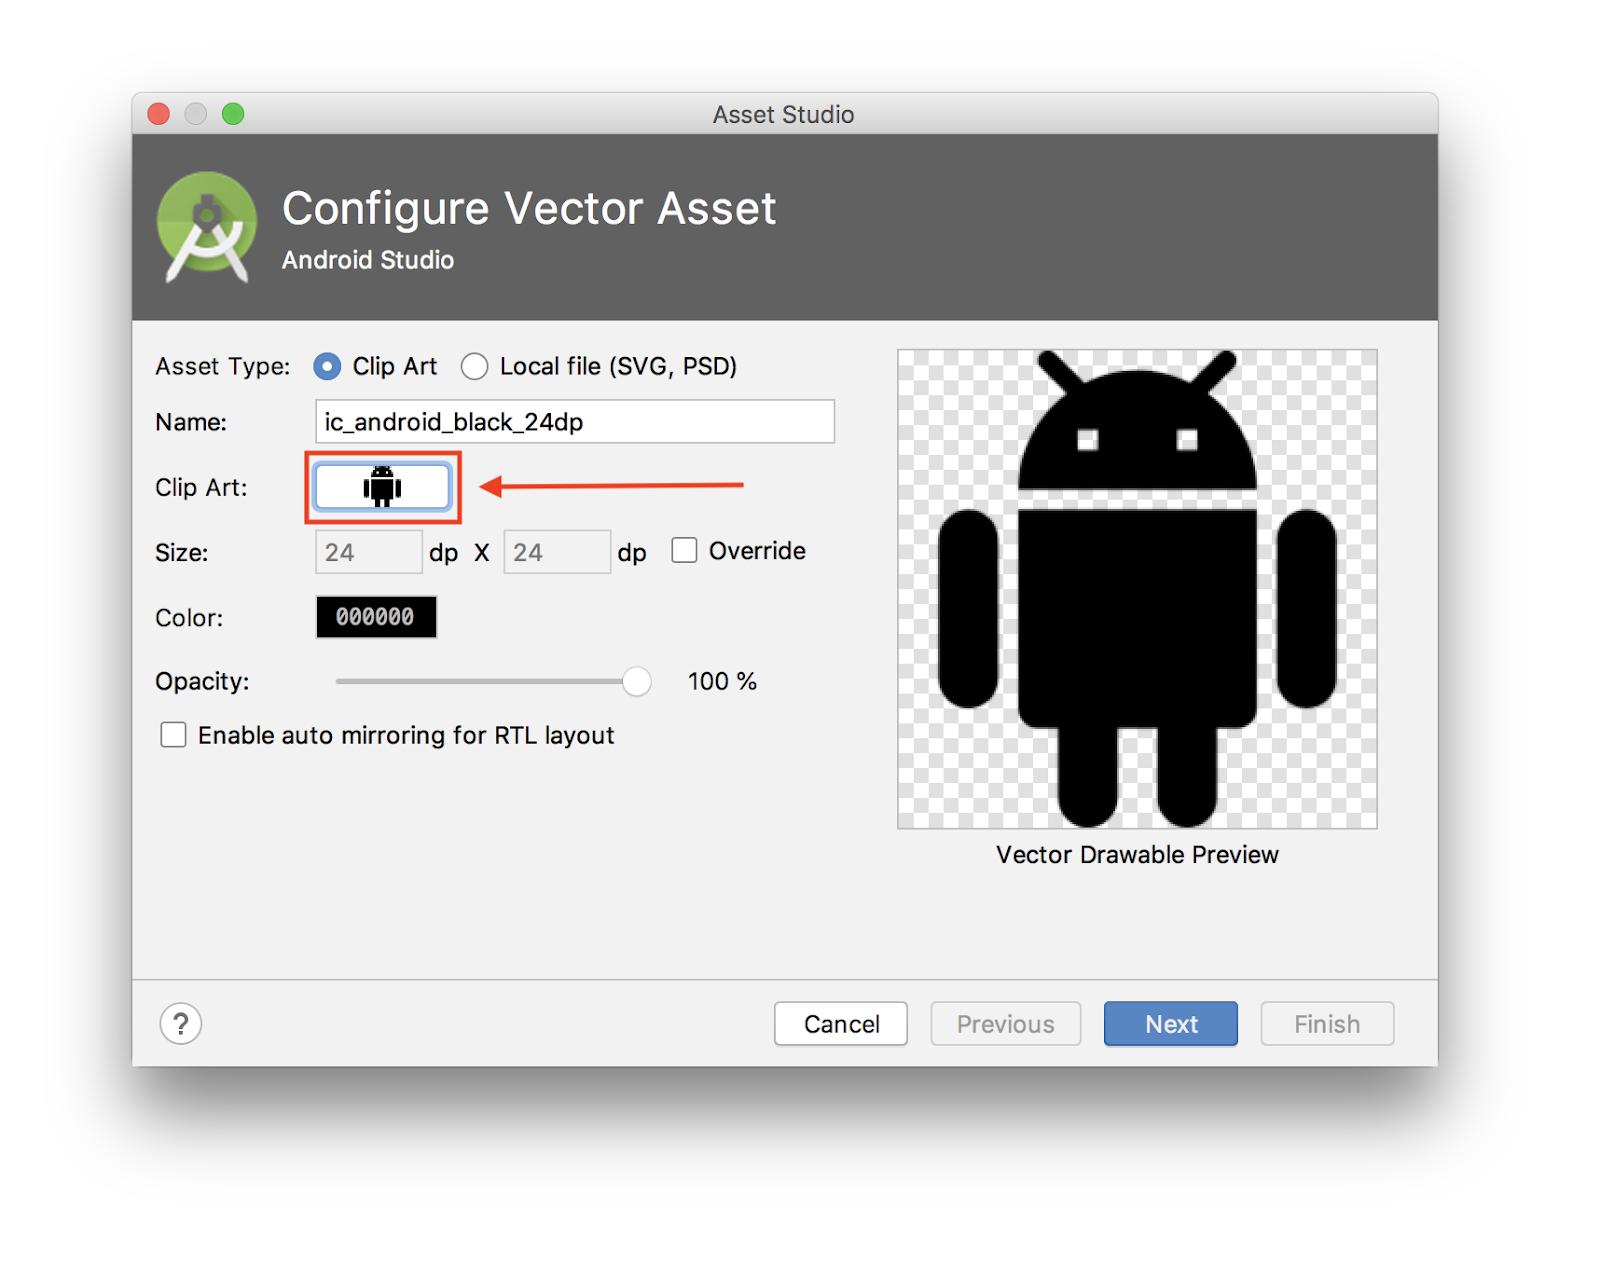
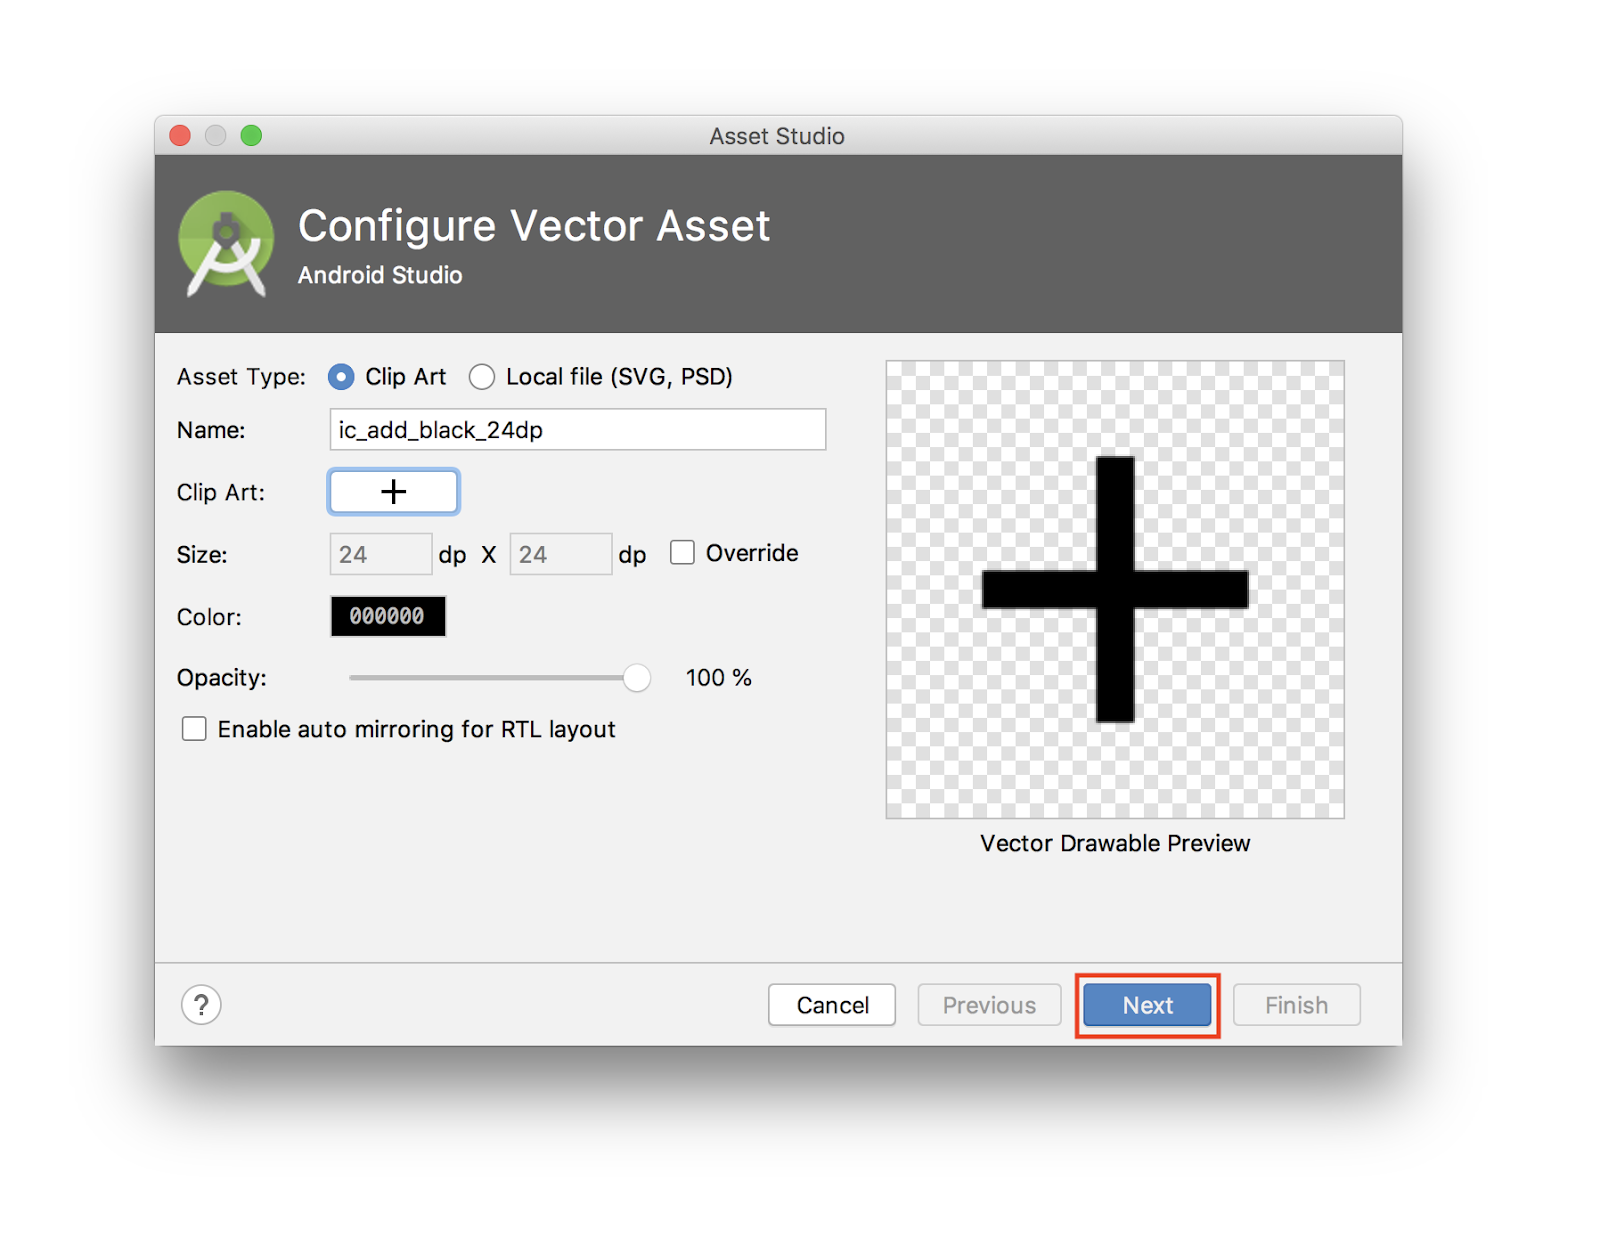
- Search for "add" and select the '+' asset. Click OK.

- After that, click Next.
- Confirm the icon path as
main > drawableand click Finish to add the asset.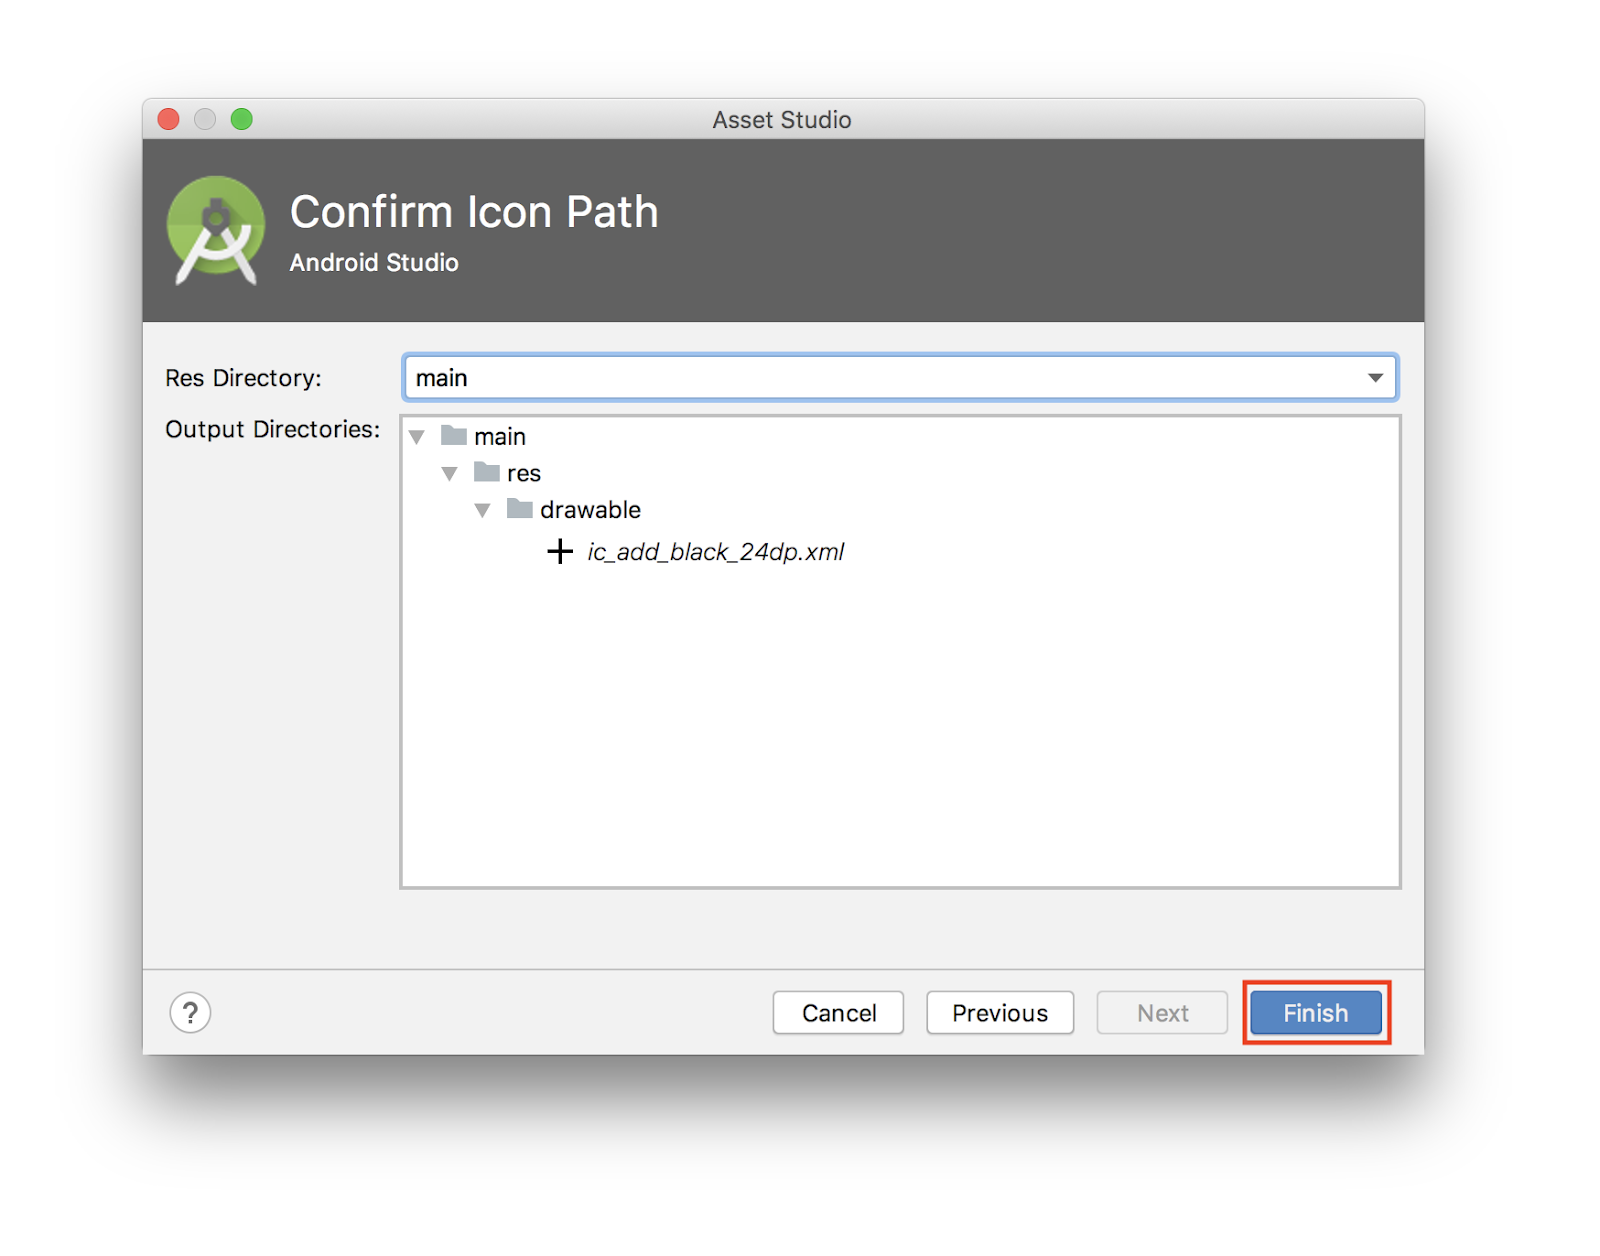
- Still in
layout/activity_main.xml, update the FAB to include the new drawable:
<com.google.android.material.floatingactionbutton.FloatingActionButton
        android:id="@+id/fab"
        app:layout_constraintBottom_toBottomOf="parent"
        app:layout_constraintEnd_toEndOf="parent"
        android:layout_width="wrap_content"
        android:layout_height="wrap_content"
        android:layout_margin="16dp"
        android:contentDescription="@string/add_word"
        android:src="@drawable/ic_add_black_24dp"/>
You are going to display the data in a RecyclerView, which is a little nicer than just throwing the data in a TextView. This codelab assumes that you know how RecyclerView, RecyclerView.LayoutManager, RecyclerView.ViewHolder, and RecyclerView.Adapter work.
Note that the words variable in the adapter caches the data. In the next task, you add the code that updates the data automatically.
Create a Kotlin class file for WordListAdapter that extends RecyclerView.Adapter. Here is the code:
class WordListAdapter internal constructor(
        context: Context
) : RecyclerView.Adapter<WordListAdapter.WordViewHolder>() {

    private val inflater: LayoutInflater = LayoutInflater.from(context)
    private var words = emptyList<Word>() // Cached copy of words

    inner class WordViewHolder(itemView: View) : RecyclerView.ViewHolder(itemView) {
        val wordItemView: TextView = itemView.findViewById(R.id.textView)
    }

    override fun onCreateViewHolder(parent: ViewGroup, viewType: Int): WordViewHolder {
        val itemView = inflater.inflate(R.layout.recyclerview_item, parent, false)
        return WordViewHolder(itemView)
    }

    override fun onBindViewHolder(holder: WordViewHolder, position: Int) {
        val current = words[position]
        holder.wordItemView.text = current.word
    }

    internal fun setWords(words: List<Word>) {
        this.words = words
        notifyDataSetChanged()
    }

    override fun getItemCount() = words.size
}
Add the RecyclerView in the onCreate() method of MainActivity.
In the onCreate() method after setContentView:
   val recyclerView = findViewById<RecyclerView>(R.id.recyclerview)
   val adapter = WordListAdapter(this)
   recyclerView.adapter = adapter
   recyclerView.layoutManager = LinearLayoutManager(this)
Run your app to make sure everything works. There are no items, because you have not hooked up the data yet.
There is no data in the database. You will add data in two ways: Add some data when the database is opened, and add an Activity for adding words.
To delete all content and repopulate the database whenever the app is started, you create a RoomDatabase.Callback and override onOpen(). Because you cannot do Room database operations on the UI thread, onOpen() launches a coroutine on the IO Dispatcher.
To launch a coroutine we need a CoroutineScope. Update the getDatabase method of the WordRoomDatabase class, to also get a coroutine scope as parameter:
fun getDatabase(
       context: Context,
       scope: CoroutineScope
  ): WordRoomDatabase {
...
}
Update the database retrieval initializer in the init block of WordViewModel to also pass the scope:
val wordsDao = WordRoomDatabase.getDatabase(application, viewModelScope).wordDao()In the WordRoomDatabase, we create a custom implementation of the RoomDatabase.Callback(), that also gets a CoroutineScope as constructor parameter. Then, we override the onOpen method to populate the database.
Here is the code for creating the callback within the WordRoomDatabase class:
private class WordDatabaseCallback(
    private val scope: CoroutineScope
) : RoomDatabase.Callback() {

    override fun onOpen(db: SupportSQLiteDatabase) {
        super.onOpen(db)
        INSTANCE?.let { database ->
            scope.launch {
                populateDatabase(database.wordDao())
            }
        }
    }

    suspend fun populateDatabase(wordDao: WordDao) {
        // Delete all content here.
        wordDao.deleteAll()

        // Add sample words.
        var word = Word("Hello")
        wordDao.insert(word)
        word = Word("World!")
        wordDao.insert(word)

        // TODO: Add your own words!
    }
}
Finally, add the callback to the database build sequence right before calling .build() on the Room.databaseBuilder():
.addCallback(WordDatabaseCallback(scope))Here is what the final code should look like:
@Database(entities = arrayOf(Word::class), version = 1, exportSchema = false)
abstract class WordRoomDatabase : RoomDatabase() {

   abstract fun wordDao(): WordDao

   private class WordDatabaseCallback(
       private val scope: CoroutineScope
   ) : RoomDatabase.Callback() {

       override fun onOpen(db: SupportSQLiteDatabase) {
           super.onOpen(db)
           INSTANCE?.let { database ->
               scope.launch {
                   var wordDao = database.wordDao()

                   // Delete all content here.
                   wordDao.deleteAll()

                   // Add sample words.
                   var word = Word("Hello")
                   wordDao.insert(word)
                   word = Word("World!")
                   wordDao.insert(word)

                   // TODO: Add your own words!
                   word = Word("TODO!")
                   wordDao.insert(word)
               }
           }
       }
   }

   companion object {
       @Volatile
       private var INSTANCE: WordRoomDatabase? = null

       fun getDatabase(
           context: Context,
           scope: CoroutineScope
       ): WordRoomDatabase {
            // if the INSTANCE is not null, then return it,
            // if it is, then create the database
            return INSTANCE ?: synchronized(this) {
                val instance = Room.databaseBuilder(
                        context.applicationContext,
                        WordRoomDatabase::class.java,
                        "word_database"
                )
                 .addCallback(WordDatabaseCallback(scope))
                 .build()
                INSTANCE = instance
                // return instance
                instance
        }
     }
   }
}
Add these string resources in values/strings.xml:
<string name="hint_word">Word...</string>
<string name="button_save">Save</string>
<string name="empty_not_saved">Word not saved because it is empty.</string>
Add this color resource in value/colors.xml:
<color name="buttonLabel">#FFFFFF</color>Create a new dimension resource file:
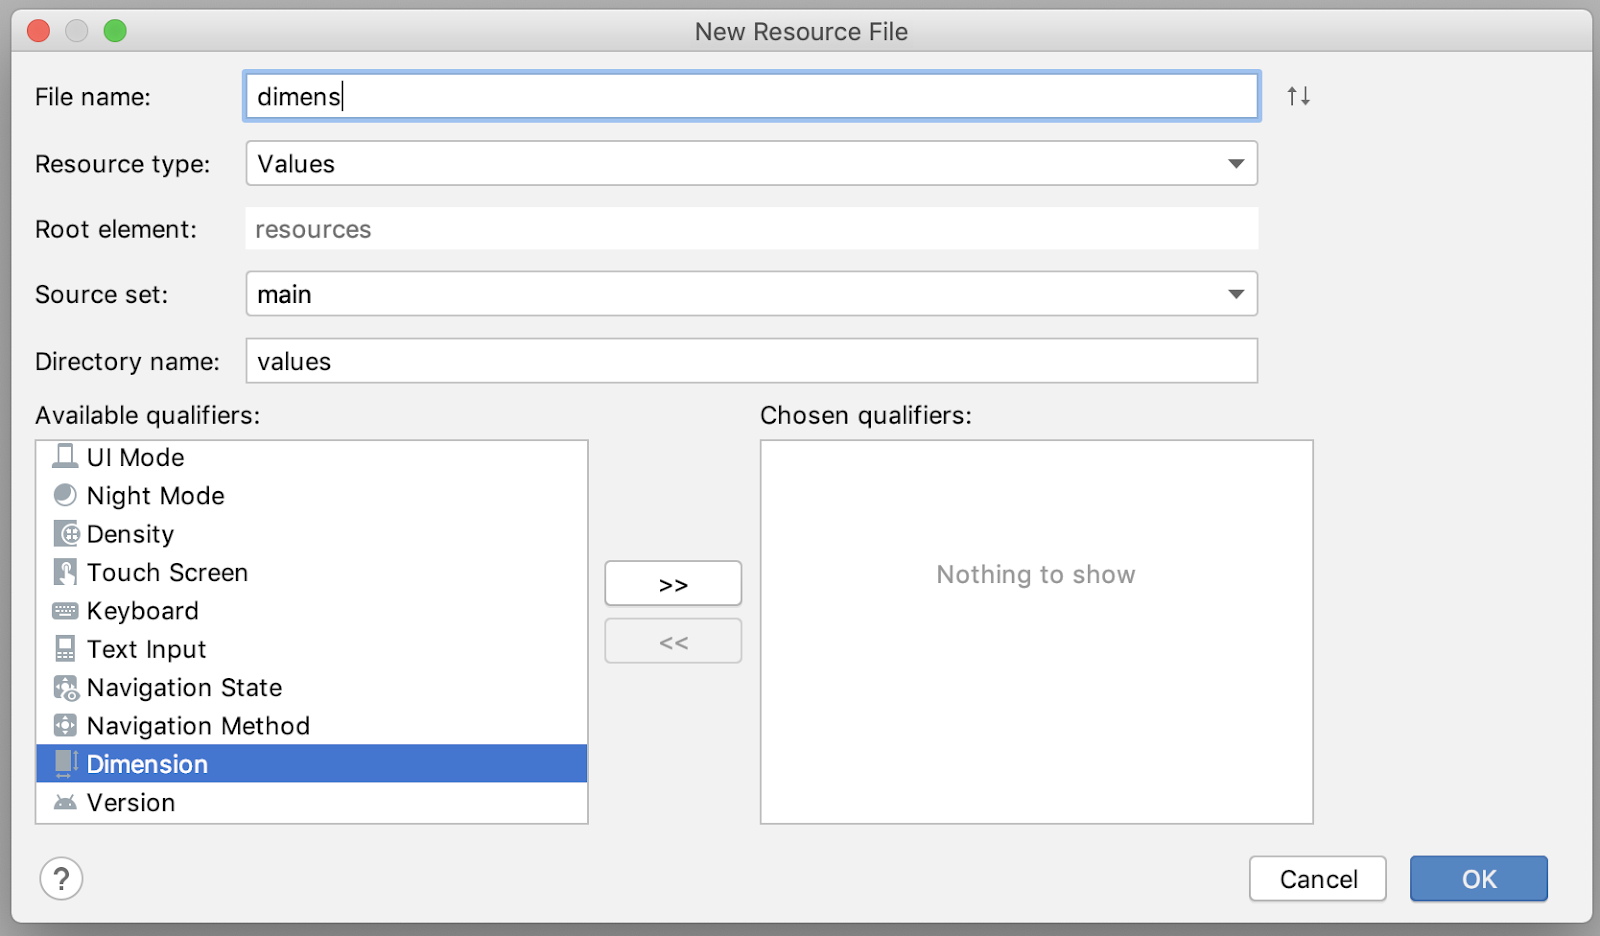
- Click the app module in the Project window.
- Select File > New > Android Resource File
- From the Available Qualifiers, select Dimension
- Set the file name: dimens
Add these dimension resources in values/dimens.xml:
<dimen name="small_padding">8dp</dimen>
<dimen name="big_padding">16dp</dimen>
Create a new empty Android Activity with the Empty Activity template:
- Select File > New > Activity > Empty Activity
- Enter
NewWordActivityfor the Activity name. - Verify that the new activity has been added to the Android Manifest.
<activity android:name=".NewWordActivity"></activity>Update the activity_new_word.xml file in the layout folder with the following code:
<LinearLayout xmlns:android="http://schemas.android.com/apk/res/android"
    android:orientation="vertical"
    android:layout_width="match_parent"
    android:layout_height="match_parent">

    <EditText
        android:id="@+id/edit_word"
        android:layout_width="match_parent"
        android:layout_height="wrap_content"
        android:minHeight="@dimen/min_height"
        android:fontFamily="sans-serif-light"
        android:hint="@string/hint_word"
        android:inputType="textAutoComplete"
        android:layout_margin="@dimen/big_padding"
        android:textSize="18sp" />

    <Button
        android:id="@+id/button_save"
        android:layout_width="match_parent"
        android:layout_height="wrap_content"
        android:background="@color/colorPrimary"
        android:text="@string/button_save"
        android:layout_margin="@dimen/big_padding"
        android:textColor="@color/buttonLabel" />

</LinearLayout>
Update the code for the activity:
class NewWordActivity : AppCompatActivity() {

    private lateinit var editWordView: EditText

    public override fun onCreate(savedInstanceState: Bundle?) {
        super.onCreate(savedInstanceState)
        setContentView(R.layout.activity_new_word)
        editWordView = findViewById(R.id.edit_word)

        val button = findViewById<Button>(R.id.button_save)
        button.setOnClickListener {
            val replyIntent = Intent()
            if (TextUtils.isEmpty(editWordView.text)) {
                setResult(Activity.RESULT_CANCELED, replyIntent)
            } else {
                val word = editWordView.text.toString()
                replyIntent.putExtra(EXTRA_REPLY, word)
                setResult(Activity.RESULT_OK, replyIntent)
            }
            finish()
        }
    }

    companion object {
        const val EXTRA_REPLY = "com.example.android.wordlistsql.REPLY"
    }
}
The final step is to connect the UI to the database by saving new words the user enters and displaying the current contents of the word database in the RecyclerView.
To display the current contents of the database, add an observer that observes the LiveData in the ViewModel.
Whenever the data changes, the onChanged() callback is invoked, which calls the adapter's setWords() method to update the adapter's cached data and refresh the displayed list.
In MainActivity, create a member variable for the ViewModel:
private lateinit var wordViewModel: WordViewModelUse ViewModelProvider to associate your ViewModel with your Activity.
When your Activity first starts, the ViewModelProviders will create the ViewModel. When the activity is destroyed, for example through a configuration change, the ViewModel persists. When the activity is re-created, the ViewModelProviders return the existing ViewModel. For more information, see ViewModel.
In onCreate() below the RecyclerView code block, get a ViewModel from the ViewModelProvider:
wordViewModel = ViewModelProvider(this).get(WordViewModel::class.java)Also in onCreate(), add an observer for the allWords LiveData property from the WordViewModel.
The onChanged() method (the default method for our Lambda) fires when the observed data changes and the activity is in the foreground:
wordViewModel.allWords.observe(this, Observer { words ->
            // Update the cached copy of the words in the adapter.
            words?.let { adapter.setWords(it) }
})
We want to open the NewWordActivity when tapping on the FAB and, once we are back in the MainActivity, to either insert the new word in the database or show a Toast. To achieve this, let's start by defining a request code:
private val newWordActivityRequestCode = 1In MainActivity, add the onActivityResult() code for the NewWordActivity.
If the activity returns with RESULT_OK, insert the returned word into the database by calling the insert() method of the WordViewModel:
override fun onActivityResult(requestCode: Int, resultCode: Int, data: Intent?) {
    super.onActivityResult(requestCode, resultCode, data)

    if (requestCode == newWordActivityRequestCode && resultCode == Activity.RESULT_OK) {
        data?.getStringExtra(NewWordActivity.EXTRA_REPLY)?.let {
            val word = Word(it)
            wordViewModel.insert(word)
        }
    } else {
        Toast.makeText(
            applicationContext,
            R.string.empty_not_saved,
            Toast.LENGTH_LONG).show()
    }
}
In MainActivity,start NewWordActivity when the user taps the FAB. In the MainActivity onCreate, find the FAB and add an onClickListener with this code:
val fab = findViewById<FloatingActionButton>(R.id.fab)
fab.setOnClickListener {
  val intent = Intent(this@MainActivity, NewWordActivity::class.java)
  startActivityForResult(intent, newWordActivityRequestCode)
}
Your finished code should look like this:
class MainActivity : AppCompatActivity() {

   private const val newWordActivityRequestCode = 1
   private lateinit var wordViewModel: WordViewModel

   override fun onCreate(savedInstanceState: Bundle?) {
       super.onCreate(savedInstanceState)
       setContentView(R.layout.activity_main)
       setSupportActionBar(toolbar)

       val recyclerView = findViewById<RecyclerView>(R.id.recyclerview)
       val adapter = WordListAdapter(this)
       recyclerView.adapter = adapter
       recyclerView.layoutManager = LinearLayoutManager(this)

       wordViewModel = ViewModelProvider(this).get(WordViewModel::class.java)
       wordViewModel.allWords.observe(this, Observer { words ->
           // Update the cached copy of the words in the adapter.
           words?.let { adapter.setWords(it) }
       })

       val fab = findViewById<FloatingActionButton>(R.id.fab)
       fab.setOnClickListener {
           val intent = Intent(this@MainActivity, NewWordActivity::class.java)
           startActivityForResult(intent, newWordActivityRequestCode)
       }
   }

   override fun onActivityResult(requestCode: Int, resultCode: Int, data: Intent?) {
       super.onActivityResult(requestCode, resultCode, data)

       if (requestCode == newWordActivityRequestCode && resultCode == Activity.RESULT_OK) {
           data?.getStringExtra(NewWordActivity.EXTRA_REPLY)?.let {
               val word = Word(it)
               wordViewModel.insert(word)
           }
       } else {
           Toast.makeText(
               applicationContext,
               R.string.empty_not_saved,
               Toast.LENGTH_LONG).show()
       }
   }
}
Now run your app! When you add a word to the database in NewWordActivity, the UI will automatically update.
Now that you have a working app, let's recap what you've built. Here is the app structure again:
The components of the app are:
MainActivity: displays words in a list using aRecyclerViewand theWordListAdapter. InMainActivity, there is anObserverthat observes the words LiveData from the database and is notified when they change.NewWordActivity:adds a new word to the list.WordViewModel: provides methods for accessing the data layer, and it returns LiveData so that MainActivity can set up the observer relationship.*LiveData<List<Word>>: Makes possible the automatic updates in the UI components. In theMainActivity, there is anObserverthat observes the words LiveData from the database and is notified when they change.Repository:manages one or more data sources. TheRepositoryexposes methods for the ViewModel to interact with the underlying data provider. In this app, that backend is a Room database.Room: is a wrapper around and implements a SQLite database. Room does a lot of work for you that you used to have to do yourself.- DAO: maps method calls to database queries, so that when the Repository calls a method such as
getAlphabetizedWords(), Room can executeSELECT * from word_table ORDER BY word ASC. Word: is the entity class that contains a single word.
* Views and Activities (and Fragments) only interact with the data through the ViewModel. As such, it doesn't matter where the data comes from.
Flow of Data for Automatic UI Updates (Reactive UI)
The automatic update is possible because we are using LiveData. In the MainActivity, there is an Observer that observes the words LiveData from the database and is notified when they change. When there is a change, the observer's onChange() method is executed and updates mWords in the WordListAdapter.
The data can be observed because it is LiveData. And what is observed is the LiveData<List<Word>> that is returned by the WordViewModel allWords property.
The WordViewModel hides everything about the backend from the UI layer. It provides methods for accessing the data layer, and it returns LiveData so that MainActivity can set up the observer relationship. Views and Activities (and Fragments) only interact with the data through the ViewModel. As such, it doesn't matter where the data comes from.
In this case, the data comes from a Repository. The ViewModel does not need to know what that Repository interacts with. It just needs to know how to interact with the Repository, which is through the methods exposed by the Repository.
The Repository manages one or more data sources. In the WordListSample app, that backend is a Room database. Room is a wrapper around and implements a SQLite database. Room does a lot of work for you that you used to have to do yourself. For example, Room does everything that you used to do with an SQLiteOpenHelper class.
The DAO maps method calls to database queries, so that when the Repository calls a method such as getAllWords(), Room can execute SELECT * from word_table ORDER BY word ASC.
Because the result returned from the query is observed LiveData, every time the data in Room changes, the Observer interface's onChanged() method is executed and the UI updated.
[Optional] Download the solution code
If you haven't already, you can take a look at the solution code for the codelab. You can look at the github repository or download the code here:
Unpack the downloaded zip file. This will unpack a root folder, android-room-with-a-view-kotlin, which contains the complete app.