
This codelab is part of the Advanced Android in Kotlin course. You'll get the most value out of this course if you work through the codelabs in sequence, but it is not mandatory. All the course codelabs are listed on the Advanced Android in Kotlin codelabs landing page.
Introduction
Notifications are messages that are shown to the user outside of your app's UI. Notifications are shown on top of the screen if the device is unlocked or, depending on the security settings, on the lock screen when the device is locked.

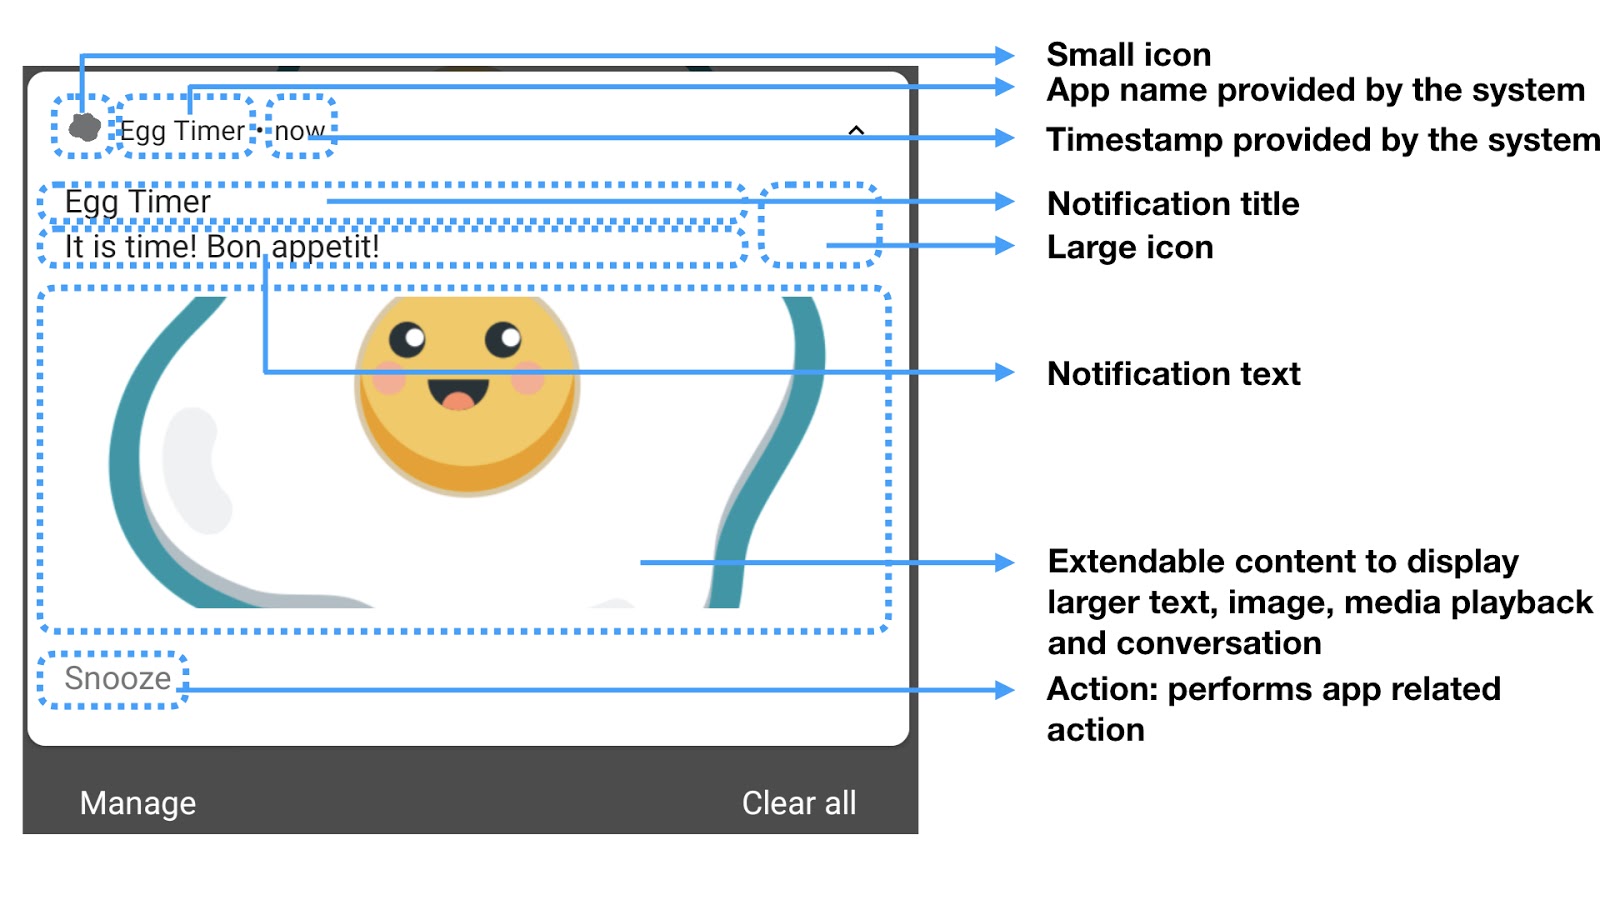
A typical notification consists of a title, a description, and an icon. A notification can also have clickable actions, a quick reply, extendable content, and images.
Notifications can deliver timely material, and they can have buttons to allow the user to perform quick actions, such as sending a reply or snoozing an alarm. Clicking on a notification takes the user to a view in your app related to the notification content.
Notifications are a helpful way to remind users of an important task, let them know something has happened, or communicate important information they need immediately while your app is in the background. Use notifications sparingly. Not only does this respect users, it also makes it more likely that your app's notification gets the attention it deserves.
In this codelab, you will learn how to create and use notifications in an Android app.
What you should already know
You should be familiar with:
- How to crate Android apps in Kotlin. In particular, work with the Android SDK.
- How to architect apps using the Architecture Components and data binding.
- A basic understanding of BroadcastReceivers
- A basic understanding of AlarmManager
What you'll learn
- How to create, style, and send a notification.
- How to cancel notifications.
- How to create notification channels.
- How to add quick actions to notifications.
- How to display notification badges on the app icon.
What you'll do
- Add a notification to the starter app.
- Cancel the notification you previously sent.
- Create channels for different types of notifications.
- Customize the notifications in the starter app.
- Add Quick Actions to make your notification interactive.
- Turn off notification badges.
Cooking eggs is simple, yet can be a challenging task if you fail to track the time. In this codelab, you will be working on an egg timer app and make it perfect, just like your future eggs. You will start with a working egg timer app which lets the user set different cooking time settings for different egg styles. The timer counts down from the selected time interval and displays a toast message when the eggs are ready.
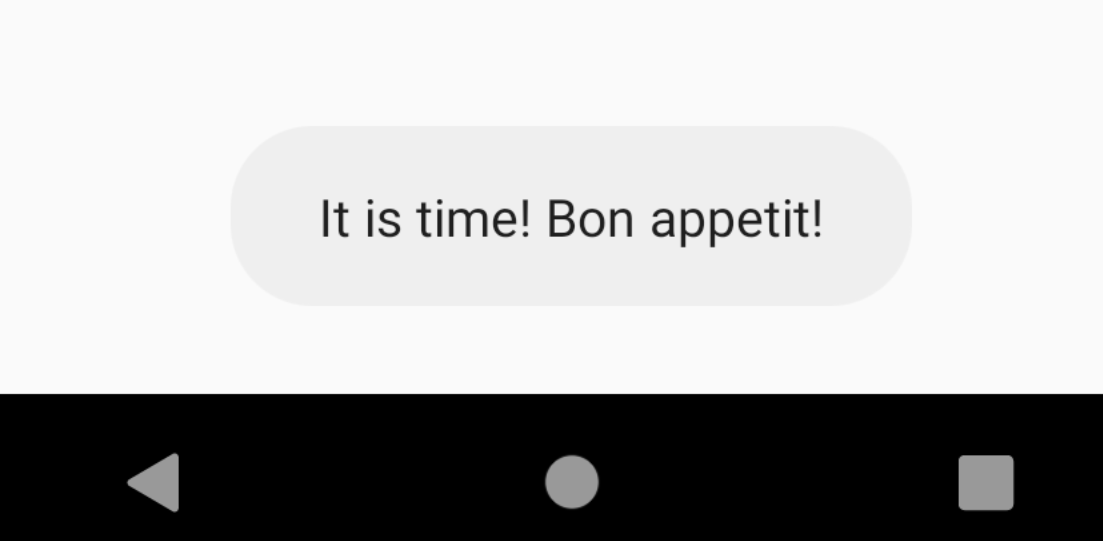
This might seem functional, but it is far from perfect, and not really user friendly. To start with, the toast message is shown only for a brief period of time, and is therefore easy to miss. Also, if the app is not in the foreground or the device is locked, there is no visual indicator for the timer's status once the toast message disappears.
Ideally, the egg timer should use notifications to tell users when time is up. The user really needs to know the eggs are ready immediately, otherwise the eggs will be overcooked! Notifications are visual, can include sounds, and can make the device vibrate—all ways to catch the user's attention! This way you can achieve perfect eggs and happy, well-fed users.
To get the sample app, you can either:
Clone the repository from GitHub and switch to the starter branch.
$ git clone https://github.com/googlecodelabs/android-kotlin-notifications
Alternatively, you can download the repository as a Zip file, unzip it, and open it in Android Studio.
- Open and run the app in Android Studio.
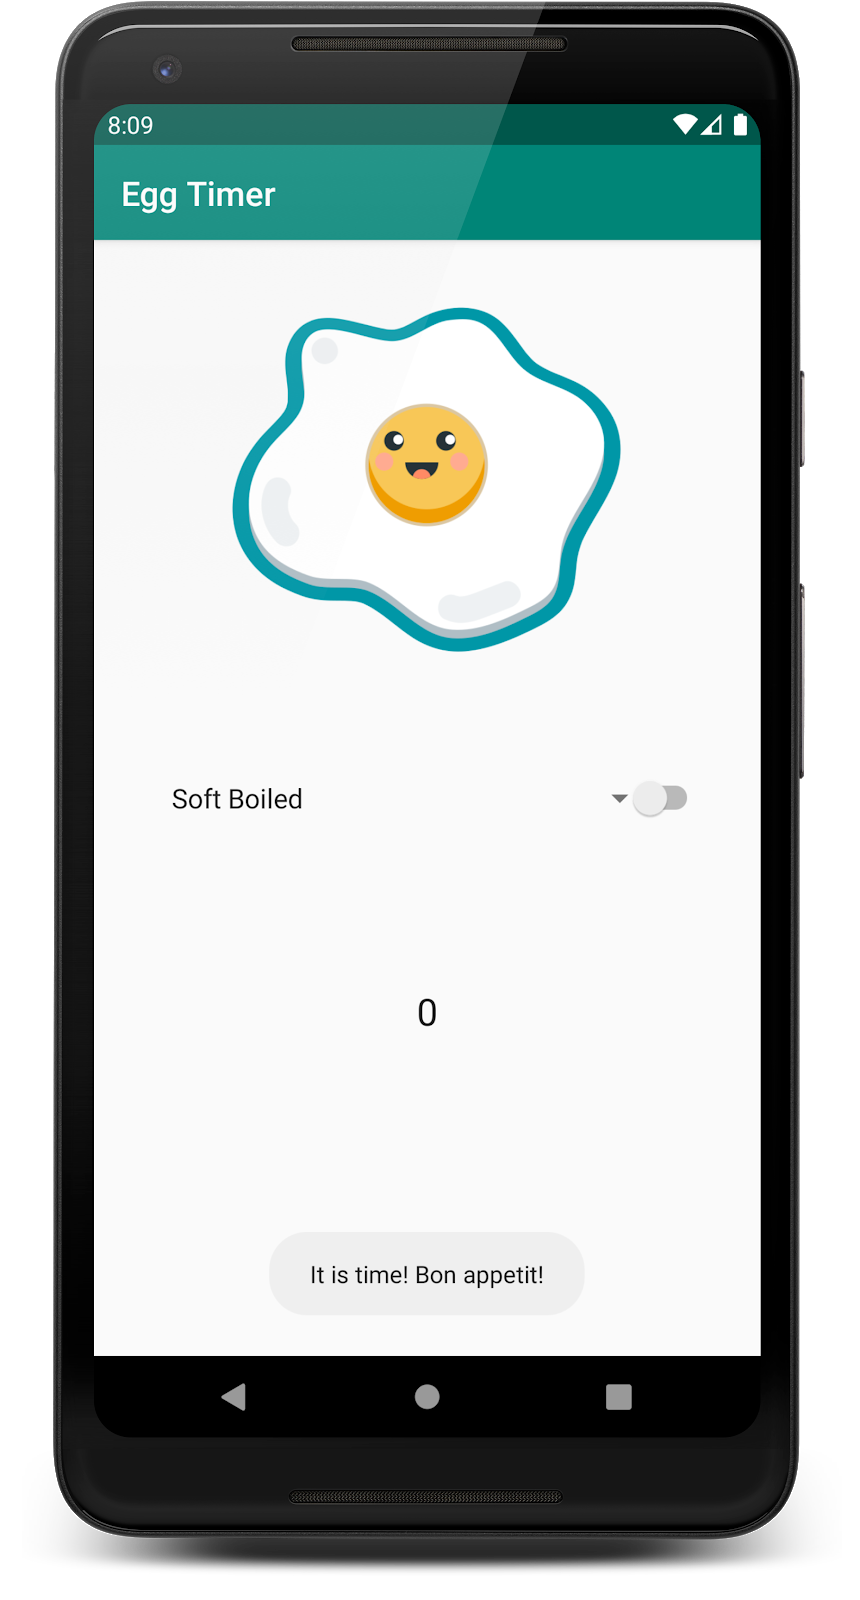
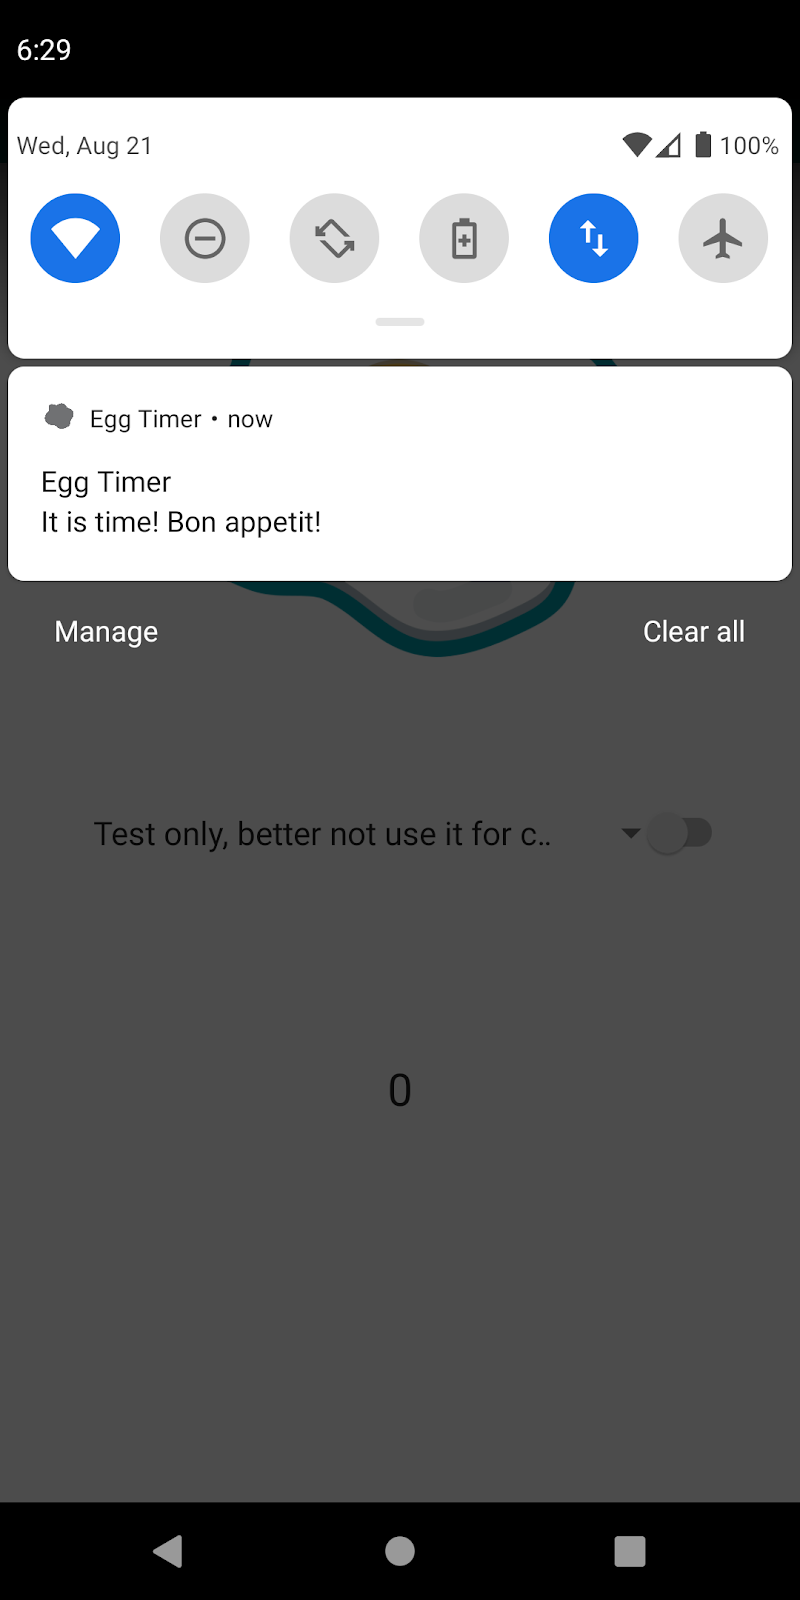
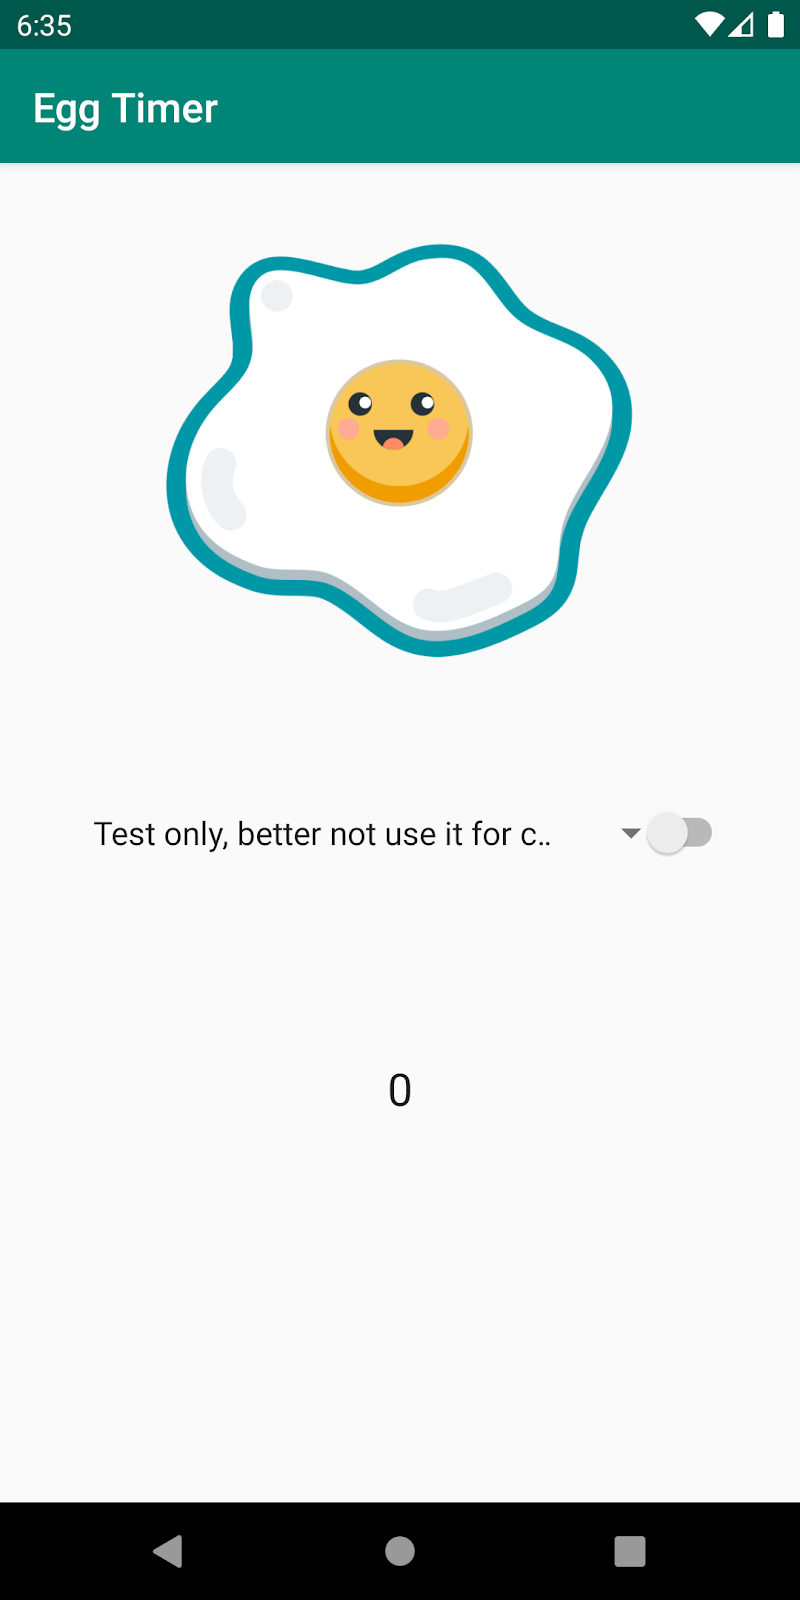
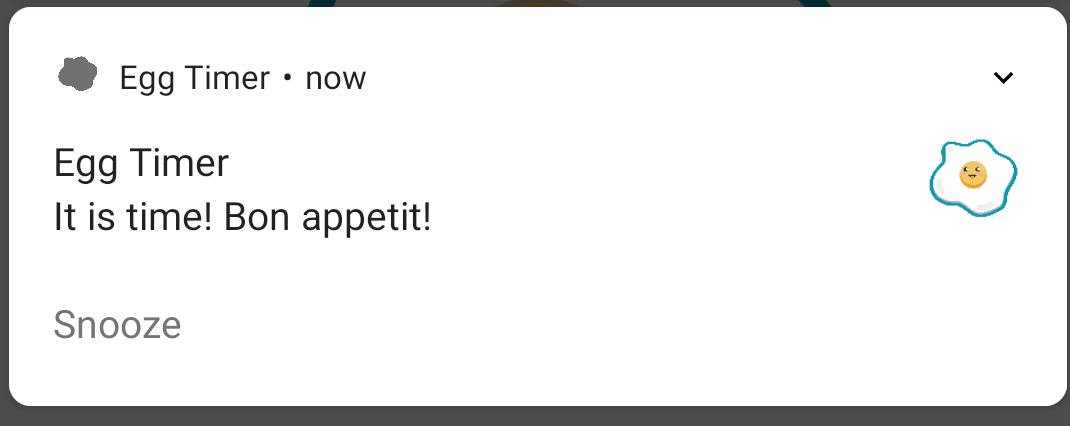
You will see an egg image and a dropdown menu with a list of predefined time intervals to cook an egg. Click on the triangle for the Soft Boiled drop-down menu. The first option in the list is given for testing purposes and sets the alarm to only 10 seconds. Next to the list is a switch which starts the egg timer. You can use this switch to start and stop the egg timer any time you want. The starter code is fully functional, which means you can set up the egg timer and watch it count down to 0. Once the timer finishes, a toast message is displayed, as shown below.
- Inspect the source code. The starter app consists of a single activity named
MainActivity. There are three sub packages namedreceiver,uiandutil.
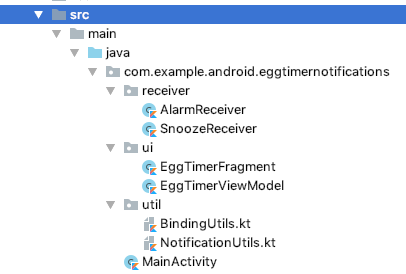
- /receiver—The
receiverpackage contains two broadcast receivers namedAlarmReceiverandSnoozeReceiver.AlarmReceiveris triggered by theAlarmManagerto send the notification when the user-defined timer is up.SnoozeReceiverhandles the user click to snooze the notification. - /ui—This contains the
EggTimerFragmentwhich is part of the UI portion of the app.EggTimerViewModelis responsible for starting and canceling the timer and for other lifecycle-related app tasks. - /util—In this package there are two files.
BindingUtils.kthas binding adapters to enable data binding between the app UI and theViewModel.NotificationUtils.kthas extension methods on theNotificationManager.
Using notifications is a great way to get the attention of your users to your app. Whether your app is not running or running in the foreground, a notification will show a popup window on top of the screen and may include sound or vibration. To create a notification, you need to use a notification builder and provide a title text, a content text, and an icon. Once the builder has all the necessary fields, NotificationManager, which is a system service, helps you to display this content as a notification. NotificationManager is responsible for sending a notification, updating its contents, and canceling the notification. In the following steps, you will be adding extension methods to NotificationManager. This way, every time you need to use NotificationManager, you will be able to use these extension functions to achieve the functionality you need to use.
Step 1: Create a basic Notification
In this task, you are creating a new notification, setting a message for your user, and sending the notification.
- Open the
NotificationUtils.ktclass and findTODO: Step 1.1. You'll find matching todos in this codelab and the app code. - Examine the given
sendNotification()function. You will be extending this extension function toNotificationManagerto send notifications.
//NotificationUtils.kt
// TODO: Step 1.1 extension function to send messages (GIVEN)
/**
 * Builds and delivers a notification.
 *
 * @param messageBody, notification text.
 * @param context, activity context.
 */
fun NotificationManager.sendNotification(messageBody: String, applicationContext: Context) {- Get an instance of the notification builder, pass in the app context and a channel ID. The channel ID is a string value for the channel.
Notification Channels are a way to group notifications. By grouping together similar types of notifications, developers and users can control all of the notifications in the channel. Once a channel is created, it can be used to deliver any number of notifications.
//NotificationUtils.kt
// TODO: Step 1.2 get an instance of NotificationCompat.Builder
val builder = NotificationCompat.Builder(
        applicationContext,
        applicationContext.getString(R.string.egg_notification_channel_id)
)- Set the notification icon to represent your app, a title, and the content text for the message you want to give to the user. You'll see more options to customize your notification further in the codelab, but this is the minimum amount of data you need to set in order to send a notification.
//NotificationUtils.kt
   // TODO: Step 1.3 set title, text and icon to builder
   .setSmallIcon(R.drawable.cooked_egg)
   .setContentTitle(applicationContext.getString(R.string.notification_title))
.setContentText(messageBody)- Next, you need to call
notify()with a unique ID for your notification and with theNotificationobject from your builder.
This ID represents the current notification instance and is needed for updating or canceling this notification. Since your app will only have one active notification at a given time, you can use the same ID for all your notifications. You are already given a constant for this purpose called NOTIFICATION_ID in NotificationUtils.kt. Notice that you can directly call notify() since you are performing the call from an extension function on the same class.
//NotificationUtils.kt
   // TODO: Step 1.4 call notify to send the notification
    // Deliver the notification
notify(NOTIFICATION_ID, builder.build())- Open
ui/EggTimerViewModel.ktand find thestartTimer()function. This function creates an alarm with the selected time interval when the user enables the egg timer. - You will trigger a notification in this function when the user starts the timer. In order to call the
sendNotification()function you previously implemented, you need an instance ofNotificationManager.NotificationManageris a system service that provides all the functions exposed for the notifications API, including the extension function you added. Anytime you want to send, cancel, or update a notification you need to request an instance of theNotificationManagerfrom the system. Call thesendNotification()|function with the notification message and with the context.
// EggTimerViewModel.kt
// TODO: Step 1.5 get an instance of NotificationManager
// and call sendNotification

val notificationManager = ContextCompat.getSystemService(
    app,
    NotificationManager::class.java
) as NotificationManager
                notificationManager.sendNotification(app.getString(R.string.timer_running), app)
You are almost there. However, if you run your app now and set the timer, you won't get a notification.
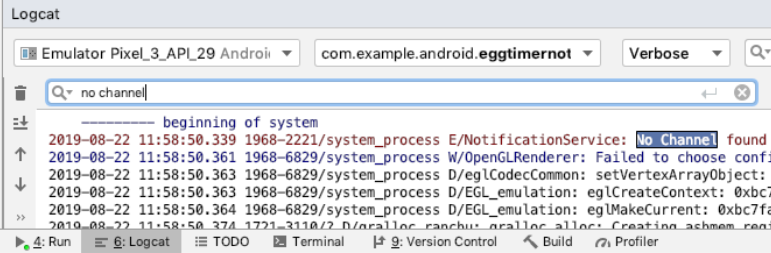
- Open
logcatand search for"No Channel found". You should see an error message that theegg_channeldoes not exist. In the following steps you will learn more about Notification Channels and fix this.
Step 2: Notification Channels
Starting with API level 26, all notifications must be assigned to a channel. If you tap and hold the app launcher icon, select app info, and tap notifications, you will see a list of notification channels associated with the app. Right now the list is empty because your app has not created any channels.
Channels represent a "type" of notification—for example, your egg timer can send a notification when the egg is cooked, and also use another channel to send daily notifications to remind you to have eggs with your breakfast. All notifications in a channel are grouped together, and users can configure notification settings for a whole channel. This allows users to personalize their notification settings based on the kind of notification they are interested in. For example, your users can disable the breakfast notifications, but still choose to see the notifications from the timer.
Developers set the initial settings, importance and behavior, to be applied to all notifications in a channel. After you set the initial settings, users can override these settings.
In Step 1.1 you used egg_notification_channel_id as your notification channel, so now you need to actually create and and customize the notification settings and behavior of this channel.
- Open
EggTimerFragment.ktand find thecreateChannel()function. - Pass the unique channel ID to the constructor of
NotificationChannel. - Pass the notification channel name, which users will also see in their Settings screen.
- As the last parameter, pass the importance level for the notification channel. Importance levels will be covered later in this codelab, so for now you can use
NotificationManager.IMPORTANCE_LOW. - On the
notificationChannelobject setenableLightsto true. This setting will enable the lights when a notification is shown. - On the
notificationChannelobject setlightColorto red in order to display a red light when a notification is shown. - On the
notificationChannelobject setenableVibrationto true in order to enable vibration. - On the
notificationChannelobject set channel description to‘Time for breakfast'. - Get an instance of
NotificationManagerby callinggetSystemService(). - Call
createNotificationChannel()onNotificationManagerand pass thenotificationChannelobject which you created in the previous step.
//EggTimerFragment.kt
private fun createChannel(channelId: String, channelName: String) {
    // TODO: Step 1.6 START create a channel
    if (Build.VERSION.SDK_INT >= Build.VERSION_CODES.O) {
        val notificationChannel = NotificationChannel(
            channelId,
            channelName,
            // TODO: Step 2.4 change importance
            NotificationManager.IMPORTANCE_LOW
        )
        // TODO: Step 2.6 disable badges for this channel

        notificationChannel.enableLights(true)
        notificationChannel.lightColor = Color.RED
        notificationChannel.enableVibration(true)
        notificationChannel.description = "Time for breakfast"

        val notificationManager = requireActivity().getSystemService(
            NotificationManager::class.java
        )
        notificationManager.createNotificationChannel(notificationChannel)
    }
    // TODO: Step 1.6 END create channel
}- Next, to create a channel, you need to call the
createChannel()function you just wrote (Step 1.7). This function takes two parameters, the channel ID and the channel name. You need to look up your channel ID and channel name from the string resources which are already given in your project.
// EggTimerFragment.kt
    // TODO: Step 1.7 call createChannel
    createChannel(
          getString(R.string.egg_notification_channel_id),
          getString(R.string.egg_notification_channel_name)
)- You need to pass the channel ID to the notification builder. You already did this in Step 1.2. Setting a wrong value as the channel ID will make the notification fail. Open
NotificationUtils.ktto verify the channel ID you previously set is correct.
// NotificationUtils.kt
val builder = NotificationCompat.Builder(
        applicationContext,
       // TODO: Step 1.8 verify the notification channel name
        applicationContext.getString(R.string.egg_notification_channel_id)
)- Run the app, and you will see the app sends a notification every time you start the timer.
- Pull the status bar and observe that the notification title, content, and icon are as you set them in the previous steps.
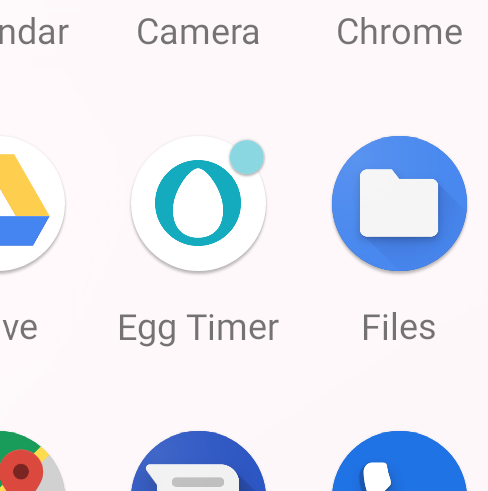
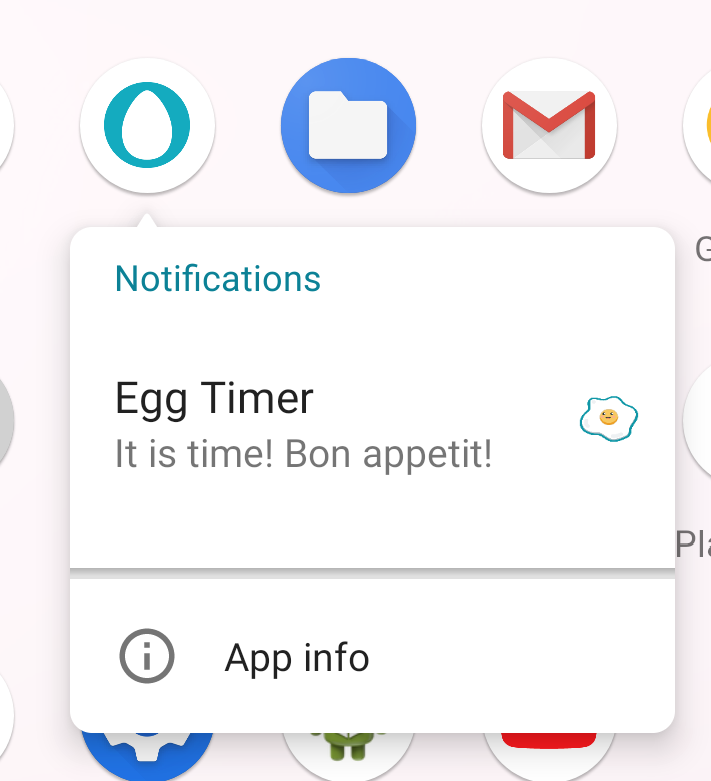
- To verify the newly created channel, close the app and find the app icon. Perform a long tap on the app icon and select App info.
|
|

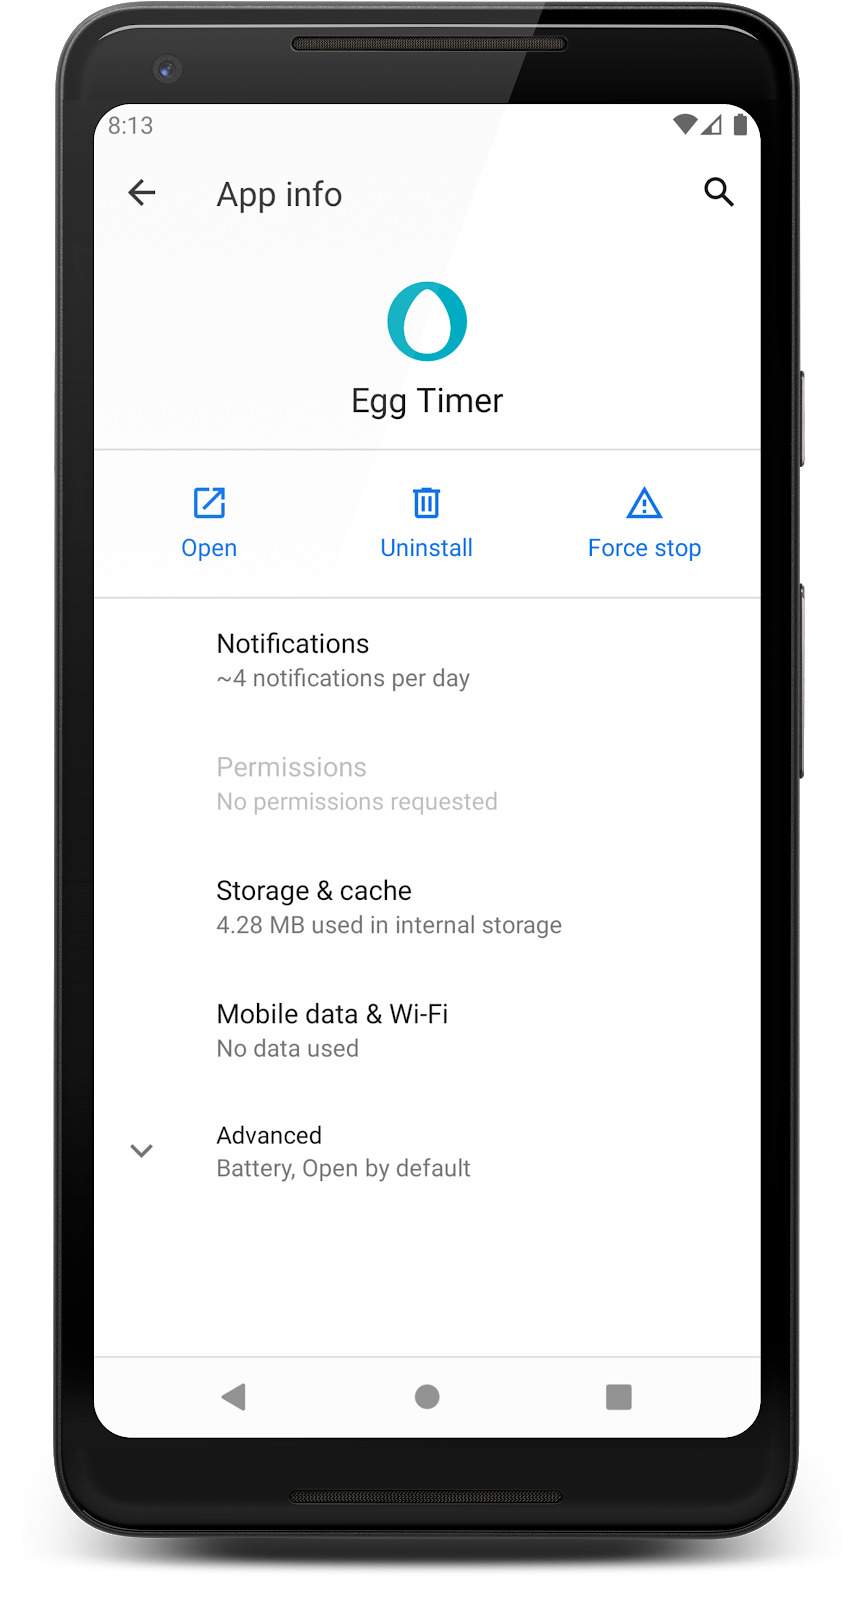
- Select Notifications from the list of settings. You should see a new channel named Egg, right below the Show notifications setting.

When you run the app the notification is now shown. Both you as the app developer and your users can customize the settings and behavior for all notifications sent on this channel. Congrats, you created a notification!
Step 3: Add notifications to your app
So far this shows the basic usage of the notifications API, but sending a notification right after starting the timer doesn't make much sense. Users would probably prefer to be notified when the egg is ready. In the following part of the codelab, you will fix this and change the toast message to a notification.
You have already sent the notification and observed how it is shown to the users but this was just the first step to creating great notifications. In this step, you will change your notification to be sent at a more appropriate time.
Your app uses AlarmManager to set up an alarm. The code related to AlarmManager is already given in the starter code and used for showing the toast message. AlarmManager keeps track of the desired time selection and will trigger the onReceive() function of AlarmReceiver.kt when the time is up. If you open AlarmReceiver.kt and navigate to onReceive(), you should see the toast message that is displayed every time you set up an egg timer.
- Open
AlarmReceiver.kt, an instance ofNotificationManager, and call thesendNotification()function with the message text and context parameters.
// AlarmReceiver.kt
   // TODO: Step 1.9 add call to sendNotification
   val notificationManager = ContextCompat.getSystemService(
       context,
       NotificationManager::class.java
   ) as NotificationManager

   notificationManager.sendNotification(
       context.getText(R.string.eggs_ready).toString(),
       context
)- Optionally, remove the toast since your app will be sending a notification when the timer is up.
// AlarmReceiver.kt
     // TODO: Step 1.10 [Optional] remove toast
//   Toast.makeText(
//       context,
//       context.getText(R.string.eggs_ready),
//       Toast.LENGTH_SHORT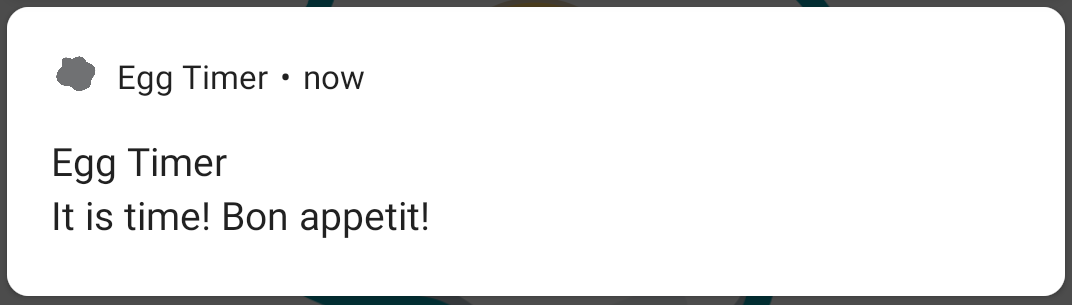
// ).show()- Run your app . You should see a notification every time you start the timer and every time the timer is up.
This isn't ideal. You don't want to send too many notifications to your users. You can remove the first notification which is sent when the user starts the timer.
- Open
EggTimerFragment.ktand remove the notification code for Step 1.5.
// EggTimeViewModel.kt

// TODO: Step 1.5 get an instance of NotificationManager
// and call sendNotification
// val notificationManager = ContextCompat.getSystemService(
//      app,
//      NotificationManager::class.java
// ) as NotificationManager
// notificationManager.sendNotification(app.getString(R.string.eggs_ready), app)- Run your app again.
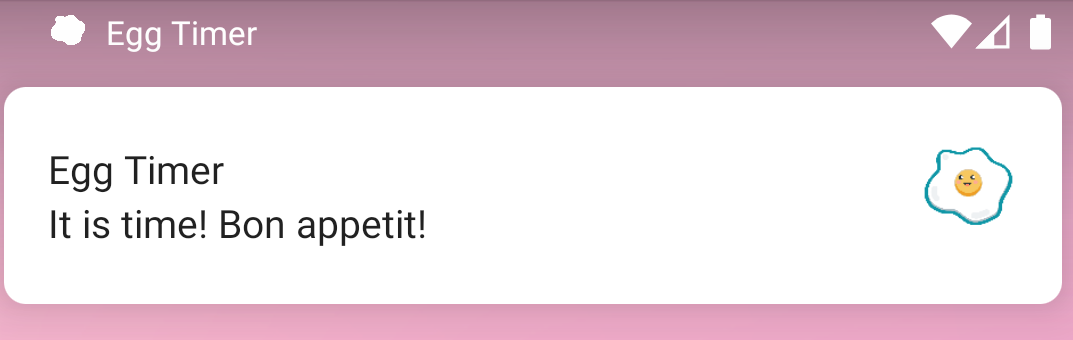
- Set a timer, put it in the background, and wait for the time to finish. You will see a notification. This is a much more useful notification.
Step 4: Add a content intent
- Run the app again, if it's not already running.
- Click the notification. Nothing happens!
Showing the notification and informing the user is great, but when a user clicks a notification, they expect to go back to the corresponding app. In this part of the codelab you will add an intent to your notification to bring the user back to the timer screen.
An Intent is a messaging object you can use to request an action from another app component. Intents can be used for starting an activity, a service, or delivering a broadcast. In this case, you use this intent to tell the system to open MainActivity when the user taps the notification. Since your app consists of only a single view, you do not have many options here. However, in a larger app, the notification should create a seamless experience by bringing the user to a screen which makes sense for when they interact with the notification.
- Open
NotificationUtils.ktand find thesendNotification()extension function. - Create an
Intentwith yourapplicationContextand the activity to be launched,MainActivity::class.java.
// NotificationUtils.kt

fun NotificationManager.sendNotification(messageBody: String, applicationContext: Context) {
    // Create the content intent for the notification, which launches
    // this activity
   // TODO: Step 1.11 create intent
    val contentIntent = Intent(applicationContext, MainActivity::class.java)
You created the intent, but the notification is displayed outside your app. To make an intent work outside your app, you need to create a new PendingIntent.
PendingIntent grants rights to another application or the system to perform an operation on behalf of your application. A PendingIntent itself is simply a reference to a token maintained by the system describing the original data used to retrieve it. This means that, even if its owning application's process is killed, the PendingIntent itself will remain usable from other processes it has been given to. In this case, the system will use the pending intent to open the app on behalf of you, regardless of whether or not the timer app is running.
- Create a
PendingIntentwithapplicationContext,NOTIFICATION_ID, thecontentIntentyou created in the previous step, and thePendingIntentflag. ThePendingIntentflag specifies the option to create a newPendingIntentor use an existing one. You need to setPendingIntent.FLAG_UPDATE_CURRENTas the flag since you do not want to create a new notification if there is an existing one. This way you will be modifying the currentPendingIntentwhich is associated with the intent you are supplying.
// NotificationUtils.kt
   // TODO: Step 1.12 create PendingIntent
    val contentPendingIntent = PendingIntent.getActivity(
        applicationContext,
        NOTIFICATION_ID,
        contentIntent,
        PendingIntent.FLAG_UPDATE_CURRENT
)- Pass the
PendingIntentto your notification. You do this by callingsetContentIntent()on theNotificationBuilder. Now, when you click the notification, thePendingIntentwill be triggered, opening up yourMainActivity. - Also set
setAutoCancel()totrue, so that when the user taps on the notification, the notification dismisses itself as it takes them to the app.
// NotificationUtils.kt
    // TODO: Step 1.13 set content intent
    .setContentIntent(contentPendingIntent)
.setAutoCancel(true)- Run the app again.
- Set a timer, put the app in the background, and wait for the notification to appear.
- Once you see the notification, click on the notification by pulling down the status bar, and observe how the app is brought to the foreground.
|
|
Step 5: Cancel the notification
You have a functional egg timer with notifications, but there is a small issue. If you set the timer, get a notification, and set the timer again, the previous notification stays on the status bar while the new timer is running. This can confuse your user if the app is in the background, and may result in undercooked eggs.
To fix this, you need to clear the previous notification when you start a new timer. Start by creating another extension function in your NotificationUtils.kt. NotificationManager has an API to cancel all active notifications called cancelAll().
- Open
NotificationsUtil.kt. - Add an extension function on
NotificationManagerwhich callscancelAll().
// NotificationUtils.kt

// TODO: Step 1.14 Cancel all notifications
/**
 * Cancels all notifications.
 *
 */
fun NotificationManager.cancelNotifications() {
    cancelAll()
}- Open
EggTimerViewModel.ktand navigate to thestartTimer()function. - Inside
startTimer(), Get an instance of theNotificationManagerfrom the system and callcancelNotifications().
//  EggTimerViewModel.kt
   //TODO Step 1.15 call cancel notification
    val notificationManager =
       ContextCompat.getSystemService(
            app,
            NotificationManager::class.java
        ) as NotificationManager
notificationManager.cancelNotifications() - Run the app and start the timer.
- After you see the notification, start the timer again and observe how our app automatically deletes the previous notification from the status bar.
The notification framework gives a variety of customization options for developers to set custom actions and style their notifications as needed. During this task, you will learn how to customize your egg timer notifications.
Step 1: Style your notification
Styling your notification according to your needs and the notification content will make your notifications stand out and look more like an extension of your application. The notification framework comes with several built-in styles to help, and you can always create your own.
NotificationCompat offers built-in styles for:
BigTextStyle, which can display a large block of text, such as showing the contents of an email when expanded.BigPictureStyle, which shows large-format notifications that include a large image attachment.InboxStyle, which shows a conversation style text content.MediaStyle, which shows controls for media playback.MessagingStyle, which shows large-format notifications that include multiple messages between any number of people.
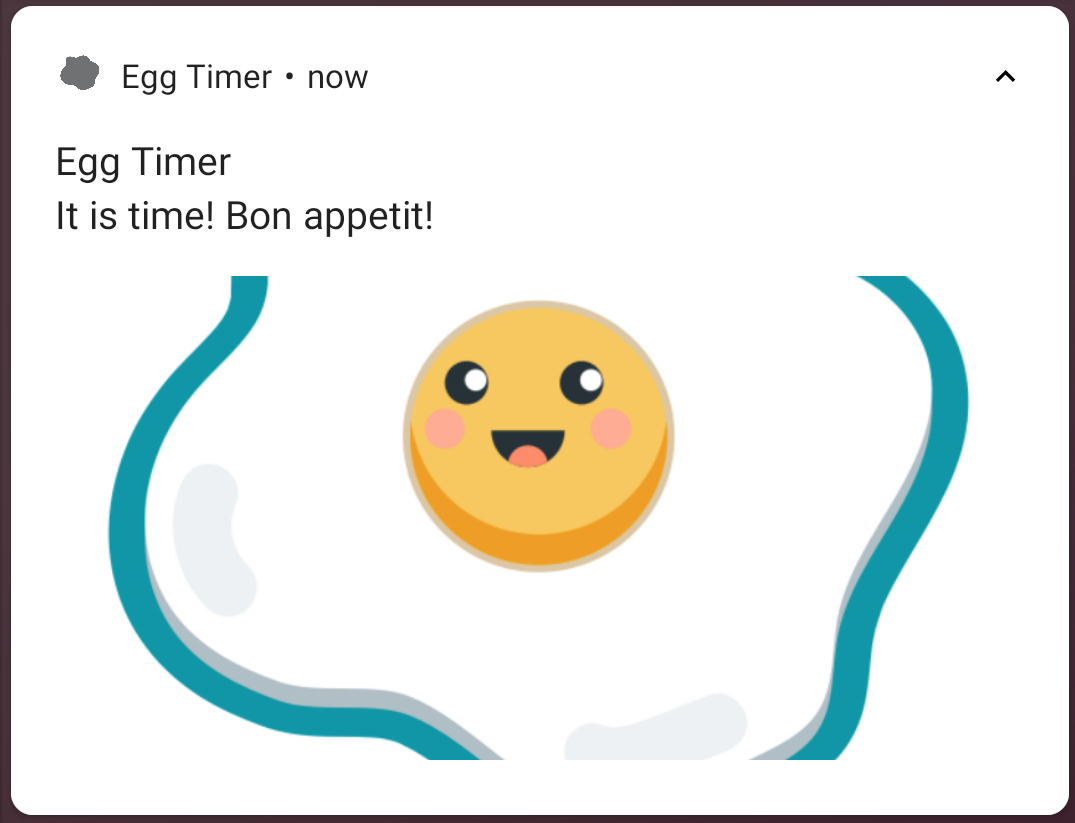
You can find more info on other styles in the documentation for Create an Expandable Notification. In this step you will use NotificationCompat.BigPictureStyle to create an expandable notification that shows a large egg image when expanded.
- Open
NotificationUtils.ktand find thesendNotification()function. - Start with loading an image from
resourcesusing theBitmapFactory.
// NotificationUtils.kt

// TODO: Step 2.0 add style
val eggImage = BitmapFactory.decodeResource(
     applicationContext.resources,
     R.drawable.cooked_egg
)
- Create a new
BigPictureStyleand set your image. - Set
bigLargeIcon()tonullso that the large icon goes away when the notification is expanded.
// NotificationUtils.kt

// TODO: Step 2.0 add style
val eggImage = BitmapFactory.decodeResource(
     applicationContext.resources,
     R.drawable.cooked_egg
)
val bigPicStyle = NotificationCompat.BigPictureStyle()
        .bigPicture(eggImage)
.bigLargeIcon(null)- Set the style with
setStyle()tobigPicStyle. - Set the large icon with
setLargeIcon()to theeggImage, so the image will be displayed as a smaller icon when notification is collapsed.
// NotificationUtils.kt
// TODO: Step 2.1 add style to builder
.setStyle(bigPicStyle)
.setLargeIcon(eggImage)- Run the app and set a timer. When the notification is first shown, it is in the collapsed state in the notification drawer. If you expand the notification, a large image is shown in the extended notification area.
Step 2: Notification actions
Notification actions are another customization you can add to your notifications. Your notifications currently redirect to your app when users click on them. In addition to this default notification action, you can add action buttons that complete an app-related task from the notification.
A notification can offer up to three action buttons that allow the user to respond quickly, such as snooze a reminder or reply to a text message. These action buttons should not duplicate the action performed when the user taps the notification.
To add an action button, pass a PendingIntent to the addAction() function on the builder. This is similar to setting up the notification's default tap action by calling setContentIntent(), except instead of launching an activity, you can do a variety of other things, for example, start a BroadcastReceiver that performs a job in the background so the action does not interrupt the app that's already open.
In this codelab, you are already given a BoadcastReceiver named SnoozeReceiver. You will use SnoozeReceiver to receive the user click on the Notification action. In the following steps you will add code to snooze the egg timer notification for 60 seconds when the user clicks the snooze action button. When the snooze action is clicked, the SnoozeReceiver will receive an intent and will create a new alarm to send a new notification after 60 seconds.
- Open
SnoozeReceiver.kt. This class is similar toAlarmReceiverwhich you used before. In the following steps you will add code which will trigger theonReceive()function of theSnoozeReceiver. In short, the code inSnoozeReceiverwill create a new alarm to send a new notification a minute later. Scrolldown to bottom of the onReceive function, get an instance of notificationManager from system and call cancelAll.
// SnoozeReceiver.kt
        val notificationManager = ContextCompat.getSystemService(
            context,
            NotificationManager::class.java
        ) as NotificationManager
notificationManager.cancelAll()- In order to use
SnoozeReceiver, openNotificationUtils.kt. - Create a new
IntentsnoozeIntentfor theSnoozeReceiverjust after the style in thesendNotification()function. - Create a pending intent by calling the
getBroadcast()method onPendingIntentwhich expects the parameters in the following steps. ThisPendingIntentwill be used by the system to set up a new alarm to post a new notification after 60 secs when the snooze button is tapped by the user. - The first parameter is the application context in which this
PendingIntentshould start the activity. - The second parameter is the request code, which is the request code for this pending intent. If you need to update or cancel this pending intent, you need to use this code to access the pending intent.
- Next, add the
snoozeIntentobject, which is the intent of the activity to be launched. - Lastly, add the flag value of
#FLAG_ONE_SHOTsince the intent will be used only once. The quick action and the notification will disappear after the first tap which is why the intent can be only be used once.
// NotificationUtils.kt

// TODO: Step 2.2 add snooze action
val snoozeIntent = Intent(applicationContext, SnoozeReceiver::class.java)
val snoozePendingIntent: PendingIntent = PendingIntent.getBroadcast(
    applicationContext,
    REQUEST_CODE,
    snoozeIntent,
    FLAGS
)- Next, call the
addAction()function on thenotificationBuilder. This function expects an icon and a text to describe your action to the user. You also need to add thesnoozeIntent. This intent will be used to trigger the rightboadcastReceiverwhen your action is clicked.
// NotificationUtils.kt
// TODO: Step 2.3 add snooze action
.addAction(
    R.drawable.egg_icon,
    applicationContext.getString(R.string.snooze),
    snoozePendingIntent
)
- Run the egg timer app to test the snooze action.
- Run the timer and put the app in the background. Once the timer is up, expand the notification and you will see that the notification now has a snooze action button which snoozes the egg timer for another minute.
Step 3: Notification importance
Importance determines how much the notification should interrupt the user visually and audibly. Notifications with higher importance will be more interruptive to users.
You must specify the importance level in the NotificationChannel constructor. You originally set low importance for the egg timer app. You can use one of five importance levels, ranging from IMPORTANCE_NONE(0) to IMPORTANCE_HIGH(4). The importance level you assign to a channel applies to all notification messages that you post to it.
Channel Importance Levels
User-visible importance level | Importance (Android 8.0 and higher) | Priority (Android 7.1 and lower) |
Makes a sound and appears as a heads-up notification (pops up at the top of the screen) | ||
Makes a sound | ||
No sound | ||
No sound and does not appear in the status bar |
For information about choosing an appropriate priority level, see "Priority levels" in the Notifications design guide. You should be careful when selecting an importance level for the notifications in your app. Channel importance should be chosen with consideration for the user's time and attention. When an unimportant notification is disguised as urgent, it can produce unnecessary alarm and be distracting. Users have full control over the importance level of their notifications, so if you create an annoying notification, they can turn off your notification channel completely.
When you first created the notification in Step 1.6, the egg timer was set to send notifications with a low priority since it was designed to not disturb the user with notifications. However, it might be a good idea to get the attention of the user before the egg overcooks. In order to change the importance level of the notification, start with the channel settings. Channel importance affects the interruption level of all notifications posted in the channel, and must be specified in the NotificationChannel constructor.
- In order to change the importance level of your app's notification channel, open
EggTimerFragment.ktand navigate tocreateChannel(). Change the importance level fromIMPORTANCE_LOWtoIMPORTANCE_HIGH.
// EggTimerFragment.kt
    val notificationChannel = NotificationChannel(
        channelId,
        channelName,
        // TODO: Step 2.4 change importance
        NotificationManager.IMPORTANCE_HIGH
    )
To support devices running Android 7.1 (API level 25) or lower, you must also call setPriority() for each notification, using a priority constant from the NotificationCompat class.
- Open
NotificationUtils.ktand add the following to the notification builder object.
// NotificationUtils.kt
   .addAction(
       R.drawable.common_google_signin_btn_icon_dark,
       applicationContext.getString(R.string.snooze),
       snoozePendingIntent
    )
   // TODO: Step 2.5 set priority
.setPriority(NotificationCompat.PRIORITY_HIGH)- Before running the app, long click on the app icon on your device or emulator and select uninstall to clear previous channel settings. If you fail to uninstall the app, the channel priority settings will not change, and this will result in no behavior change when the notification is posted.
- Now run the app again and start the timer. This time, when the notification is delivered, you should see a popup appear at the top of the screen, regardless of whether your app is running in the foreground or background.
Step 4: Notification badges
Notification badges are small dots that appear on the launcher icon of the associated app when the app has an active notification. Users can long-press on the app icon to reveal the notifications.
|
|
These dots, called badges, appear by default, and there's nothing your app needs to do. However, there might be situations where badges don't make sense for your notifications, so you can disable them on a per-channel basis by calling setShowBadge(false) on your NotificationChannel object. Since the egg timer only has one active notification at a given time, the badge on your app icon doesn't offer much benefit for your users. In the following steps you will disable the badge and only show a notification for the egg timer.
- Add
setShowBadge(false)to the channel creation code for the egg timer to disable badges.
// EggTimerFragment.kt

    ).apply {
        // TODO: Step 2.6 disable badges for this channel
        setShowBadge(false)
}- Run the app again, start the timer and watch the app icon. You shouldn't see any badges on the app icon.
The solution code is in the master branch of your downloaded code.
- Use the NotificationManager class to create, send, update, and cancel a notification using.
- Use a NotificationChannel object with the createNotificationChannel method to set a channel for the notification.
- Use addAction() to add quick actions to a notification.
- Use setShowBadge() to enable or disable badges,.
- Style your notifications using styles which extends from Notification.Style
- Set the importance level with NotificationChannel.setImportance()
Udacity course:
Android developer documentation:
For links to other codelabs in this course, see the Advanced Android in Kotlin codelabs landing page.