
مستوى الترميز: مبتدئ
المدة: 15 دقيقة
نوع المشروع: أتمتة باستخدام قائمة مخصّصة
الأهداف
- فهم ما يفعله الحلّ
- فهم وظائف خدمات "برمجة تطبيقات Google" ضمن الحلّ
- إعداد النص البرمجي
- شغِّل النص البرمجي.
لمحة عن هذا الحل
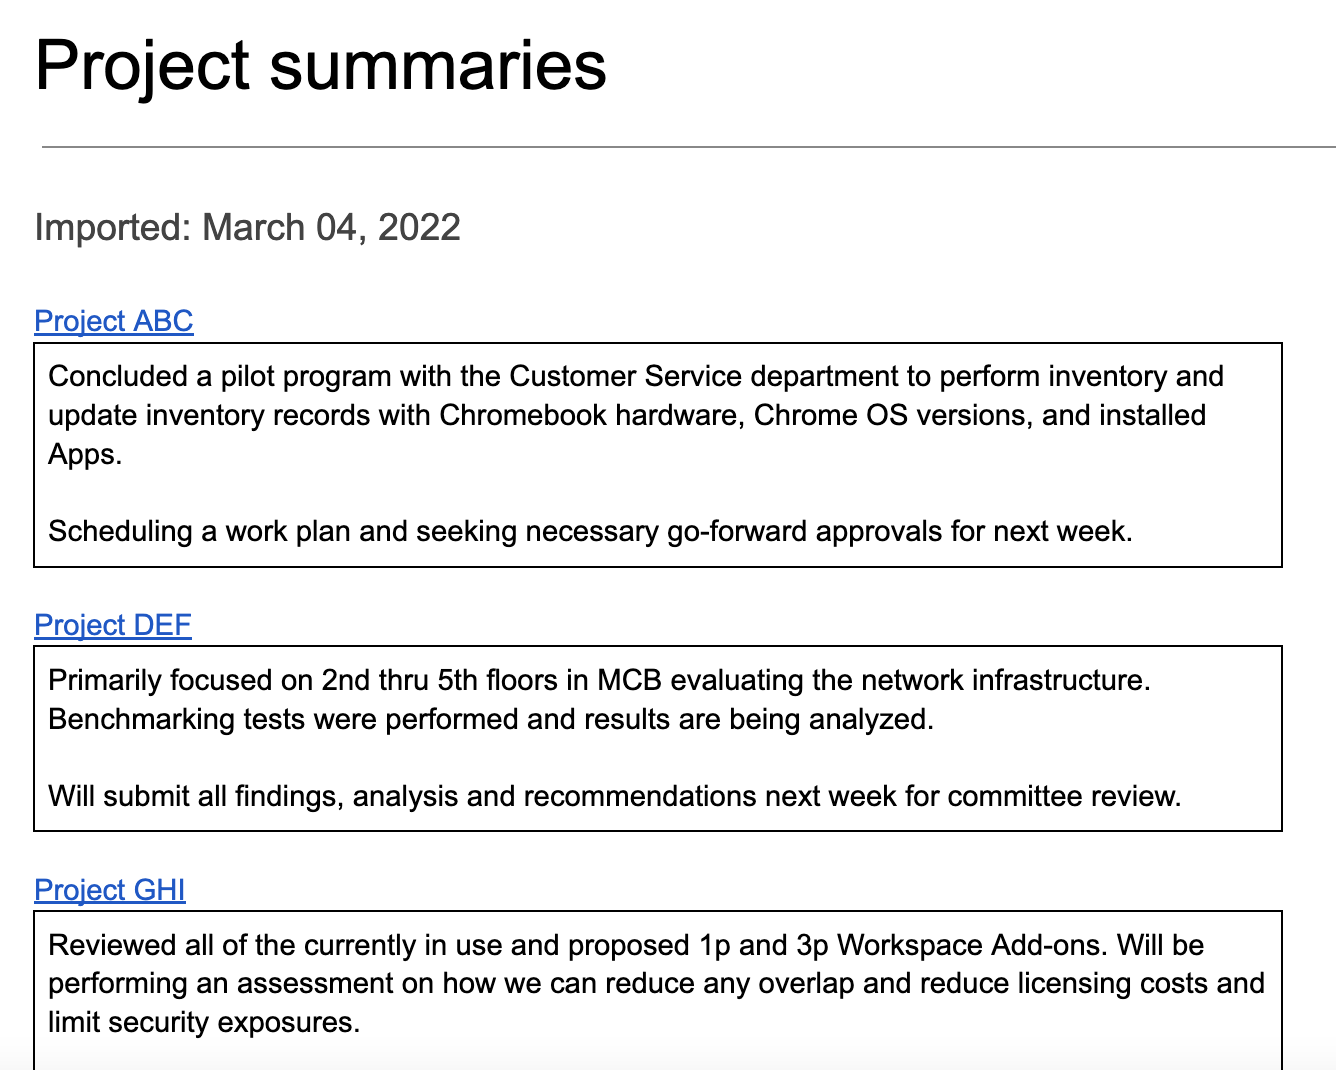
لتوفير الوقت وتقليل الأخطاء الناتجة عن عمليات النسخ واللصق اليدوية، يمكنك استيراد المحتوى تلقائيًا من مستندات متعددة إلى مستند رئيسي واحد من "مستندات Google". يركّز هذا الحلّ على تجميع تقارير حالة المشاريع، ولكن يمكنك تعديله ليناسب احتياجاتك.
آلية العمل
ينشئ النص البرمجي مجلدًا لتخزين المستندات التي تريد استيراد المحتوى منها ومستند نموذج لبدء عملية الاستيراد. يتضمّن النص البرمجي أيضًا دوال تنشئ مستندات نموذجية لعرض هذا الحلّ.
عندما يختار المستخدم استيراد الملخّصات من القائمة المخصّصة، يحصل النص البرمجي على جميع ملفات "مستندات Google" في المجلد ويتكرّر خلال كل ملف. يبحث النص البرمجي عن سلسلة ونوع عنوان محدّدَين لتحديد نص الملخّص الذي يجب نسخه. بعد نسخ النص، يغيّر النص البرمجي لون نص سلسلة المعرّف للحدّ من التكرار. يلصق النص البرمجي الملخّصات في المستند الرئيسي، كل ملخّص في جدول خاص به يتضمّن خلية واحدة.
خدمات "برمجة تطبيقات Google"
يستخدم هذا الحل الخدمات التالية:
- خدمة المستندات: تنشئ النموذج ومستندات المصدر النموذجية. تتكرّر هذه العملية في كل مستند مصدر بحثًا عن ملخّصات مشاريع جديدة لاستيرادها. يتم استيراد الملخّصات إلى المستند الرئيسي. تعديل المستندات المصدر لمنع استيراد الملخّصات أكثر من مرة
- خدمة Google Drive: تنشئ مجلدًا لتخزين المستندات المصدر. يضيف هذا الإجراء مستند النموذج ومستندات المصدر النموذجية إلى المجلد.
- خدمة الأدوات المساعدة: تعمل على تنسيق التاريخ الذي يضيفه النص البرمجي إلى المستند الرئيسي في كل مرة يستورد فيها النص البرمجي ملخّصات من المستندات المصدر.
- الخدمة الأساسية: تستخدم الفئة
Sessionللحصول على المنطقة الزمنية للبرنامج النصي. يستخدم النص البرمجي المنطقة الزمنية عند إضافة تاريخ الاستيراد إلى المستند الرئيسي.
المتطلبات الأساسية
لاستخدام هذا النموذج، يجب استيفاء المتطلبات الأساسية التالية:
لاستخدام هذا النموذج، يجب استيفاء المتطلبات الأساسية التالية:
- حساب Google (قد تتطلّب حسابات Google Workspace موافقة المشرف).
- متصفّح ويب يمكنه الوصول إلى الإنترنت
إعداد النص البرمجي
انقر على الزر التالي لإنشاء نسخة من مستند المحتوى المجمّع:
تشغيل النص البرمجي
اتّبِع الخطوات التالية لتشغيل النص البرمجي والاطّلاع على طريقة عمله.
تشغيل عرض توضيحي باستخدام مستندات نموذجية
- انقر على استيراد الملخّصات > ضبط > تشغيل عملية الإعداد التجريبي باستخدام مستندات نموذجية. قد تحتاج إلى إعادة تحميل الصفحة لتظهر هذه القائمة المخصّصة.
- امنح الإذن للنصّ البرمجي عند مطالبتك بذلك. <<../_snippets/oauth.md>>
- انقر على استيراد الملخّصات > ضبط > تشغيل عملية الإعداد التجريبي باستخدام مستندات نموذجية مرة أخرى.
- عندما يُطلب منك ذلك، انسخ عنوان URL لمجلد Drive لاستخدامه في خطوة لاحقة.
- انقر على موافق.
- انقر على استيراد الملخّصات > استيراد الملخّصات.
- انقر على حسنًا عندما يُطلب منك ذلك.
- راجِع ملخّصات المشاريع التي تم استيرادها من المستندات النموذجية.
إضافة ملخّص واستيراده
- في علامة تبويب متصفّح جديدة، الصِق عنوان URL الخاص بالمجلد لفتح مجلد حالة المشروع.
- افتح ملف Project ABC.
- أنشئ ملخّصًا جديدًا لاستيراده من خلال إضافة المحتوى التالي إلى نهاية المستند:
- اكتب
Summaryواضبط نمط النص على العنوان 3. - أسفل
Summaryمباشرةً، أدرِج جدولاً 1x1. تأكَّد من عدم وجود أسطر فارغة بينSummaryوالجدول. - في الجدول، اكتب
Hello world!.
- اكتب
- ارجع إلى المستند الرئيسي وانقر على استيراد الملخّصات > استيراد الملخّصات.
- انقر على حسنًا عندما يُطلب منك ذلك.
- يمكنك الاطّلاع على آخر عملية استيراد في نهاية المستند.
مراجعة الرمز البرمجي
لمراجعة رمز برمجة تطبيقات الخاص بهذا الحل، انقر على عرض الرمز المصدر:
عرض رمز المصدر
Code.gs
</section>
<section>
  <h3>Menu.gs</h3>
</section>
<section>
  <h3>Setup.gs</h3>
</section>
<section>
  <h3>Utilities.gs</h3>
</section>
المساهمون
تحتفظ Google بهذا النموذج بمساعدة خبراء التطوير في Google.