
Page Summary
-
This Google Workspace add-on enhances Google Docs by providing previews of Google Books links, transforming them into smart chips for easy access to book information.
-
The add-on leverages Apps Script services, including UrlFetch and Card Service, to connect to the Google Books API and display book details within a preview card.
-
Users must set up a Google Cloud project, enable the Google Books API, configure the OAuth consent screen, and obtain an API key before implementing the add-on.
-
After setting up the environment and the script, users can install a test deployment to preview Google Books links directly within their Google Docs documents.
-
The provided code snippets showcase the add-on's functionality, allowing users to review and customize its behavior according to their preferences.
Coding level: Intermediate
Duration: 30 minutes
Project type: Google Workspace add-on
Objectives
- Understand what the add-on does.
- Understand how to build an add-on using Apps Script, and understand what the Apps Script services do.
- Set up your environment.
- Set up the script.
- Run the script.
About this Google Workspace add-on
In this sample, you create a Google Workspace add-on that previews links from Google Books in a Google Docs document. When you type or paste a Google Books URL into a document, the add-on recognizes the link and triggers a link preview. To preview the link, you can convert the link into a smart chip and hold the pointer over the link to view a card that displays more information about the book.
This add-on uses Apps Script's UrlFetch Service to connect to the Google Books API and get information about Google Books to display in Google Docs.
How it works
In the Google Workspace add-on's manifest
file, the script configures
the add-on to extend Google Docs and trigger link
previews for URLs that match certain patterns from the Google Books website
(https://books.google.com).
In the code file, the script connects to the Google Books API and uses the URL
to get information about the book (which is an instance of the Volume
resource). The
script uses this information to generate a smart chip that displays the book's
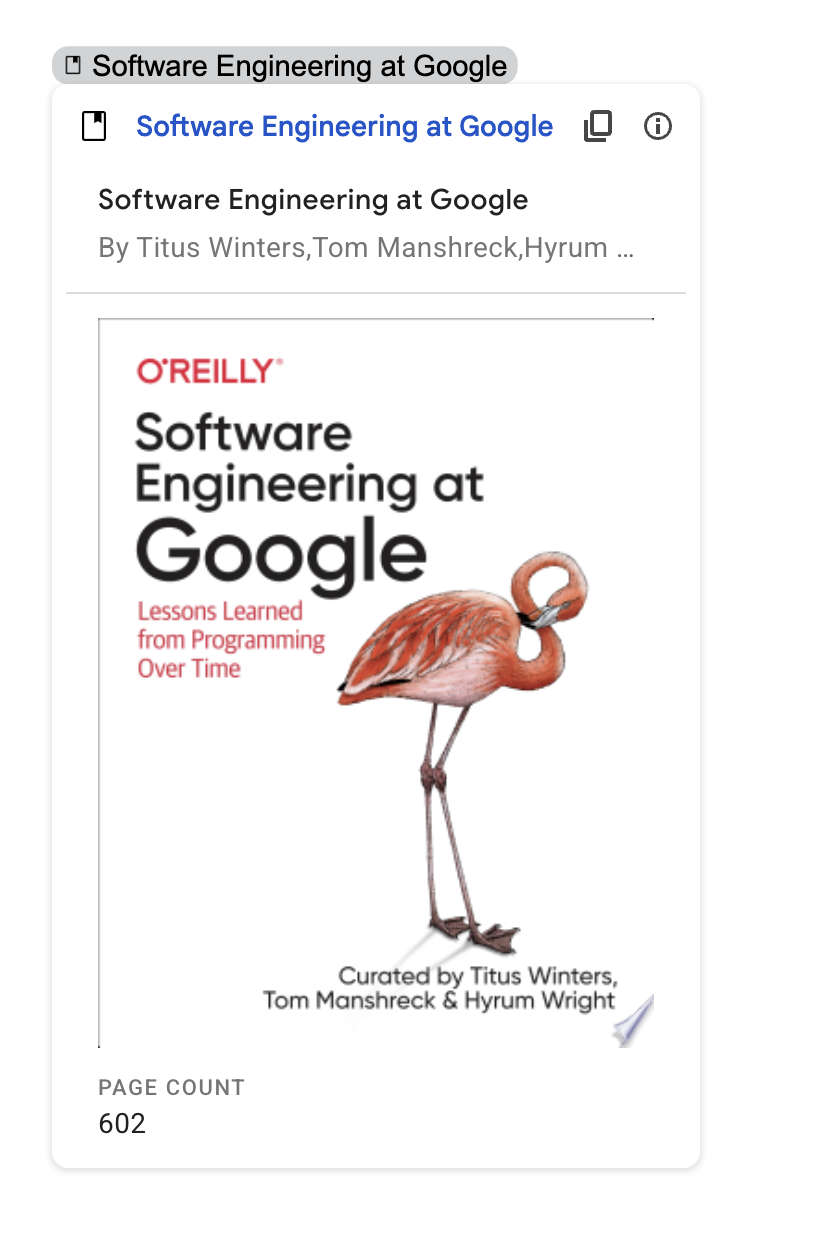
title and a preview card that displays a summary, the page count, an image of
the book cover, and number of ratings.
Apps Script services
This add-on uses the following services:
- UrlFetch Service–Connects to the Google Books
API to get information about books (which are instances of the APIs
Volumeresource). - Card Service–Creates the user interface of the add-on.
Prerequisites
To use this sample, you need the following prerequisites:
- A Google Account (Google Workspace accounts might require administrator approval).
A web browser with access to the internet.
Set up your environment
The following sections set up your environment for building the add-on.
Open your Cloud project in the Google Cloud console
If it's not open already, open the Cloud project that you intend to use for this sample:
- In the Google Cloud console, go to the Select a project page.
- Select the Google Cloud project you want to use. Or, click Create project and follow the on-screen instructions. If you create a Google Cloud project, you might need to turn on billing for the project.
Turn on the Google Books API
This add-on connects to the Google Books API. Before using Google APIs, you need to turn them on in a Google Cloud project. You can turn on one or more APIs in a single Google Cloud project.
In your Cloud project, turn on the Books API.
Configure the OAuth consent screen
This add-on requires a Cloud project with a configured consent screen. Configuring the OAuth consent screen defines what Google displays to users and registers your app so that you can publish it later.
- In the Google API Console, go to Menu > Google Auth platform > Branding.
- If you have already configured the Google Auth platform, you can configure the following OAuth Consent Screen settings in Branding, Audience, and Data Access. If you see a message that says Google Auth platform not configured yet, click Get Started:
- Under App Information, in App name, enter a name for the app.
- In User support email, choose a support email address where users can contact you if they have questions about their consent.
- Click Next.
- Under Audience, select Internal.
- Click Next.
- Under Contact Information, enter an Email address where you can be notified about any changes to your project.
- Click Next.
- Under Finish, review the Google API Services User Data Policy and if you agree, select I agree to the Google API Services: User Data Policy.
- Click Continue.
- Click Create.
- For now, you can skip adding scopes. In the future, when you create an app for use outside of your Google Workspace organization, you must change the User type to External. Then add the authorization scopes that your app requires. To learn more, see the full Configure OAuth consent guide.
Get an API key for the Google Books API
- Go to the Google API Console. Make sure your billing-enabled project is open.
In the Google API Console, go to Menu > APIs & Services > Credentials.
Click Create credentials > API key.
Take note of your API key for use in a later step.
Set up the script
The following sections set up the script for building the add-on.
Create the Apps Script project
- Click the following button to open the Preview links from Google Books
Apps Script project.
Open the project - Click Overview.
- On the overview page, click
 Make a copy.
 - In your copy of the Apps Script project, go to the
Code.gsfile and replaceYOUR_API_KEYwith the API key that you generated in the previous section.
In the future, if you want to use certain Google APIs or publish your app, you must associate your Cloud project with your Apps Script project. For this guide, you don't need to do so. To learn more, see the Google Cloud projects guide.
Test the add-on
The following sections test the add-on you created.
Install a test deployment
- In your Apps Script project, click Editor.
- Click Deploy > Test deployments.
- Click Install > Done.
Preview a link in Google Docs
- Create a Google Docs document at docs.new.
- Paste the following URL to the document, and press the tab key to
convert the URL into a smart chip:
https://www.google.com/books/edition/Software_Engineering_at_Google/V3TTDwAAQBAJ - Hold the pointer over the smart chip, and when prompted, authorize access to execute the add-on. The preview card displays information about the book.
The following image shows the link preview:

Review the code
To review the Apps Script code for this add-on, click View source code to expand the section: