
Z tego krótkiego wprowadzenia dowiesz się, jak utworzyć niestandardowy krok w Workspace Studio za pomocą Google Apps Script. Krok niestandardowy przyjmuje jako dane wejściowe 2 liczby i działanie arytmetyczne, wykonuje obliczenia i zwraca wynik.
Cele
- Utwórz niestandardowy krok w Workspace Studio za pomocą Google Apps Script.
- Wdróż niestandardowy krok w swojej organizacji Google Workspace.
- Przetestuj niestandardowy krok w Workspace Studio.
Wymagania wstępne
- konto Google z dostępem do Workspace Studio;
Konfigurowanie skryptu
Aby skonfigurować skrypt, utwórz nowy projekt Apps Script, a następnie połącz go z projektem w chmurze.
Kliknij ten przycisk, aby otworzyć projekt Apps Script Szybki start dotyczący kalkulatora.
Kliknij Przegląd.
Na stronie przeglądu kliknij
 Utwórz kopię.
Nadaj nazwę kopii projektu Apps Script:
Kliknij Kopia krótkiego wprowadzenia do kalkulatora.
W polu Nazwa projektu wpisz
Calculator quickstart.Kliknij Zmień nazwę.
Opcjonalnie: sprawdź kod szybkiego startu
W poprzedniej sekcji skopiowano cały projekt Apps Script, który zawiera cały wymagany kod aplikacji dla niestandardowego kroku przepływu, więc nie trzeba kopiować i wklejać każdego pliku.
Opcjonalnie możesz przejrzeć każdy skopiowany plik w sekcji powyżej:
appsscript.jsonplik manifestu, Specjalny plik JSON, który zawiera podstawowe informacje o projekcie potrzebne Apps Script do uruchomienia skryptu.
Wyświetl
appsscript.jsonkod{ "timeZone": "America/Los_Angeles", "exceptionLogging": "STACKDRIVER", "runtimeVersion": "V8", "addOns": { "common": { "name": "Calculator", "logoUrl": "https://www.gstatic.com/images/branding/productlogos/calculator_search/v1/web-24dp/logo_calculator_search_color_1x_web_24dp.png", "useLocaleFromApp": true }, "flows": { "workflowElements": [ { "id": "actionElement", "state": "ACTIVE", "name": "Calculate", "description": "Asks the user for two values and a math operation, then performs the math operation on the values and outputs the result.", "workflowAction": { "inputs": [ { "id": "value1", "description": "value1", "cardinality": "SINGLE", "dataType": { "basicType": "INTEGER" } }, { "id": "value2", "description": "value2", "cardinality": "SINGLE", "dataType": { "basicType": "INTEGER" } }, { "id": "operation", "description": "operation", "cardinality": "SINGLE", "dataType": { "basicType": "STRING" } } ], "outputs": [ { "id": "result", "description": "Calculated result", "cardinality": "SINGLE", "dataType": { "basicType": "INTEGER" } } ], "onConfigFunction": "onConfigCalculateFunction", "onExecuteFunction": "onExecuteCalculateFunction" } } ] } } }
Calculator.gsDefiniuje niestandardowy krok w Google Workspace Studio. Krok o nazwie „Oblicz” przyjmuje jako dane wejściowe 2 liczby i działanie, a jako dane wyjściowe zwraca wynik obliczeń.
Wyświetl
Calculator.gskod/** * This script defines a custom step for Google Workspace Studio. * The step, named "Calculate", takes two numbers and an operation as input * and returns the result of the calculation. * * The script includes functions to: * * 1. Define the configuration UI for the step using Card objects: * * - `onConfigCalculateFunction()`: Generates the main configuration card. * - Helper functions like `pushCard()`, `saveButton()` to build card components. * * 2. Handle the execution of the step. * * - `onExecuteCalculateFunction()`: Retrieves inputs, performs the calculation, * and returns outputs. * * To learn more, see the following quickstart guide: * https://developers.google.com/workspace/add-ons/studio/quickstart */ /** * Creates an action response to push a new card onto the card stack. * * This function generates an action object that, when returned, causes the * provided card to be pushed onto the card stack, making it the currently * displayed card in the configuration UI. * @param {Object} card The Card object to push. * @return {Object} The action response object. */ function pushCard(card) { return { "action": { "navigations": [{ "push_card": card } ] } }; } /** * Creates an action response to update the currently displayed card. * * This function generates an action object that, when returned, causes the * currently displayed card to be replaced with the provided card in the * configuration UI. * @param {Object} card The Card object to update. * @return {Object} The render actions object. */ function updateCard(card) { return { "render_actions": { "action": { "navigations": [{ "update_card": card } ] } } }; } /** * Creates a button configuration object for saving the step. * * This function generates a button definition that, when clicked, triggers * a save action for the current step configuration. * @return {Object} The button widget object. */ function saveButton() { return { "text": "Save", "onClick": { "hostAppAction" : { "workflowAction" : { "saveWorkflowAction" : {} } } }, }; } /** * Creates a button configuration object for a refresh action. * * This function generates a button definition that, when clicked, triggers * a function to refresh the current card. * @param {string} functionName The name of the Apps Script function to call on click. * @return {Object} The button widget object. */ function refreshButton(functionName) { return { "text": "Refresh", "onClick": { "action" : { "function" : functionName } }, }; } /** * Generates and displays a configuration card for the sample calculation action. * * This function creates a card with input fields for two values and a dropdown * for selecting an arithmetic operation. The card also includes a "Save" * button to save the action configuration for the step. * * The input fields are configured to let the user select outputs from previous * steps as input values using the `hostAppDataSource` property. * This function is called when the user adds or edits the "Calculate" step in the UI. * @return {Object} The action response object containing the card to display. */ function onConfigCalculateFunction() { var card = { "sections": [ { "header": "Action sample: Calculate", "widgets": [ { "textInput": { "name": "value1", "label": "First value", "hostAppDataSource" : { "workflowDataSource" : { "includeVariables" : true } } } }, { "selectionInput": { "name": "operation", "label": "Operation", "type": "DROPDOWN", "items": [ { "text": "+", "value": "+", }, { "text": "-", "value": "-", }, { "text": "x", "value": "x", }, { "text": "/", "value": "/", } ] } }, { "textInput": { "name": "value2", "label": "Second value", "hostAppDataSource" : { "workflowDataSource" : { "includeVariables" : true } } } } ] } ] }; return pushCard(card); } /** * Gets an integer value from variable data, handling both string and integer formats. * * This function attempts to extract an integer value from the provided variable data. * It checks if the data contains string values and, if so, parses the first string * as an integer. If integer values are present, it returns the first integer. * @param {Object} variableData The variable data object from the event. * @return {number} The extracted integer value. */ function getIntValue(variableData) { if (variableData.stringValues) { return parseInt(variableData.stringValues[0]); } return variableData.integerValues[0]; } /** * Returns output variables from a step. * * This function constructs an object that, when returned, sends the * provided variable values as output from the current step. * The variable values are logged to the console for debugging purposes. */ function outputVariables(variableDataMap) { const workflowAction = AddOnsResponseService.newReturnOutputVariablesAction() .setVariableDataMap(variableDataMap); const hostAppAction = AddOnsResponseService.newHostAppAction() .setWorkflowAction(workflowAction); const renderAction = AddOnsResponseService.newRenderActionBuilder() .setHostAppAction(hostAppAction) .build(); return renderAction; } /** * Executes the calculation action based on the inputs from an event. * * This function retrieves input values ("value1", "value2") and the "operation" * from the event, performs the calculation, and returns the "result" and * "log" as output variables. * This function is called when the flow reaches this custom step. * @param {Object} event The event object passed by the runtime. * @return {Object} The output variables object. */ function onExecuteCalculateFunction(event) { console.log("output: " + JSON.stringify(event)); var calculatedValue = 0; var value1 = event.workflow.actionInvocation.inputs["value1"].integerValues[0]; var value2 = event.workflow.actionInvocation.inputs["value2"].integerValues[0]; var operation = event.workflow.actionInvocation.inputs["operation"].stringValues[0]; if (operation == "+") { calculatedValue = value1 + value2; } else if (operation == "-") { calculatedValue = value1 - value2; } else if (operation == "x") { calculatedValue = value1 * value2; } else if (operation == "/") { calculatedValue = value1 / value2; } const variableDataMap = { "result": AddOnsResponseService.newVariableData().addIntegerValue(calculatedValue) }; return outputVariables(variableDataMap); }
Wdrażanie i testowanie kroku
Aby przetestować krok, skonfiguruj testowe wdrożenie dodatku, dodaj krok do przepływu, a następnie uruchom przepływ.
Skonfiguruj wdrożenie testowe dodatku:
- Otwórz projekt skryptu w edytorze Apps Script.
- Kliknij Wdrażanie > Testuj wdrożenia.
- Kliknij Zainstaluj.
- U dołu kliknij Gotowe.
Możesz umożliwić innym użytkownikom testowanie dodatku, udostępniając projekt Apps Script na ich kontach (wymagane są uprawnienia do edycji). Następnie poproś użytkowników o wykonanie opisanych wcześniej czynności.
Po zainstalowaniu dodatek jest od razu dostępny w przepływach. Przed pojawieniem się dodatku może być konieczne odświeżenie Flows. Przed użyciem dodatku musisz go też autoryzować.
Więcej informacji o wdrażaniu testowym znajdziesz w artykule Instalowanie nieopublikowanego dodatku.
Otwórz Flow.
Utwórz przepływ zawierający Twój krok:
- Kliknij Nowy proces.
- Wybierz sposób rozpoczęcia przepływu. Jeśli krok wymaga zmiennej wejściowej, skonfiguruj ją jako część danych wyjściowych startera.
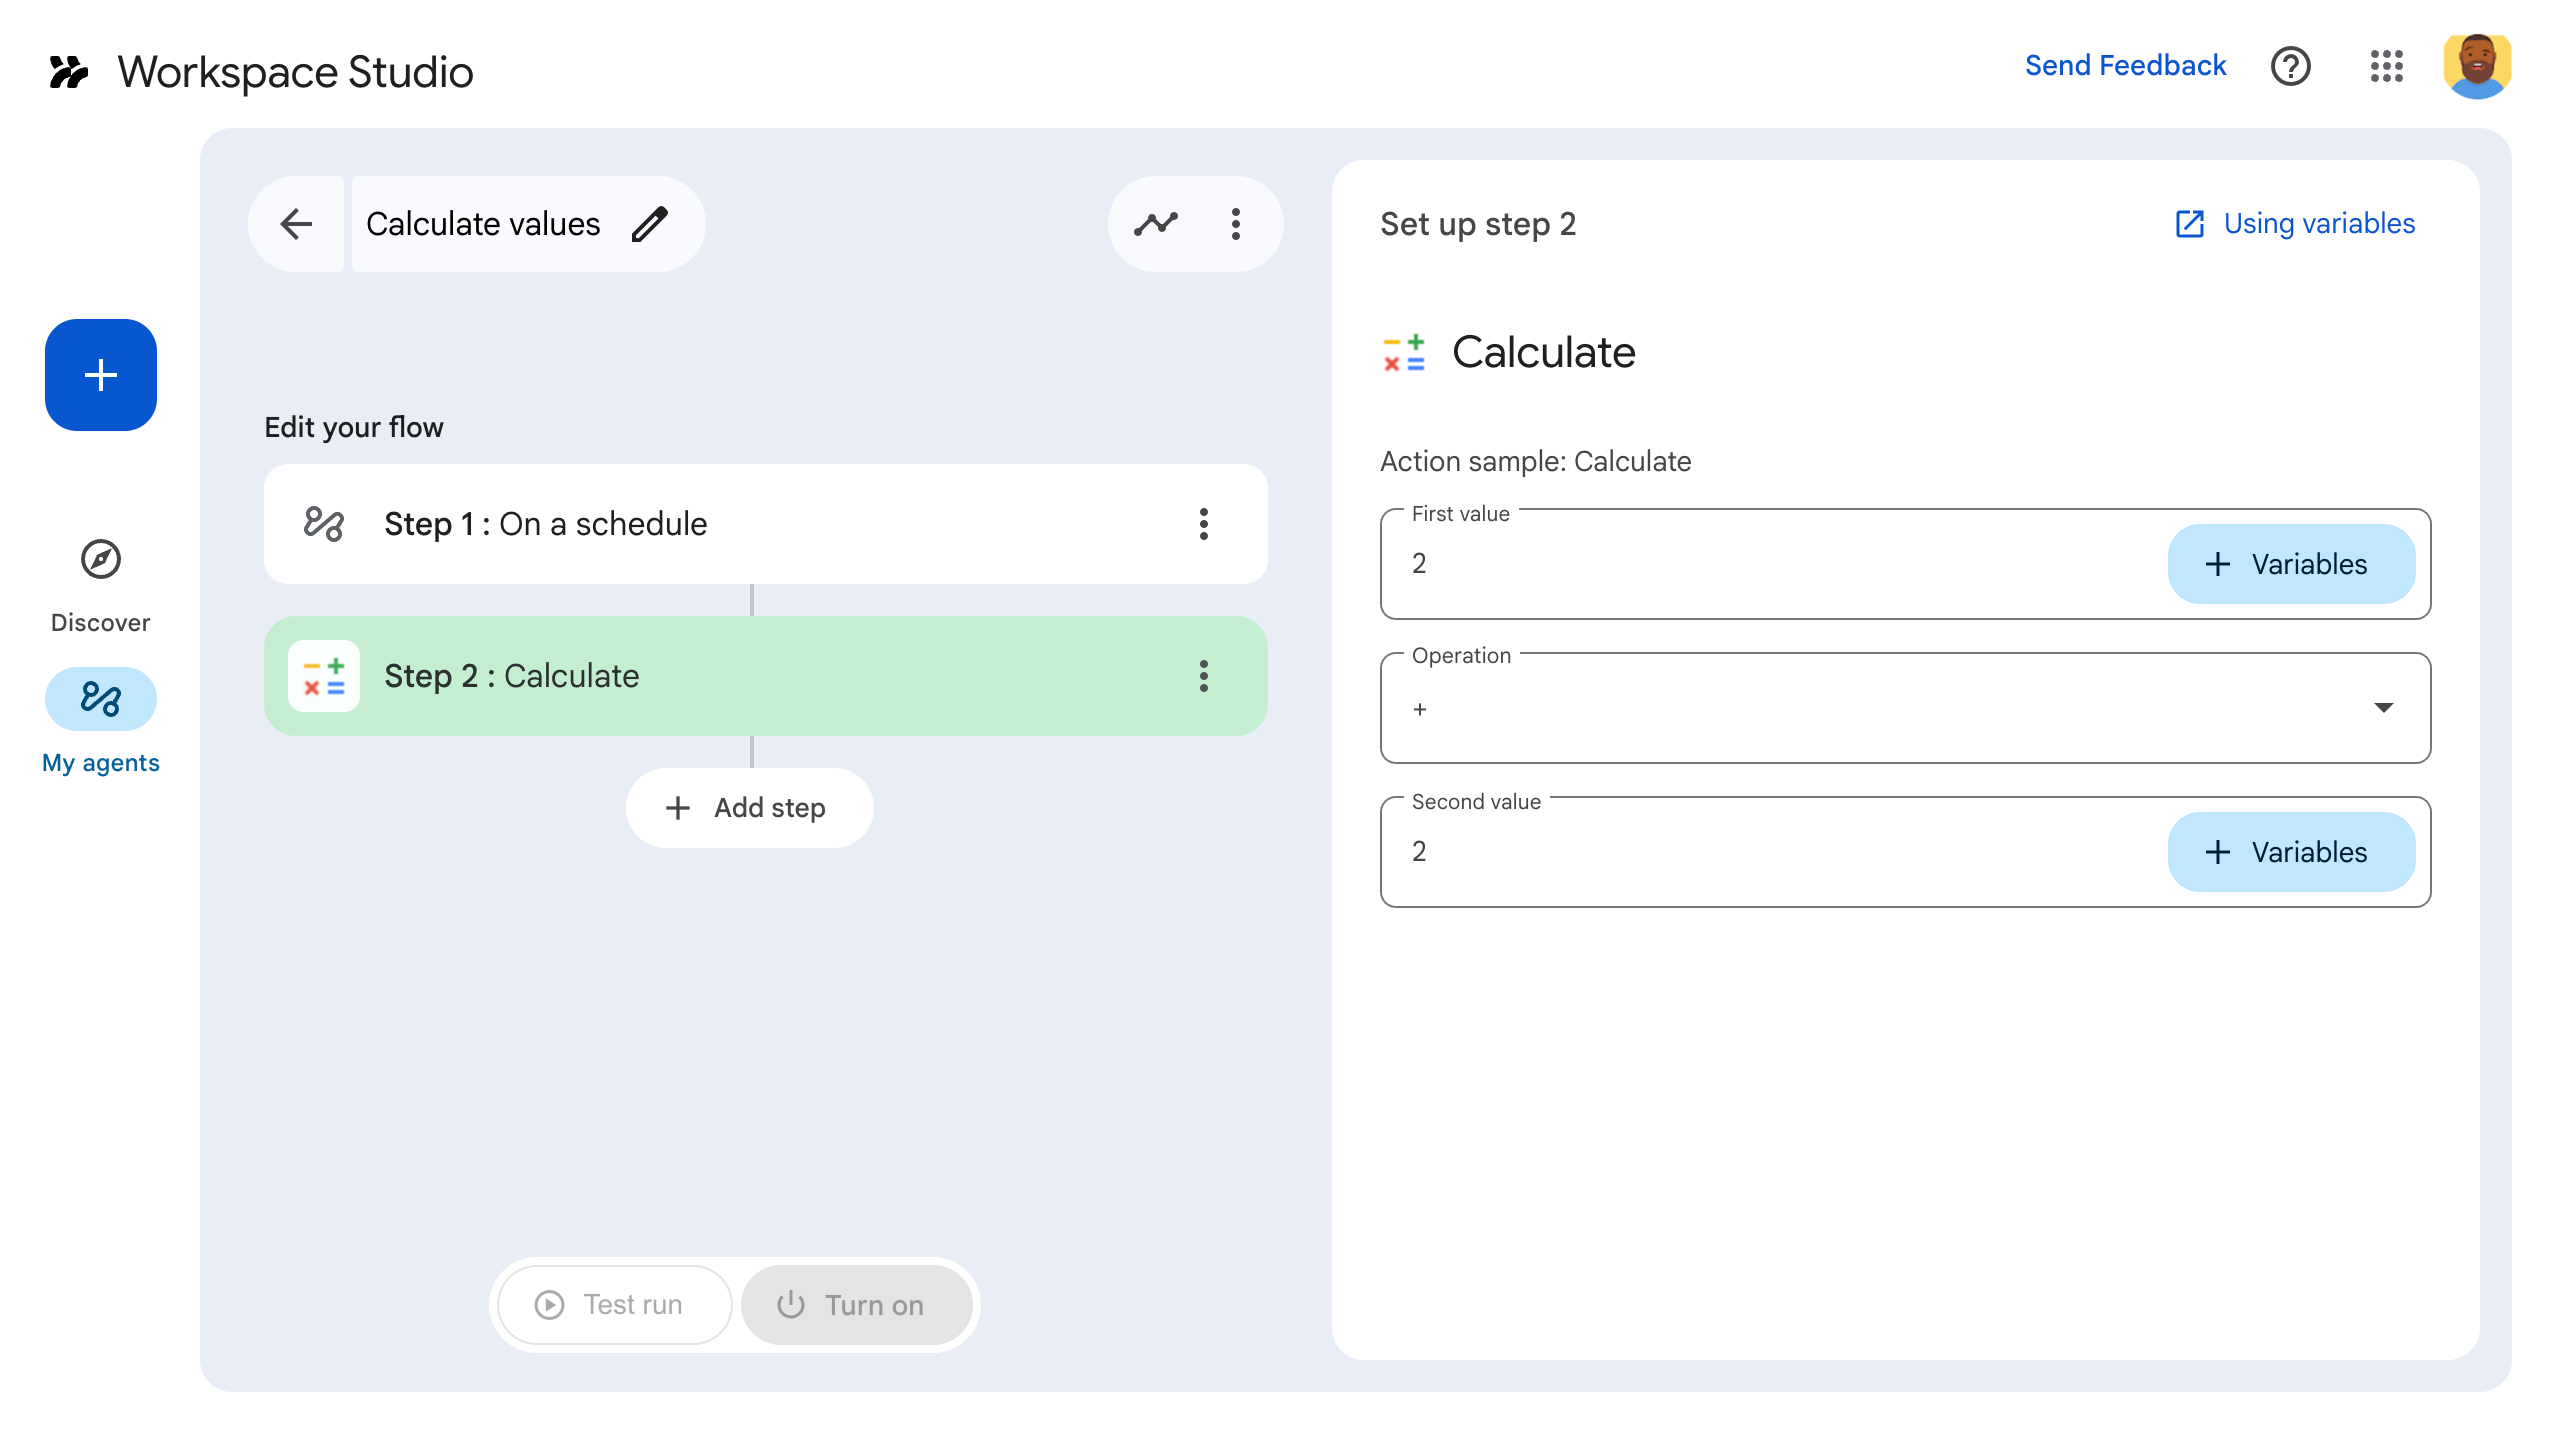
- Kliknij Dodaj krok. Wybierz utworzony lub zaktualizowany krok o nazwie Oblicz.
- Skonfiguruj krok. W przypadku kroku obliczania wybierz 2 wartości i działanie matematyczne. Krok zostanie zapisany automatycznie.
- Aby przetestować dane wyjściowe kroku, dodaj kolejny krok. Jeśli na przykład chcesz dodać dane wyjściowe do wiadomości w Google Chat, dodaj krok Powiadom mnie w Google Chat. W sekcji Wiadomość kliknij Zmienne i wybierz dane wyjściowe kroku. W przypadku kroku obliczania wybierz Zmienne > Krok 2. Oblicz > Obliczony wynik. Zmienna pojawi się jako element w polu Wiadomość.
- Kliknij Włącz. Przepływ jest gotowy do uruchomienia.
Uruchom przepływ, wywołując jego polecenie inicjujące. Jeśli np. przepływ rozpoczyna się zgodnie z harmonogramem, zostanie uruchomiony w określonym dniu i o określonej godzinie.
Sprawdź, czy przepływ działa zgodnie z oczekiwaniami. Sprawdź dzienniki, otwierając kartę Aktywność w narzędziu do tworzenia przepływów. Aby dowiedzieć się, jak tworzyć niestandardowe logi na karcie Aktywność, przeczytaj artykuł Dzienniki aktywności.
Dalsze kroki
Udało Ci się utworzyć i przetestować niestandardowy krok w Workspace Studio. Teraz możesz:
Dalej dostosowuj krok, prosząc Gemini o pomoc we wdrożeniu bardziej złożonej logiki.
Utwórz kartę konfiguracji, aby dostosować konfigurację kroku.
Rejestrowanie aktywności i błędów, aby rejestrować przebiegi kroków i rozwiązywać związane z nimi problemy.
Sprawdź obiekty zdarzeń, aby przejrzeć ładunek JSON, który przepływy wysyłają i odbierają podczas wykonywania kroków.