
Gerçekçi Fotoğraf 3B Parçalar, OGC standardı glTF biçimindedir. Bu, 3B görselleştirmelerinizi oluşturmak için OGC 3B Parçalar spesifikasyonunu destekleyen herhangi bir oluşturucuyu kullanabileceğiniz anlamına gelir. Örneğin, Cesium, 3D görselleştirmeleri oluşturmak için kullanılan temel bir açık kaynak kitaplığıdır.
CesiumJS ile çalışma
CesiumJS, web'de 3D görselleştirme için kullanılan açık kaynaklı bir JavaScript kitaplığıdır. CesiumJS'yi kullanma hakkında daha fazla bilgi için CesiumJS'yi öğrenme başlıklı makaleyi inceleyin.
Kullanıcı denetimleri
CesiumJS karo oluşturucuda standart bir kullanıcı denetimleri grubu bulunur.
| İşlem | Açıklama |
|---|---|
| Görünümü kaydır | Sol tıklayıp sürükleme |
| Görünümü yakınlaştır | Sağ tıklayıp sürükleyin veya fare tekerleğini kaydırın |
| Görünümü döndür | Ctrl + sol/sağ tıklayıp sürükleyin veya ortadaki düğmeyle tıklayıp sürükleyin |
En iyi uygulamalar
CesiumJS 3D yükleme sürelerini azaltmak için uygulayabileceğiniz birkaç yaklaşım vardır. Örneğin:
Oluşturma HTML'nize aşağıdaki ifadeyi ekleyerek eşzamanlı istekleri etkinleştirin:
Cesium.RequestScheduler.requestsByServer["tile.googleapis.com:443"] = <REQUEST_COUNT>REQUEST_COUNTne kadar yüksek olursa karolar o kadar hızlı yüklenir. AncakREQUEST_COUNTsürümü 10'dan büyük olan ve önbelleğin devre dışı bırakıldığı bir Chrome Tarayıcı'da yükleme yaparken bilinen bir Chrome sorunuyla karşılaşabilirsiniz. Çoğu kullanım alanında, optimum performans içinREQUEST_COUNTdeğerinin 18 olmasını öneririz.Ayrıntı düzeylerini atlamayı etkinleştirin. Daha fazla bilgi için bu Cesium sorununa bakın.
showCreditsOnScreen: true özelliğini etkinleştirerek veri ilişkilendirmelerini doğru şekilde gösterdiğinizden emin olun. Daha fazla bilgi için Politikalar'a bakın.
Oluşturma metrikleri
Kare hızını bulmak için requestAnimationFrame yönteminin saniyede kaç kez çağrıldığına bakın.
Kare gecikmesinin nasıl hesaplandığını görmek için PerformanceDisplay sınıfına göz atın.
CesiumJS oluşturucu örnekleri
CesiumJS oluşturucuyu Map Tiles API'nin 3D Tiles özelliğiyle kullanmak için kök karo grubu URL'sini sağlamanız yeterlidir.
Basit örnek
Aşağıdaki örnekte, CesiumJS oluşturucu başlatılır ve ardından kök tileset yüklenir.
<!DOCTYPE html>
<head>
  <meta charset="utf-8">
  <title>CesiumJS 3D Tiles Simple Demo</title>
  <script src="https://ajax.googleapis.com/ajax/libs/cesiumjs/1.105/Build/Cesium/Cesium.js"></script>
  <link href="https://ajax.googleapis.com/ajax/libs/cesiumjs/1.105/Build/Cesium/Widgets/widgets.css" rel="stylesheet">
</head>
<body>
  <div id="cesiumContainer"></div>
  <script>

    // Enable simultaneous requests.
    Cesium.RequestScheduler.requestsByServer["tile.googleapis.com:443"] = 18;

    // Create the viewer.
    const viewer = new Cesium.Viewer('cesiumContainer', {
      imageryProvider: false,
      baseLayerPicker: false,
      geocoder: false,
      globe: false,
      // https://cesium.com/blog/2018/01/24/cesium-scene-rendering-performance/#enabling-request-render-mode
      requestRenderMode: true,
    });

    // Add 3D Tiles tileset.
    const tileset = viewer.scene.primitives.add(new Cesium.Cesium3DTileset({
      url: "https://tile.googleapis.com/v1/3dtiles/root.json?key=YOUR_API_KEY",
      // This property is needed to appropriately display attributions
      // as required.
      showCreditsOnScreen: true,
    }));
  </script>
</body>
requestRenderMode hakkında bilgi için İstek oluşturma modunu etkinleştirme bölümüne bakın.
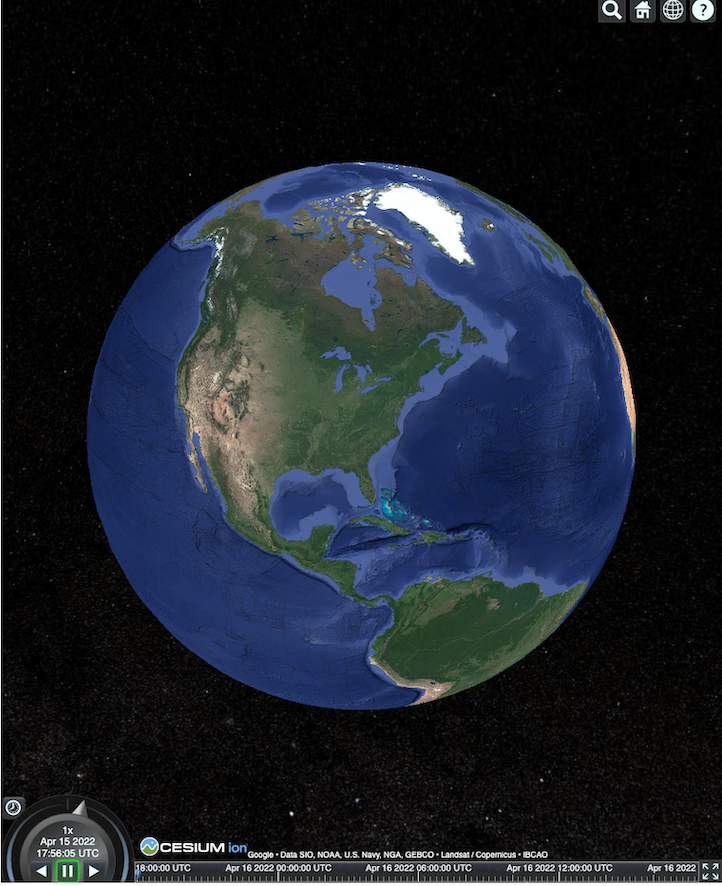
HTML sayfası burada gösterildiği gibi oluşturulur.
Places API (Yeni) entegrasyonu
Daha fazla bilgi almak için CesiumJS'yi Places API (Yeni) ile kullanabilirsiniz. Otomatik tamamlama widget'ını kullanarak yerlerin görüntü alanına uçabilirsiniz. Bu örnekte, bu talimatlar uygulanarak etkinleştirilen Yer Adı Otomatik Tamamlama API'si ve bu talimatlar uygulanarak etkinleştirilen Maps JavaScript API kullanılmaktadır.
<!DOCTYPE html>
<head>
 <meta charset="utf-8" />
 <title>CesiumJS 3D Tiles Places API (New) Integration Demo</title>
 <script src="https://ajax.googleapis.com/ajax/libs/cesiumjs/1.105/Build/Cesium/Cesium.js"></script>
 <link href="https://ajax.googleapis.com/ajax/libs/cesiumjs/1.105/Build/Cesium/Widgets/widgets.css" rel="stylesheet">
</head>
<body>
 <label for="pacViewPlace">Go to a place: </label>
 <input
   type="text"
   id="pacViewPlace"
   name="pacViewPlace"
   placeholder="Enter a location..."
   style="width: 300px"
 />
 <div id="cesiumContainer"></div>
 <script>
   // Enable simultaneous requests.
   Cesium.RequestScheduler.requestsByServer["tile.googleapis.com:443"] = 18;

   // Create the viewer.
   const viewer = new Cesium.Viewer("cesiumContainer", {
     imageryProvider: false,
     baseLayerPicker: false,
     requestRenderMode: true,
     geocoder: false,
     globe: false,
   });

   // Add 3D Tiles tileset.
   const tileset = viewer.scene.primitives.add(
     new Cesium.Cesium3DTileset({
       url: "https://tile.googleapis.com/v1/3dtiles/root.json?key=YOUR_API_KEY",
       // This property is required to display attributions as required.
       showCreditsOnScreen: true,
     })
   );

   const zoomToViewport = (viewport) => {
     viewer.entities.add({
       polyline: {
         positions: Cesium.Cartesian3.fromDegreesArray([
           viewport.getNorthEast().lng(), viewport.getNorthEast().lat(),
           viewport.getSouthWest().lng(), viewport.getNorthEast().lat(),
           viewport.getSouthWest().lng(), viewport.getSouthWest().lat(),
           viewport.getNorthEast().lng(), viewport.getSouthWest().lat(),
           viewport.getNorthEast().lng(), viewport.getNorthEast().lat(),
         ]),
         width: 10,
         clampToGround: true,
         material: Cesium.Color.RED,
       },
     });
     viewer.flyTo(viewer.entities);
   };

   function initAutocomplete() {
     const autocomplete = new google.maps.places.Autocomplete(
       document.getElementById("pacViewPlace"),
       {
         fields: [
           "geometry",
           "name",
         ],
       }
     );
     autocomplete.addListener("place_changed", () => {
       viewer.entities.removeAll();
       const place = autocomplete.getPlace();
       if (!place.geometry || !place.geometry.viewport) {
         window.alert("No viewport for input: " + place.name);
         return;
       }
       zoomToViewport(place.geometry.viewport);
     });
   }
 </script>
 <script
   async=""
   src="https://maps.googleapis.com/maps/api/js?key=YOUR_API_KEY&libraries=places&callback=initAutocomplete"
 ></script>
</body>
Dönen drone görünümü
Kamerayı kontrol ederek karo kümesinde animasyon oluşturabilirsiniz. Places API (New) ve Elevation API ile birleştirildiğinde bu animasyon, herhangi bir önemli yerin üzerinde etkileşimli bir drone uçuşunu simüle eder.
Bu kod örneği, sizi otomatik tamamlama widget'ında seçtiğiniz yerin etrafında uçurur.
<!DOCTYPE html>
<head>
  <meta charset="utf-8" />
  <title>CesiumJS 3D Tiles Rotating Drone View Demo</title>
  <script src="https://ajax.googleapis.com/ajax/libs/cesiumjs/1.105/Build/Cesium/Cesium.js"></script>
  <link href="https://ajax.googleapis.com/ajax/libs/cesiumjs/1.105/Build/Cesium/Widgets/widgets.css" rel="stylesheet">
</head>
<body>
  <label for="pacViewPlace">Go to a place: </label>
  <input type="text" id="pacViewPlace" name="pacViewPlace" placeholder="Enter a location..." style="width: 300px" />
  <div id="cesiumContainer"></div>
  <script>
    // Enable simultaneous requests.
    Cesium.RequestScheduler.requestsByServer["tile.googleapis.com:443"] = 18;

    // Create the viewer and remove unneeded options.
    const viewer = new Cesium.Viewer("cesiumContainer", {
      imageryProvider: false,
      baseLayerPicker: false,
      homeButton: false,
      fullscreenButton: false,
      navigationHelpButton: false,
      vrButton: false,
      sceneModePicker: false,
      geocoder: false,
      globe: false,
      infobox: false,
      selectionIndicator: false,
      timeline: false,
      projectionPicker: false,
      clockViewModel: null,
      animation: false,
      requestRenderMode: true,
    });

    // Add 3D Tile set.
    const tileset = viewer.scene.primitives.add(
      new Cesium.Cesium3DTileset({
        url: "https://tile.googleapis.com/v1/3dtiles/root.json?key=YOUR_API_KEY",
        // This property is required to display attributions.
        showCreditsOnScreen: true,
      })
    );

    // Point the camera at a location and elevation, at a viewport-appropriate distance.
    function pointCameraAt(location, viewport, elevation) {
      const distance = Cesium.Cartesian3.distance(
        Cesium.Cartesian3.fromDegrees(
          viewport.getSouthWest().lng(), viewport.getSouthWest().lat(), elevation),
        Cesium.Cartesian3.fromDegrees(
          viewport.getNorthEast().lng(), viewport.getNorthEast().lat(), elevation)
      ) / 2;
      const target = new Cesium.Cartesian3.fromDegrees(location.lng(), location.lat(), elevation);
      const pitch = -Math.PI / 4;
      const heading = 0;
      viewer.camera.lookAt(target, new Cesium.HeadingPitchRange(heading, pitch, distance));
    }

    // Rotate the camera around a location and elevation, at a viewport-appropriate distance.
    let unsubscribe = null;
    function rotateCameraAround(location, viewport, elevation) {
      if(unsubscribe) unsubscribe();
      pointCameraAt(location, viewport, elevation);
      unsubscribe = viewer.clock.onTick.addEventListener(() => {
        viewer.camera.rotate(Cesium.Cartesian3.UNIT_Z);
      });
    }

    function initAutocomplete() {
      const autocomplete = new google.maps.places.Autocomplete(
        document.getElementById("pacViewPlace"), {
          fields: [
            "geometry",
            "name",
          ],
        }
      );

      autocomplete.addListener("place_changed", async () => {
        const place = autocomplete.getPlace();

        if (!(place.geometry && place.geometry.viewport && place.geometry.location)) {
          window.alert(`Insufficient geometry data for place: ${place.name}`);
          return;
        }
        // Get place elevation using the ElevationService.
        const elevatorService = new google.maps.ElevationService();
        const elevationResponse =  await elevatorService.getElevationForLocations({
          locations: [place.geometry.location],
        });

        if(!(elevationResponse.results && elevationResponse.results.length)){
          window.alert(`Insufficient elevation data for place: ${place.name}`);
          return;
        }
        const elevation = elevationResponse.results[0].elevation || 10;

        rotateCameraAround(
          place.geometry.location,
          place.geometry.viewport,
          elevation
        );
      });
    }
  </script>
  <script async src="https://maps.googleapis.com/maps/api/js?key=YOUR_API_KEY&libraries=places&callback=initAutocomplete"></script>
</body>
Çoklu çizgiler ve etiketler çizme
Bu kod örneğinde, haritaya çoklu çizgilerin ve etiketlerin nasıl ekleneceği gösterilmektedir. Sürüş ve yaya yol tariflerini veya mülk sınırlarını göstermek ya da sürüş ve yürüme sürelerini hesaplamak için haritaya çoklu çizgiler ekleyebilirsiniz. Ayrıca, sahneyi oluşturmadan da özellikleri alabilirsiniz.
Kullanıcıları bir mahallede özel olarak hazırlanmış bir tura çıkarabilir veya şu anda satışta olan komşu mülkleri gösterebilir ve ardından sahneye reklam panoları gibi 3D nesneler ekleyebilirsiniz.
Görüntülediğiniz tesisleri listeleyerek bir geziyi özetleyebilir ve bu ayrıntıları sanal nesnelerde gösterebilirsiniz.
<!DOCTYPE html>
<head>
  <meta charset="utf-8" />
  <title>CesiumJS 3D Tiles Polyline and Label Demo</title>
  <script src="https://ajax.googleapis.com/ajax/libs/cesiumjs/1.105/Build/Cesium/Cesium.js"></script>
  <link
    href="https://ajax.googleapis.com/ajax/libs/cesiumjs/1.105/Build/Cesium/Widgets/widgets.css"
    rel="stylesheet"
  />
</head>
<body>
  <div id="cesiumContainer"></div>
  <script>
    // Enable simultaneous requests.
    Cesium.RequestScheduler.requestsByServer["tile.googleapis.com:443"] = 18;

    // Create the viewer.
    const viewer = new Cesium.Viewer("cesiumContainer", {
      imageryProvider: false,
      baseLayerPicker: false,
      requestRenderMode: true,
      geocoder: false,
      globe: false,
    });

    // Add 3D Tiles tileset.
    const tileset = viewer.scene.primitives.add(
      new Cesium.Cesium3DTileset({
        url: "https://tile.googleapis.com/v1/3dtiles/root.json?key=YOUR_API_KEY",

        // This property is required to display attributions as required.
        showCreditsOnScreen: true,
      })
    );

    // Draws a circle at the position, and a line from the previous position.
    const drawPointAndLine = (position, prevPosition) => {
      viewer.entities.removeAll();
      if (prevPosition) {
        viewer.entities.add({
          polyline: {
            positions: [prevPosition, position],
            width: 3,
            material: Cesium.Color.WHITE,
            clampToGround: true,
            classificationType: Cesium.ClassificationType.CESIUM_3D_TILE,
          },
        });
      }
      viewer.entities.add({
        position: position,
        ellipsoid: {
          radii: new Cesium.Cartesian3(1, 1, 1),
          material: Cesium.Color.RED,
        },
      });
    };

    // Compute, draw, and display the position's height relative to the previous position.
    var prevPosition;
    const processHeights = (newPosition) => {
      drawPointAndLine(newPosition, prevPosition);

      const newHeight = Cesium.Cartographic.fromCartesian(newPosition).height;
      let labelText = "Current altitude (meters above sea level):\n\t" + newHeight;
      if (prevPosition) {
        const prevHeight =
          Cesium.Cartographic.fromCartesian(prevPosition).height;
        labelText += "\nHeight from previous point (meters):\n\t" + Math.abs(newHeight - prevHeight);
      }
      viewer.entities.add({
        position: newPosition,
        label: {
          text: labelText,
          disableDepthTestDistance: Number.POSITIVE_INFINITY,
          pixelOffset: new Cesium.Cartesian2(0, -10),
          showBackground: true,
          verticalOrigin: Cesium.VerticalOrigin.BOTTOM,
        }
      });

      prevPosition = newPosition;
    };

    const handler = new Cesium.ScreenSpaceEventHandler(viewer.canvas);
    handler.setInputAction(function (event) {
      const earthPosition = viewer.scene.pickPosition(event.position);
      if (Cesium.defined(earthPosition)) {
        processHeights(earthPosition);
      }
    }, Cesium.ScreenSpaceEventType.LEFT_CLICK);
  </script>
</body>
Kamera yörüngesi
Cesium'da, kamerayı önemli bir noktanın etrafında döndürerek binalarla çarpışmayı önleyebilirsiniz. Alternatif olarak, kamera binaların içinden geçerken binaları şeffaf hale getirebilirsiniz.
Öncelikle kamerayı bir noktaya kilitleyin. Ardından, öğenizi sergilemek için bir kamera yörüngesi oluşturabilirsiniz. Bu kod örneğinde gösterildiği gibi, kameranın lookAtTransform işlevini bir etkinlik işleyiciyle kullanarak bunu yapabilirsiniz.
// Lock the camera onto a point.
const center = Cesium.Cartesian3.fromRadians(
  2.4213211833389243,
  0.6171926869414084,
  3626.0426275055174
);

const transform = Cesium.Transforms.eastNorthUpToFixedFrame(center);

viewer.scene.camera.lookAtTransform(
  transform,
  new Cesium.HeadingPitchRange(0, -Math.PI / 8, 2900)
);

// Orbit around this point.
viewer.clock.onTick.addEventListener(function (clock) {
  viewer.scene.camera.rotateRight(0.005);
});
Kamerayı kontrol etme hakkında daha fazla bilgi için Kamerayı kontrol etme başlıklı makaleyi inceleyin.
Cesium for Unreal ile çalışma
Unreal için Cesium eklentisini 3D Tiles API ile kullanmak istiyorsanız aşağıdaki adımları uygulayın.
Cesium for Unreal eklentisini yükleyin.
Yeni bir Unreal projesi oluşturun.
Google Photorealistic 3D Tiles API'ye bağlanın.
Menüden Cesium > Cesium'u seçerek Cesium penceresini açın.
Boş 3D Tiles Karo Seti'ni seçin.
World Outliner'da bu Cesium3DTileset'i seçerek Details panelini açın.
Source (Kaynak) ayarını From Cesium Ion (Cesium Ion'dan) yerine From URL (URL'den) olarak değiştirin.
URL'yi Google 3D Tiles URL'si olarak ayarlayın.
https://tile.googleapis.com/v1/3dtiles/root.json?key=YOUR_API_KEY- Atıfları doğru şekilde göstermek için Ekranda Kredileri Göster'i etkinleştirin.
Bu işlem dünyayı yükler. Herhangi bir LatLng'ye gitmek için Outliner panelinde CesiumGeoreference öğesini seçin ve ardından Details panelinde Origin Latitude/Longitude/Height'ı düzenleyin.
Unity için Cesium ile çalışma
Cesium for Unity ile fotogerçekçi karoları kullanmak için aşağıdaki adımları uygulayın.
Yeni bir Unity projesi oluşturun.
Package Manager (Paket Yöneticisi) bölümüne (Editor > Project Settings [Proje Ayarları] aracılığıyla) yeni bir Scoped Registry (Kapsamlı Kayıt Defteri) ekleyin.
Ad: Sezyum
URL: https://unity.pkg.cesium.com
Kapsamlar: com.cesium.unity
Cesium for Unity paketini yükleyin.
Google Gerçekçi Fotoğraf 3B Parçalar API'sine bağlanma
Menüden Cesium > Cesium'u seçerek Cesium penceresini açın.
Boş 3D Tiles Karo Seti'ni tıklayın.
Sol panelde, Source (Kaynak) altındaki Tileset Source (Karo Kümesi Kaynağı) seçeneğinde, From URL'yi (URL'den) seçin (From Cesium Ion [Cesium Ion'dan] yerine).
URL'yi Google 3D Tiles URL'si olarak ayarlayın.
https://tile.googleapis.com/v1/3dtiles/root.json?key=YOUR_API_KEY- Atıfları doğru şekilde göstermek için Ekranda Kredileri Göster'i etkinleştirin.
Bu işlem dünyayı yükler. Herhangi bir LatLng'ye gitmek için Scene Hierarchy'de (Sahne Hiyerarşisi) CesiumGeoreference öğesini seçin, ardından Inspector'da (Denetleyici) Origin Latitude/Longitude/Height (Başlangıç Enlemi/Boylamı/Yüksekliği) değerini düzenleyin.
deck.gl ile çalışma
WebGL tarafından desteklenen deck.gl, yüksek performanslı ve büyük ölçekli veri görselleştirmeleri için açık kaynaklı bir JavaScript çerçevesidir.
İlişkilendirme
Karoların gltf asset alanından copyright alanını çıkarıp oluşturulan görünümde göstererek veri ilişkilendirmelerini doğru şekilde gösterdiğinizden emin olun. Daha fazla bilgi için Veri ilişkilendirmelerini görüntüleme başlıklı makaleyi inceleyin.
deck.gl oluşturucu örnekleri
Basit örnek
Aşağıdaki örnekte deck.gl oluşturucu başlatılır ve ardından bir yer 3D olarak yüklenir. Kodunuzda YOUR_API_KEY kısmını gerçek API anahtarınızla değiştirdiğinizden emin olun.
<!DOCTYPE html>
<html>
 <head>
   <title>deck.gl Photorealistic 3D Tiles example</title>
   <script src="https://unpkg.com/deck.gl@latest/dist.min.js"></script>
   <style>
     body { margin: 0; padding: 0;}
     #map { position: absolute; top: 0;bottom: 0;width: 100%;}
     #credits { position: absolute; bottom: 0; right: 0; padding: 2px; font-size: 15px; color: white;
        text-shadow: -1px 0 black, 0 1px black, 1px 0 black, 0 -1px black;}
   </style>
 </head>

 <body>
   <div id="map"></div>
   <div id="credits"></div>
   <script>
     const GOOGLE_API_KEY = YOUR_API_KEY;
     const TILESET_URL = `https://tile.googleapis.com/v1/3dtiles/root.json`;
     const creditsElement = document.getElementById('credits');
     new deck.DeckGL({
       container: 'map',
       initialViewState: {
         latitude: 50.0890,
         longitude: 14.4196,
         zoom: 16,
         bearing: 90,
         pitch: 60,
         height: 200
       },
       controller: {minZoom: 8},
       layers: [
         new deck.Tile3DLayer({
           id: 'google-3d-tiles',
           data: TILESET_URL,
           loadOptions: {
            fetch: {
              headers: {
                'X-GOOG-API-KEY': GOOGLE_API_KEY
              }
            }
          },
           onTilesetLoad: tileset3d => {
             tileset3d.options.onTraversalComplete = selectedTiles => {
               const credits = new Set();
               selectedTiles.forEach(tile => {
                 const {copyright} = tile.content.gltf.asset;
                 copyright.split(';').forEach(credits.add, credits);
                 creditsElement.innerHTML = [...credits].join('; ');
               });
               return selectedTiles;
             }
           }
         })
       ]
     });
   </script>
 </body>
</html>
Google Gerçekçi Fotoğraf 3B Parçalar'ın üzerinde 2B katmanları görselleştirme
deck.gl TerrainExtension, 2D verileri 3D yüzeyde oluşturur. Örneğin, bir binanın izdüşümünün GeoJSON'unu Gerçekçi Fotoğraf 3B Parçalar geometrisinin üzerine yerleştirebilirsiniz.
Aşağıdaki örnekte, binaların bulunduğu bir katman, Gerçekçi Fotoğraf 3B Parçalar yüzeyine uyarlanmış poligonlarla görselleştirilmiştir.
<!DOCTYPE html>
<html>
 <head>
   <title>Google 3D tiles example</title>
   <script src="https://unpkg.com/deck.gl@latest/dist.min.js"></script>
   <style>
     body { margin: 0; padding: 0;}
     #map { position: absolute; top: 0;bottom: 0;width: 100%;}
     #credits { position: absolute; bottom: 0; right: 0; padding: 2px; font-size: 15px; color: white;
        text-shadow: -1px 0 black, 0 1px black, 1px 0 black, 0 -1px black;}
   </style>
 </head>

 <body>
   <div id="map"></div>
   <div id="credits"></div>
   <script>
     const GOOGLE_API_KEY = YOUR_API_KEY;
     const TILESET_URL = `https://tile.googleapis.com/v1/3dtiles/root.json`;
     const BUILDINGS_URL = 'https://raw.githubusercontent.com/visgl/deck.gl-data/master/examples/google-3d-tiles/buildings.geojson'
     const creditsElement = document.getElementById('credits');
     const deckgl = new deck.DeckGL({
       container: 'map',
       initialViewState: {
         latitude: 50.0890,
         longitude: 14.4196,
         zoom: 16,
         bearing: 90,
         pitch: 60,
         height: 200
       },
       controller: true,
       layers: [
         new deck.Tile3DLayer({
           id: 'google-3d-tiles',
           data: TILESET_URL,
           loadOptions: {
            fetch: {
              headers: {
                'X-GOOG-API-KEY': GOOGLE_API_KEY
              }
            }
          },
          onTilesetLoad: tileset3d => {
             tileset3d.options.onTraversalComplete = selectedTiles => {
               const credits = new Set();
               selectedTiles.forEach(tile => {
                 const {copyright} = tile.content.gltf.asset;
                 copyright.split(';').forEach(credits.add, credits);
                 creditsElement.innerHTML = [...credits].join('; ');
               });
               return selectedTiles;
             }
           },
           operation: 'terrain+draw'
         }),
         new deck.GeoJsonLayer({
           id: 'buildings',
           // This dataset is created by CARTO, using other Open Datasets available. More info at: https://3dtiles.carto.com/#about.
           data: 'https://raw.githubusercontent.com/visgl/deck.gl-data/master/examples/google-3d-tiles/buildings.geojson',
           stroked: false,
           filled: true,
           getFillColor: ({properties}) => {
             const {tpp} = properties;
             // quantiles break
             if (tpp < 0.6249)
               return [254, 246, 181]
             else if (tpp < 0.6780)
               return [255, 194, 133]
             else if (tpp < 0.8594)
               return [250, 138, 118]
             return [225, 83, 131]
           },
           opacity: 0.2,
           extensions: [new deck._TerrainExtension()]
         })
       ]
     });
   </script>
 </body>
</html>