2009 年 1 月
目标
本教程介绍如何使用地理标记的照片创建 KML PhotoOverlays。虽然示例代码是用 Python 编写的,但其他编程语言中也有许多类似的库,因此将此代码转换为其他语言应该不成问题。本文中的代码依赖于一个开源 Python 库 EXIF.py。
简介
数码相机是非常出色的设备。许多用户可能没有意识到,他们使用 Google 相册的功能远不止拍摄照片和视频。它们还会使用有关相机及其设置的元数据标记这些视频和照片。在过去几年中,人们找到了一些方法来向这些信息添加地理数据,这些数据要么由相机制造商嵌入(例如某些 Ricoh 和 Nikon 相机),要么通过 GPS 记录器和 EyeFi Explore 等设备添加。iPhone 等拍照手机和使用 Android 操作系统的手机(例如 T-Mobile 的 G1)会自动嵌入这些数据。某些照片上传网站(例如 Panoramio、Picasa 线上相册和 Flickr)会自动解析 GPS 数据,并使用这些数据为照片添加地理标记。然后,您可以在 Feed 中获取这些数据。但这样有什么乐趣呢?本文将探讨如何自行获取这些数据。
EXIF 标头
将数据嵌入到图片文件中的最常见方法是使用可交换图像文件格式 (EXIF)。数据以二进制形式按标准方式存储在 EXIF 标头中。如果您了解 EXIF 标头的规范,可以自行解析这些标头。幸运的是,有人已经完成了这项艰巨的任务,并为您编写了一个 Python 模块。EXIF.py 开源库是读取 JPEG 文件头的好工具。
《行为准则》
本文的示例代码位于以下文件中:exif2kml.py。如果您想直接跳到使用该模块,请下载该模块以及 EXIF.py,并将它们放在同一目录下。运行 python exif2kml.py foo.jpg,将 foo.jpg 替换为带有地理标记的照片的路径。它将生成一个名为 test.kml 的文件。
解析 Exif 标头
EXIF.py 提供了一个简单的接口,用于提取 Exif 标头。只需运行 process_file() 函数,它就会以 dict 对象的形式返回标头。
def GetHeaders(the_file):
  """Handles getting the Exif headers and returns them as a dict.

  Args:
    the_file: A file object

  Returns:
    a dict mapping keys corresponding to the Exif headers of a file.
  """

  data = EXIF.process_file(the_file, 'UNDEF', False, False, False)
  return data
获得 Exif 标头后,您需要提取 GPS 坐标。EXIF.py 将这些视为 Ratio 对象,即用于存储值的分子和分母的对象。这样可以设置精确的比率,而不是依赖于浮点数。不过,KML 需要的是小数,而不是比率。因此,您需要提取每个坐标,并将分子和分母转换为一个浮点数(以十进制度表示):
def DmsToDecimal(degree_num, degree_den, minute_num, minute_den,
                 second_num, second_den):
  """Converts the Degree/Minute/Second formatted GPS data to decimal degrees.

  Args:
    degree_num: The numerator of the degree object.
    degree_den: The denominator of the degree object.
    minute_num: The numerator of the minute object.
    minute_den: The denominator of the minute object.
    second_num: The numerator of the second object.
    second_den: The denominator of the second object.

  Returns:
    A deciminal degree.
  """

  degree = float(degree_num)/float(degree_den)
  minute = float(minute_num)/float(minute_den)/60
  second = float(second_num)/float(second_den)/3600
  return degree + minute + second


def GetGps(data):
  """Parses out the GPS coordinates from the file.

  Args:
    data: A dict object representing the Exif headers of the photo.

  Returns:
    A tuple representing the latitude, longitude, and altitude of the photo.
  """

  lat_dms = data['GPS GPSLatitude'].values
  long_dms = data['GPS GPSLongitude'].values
  latitude = DmsToDecimal(lat_dms[0].num, lat_dms[0].den,
                          lat_dms[1].num, lat_dms[1].den,
                          lat_dms[2].num, lat_dms[2].den)
  longitude = DmsToDecimal(long_dms[0].num, long_dms[0].den,
                           long_dms[1].num, long_dms[1].den,
                           long_dms[2].num, long_dms[2].den)
  if data['GPS GPSLatitudeRef'].printable == 'S': latitude *= -1
  if data['GPS GPSLongitudeRef'].printable == 'W': longitude *= -1
  altitude = None

  try:
    alt = data['GPS GPSAltitude'].values[0]
    altitude = alt.num/alt.den
    if data['GPS GPSAltitudeRef'] == 1: altitude *= -1

  except KeyError:
    altitude = 0

  return latitude, longitude, altitude
获得坐标后,您可以轻松为每张照片创建一个简单的 PhotoOverlay:
def CreatePhotoOverlay(kml_doc, file_name, the_file, file_iterator):
  """Creates a PhotoOverlay element in the kml_doc element.

  Args:
    kml_doc: An XML document object.
    file_name: The name of the file.
    the_file: The file object.
    file_iterator: The file iterator, used to create the id.

  Returns:
    An XML element representing the PhotoOverlay.
  """

  photo_id = 'photo%s' % file_iterator
  data = GetHeaders(the_file)
  coords = GetGps(data)

  po = kml_doc.createElement('PhotoOverlay')
  po.setAttribute('id', photo_id)
  name = kml_doc.createElement('name')
  name.appendChild(kml_doc.createTextNode(file_name))
  description = kml_doc.createElement('description')
  description.appendChild(kml_doc.createCDATASection('<a href="#%s">'
                                                     'Click here to fly into '
                                                     'photo</a>' % photo_id))
  po.appendChild(name)
  po.appendChild(description)

  icon = kml_doc.createElement('icon')
  href = kml_doc.createElement('href')
  href.appendChild(kml_doc.createTextNode(file_name))

  camera = kml_doc.createElement('Camera')
  longitude = kml_doc.createElement('longitude')
  latitude = kml_doc.createElement('latitude')
  altitude = kml_doc.createElement('altitude')
  tilt = kml_doc.createElement('tilt')

  # Determines the proportions of the image and uses them to set FOV.
  width = float(data['EXIF ExifImageWidth'].printable)
  length = float(data['EXIF ExifImageLength'].printable)
  lf = str(width/length * -20.0)
  rf = str(width/length * 20.0)

  longitude.appendChild(kml_doc.createTextNode(str(coords[1])))
  latitude.appendChild(kml_doc.createTextNode(str(coords[0])))
  altitude.appendChild(kml_doc.createTextNode('10'))
  tilt.appendChild(kml_doc.createTextNode('90'))
  camera.appendChild(longitude)
  camera.appendChild(latitude)
  camera.appendChild(altitude)
  camera.appendChild(tilt)

  icon.appendChild(href)

  viewvolume = kml_doc.createElement('ViewVolume')
  leftfov = kml_doc.createElement('leftFov')
  rightfov = kml_doc.createElement('rightFov')
  bottomfov = kml_doc.createElement('bottomFov')
  topfov = kml_doc.createElement('topFov')
  near = kml_doc.createElement('near')
  leftfov.appendChild(kml_doc.createTextNode(lf))
  rightfov.appendChild(kml_doc.createTextNode(rf))
  bottomfov.appendChild(kml_doc.createTextNode('-20'))
  topfov.appendChild(kml_doc.createTextNode('20'))
  near.appendChild(kml_doc.createTextNode('10'))
  viewvolume.appendChild(leftfov)
  viewvolume.appendChild(rightfov)
  viewvolume.appendChild(bottomfov)
  viewvolume.appendChild(topfov)
  viewvolume.appendChild(near)

  po.appendChild(camera)
  po.appendChild(icon)
  po.appendChild(viewvolume)
  point = kml_doc.createElement('point')
  coordinates = kml_doc.createElement('coordinates')
  coordinates.appendChild(kml_doc.createTextNode('%s,%s,%s' %(coords[1],
                                                              coords[0],
                                                              coords[2])))
  point.appendChild(coordinates)

  po.appendChild(point)

  document = kml_doc.getElementsByTagName('Document')[0]
  document.appendChild(po)
您可以看到,我们只是使用了标准的 W3C DOM 方法,因为这些方法在大多数编程语言中都可用。如需了解整个流程的运作方式,请点击此处下载代码。
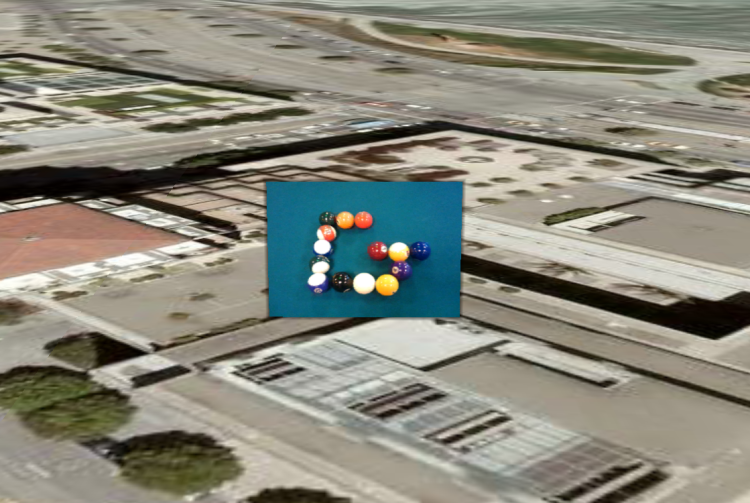
此示例未充分利用 PhotoOverlays 的强大功能,而 PhotoOverlays 可让您深入探索高分辨率照片。不过,它确实展示了如何以广告牌样式在 Google 地球上悬挂照片。下面是使用此代码创建的 KML 文件示例:
<?xml version="1.0" encoding="utf-8"?>
<kml xmlns="http://www.opengis.net/kml/2.2">
  <Document>
    <PhotoOverlay id="photo0">
      <name>
        1228258523134.jpg
      </name>
      <description>
<![CDATA[<a href="#photo0">Click here to fly into photo</a>]]>      </description>
      <Camera>
      	<longitude>
          -122.3902159196034
        </longitude>
        <latitude>
           37.78961266330473
        </latitude>
        <altitude>
          10
        </altitude>
        <tilt>
          90
        </tilt>
      </Camera>
      <Icon>
        <href>
          1228258523134.jpg
        </href>
      </Icon>
      <ViewVolume>
        <leftFov>
          -26.6666666667
        </leftFov>
        <rightFov>
          26.6666666667
        </rightFov>
        <bottomFov>
          -20
        </bottomFov>
        <topFov>
          20
        </topFov>
        <near>
          10
        </near>
      </ViewVolume>
      <Point>
        <coordinates>
          -122.3902159196034,37.78961266330473,0
        </coordinates>
      </Point>
    </PhotoOverlay>
  </Document>
</kml>
以下是它在 Google 地球中的显示效果:

注意事项
照片地理标记功能仍处于起步阶段。
请注意以下事项:
- GPS 设备并非始终 100% 准确,尤其是相机中的 GPS 设备,因此您应检查照片的位置信息。
- 许多设备不跟踪海拔高度,而是将其设置为 0。如果您非常重视海拔高度数据,则应寻找其他方式来获取该数据。
- GPS 位置是相机的位置,而不是照片拍摄对象的位置。因此,此示例将 Camera 元素放置在 GPS 位置,而将实际照片放置在该位置之外。
- Exif 不会捕获有关相机指向方向的信息,因此您可能需要调整
PhotoOverlays。好消息是,某些设备(例如基于 Android 操作系统的手机)确实允许您直接捕获指南针方向和倾斜度等数据,只是无法在 Exif 标头中捕获。
尽管如此,这仍然是一种强大的照片可视化方式。希望在不久的将来,我们能看到更多更准确的照片地理标记。
后续步骤
既然您已开始使用 EXIF 标头,不妨探索一下 EXIF 规范。其中存储了许多其他数据,您可能对捕获这些数据并将其放入说明气泡中感兴趣。您还可以考虑使用 ImagePyramids 创建更丰富的 PhotoOverlays。开发者指南中关于 PhotoOverlays 的文章对如何使用它们进行了很好的概述。
