
1. Before you begin
What you will build.
In this codelab, you will use App Check to add another layer of protection to your API key used in a web environment.
Specifically the following steps will be followed through the Codelab to tie the functionality together:
- Create a web page to host a Map using the Google Maps Platform Javascript API.
- Host the page so it can be accessed online.
- Restrict the domains and APIs that can use the API using Cloud Console.
- Add and initialize the App Check library through Firebase.
- Add the attestation provider to check the applications validity.
- Enforce checking on your app and monitor.
At the end of the codelab you should have a working site which enforces security on both the API keys being used, the domains from which these are accessed and the types of applications that can use them.
2. Prerequisites
Enabling App Check requires the use of three Google services to provide the protection, you should familiarize yourself with these areas.
Firebase - This provides the enforcement of the services that check that the APIs keys are being referred from the appropriate domains. This will also provide the hosting and deployment functionality through the use of Firebase Studio.
reCAPTCHA - This provides the functionality to check if humans are using the application and also provides the public and private keys for connecting Firebase to the client application domain.
Google Cloud Platform - This provides the API keys used by both Google Maps Platform and Firebase and the restriction on the domain using the Maps key.
You can see how these all function together in the following architecture diagram:
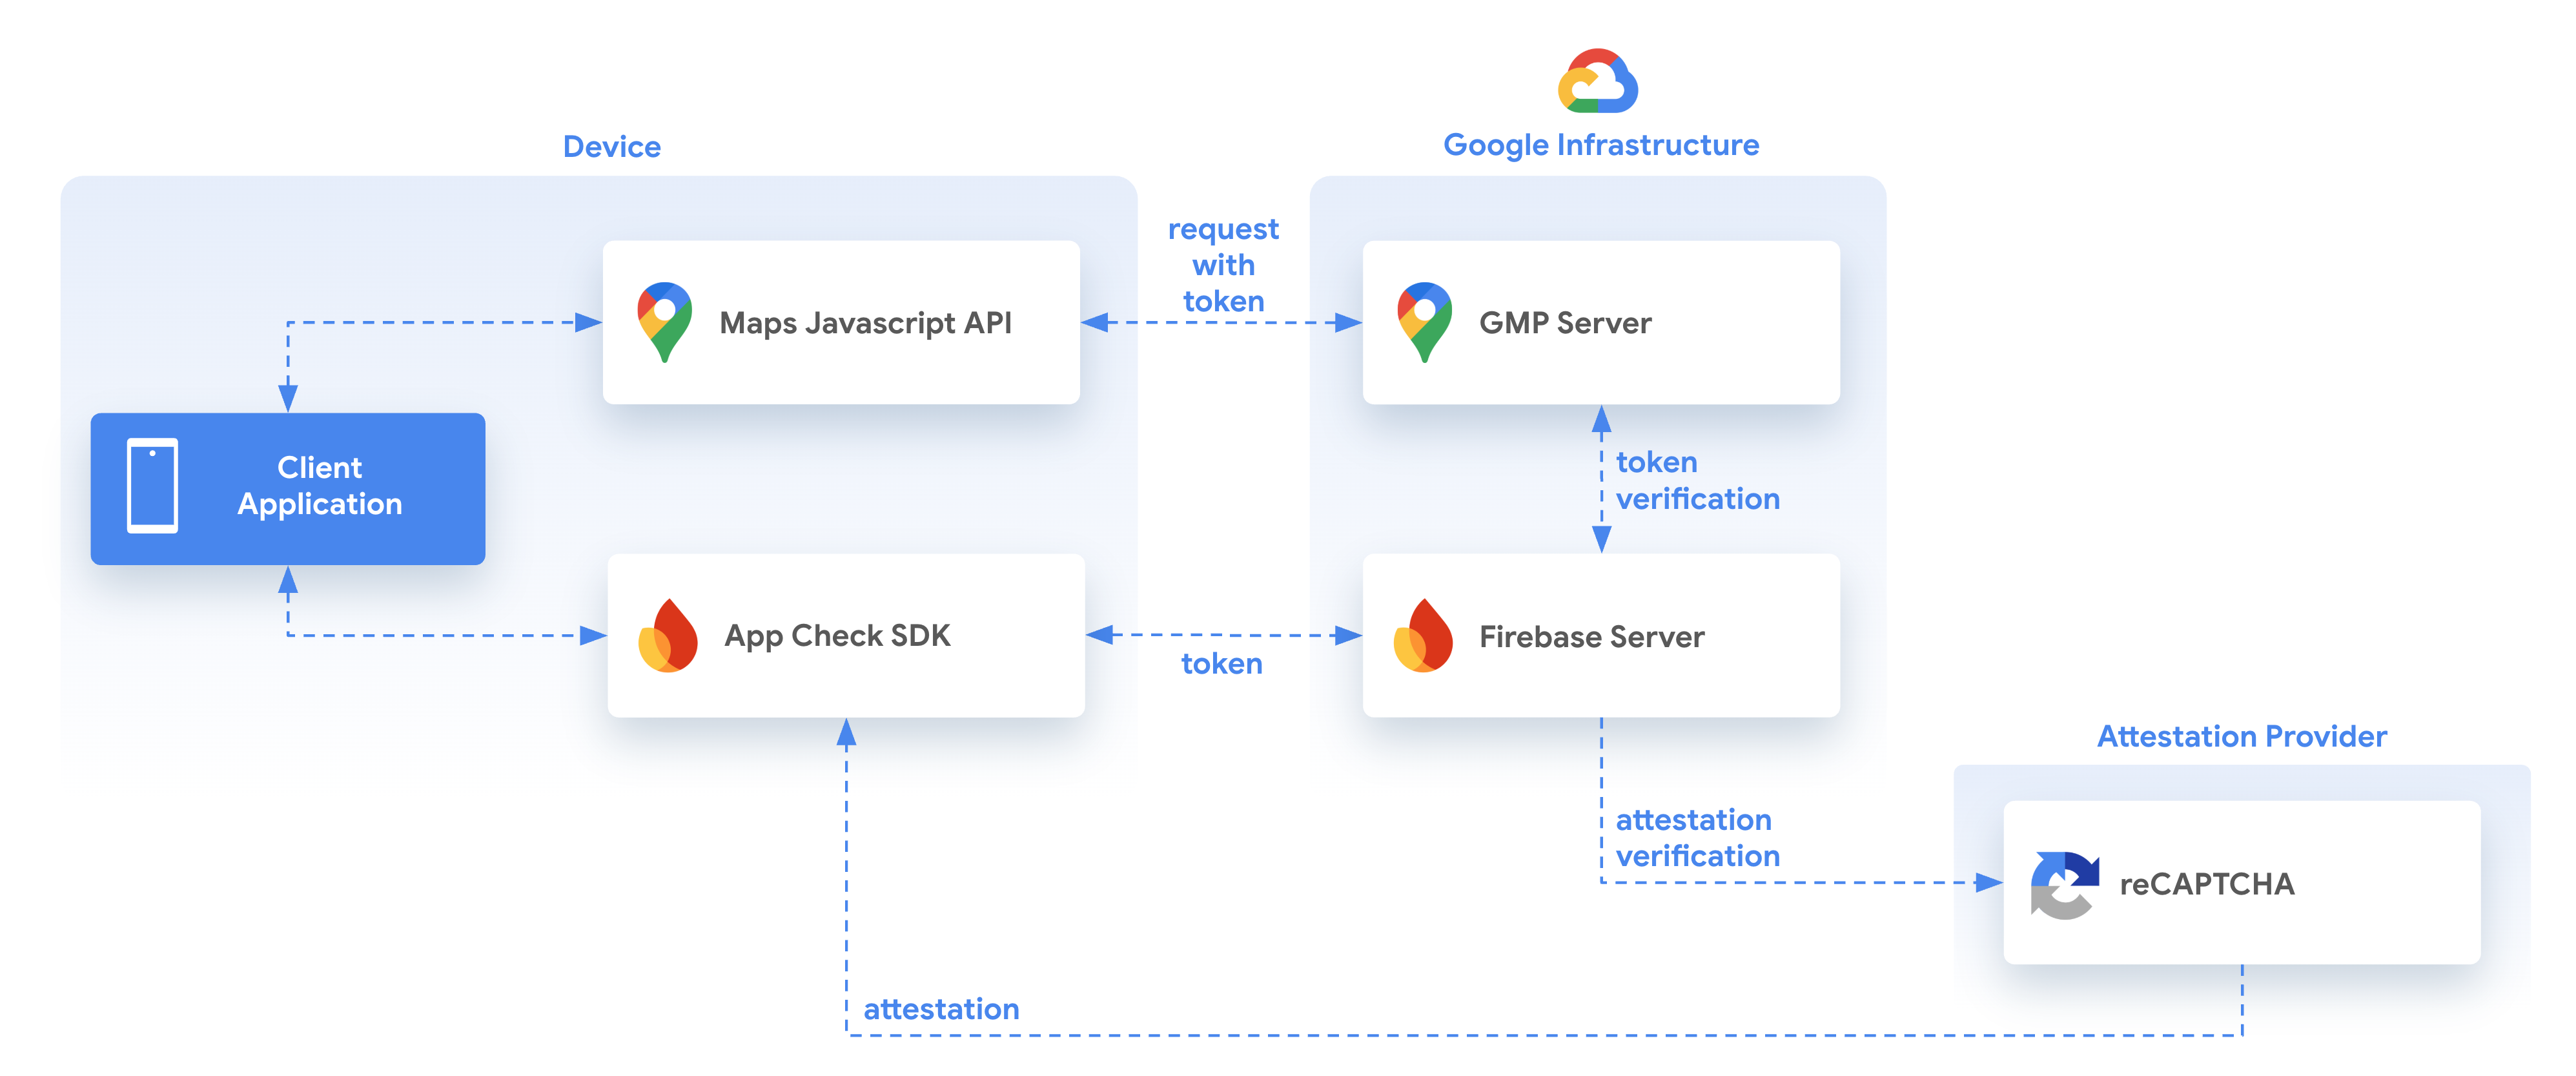
When using App Check and Google Maps Platform the following elements work together to both determine if the requests are coming from a valid application and user, using attestation provided by an attestation provider, in this case reCAPTCHA.
This is performed through the use of the App Check SDK provided by Firebase, which checks the validity of the calling application and then provides a token to the application by which subsequent calls to the Google Maps Platform Javascript API are made. In turn the Google Maps Platform Javascript API checks the validity of the provided token with Firebase to make sure it is coming from both the correct domain but also through the attestation provider from a valid user.
You can find more details about using App Check and the Maps JavaScript API at the following location and you should familiarize yourself with the steps required.
https://developers.google.com/maps/documentation/javascript/maps-app-check
3. Get set up
If you haven't already got a Google Cloud account, you will need to set one up with billing enabled at the start. Follow the instructions to get this created before you start.
Set up Google Maps Platform
If you do not already have a Google Cloud Platform account and a project with billing enabled, please see the Getting Started with Google Maps Platform guide to create a billing account and a project.
- In the Cloud Console, click the project drop-down menu and select the project that you want to use for this codelab.

- Enable the Google Maps Platform APIs and SDKs required for this codelab in the Google Cloud Marketplace. To do so, follow the steps in this video or this documentation.
- Generate an API key in the Credentials page of Cloud Console. You can follow the steps in this video or this documentation. All requests to Google Maps Platform require an API key.
Other Requirements for this Codelab
To complete this codelab, you'll need the following accounts, services, and tools:
- Basic knowledge of JavaScript, HTML, and CSS
- A Google Cloud account with billing enabled (as mentioned)
- A Google Maps Platform API key with the Maps JavaScript API enabled (This will be done during the codelab).
- Basic understanding of web hosting and deployment (You will be guided through this in the codelab). This will be done through Firebase console and Firebase Studio.
- A web browser to view the files in as you work.
4. Create a page in Firebase Studio
This codelab does not assume that you already have an application created and it uses Firebase Studio to create a page to host the Map application and deploy it to Firebase for testing purposes. If you have an existing application you can also use that instead, changing the appropriate host domains, code snippets and API keys to ensure the correct implementation.
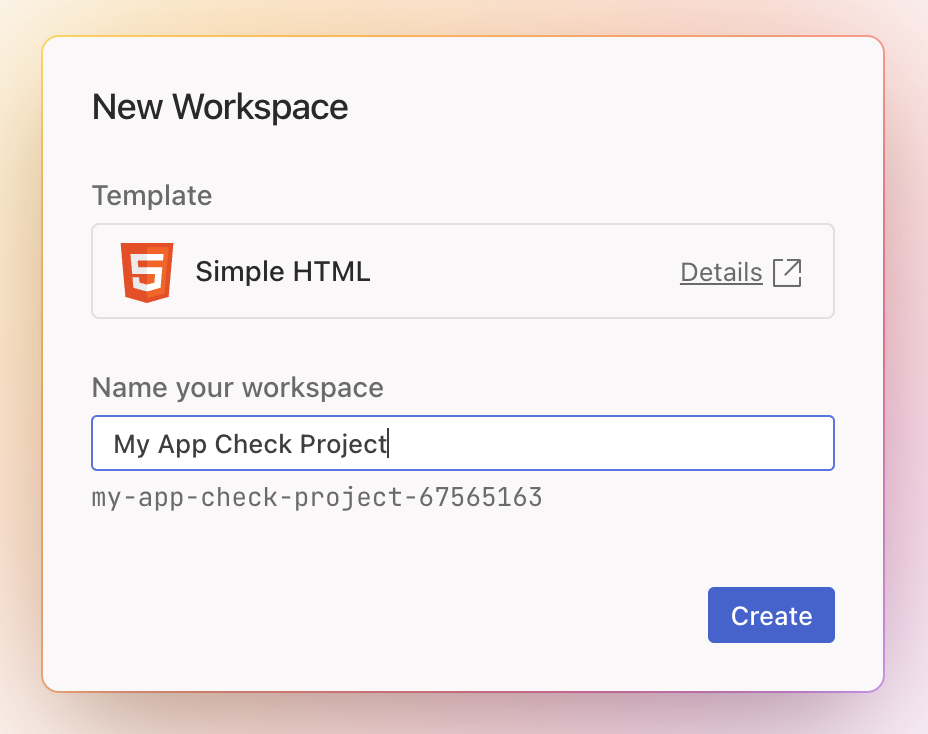
Navigate to Firebase Studio (requires a Google Account) and create a new Simple HTML application, you may have to click the "See all templates" button to expose this option or just click this link for direct access.
Give the workspace an appropriate name, such as myappcheck-map (plus some random number for uniqueness, it will add one for you). Firebase Studio will then create the workspace.
Once you have filled the name in you can click the create button and it will start the project creation process.
Once it has been created you can replace the text in the index.html file with the following code which creates a page with a map in it.
<!doctype html>
<html>

<head>
 <title>Secure Map</title>
 <style>
   #map {
     height: 100%;
   }

   html,
   body {
     height: 100%;
     margin: 0;
     padding: 0;
     font-family: Arial, Helvetica, sans-serif;
   }
 </style>
</head>

<body>
 <h3>App Check Security Demo</h3>
 <!--The div element for the map -->
 <div id="map"></div>
 <script>
   (g => { var h, a, k, p = "The Google Maps JavaScript API", c = "google", l = "importLibrary", q = "__ib__", m = document, b = window; b = b[c] || (b[c] = {}); var d = b.maps || (b.maps = {}), r = new Set, e = new URLSearchParams, u = () => h || (h = new Promise(async (f, n) => { await (a = m.createElement("script")); e.set("libraries", [...r] + ""); for (k in g) e.set(k.replace(/[A-Z]/g, t => "_" + t[0].toLowerCase()), g[k]); e.set("callback", c + ".maps." + q); a.src = `https://maps.${c}apis.com/maps/api/js?` + e; d[q] = f; a.onerror = () => h = n(Error(p + " could not load.")); a.nonce = m.querySelector("script[nonce]")?.nonce || ""; m.head.append(a) })); d[l] ? console.warn(p + " only loads once. Ignoring:", g) : d[l] = (f, ...n) => r.add(f) && u().then(() => d[l](f, ...n)) })({
     key: "YOUR_API_KEY",
     v: "weekly",
     // Use the 'v' parameter to indicate the version to use (weekly, beta, alpha, etc.).
     // Add other bootstrap parameters as needed, using camel case.
   });
 </script>
 <script>
   let map;
   async function initMap() {
     const { Map } = await google.maps.importLibrary("maps");
     map = new Map(document.getElementById("map"), {
       center: { lat: 51.5208, lng: -0.0977 },
       zoom: 17,
     });
   }
   initMap();
 </script>
</body>

</html>
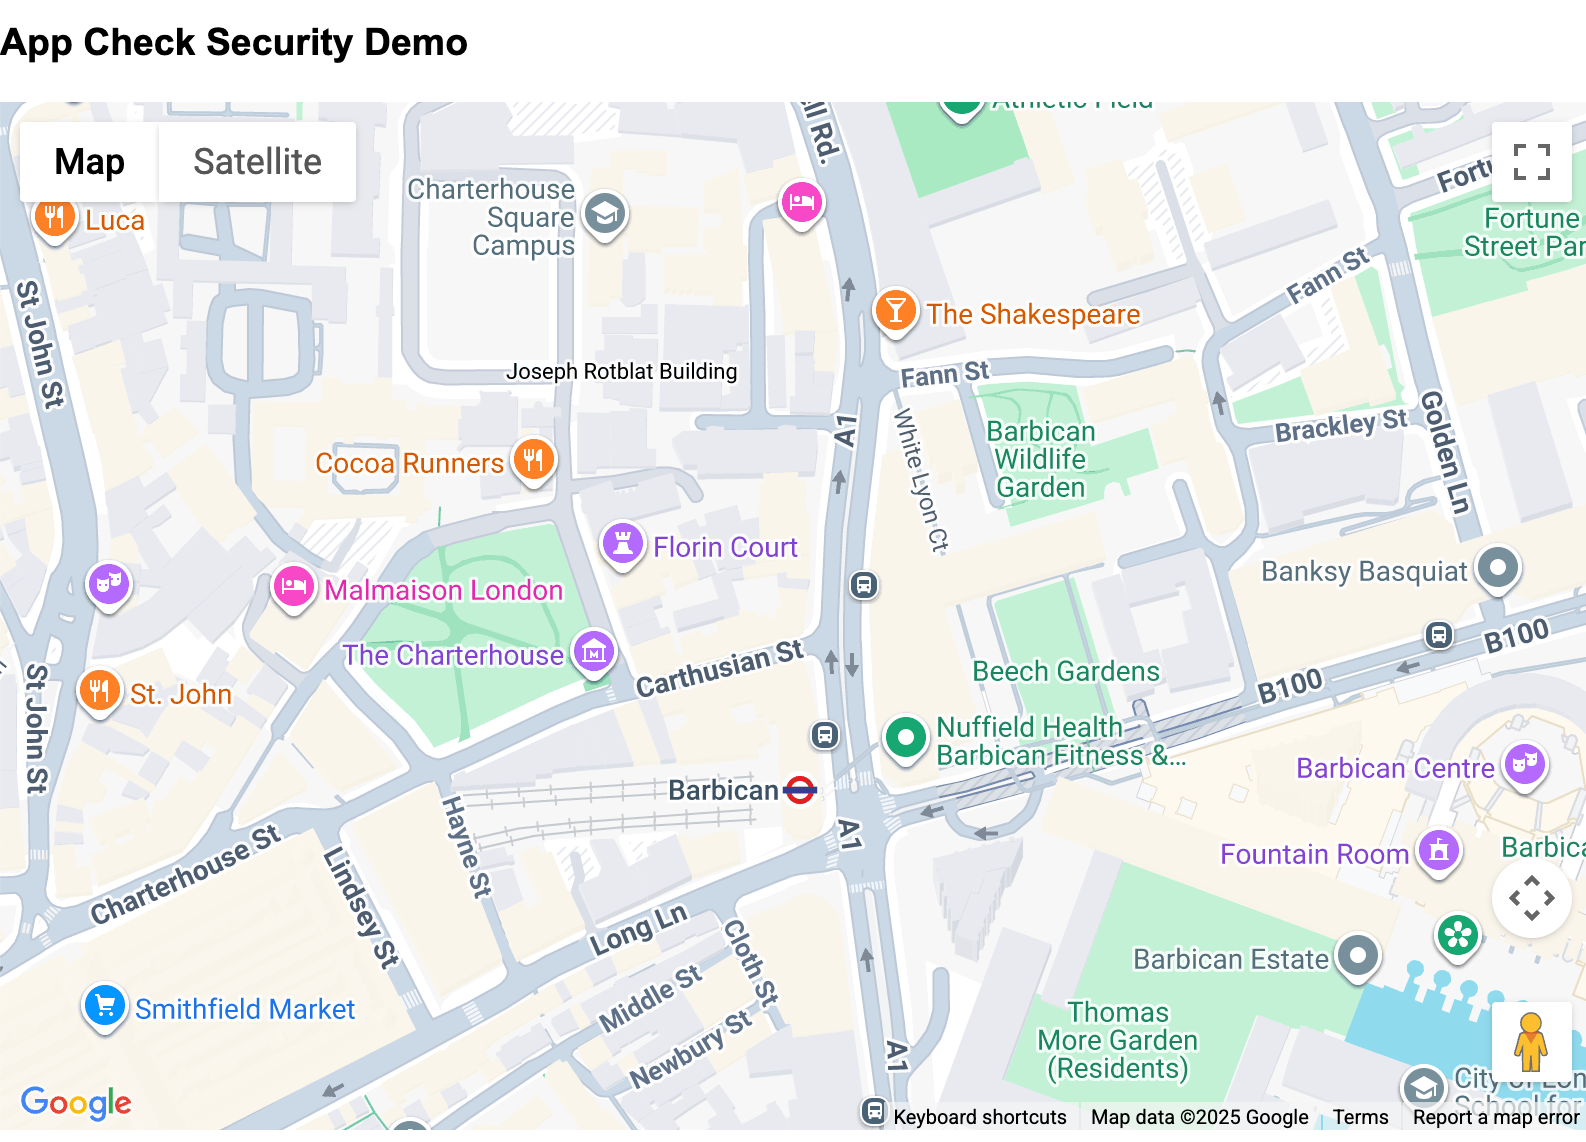
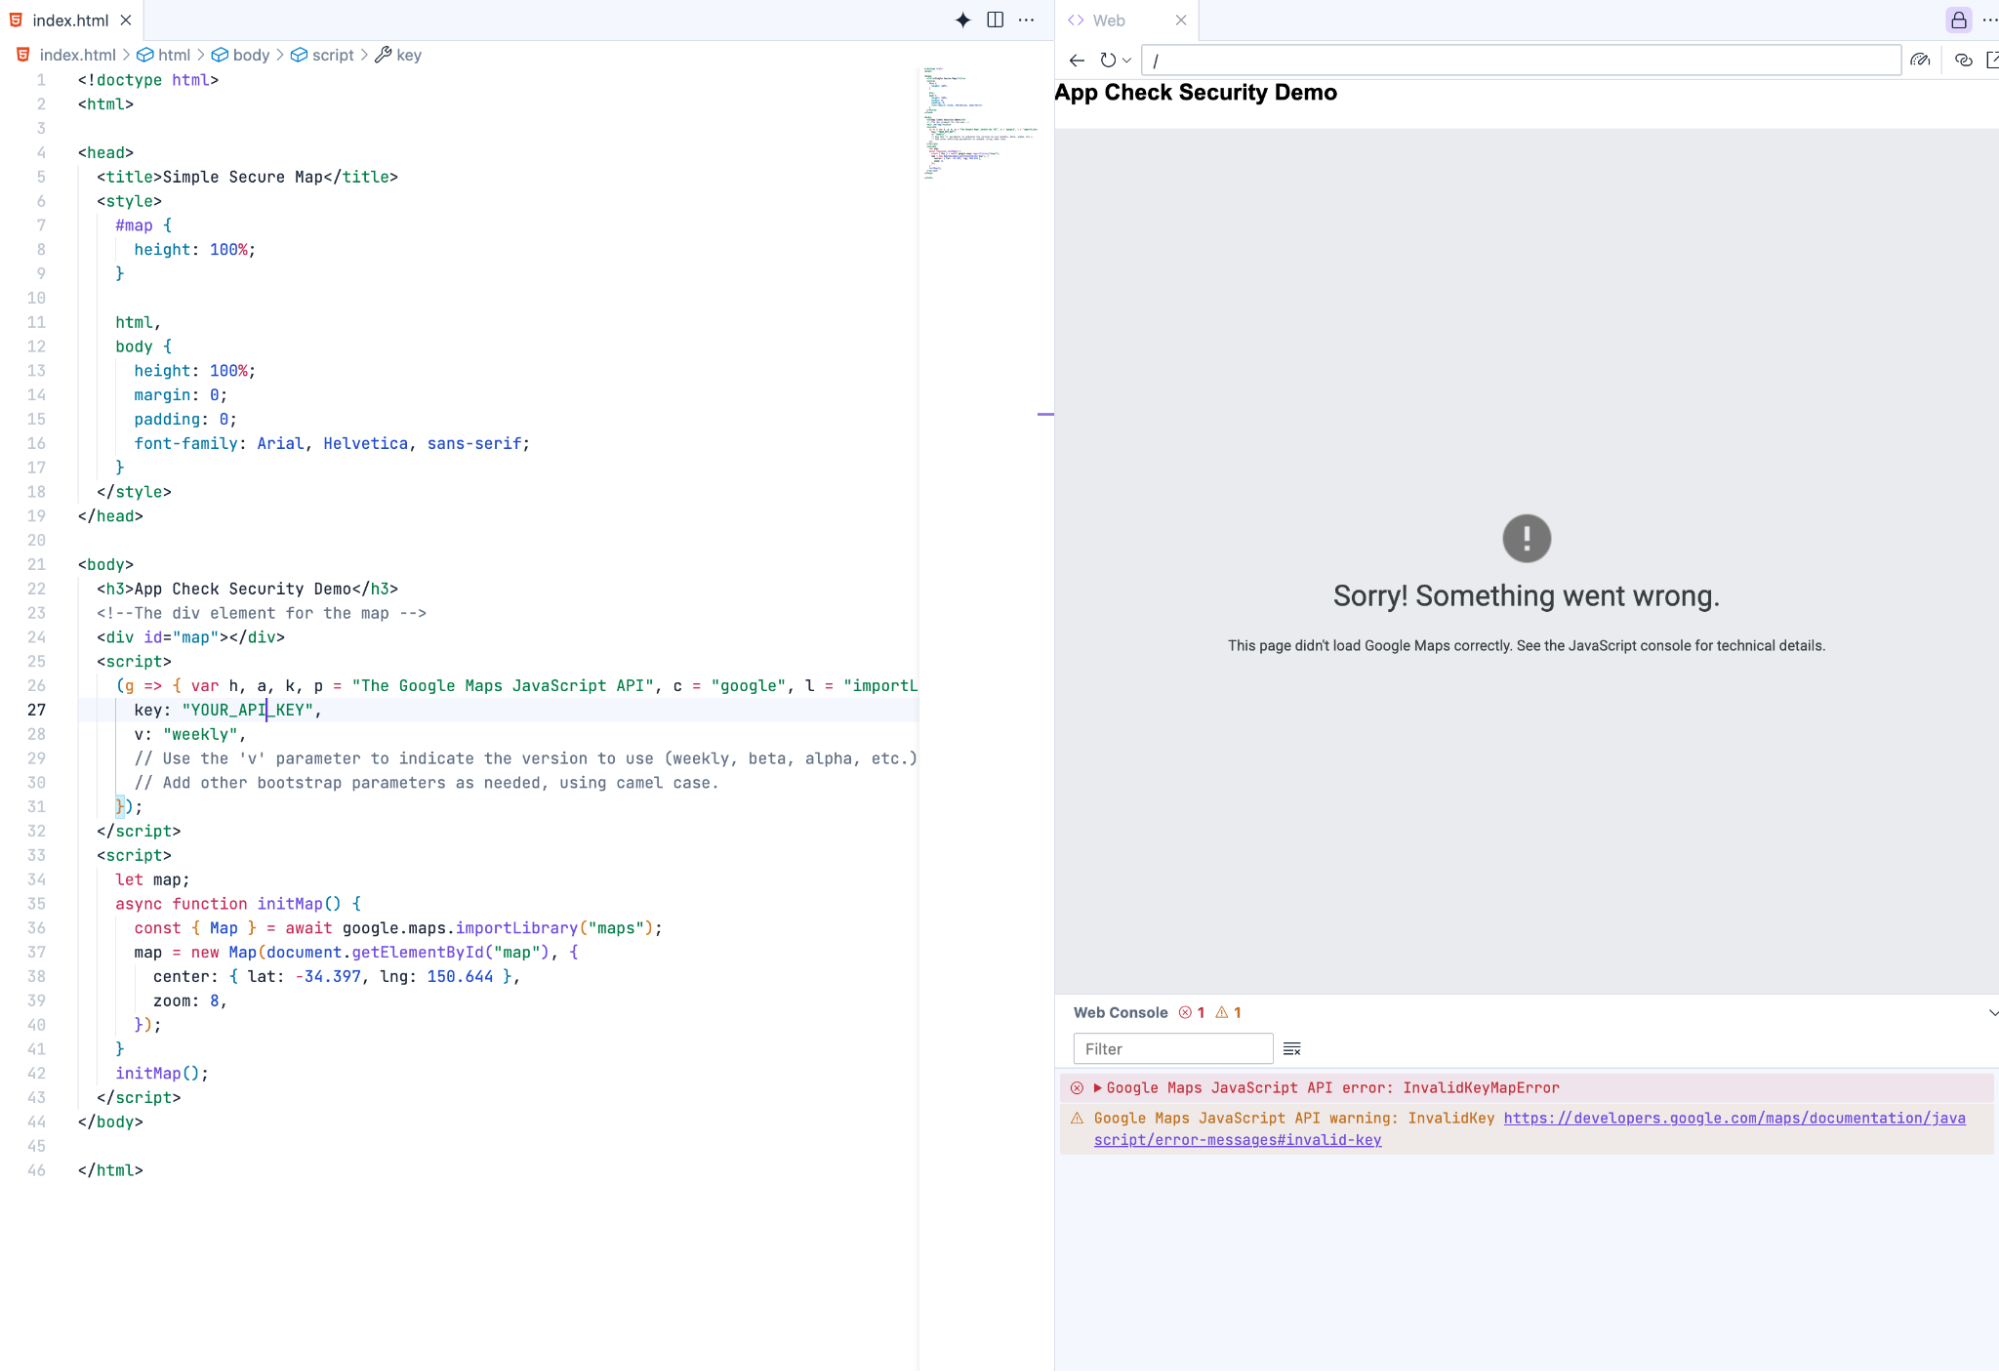
When run this should give a page showing a map of the working application as shown in the image, but!
When the page is actually loaded though an error will be displayed as it will need a Google Maps Platform API key in the page, which will be added in a subsequent section.
The actual error message may be seen in the web console in Firebase Studio.

In order to fix this we will need to add an API key to the page. The API key is the way the page and the implementation of the Maps Javascript API is tied together. It is also an area of exploit, as it needs to be contained in the page in an unencrypted manner, where the API key may be taken and used on different sites.
One method of protection is through the use of application restrictions, either through the type of application being used or through the referring domain or IP address being called. You can find out more about best practices at the following site:
https://developers.google.com/maps/api-security-best-practices#rec-best-practices
or through the use of direct calls from command line or server, applications which themselves have no way of providing a referrer or being tracked, so are potentially a security hole.
5. Create a Firebase application
Firebase is used to provide the functionality to tie the attestation provider to check the following:
- Requests originate from your authentic app
- Requests originate from an authentic, untampered device and user session.
In this codelab reCAPTCHA v3 will be used as the provider of this attestation.
Create a Firebase application and host.
Go to https://firebase.google.com/ and create a new Firebase project from the "Go to console" link.
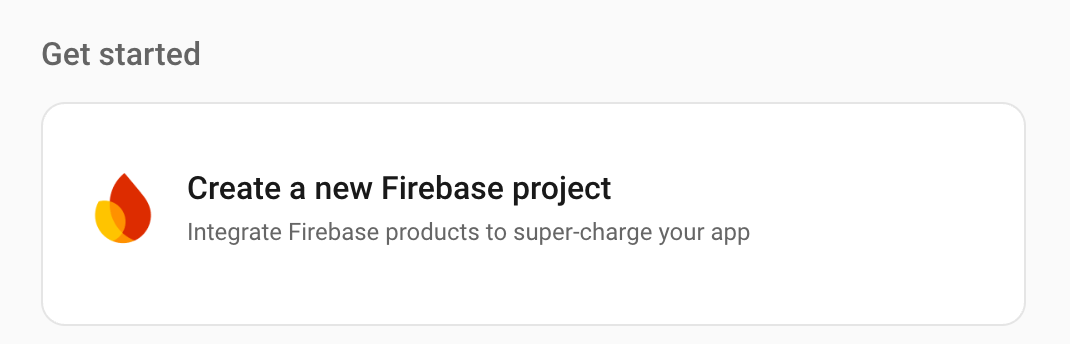
Create a new project by clicking on the following area.
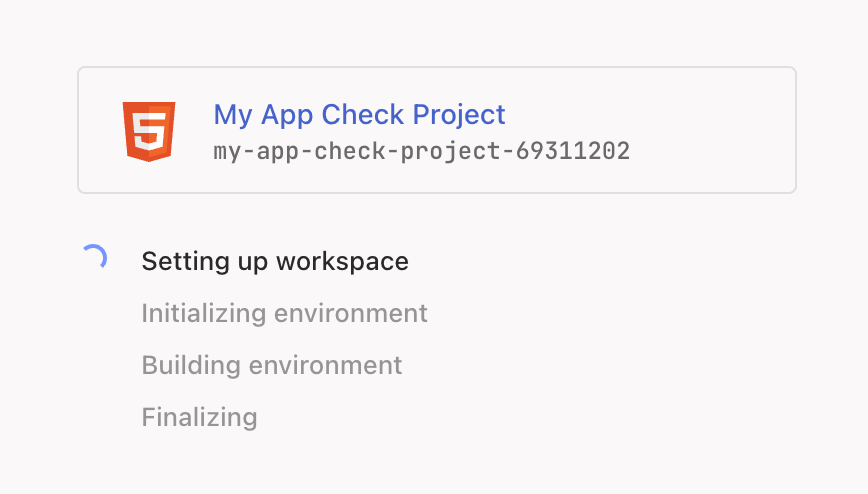
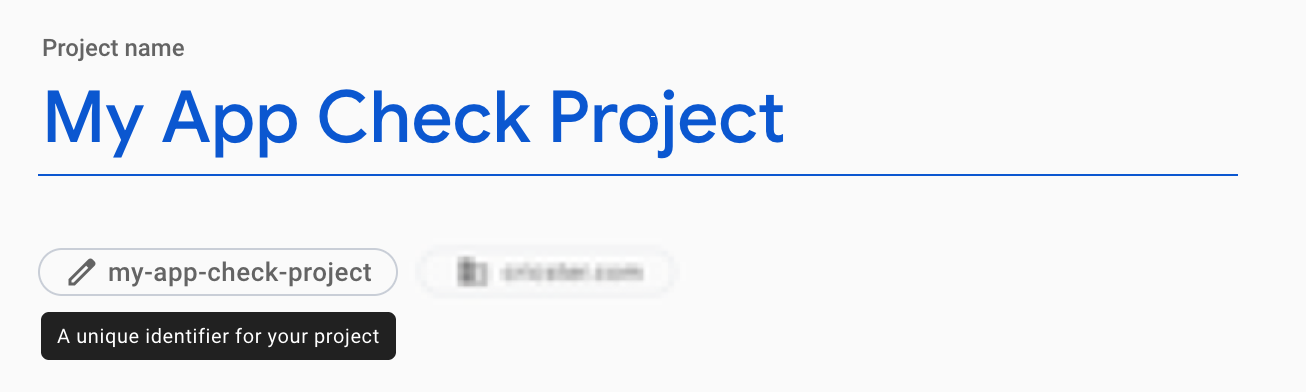
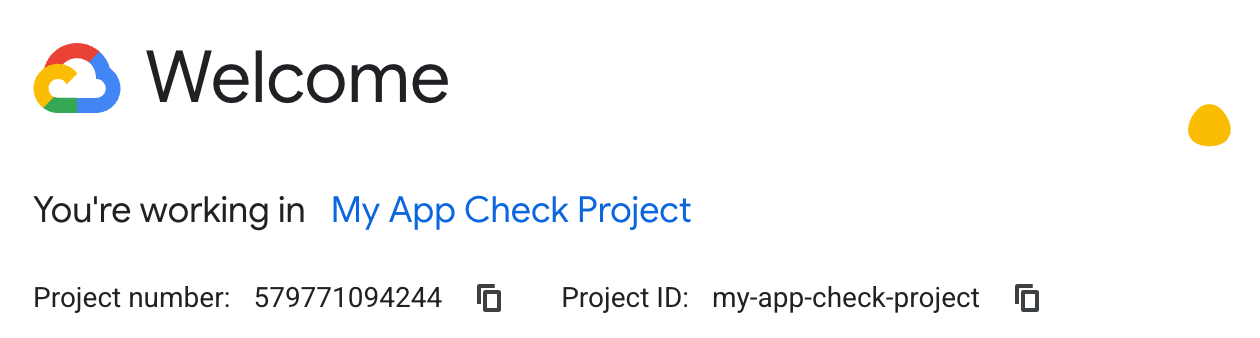
Choose a name for the project, such as My App Check Project, it does not have to be the same name as was used before as this is just for reference, the actual name of the project can be edited just below the text, it will be made up of the name you entered and if not unique will have a number added to it.
If you are prompted to add other services (such as Google Analytics) to your application you can accept them or not, but for this codelab they are not needed so may be left off.
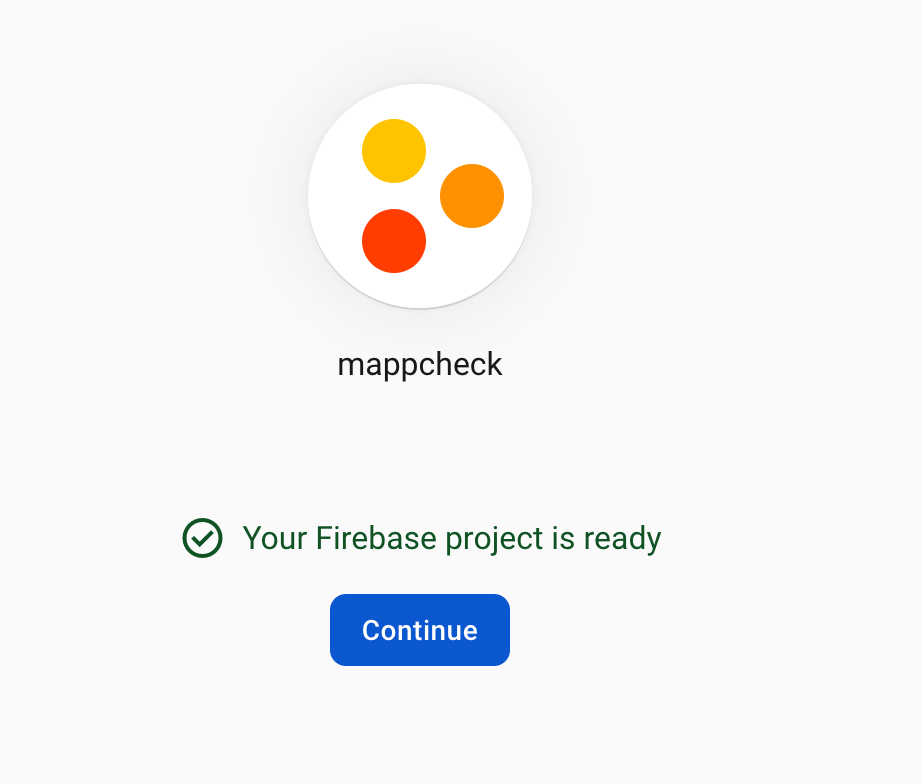
Click the "create project" button and wait for the project to be created. When this has been completed it will notify you.
Click continue when this is ready to start interacting with the project.
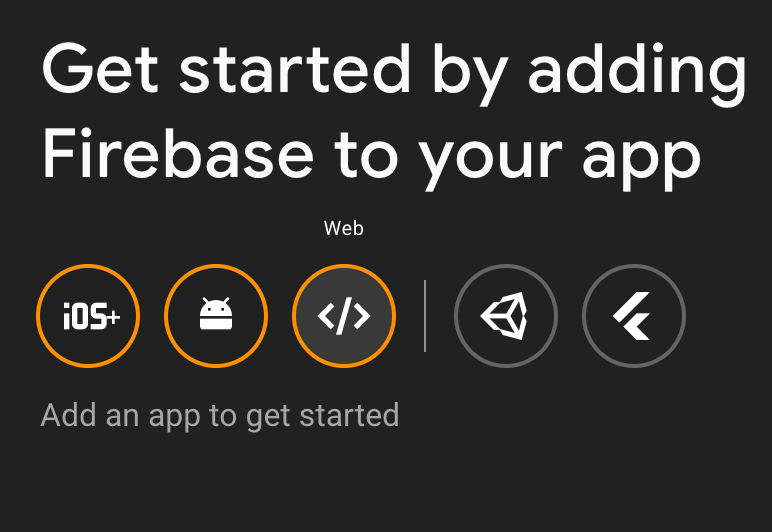
From the main page you may then choose to get started by adding Firebase to your app and choosing the web option.
Choose to set up Firebase Hosting to your site for somewhere for the files to go once they are deployed (for your actual site you may use your own option but to follow along this Codelab you are going to deploy to Firebase Hosting).
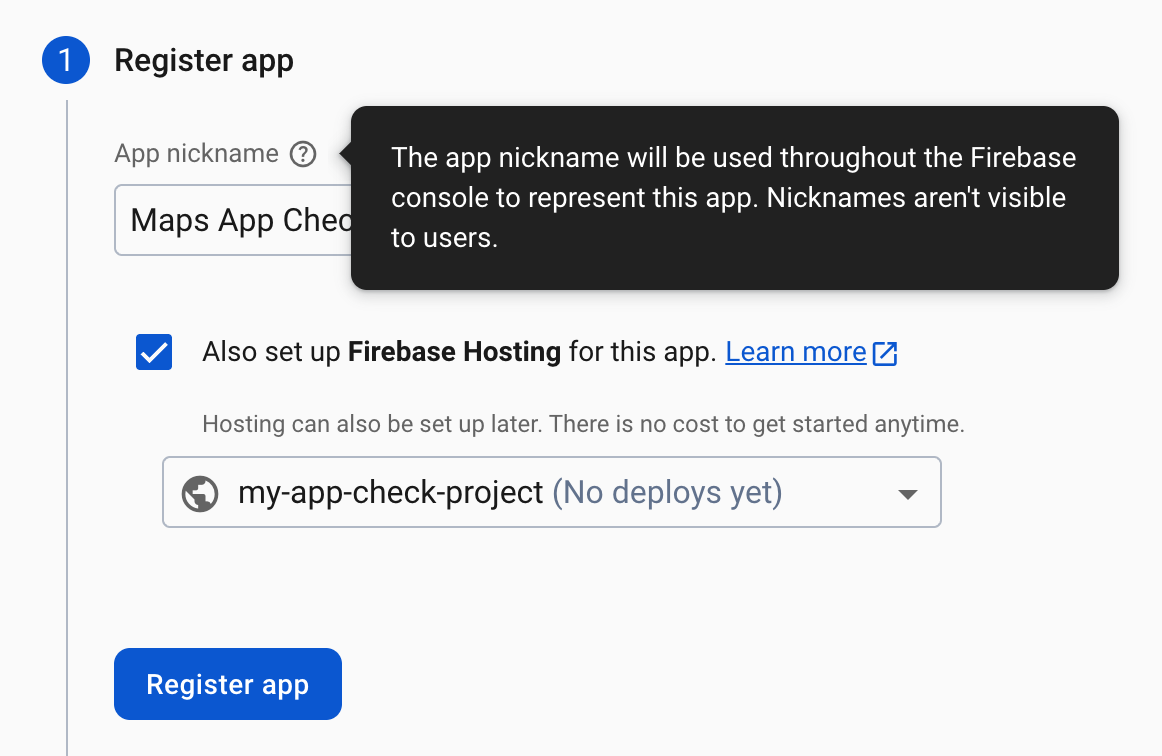
Click Register app to create the application. Next you will take the created script and use it to reference the project in firebase from our web application.
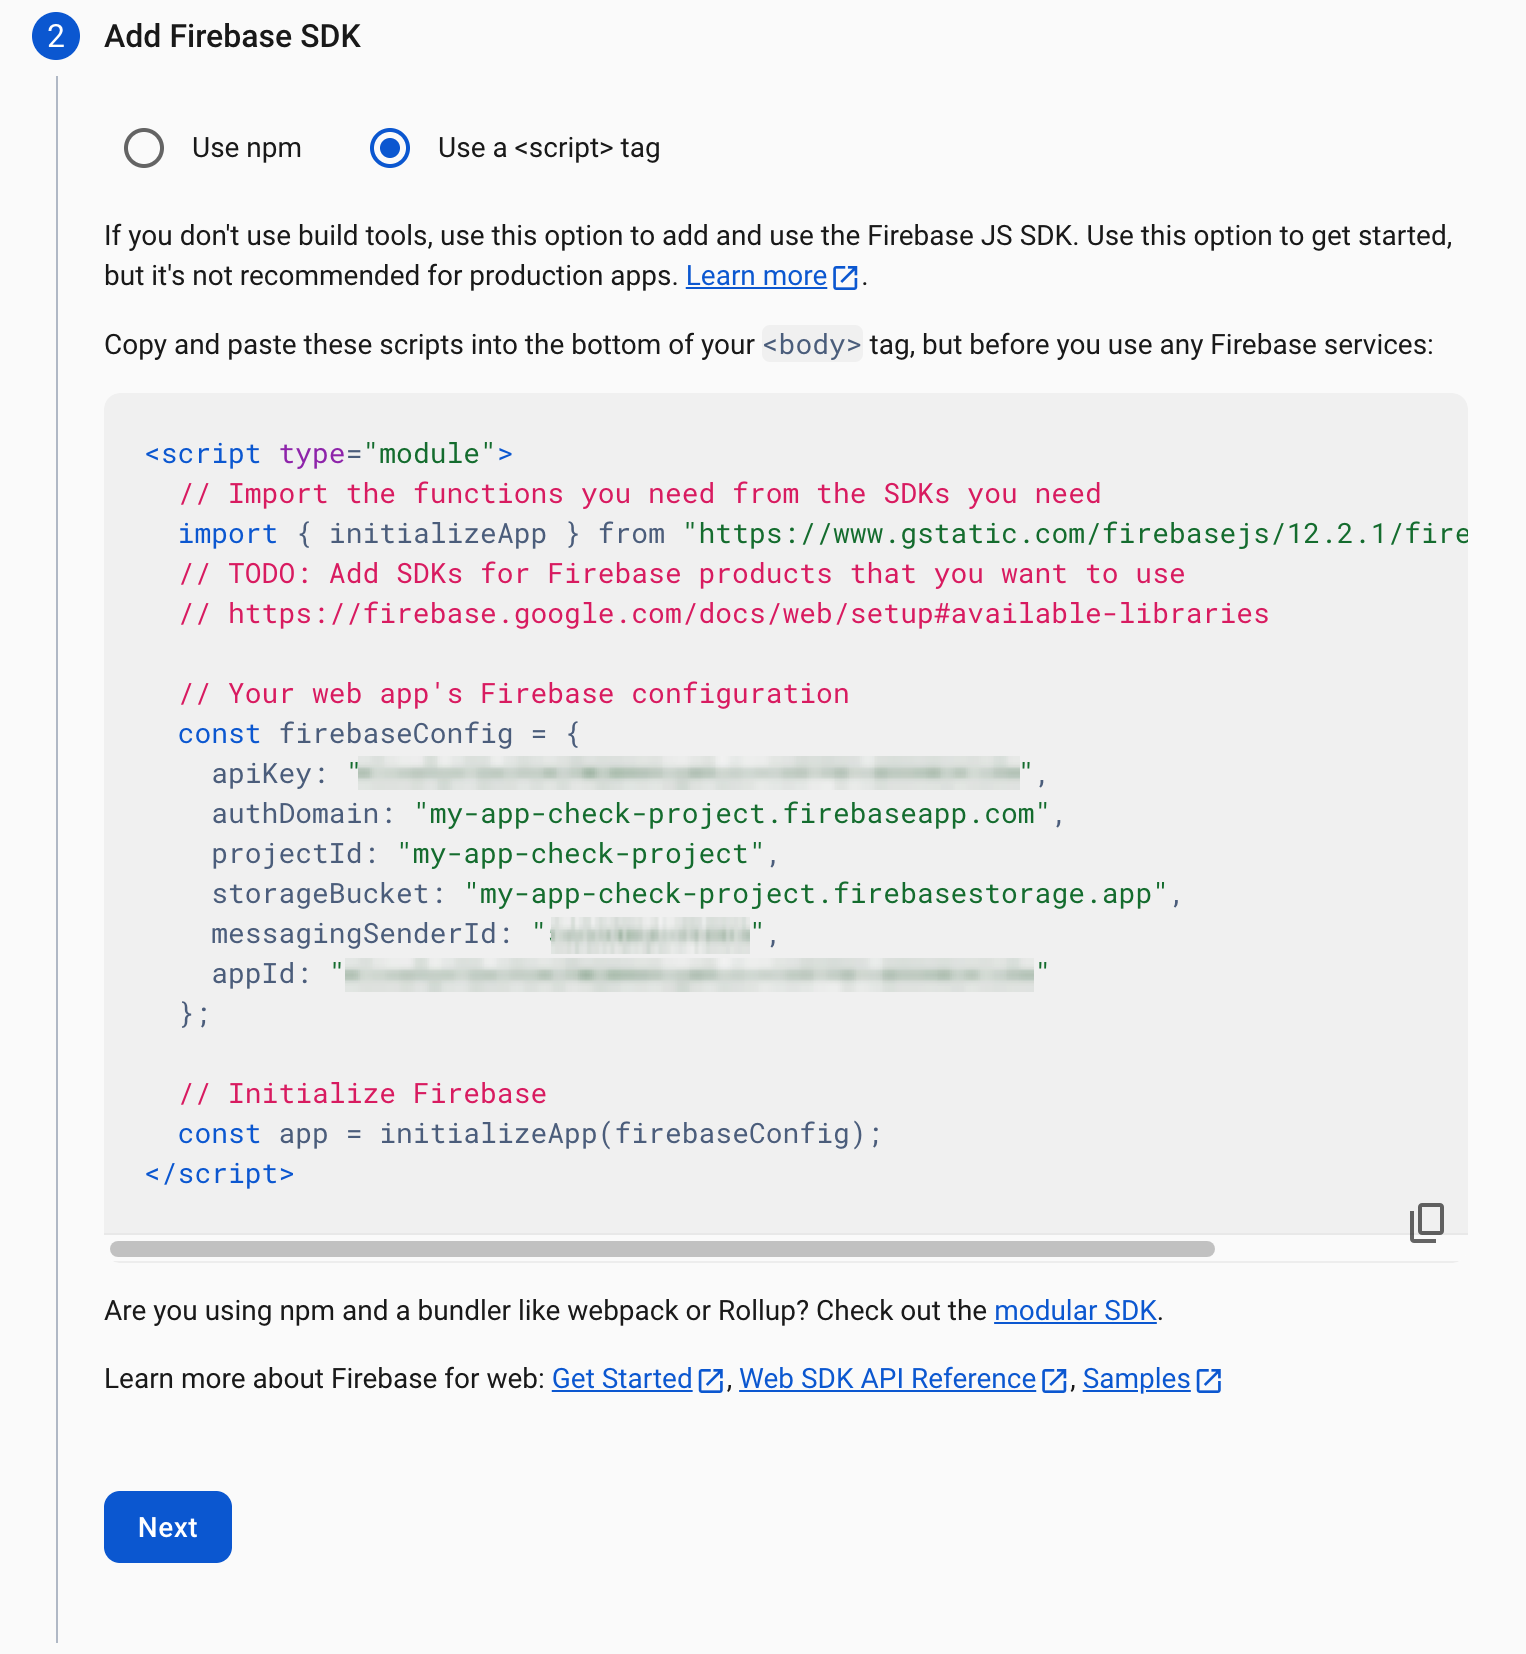
The firebase config code in the next tab will be use in the application to connect firebase and the maps apis together so it is worth copying, from the "Use the script tag" section. Which you will paste in the project index.html.
Click next for the other sections and then see the created app in the project setting section of the site.
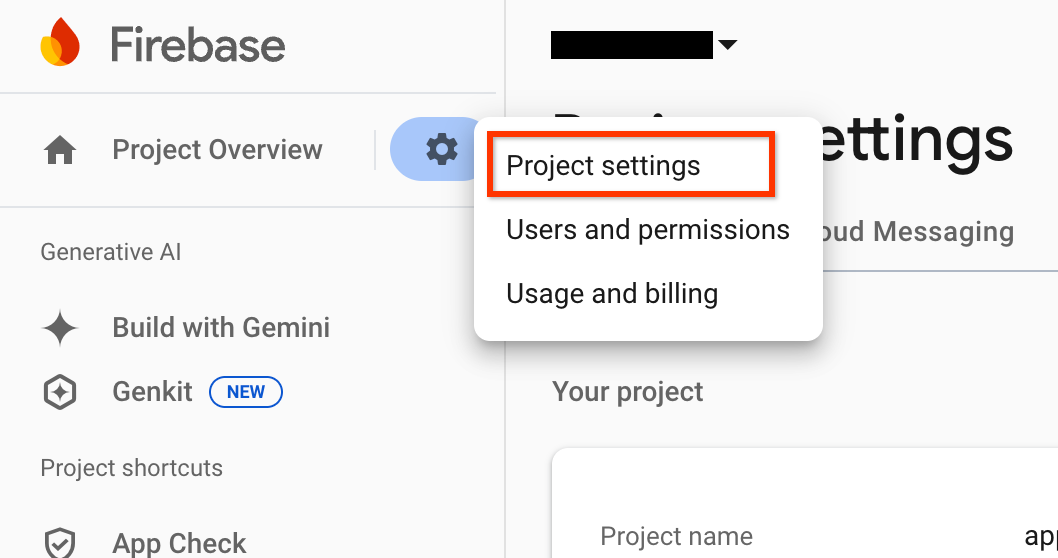
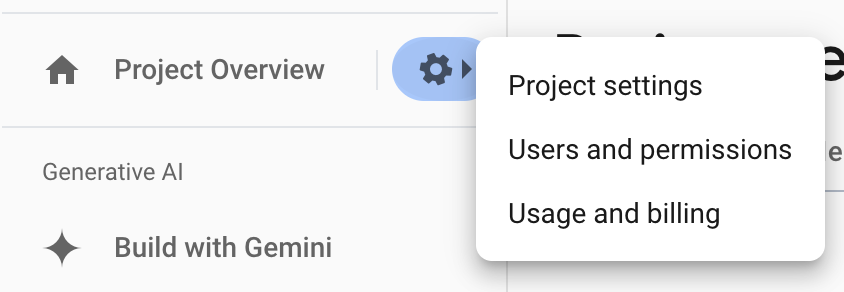
If you need to go back and find the details of the configuration at a later date you can also find the app details from the "Settings" button, as shown:
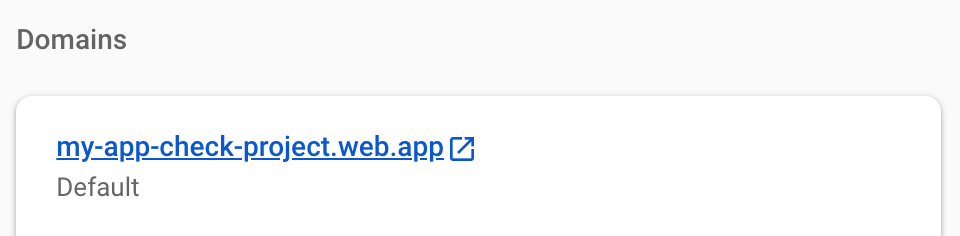
Before leaving this section, you will need to note the domain of the created Firebase hosting site that is created for use later with reCAPTCHA. This allows the site name to be tied to the attestation provider, meaning only requests from that site will get verified.
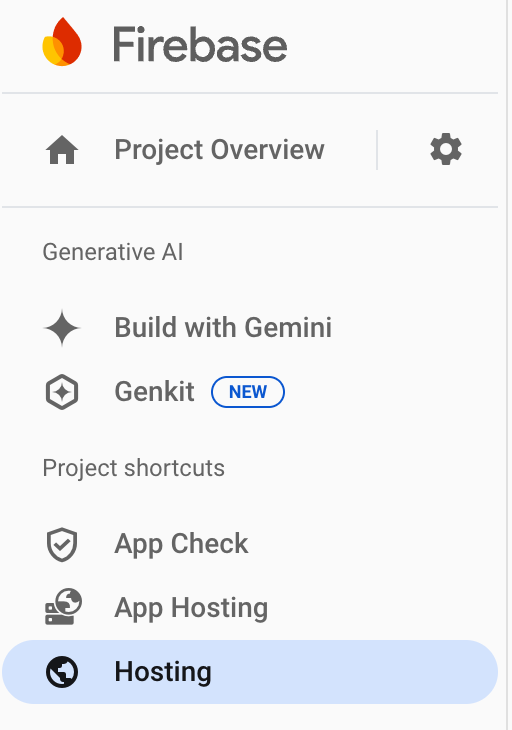
Go to the hosting section from the project shortcuts or Build menu on the left
 or
or 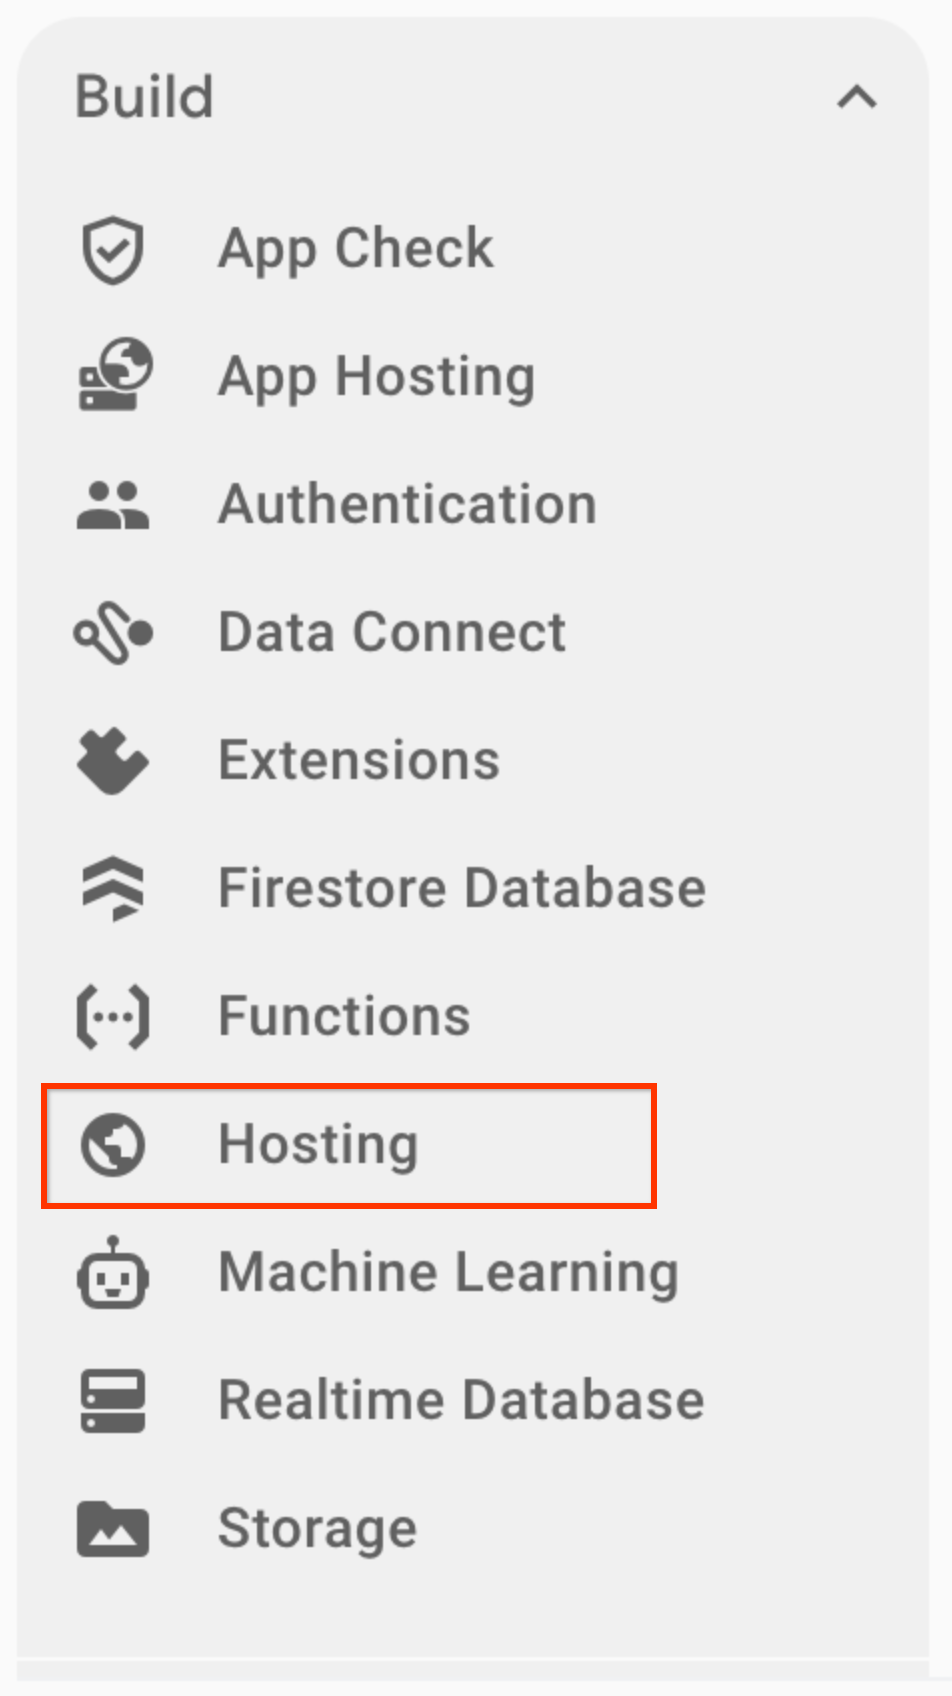
And from the section look up the domain that has been created for the application. You may have to click through a few screens to get it set up if it has not already been done.
6. Secure API Keys
Go into the Cloud Console on the same account that you are using Firebase on to look at the project that has been created,

If you have multiple projects you may need to use the drop-down or search box to select the correct one, with the name of your Firebase project.

This will open up the newly created project. You will now add the Maps Javascript API to this project so it can be used within the project, including restricting its use to a specific API key and hosting domain.
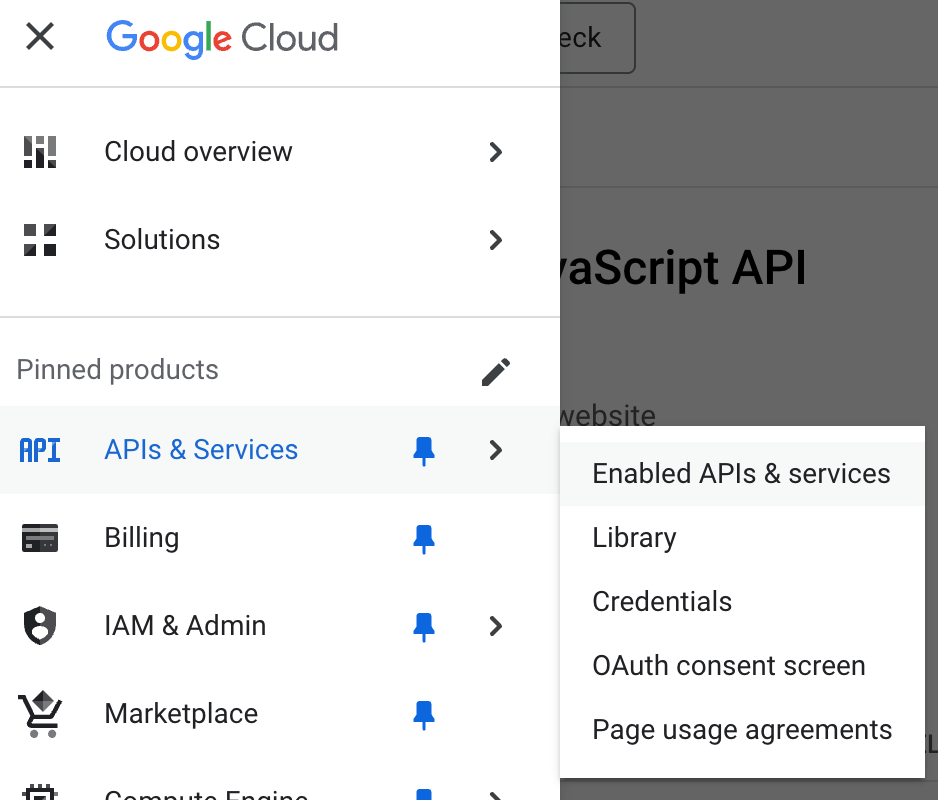
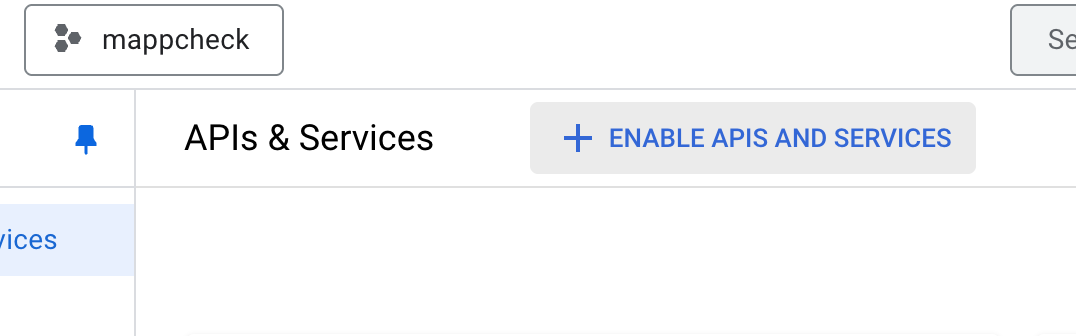
Use the menu on the left side to enable the Maps APIs on the project. Select the "APIs & Services" option and "Enabled APIs & Services".
Select the "ENABLE APIS AND SERVICES" option
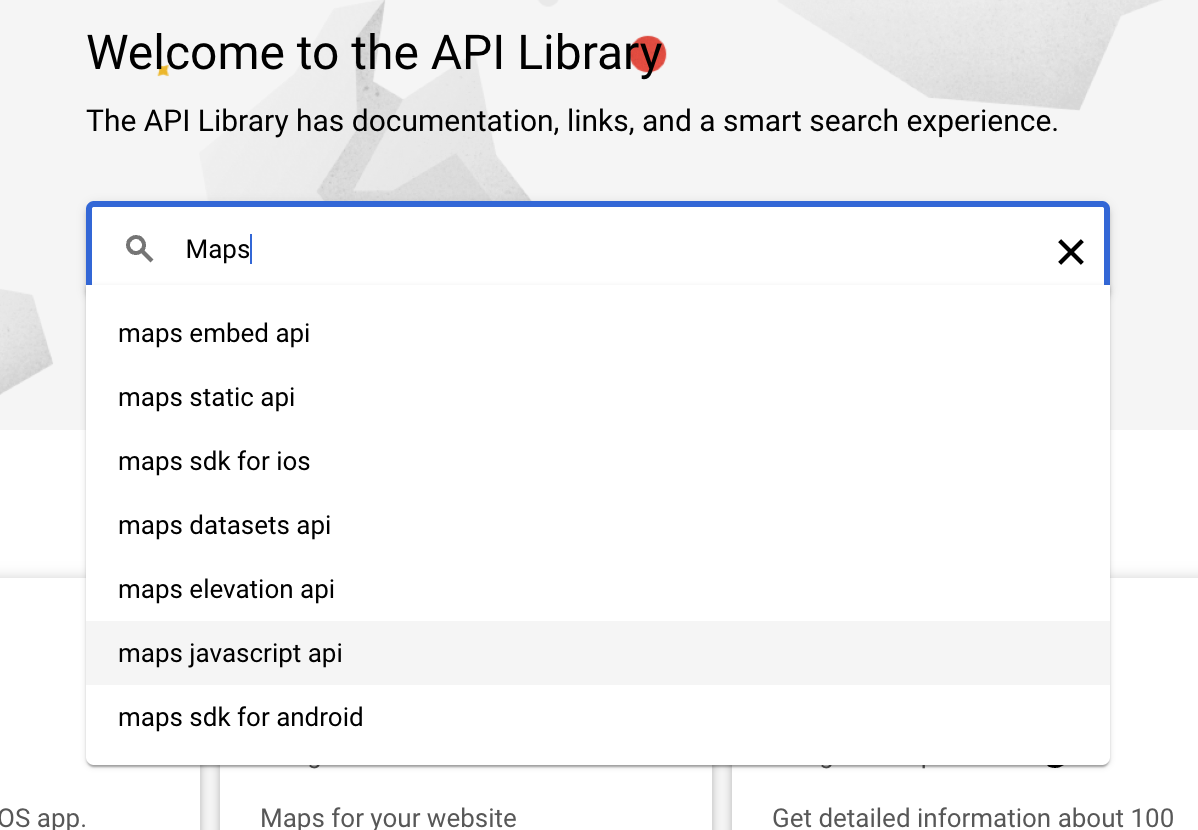
Enter "Maps Javascript API" into the search box.
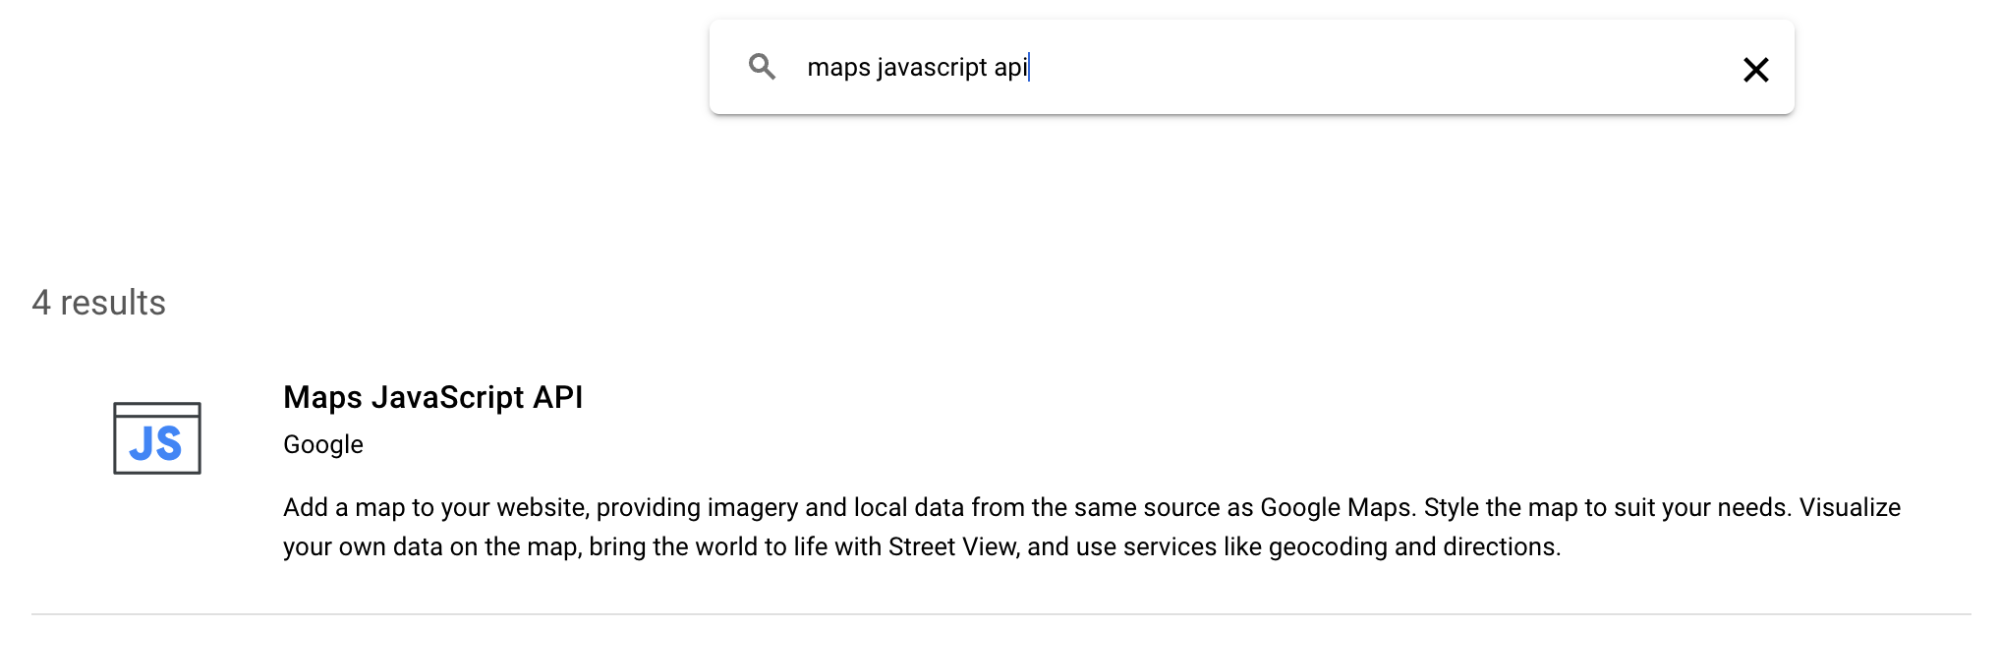
Select the matched result.
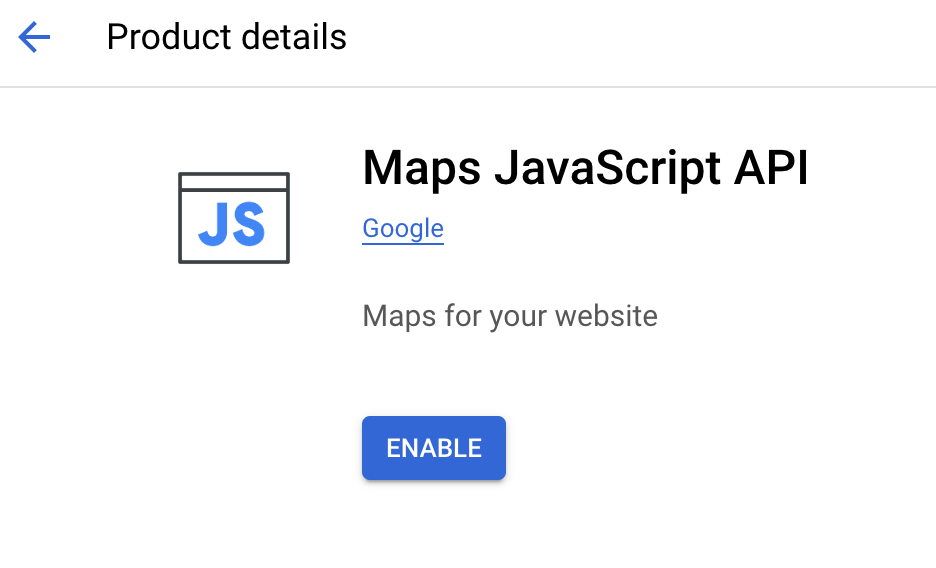
Then click enable on the API to add it to your project (this may have already be done if you have used this project before).
Once this is enabled you can choose to add an API key and restrict it, but for now this will be skipped.
Using the left menu options again, go back to the API & Services section and select the browser key that was created for you.

Add the Maps JavaScript API to one of the API restrictions.
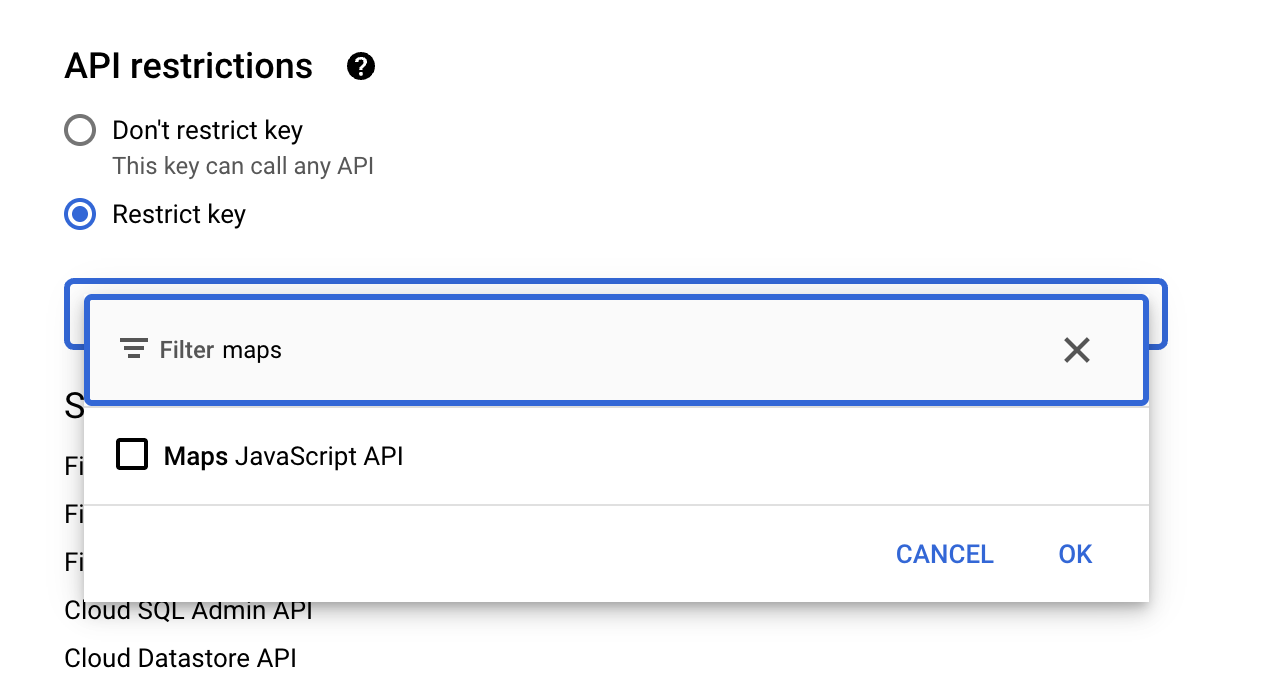
For keys in a live application you would also put a limitation on the domain that was hosting the application, do this now using the domain created for you in Firebase. You should also add /* onto the end of the domain to make sure it covers all paths under it.

You can find more details about enabling this at the following location for more information about restricting API keys.
https://developers.google.com/maps/api-security-best-practices#restricting-api-keys
7. Create reCAPTCHA secrets
The next step is to create a reCAPTCHA project to provide the attestation and keys for both the client and server.
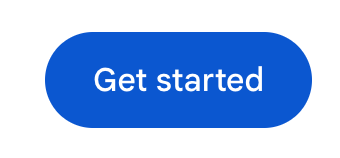
Go to the reCAPTCHA site at https://www.google.com/recaptcha/ and click the get started button.
Next register a new site, make sure you enter the right domain to restrict.
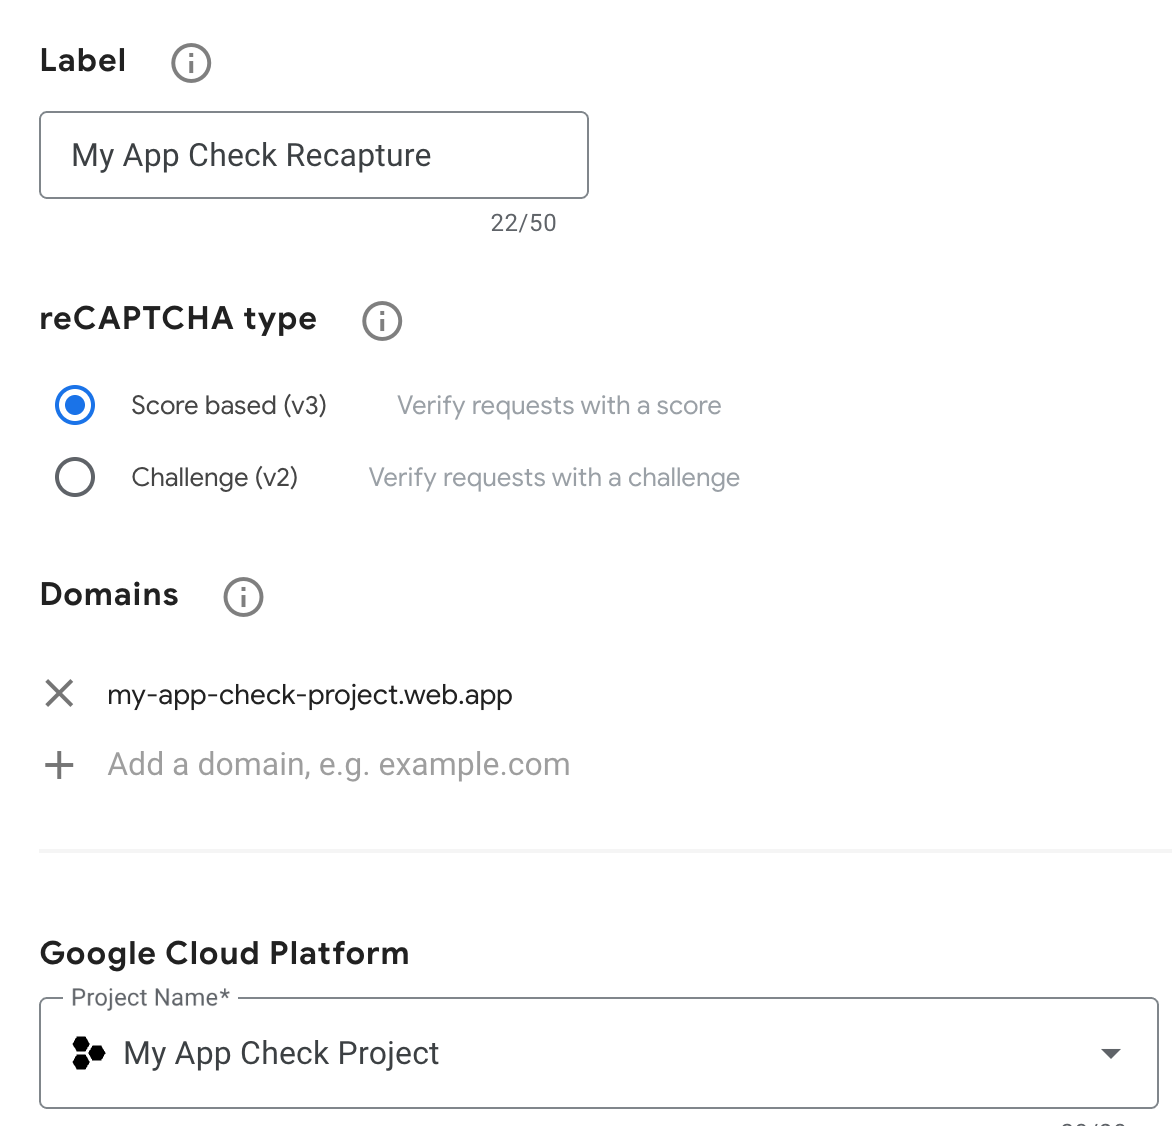
Also make sure you have selected the same Google Cloud Project that Firebase created in case you have more than one.
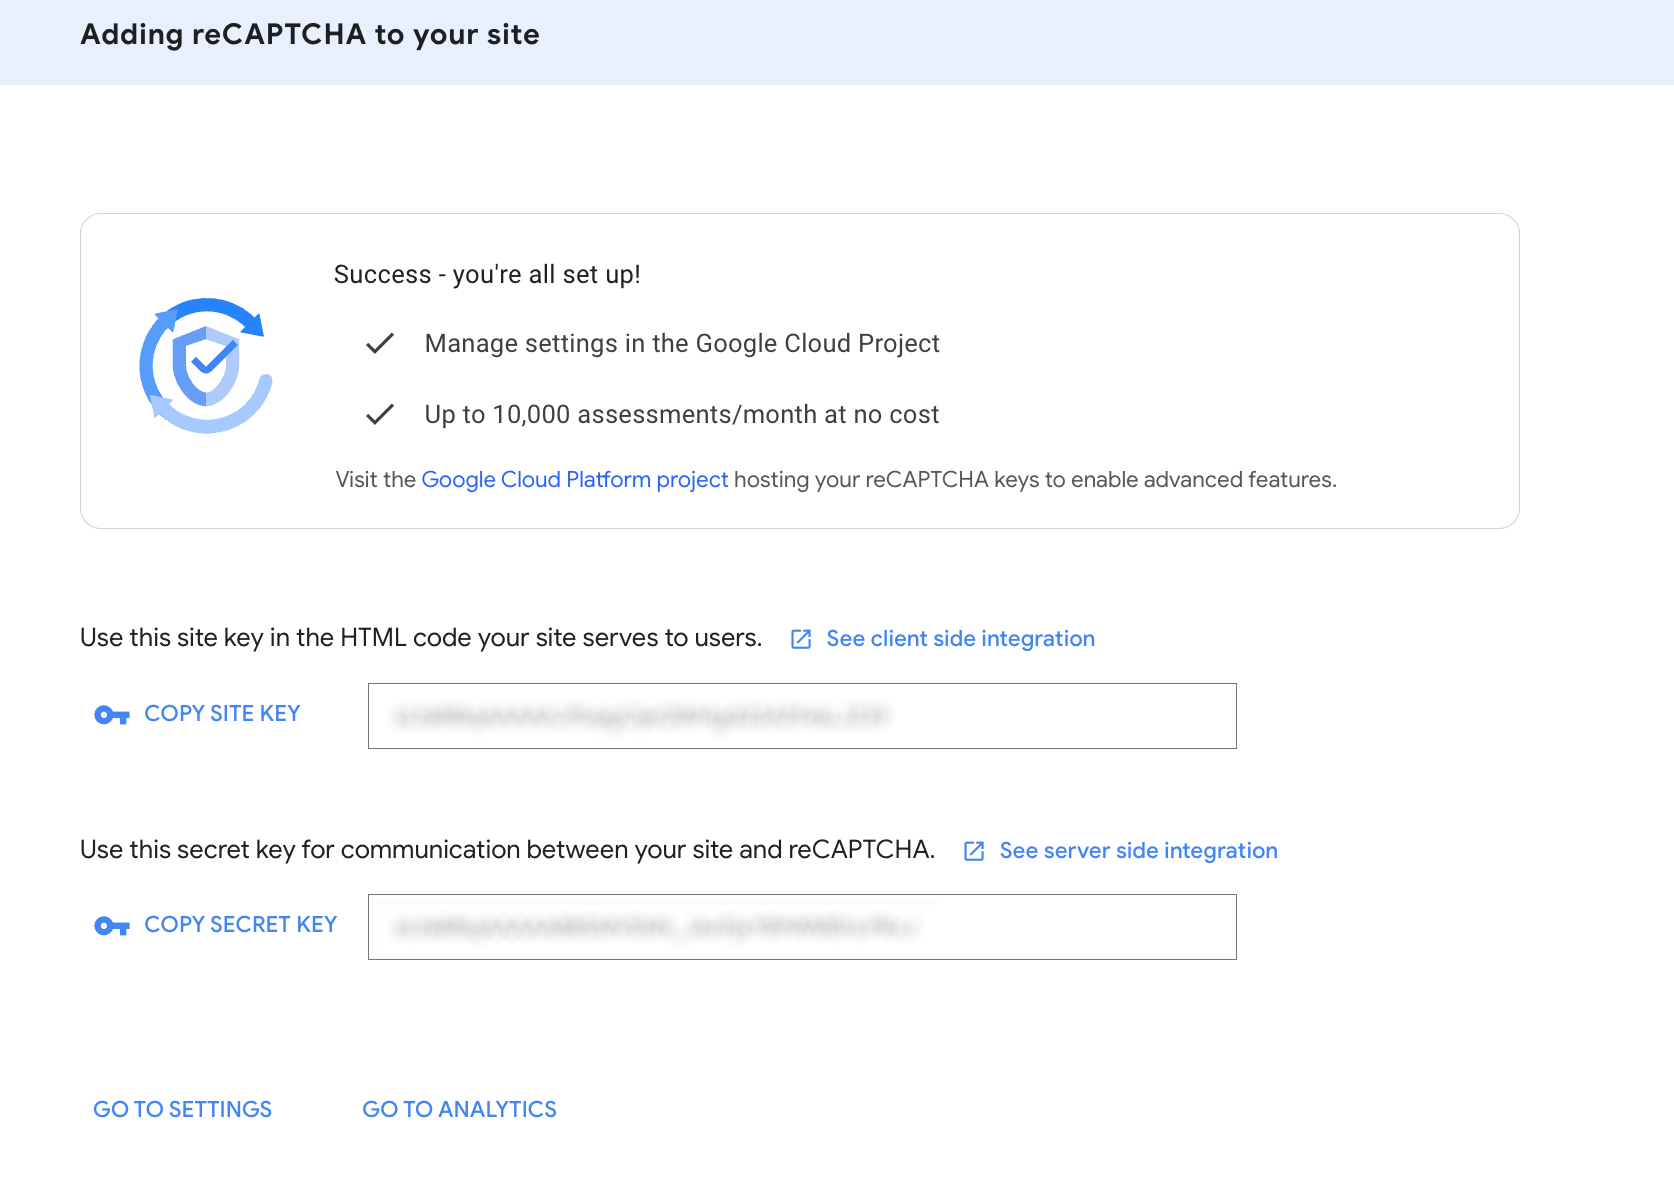
This creates two keys, a secret key that you will enter into the Firebase console, this should never be put into any page or application that can be viewed publicly, and a site key that will use in the web application.
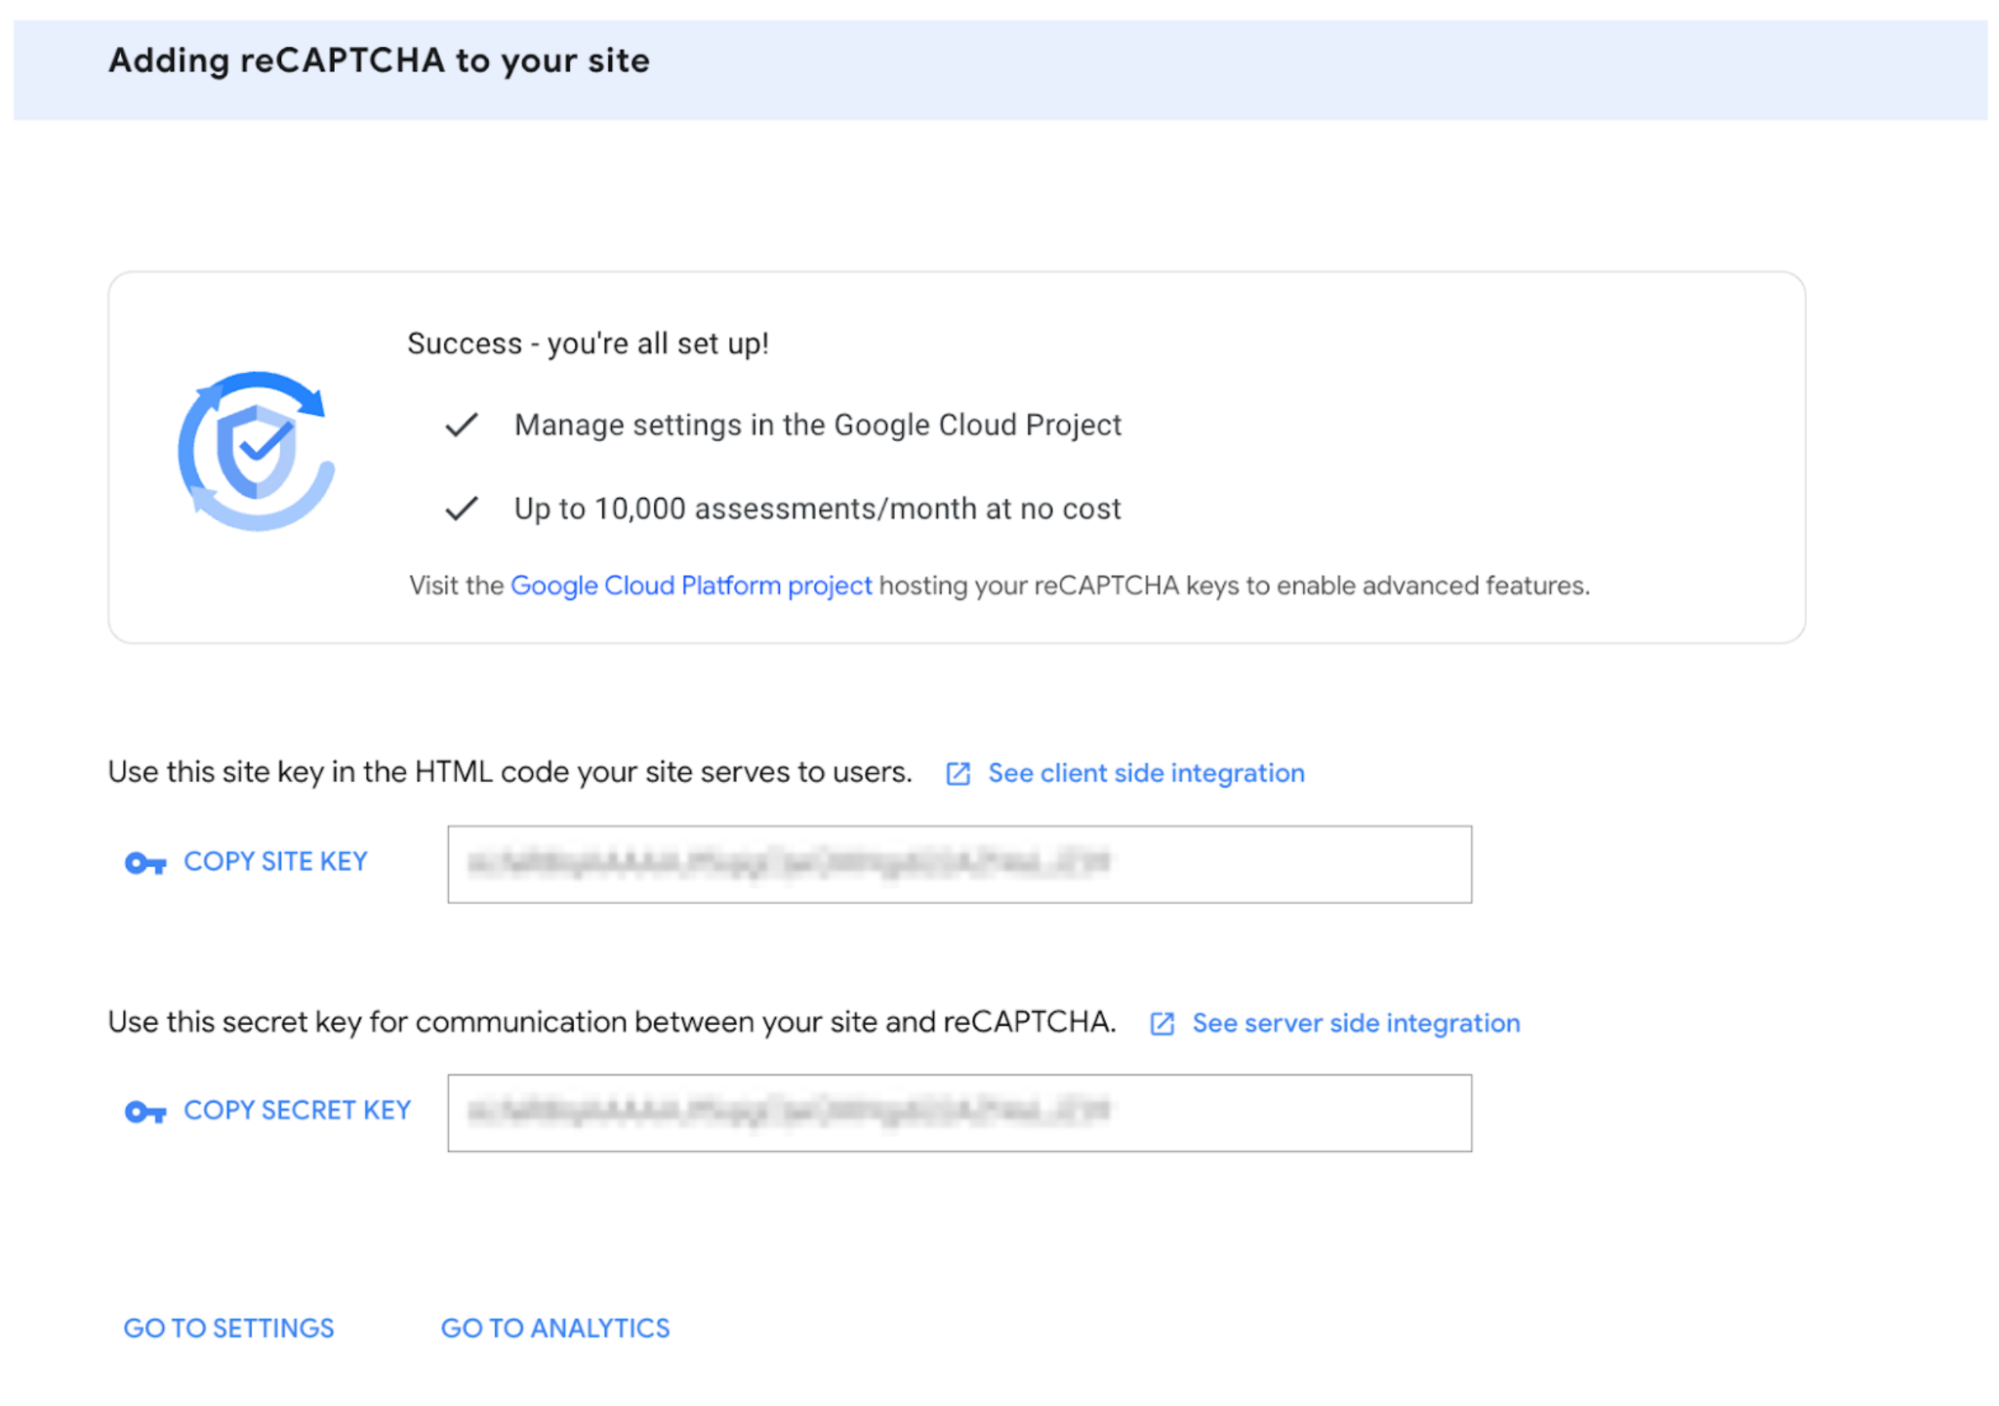
Keep this page open as you will need it. Click the copy Secret Key button and then go back to the firebase site.
8. Add reCAPTCHA to Firebase
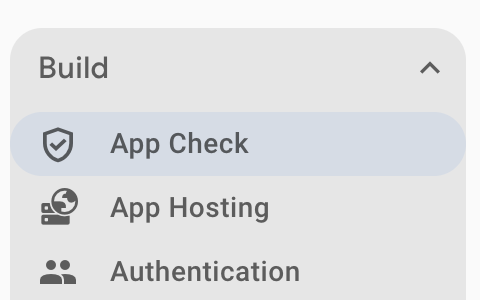
In the Firebase Admin console go to the left hand side menu items. Under the Build menu item choose App Check.
The list of services can't be enabled until there is an App registered (this was created earlier when hosting was added to the site), click get started if you need to to set this up.
Click the App tab and open up the Web app and then enter in the secret that you copied from the reCAPTCHA site and click save.
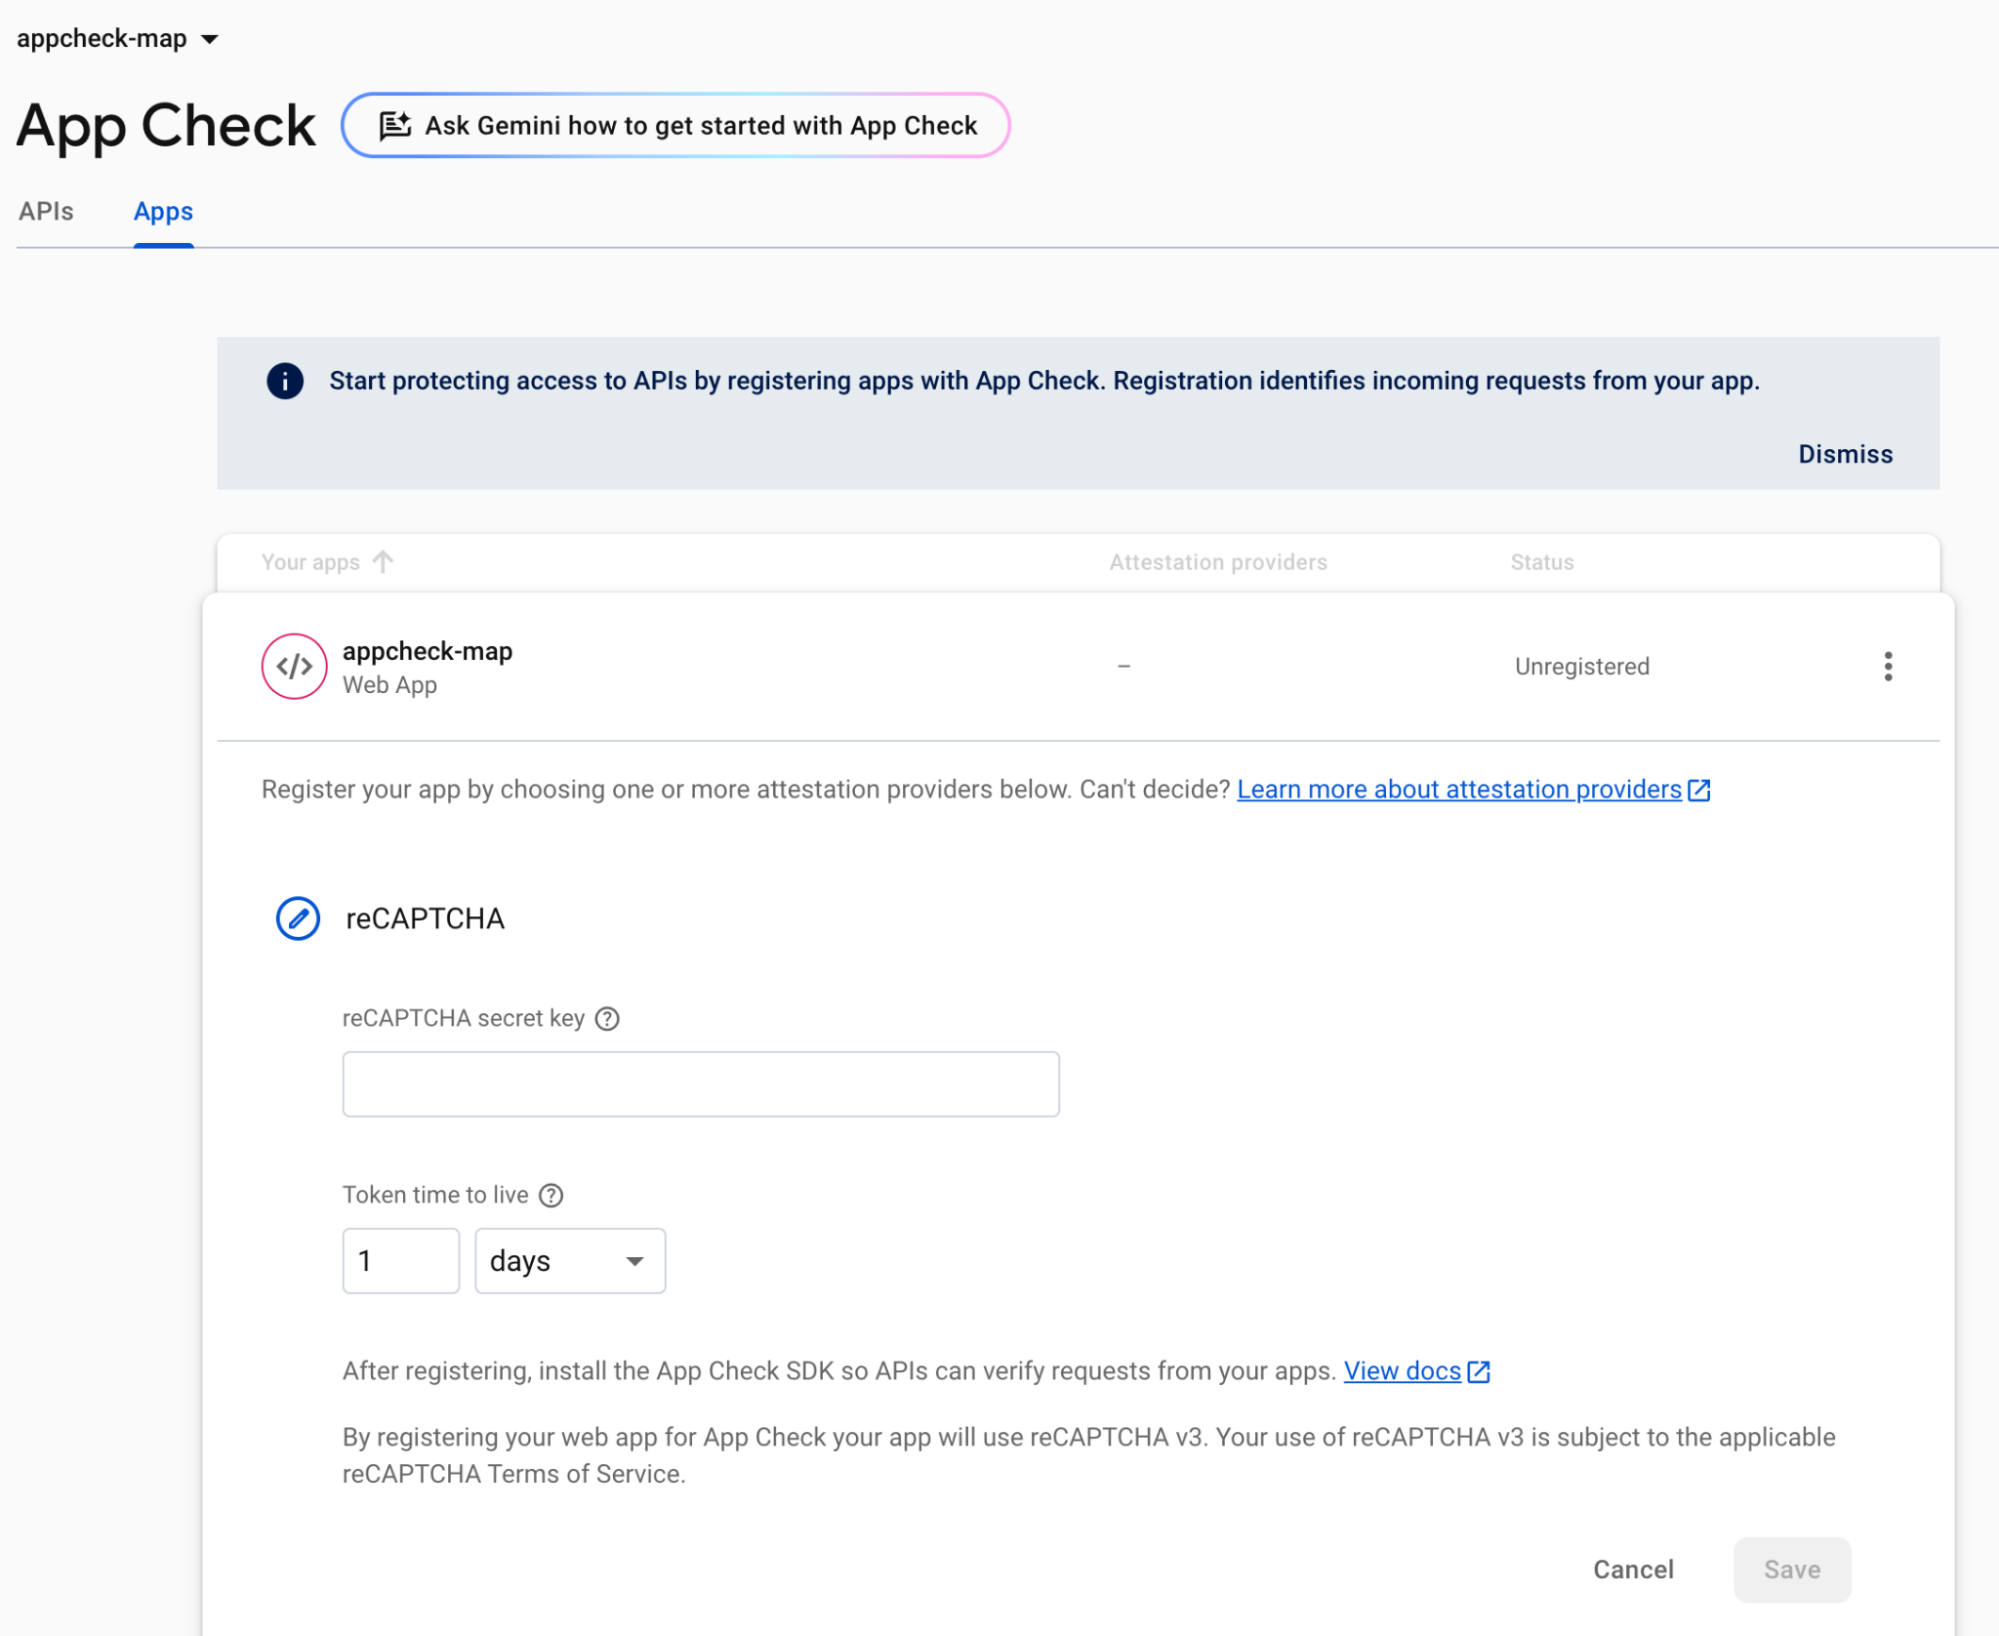
There should now be a green tick by the reCAPTCHA provider. This web application can now use reCAPTCHA to attest whether a user or site is correctly calling the service.
On the APIs Tab it should now show that the Google Maps Platform API is active but now unenforced.

You have now linked the reCAPTCHA secret with the Firebase project and can now go and add the code into the web page to match the site key to the right provider for use with the Maps application.
The site key is checked by reCAPTCHA to match the secret key, once done it confirms that the calling page is correct and App Check provides a token that can be used by subsequent calls to the Maps Javascript API, without this attestation the token won't be given and the requests can't be validate.
9. Add verification to page and deploy.
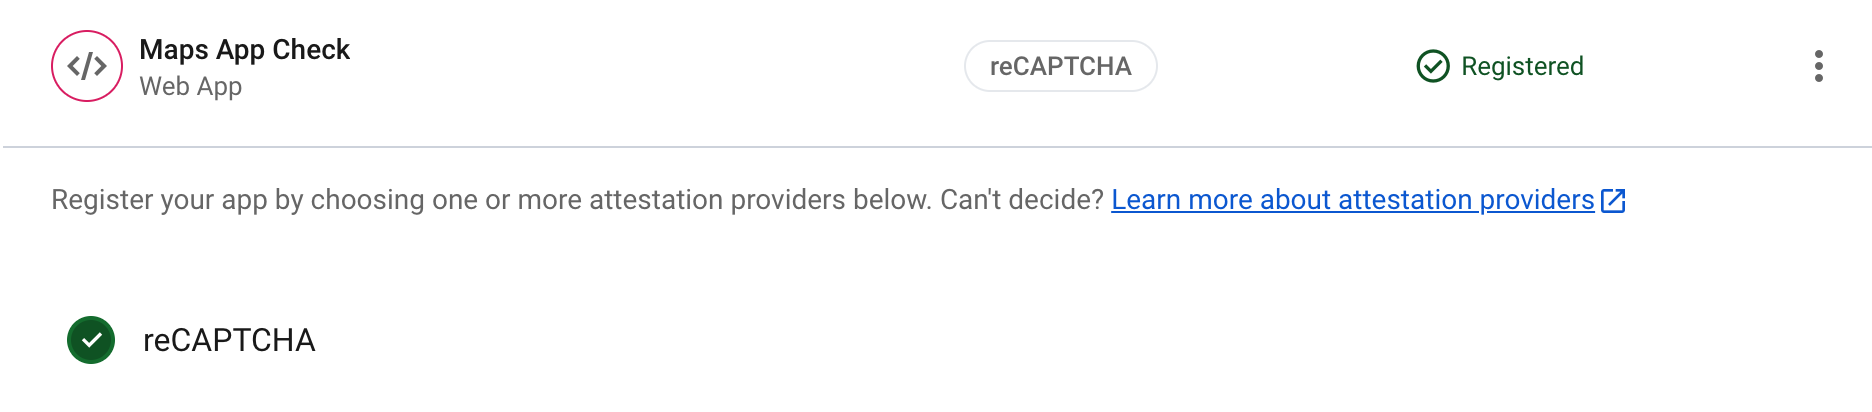
Go back to the cloud console and copy the API key that is needed to be used for the Maps API.
You can find this from the side menu in the console, under the APIs and Services side menu, under the Credentials option.
From this you can select the existing Browser key (although as noted you can use a different existing key or create a new one).

Click the show key button and copy the key from the displayed dialog window.
Go back to the Firebase Studio project where the HTML page you created was opened earlier. Now you can add the API key to the page to make the Maps API work where the page has "YOUR_API_KEY".
One you rerun the page there will now be a different error message.

This means that the development domain you are hosting the page from is not allowed (we only added the deployed domain). We will need to publish this site to the correct domain using Firebase hosting. You can get more details at the following location:
and this video
Build, test, and deploy your Firebase web apps faster in Project IDX
Further details can be found under Map Loading Errors on the Maps Javascript API site.
If you have the RefererNotAllowedMapError, you can fix this by deploying the page to the correct domain.
Go back to Firebase Studio and click the "Firebase Studio" icon (this might be on the far left or far right side depending on the option you have set up) to open up the hosting options.

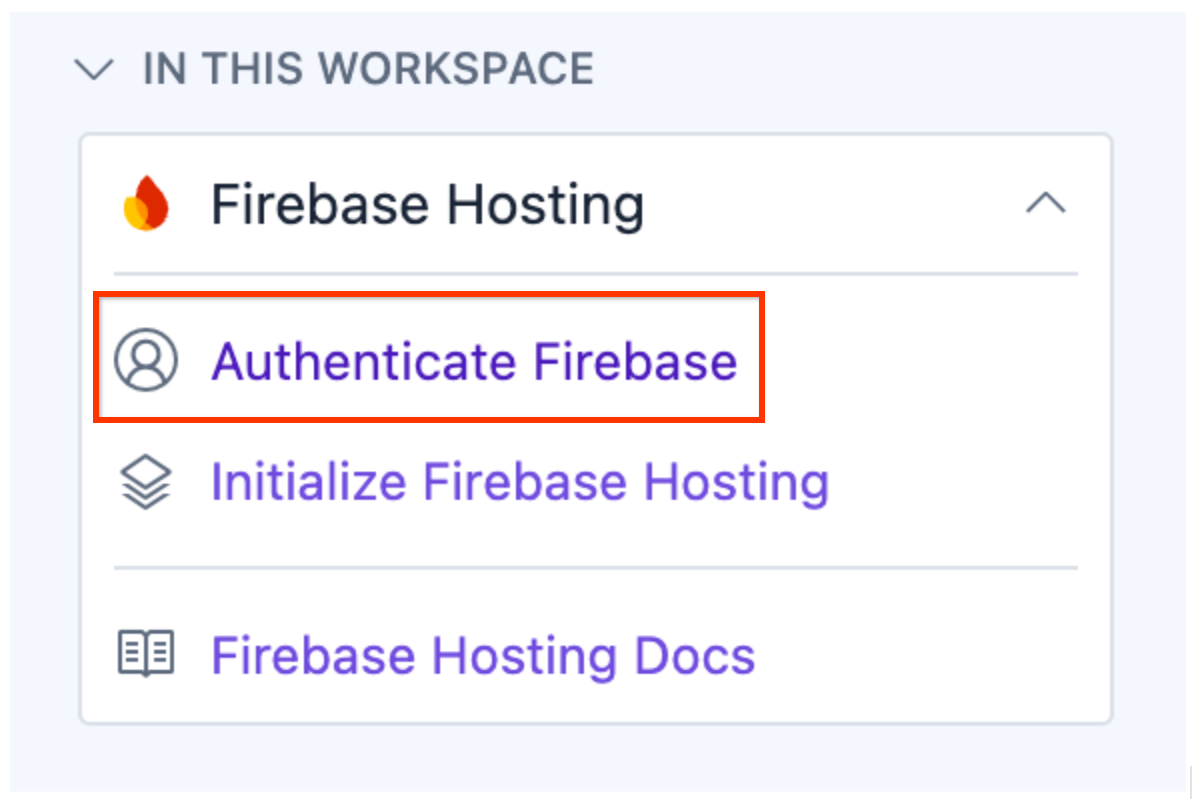
In this codelab you will next need to "Host the App with Firebase" to connect your firebase instance with the studio application.
Then click "Authenticate Firebase" to start the authentication process going , this allows your account to be able to automate the hosting with the backend from within studio.
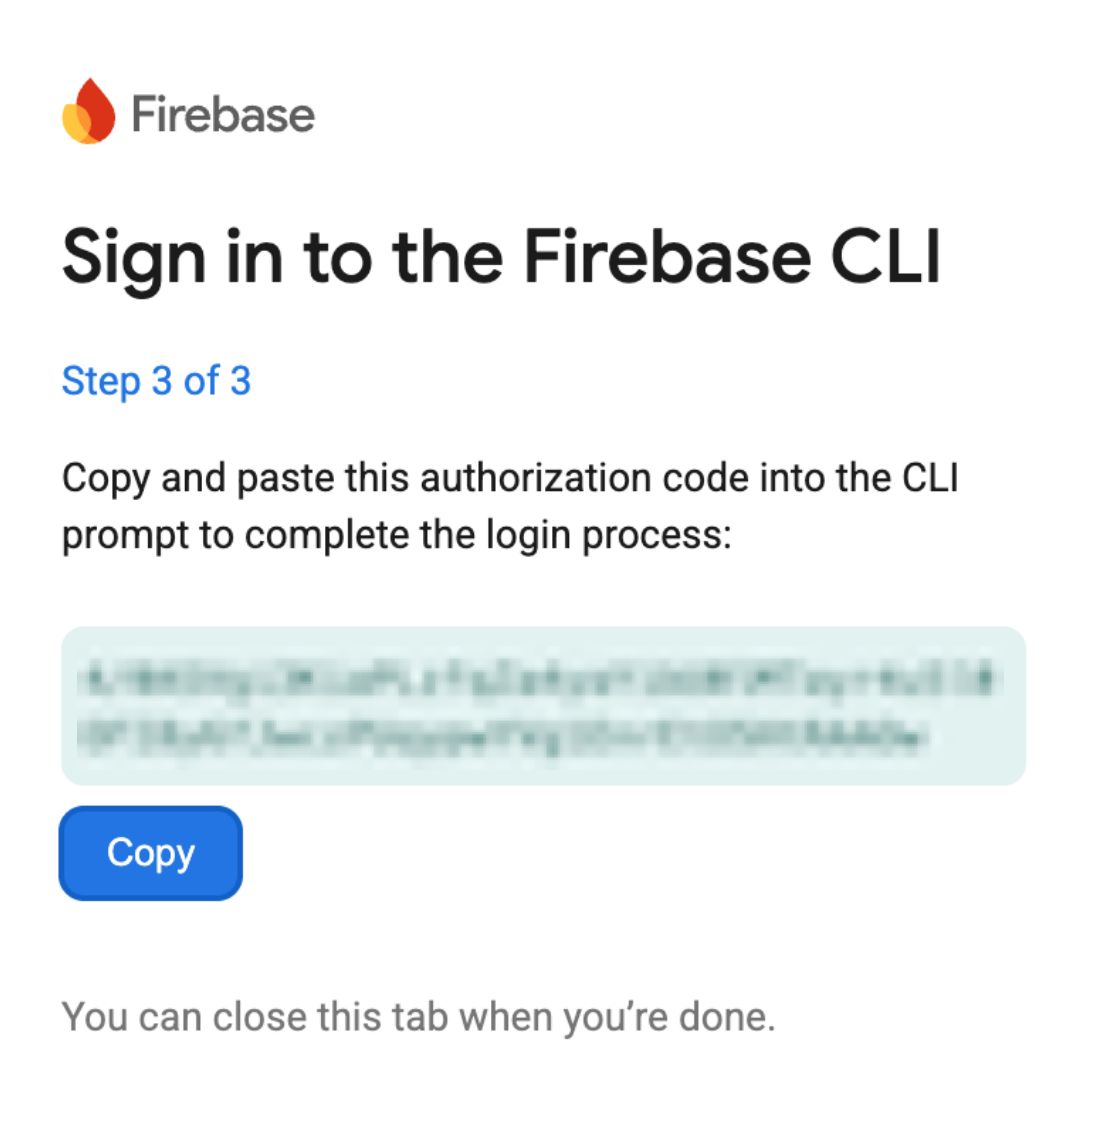
Follow the instructions in the command window to authorize the deployment.
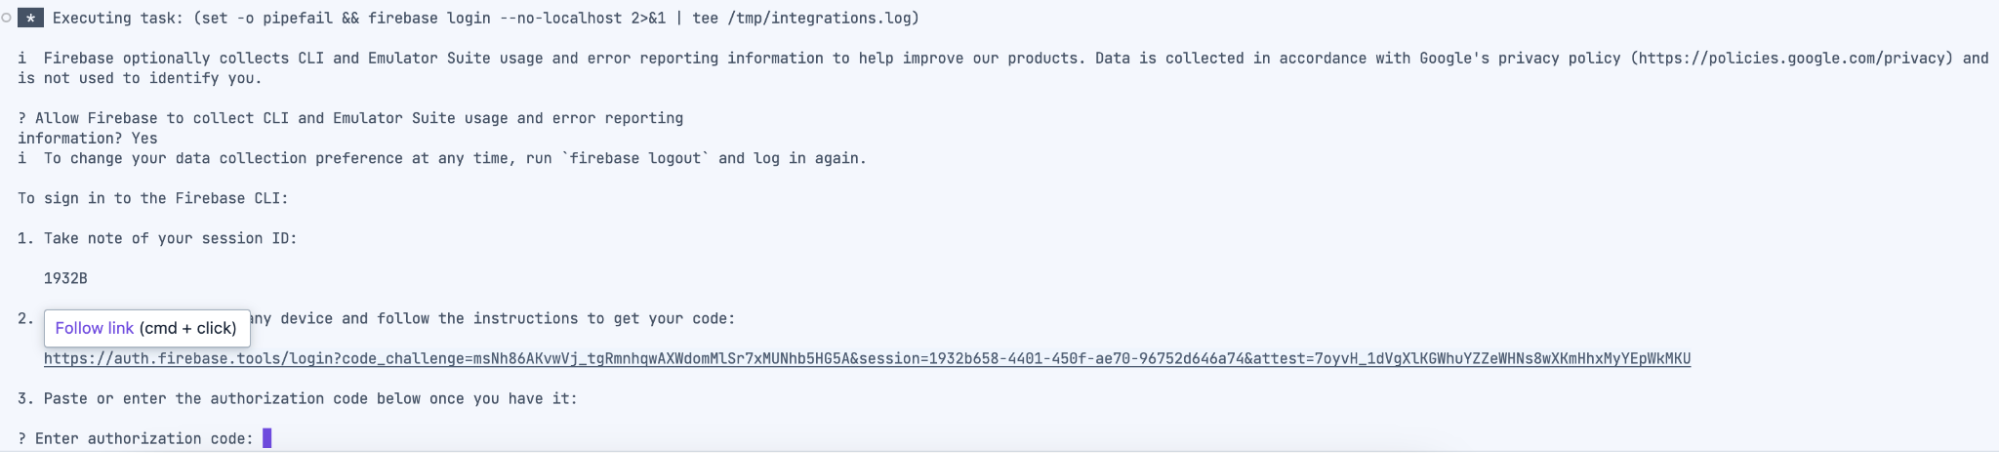
Follow the on screen instructions (including opening a new window) and copy the authorization code where it requests it and paste it into the command window in Firebase studio.
You can get more details about this process at the following location:
https://firebase.google.com/docs/studio/deploy-app
Once this has been done you can then click the "initialize firebase hosting" to link the project up to the Firebase project.
Select "Use an existing project" and select the project you created during the earlier section. Accept the rest of the defaults (your example may vary depending upon the name that you choose when setting up the project).
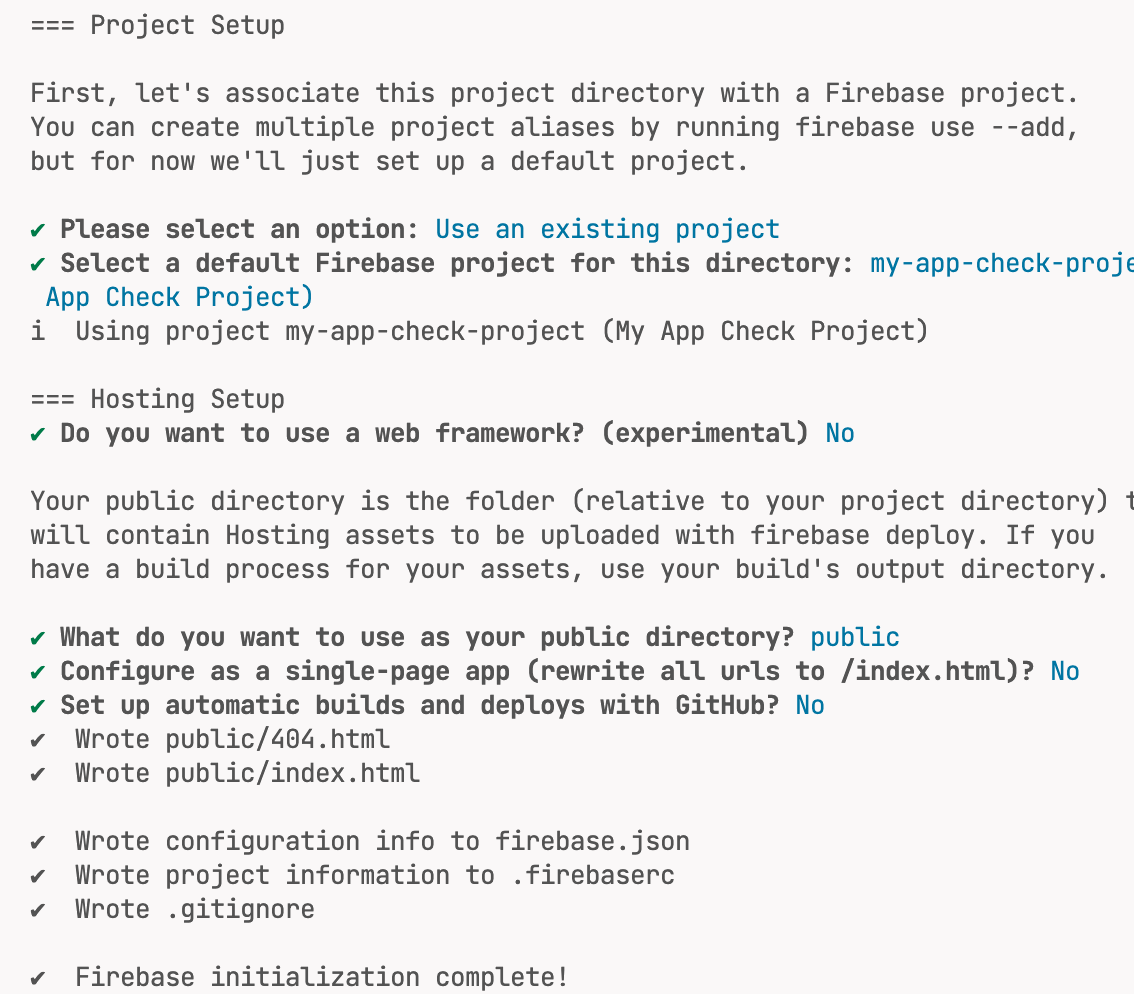
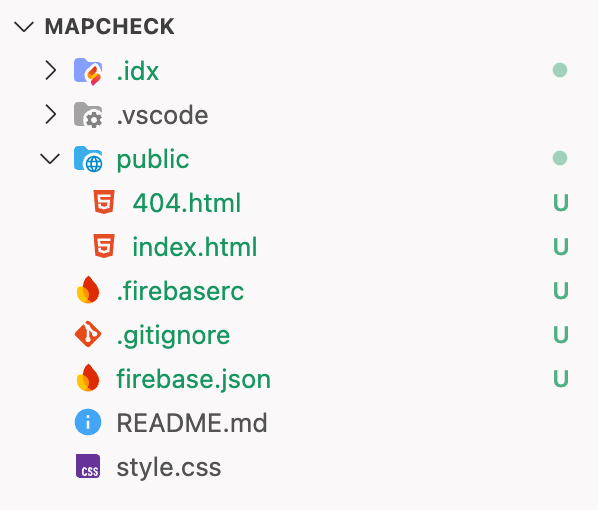
Go back to the explorer view and replace the created index.html file in the public directory with the one you already had in the root directory.
You can now go back to the Firebase Studio sidebar and deploy the site to production.

This will show the deployment steps in the console.
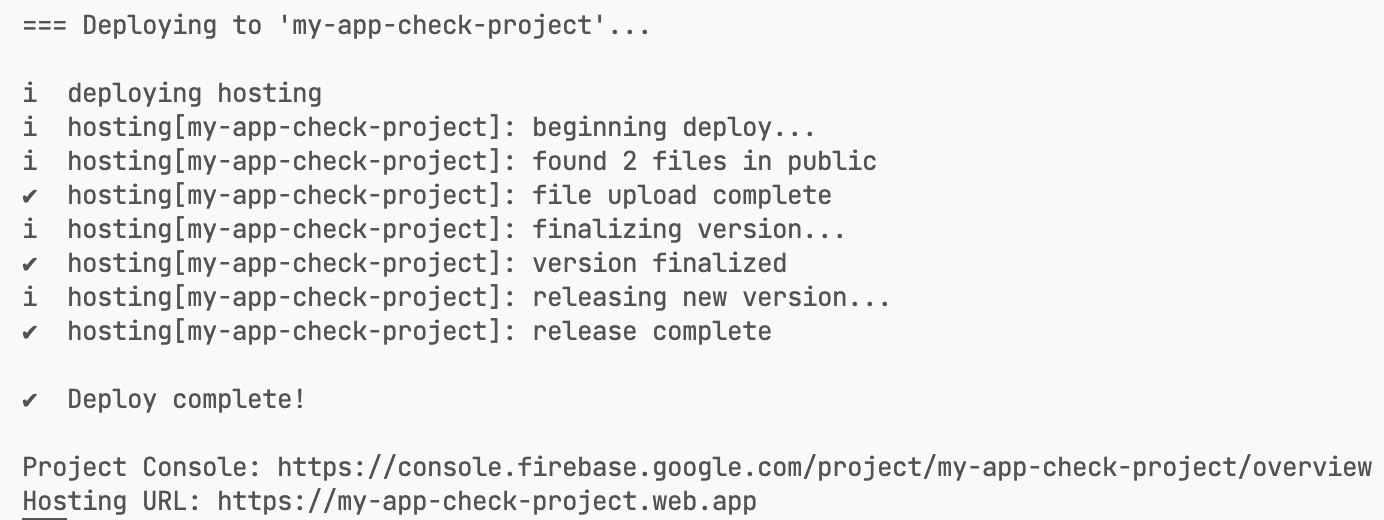
Open the deployed site from the "Hosting URL" shown (noted here as https://my-app-check-project.web.app/ but will be different for your project).
The application will now show the map on the page as the APIs work for the domains being used.
Now there is a working page, with constraints made to the type of APIs that may be used with the API key and also the domains that the API key might be used for. The next step is to lock down access to only that domain. To do this you will need to add the previously generated Firebase script section to secure the page using App Check. This will be done in the next section.
10. Secure page
Whilst the current page secures the API key to the domain, it does not add the attestation step to make sure it is being used by the correct application and by a person. The key may still be stolen and used by a malicious actor. In order to stop this the Firebase configuration, provider and site key need to be added to the page in order to get the correct token for the client.
You can also see that for the Maps API the usage is being tracked in Firebase. As it is not using any correct tokens it is making unverified requests.
The required connection details can be obtained from the Firebase project.
Get the Firebase details from the console which contains the Firebase config details. Go to the project setting page under firebase and under the CDN section of the app grab the code section for the CDN setup (the simplest).
In the Firebase project, choose the cog to show the project settings.
Which opens the following page which contains the details in the general section , under your apps.
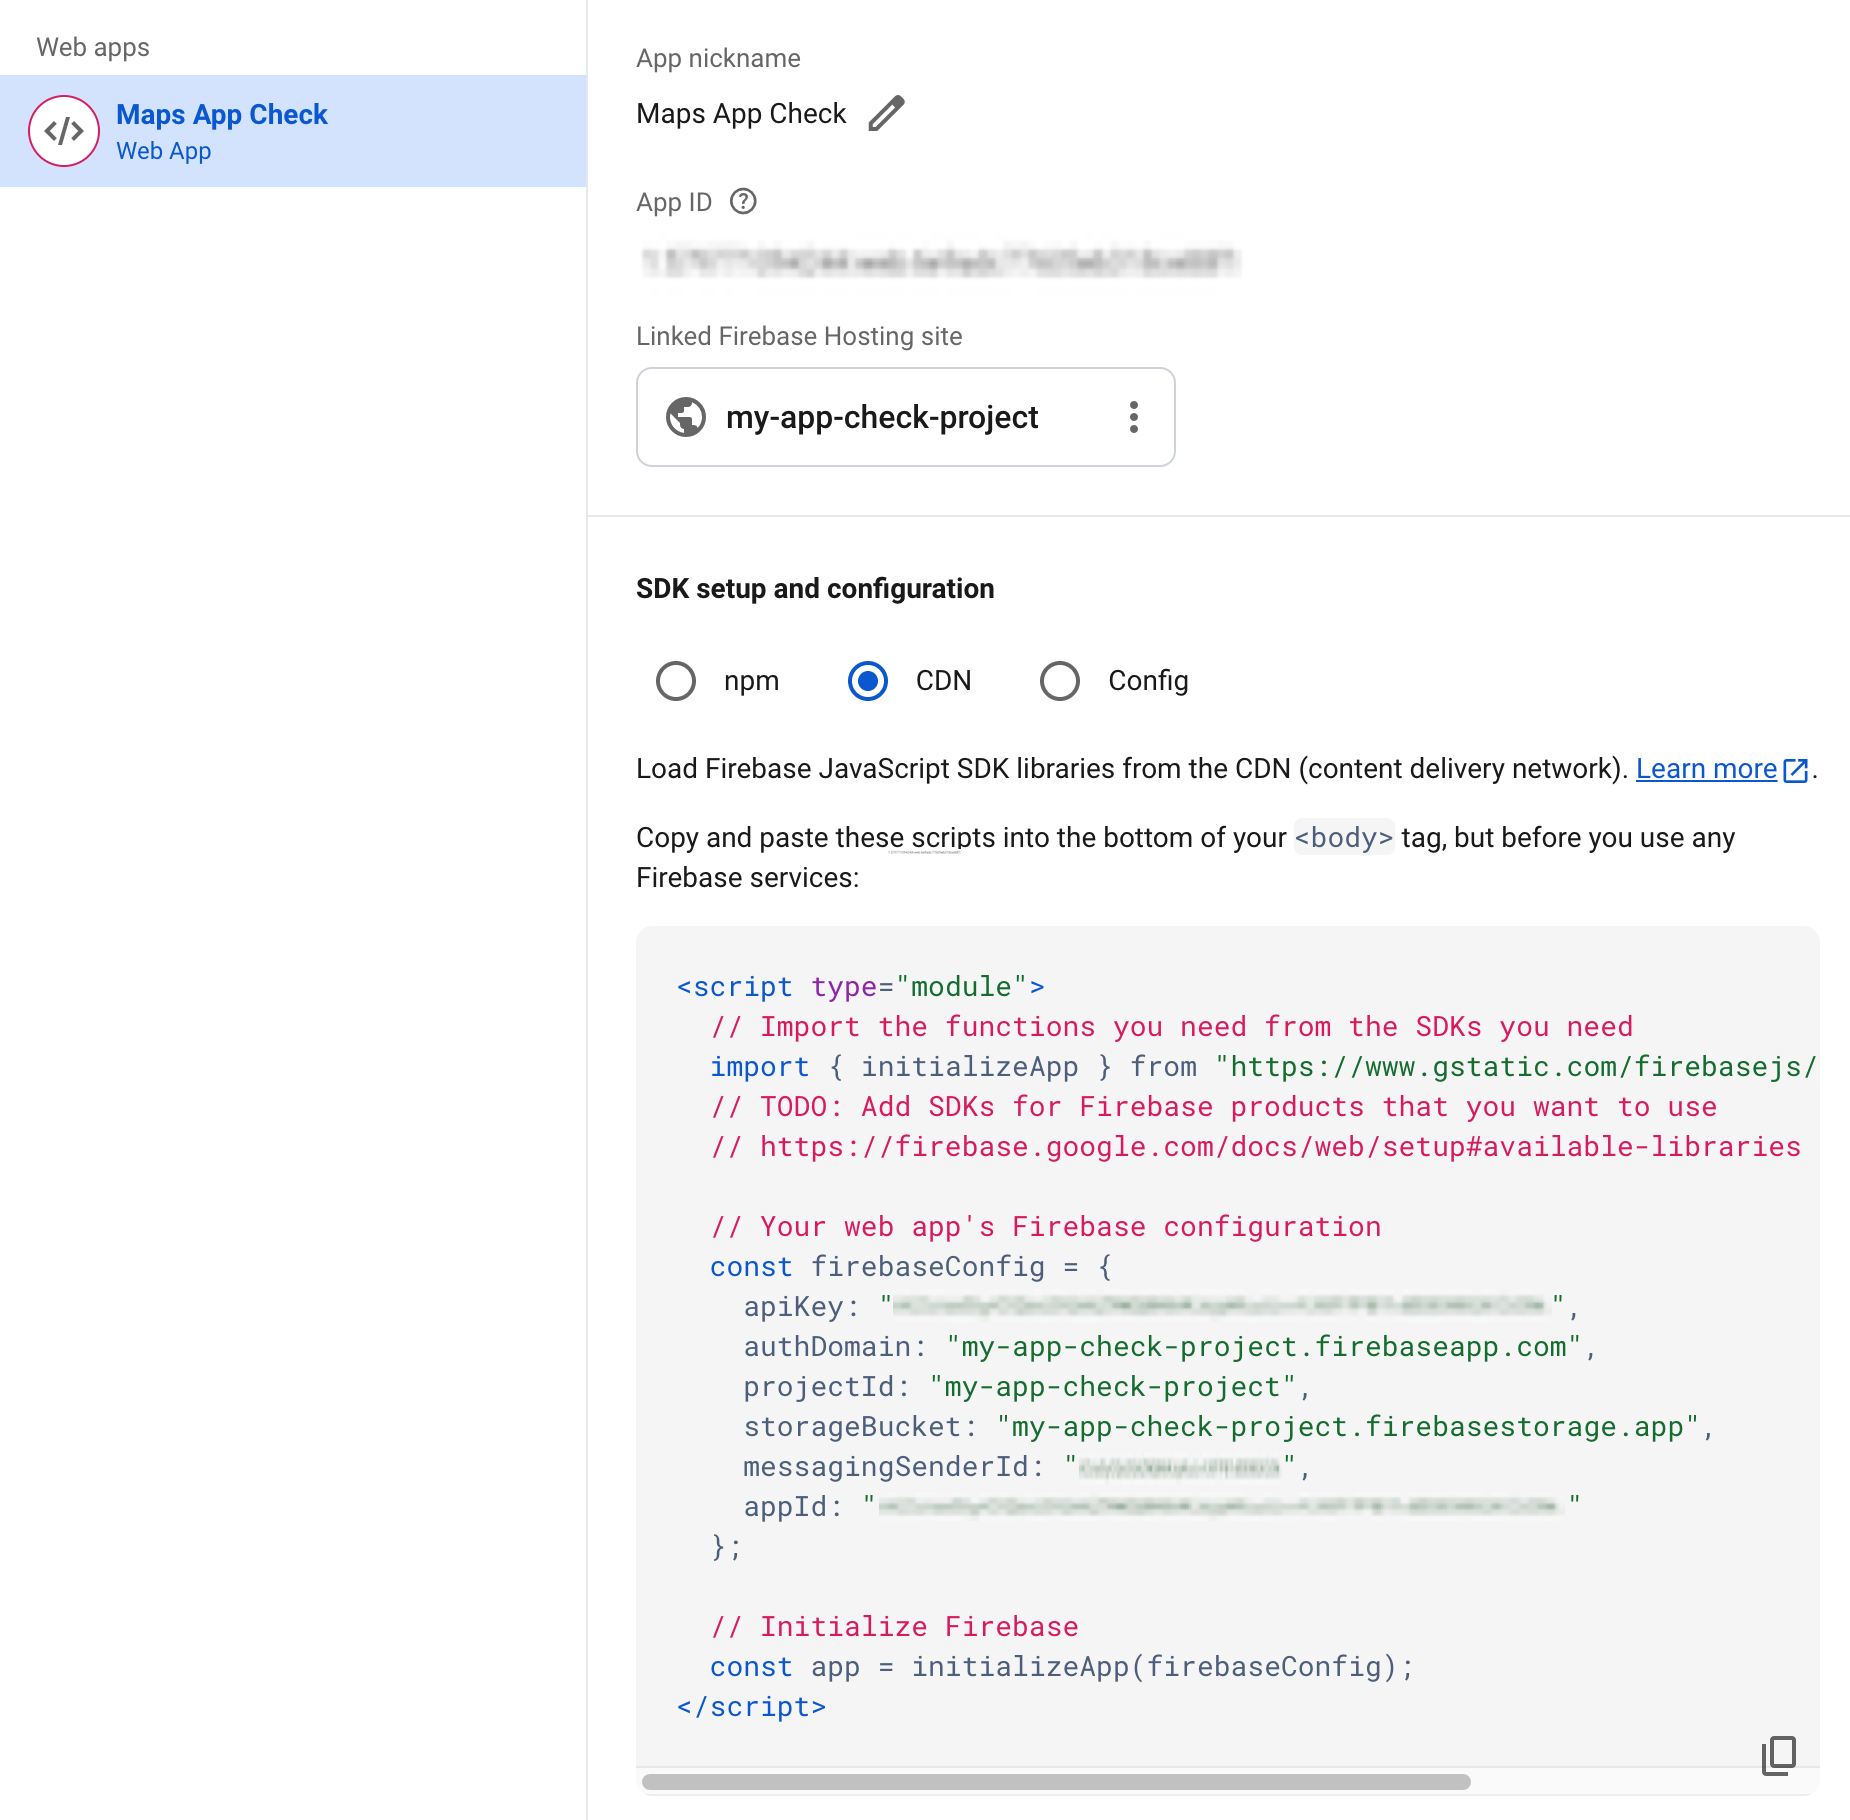
Copy this into the Firebase Studio page (public/index.html) that contains the map and is hosted. Which will look like the following (with your details and not exactly the ones in the this file):
<!doctype html>
<html>

<head>
 <title>Secure Map</title>
 <style>
   #map {
     height: 100%;
   }

   html,
   body {
     height: 100%;
     margin: 0;
     padding: 0;
     font-family: Arial, Helvetica, sans-serif;
   }
 </style>
</head>

<body>
 <h3>App Check Security Demo</h3>
 <!--The div element for the map -->
 <div id="map"></div>
 <script>
   (g => { var h, a, k, p = "The Google Maps JavaScript API", c = "google", l = "importLibrary", q = "__ib__", m = document, b = window; b = b[c] || (b[c] = {}); var d = b.maps || (b.maps = {}), r = new Set, e = new URLSearchParams, u = () => h || (h = new Promise(async (f, n) => { await (a = m.createElement("script")); e.set("libraries", [...r] + ""); for (k in g) e.set(k.replace(/[A-Z]/g, t => "_" + t[0].toLowerCase()), g[k]); e.set("callback", c + ".maps." + q); a.src = `https://maps.${c}apis.com/maps/api/js?` + e; d[q] = f; a.onerror = () => h = n(Error(p + " could not load.")); a.nonce = m.querySelector("script[nonce]")?.nonce || ""; m.head.append(a) })); d[l] ? console.warn(p + " only loads once. Ignoring:", g) : d[l] = (f, ...n) => r.add(f) && u().then(() => d[l](f, ...n)) })({
     key: "YOUR_API_KEY",
     v: "weekly",
     // Use the 'v' parameter to indicate the version to use (weekly, beta, alpha, etc.).
     // Add other bootstrap parameters as needed, using camel case.
   });
 </script>
 <script type="module">
   // Import the functions you need from the SDKs you need
   import { initializeApp } from "https://www.gstatic.com/firebasejs/12.2.1/firebase-app.js";

   const firebaseConfig = {
     apiKey: "YOUR_API_KEY",
     authDomain: "appcheck-map.firebaseapp.com",
     projectId: "appcheck-map",
     storageBucket: "appcheck-map.firebasestorage.app",
     messagingSenderId: "YOUR_SENDER_KEY",
     appId: "YOUR_APP_ID"
   };
    // Initialize Firebase
   const app = initializeApp(firebaseConfig);

   let map;
   async function initMap() {
     const { Map } = await google.maps.importLibrary("maps");
     map = new Map(document.getElementById("map"), {
       center: { lat: 51.5208, lng: -0.0977 },
       zoom: 17,
     });
   }
   initMap();
 </script>
</body>

</html>
Now Firebase has been added into our application, the calls to the reCAPTCHA library using the provided site key that you got earlier from the reCAPTCHA site (from before).
You can get more details about adding these sections at the following Maps documentation page:
https://developers.google.com/maps/documentation/javascript/maps-app-check
Add the App Check library into the page, then load the functions to initialize app check with the firebase config, and get the token using the ReCaptchaV3Provider.
First import the App Check library:
       import {
           getToken,
           initializeAppCheck,
           ReCaptchaV3Provider,
       } from "https://www.gstatic.com/firebasejs/12.2.1/firebase-app-check.js";
Next you add the code to initialize App Check with the Firebase config and the reCAPTCHA provider using the site token.
       // Get App Check Token
       const appCheck = initializeAppCheck(app, {
           provider: new ReCaptchaV3Provider('<INSERT SITE KEY>'),
           isTokenAutoRefreshEnabled: true,
       });
Finally attach a function to the Map Control using the settings function of the Maps Core library to get a token. This will make the token requests as required by the map control depending on the token life length.
       const { Settings } = await google.maps.importLibrary('core');
     Settings.getInstance().fetchAppCheckToken = () =>
           getToken(appCheck, /* forceRefresh = */ false);
The full file is as follows:
<!doctype html>
<html>

<head>
 <title>Secure Map</title>
 <style>
   #map {
     height: 100%;
   }

   html,
   body {
     height: 100%;
     margin: 0;
     padding: 0;
     font-family: Arial, Helvetica, sans-serif;
   }
 </style>
</head>

<body>
 <h3>App Check Security Demo</h3>
 <!--The div element for the map -->
 <div id="map"></div>
 <script>
   (g => { var h, a, k, p = "The Google Maps JavaScript API", c = "google", l = "importLibrary", q = "__ib__", m = document, b = window; b = b[c] || (b[c] = {}); var d = b.maps || (b.maps = {}), r = new Set, e = new URLSearchParams, u = () => h || (h = new Promise(async (f, n) => { await (a = m.createElement("script")); e.set("libraries", [...r] + ""); for (k in g) e.set(k.replace(/[A-Z]/g, t => "_" + t[0].toLowerCase()), g[k]); e.set("callback", c + ".maps." + q); a.src = `https://maps.${c}apis.com/maps/api/js?` + e; d[q] = f; a.onerror = () => h = n(Error(p + " could not load.")); a.nonce = m.querySelector("script[nonce]")?.nonce || ""; m.head.append(a) })); d[l] ? console.warn(p + " only loads once. Ignoring:", g) : d[l] = (f, ...n) => r.add(f) && u().then(() => d[l](f, ...n)) })({
     key: "YOUR_API_KEY",
     v: "weekly",
     // Use the 'v' parameter to indicate the version to use (weekly, beta, alpha, etc.).
     // Add other bootstrap parameters as needed, using camel case.
   });
 </script>
 <script type="module">
   import { initializeApp } from "https://www.gstatic.com/firebasejs/12.2.1/firebase-app.js";

   import {
     getToken,
     initializeAppCheck,
     ReCaptchaV3Provider,
   } from "https://www.gstatic.com/firebasejs/12.2.1/firebase-app-check.js";

   const firebaseConfig = {
     apiKey: "YOUR_API_KEY",
     authDomain: "appcheck-map.firebaseapp.com",
     projectId: "appcheck-map",
     storageBucket: "appcheck-map.firebasestorage.app",
     messagingSenderId: "YOUR_SENDER_KEY",
     appId: "YOUR_APP_ID"
   };

   // Initialize Firebase
   const app = initializeApp(firebaseConfig);

   // Get App Check Token
   const appCheck = initializeAppCheck(app, {
     provider: new ReCaptchaV3Provider('<INSERT SITE KEY>'),
     isTokenAutoRefreshEnabled: true,
   });

   let map;
   async function initMap() {
     const { Map } = await google.maps.importLibrary("maps");

     const { Settings } = await google.maps.importLibrary('core');
     Settings.getInstance().fetchAppCheckToken = () =>
       getToken(appCheck, /* forceRefresh = */ false);

     map = new Map(document.getElementById("map"), {
       center: { lat: 51.5208, lng: -0.0977 },
       zoom: 17,
     });
   }
   initMap();
 </script>
</body>

</html>
Deploy this to the Firebase site using Firebase Studio and run the page.
11. Enforce monitoring
Now the page is set up, when it is run you can now see that it is being checked. Go back to the Firebase console and open the App Check section again. App Check should now be monitoring the Maps Javascript API.

Opening the window will now show that the clients are making requests and that the attestation is working (shown by dark blue "verified" requests on the graph). Other requests will show calls during the development phase before the verification has been completed.
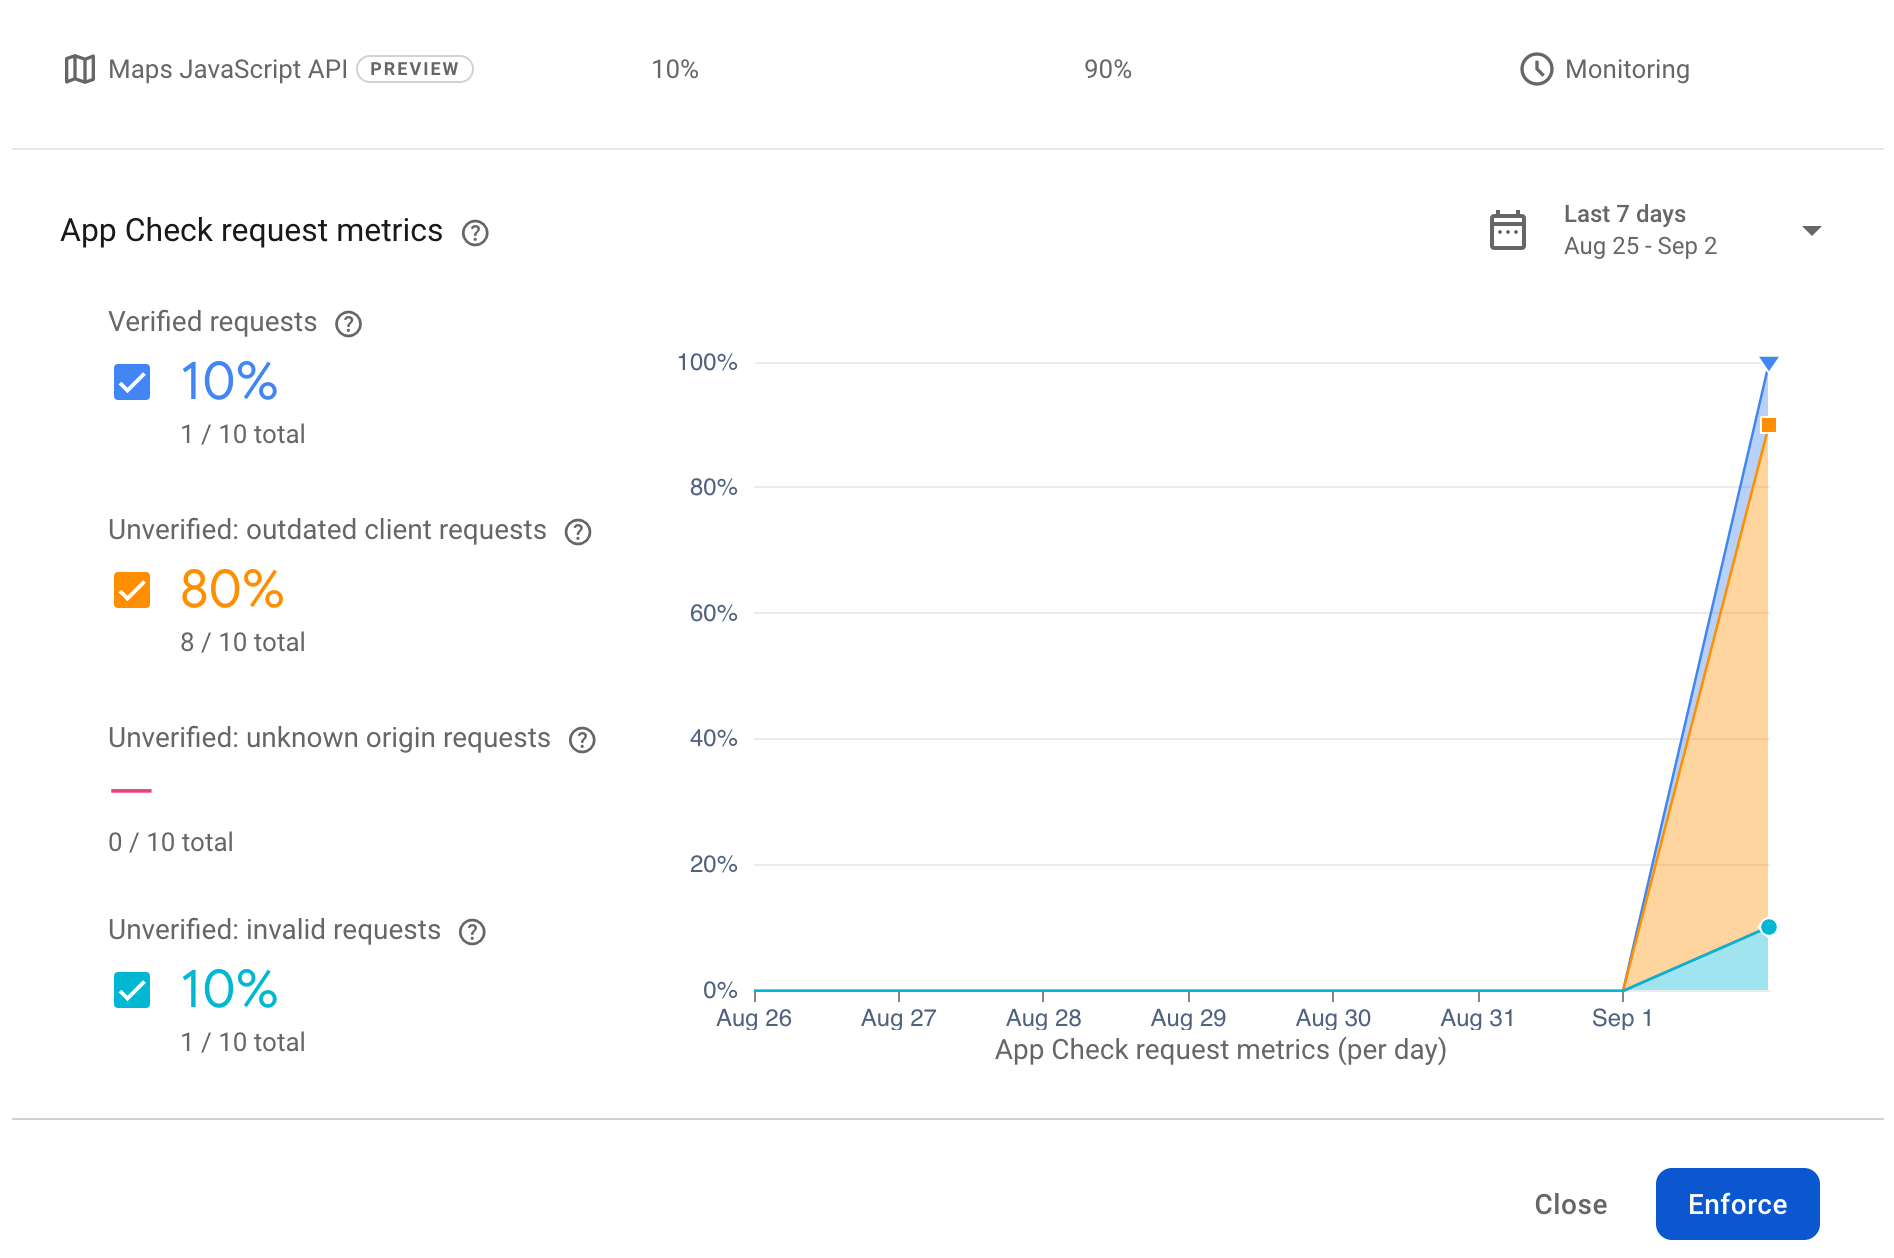
Now that the clients can be seen to be working, enforcement can be enabled on the site to make sure the API keys cannot be used from an invalid client application. Click the Enforce button to start the enforcement.
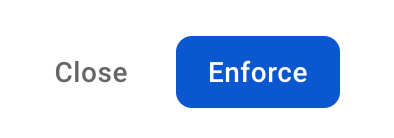
Clicking this will give you a large warning sign showing that this will lock down your application, in the real world you would only do this when you know that all of your clients have the right keys and are working, otherwise your users might not be able to get access to the site.
It can also take some time to enforce. Which is noted on screen, if you test for enforcement straight away it might not have had time to propagate.

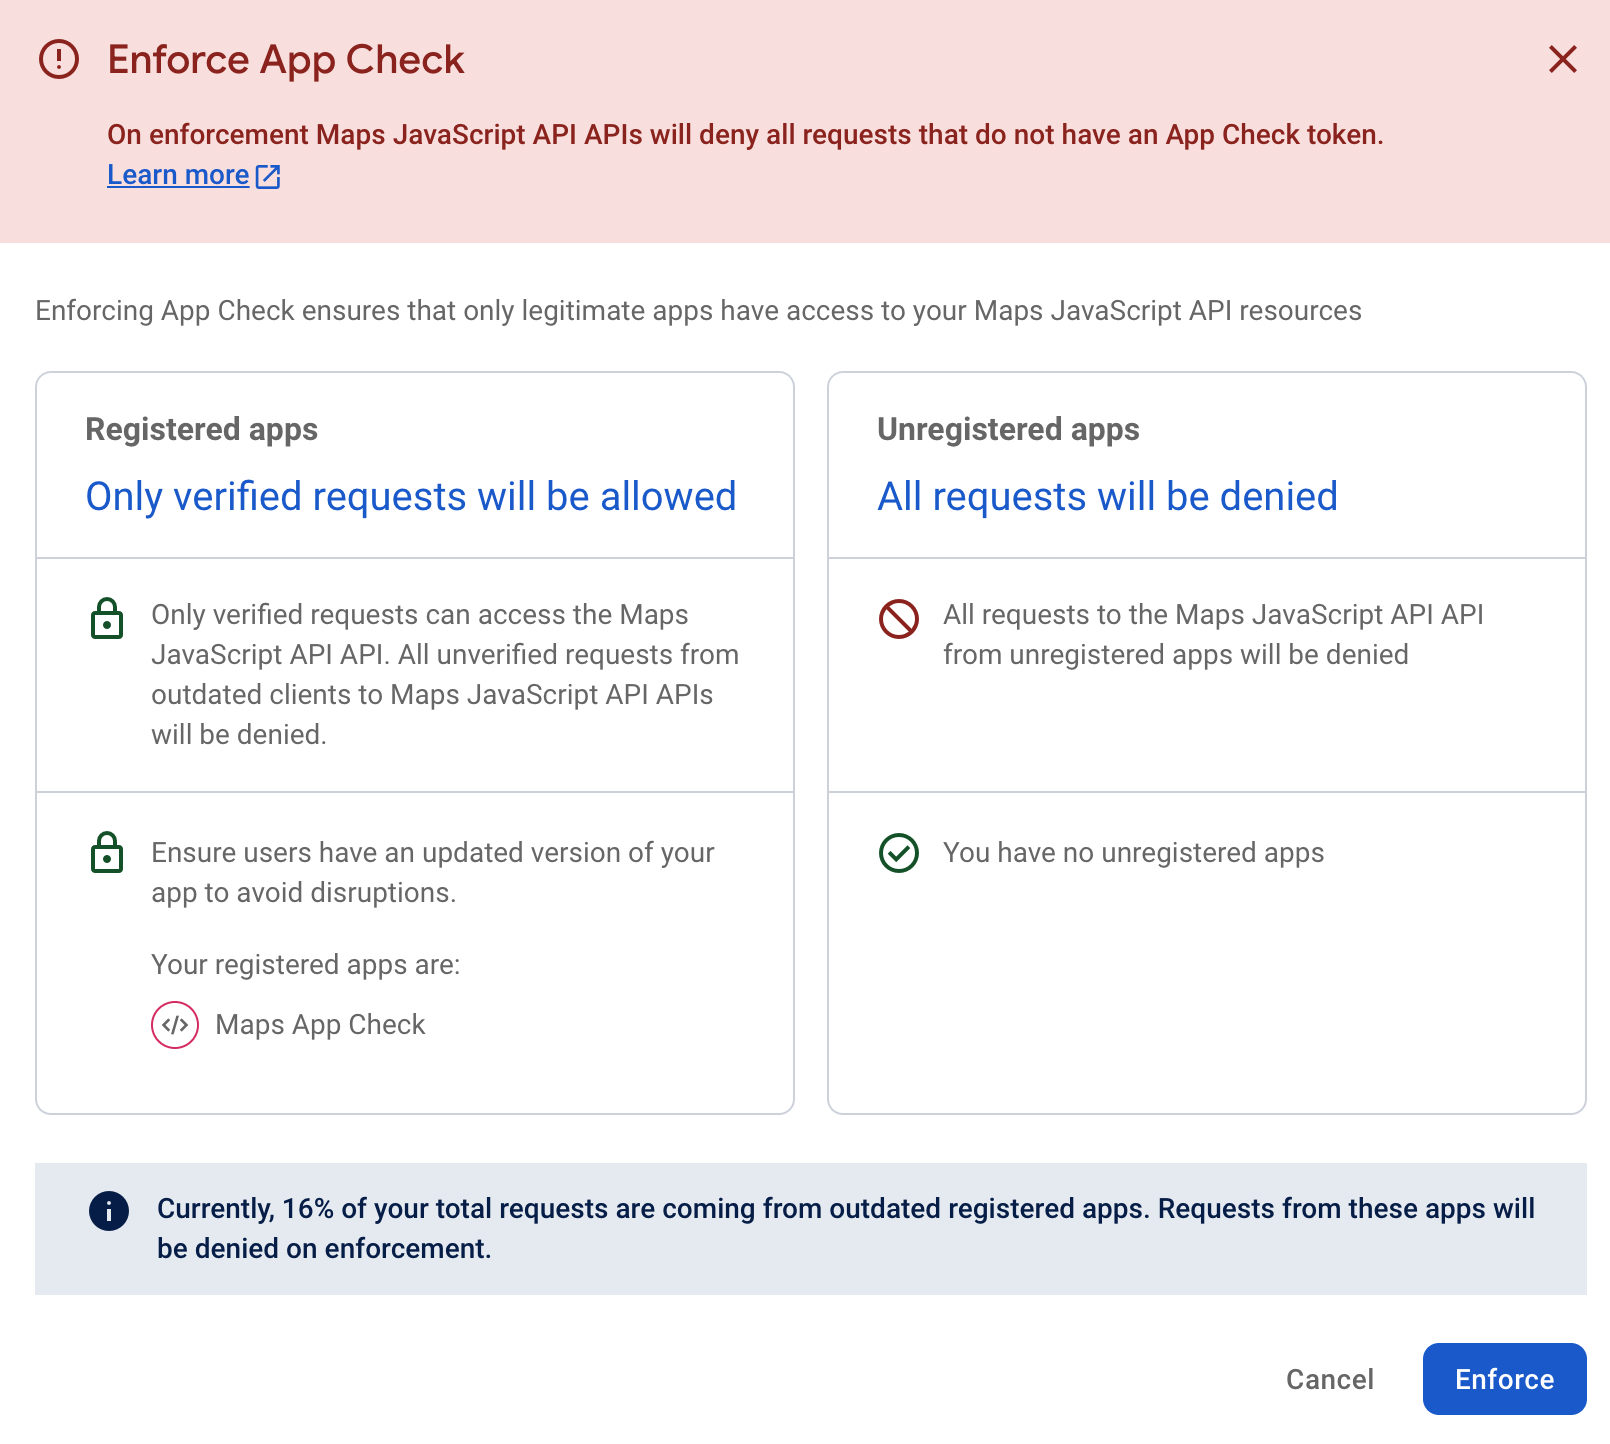
When making the request for the page, you should be able to see it working as before, nothing has actually change in the site.
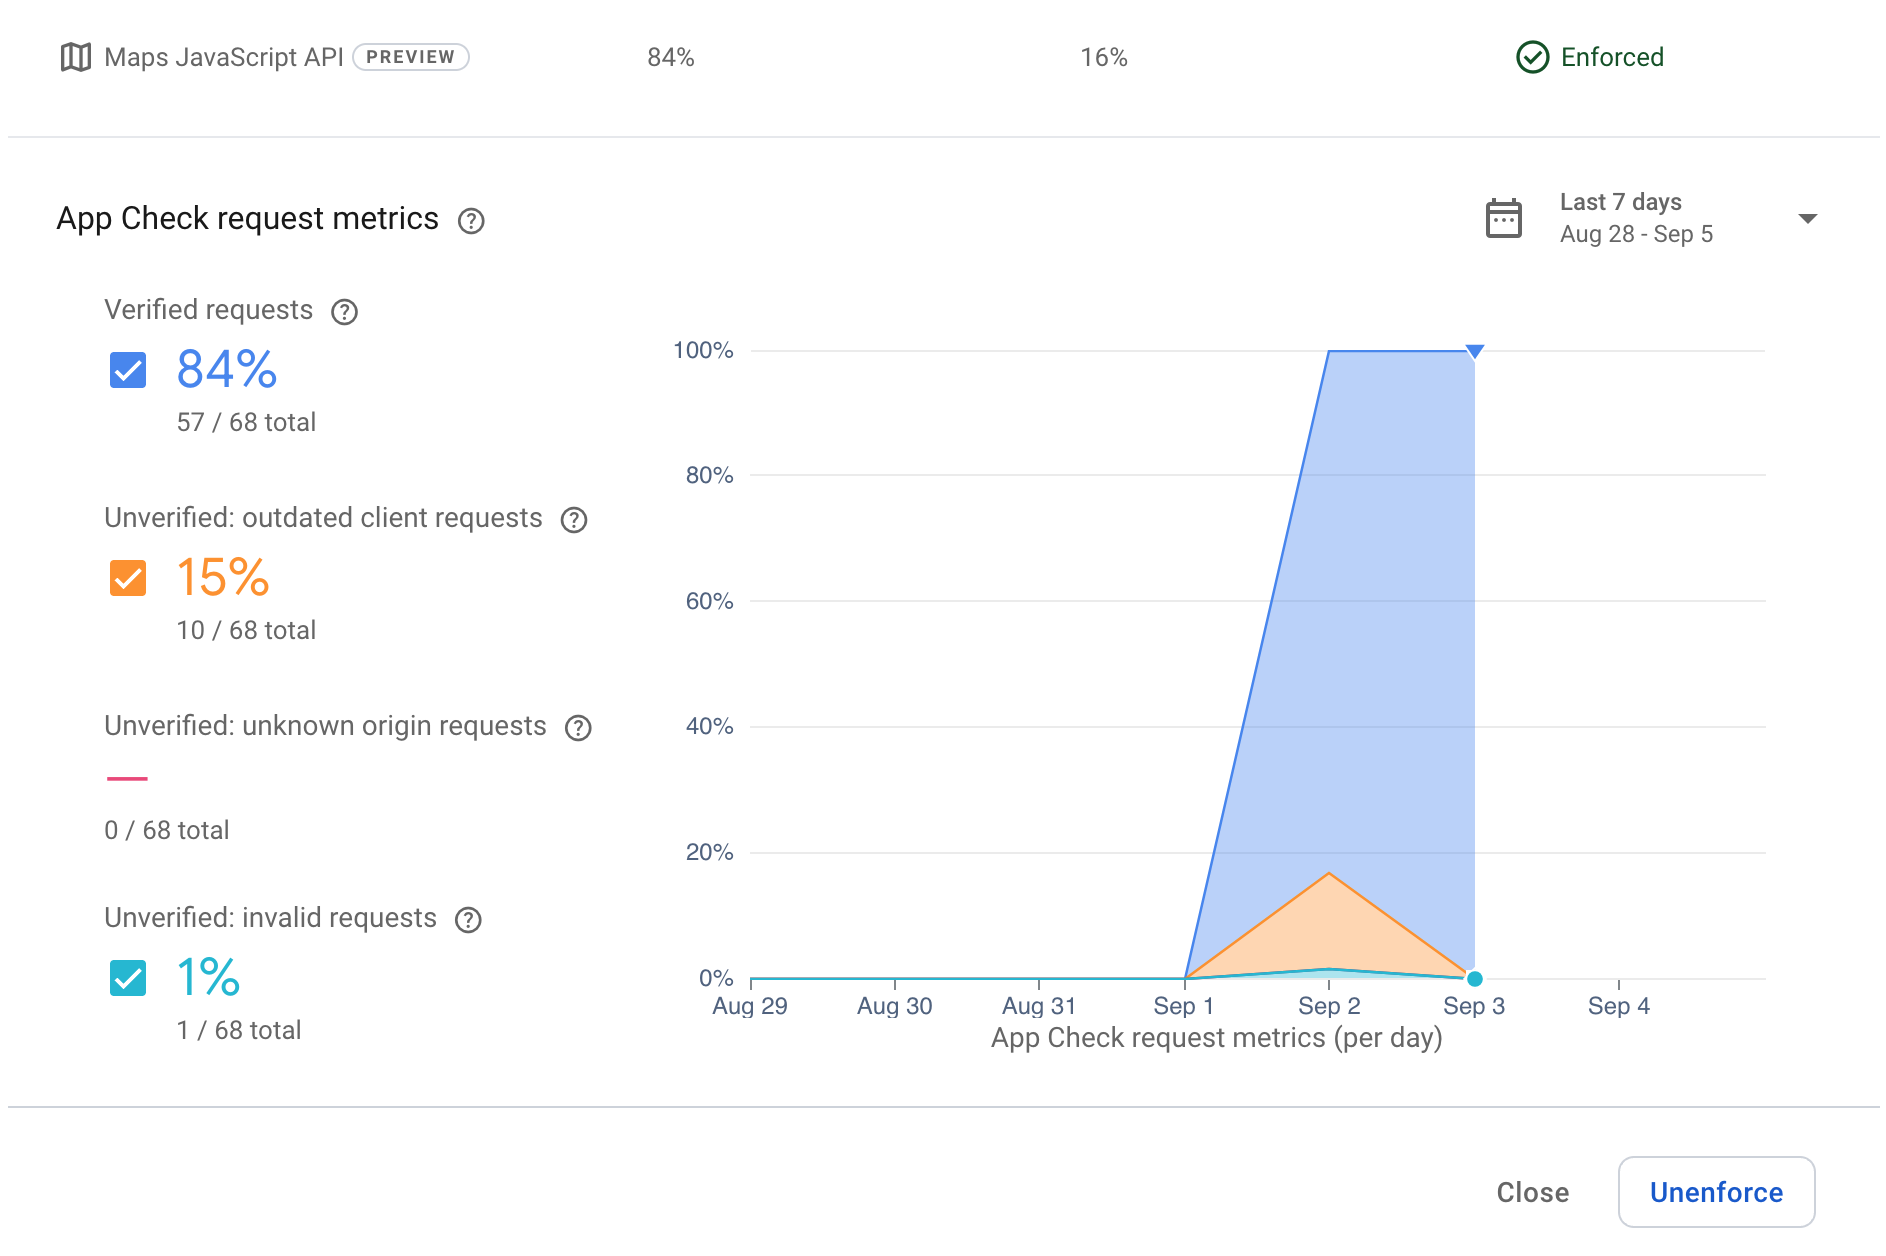
Now over time you should see the number of verified requests in the console increase, as might be seen here:
You can test it is working by going back to the original sample in the codelab and creating a new page without the app check functionality. Call this page something like nocheck.html and place it in the public folder in the same place as index.html.
<!doctype html>
<html>

<head>
 <title>Secure Map</title>
 <style>
   #map {
     height: 100%;
   }

   html,
   body {
     height: 100%;
     margin: 0;
     padding: 0;
     font-family: Arial, Helvetica, sans-serif;
   }
 </style>
</head>

<body>
 <h3>App Check Security Demo</h3>
 <!--The div element for the map -->
 <div id="map"></div>
 <script>
   (g => { var h, a, k, p = "The Google Maps JavaScript API", c = "google", l = "importLibrary", q = "__ib__", m = document, b = window; b = b[c] || (b[c] = {}); var d = b.maps || (b.maps = {}), r = new Set, e = new URLSearchParams, u = () => h || (h = new Promise(async (f, n) => { await (a = m.createElement("script")); e.set("libraries", [...r] + ""); for (k in g) e.set(k.replace(/[A-Z]/g, t => "_" + t[0].toLowerCase()), g[k]); e.set("callback", c + ".maps." + q); a.src = `https://maps.${c}apis.com/maps/api/js?` + e; d[q] = f; a.onerror = () => h = n(Error(p + " could not load.")); a.nonce = m.querySelector("script[nonce]")?.nonce || ""; m.head.append(a) })); d[l] ? console.warn(p + " only loads once. Ignoring:", g) : d[l] = (f, ...n) => r.add(f) && u().then(() => d[l](f, ...n)) })({
     key: "YOUR_API_KEY",
     v: "weekly",
     // Use the 'v' parameter to indicate the version to use (weekly, beta, alpha, etc.).
     // Add other bootstrap parameters as needed, using camel case.
   });
 </script>
 <script>
   let map;
   async function initMap() {
     const { Map } = await google.maps.importLibrary("maps");
     map = new Map(document.getElementById("map"), {
       center: { lat: 51.5208, lng: -0.0977 },
       zoom: 17,
     });
   }
   initMap();
 </script>
</body>

</html>
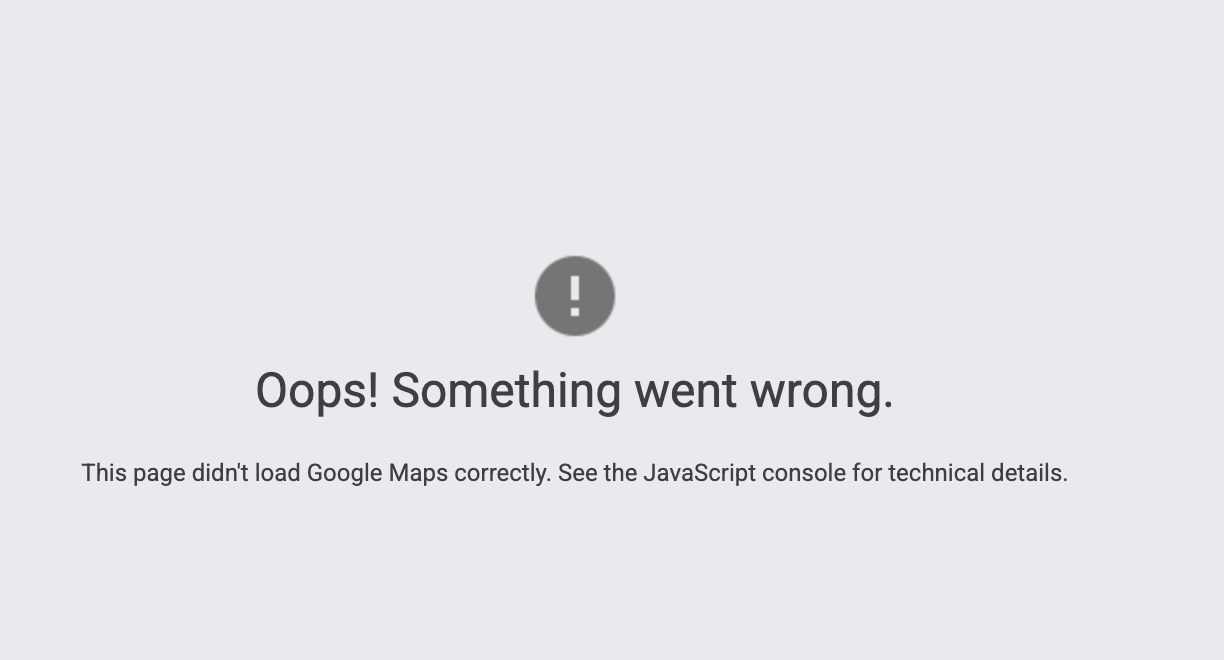
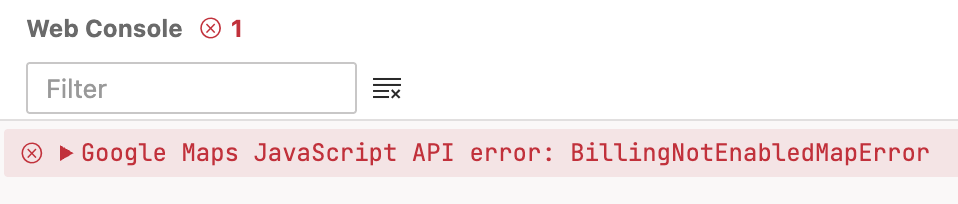
Once you have done this and put in the correct API key, then when requesting the page (use yourdomain/nocheck.html) you should have the following grey error box.
Checking the console you should see an error message like the following:

App check has successfully blocked the request for the map on the page as its no longer getting the app check token for the enforced site.
12. Congratulations!
Congratulations you have successfully enabled App Check on your site!
You've successfully built an application that uses Firebase App Check to make sure that the requests come from a valid domain and user.
What you learned
- How to use Firebase Studio to host and deploy a web page.
- How to use Cloud Console to enable and secure Google Maps Platform APIs.
- How to use reCAPTURE to generate keys that can be used to attest calls.
- How to use Firebase App Check and integrate it into the Maps JavaScript API.
- See how to enforce and monitor calls to protected sites with Firebase Studio.
What's next?
- Check out the documentation for App Check for Google Maps Javascript API
- Learn more about App Check in Firebase.
- Try another codelab with App Check and the Google Maps Places API.
- Learn more about reCAPTCHA.