1. Overview

This codelab will teach you how to build a Custom Web Receiver app that uses the Cast Live Breaks API.
What is Google Cast?
Google Cast allows users to cast content from a mobile device to a TV. Users can then use their mobile device as a remote control for media playback on the TV.
The Google Cast SDK lets you extend your app to control a TV or sound system. The Cast SDK lets you add the necessary UI components based on the Google Cast Design Checklist.
The Google Cast Design Checklist is provided to make the Cast user experience simple and predictable across all supported platforms.
What are we going to be building?
When you have completed this codelab, you will have built a Cast Receiver that takes advantage of the Live APIs.
What you'll learn
- How to handle live video content in Cast.
- How to configure the various live streaming scenarios supported by Cast.
- How to add program data to your livestream
What you'll need
- The latest Google Chrome browser.
- HTTPS hosting service such as Firebase Hosting or ngrok.
- A Google Cast device such as a Chromecast or Android TV configured with internet access.
- A TV or monitor with HDMI input, or a Google Home Hub
Experience
- You will need to have previous web development knowledge.
- Previous experience building Cast sender & receiver applications.
How will you use this tutorial?
How would you rate your experience with building web apps?
2. Get the sample code
You can download all the sample code to your computer...
and unpack the downloaded zip file.
3. Deploying your receiver locally
To be able to use your web receiver with a Cast device, it needs to be hosted somewhere where your Cast device can reach it. Should you already have a server available to you that supports https, skip the following instructions and make note of the URL, as you'll need it in the next section.
If you don't have a server available to use, you can use Firebase Hosting or ngrok.
Run the server
Once you have the service of your choice set up, navigate to app-start and start your server.
Make note of the URL for your hosted receiver. You will be using it in the next section.
4. Register an application in the Cast Developer Console
You must register your application to be able to run a custom receiver, as built-in this codelab, on Chromecast devices. After you've registered your application, you'll receive an application ID that your sender application must use to perform API calls, such as to launch a receiver application.
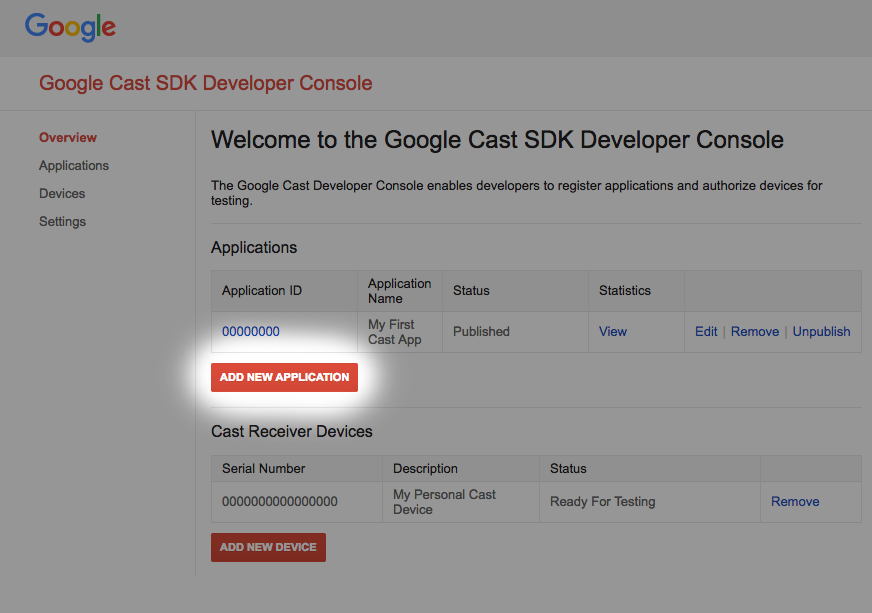
Click "Add new application"
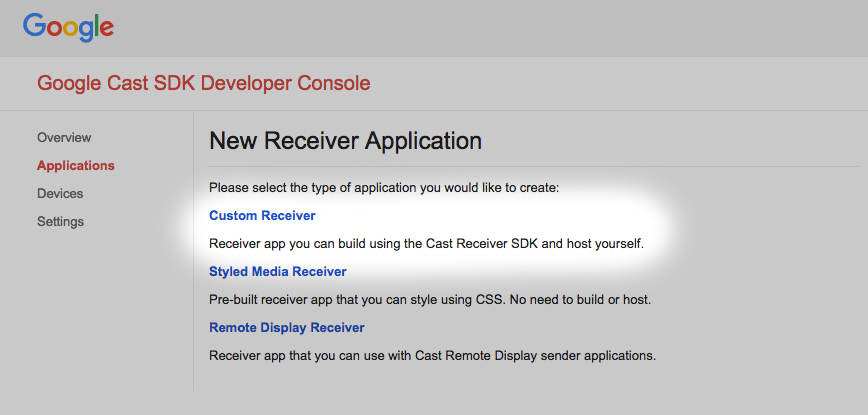
Select "Custom Receiver", this is what we're building.
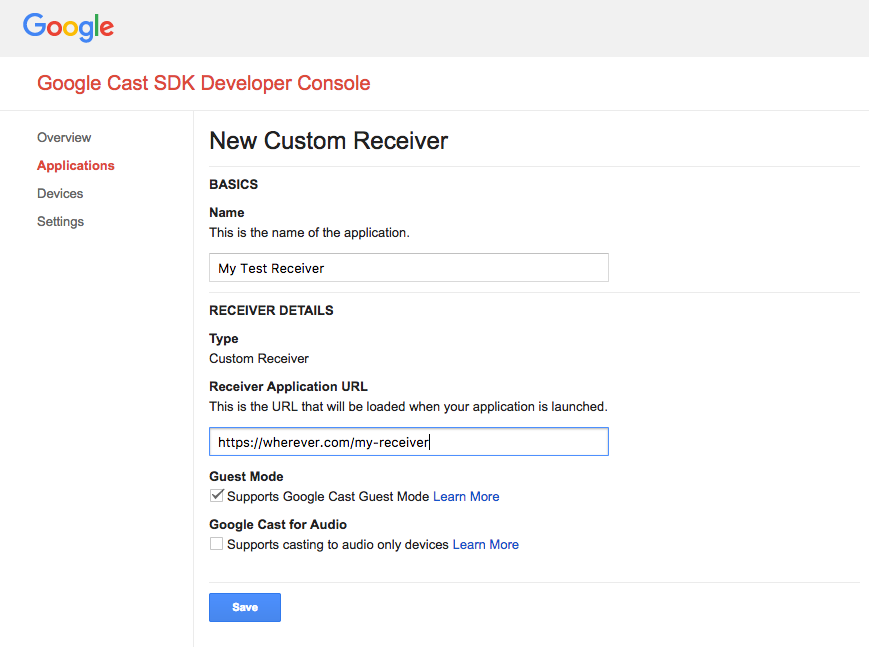
Enter the details of your new receiver, be sure to use the URL you ended up with
in the last section. Make a note of the Application ID assigned to your brand new receiver.
You must also register your Google Cast device so that it may access your receiver application before you publish it. Once you publish your receiver application, it will be available to all Google Cast devices. For the purpose of this codelab it's advised to work with an unpublished receiver application.
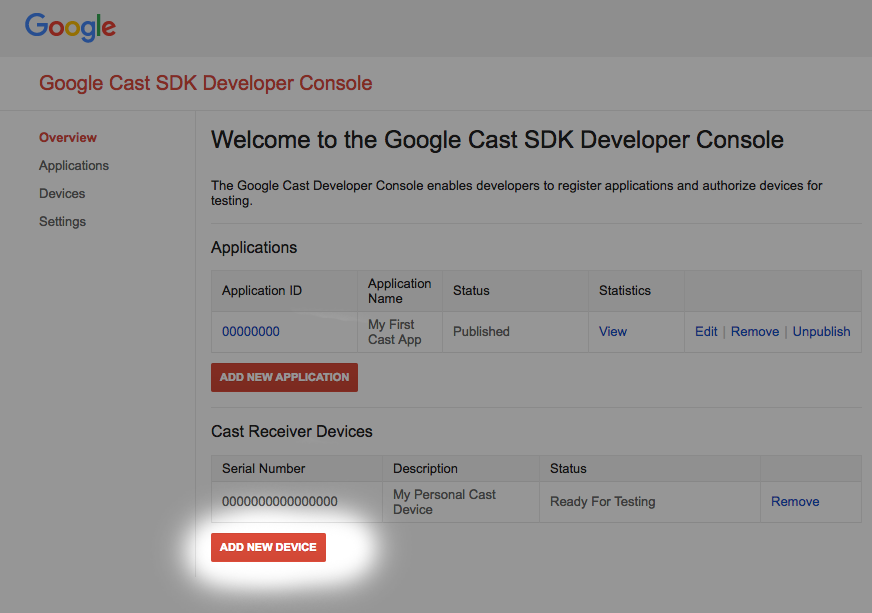
Click "Add new Device"

Enter the serial number printed on the back of your Cast device and give it a descriptive name. You can also find your serial number by casting your screen in Chrome when accessing Google Cast SDK Developer Console
It will take 5-15 minutes for your receiver and device to be ready for testing. After waiting 5-15 minutes you must reboot your Cast device.
5. Casting a simple live stream
Before starting this codelab, it may be helpful to review the live developer guide which provides an overview of the live APIs.
For our sender, we will use the Cactooll to initiate a Cast session. The receiver is designed to automatically start playing a livestream.
The receiver is composed of three files. A basic html file called receiver.html which contains the main app structure. You won't need to modify this file. There is also a file called receiver.js, which contains all of the logic for the receiver. Finally, there is also a metadata_service.js which will be used later in the codelab to simulate obtaining program guide data.
To begin, open the Cactool in Chrome. Enter the Receiver Application ID you were given on the Cast SDK Developer Console and click Set.
The Web Receiver Cast Application Framework (CAF) needs to be instructed that the content to be played is a livestream. To do so, modify the application with the following line of code. Add it to the main body of the load interceptor in receiver.js:
request.media.streamType = cast.framework.messages.StreamType.LIVE;
Setting the stream type to LIVE enables CAF's live UI. The Web Receiver SDK will automatically jump to the live edge of the stream. Live program guide data hasn't been added yet so the scrub bar will represent the full length of the seekable-range of the stream.
Save your changes to receiver.js and initiate a Cast session on the Cactool by clicking on the cast button and selecting a target cast device. The livestream should begin playing immediately.
6. Adding program guide data
CAF's support for live content now includes support for displaying program guide data in receiver and sender applications. Content providers are strongly encouraged to include programming metadata in their receiver applications for a better end user experience, especially for long running live streams like TV Channels.
CAF supports setting metadata for multiple programs in a single stream. By setting start timestamps and durations on MediaMetadata objects, the receiver automatically updates the metadata shown on senders and the overlay based on the player's current location in the stream. Below is a sample of the APIs and their general usage.
// A sample metadata object for a single tv show
const currentShow = new cast.framework.messages.TvShowMediaMetadata();
currentShow.episode = 15;
currentShow.seriesTitle = 'The Odyssey';
currentShow.title = 'Scylla and Charybdis';
currentShow.sectionStartAbsoluteTime = toUnixTimestamp('9:00 PM');
currentShow.sectionDuration = HOUR_IN_SECONDS;
For this codelab we will use a sample metadata service to provide the metadata for our livestream. To create a listing of program metadata, create a container. The ContainerMetadata holds a list of MediaMetadata objects for a single media stream. Each MediaMetadata object represents a single section in the container. When the playhead is within the bounds of a given section, its metadata is be automatically copied over to the media status. Add the following code to the receiver.js file to download the sample metadata from our service and provide the container to CAF.
/**
 *   Gets the current program guide data from the sample MetadataService. Once
 *   obtained, the guide information is added using QueueManager.
 */
async function loadGuideData() {
  const data = await MetadataService.fetchLiveMetadata();
  const containerMetadata = new cast.framework.messages.ContainerMetadata();
  containerMetadata.sections = data;

  playerManager.getQueueManager().setContainerMetadata(containerMetadata);
}
Additionally, add a call to the function for loading the guide data in the load interceptor:
loadGuideData();
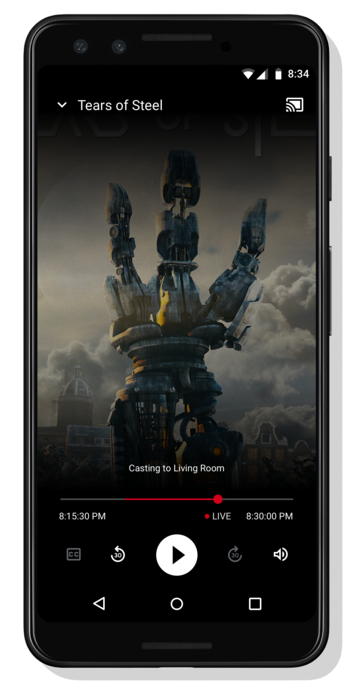
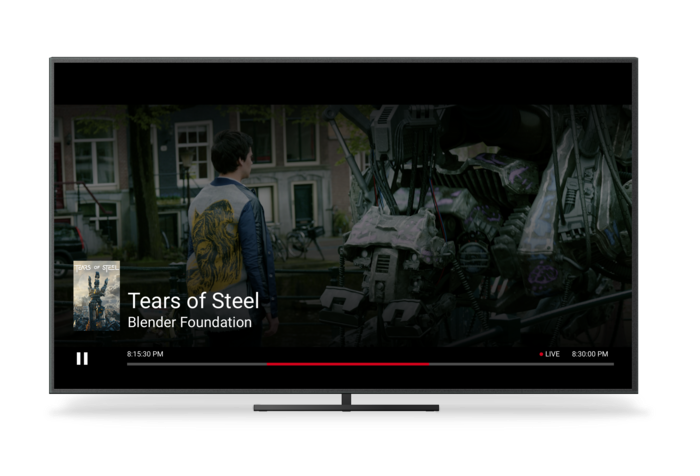
Save the receiver.js file and initiate a Cast session. You should see the program start time, end time, and title all displayed on screen.
A new media status message is sent from the receiver to all senders when the playhead transitions to a new section in the container so that the sender applications can update their UI. It is recommended that receiver applications update the container metadata in a media status interceptor to continue feeding program information to the sender applications. In our sample service we return the current program metadata, as well as the metadata for the next two programs. To update the metadata for a stream, create a new container and call setContainerMetadata as in the previous example.
7. Disabling seek
Most video streams are composed of segments that hold a range of video frames. Unless otherwise specified, CAF will allow users to seek within these segments. The Web Receiver can specify this by calling on a couple of APIs available.
In the load interceptor, remove the SEEK supported media command. This disables seeking on all mobile sender and touch interfaces. Add the following code after the definitions for the SDK instance variables in receiver.js.
// Disable seeking
playerManager.removeSupportedMediaCommands(
    cast.framework.messages.Command.SEEK, true);
To disable voice seek commands powered by assistant like Ok Google, skip back 60 seconds, the seek interceptor should be used. This interceptor gets called every time a seek request is made. If the SEEK supported media command is disabled, the interceptor will reject the seek request. Add the following code snippet to the receiver.js file:
/**
 * A seek interceptor is called whenever CAF receives a request to seek to
 * a different location in media. This interceptor can be used to modify that
 * seek request or disable seeking completely.
 */
playerManager.setMessageInterceptor(
    cast.framework.messages.MessageType.SEEK, (seekRequestData) => {
      // if the SEEK supported media command is disabled, block seeking
      if (!(playerManager.getSupportedMediaCommands() &
            cast.framework.messages.Command.SEEK)) {
        castDebugLogger.info(TAG, 'Seek blocked.');
        return null;
      }

      return seekRequestData;
    });
Save the receiver.js file and initiate a Cast session. You should no longer be able to seek within the livestream.
8. Congratulations
You now know how to create a custom receiver application using the latest Cast Receiver SDK.
For more details, see the Live Streaming Developer's Guide.