Caricare file su Google Drive da Moduli Google

Livello di programmazione: principiante
Durata: 10 minuti
Tipo di progetto: automazione con un attivatore basato su eventi

Obiettivi

  • Scopri cosa fa la soluzione.
  • Scopri cosa fanno i servizi Apps Script all'interno di questa soluzione.
  • Configura lo script.
  • Esegui lo script.

Informazioni su questa soluzione

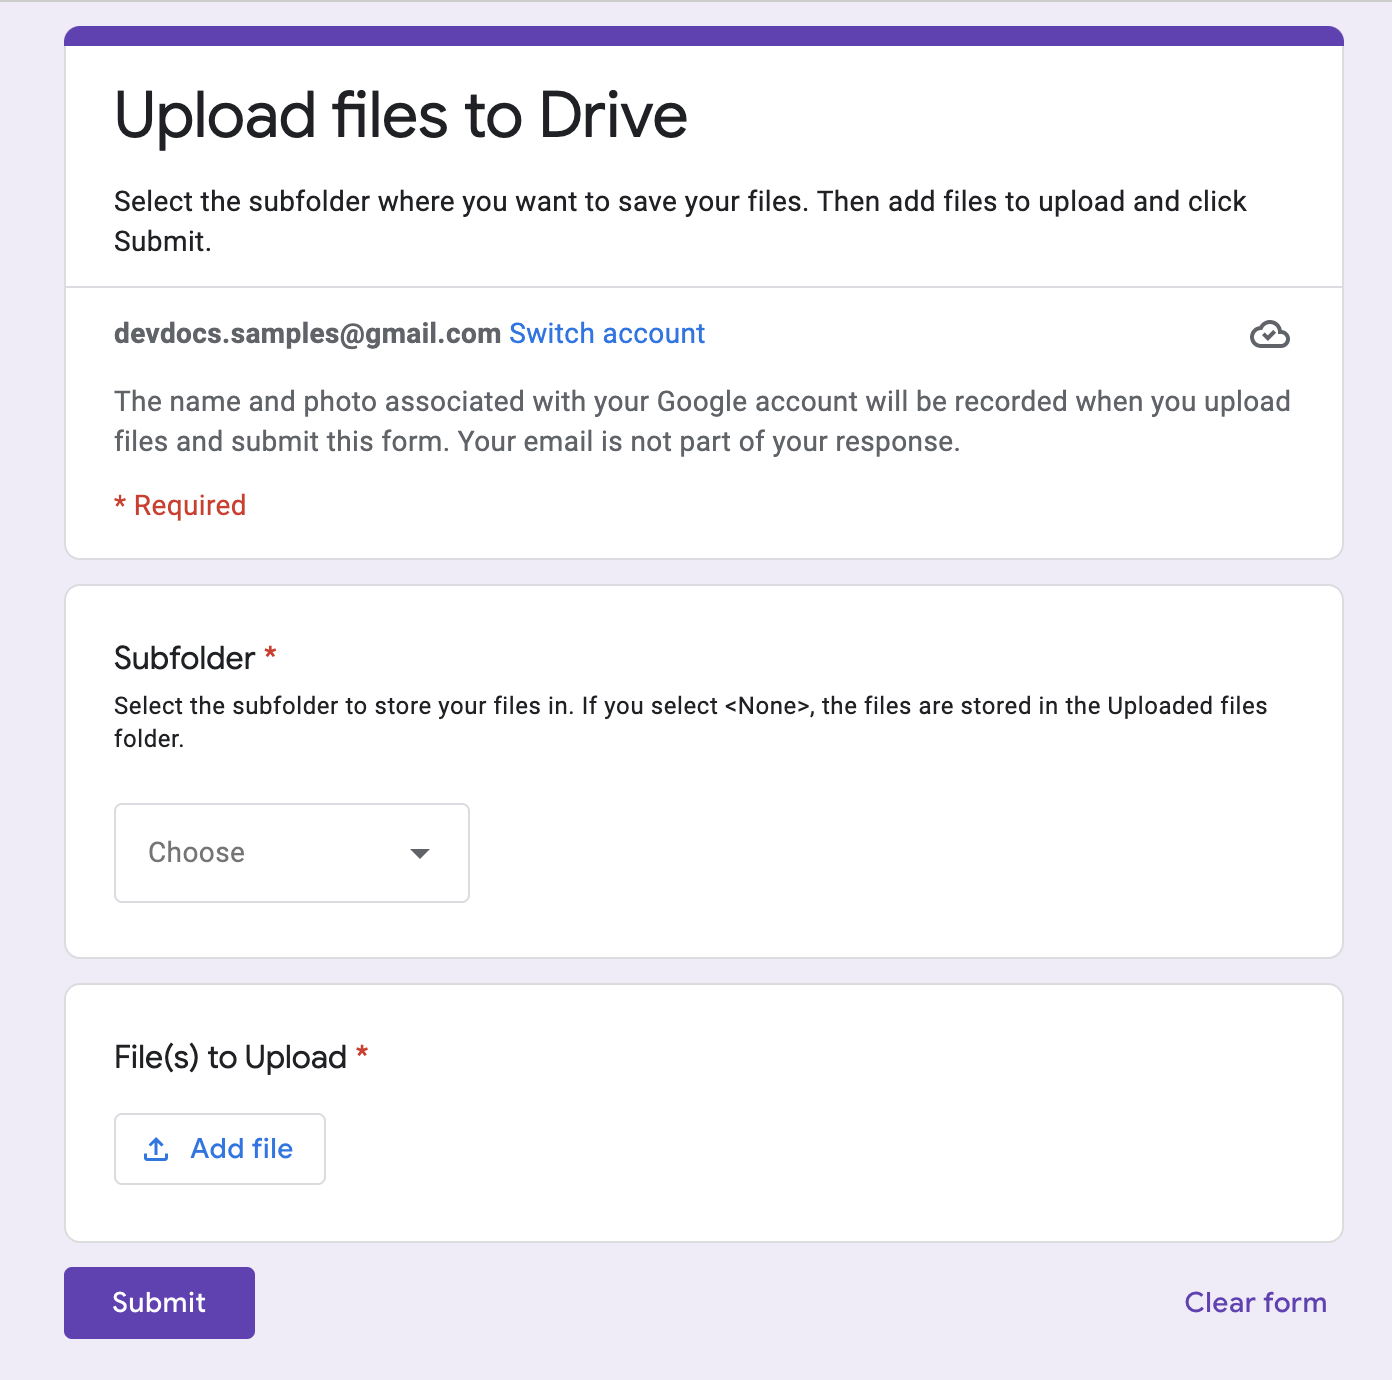
Caricare e organizzare contemporaneamente i file su Google Drive utilizzando Moduli Google. Il modulo include input per i file da caricare e su come i file devono essere organizzati.

Screenshot del modulo per caricare i file

Come funziona

Una funzione di configurazione crea una cartella per archiviare tutti i file caricati e un trigger che si attiva ogni volta che un utente invia il modulo. Quando un utente compila il modulo, sceglie i file da caricare e una sottocartella in cui archiviare i file. Una volta che l'utente invia il modulo, lo script indirizza i file alla sottocartella corrispondente. Se la cartella non esiste ancora, viene creata dallo script.

Servizi Apps Script

Questa soluzione utilizza i seguenti servizi:

  • Servizio script: crea l'attivatore che si attiva ogni volta che un utente invia il modulo.
  • Servizio proprietà: archivia l'ID dell'attivatore creato dallo script durante la configurazione per evitare trigger duplicati.
  • Servizio Drive: durante la configurazione, recupera la posizione del modulo su Drive e crea una cartella nello stesso percorso. Quando un utente invia il modulo, il servizio di Drive indirizza i file a quella cartella e, se selezionata, a una sottocartella designata. Se la sottocartella non esiste ancora, viene creata dallo script.
  • Servizio per i moduli: recupera i file e il nome della cartella che l'utente ha scelto dopo aver inviato il modulo e lo invia al servizio Drive.

Prerequisiti

Per utilizzare questo esempio, devi disporre dei seguenti prerequisiti:

  • Un Account Google (gli account Google Workspace potrebbero richiedere l'approvazione dell'amministratore).
  • Un browser web con accesso a internet.

Configura lo script

Crea il modulo

  1. Vai a forms.google.com e fai clic su Vuoto .
  2. Fai clic su Modulo senza titolo e rinomina il modulo in Carica i file su Drive.
  3. Fai clic su Domanda senza titolo e rinomina la domanda in Sottocartella.
  4. Nella domanda Sottocartella, fai clic su Altro > Descrizione.
  5. In Descrizione, inserisci Seleziona la sottocartella in cui archiviare i file. Se selezioni <Nessuno>, i file vengono archiviati nella cartella File caricati.
  6. Aggiungi le seguenti opzioni alla domanda Sottocartella:
    • <nessuno>
    • Progetto A
    • Progetto B
    • Progetto C
  7. Per rendere obbligatoria la domanda, fai clic su Obbligatoria.
  8. Fai clic su Aggiungi domanda .
  9. Fai clic su Scelta multipla e seleziona Caricamento file.
  10. Fai clic su Continua.
  11. In Domanda, inserisci File da caricare. Puoi scegliere i tipi di file e il numero massimo di file che vuoi consentire alle persone di caricare.
  12. Per rendere obbligatoria la domanda, fai clic su Obbligatoria.

Crea il progetto Apps Script

  1. Nel modulo, fai clic su Altro > Editor di script.
  2. Fai clic su Progetto senza titolo e rinomina il progetto in Carica i file in Drive.
  3. Per creare un altro file di script, fai clic su Aggiungi un file > Script. Assegna al file il nome Setup.
  4. Sostituisci il contenuto di entrambi i file di script con il seguente contenuto:

    Code.gs

    solutions/automations/upload-files/Code.js
    // TODO Before you start using this sample, you must run the setUp() 
    // function in the Setup.gs file.
    
    // Application constants
    const APP_TITLE = "Upload files to Drive from Forms";
    const APP_FOLDER_NAME = "Upload files to Drive (File responses)";
    
    // Identifies the subfolder form item
    const APP_SUBFOLDER_ITEM = "Subfolder";
    const APP_SUBFOLDER_NONE = "<None>";
    
    
    /**
     * Gets the file uploads from a form response and moves files to the corresponding subfolder.
     *  
     * @param {object} event - Form submit.
     */
    function onFormSubmit(e) {
      try {
        // Gets the application root folder.
        var destFolder = getFolder_(APP_FOLDER_NAME);
    
        // Gets all form responses.
        let itemResponses = e.response.getItemResponses();
    
        // Determines the subfolder to route the file to, if any.
        var subFolderName;
        let dest = itemResponses.filter((itemResponse) =>
          itemResponse.getItem().getTitle().toString() === APP_SUBFOLDER_ITEM);
    
        // Gets the destination subfolder name, but ignores if APP_SUBFOLDER_NONE was selected;
        if (dest.length > 0) {
          if (dest[0].getResponse() != APP_SUBFOLDER_NONE) {
            subFolderName = dest[0].getResponse();
          }
        }
        // Gets the subfolder or creates it if it doesn't exist.
        if (subFolderName != undefined) {
          destFolder = getSubFolder_(destFolder, subFolderName)
        }
        console.log(`Destination folder to use:
        Name: ${destFolder.getName()}
        ID: ${destFolder.getId()}
        URL: ${destFolder.getUrl()}`)
    
        // Gets the file upload response as an array to allow for multiple files.
        let fileUploads = itemResponses.filter((itemResponse) => itemResponse.getItem().getType().toString() === "FILE_UPLOAD")
          .map((itemResponse) => itemResponse.getResponse())
          .reduce((a, b) => [...a, ...b], []);
    
        // Moves the files to the destination folder.
        if (fileUploads.length > 0) {
          fileUploads.forEach((fileId) => {
            DriveApp.getFileById(fileId).moveTo(destFolder);
            console.log(`File Copied: ${fileId}`)
          });
        }
      }
      catch (err) {
        console.log(err);
      }
    }
    
    
    /**
     * Returns a Drive folder under the passed in objParentFolder parent
     * folder. Checks if folder of same name exists before creating, returning 
     * the existing folder or the newly created one if not found.
     *
     * @param {object} objParentFolder - Drive folder as an object.
     * @param {string} subFolderName - Name of subfolder to create/return.
     * @return {object} Drive folder
     */
    function getSubFolder_(objParentFolder, subFolderName) {
    
      // Iterates subfolders of parent folder to check if folder already exists.
      const subFolders = objParentFolder.getFolders();
      while (subFolders.hasNext()) {
        let folder = subFolders.next();
    
        // Returns the existing folder if found.
        if (folder.getName() === subFolderName) {
          return folder;
        }
      }
      // Creates a new folder if one doesn't already exist.
      return objParentFolder.createFolder(subFolderName)
        .setDescription(`Created by ${APP_TITLE} application to store uploaded Forms files.`);
    }
    

    Setup.gs

    solutions/automations/upload-files/Setup.js
    // TODO You must run the setUp() function before you start using this sample.
    
    /** 
     * The setUp() function performs the following:
     *  - Creates a Google Drive folder named by the APP_FOLDER_NAME
     *    variable in the Code.gs file.
     *  - Creates a trigger to handle onFormSubmit events.
     */
    function setUp() {
      // Ensures the root destination folder exists.
      const appFolder = getFolder_(APP_FOLDER_NAME);
      if (appFolder !== null) {
        console.log(`Application folder setup.
        Name: ${appFolder.getName()}
        ID: ${appFolder.getId()}
        URL: ${appFolder.getUrl()}`)
      }
      else {
        console.log(`Could not setup application folder.`)
      }
      // Calls the function that creates the Forms onSubmit trigger.
      installTrigger_();
    }
    
    /** 
     * Returns a folder to store uploaded files in the same location
     * in Drive where the form is located. First, it checks if the folder
     * already exists, and creates it if it doesn't.
     *
     * @param {string} folderName - Name of the Drive folder. 
     * @return {object} Google Drive Folder
     */
    function getFolder_(folderName) {
    
      // Gets the Drive folder where the form is located.
      const ssId = FormApp.getActiveForm().getId();
      const parentFolder = DriveApp.getFileById(ssId).getParents().next();
    
      // Iterates through the subfolders to check if folder already exists.
      // The script checks for the folder name specified in the APP_FOLDER_NAME variable.
      const subFolders = parentFolder.getFolders();
      while (subFolders.hasNext()) {
        let folder = subFolders.next();
    
        // Returns the existing folder if found.
        if (folder.getName() === folderName) {
          return folder;
        }
      }
      // Creates a new folder if one doesn't already exist.
      return parentFolder.createFolder(folderName)
        .setDescription(`Created by ${APP_TITLE} application to store uploaded files.`);
    }
    
    /**
     * Installs trigger to capture onFormSubmit event when a form is submitted.
     * Ensures that the trigger is only installed once.
     * Called by setup().
     */
    function installTrigger_() {
      // Ensures existing trigger doesn't already exist.
      let propTriggerId = PropertiesService.getScriptProperties().getProperty('triggerUniqueId')
      if (propTriggerId !== null) {
        const triggers = ScriptApp.getProjectTriggers();
        for (let t in triggers) {
          if (triggers[t].getUniqueId() === propTriggerId) {
            console.log(`Trigger with the following unique ID already exists: ${propTriggerId}`);
            return;
          }
        }
      }
      // Creates the trigger if one doesn't exist.
      let triggerUniqueId = ScriptApp.newTrigger('onFormSubmit')
        .forForm(FormApp.getActiveForm())
        .onFormSubmit()
        .create()
        .getUniqueId();
      PropertiesService.getScriptProperties().setProperty('triggerUniqueId', triggerUniqueId);
      console.log(`Trigger with the following unique ID was created: ${triggerUniqueId}`);
    }
    
    /**
     * Removes all script properties and triggers for the project.
     * Use primarily to test setup routines.
     */
    function removeTriggersAndScriptProperties() {
      PropertiesService.getScriptProperties().deleteAllProperties();
      // Removes all triggers associated with project.
      const triggers = ScriptApp.getProjectTriggers();
      for (let t in triggers) {
        ScriptApp.deleteTrigger(triggers[t]);
      }
    }
    
    /**
     * Removes all form responses to reset the form.
     */
    function deleteAllResponses() {
      FormApp.getActiveForm().deleteAllResponses();
    }
    

Esegui lo script

  1. Nell'editor di Apps Script, passa al file Setup.gs.
  2. Nel menu a discesa della funzione, seleziona setUp.
  3. Fai clic su Esegui.
  4. Quando richiesto, autorizza lo script. Se nella schermata per il consenso OAuth viene visualizzato l'avviso Questa app non è verificata, continua selezionando Avanzate > Vai a {Nome progetto} (non sicuro).

  5. Torna al modulo e fai clic su Anteprima Icona anteprima.

  6. Nel modulo, seleziona una sottocartella e carica un file.

  7. Fai clic su Invia.

  8. Vai su Drive e apri la cartella Carica i file in Drive (risposte su file). I file caricati si trovano nella sottocartella selezionata nel modulo.

Collaboratori

Questo campione è gestito da Google con l'aiuto degli Esperti Google Developers.

Passaggi successivi