به بازخورد پاسخ دهید

سطح کدنویسی : مبتدی
مدت زمان : ۱۵ دقیقه
نوع پروژه : اتوماسیون با منوی سفارشی و تریگر رویداد محور

اهداف

  • بفهمید که راه حل چه کاری انجام می‌دهد.
  • درک کنید که سرویس‌های Apps Script در این راهکار چه کاری انجام می‌دهند.
  • اسکریپت را تنظیم کنید.
  • اسکریپت را اجرا کنید.

درباره این راهکار

ایجاد خودکار پاسخ‌های ایمیل پیش‌نویس به بازخوردهای دریافتی از فرم‌های گوگل. این راهکار بر بازخوردهای دریافتی از دانشجویان در دوره تمرکز دارد، اما می‌توانید آن را در هر مورد استفاده‌ای که از طریق فرم‌های گوگل بازخورد دریافت می‌کنید، اعمال کنید.

پاسخ‌های ارسال فرم از Gmail ارسال می‌شوند

چگونه کار می‌کند؟

این اسکریپت یک تریگر رویدادمحور نصب می‌کند که هر بار که کاربر فرمی را ارسال می‌کند، اجرا می‌شود. با هر ارسال فرم، اسکریپت یک پیش‌نویس ایمیل در جیمیل ایجاد می‌کند. ایمیل به شخصی که فرم را ارسال کرده است، ارسال می‌شود و شامل پاسخ‌های فرم و یک پیام تشکر عمومی است. می‌توانید قبل از ارسال، ایمیل را ویرایش کنید.

سرویس‌های اسکریپت برنامه‌ها

این راهکار از سرویس‌های زیر استفاده می‌کند:

  • سرویس اسکریپت - تریگر رویداد-محوری را نصب می‌کند که هنگام ارسال فرم توسط کاربر فعال می‌شود.
  • سرویس صفحه گسترده - پاسخ‌های فرم را به Gmail ارسال می‌کند.
  • سرویس جیمیل - پیش‌نویس ایمیل را با پیام تشکر و فرم‌های پاسخ ایجاد می‌کند.

پیش‌نیازها

برای استفاده از این نمونه، به پیش‌نیازهای زیر نیاز دارید:

  • یک حساب گوگل (حساب‌های کاربری گوگل ورک‌اسپیس ممکن است نیاز به تأیید مدیر داشته باشند).
  • یک مرورگر وب با دسترسی به اینترنت.

اسکریپت را تنظیم کنید

برای ایجاد یک کپی از صفحه گسترده نمونه پاسخ به بازخورد ، روی دکمه زیر کلیک کنید. پروژه اسکریپت برنامه‌ها برای این راه‌حل به صفحه گسترده پیوست شده است.
یک کپی تهیه کنید

اسکریپت را اجرا کنید

  1. روی ابزار پاسخ فرم > فعال کردن پاسخ‌های پیش‌نویس خودکار کلیک کنید. ممکن است لازم باشد صفحه را برای نمایش این منوی سفارشی رفرش کنید.
  2. وقتی از شما خواسته شد، اسکریپت را تأیید کنید. اگر صفحه رضایت OAuth هشدار « این برنامه تأیید نشده است» را نشان می‌دهد، با انتخاب Advanced > Go to {Project Name} (unsafe) ادامه دهید.

  3. روی ابزار پاسخ فرم کلیک کنید > دوباره پاسخ‌های پیش‌نویس خودکار را فعال کنید .

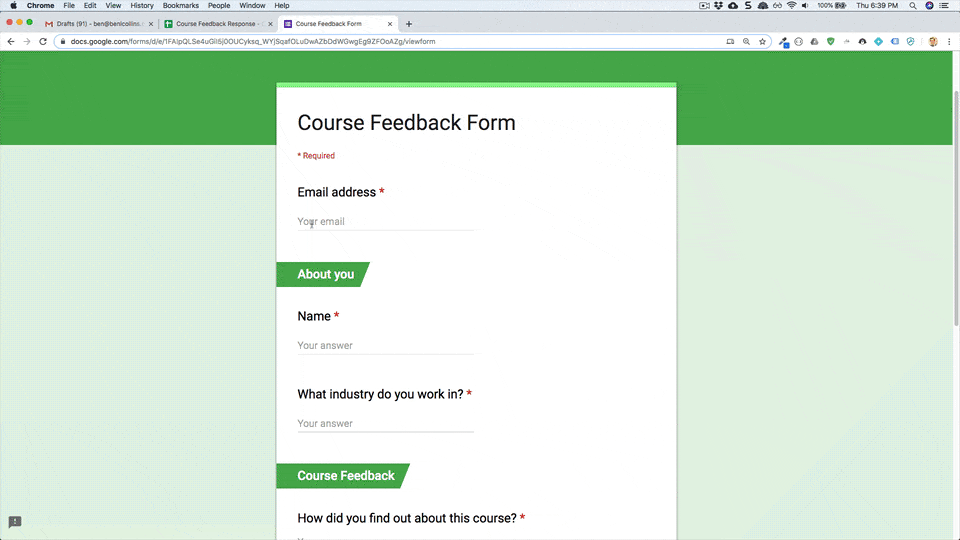
  4. روی ابزارها > مدیریت فرم > رفتن به فرم زنده کلیک کنید.

  5. فرم را پر کنید و روی ارسال کلیک کنید.

  6. جیمیل را باز کنید و پیش‌نویس‌های خود را بررسی کنید. باید یک پیش‌نویس جدید به همراه پاسخ فرم داشته باشید.

کد را مرور کنید

برای بررسی کد Apps Script برای این راهکار، روی مشاهده کد منبع در زیر کلیک کنید:

مشاهده کد منبع

کد.gs

راهکارها/اتوماسیون‌ها/پاسخ-بازخورد-دوره/Code.js
// To learn how to use this script, refer to the documentation:
// https://developers.google.com/apps-script/samples/automations/course-feedback-response

/*
Copyright 2022 Google LLC

Licensed under the Apache License, Version 2.0 (the "License");
you may not use this file except in compliance with the License.
You may obtain a copy of the License at

    https://www.apache.org/licenses/LICENSE-2.0

Unless required by applicable law or agreed to in writing, software
distributed under the License is distributed on an "AS IS" BASIS,
WITHOUT WARRANTIES OR CONDITIONS OF ANY KIND, either express or implied.
See the License for the specific language governing permissions and
limitations under the License.
*/

/**
 * Creates custom menu for user to run scripts.
 */
function onOpen() {
  const ui = SpreadsheetApp.getUi();
  ui.createMenu("Form Reply Tool")
    .addItem("Enable auto draft replies", "installTrigger")
    .addToUi();
}

/**
 * Installs a trigger on the Spreadsheet for when a Form response is submitted.
 */
function installTrigger() {
  ScriptApp.newTrigger("onFormSubmit")
    .forSpreadsheet(SpreadsheetApp.getActive())
    .onFormSubmit()
    .create();
}

/**
 * Creates a draft email for every response on a form
 *
 * @param {Object} event - Form submit event
 */
function onFormSubmit(e) {
  const responses = e.namedValues;

  // parse form response data
  const timestamp = responses.Timestamp[0];
  const email = responses["Email address"][0].trim();

  // create email body
  const emailBody = createEmailBody(responses);

  // create draft email
  createDraft(timestamp, email, emailBody);
}

/**
 * Creates email body and includes feedback from Google Form.
 *
 * @param {string} responses - The form response data
 * @return {string} - The email body as an HTML string
 */
function createEmailBody(responses) {
  // parse form response data
  const name = responses.Name[0].trim();
  const industry = responses["What industry do you work in?"][0];
  const source = responses["How did you find out about this course?"][0];
  const rating =
    responses["On a scale of 1 - 5 how would you rate this course?"][0];
  const productFeedback =
    responses["What could be different to make it a 5 rating?"][0];
  const otherFeedback = responses["Any other feedback?"][0];

  // create email body
  const htmlBody = `Hi ${name},<br><br>Thanks for responding to our course feedback questionnaire.<br><br>It's really useful to us to help improve this course.<br><br>Have a great day!<br><br>Thanks,<br>Course Team<br><br>****************************************************************<br><br><i>Your feedback:<br><br>What industry do you work in?<br><br>${industry}<br><br>How did you find out about this course?<br><br>${source}<br><br>On a scale of 1 - 5 how would you rate this course?<br><br>${rating}<br><br>What could be different to make it a 5 rating?<br><br>${productFeedback}<br><br>Any other feedback?<br><br>${otherFeedback}<br><br></i>`;

  return htmlBody;
}

/**
 * Create a draft email with the feedback
 *
 * @param {string} timestamp Timestamp for the form response
 * @param {string} email Email address from the form response
 * @param {string} emailBody The email body as an HTML string
 */
function createDraft(timestamp, email, emailBody) {
  console.log("draft email create process started");

  // create subject line
  const subjectLine = `Thanks for your course feedback! ${timestamp}`;

  // create draft email
  GmailApp.createDraft(email, subjectLine, "", {
    htmlBody: emailBody,
  });
}

مشارکت‌کنندگان

این نمونه توسط بن کالینز، مربی در benlcollins.com و متخصص توسعه گوگل، ایجاد شده است.

این نمونه توسط گوگل و با کمک متخصصان توسعه‌دهنده گوگل نگهداری می‌شود.

مراحل بعدی