
Hướng dẫn bắt đầu nhanh này hướng dẫn bạn cách tạo một bước tuỳ chỉnh cho quy trình Workspace bằng Google Apps Script. Bước tuỳ chỉnh này nhận hai số và một phép toán số học làm dữ liệu đầu vào, thực hiện phép tính và xuất kết quả.
Mục tiêu
- Tạo bước tuỳ chỉnh cho Workspace Flows bằng Google Apps Script.
- Triển khai bước tuỳ chỉnh cho tổ chức Google Workspace của riêng bạn.
- Kiểm thử bước tuỳ chỉnh trong Workspace Flows.
Điều kiện tiên quyết
- Một Tài khoản Google có quyền truy cập vào Workspace Flows thông qua chương trình Gemini Alpha.
Thiết lập tập lệnh
Để thiết lập tập lệnh, hãy tạo một dự án Apps Script mới rồi kết nối dự án đó với dự án Cloud của bạn.
Nhấp vào nút sau để mở dự án Hướng dẫn nhanh về máy tính Flows của Apps Script.
Nhấp vào Tổng quan.
Trên trang tổng quan, hãy nhấp vào biểu tượng
 Tạo bản sao.
Đặt tên cho bản sao của dự án Apps Script:
Nhấp vào Bản sao của hướng dẫn nhanh về máy tính trong Flows.
Trong phần Tiêu đề dự án, hãy nhập
Flows calculator quickstart.Nhấp vào Đổi tên.
Không bắt buộc: Xem lại mã khởi động nhanh
Trong phần trước, bạn đã sao chép toàn bộ dự án Apps Script chứa tất cả mã ứng dụng cần thiết cho bước tuỳ chỉnh của quy trình. Vì vậy, bạn không cần sao chép và dán từng tệp.
Bạn có thể xem lại từng tệp mà bạn đã sao chép trong phần trước tại đây (không bắt buộc):
appsscript.jsonTệp kê khai. Một tệp JSON đặc biệt chỉ định thông tin cơ bản về dự án mà Apps Script cần để chạy tập lệnh.
Xem mã
appsscript.json{ "timeZone": "America/Los_Angeles", "exceptionLogging": "STACKDRIVER", "runtimeVersion": "V8", "addOns": { "common": { "name": "Calculator", "logoUrl": "https://www.gstatic.com/images/branding/productlogos/calculator_search/v1/web-24dp/logo_calculator_search_color_1x_web_24dp.png", "useLocaleFromApp": true }, "flows": { "workflowElements": [ { "id": "actionElement", "state": "ACTIVE", "name": "Calculate", "description": "Asks the user for two values and a math operation, then performs the math operation on the values and outputs the result.", "workflowAction": { "inputs": [ { "id": "value1", "description": "value1", "cardinality": "SINGLE", "dataType": { "basicType": "INTEGER" } }, { "id": "value2", "description": "value2", "cardinality": "SINGLE", "dataType": { "basicType": "INTEGER" } }, { "id": "operation", "description": "operation", "cardinality": "SINGLE", "dataType": { "basicType": "STRING" } } ], "outputs": [ { "id": "result", "description": "Calculated result", "cardinality": "SINGLE", "dataType": { "basicType": "INTEGER" } }, { "id": "log", "description": "Logged result of flow event.", "cardinality": "SINGLE", "dataType": { "basicType": "STRING" } } ], "onConfigFunction": "onConfigCalculateFunction", "onExecuteFunction": "onExecuteCalculateFunction" } } ] } } }
Calculator.gsXác định một bước tuỳ chỉnh cho Workspace Flows. Bước này có tên là "Tính toán", nhận hai số và một phép toán làm dữ liệu đầu vào, đồng thời trả về kết quả của phép tính.
Xem mã
Calculator.gs/** * This script defines a custom step for Google Workspace Flows. * The step, named "Calculate", takes two numbers and an operation as input * and returns the result of the calculation. * * The script includes functions to: * * 1. Define the configuration UI for the step using Card objects: * * - `onConfigCalculateFunction()`: Generates the main configuration card. * - Helper functions like `pushCard()`, `saveButton()` to build card components. * * 2. Handle the execution of the step. * * - `onExecuteCalculateFunction()`: Retrieves inputs, performs the calculation, * and returns outputs. * * To learn more, see the following quickstart guide: * https://developers.google.com/workspace/add-ons/workflows/quickstart */ /** * Creates an action response to push a new card onto the card stack. * * This function generates an action object that, when returned, causes the * provided card to be pushed onto the card stack, making it the currently * displayed card in the configuration UI. * @param {Object} card The Card object to push. * @return {Object} The action response object. */ function pushCard(card) { return { "action": { "navigations": [{ "push_card": card } ] } }; } /** * Creates an action response to update the currently displayed card. * * This function generates an action object that, when returned, causes the * currently displayed card to be replaced with the provided card in the * configuration UI. * @param {Object} card The Card object to update. * @return {Object} The render actions object. */ function updateCard(card) { return { "render_actions": { "action": { "navigations": [{ "update_card": card } ] } } }; } /** * Creates a button configuration object for saving the workflow. * * This function generates a button definition that, when clicked, triggers * a save action for the current workflow configuration. * @return {Object} The button widget object. */ function saveButton() { return { "text": "Save", "onClick": { "hostAppAction" : { "workflowAction" : { "saveWorkflowAction" : {} } } }, }; } /** * Creates a button configuration object for a refresh action. * * This function generates a button definition that, when clicked, triggers * a function to refresh the current card. * @param {string} functionName The name of the Apps Script function to call on click. * @return {Object} The button widget object. */ function refreshButton(functionName) { return { "text": "Refresh", "onClick": { "action" : { "function" : functionName } }, }; } /** * Generates and displays a configuration card for the sample calculation action. * * This function creates a card with input fields for two values and a dropdown * for selecting an arithmetic operation. The card also includes a "Save" * button to save the action configuration for the workflow. * * The input fields are configured to let the user select outputs from previous * workflow steps as input values using the `hostAppDataSource` property. * This function is called when the user adds or edits the "Calculate" step in the Flows UI. * @return {Object} The action response object containing the card to display. */ function onConfigCalculateFunction() { var card = { "sections": [ { "header": "Action sample: Calculate", "widgets": [ { "textInput": { "name": "value1", "label": "First value", "hostAppDataSource" : { "workflowDataSource" : { "includeVariables" : true } } } }, { "selectionInput": { "name": "operation", "label": "Operation", "type": "DROPDOWN", "items": [ { "text": "+", "value": "+", }, { "text": "-", "value": "-", }, { "text": "x", "value": "x", }, { "text": "/", "value": "/", } ] } }, { "textInput": { "name": "value2", "label": "Second value", "hostAppDataSource" : { "workflowDataSource" : { "includeVariables" : true } } } } ] } ] }; return pushCard(card); } /** * Gets an integer value from variable data, handling both string and integer formats. * * This function attempts to extract an integer value from the provided variable data. * It checks if the data contains string values and, if so, parses the first string * as an integer. If integer values are present, it returns the first integer. * @param {Object} variableData The variable data object from the event. * @return {number} The extracted integer value. */ function getIntValue(variableData) { if (variableData.stringValues) { return parseInt(variableData.stringValues[0]); } return variableData.integerValues[0]; } /** * Executes the calculation action based on the inputs from a workflow event. * * This function retrieves input values ("value1", "value2") and the "operation" * from the workflow event, performs the calculation, and returns the "result" and * "log" as output variables. * This function is called when the workflow execution reaches this custom step. * @param {Object} event The event object passed by the Flows runtime. * @return {Object} The output variables object. */ function onExecuteCalculateFunction(event) { console.log("output: " + JSON.stringify(event)); var calculatedValue = 0; var value1 = getIntValue(event.workflow.actionInvocation.inputs["value1"]); var value2 = getIntValue(event.workflow.actionInvocation.inputs["value2"]); var operation = event.workflow.actionInvocation.inputs["operation"].stringValues[0]; if (operation == "+") { calculatedValue = value1 + value2; } else if (operation == "-") { calculatedValue = value1 - value2; } else if (operation == "x") { calculatedValue = value1 * value2; } else if (operation == "/") { calculatedValue = value1 / value2; } var renderAction = { "hostAppAction" : { "workflowAction" : { "returnOutputVariablesAction" : { "variableValues" : [ { "variableId": "result", "integerValues": [ calculatedValue ] } ] } } } }; }
Triển khai và kiểm thử bước
Để kiểm thử bước này, hãy thiết lập một bản triển khai kiểm thử cho tiện ích bổ sung, thêm bước này vào một quy trình rồi chạy quy trình đó.
Thiết lập một bản triển khai thử nghiệm cho tiện ích bổ sung:
- Mở dự án tập lệnh trong trình chỉnh sửa Apps Script.
- Nhấp vào Triển khai > Kiểm thử việc triển khai.
- Nhấp vào Install (Cài đặt).
- Ở dưới cùng, hãy nhấp vào Xong.
Bạn có thể cho phép người dùng khác kiểm thử tiện ích bổ sung bằng cách chia sẻ dự án Apps Script với tài khoản của họ (cần có quyền chỉnh sửa). Sau đó, nhắc người dùng làm theo các bước trước đó.
Sau khi cài đặt, tiện ích bổ sung sẽ có sẵn ngay lập tức trong Flows. Bạn có thể cần làm mới Flows trước khi tiện ích bổ sung xuất hiện. Bạn cũng phải uỷ quyền cho tiện ích bổ sung trước khi sử dụng.
Để tìm hiểu thêm về việc triển khai thử nghiệm, hãy xem phần Cài đặt tiện ích bổ sung chưa xuất bản.
Mở Flows.
Tạo một quy trình bao gồm bước của bạn:
- Nhấp vào Luồng mới.
- Chọn cách bắt đầu quy trình. Khi kiểm thử một bước, hãy chọn một điều kiện khởi động mà bạn có thể tự thiết lập, chẳng hạn như tự gửi email cho chính mình. Nếu bước của bạn yêu cầu một biến đầu vào, hãy định cấu hình biến đầu vào trong phần đầu ra của bước khởi động.
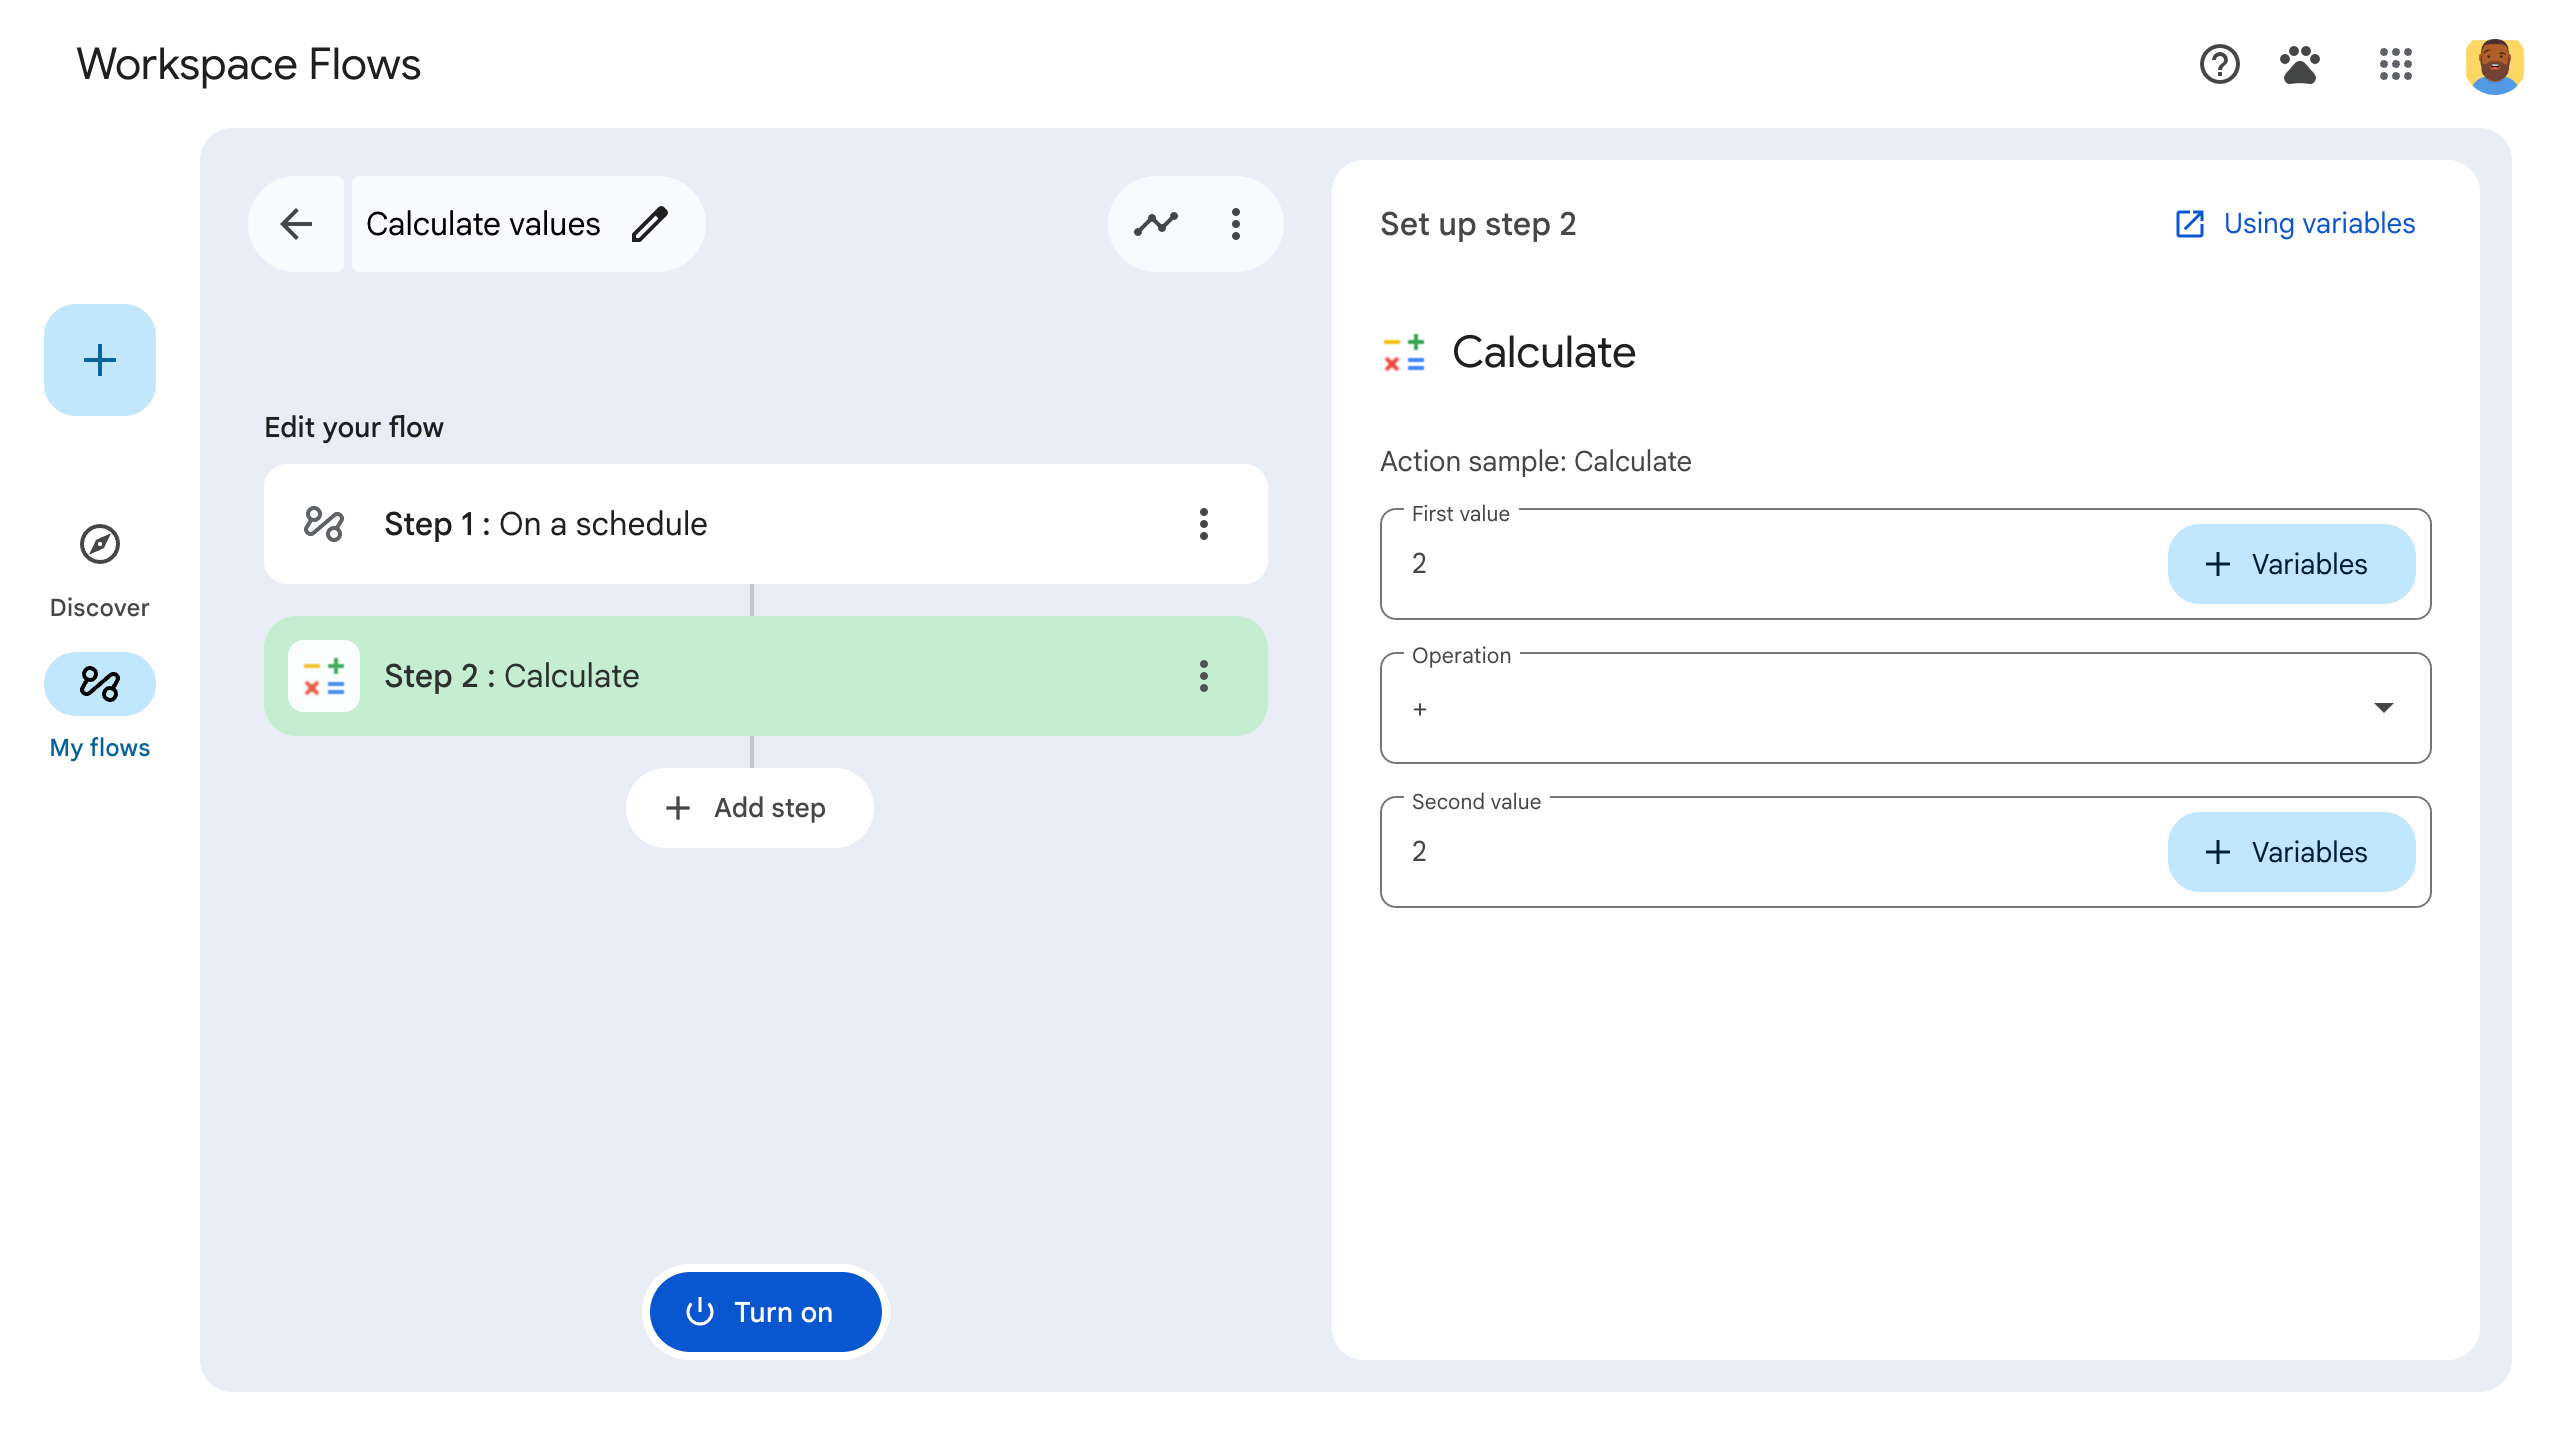
- Nhấp vào Thêm bước. Chọn bước mà bạn đã tạo hoặc cập nhật, có tên là Tính toán.
- Định cấu hình bước của bạn. Đối với bước tính toán, hãy chọn hai giá trị và một phép toán. Bước này sẽ tự động lưu.
- Để kiểm thử đầu ra của bước, hãy thêm một bước khác. Ví dụ: để thêm đầu ra vào một thư email, bạn có thể thêm bước Gửi thư của Gmail. Trong Message (Thông báo), hãy nhấp vào Variables (Biến) rồi chọn đầu ra của bước. Đối với bước tính toán, hãy chọn Variables (Biến) > Step 2: Calculated result (Bước 2: Kết quả được tính) > Calculated result (Kết quả được tính). Biến này xuất hiện dưới dạng một khối trong trường Tin nhắn.
- Nhấp vào Bật. Luồng của bạn đã sẵn sàng chạy.
Chạy quy trình bằng cách kích hoạt điều kiện khởi động của quy trình. Ví dụ: nếu quy trình của bạn bắt đầu khi bạn nhận được email, hãy gửi email cho chính mình.
Xác minh xem luồng có chạy như dự kiến hay không. Kiểm tra nhật ký bằng cách truy cập vào thẻ Hoạt động của trình tạo quy trình. Để tìm hiểu cách tạo nhật ký tuỳ chỉnh trong thẻ Hoạt động, hãy xem phần Nhật ký hoạt động.
Các bước tiếp theo
Bạn đã tạo và kiểm thử thành công một bước tuỳ chỉnh trong quy trình cho Workspace Flows. Hiện bạn có thể:
Tiếp tục tuỳ chỉnh bước này bằng cách yêu cầu Gemini giúp bạn triển khai logic phức tạp hơn.
Tạo thẻ cấu hình để tuỳ chỉnh cấu hình bước.
Ghi nhật ký hoạt động và lỗi để ghi lại và khắc phục sự cố khi chạy các bước.
Xem xét các đối tượng sự kiện của quy trình để xem xét tải trọng JSON mà quy trình gửi và nhận khi quy trình chạy.