Setting up a new server container
To use server-side tagging, you need a server to run your container on. This chapter walks you through the automatic deployment option in Tag Manager which sets up a Cloud Run server for you. You can also deploy a tagging server in Cloud Run manually, which is covered in Planning infrastructure requirements and costs.
Before you begin
Before you get started with the course, you need:
- A credit card so that the provisioning process can create a Google Cloud Platform billing account for you. The actual load while working through the course should stay well below the free tier of the relevant Google Cloud Platform services. You are billed if usage is high.
- A Tag Manager account with rights to create a new server container.
- A Tag Manager web container or a Google tag as the data source for sending requests to a server container.
- A Google Analytics property, as this will serve as our example data stream.
- Optional but recommended: A subdomain of your website for your server environment to establish a first-party context.
Tagging server deployment options
The easiest way to deploy a server container is by using the automatic provisioning setup that you can initiate from the Tag Manager user interface. A Google Cloud Platform project is automatically created for your environment, and the server is deployed as a Google Cloud Run service.
This chapter uses the automatic provisioning option.
Other deployment options
If you want more control over the deployment, you have the following options:
- User interface deployment: Use the Google Cloud Run user interface to configure the deployment parameters Google Cloud Run.
- Command line deployment: Run commands in the Google Cloud Shell that lets you configure the deployment parameters for Google Cloud Run.
- Manual deployment: Deploy the Docker image in the server environment of your choice.
The table outlines the available options.
| Deployment option | Ease of use | Features |
|---|---|---|
| Automatic (Google Cloud Run) | Easy |
|
| User interface (Google Cloud Run) | Moderate |
|
| Command line (Google Cloud Shell) | Moderate |
|
Manual (Docker) | Difficult |
|
Create a new server container and provision the GCP resources
The first thing you need to do is create a new server container in Tag Manager and start the automatic provisioning process.
- Open Google Tag Manager
- In your account's overflow menu
 , click Create Container.
 - In Container Settings, name your new container and select Server. Click Create. Once the container was created, you will see a setup screen.
- Click Automatically provision tagging server.
- Choose or create a billing account for your container and create the server.
Result: Google Tag Manager deploys a tagging server onto Cloud Run with a testing configuration and adds the Cloud Run domain as the tagging server URL.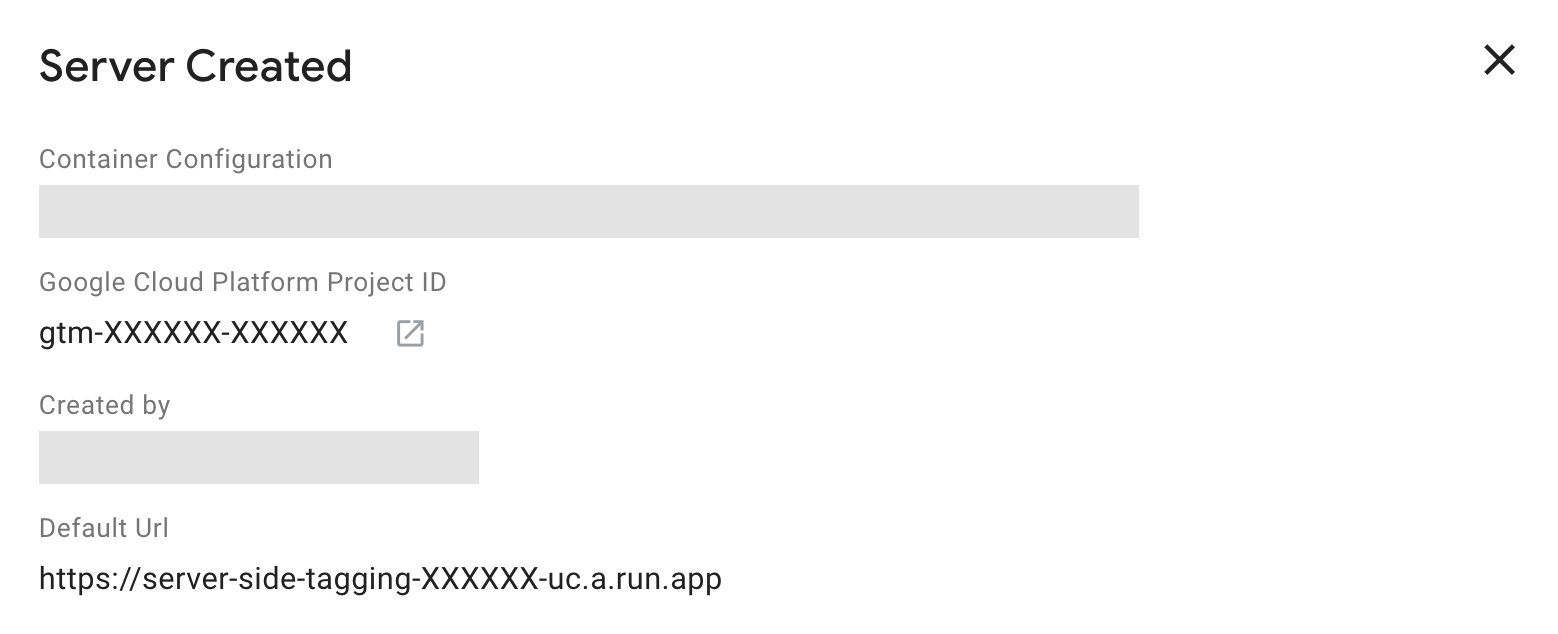
The Default Url is automatically generated and assigned by Google Cloud Run. It consists ofhttps://[GOOGLE_CLOUD_PLATFORM_PROJECT_ID]-[GOOGLE_CLOUD_REGION_ID].a.run.app. With the automatic provisioning setup, the Google Cloud region is alwaysus-central1, and the region ID is thusuc.
Verify with API (/healthy endpoint)
Before you start the next chapter, verify that your Cloud Run server is correctly provisioned and reachable via its API endpoint:
- Copy the Default Url from the configuration overlay.
- Open a new browser tab.
- Paste the Default Url and append
/healthyto the path. For example, the full URL for the container above would behttps://server-side-tagging-XXXXXX.uc.a.run.app/healthy - ✅ If your service works, you should see the text
okon the page. - ❌ If you do not see the
okor the provisioning failed for some reason, you can try checking the deployment parameters in the Google Cloud Run user interface.
Summary
To review, you've created a server container in Tag Manager. Then, you've set up an actual server running on Cloud Run.
Next, you will learn how to configure the data flow between the web browser and the tagging server by setting up Google Analytics.