Page Summary
-
This guide explains how Content Management Systems (CMS) and website builders can integrate the Google tag to enable users to access Google's measurement products, such as Google Analytics 4 and Google Ads.
-
Before starting, obtain a Google tag Developer ID by filling out the request form, but only if your implementation will be used by multiple unrelated websites.
-
CMS platforms should integrate the Google tag snippet, allowing users to input their Google tag ID, and implement the Consent API to manage user consent for cookies.
-
It's crucial to set up event data to send information about user interactions to Google, including key events like purchases and sign-ups, and ideally at least 8 core events by default.
-
Before deploying the integration, verify it functions correctly with Google Analytics 4, remarketing, and conversion measurement, and update your user documentation with clear implementation instructions.
The Google tag is a snippet of code that can be added to a website to measure user activity across a variety of Google products, including Google Analytics 4, Google Ads, and Google Marketing Platform. Learn more about the Google tag
This guide describes how to integrate the Google tag into your Content Management System (CMS) or website builder to provide your end users with access to Google's measurement products.
Audience
This guide is intended for Content Management System (CMS) owners or website builders who want to provide their users with an integration with Google measurement products. This guide is not intended for users of a CMS or website builder.
Before you begin
Make sure you have a Google tag Developer ID. If you don't have a Google tag Developer ID, fill out the Google tag Developer ID request form. Your Developer ID is different from other IDs, such as the Measurement ID or Conversion ID, which your end users add to their website measurement code.
Overview
To integrate your platform with Google products, follow these steps:
- Create an integration with the Google tag
- Update your user input structure
- Implement the Consent API
- Set up event data
- Verify your updated integration
- Update your user deployment instructions
Create an integration with the Google tag
By creating an integration with the Google tag, your customers can deploy Google measurement products (through gtag.js) on every page of their site. Make sure to remove any existing legacy tag integrations (for instance, analytics.js) before creating an integration with gtag.js.
To create an integration with the Google tag, replace your existing code snippet
with the following snippet. Make sure users can replace TAG_ID with
their own Tag ID.
<!-- Google tag (gtag.js) -->
<script async src="https://www.googletagmanager.com/gtag/js?id=GOOGLE_TAG_ID"></script>
<script>
  window.dataLayer = window.dataLayer || [];
  function gtag(){dataLayer.push(arguments);}
  gtag('set', 'developer_id.<developer ID>', true); // Replace with your Google tag Developer ID
  gtag('js', new Date());

  gtag('config', 'GOOGLE_TAG_ID');
</script>
Note the following:
- Advertisers can opt out of ad personalization features like remarketing with
the
allow_ad_personalization_signalsparameter (see Disable the collection of personalized advertising data. - Ideally, the Google tag snippet should appear only once per page. The snippet can accommodate multiple tag IDs. If there's an existing instance of gtag.js, you should add new tag IDs to the existing tag. Learn more
Update your user input structure
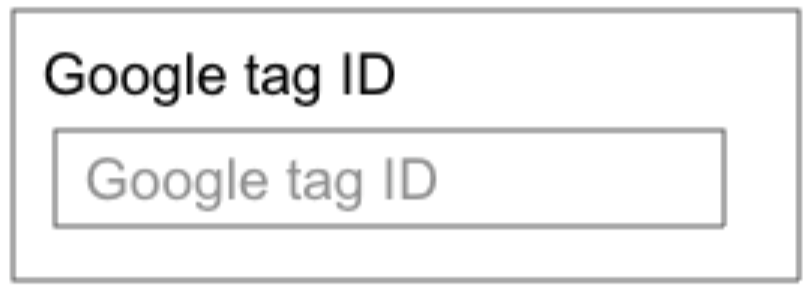
Your customers should be able to supply multiple forms of their Google tag ID through one interface, regardless of the Google measurement product they are deploying.
For example, the following shows a simple Google tag input. The integration should be framed as a deployment for the Google tag. This can be subtitled as a method to deploy Google Ads and Google analytics.
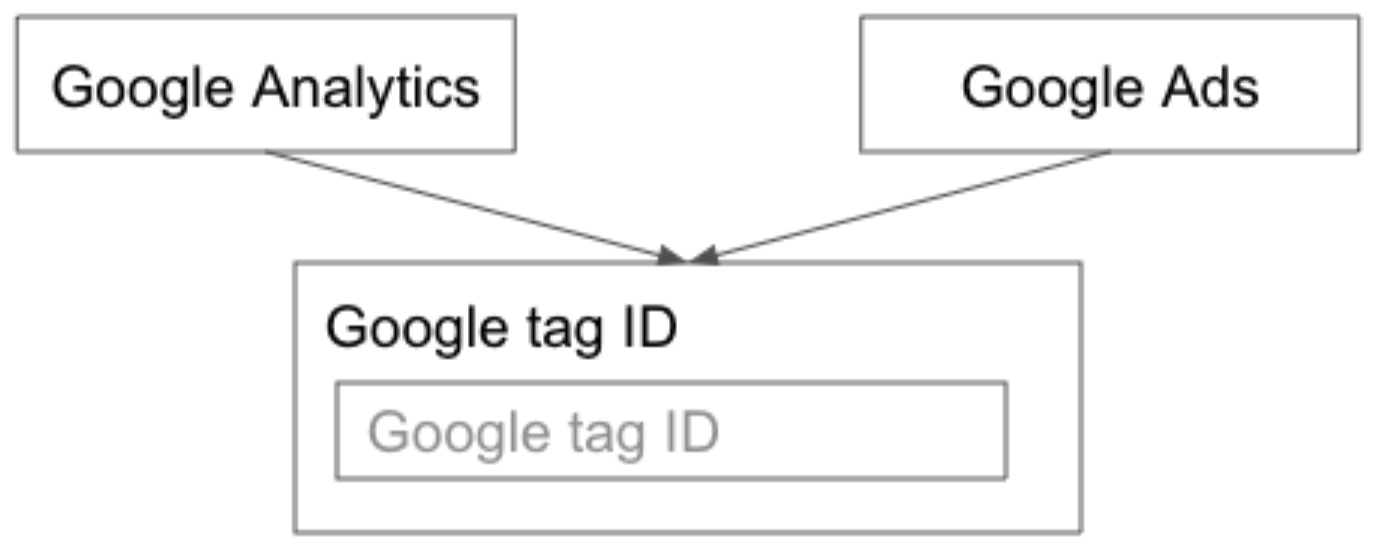
Alternatively, the following diagram shows how a platform might have separate user flows for Analytics and Ads, but each flow leads to one interface where users supply their Google tag ID.
The tag ID input should accept multiple ID variants using the regular expression pattern [A-Z]{1,3}\w{5,}[\w]*
Implement the Consent API (aka Consent Mode)
The Google tag has a built-in Consent API to manage user consent. It's able to differentiate user consent for cookies for ad purposes from those for analytics purposes.
The expected outcome is that customers get at least the
gtag('consent', 'update' {...}) call integrated with no action required by the
customer. This should ensure Google tags (Google Ads, Floodlight, Google
Analytics, Conversion Linker) are able to read the latest user consent state and
include the state in network requests to Google (via the parameter &gcs).
Additional implementation steps would be to deploy or to assist advertisers in
deploying (e.g., via a UI) the gtag('consent', default' {...}) state and
unblocking Google tags (i.e., no consent-based conditional firing) to enable
consent mode to fire them in a consent-aware manner.
For implementation details, see Manage consent settings (web).
Set up event data
You should send rich event data from the customer's website to their Google
account with no action required by the customer. For example, you could add the
events along a purchase funnel (i.e., add_to_cart, begin_checkout,
add_payment_info, add_shipping_info, and purchase), lead generation, and
sign ups.
The following are best practices for adding events:
- Log everything possible
- Set up at least 8 core events
- Prioritize ecommerce events
Log everything possible
Where possible, you should set up events by default. This includes:
- Key events, such as
purchaseorsign_up - Events before key events such as
add_to_cart - Behavioral engagements such as media interactions that help customers understand how they’re engaging their end users
You should add key event snippets to key event pages only (e.g., purchase confirmation, form submission confirmation). Note that you should still add the Google tag on every page of the site.
Events are sent using the event command.
This includes the same Google tag Developer ID that you included in the global
site tag described above:
gtag('event', 'my_event', {
  'developer_id.<developer ID>': true,
  // Additional event parameters
});
For example, you can use the event command to send a login event with a
method value of "Google":
gtag('event', 'login', {
  'developer_id.<developer ID>': true,
  'method': 'Google'
});
<!-- Event snippet for sales conversion page -->
<script>
  gtag('event', 'conversion', {
      'developer_id.<developer ID>': true,
      'value': <value>,
      'currency': '<currency>',
      'transaction_id': '<transaction_id>'
  });
</script>
Note the following:
- Your Developer ID
<developer ID>is unique and specific to your platform. Attach the ID to every event. - The following parameters are optional and can be omitted:
'value'is the numeric value of the key event (e.g. the price of a purchase)'currency'is a three-letter currency code, useful for advertisers who accept multiple currencies'transaction_id'is a unique ID for the transaction (e.g. an order ID); it's used for de-duplication purposes.
- Though some parameters are optional, it's recommended that you include as
much information as is available for each event.
- Parameters provide additional information about the ways in which users interact with your website or app. For example, when someone views a product you sell, you can include parameters that describe the product they viewed, such as the name, category, and price.
- Some parameters automatically populate the prebuilt dimensions and metrics in Google Analytics and give users a better understanding of their customers.
If you want to measure a key event based on a click (e.g. a click a button or a dynamic response for a site using AJAX), you can also use the following snippet:
<!-- Event snippet for sales conversion page
    In your HTML page, add the snippet and call gtag_report_conversion
    when someone clicks on the chosen link or button. -->
<script>
  function gtag_report_conversion(url) {
  var callback = function () {
    if (typeof(url) != 'undefined') {
      window.location = url;
    }
  };
  gtag('event', 'conversion', {
    'developer_id.<developer ID>': true,
    'value': <value>,
    'currency': '<currency>',
    'transaction_id': '<transaction_id>',
    'event_callback': callback
  });
  return false;
}
</script>
Set up at least 8 core events
We recommend that you set up a core set of events that have the most value to site owners. At minimum, we recommend that you set up the following events:
view_item_list: when a user views a list of items (e.g. list of products). Learn moregtag('event', 'view_item_list', { item_list_id: "related_products", item_list_name: "Related products", items: [{ item_id: "SKU_123", item_name: "Test Item", currency: "USD", discount: 2.22, price: 99.9, quantity: 1 }] });add_to_cart: when a user adds one or more products to a shopping cart. Learn moregtag('event', 'add_to_cart', { value: 99.0, currency: "USD", items: [{ item_id: "SKU_123", item_name: "Test Product", price: 99.0, currency: ‘USD’, quantity: 1, item_category: "All Products" }] });begin_checkout: when a user initiates the checkout process for one or more products. Learn moregtag('event', 'begin_checkout') { value: 99.0, currency: "USD", items: [{ item_id: "SKU_123", item_name: "Test Product", price: 99.0, currency: ‘USD’, quantity: 1, item_category: "All Products" }] });purchase: when a user purchases one or more products or services. Learn moregtag('event', 'purchase', {value: XX, currency: 'USD', items: [{xx},{xx}]});sign_up: when a user signs up so the end user can see the most popular sign-up methods (e.g., Google account, email address). Learn moregtag('event', 'sign_up', {method: 'web'});generate_lead: when a user submits a form. Learn moregtag('event', 'generate_lead', {value: XX, currency: 'USD'});subscribe: when a user subscribes to a service or newsletter.gtag('event', 'subscribe', {value: XX, currency: 'USD', coupon: 'XX'});book_appointment: when a user books an appointment.gtag('event', 'book_appointment', {value: XX, currency: 'USD', coupon: 'XX'});
Additional recommendations
Google supports many more events and parameters, in particular for ecommerce. In general, we advise you capture the following:
- Any success event directly associated with value
- Success events that contribute to core key events (add_to_cart, sign_up, etc.)
- Engagements and user interactions that help advertisers understand how they're engaging their end users
The following are additional resources that further explain event collection:
- Events
- Recommended events by use case
- Measure ecommerce for Google Analytics 4 properties
We're interested in discussing potential extensions to this schema, so please let us know if you have suggestions.
Verify your updated integration
Before you push your changes to production, verify compatibility with the following:
- Your Google tag with a Google Analytics 4 destination
- Your Google tag for remarketing and conversion measurement
Additionally, verify that the tag fires properly on all pages, including key event pages, using any of these tools:
- Google Tag Assistant: Tag Assistant lets you see which Google tags have fired and in which order. Tag Assistant debug mode shows what data is being passed to the data layer, and what events triggered those data exchanges.
- Chrome developer tools: Use the Network tab to filter requests that contain "google" to verify how data is sent.
- (Server-side) Google Analytics realtime report: Create a free Google Analytics account and use the Realtime report to see if the tag hits are received by Google's servers.
To report a bug or provide feedback on missing information, fill out the Content Management System Support form.
When possible, please share test access with Google for ongoing verification.
Update your user deployment instructions
Update your documentation to provide clear instructions on how to implement Google measurement products via your implementation. Please share a draft of these instructions by filling out the CMS Integration Setup Documentation review form so we may provide feedback.